Tutorial Assets
You’ll need the following resources in order to complete this project:
1. How to Make a New Photoshop Document
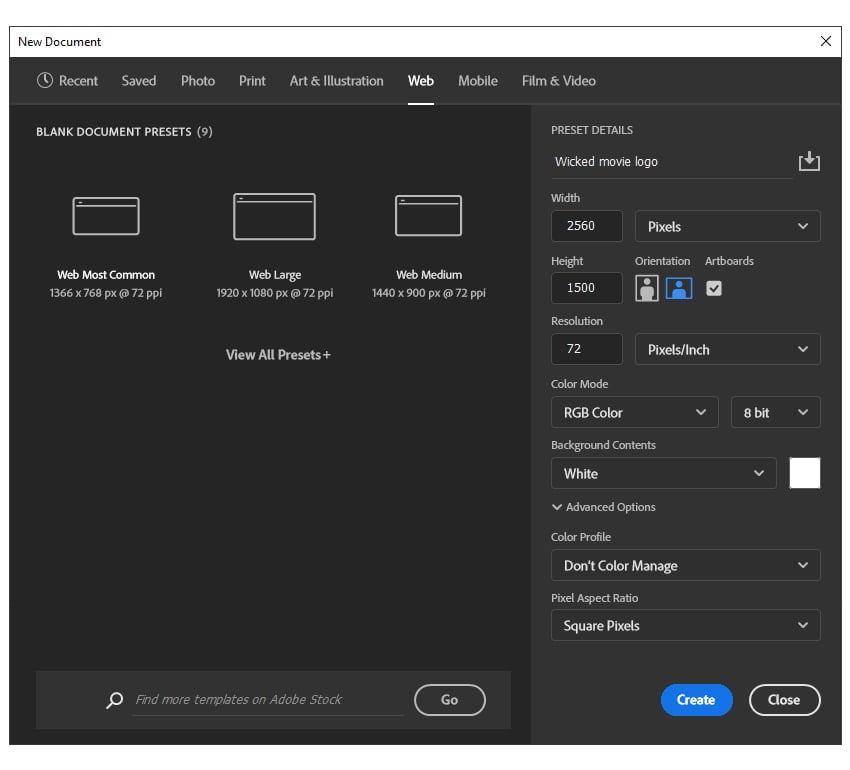
Launch Photoshop and go to File > New to open a blank document. Type Wicked movie logo as the name of your file, set the dimensions shown, and then select Pixels as the Units and RGB as the Color Mode. Choose a white background for the moment. Hit Create.
2. How to Make the Wicked Text
Step 1
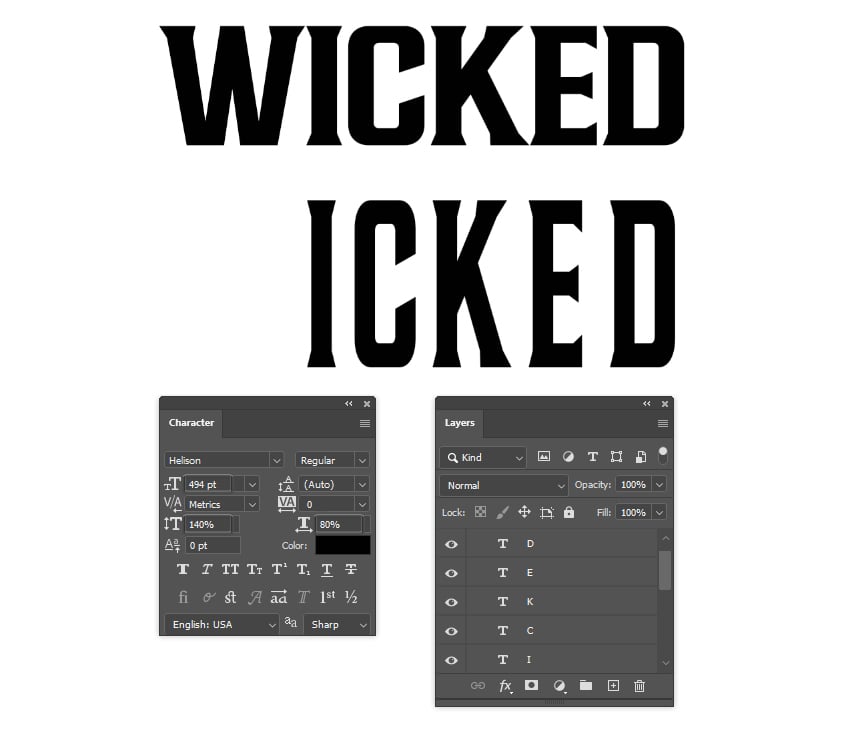
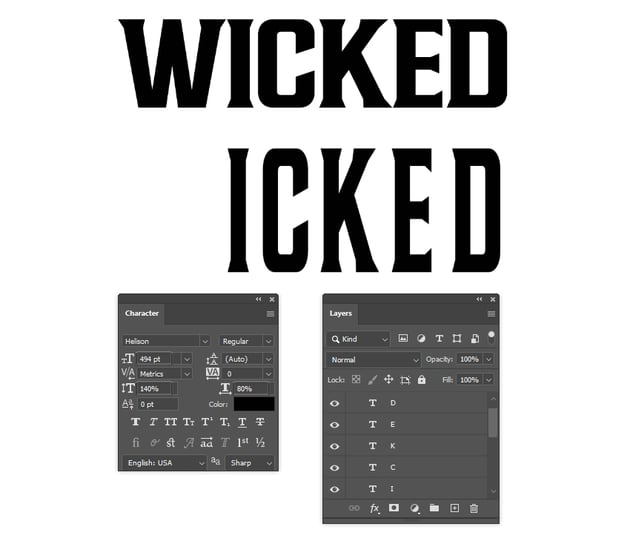
Let’s start the Wicked musical logo with the text. Grab the Horizontal Type Tool (T), click on your artboard, and write “WICKED” in capital letters. I’m using the Helison Font, which will be the most similar to the original Wicked font after applying the following settings:
- Font size: 494 pt
- Vertically scale: 140%
- Horizontally scale: 80%
- Color: black
The letter W is not what we need, so you can remove it. I also recommend writing each letter separately so you have a layer for each in the Layers panel.
Step 2
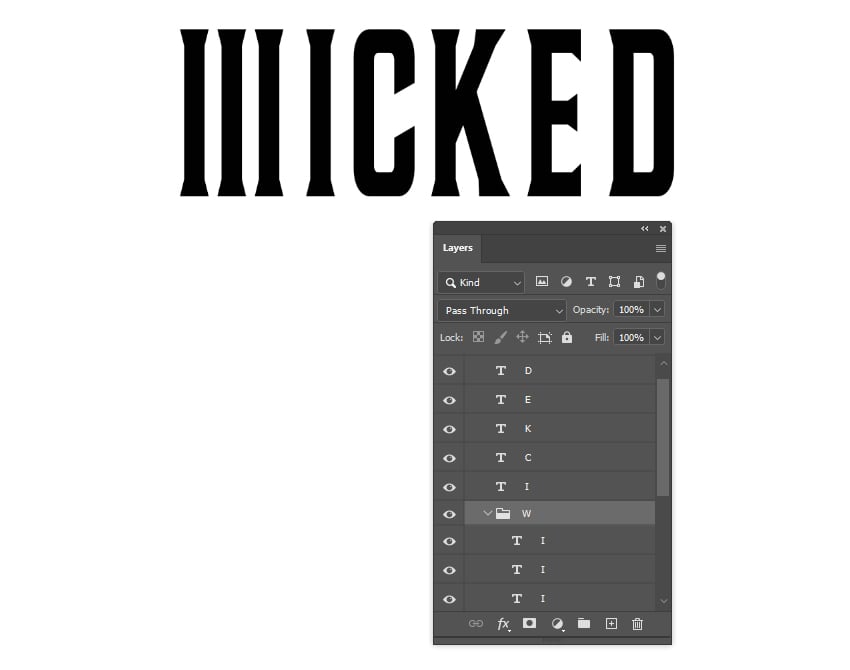
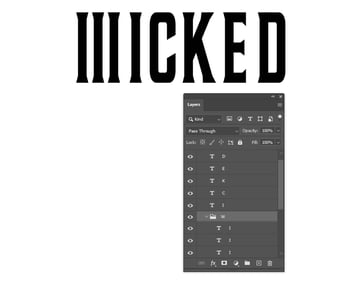
For the letter W, make three copies of the letter I and arrange them as shown. We’ll get back to it and distort it to make it look like the original Wicked logo.
Step 3
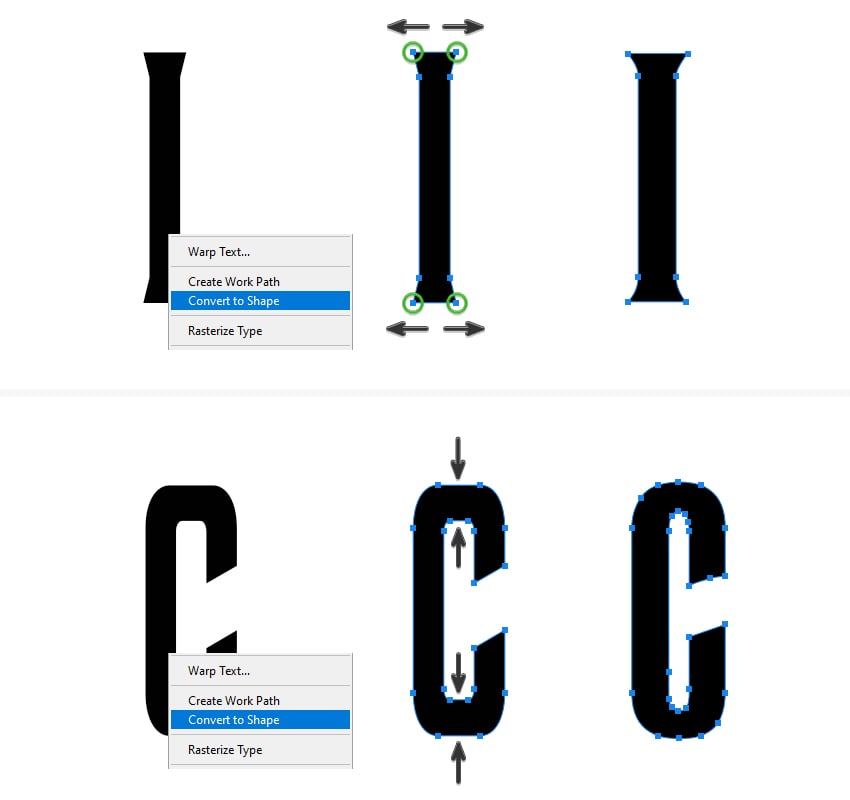
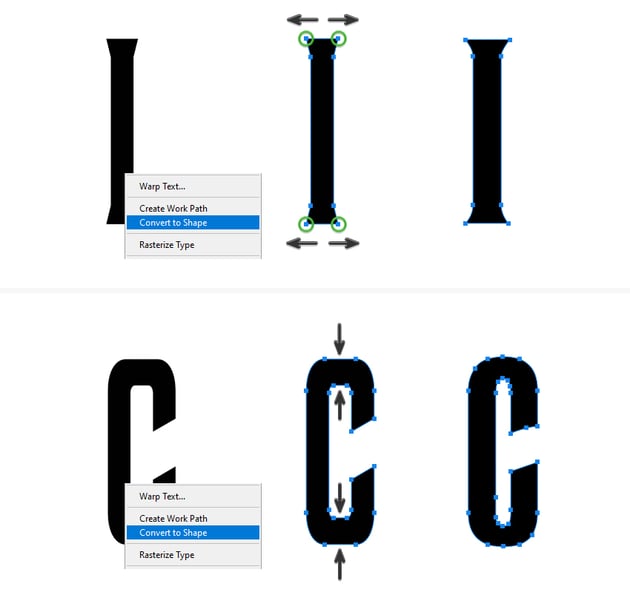
Let’s start to distort the letters. Select the letter I layer in the Layers panel, right-click on it, and choose Convert to Shape from the menu. Now, the text will turn into a shape with anchor points that you can modify with the Direct Selection Tool (A). Select the top and bottom corner points and move them away from each other to elongate the serifs. Also, make the letter a little wider by selecting and moving only half of it with the Direct Selection Tool (A).
Next, Convert to Shape the letter C layer. Make the indicated areas rounded by adding an extra point with the Add Anchor Point Tool and then adjusting the handles. Also, make the letter a little wider.
Step 4
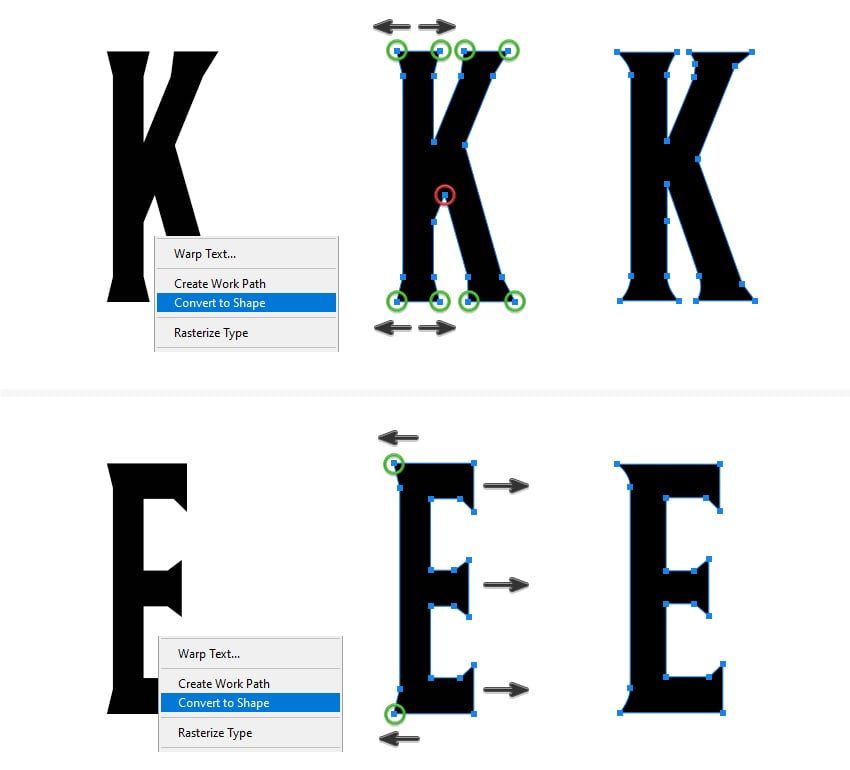
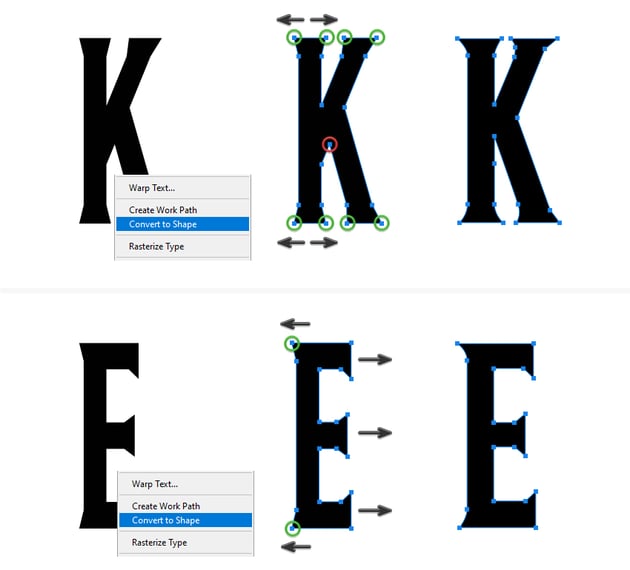
Follow the same process to distort the letter K. Move the corner points of each leg away from each other to make the serifs pointier. After that, select only the point highlighted with red using the Direct Selection Tool (A), and move it upwards.
For the letter E, select the points highlighted with green and move them to the left to elongate the serifs. Also, make the three legs longer by dragging a selection over their end points, and move them to the right with the Direct Selection Tool (A).
Step 5
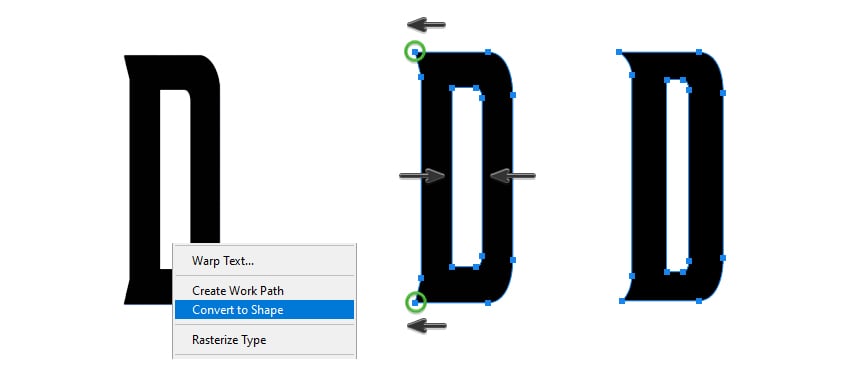
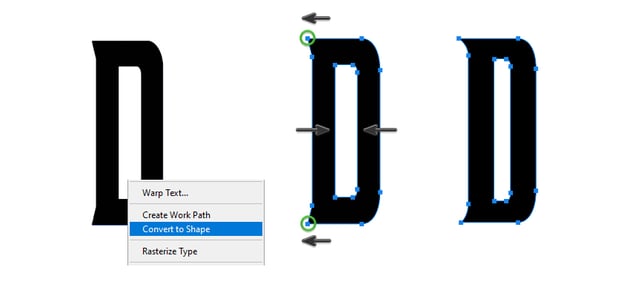
Continue with the letter D. Make the serifs pointier, and then make the inner hole thinner by moving the anchor points with the Direct Selection Tool (A).
Step 6
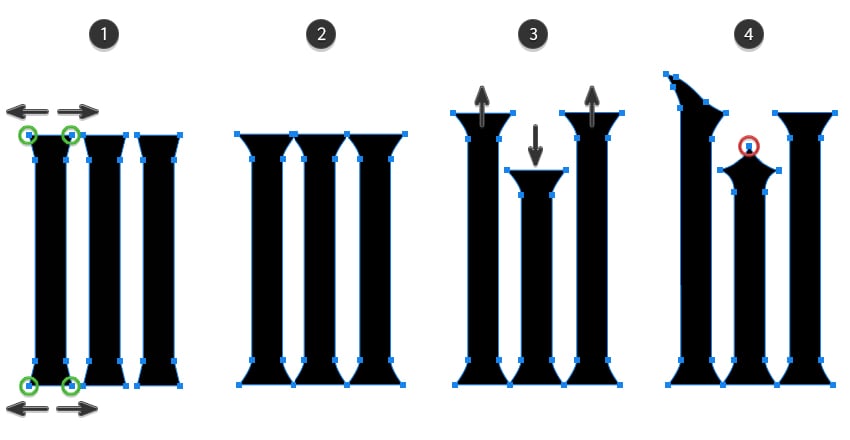
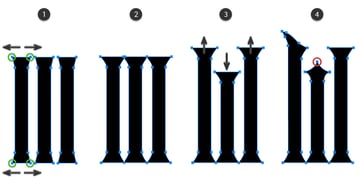
It’s time to create the W letter. Convert to Shape the three copies of the letter I, and then elongate the serifs as you did before (1). Do this for all three shapes (2). Next, make the first and third shapes longer and the middle shape shorter by dragging a selection over their top points with the Direct Selection Tool (A) and then moving them (3).
The original letter W is quite unusual, so we need to distort the first and middle shapes even more. Use the Add Anchor Point Tool (A) to add extra points and the Direct Selection Tool (A) to move these points and adjust the handles until the shapes look like the original as much as possible (4).
Step 7
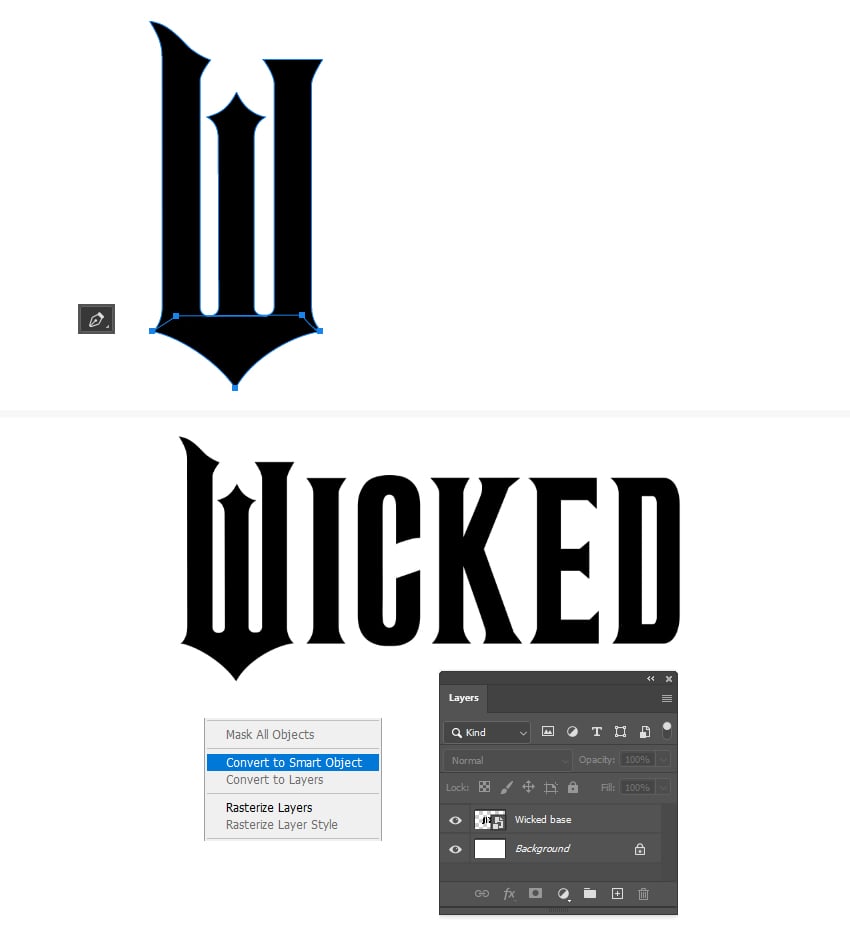
When you’re happy with the look of the three legs, go ahead and draw a shape with the Pen Tool (P), as shown at the bottom of the image below.
At this point, you can still make adjustments to the letters because they are live shapes. When you’re done, select all the letter layers in the Layers panel, right-click, and choose Convert to Smart Object from the menu. Name the resulting layer Wicked base.
Step 1
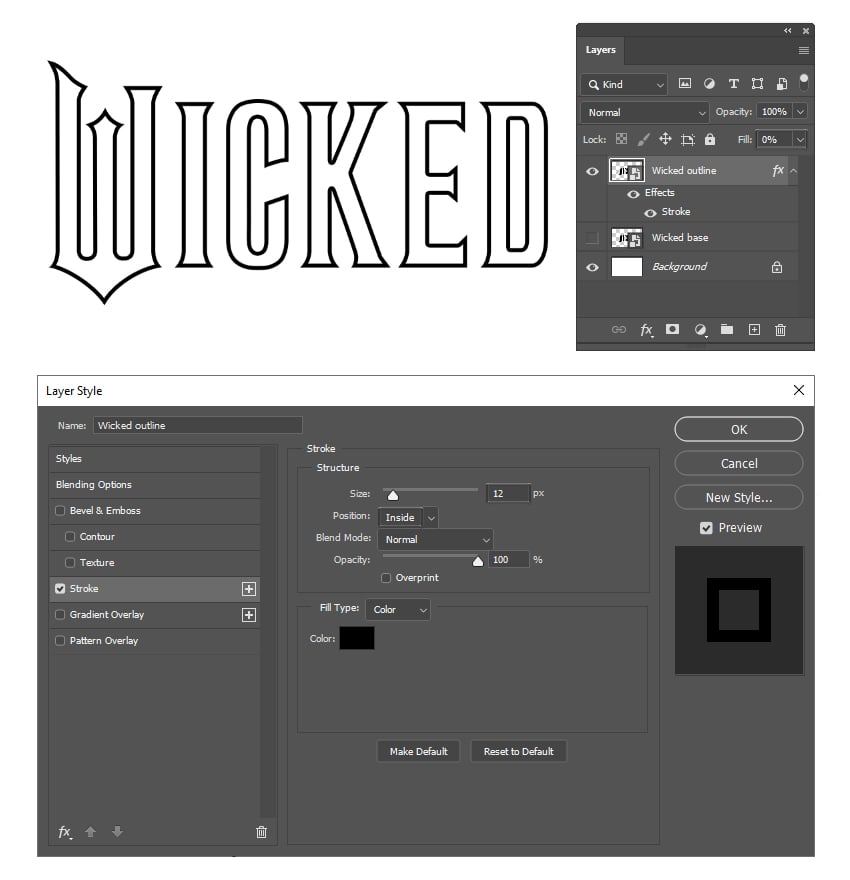
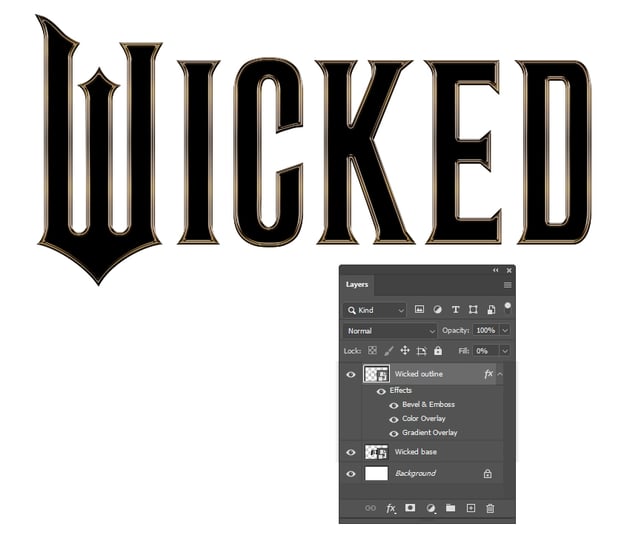
Duplicate the Wicked base layer and name it Wicked outline. Double-click on it to open the Layer Style window and apply Stroke using the settings shown. Hit OK. Set the Fill to 0%. Now, if you put the Wicked base layer on invisible, you will see that you have the text outline.
Step 2
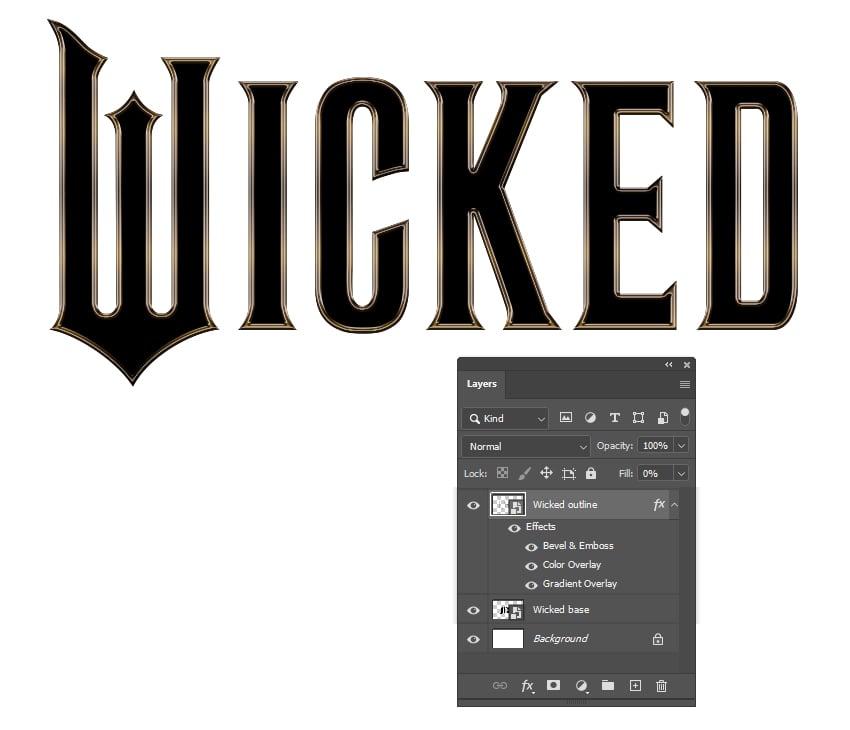
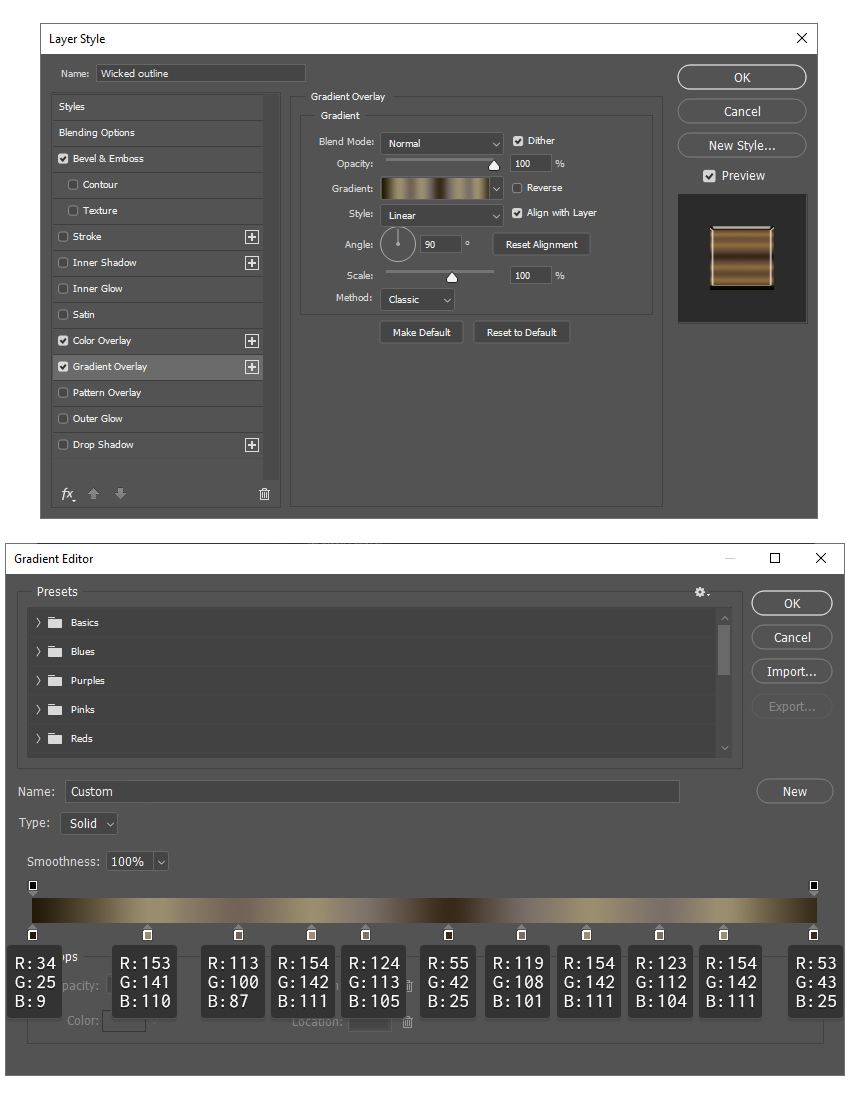
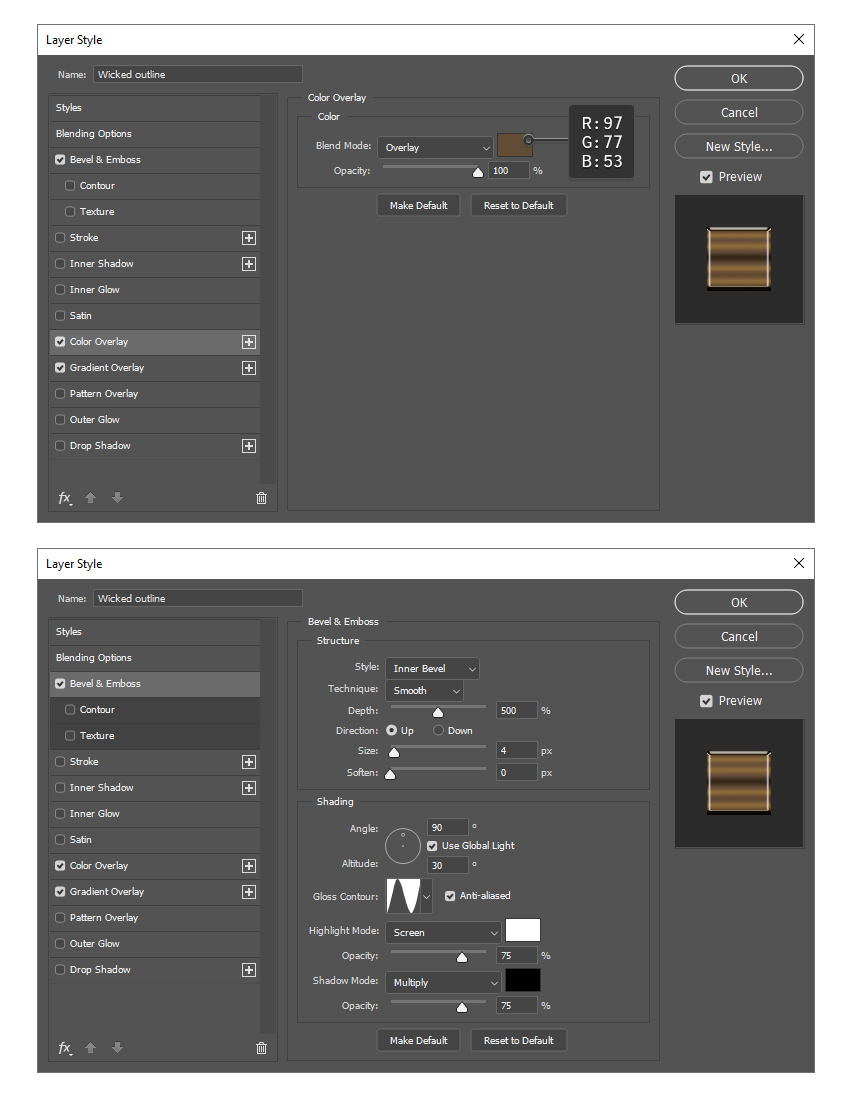
Double-click on the Wicked outline layer to open the Layer Style window and apply Gradient Overlay, Color Overlay, and Bevel & Emboss styles to obtain the metallic outline.
These are the Gradient Overlay settings:
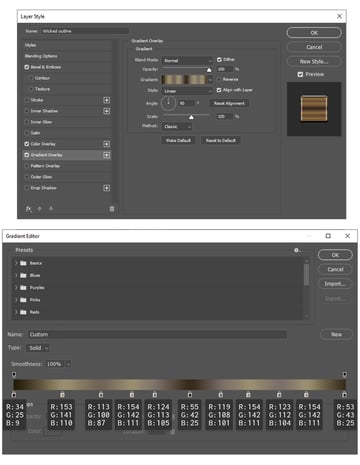
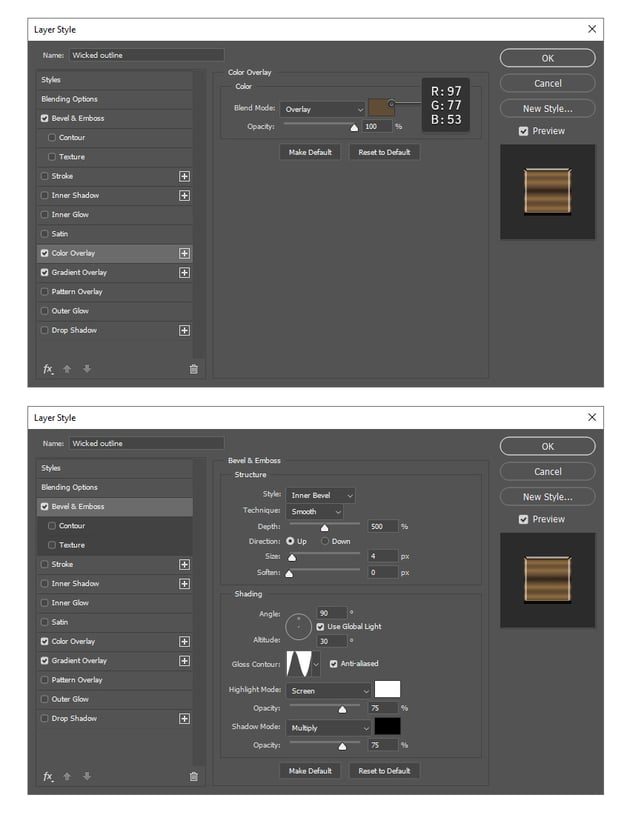
These are the Color Overlay and Bevel & Emboss settings:
4. How to Make the Wicked Green Outline
Step 1
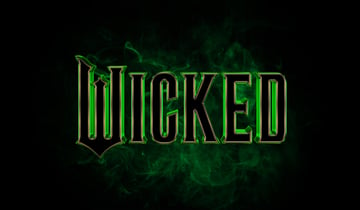
If you take a look at the Wicked movie poster to see the original logo, you will notice that it has a thin green outline as well. Let’s create it in the following steps.
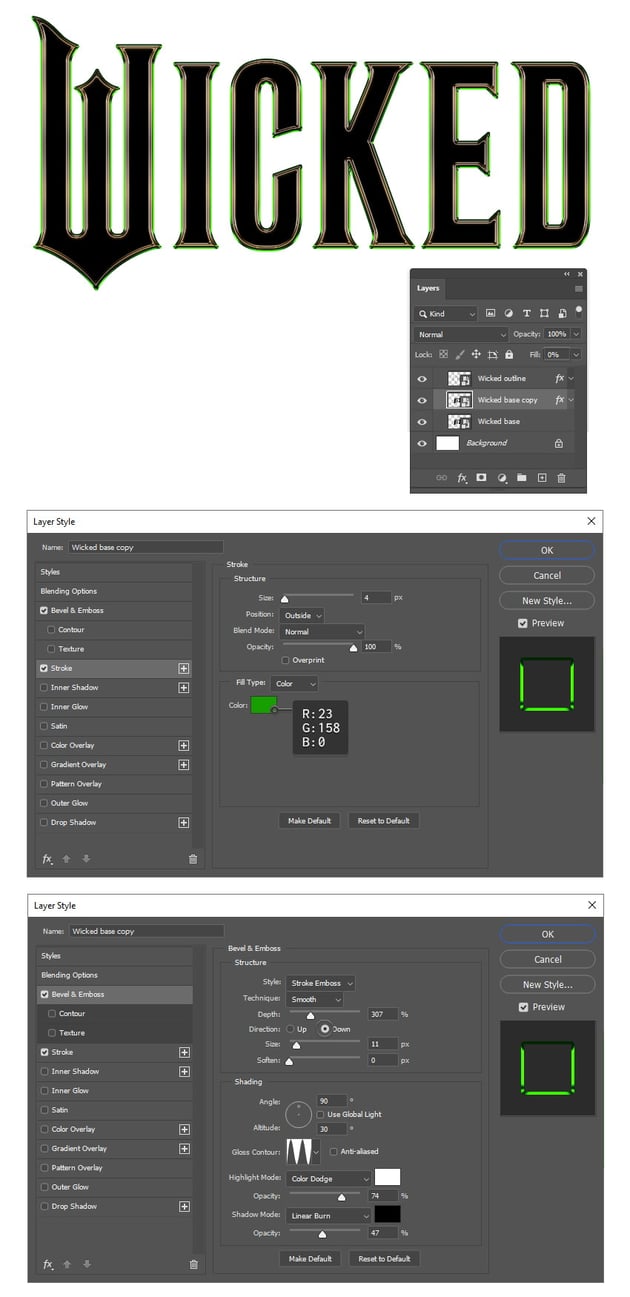
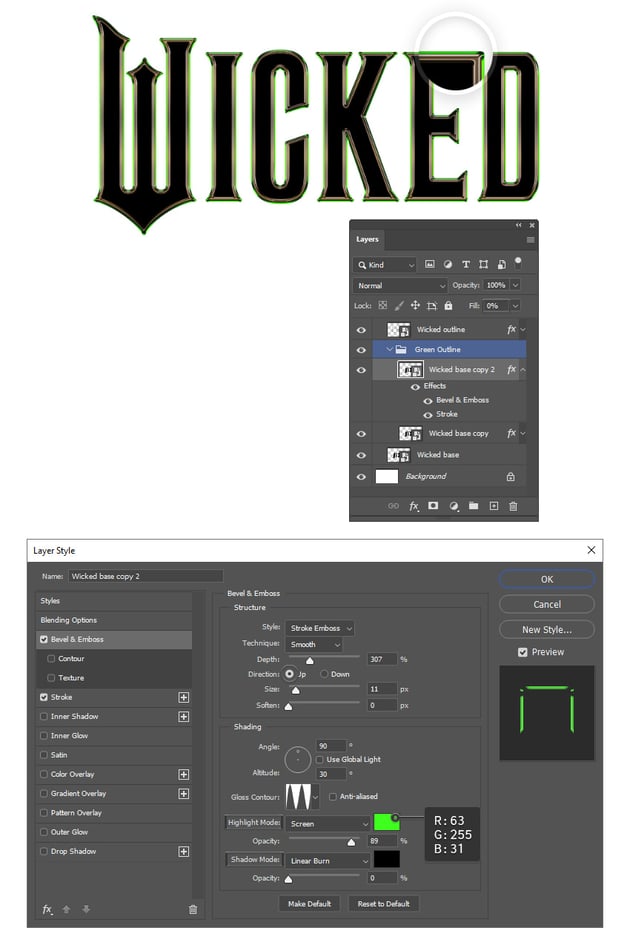
Duplicate the Wicked base layer and then apply the Stroke and the Bevel & Emboss layer styles using the settings shown.
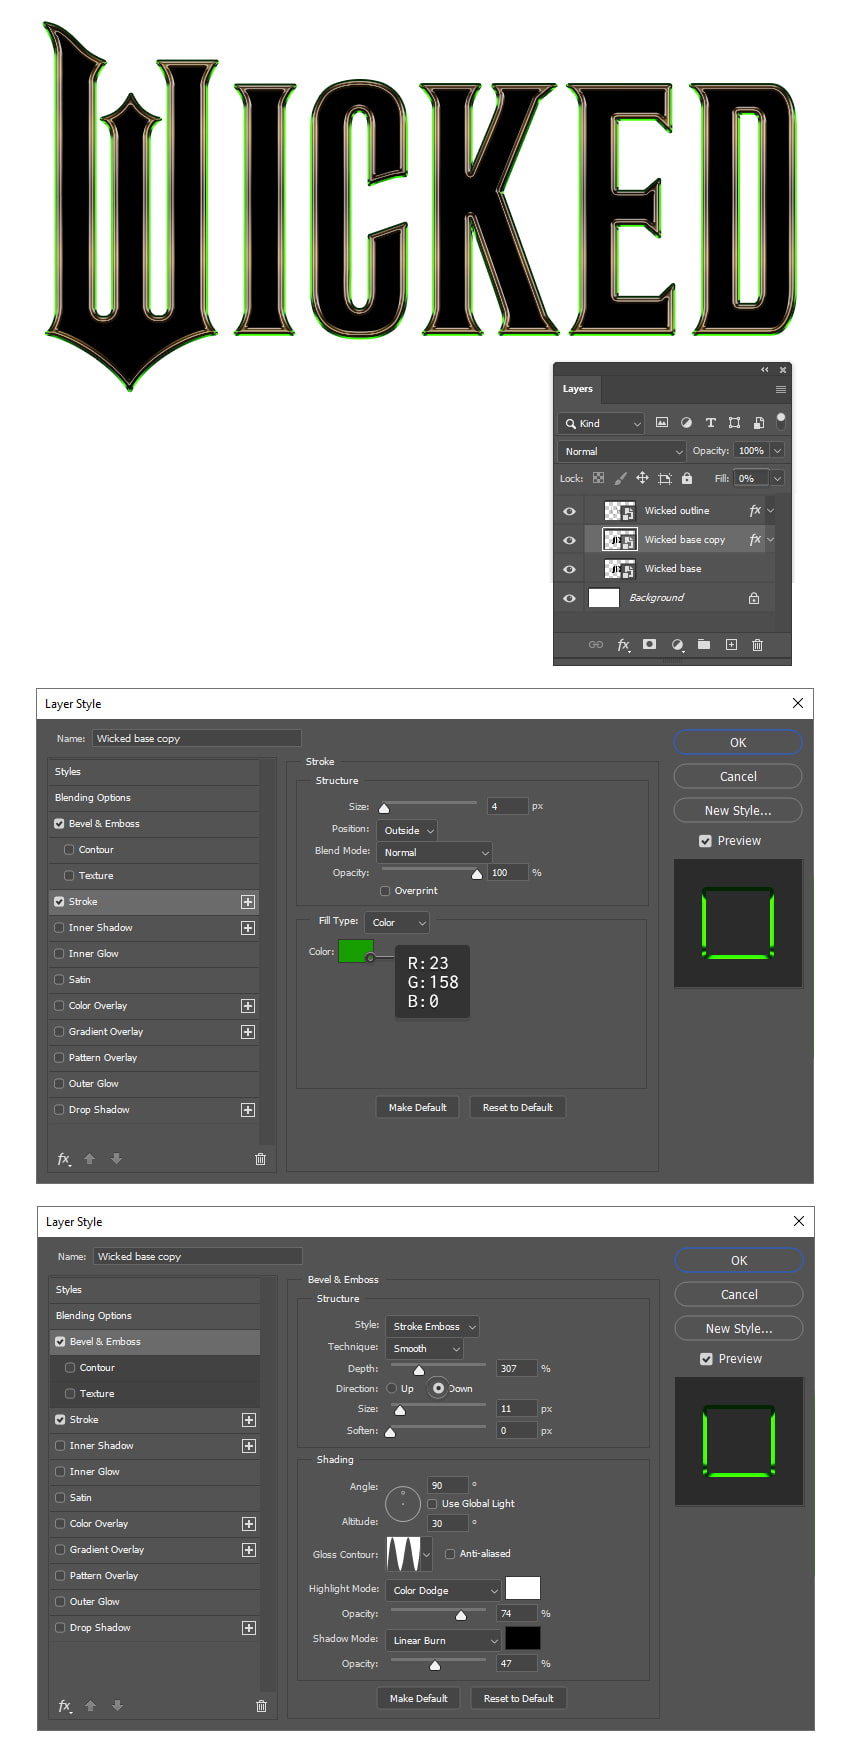
Step 2
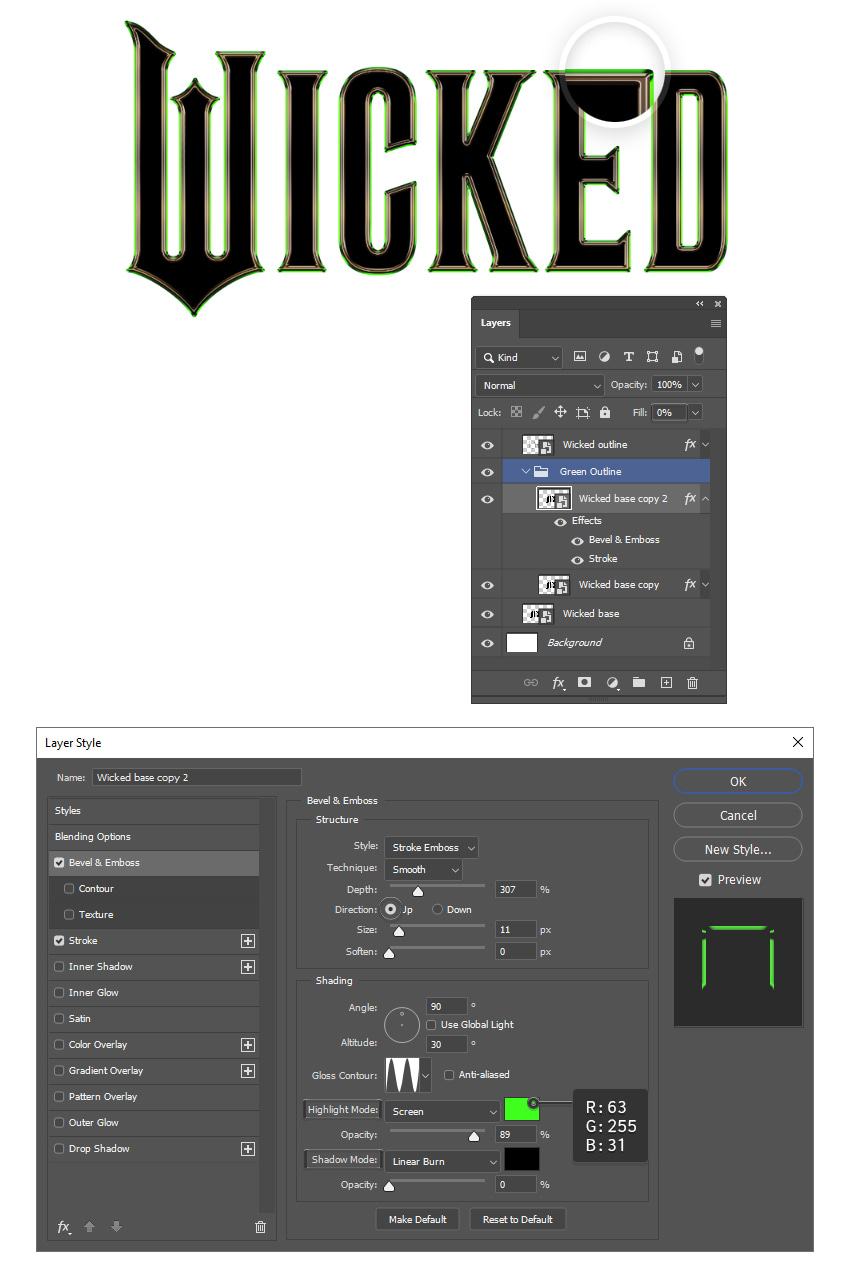
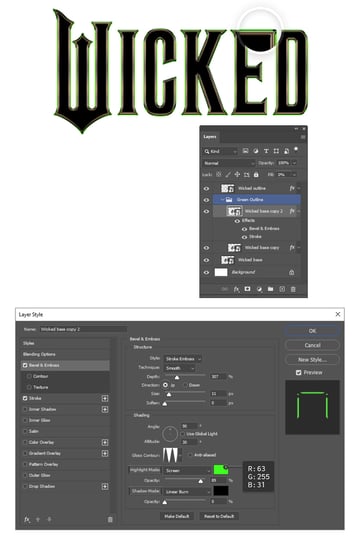
Now, duplicate the Wicked base copy layer that you made in the previous step. Open the Layer Style window and, under Bevel & Emboss, change the Direction to Up along with the Highlight Mode and Shadow Mode settings. Keep the Stroke settings as they are.
Once that’s done, select these two layers and group them. Name the group Green Outline.
5. How to Make 3D Text in Photoshop
Step 1
To make 3D text, Photoshop had an entire 3D menu which unfortunately got discontinued. We can still create a 3D text effect, though. Here’s how.
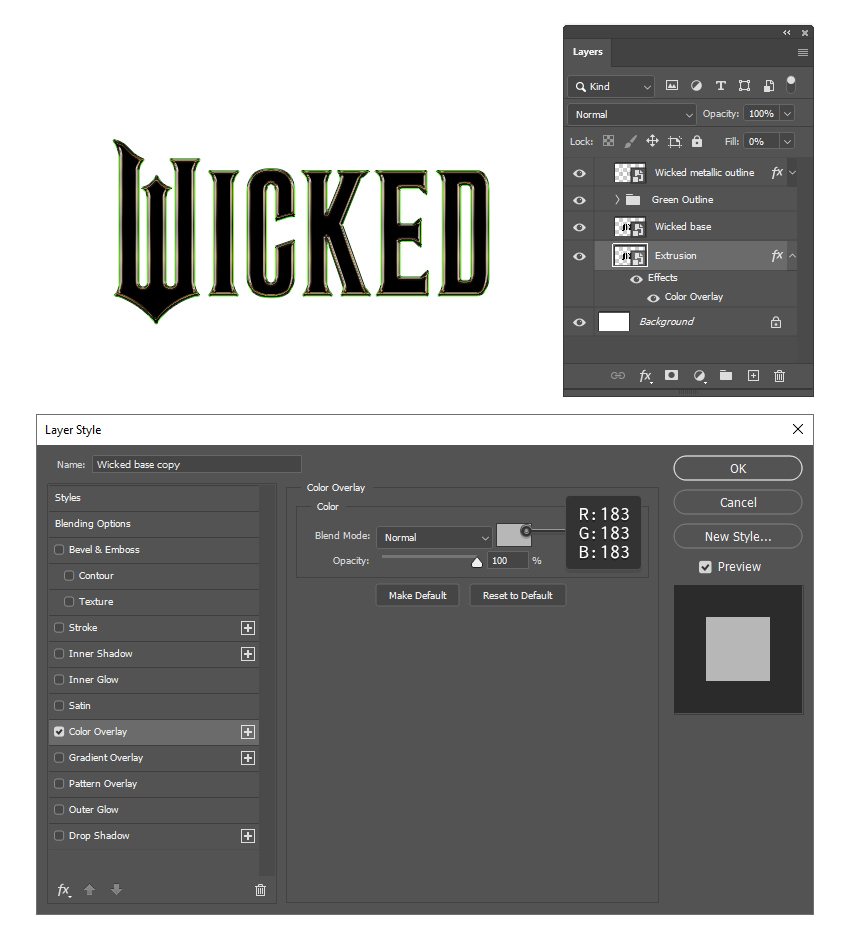
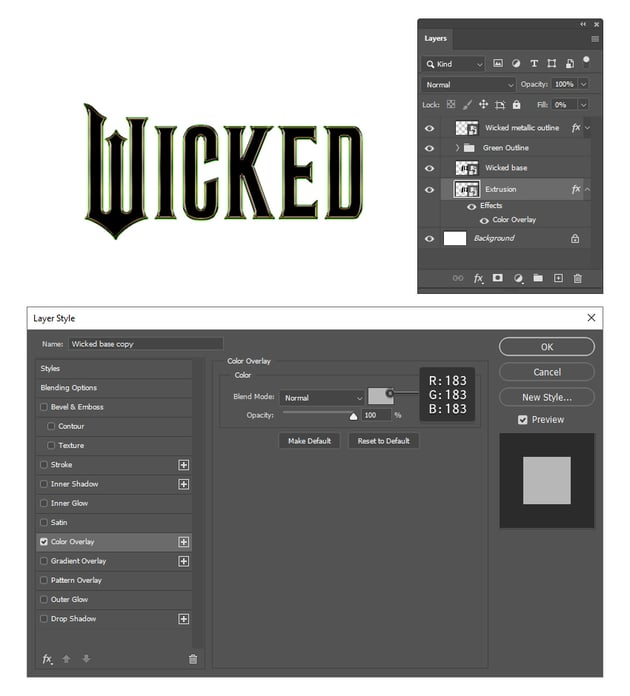
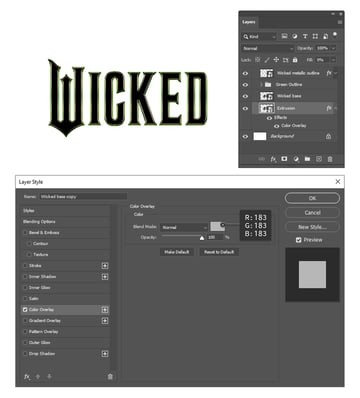
Duplicate the Wicked base layer and move it to the bottom of the Layers panel. Name it Extrusion. In the Layer Style window, apply Color Overlay using light gray and hit OK. The layer will not be visible, but it will help us create a 3D action.
Step 2
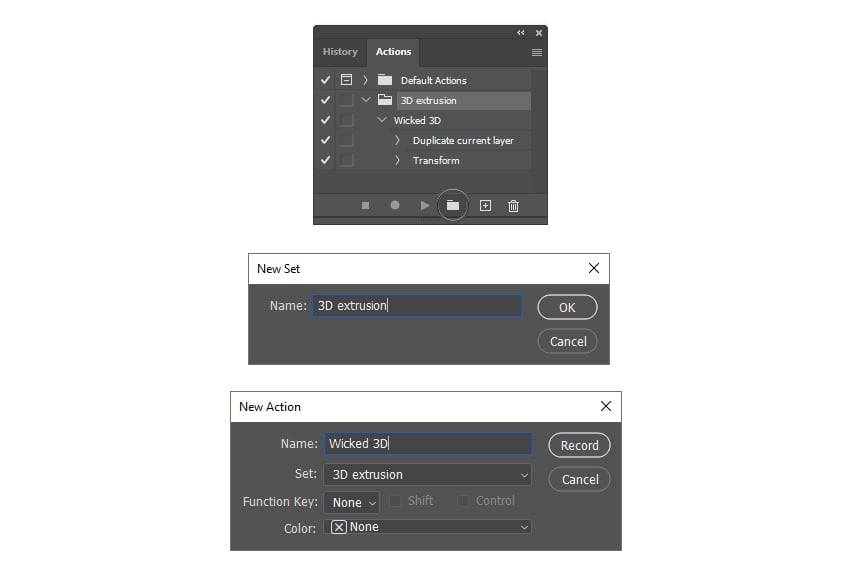
Open the Actions window by going to Window > Actions. Press Create new set at the bottom, and enter 3D extrusion as the name. Hit OK.
Next, press Create new action at the bottom of the window (the + sign), and enter Wicked 3D as the name of the action. Make sure the Set is assigned to 3D extrusion, and you can also assign a Function Key if you want. Hit Record.
Step 3
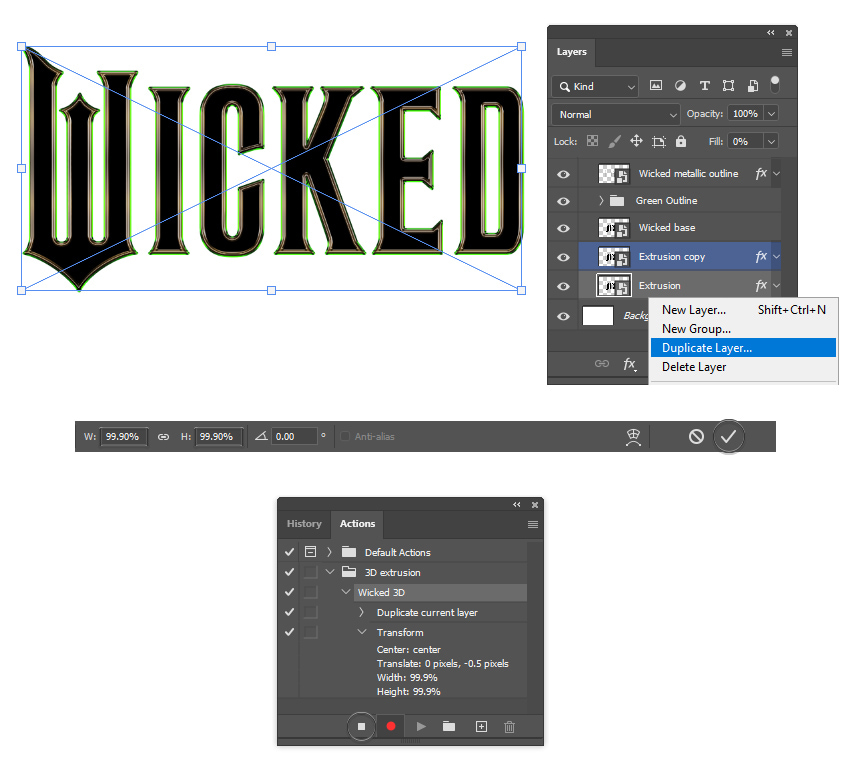
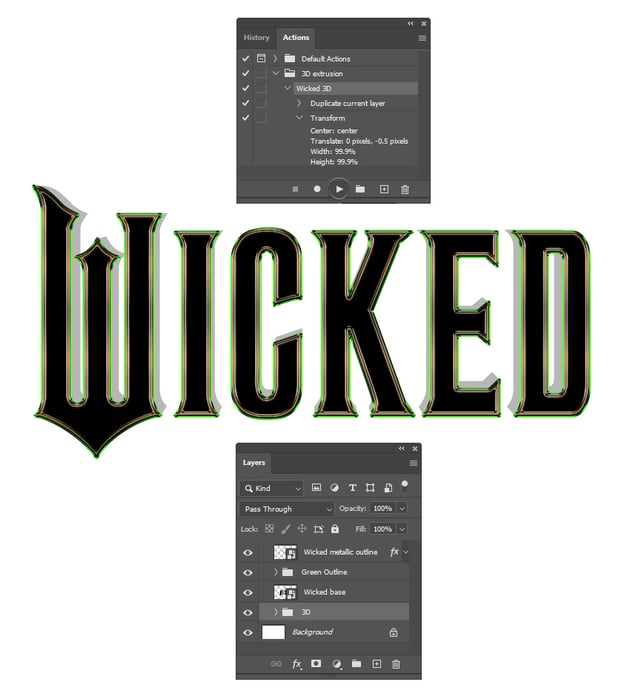
At this point, you’re in recording mode, as indicated by the red circle at the bottom of the Actions window. Select the gray Extrusion layer that you made earlier, right-click on it, and choose Duplicate from the menu. The new layer will be automatically named Extrusion copy. Next, go to Edit > Free Transform (Control-T), and type 99.90% in the Width box and 99.90% in the Height box up in the Options panel (Window > Options). Hit the Commit transform icon or press Enter.
You can see the two operations, Duplicate and Transform, that have been recorded in the Actions panel, and you can now press Stop recording at the bottom of the panel. The action is ready to use.
Step 4
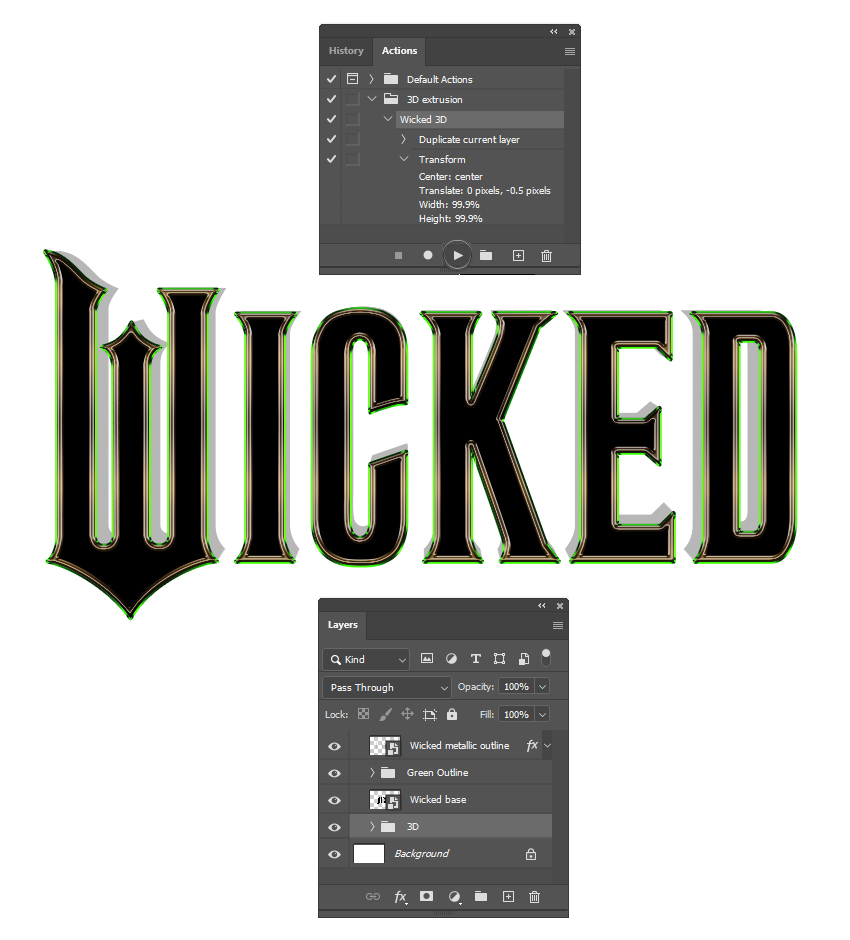
While the Extrusion copy layer and the Wicked 3D Action are selected, press Play selection at the bottom of the Actions panel about 30 times. Each time you hit Play, a new layer will be generated and you will start seeing the 3D extrusion growing. Once you’re done, select and group all these extrusion layers and name the group 3D.
Step 5
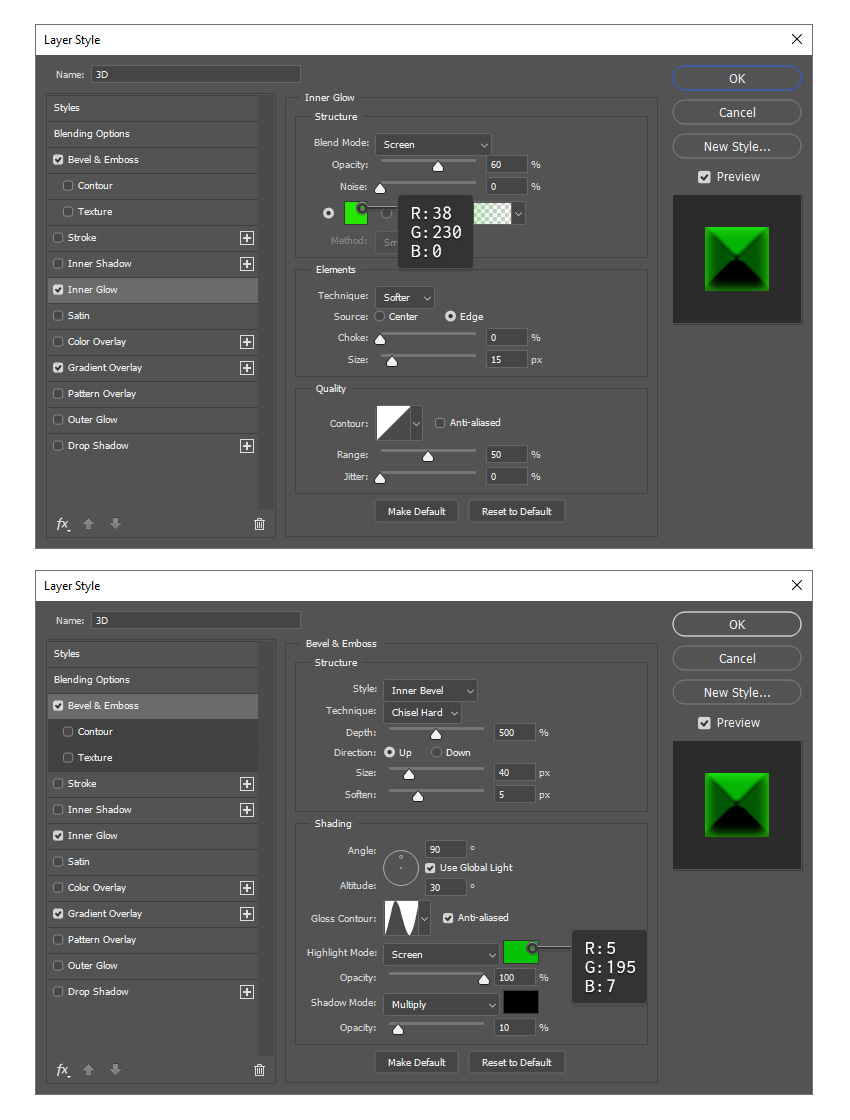
In order to create the bright green 3D text effect, double-click on the 3D group and apply the Gradient Overlay, Inner Glow, and Bevel & Emboss layer styles.
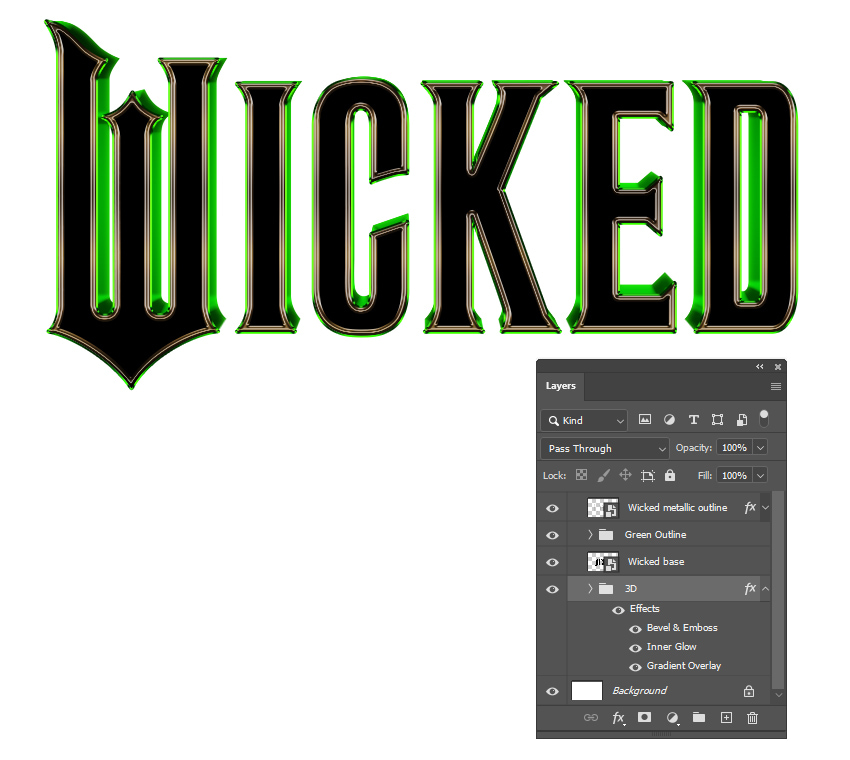
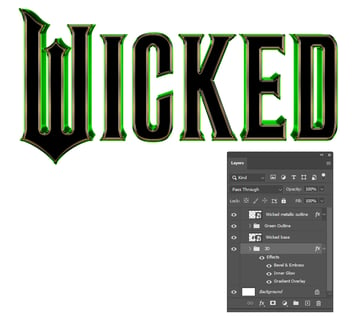
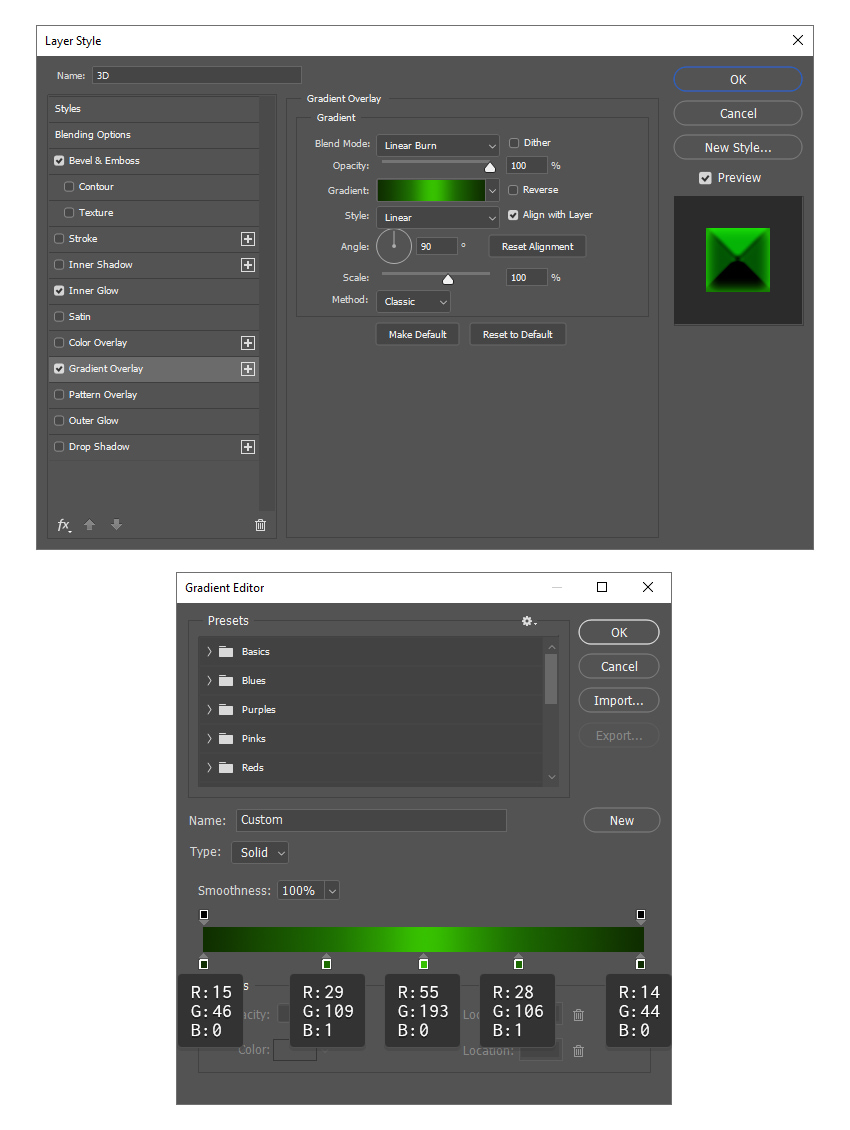
Here are the Gradient Overlay settings:
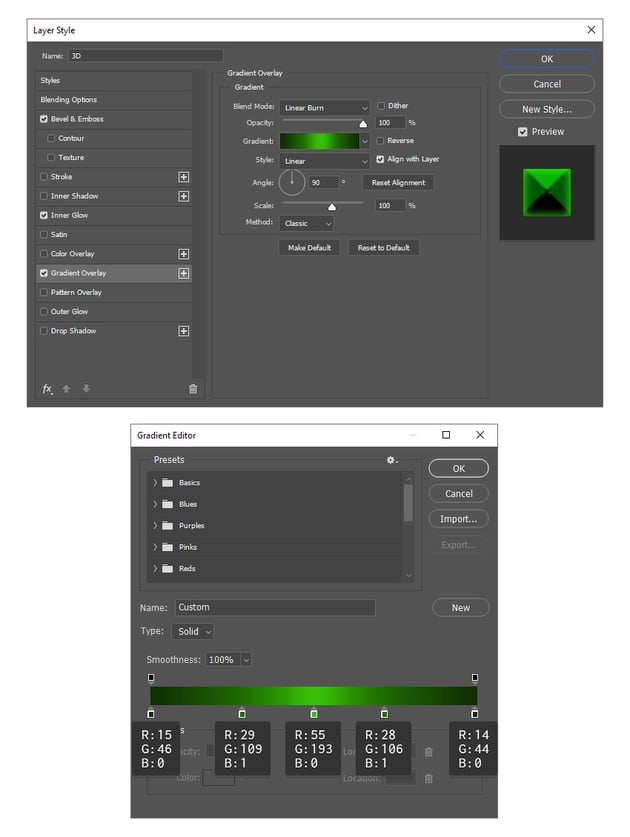
These are the Inner Glow and Bevel & Emboss settings:
6. How to Create Shading in Photoshop
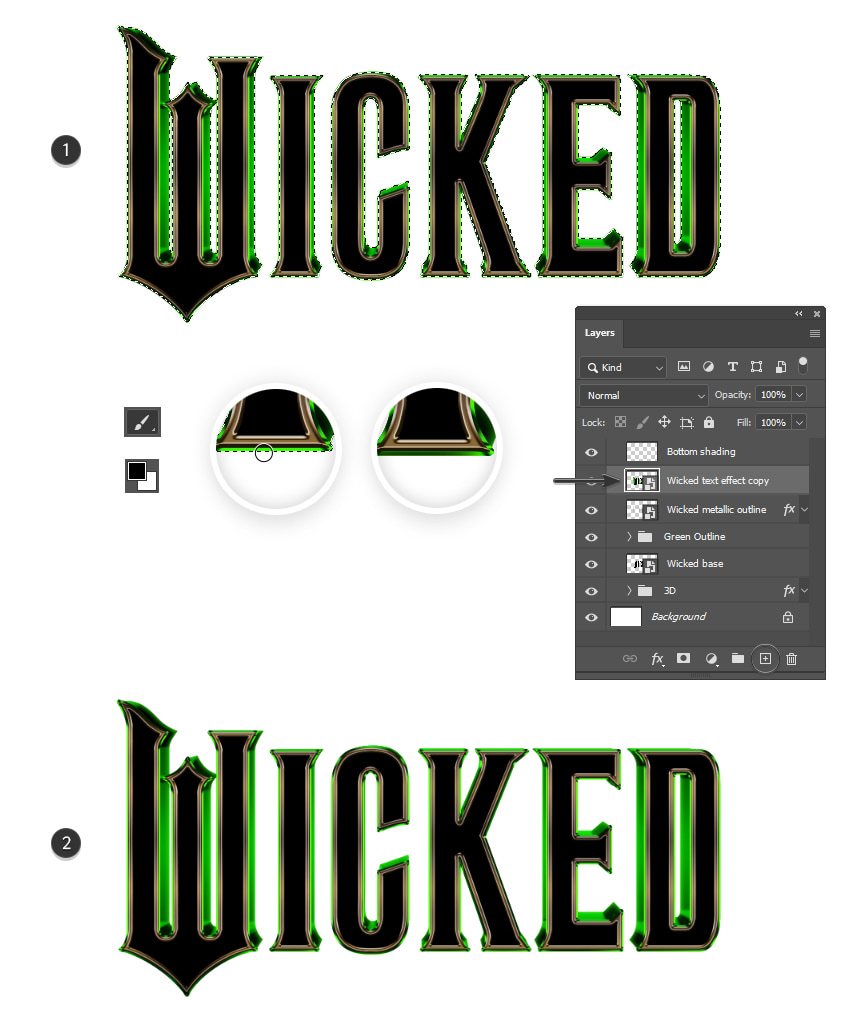
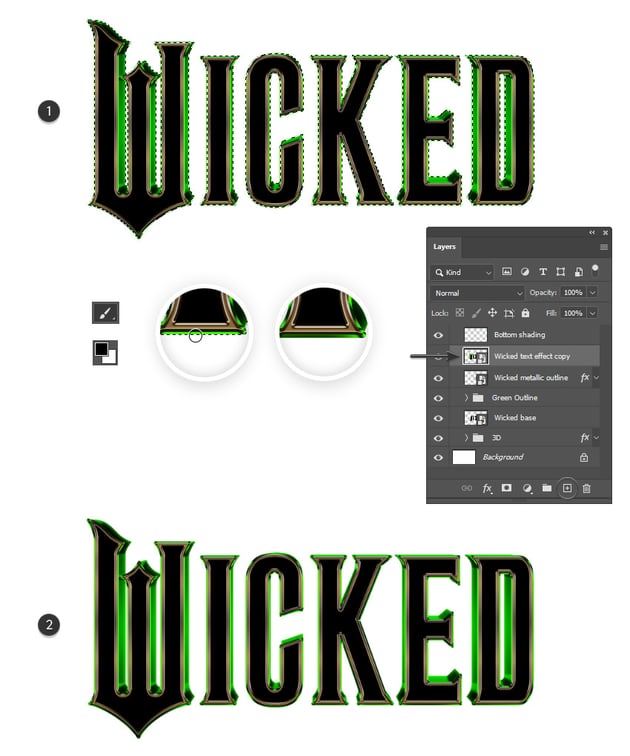
To improve the final look of your Wicked logo, you can add shading at the bottom of the letters. Select the entire text effect in the Layers panel, right-click, and choose Duplicate from the menu to make a copy of everything. Follow up with Convert to Smart Object, and a new layer will be formed that you can name Wicked text effect copy. You don’t actually need this layer; just Control-click on this layer’s thumbnail to get a selection around the entire Wicked text (1).
Now, grab the Brush Tool (B), set the color to black, and choose a small brush size of about 20–30 px. Press New Layer at the bottom of the Layers panel, and name it Bottom shading. Start painting inside this layer with the Brush Tool (B) over the green outline at the bottom of each letter. The active selection will help you avoid painting over the background too.
Once you’re done, go to Select > Deselect (Control-D), and you can now delete the Wicked text effect copy layer. Reduce the Opacity of the Bottom shading layer to about 50% or as much as you want (2).
Congratulations! You’re Done
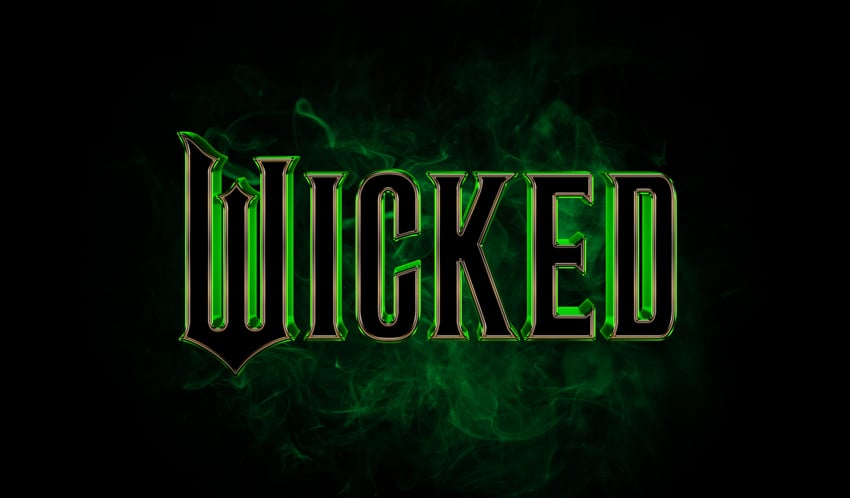
You have successfully learned how to make your own Wicked musical logo. Put it over a cool background like the Abstract smoky mystical dark background that I’ve used.
Now that you know how to make it, feel free to apply the same techniques to create other popular logos. Make sure to check out Envato Elements, where you will find many resources ready to be used, from fonts to photos, actions, graphics, and so much more. They will surely help you improve your work.
Popular Resources From Envato Elements
Envato Elements is an excellent resource for text effects, fonts, logos, actions, and so much more. Here’s a short list of some of the most popular text effects that you can find. Grab them and take your designs to the next level.
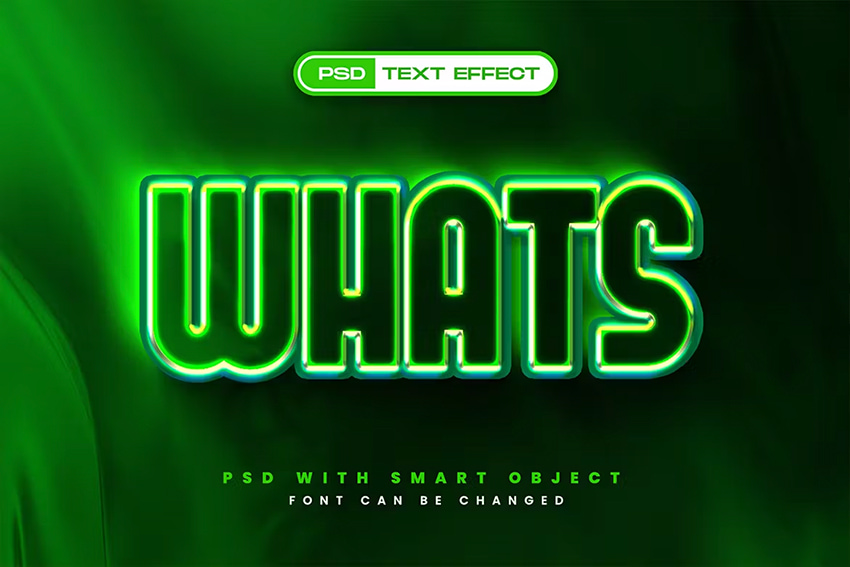
Whats Text Effect (PSD, PDF)
This text effect has a similar bright green and black color scheme, and it’s ready to be used in your project. Write the desired text, change the font, and make your titles, headlines, posters, covers, and banners stand out.
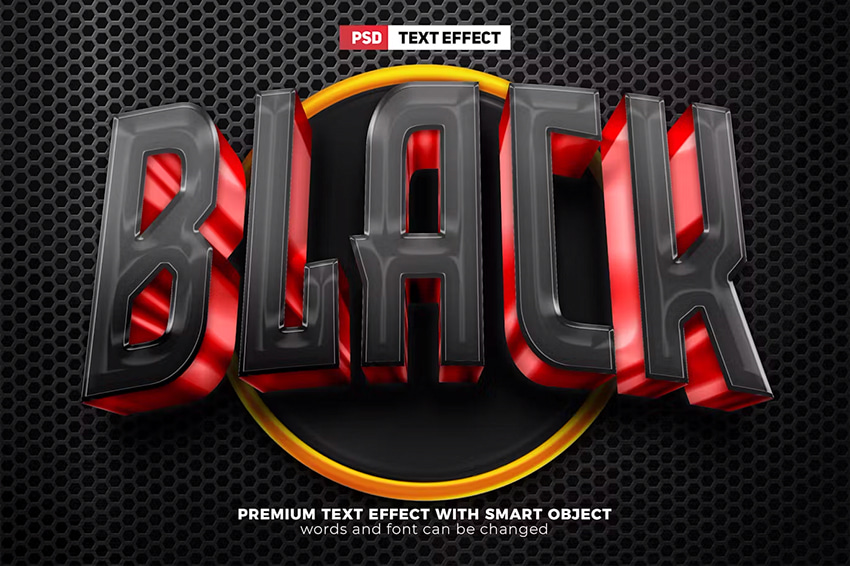
Black Red Team Esport 3D Text Effect (PSD)
This is another effect that’s similar in style but has a vivid red 3D extrusion that will make your designs pop. It’s easy to edit, so feel free to add your personal touch and make it fit perfectly in your next project.
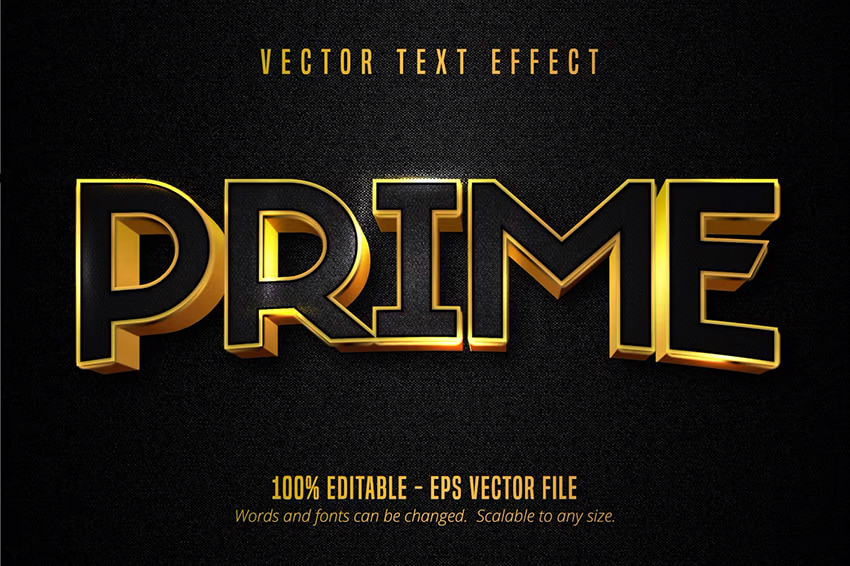
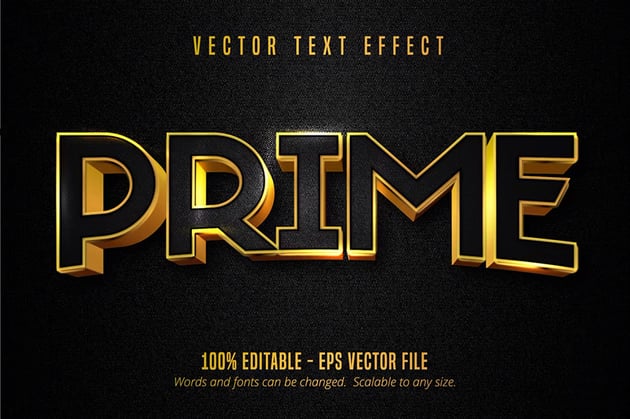
Prime Editable Text Effect, Gold Font Style (AI, EPS)
If you’re looking for a more elegant and modern 3D text effect, this is a great option that you can use right away. All you have to do is type in the desired text, and it’s done!
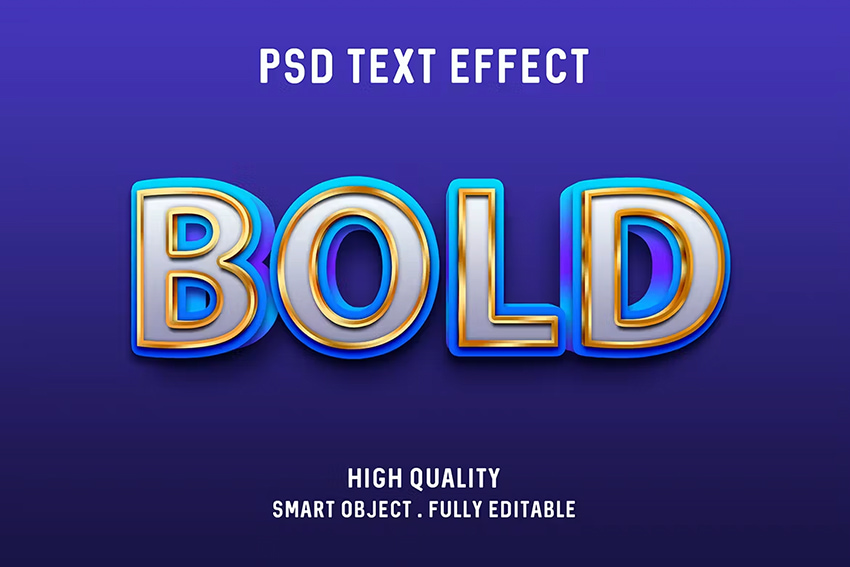
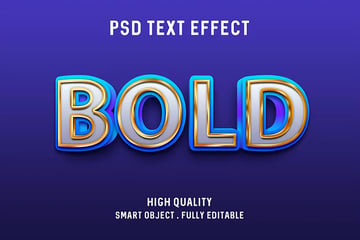
Blue Gold Text Effect (PSD)
This text effect has a metallic outline and a blue 3D extrusion. It’s eye-catching and ready to be used on posters, flyers, headlines, banners, gaming, and so much more. Give it a try!
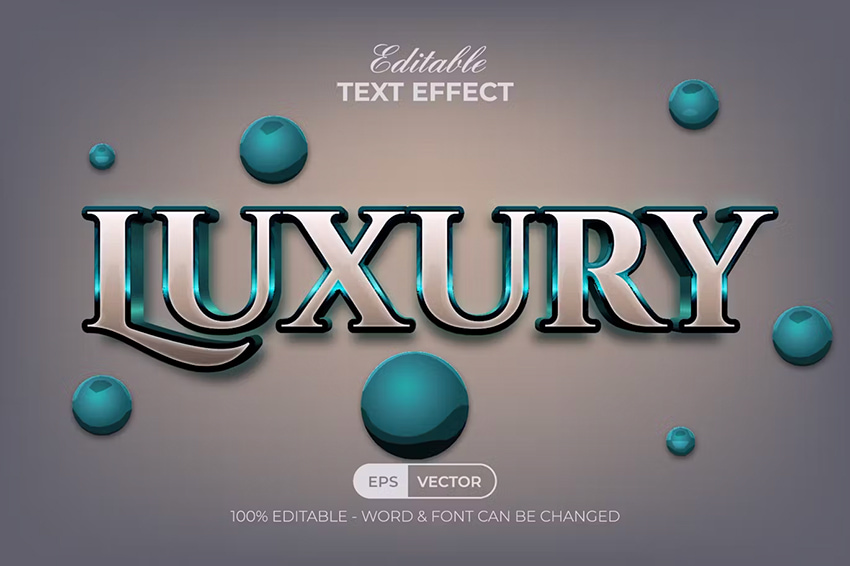
Luxury Text Effect Shiny Style (AI, EPS)
Here’s a gorgeous shiny text effect that will bring some luxury into your design and draw attention. It is vector and easy to edit, so you can try any other colors you want. Be creative with it!
Want to Learn More Skills?
Did you like this tutorial on how to make a 3D text effect in Photoshop? We have loads of tutorials on Envato Tuts+ that teach many other useful techniques. Here’s a list of tutorials specially made for you. Take a look!