If you’re interested in learning how to make text effects in Photoshop, the Avengers: Endgame logo is a great opportunity to do so. Let’s recreate this cool text effect together! This tutorial will teach you how to distort a font in Photoshop, how to define a pattern, how to use textures, how to create a 3D extrusion, and so much more. Let’s start!
If you don’t have the time to learn how to make the Avengers text effect, you can always try Envato Elements, where you will find a large selection of text effects, fonts, photos, and graphics that are ready to be used in your projects.
What You’ll Learn in This Avengers Text Effect Photoshop Tutorial
- How to distort a font in Adobe Photoshop
- How to make an Avengers text effect in Photoshop
- How to define a new pattern in Photoshop
- How to use textures in Photoshop
- How to make a 3D extrusion from a layer in Photoshop
Tutorial Assets
You’ll need the following resources in order to complete this project:
1. How to Open a New Photoshop Document
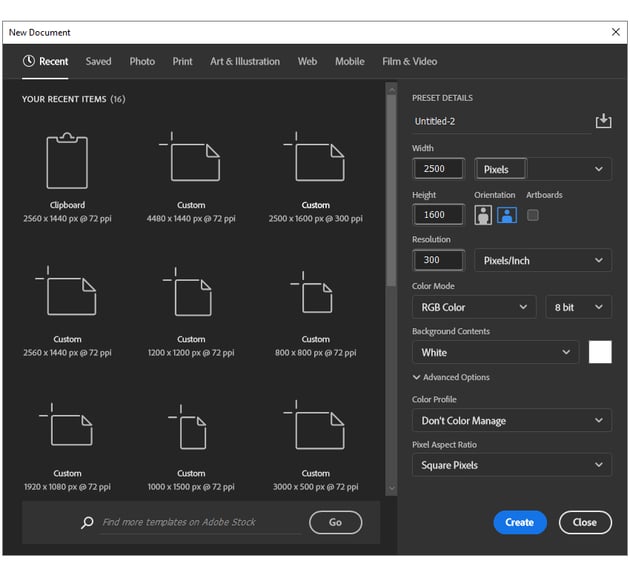
Launch Photoshop and go to File > New to open a blank document. Type a name for your file, set the dimensions, and then select Pixels as Units and RGB as Color Mode. Choose a white background for the moment.

2. How to Distort a Font in Adobe Photoshop
Step 1
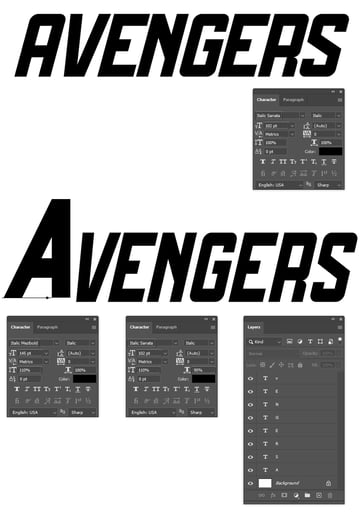
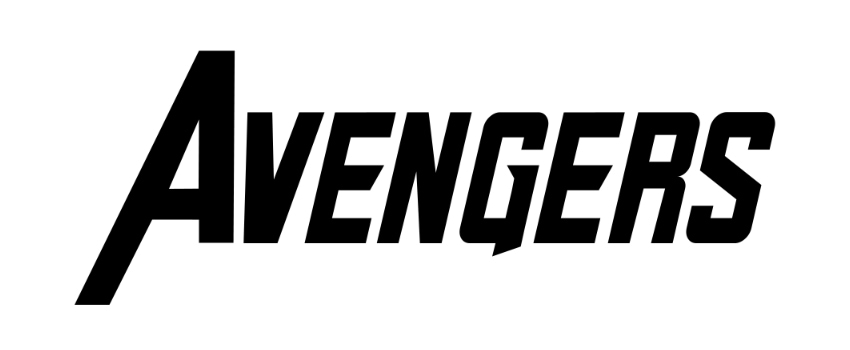
The first thing to do in our Avengers text effect PSD file is to type AVENGERS using the Horizontal Type Tool (T). The font I used is Italic Sanata, with a size of 102 pt and the color black. I recommend typing each letter separately because we’re going to distort the font in the next few steps.
This font is very similar to the original Avengers logo, but the letter A doesn’t match. Let’s replace it with the Italic Mezibold Font, with a size of 145 pt and the color black. Open the Character panel (Window > Character) and enter 110% in the Vertically scale field to make the letter taller.
Go back to the VENGERS text, and enter 110% in the Vertically scale field and 95% in the Horizontally scale field. This will make each letter taller and slimmer.


Step 2
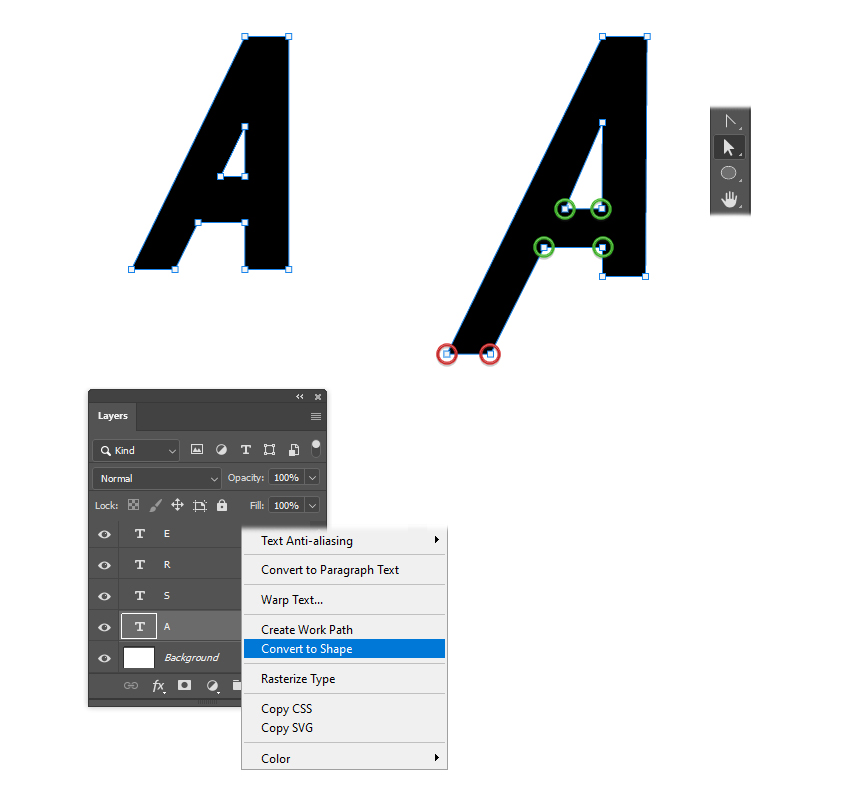
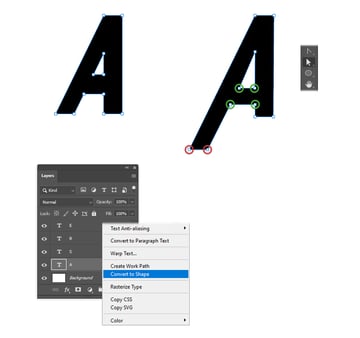
Let’s focus on the letter A and distort it a little. Right-click on layer A and choose Convert to Shape from the menu. Now, you can select the points individually and move them with the Direct Selection Tool (A). Hold the Shift key to select more points at the same time.
Move the points highlighted with green downwards, and then move the points highlighted with red to elongate the leg of the letter as shown.

Step 3
We’re going to keep distorting the other letters to make them more similar to the original Avengers text.
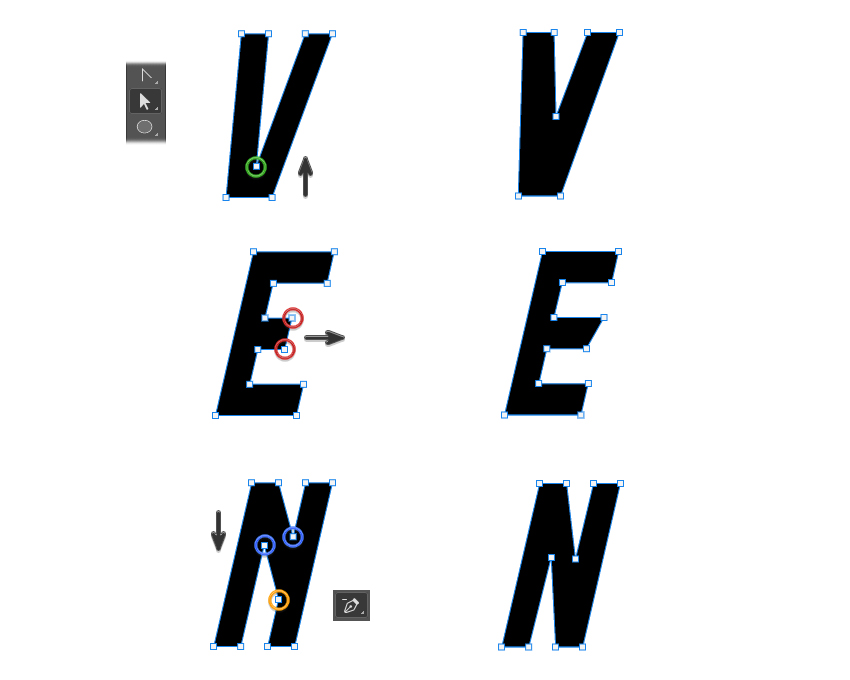
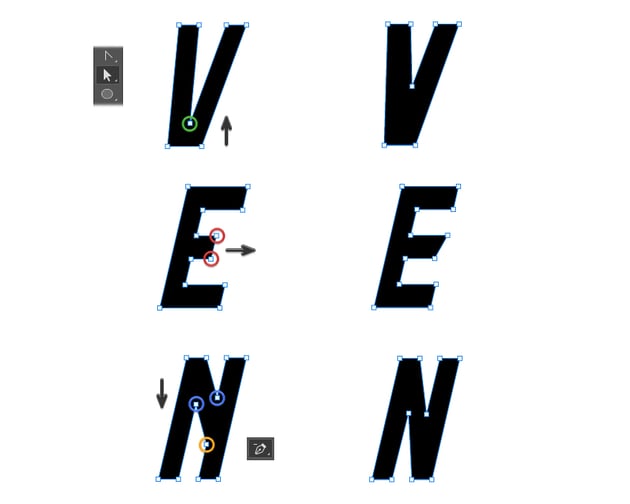
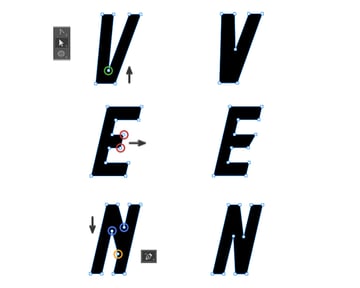
Convert to Shape the letter V, and then select only the point highlighted with green using the Direct Selection Tool (A) and move it upwards.
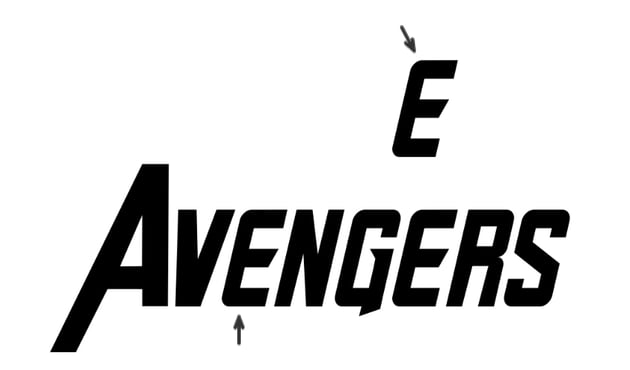
Convert to Shape the letter E, and then move the points highlighted with red to the right to create the slanted arm.
Convert to Shape the letter N. Move the points highlighted with blue downwards, and then delete the point highlighted with orange using the Delete Anchor Point Tool.
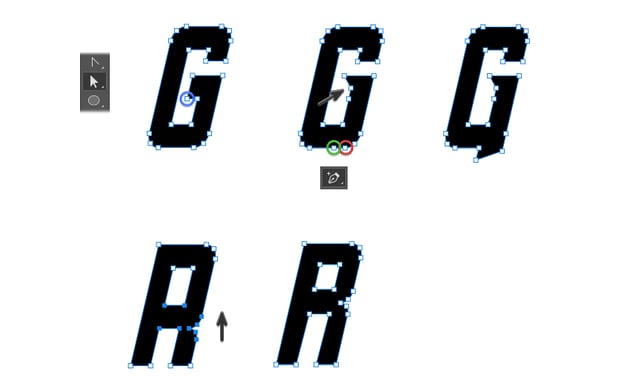
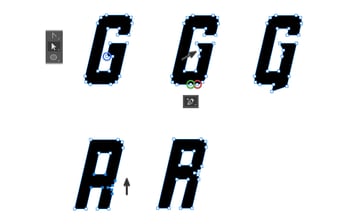
Step 4
Continue with the letter G. Use the Direct Selection Tool (A) to move the point highlighted with blue as indicated, and then switch to the Add Anchor Point Tool and add an extra point at the bottom (highlighted with green). Next, move the red point downwards and to the left to distort the bottom of the letter.
For the letter R, select all the blue points shown below and move them upwards with the Direct Selection Tool (A). The letter S remains the same.

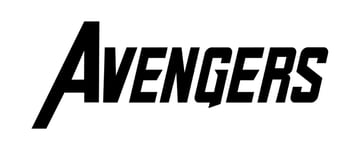
Step 5
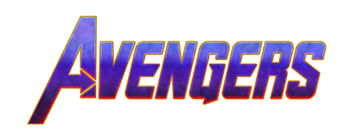
This is what the Avengers logo text looks like at this point. Very similar to the original logo, right?

Step 6
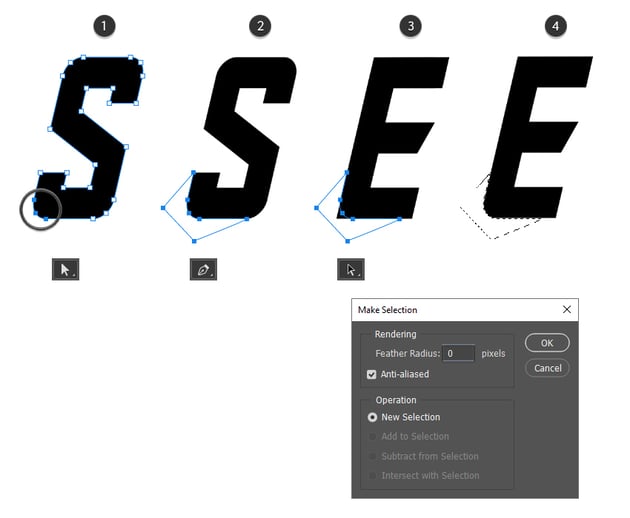
Convert to Shape the letter S, and then use the Direct Selection Tool (A) to select only the three points indicated (1). Go to Edit > Copy (Control-C), and then click on the New Layer icon at the bottom of the Layers panel and Paste (Control-V) those points into the new layer. Switch to the Pen Tool (P) and close the shape as shown (2).
Use the Path Selection Tool to select this shape and move it over the letter E, making it fit perfectly over the bottom-left corner (3). Right-click on the shape and choose Make Selection from the menu. Keep the Feather Radius to 0 px and hit OK. Now that the selection is ready, while you’re on layer E, you can press the Delete key on your keyboard, and this action will turn the sharp corner into a rounded corner just like the letter S (4). Follow up with Select > Deselect (Control-D).

Step 7
Repeat the technique explained in the previous step and create the rounded corner at the top of the letter E. Once that’s done, duplicate layer E and replace the other E in the Avengers text.


Step 8
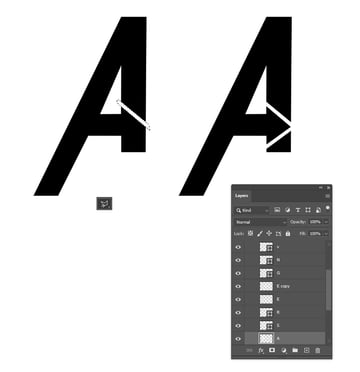
Right-click on layer A and choose Rasterize Layer from the menu. Now, take the Lasso Tool (L) and make an angled selection over the letter A as shown. We are making the arrowhead now. Press the Delete key on your keyboard to cut that section out. Repeat the same thing in the opposite direction, and you will get the arrowhead.


Step 9
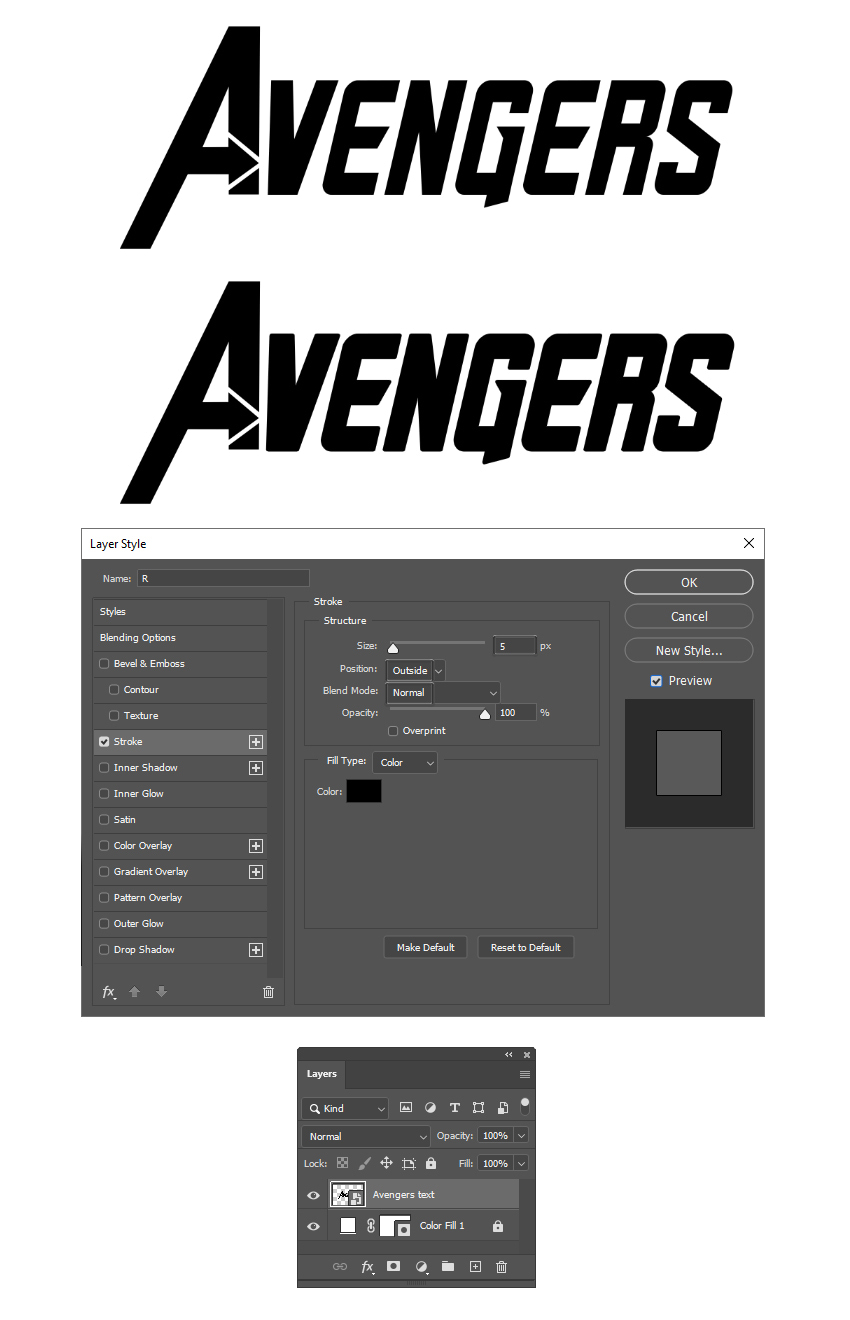
At this point, the Avengers text is almost ready. All we need to do is to make the letters a bit bolder by applying a Stroke layer style. Use the settings shown for the letters V, E, N, G, E, R, and S. Do not apply this style to the letter A.
Next, select all the layers, right-click, and choose Convert to Smart Object from the menu. This action will merge everything into one layer: the Avengers text.

Step 10
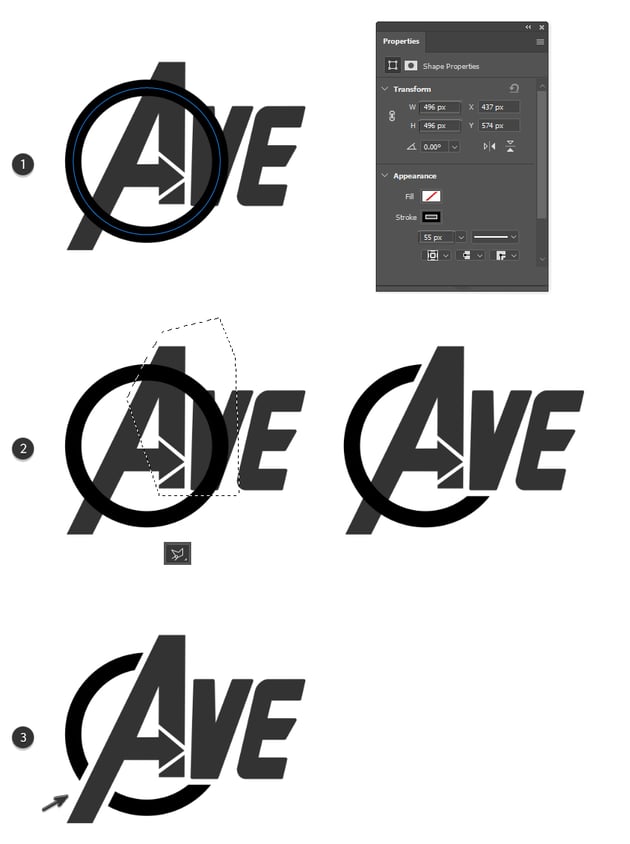
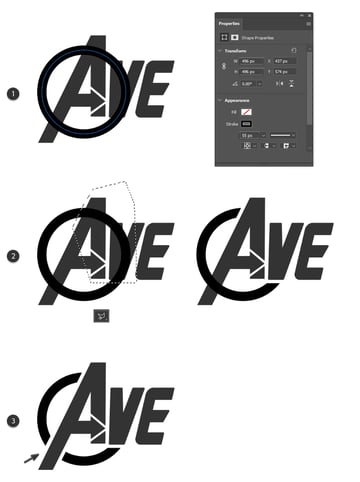
Grab the Ellipse Tool (U) and draw a circle over the letter A of about 496 x 496 px. Give it a 55 px black Stroke in the Properties panel (1).
Right-click on the circle layer and choose Rasterize layer from the menu. Use the Lasso Tool (L) and create a selection over the circle as shown. Then press Delete to cut that section from the circle (2). Do the same thing around the long leg of the letter A and cut a section out (3).

3. How to Make an Avengers Text Effect in Photoshop
Step 1
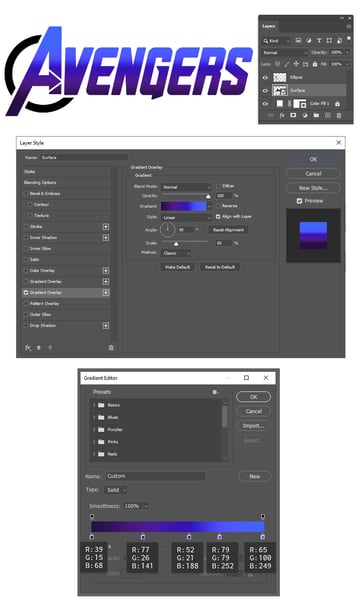
The text is ready, and now we can start making the actual Avengers text effect. Select the Avengers text layer, and let’s rename it Surface. We will apply a series of layer effects to it in the following steps.
Double-click on the layer to open the Layer Style window, and first apply a Gradient Overlay using the settings shown below.


Step 2
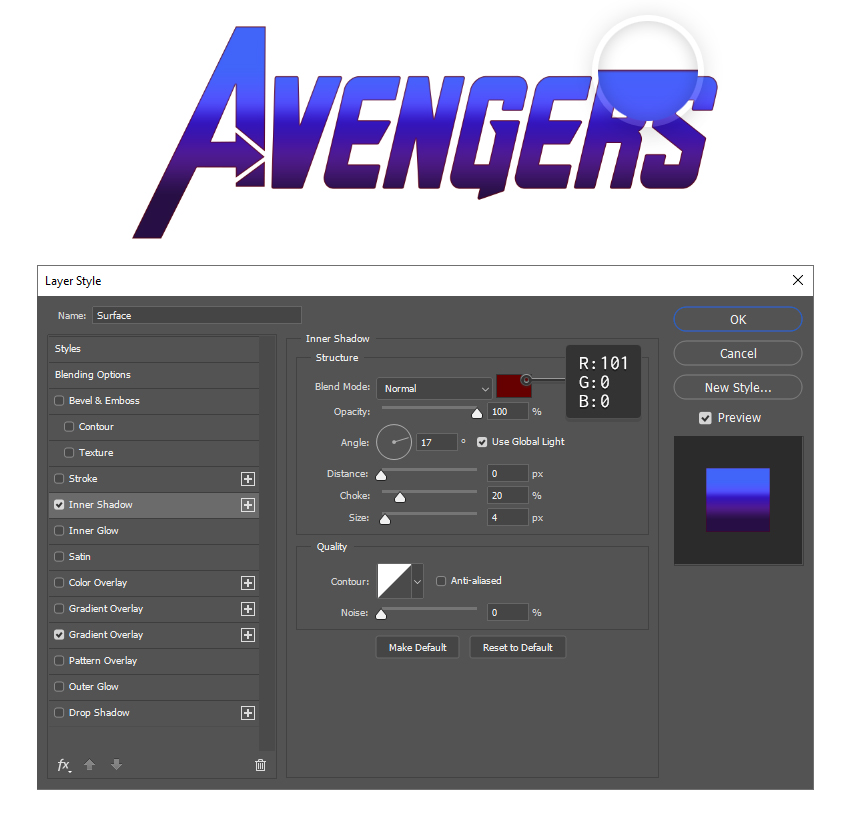
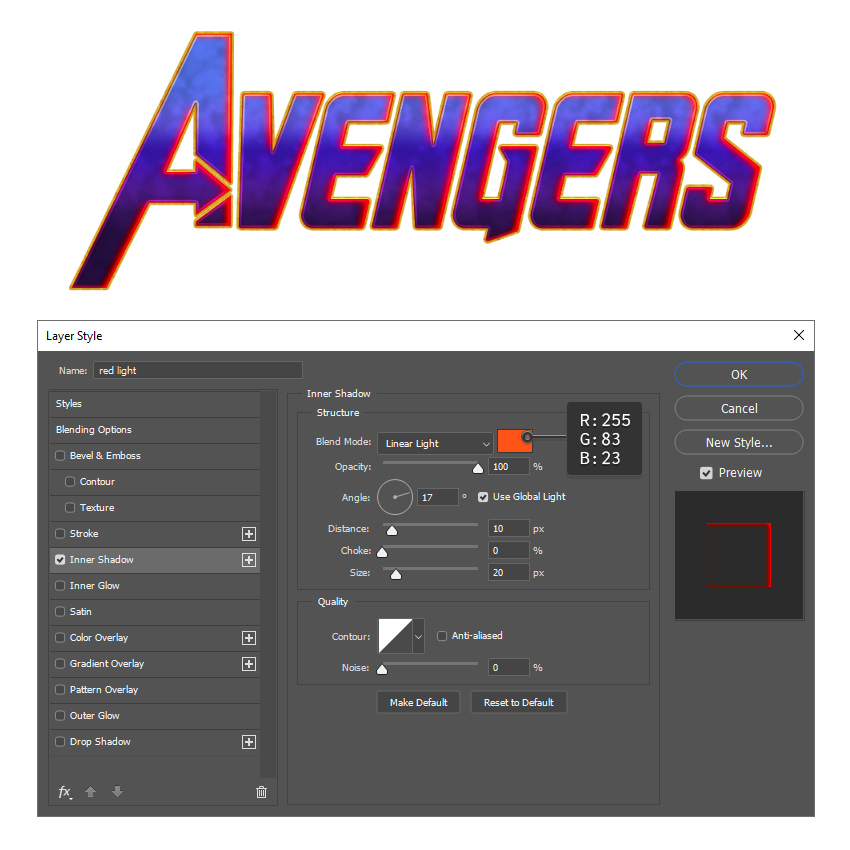
Next, apply an Inner Shadow using the settings shown:


Step 3
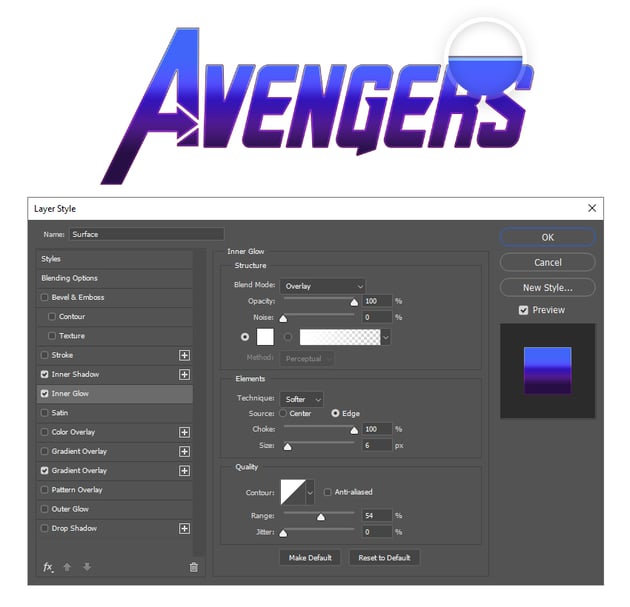
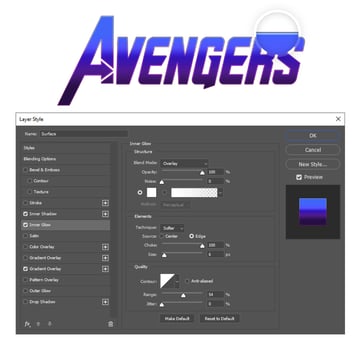
These are the Inner Glow settings:

Step 4
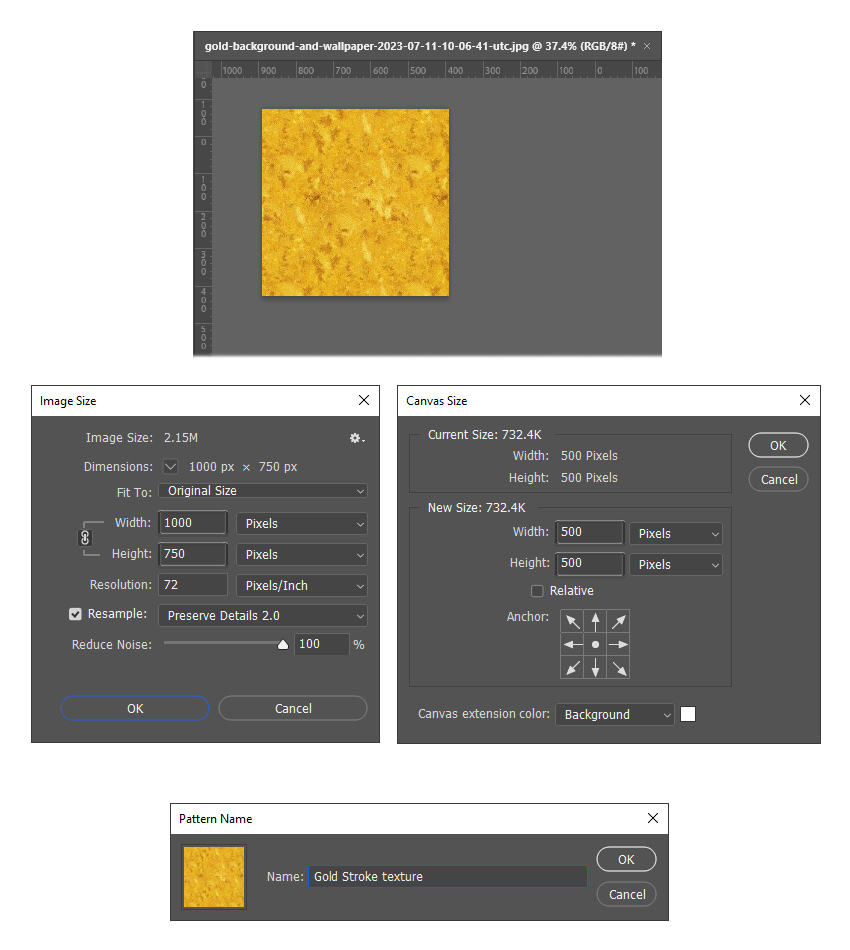
At this point, we need to define a new pattern. Download the Gold Background image and open it in Photoshop. Go to Image > Image Size and change its size from 3000 x 2250 px to 1000 x 750 px. Hit OK. Next, go to Image > Canvas Size and set both the Width and Height to 500 px. Hit OK.
To define this image as a pattern, go to Edit > Define Pattern and name it Gold Stroke texture.

Step 5
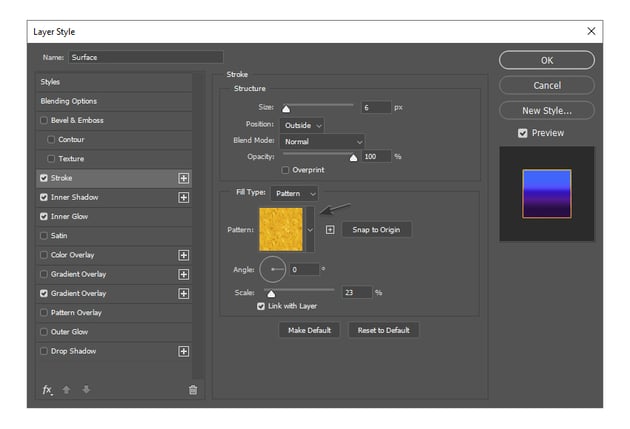
Double-click on the Surface layer to open the Layer Style window again. Activate Stroke and use the settings shown. For the Fill Type, choose Pattern, and select the newly defined pattern texture. Scale it to about 20–25%.


Step 6
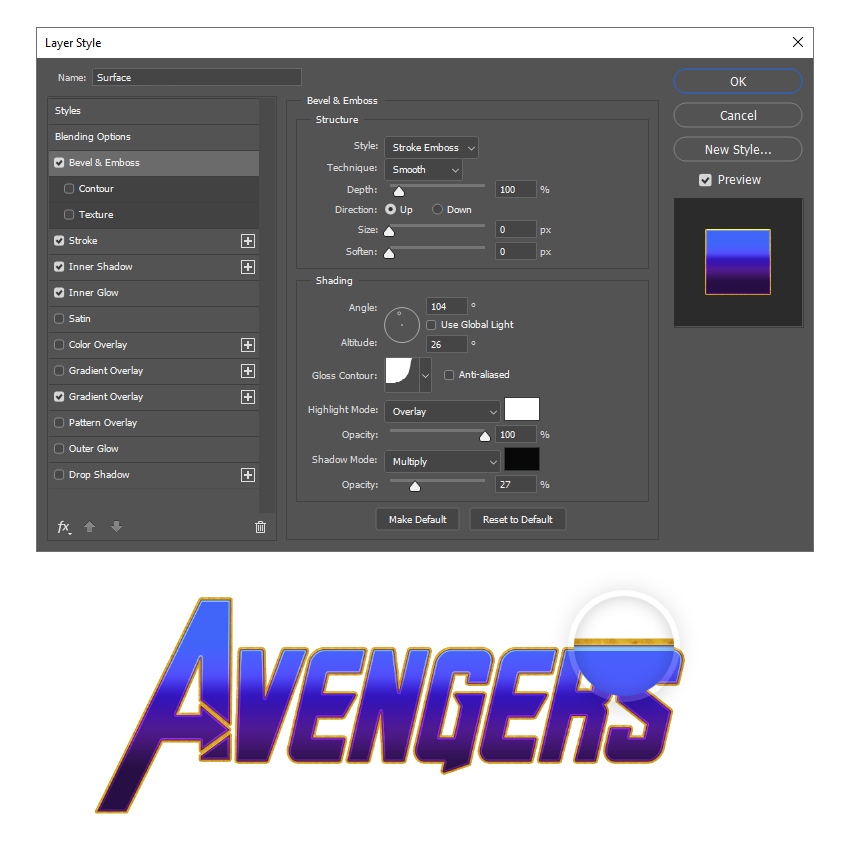
The next layer style is Bevel & Emboss. Apply the following settings:

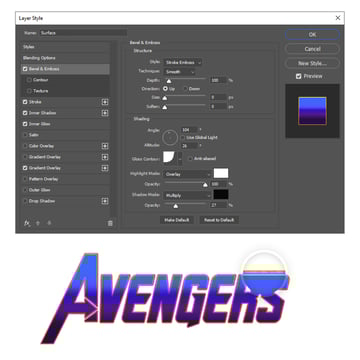
Step 7
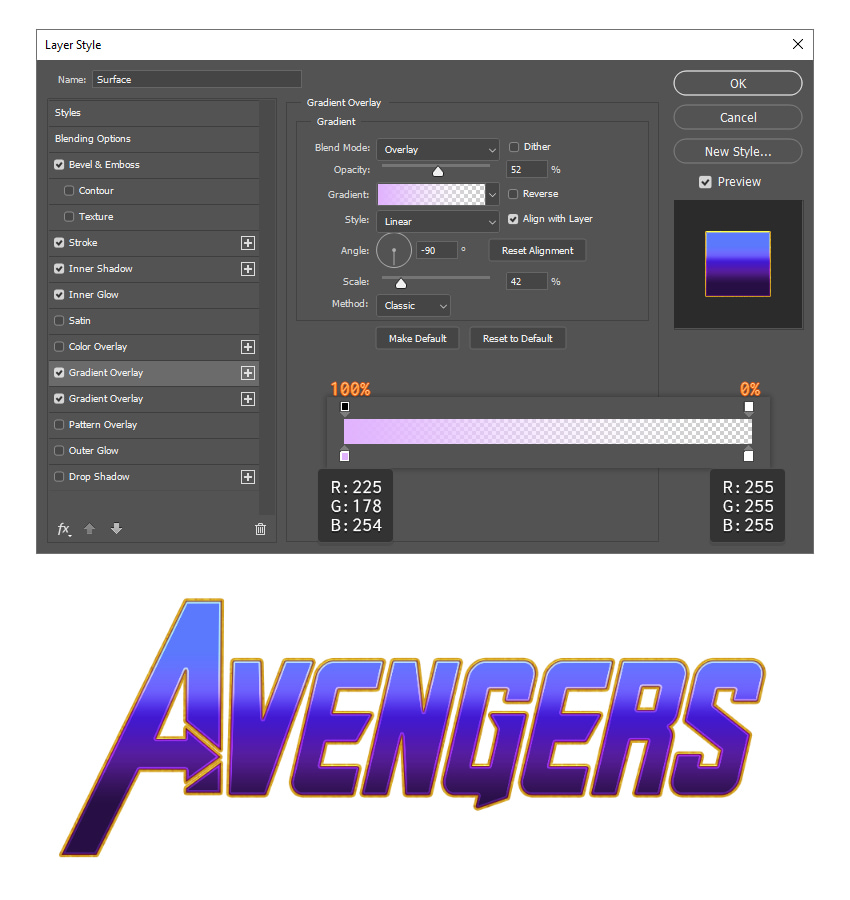
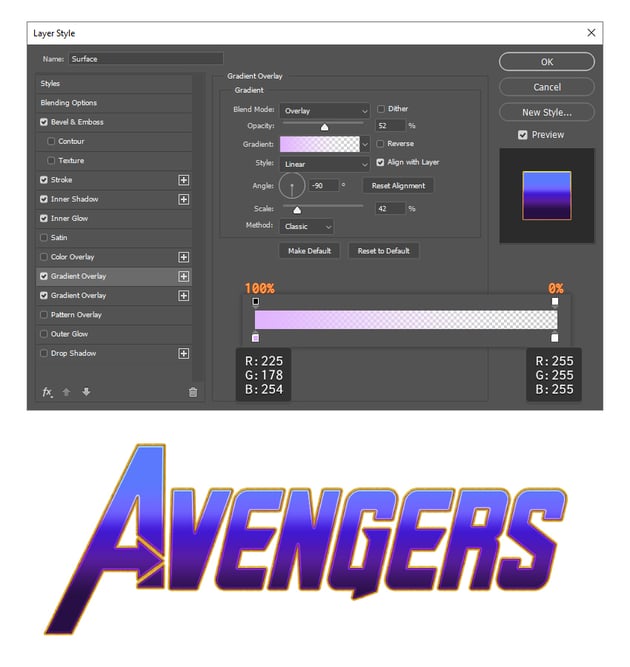
Add a new Gradient Overlay by clicking on the + sign. Use the settings and the linear gradient from light purple to transparent shown below. This will add a soft purple highlight at the top of the Avengers text effect.

Step 8
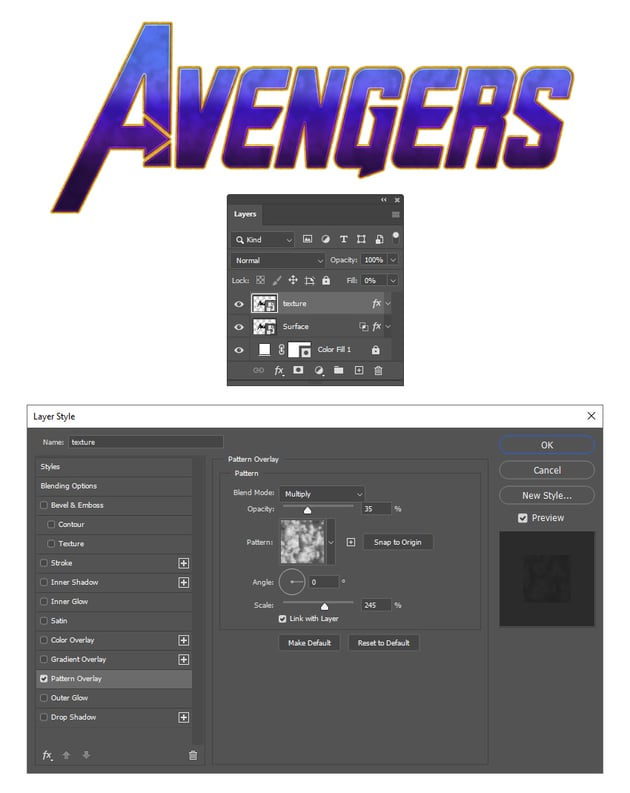
Duplicate the Surface layer and rename the copy from above “texture”. Delete all the existing layer styles applied.
Open the Layer Style window and activate only Pattern Overlay. This time, we will use a texture available in Photoshop called Clouds. Find it under Legacy Patterns and More > Legacy Patterns > Texture Fill. Adjust all the settings as indicated.


Step 9
Duplicate the Texture layer and rename the copy from above “red light”. Open the Layer Style window, deactivate the Pattern Overlay that’s currently applied, and activate only Inner Shadow. Apply the settings shown, and you will get a bright red light inside the letters.


Step 10
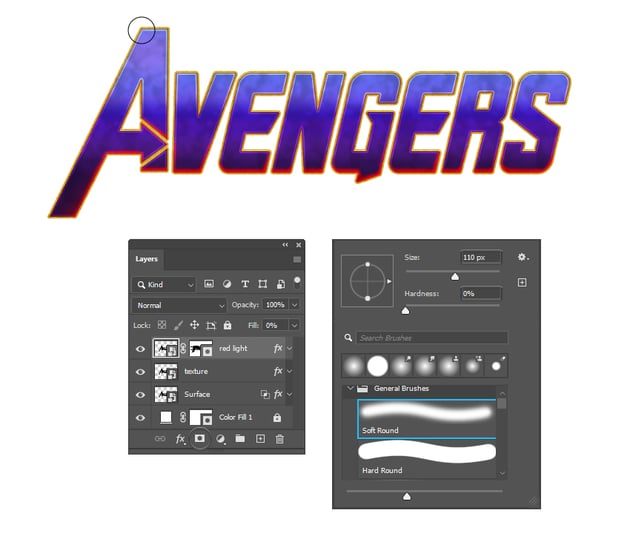
While you’re on the Red light layer, press the Layer Mask icon at the bottom of the Layers panel. Now, grab the Brush Tool (B) and start to brush over the letters with black in order to mask the red light. Start from the top and leave only some red light along the bottom and right edges of the letters.
Choose these brush settings in the Brush Preset picker panel:
- Type: Soft Round
- Size: 110 px
- Hardness: 0%
- Color: black R=0, G=0, B=0


Step 11
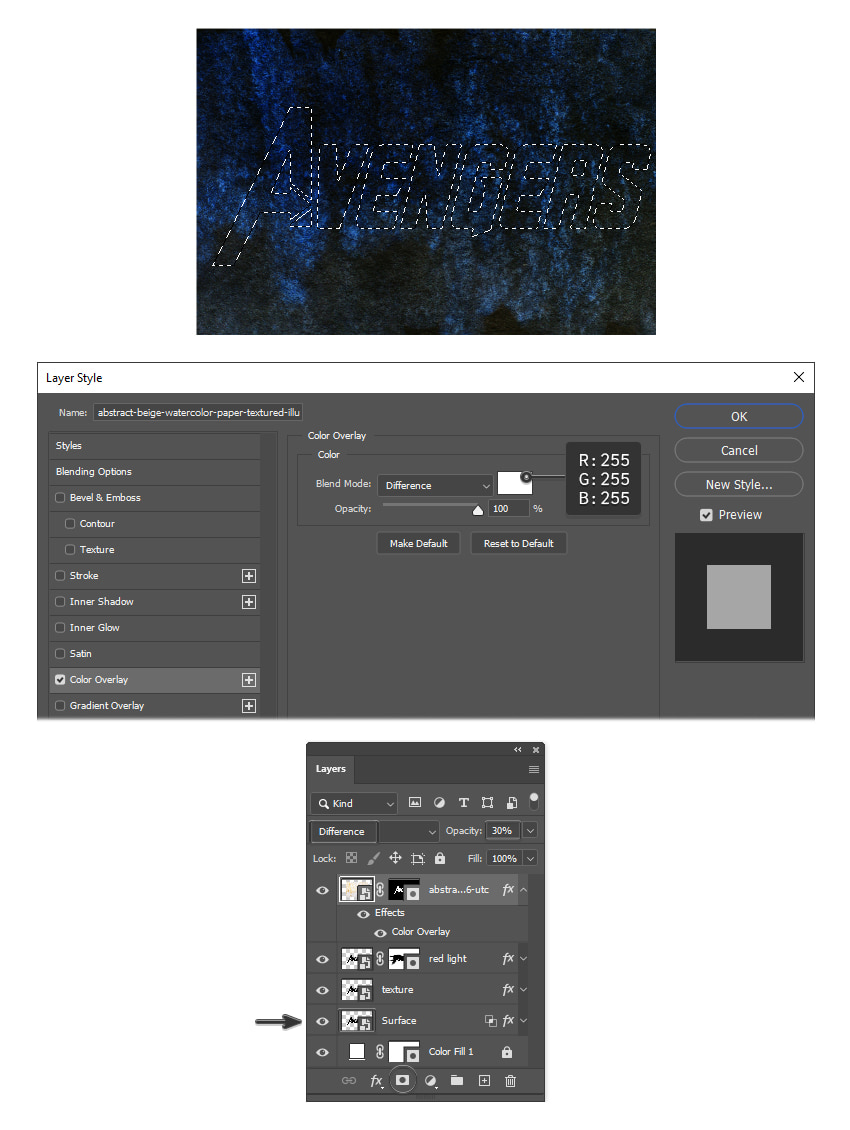
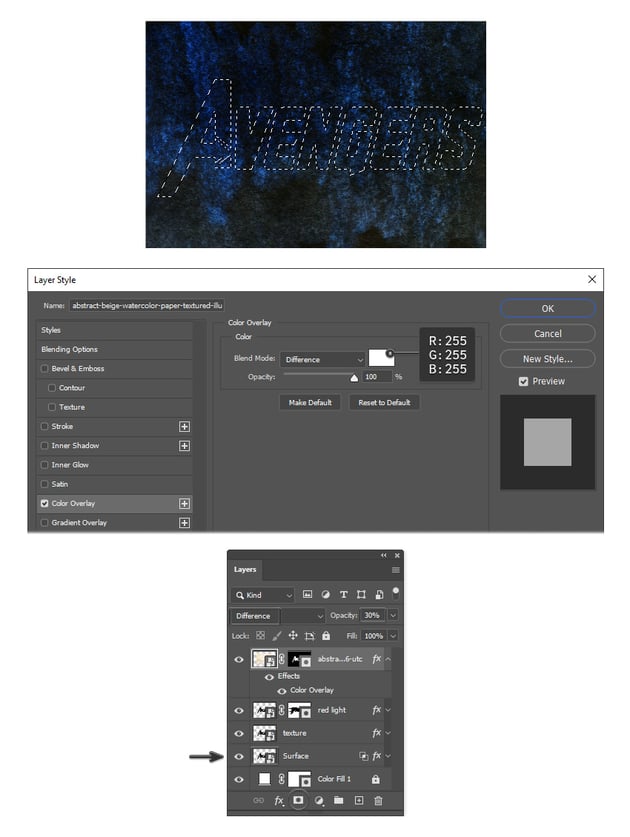
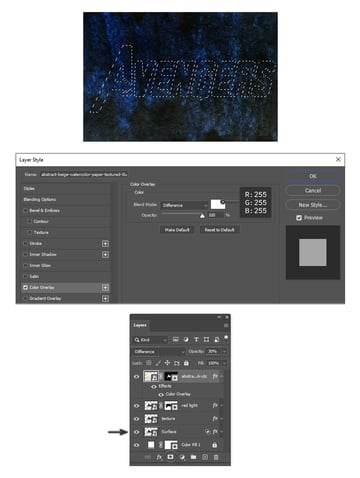
It’s time to import a new texture into your Avengers text effect PSD file. I’m using the Abstract Watercolor Illustration to create a grunge-textured look for the text effect. Go to File > Place Embedded, locate the image on your computer, and hit Place. Double-click on the image layer to open the Layer Style window, and activate Color Overlay. Use the settings shown to turn the image from white/beige to black/blue.
To mask the grunge texture, Control-click on the thumbnail of the Surface layer to create a selection around all the letters. While the grunge texture layer is selected, press the Layer Mask icon at the bottom of the Layers panel. Set the Blending mode to Difference and reduce the Opacity to 30%.
Step 12
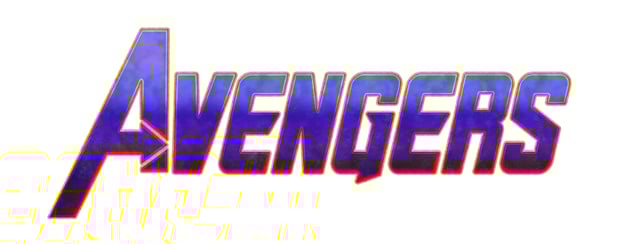
This is how the text effect looks now:

4. How to Make a 3D Extrusion in Photoshop
Step 1
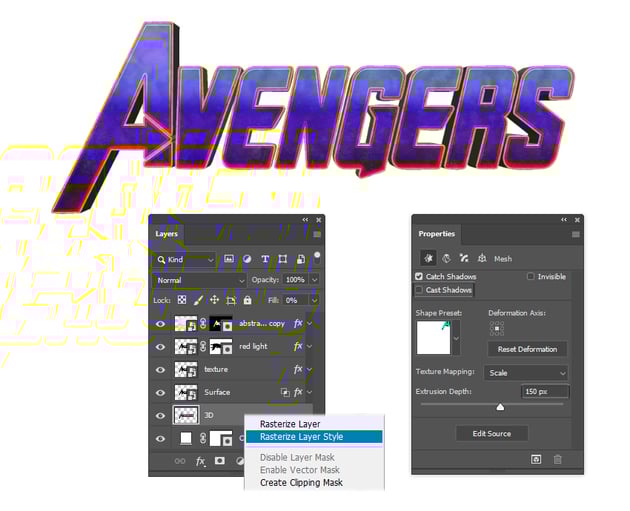
Duplicate the Surface layer and rename the copy underneath 3D. Right-click on the 3D layer and choose Rasterize Layer Style from the menu. Next, go to 3D > New 3D Extrusion from Selected Layer. In the Properties panel, apply an Extrusion Depth of 150 px and uncheck Cast Shadows. Follow up with Rasterize Layer to turn the live 3D extrusion into a raster layer so that you can apply layer styles to it.


Step 2
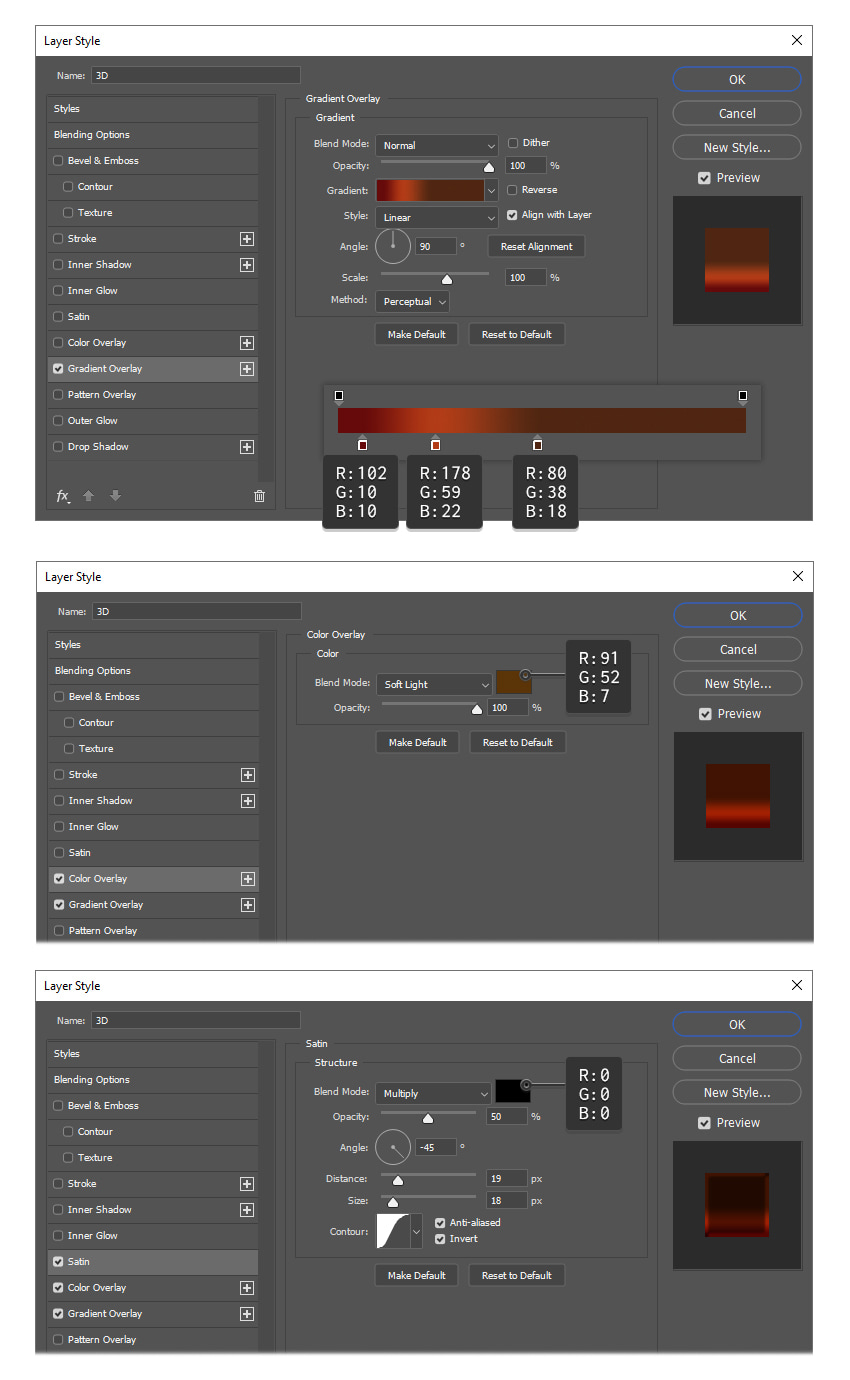
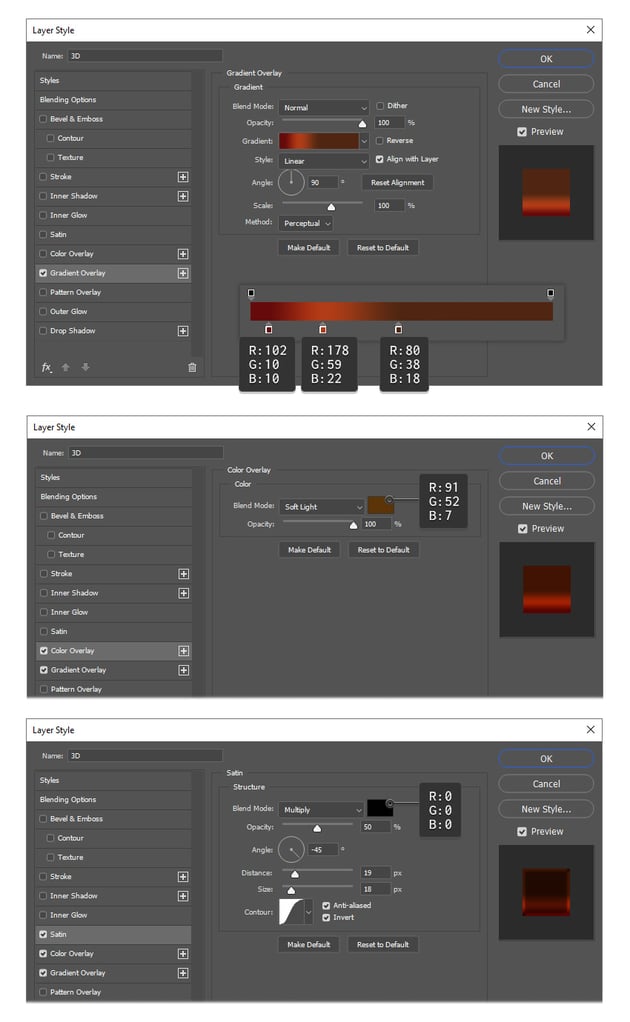
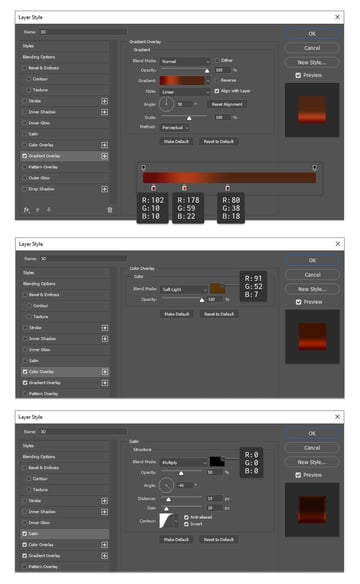
Double-click on the 3D layer to open the Layer Styles window, and apply Gradient Overlay, Color Overlay, and Satin styles using the settings shown below.
Step 3
At this point, the text effect looks like this:

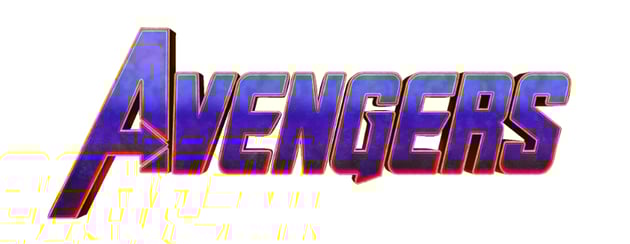
Step 4
Now, that the text is done, you can focus on the circle.
Follow the steps previously explained to obtain the same look for the circle. You will have the same layers and the same styles and settings applied. The only difference is that the 3D Extrusion Depth is smaller: about 80 px.
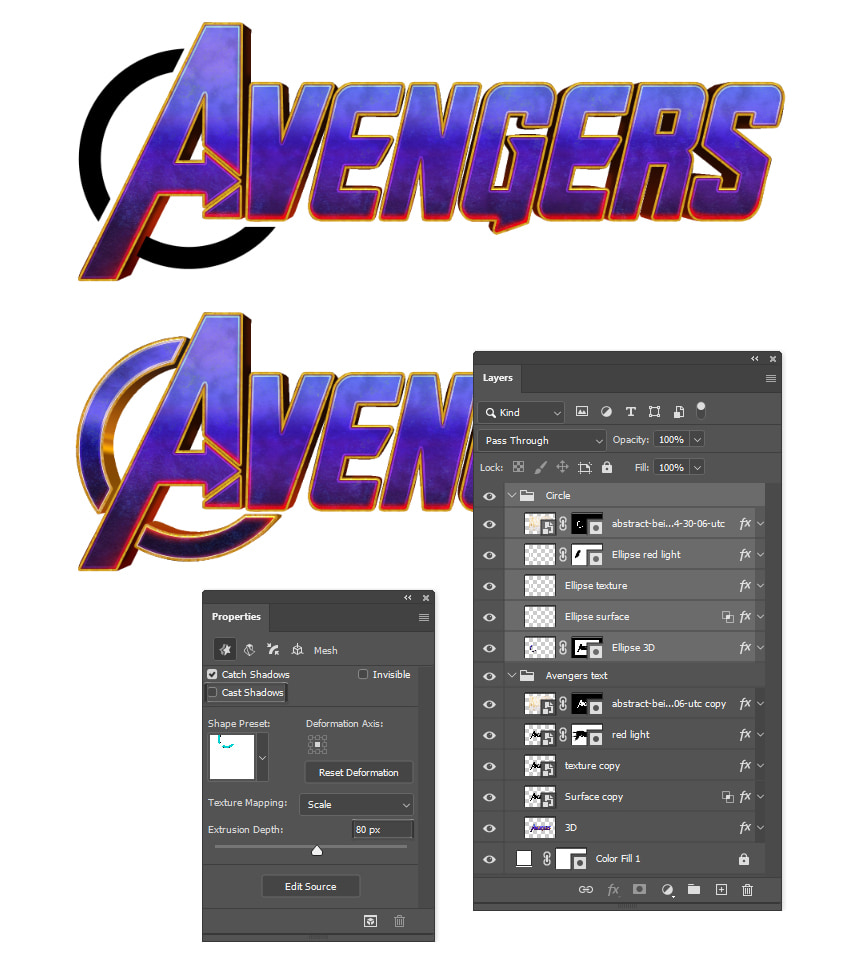
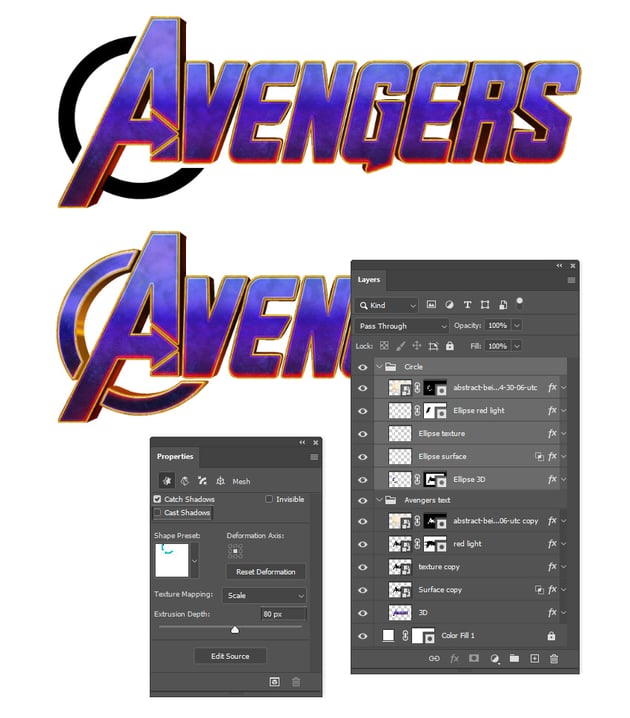
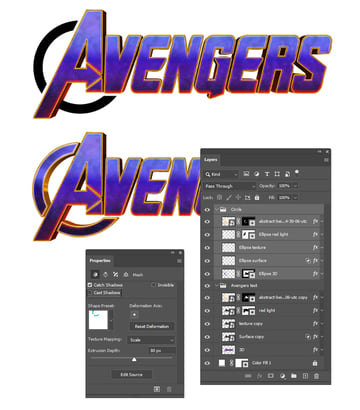
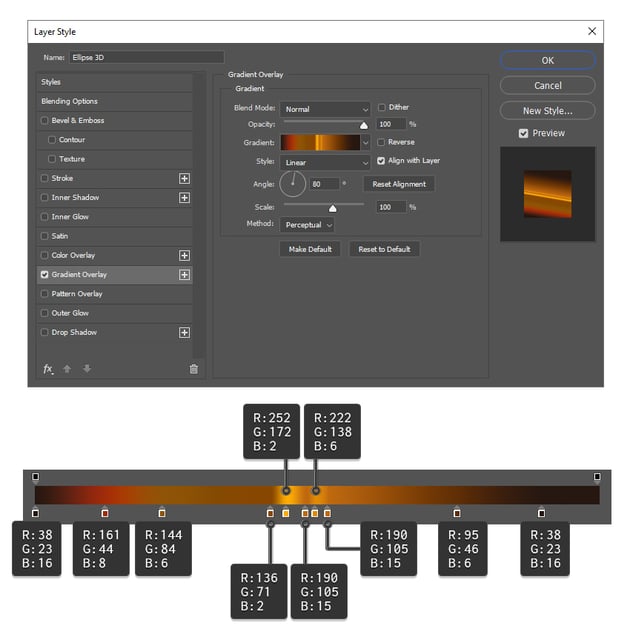
After rasterizing the 3D extrusion, use these Gradient Overlay settings:

5. How to Make the “Endgame” Text Effect
Step 1
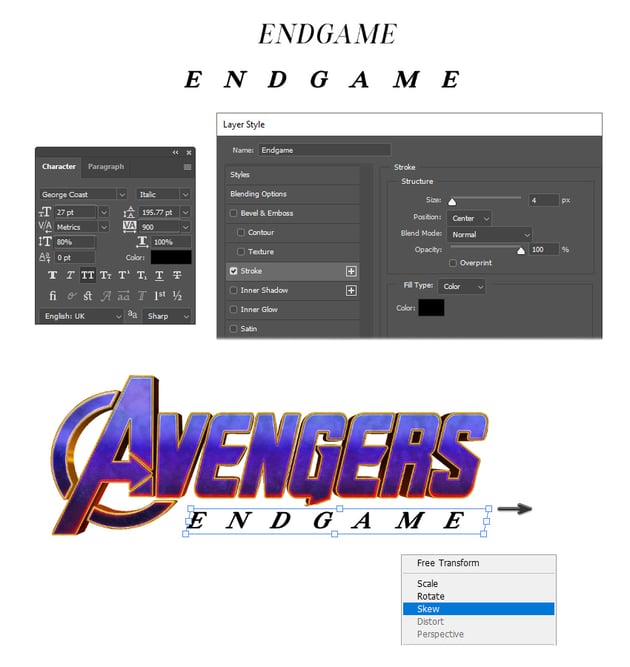
Grab the Horizontal Type Tool (T) and write ENDGAME in your Avengers text effect PSD file. The George Coast Nostalgic Font is very similar to the original, with a few tweaks.
- Size: 27 pt
- Tracking for selected characters: 900
- Vertically scale: 80%
Double-click on the Endgame layer and apply a Stroke layer style using the settings shown. This will make the font bolder. Next, go to Edit > Transform > Skew and drag the top-right corner point to the right in order to make the font look more italic.


Step 2
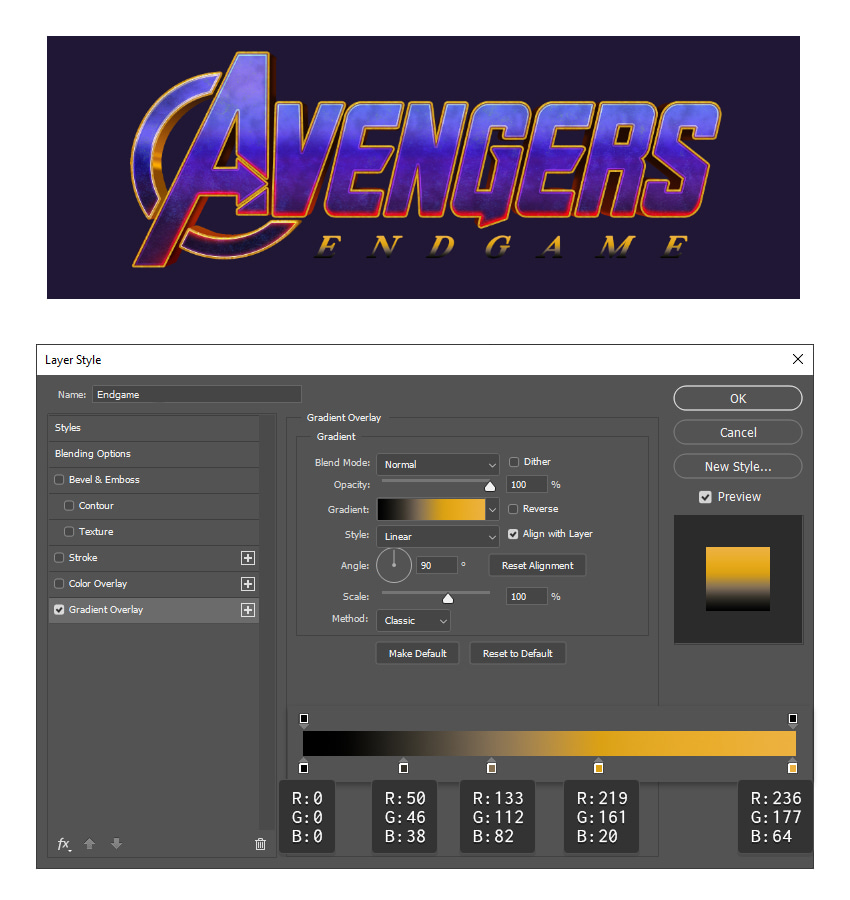
Apply a Gradient Overlay layer style to the Endgame layer using the gradient and settings shown below.


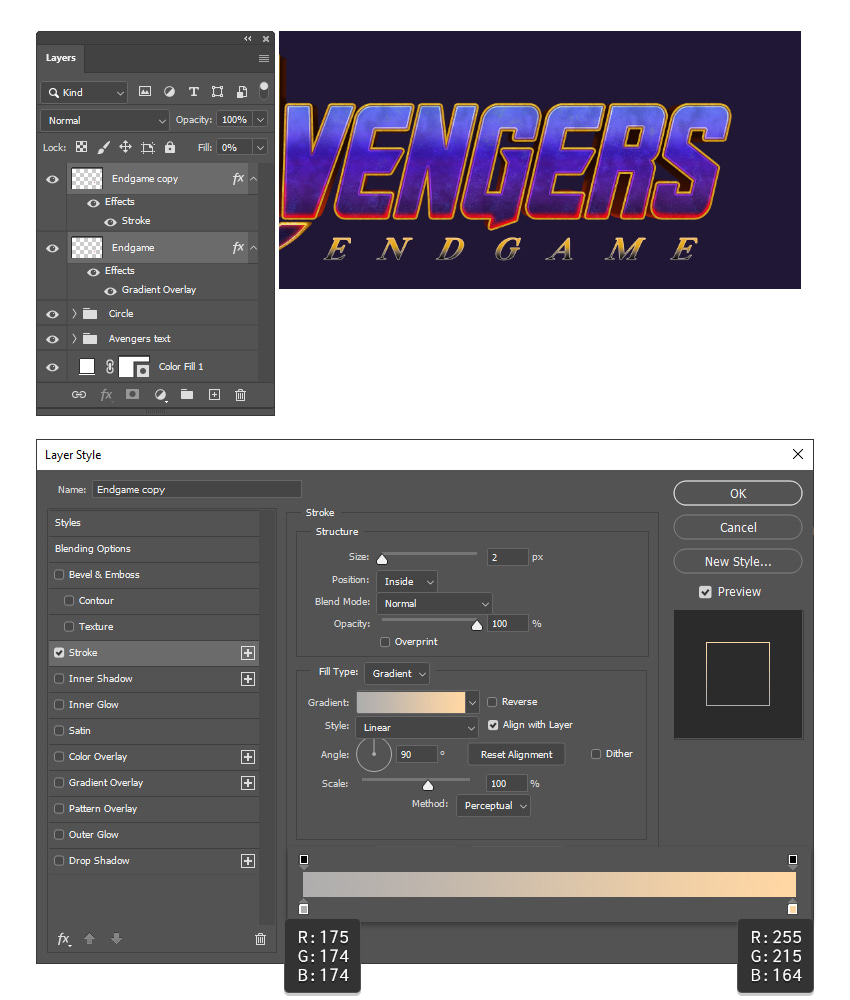
Step 3
Duplicate the Endgame layer. Open the Layer Style window for the Endgame copy layer above, deactivate the Gradient Overlay, and apply a Stroke. Use the gradient and settings shown to get a thin stroke around the letters.

Congratulations! You’re Done
You have successfully learned how to make text effects in Photoshop. Avengers: Endgame is a fun logo to recreate. Try to improve your design by adding a cool background like Deep Space wallpaper, which works perfectly.
Now that you know how to make it, feel free to apply the same techniques to create other popular movie logos. Make sure to check out Envato Elements, where you will find many text effects, fonts, photos, textures, and graphics that might inspire you, or download them ready to use in your projects.
Popular Resources From Envato Elements
Envato Elements is an excellent resource for text effects, fonts, logos, actions, and so much more. Here’s a short list of some of the most popular resources that you can find. Grab them and take your designs to the next level.
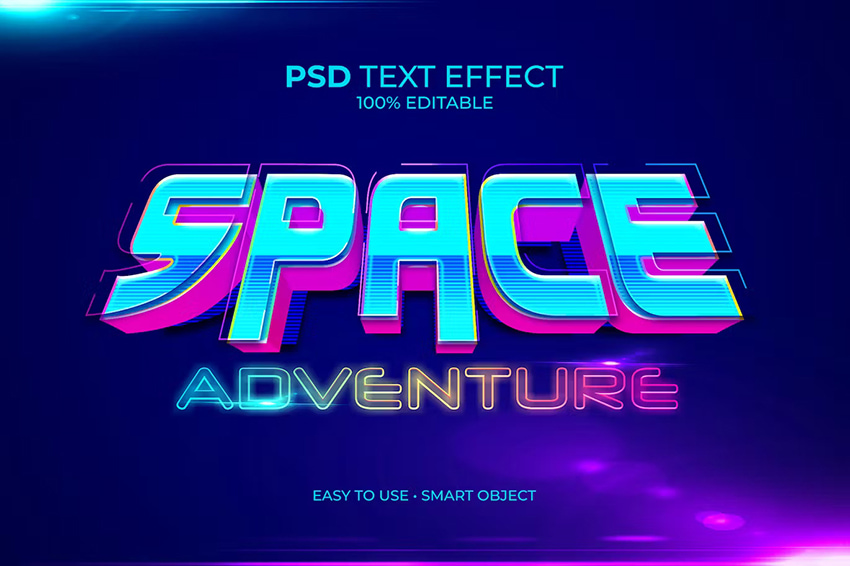
Space Adventure Text Effect (PSD)
This cool text effect has a bright pink 3D extrusion that will make your designs pop. All you have to do is type in the desired text and make it your own.


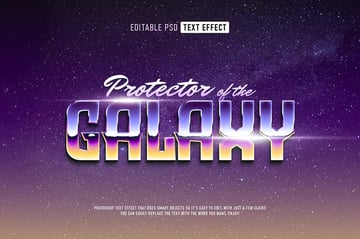
Retro Futuristic Text Effect (PSD)
Here’s a galaxy-inspired text effect that is eye-catching and ready to be used on posters, flyers, headlines, banners, gaming, and so much more. Give it a try!


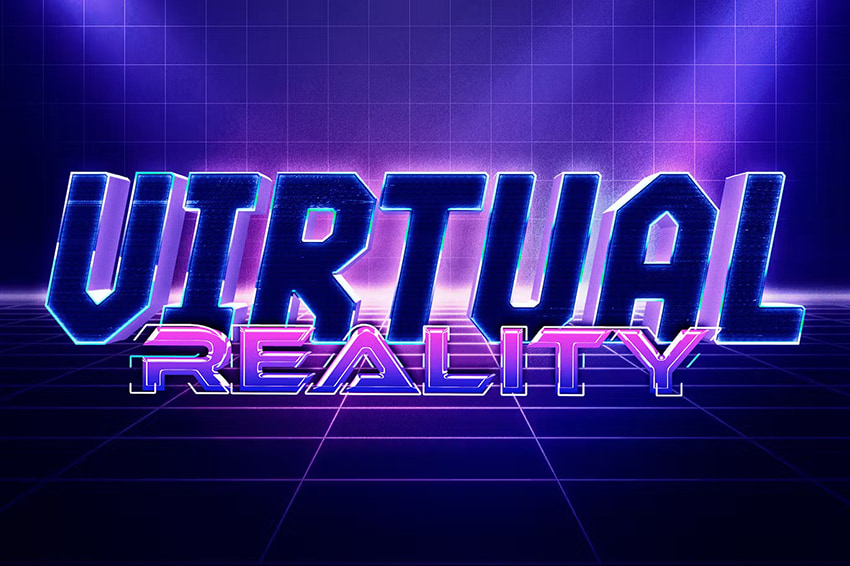
Virtual World Text Effect (PSD)
If you’re looking for a digital, VR-inspired text effect, I have a great option that you can use right away. Add your personal touch by changing the colors or the text, and it will fit perfectly in your next project.


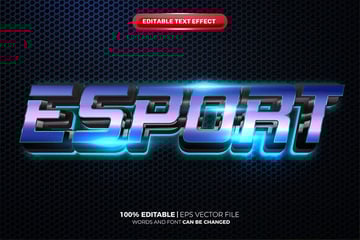
Metal Blue Esport 3D Text Effect (AI, EPS)
Here’s a gorgeous metallic, shiny text effect that will bring your project to life and draw all the attention. It is vector and easy to edit, so you can try any other colors you want.


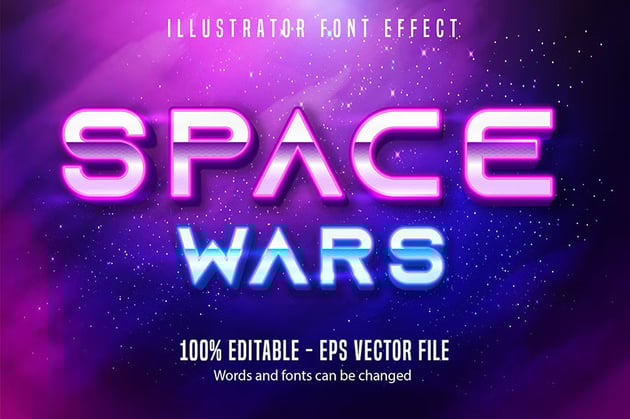
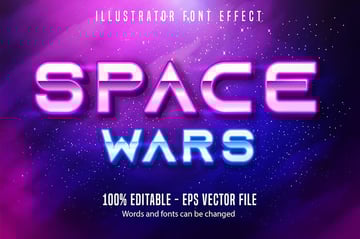
Space Wars Editable Text Effect & Font Style (AI, EPS)
Space Wars is another 3D text effect that you can customize even further to make it fit into your project. Be creative with it!

Want to Learn More Skills?
We have loads of tutorials on Envato Tuts+ that teach many other useful techniques. Here’s a list of tutorials specially made for you. Take a look!