

In this tutorial, I’ll explain how to create a realistic 3D gold text effect using layer styles in Adobe Photoshop. Let’s get started!
Tutorial Assets
The following assets were used during the production of this tutorial:
- Download the file Gold_Text_Effect-Assets.zip and extract both files inside.
- Install the Pattern file “Patterns.pat“.
- Install the Contour file “CustomContours.shc”.
Note: To install, you have to double-click the icons. It’s that simple.
- Download and install the “Anton font”.
1. How to Create the Background
Step 1
Create a new document (File > New).
- Width: 850 px
- Height: 500 px
- Resolution: 72 PPI

Step 2
Duplicate the background (go to Layer > Duplicate Layer > OK) and rename the new layer “Background Pattern“.

Step 3
Now we are going to add a texture to the background layer.
Double-click on the “Background Pattern” layer to open the layer style window. Go to Pattern Overlay, and then click on the Pattern box and select the newly added Pattern01. Click OK.

Step 4
To make the background look a bit dark, we are going to add a Color Overlay black layer with 50% opacity. You have to double-click on Background Pattern layer and, once the layer style window appears, set the following values on Color Overlay section.
- Blend Mode: Normal
- Color:
#000000 - Opacity: 50%

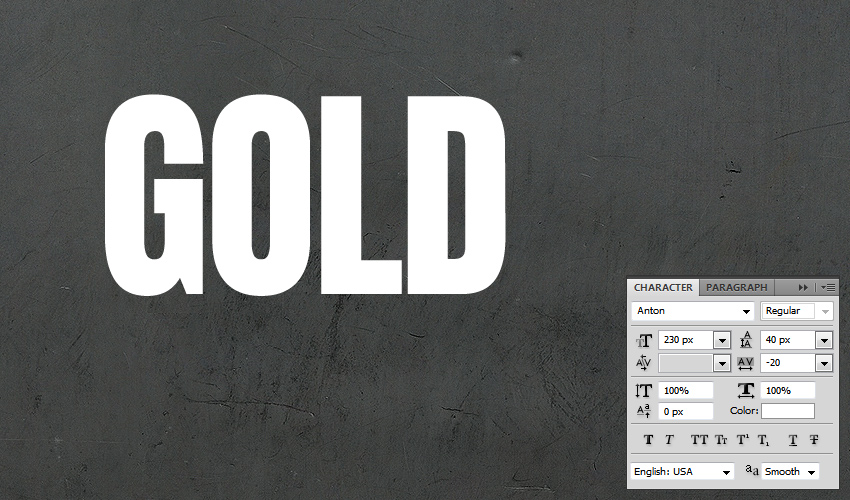
2. How to Create the Text and Align It
Step 1
Type the word “GOLD” using the Anton font.
- Font Size: 230 px
- Tracking: –20 pt
- Anti-aliasing mode: Smooth
- Color:
#ffffff
Step 2
Duplicate the GOLD text layer and name it “GOLD A” for the top layer and “GOLD B” for the bottom layer. We are going to get the 3D effect with both layers soon.
Using the Move Tool, select both text layers and the background layer and then click the align commands on the top menu to center the text.
- Align Horizontal: Center
- Align Vertical: Center

3. Styling the Main Layer
Step 1
We are going to work on the GOLD A layer. Go to Layer Style > Pattern Overlay, click on the Pattern box, and choose Pattern02 from the list. This texture will work as a base for the golden metal effect.

Step 2
To start creating the shining look, go to Layer Style > Bevel & Emboss and use the following values.
- Style: Inner Bevel
- Technique: Smooth
- Depth: 675%
- Direction: Up
- Size: 190 px
- Soften: 0 px
- Angle: 90º
- Use Global Light: Unchecked
- Altitude: 30º
Now, we are going to add the previously installed “CustomContours.shc” file. Click on the Gloss Contour drop-down icon and then select the contour named “CustomContour01“
Now we can continue:
- Anti-aliased: Checked
- Highlight Mode: Linear Dodge (Add)
- Highlight Color:
#ebe89b - Highlight Opacity: 30%
- Shadow Mode: Color Dodge
- Shadow Color:
#655f54 - Shadow Opacity: 40%

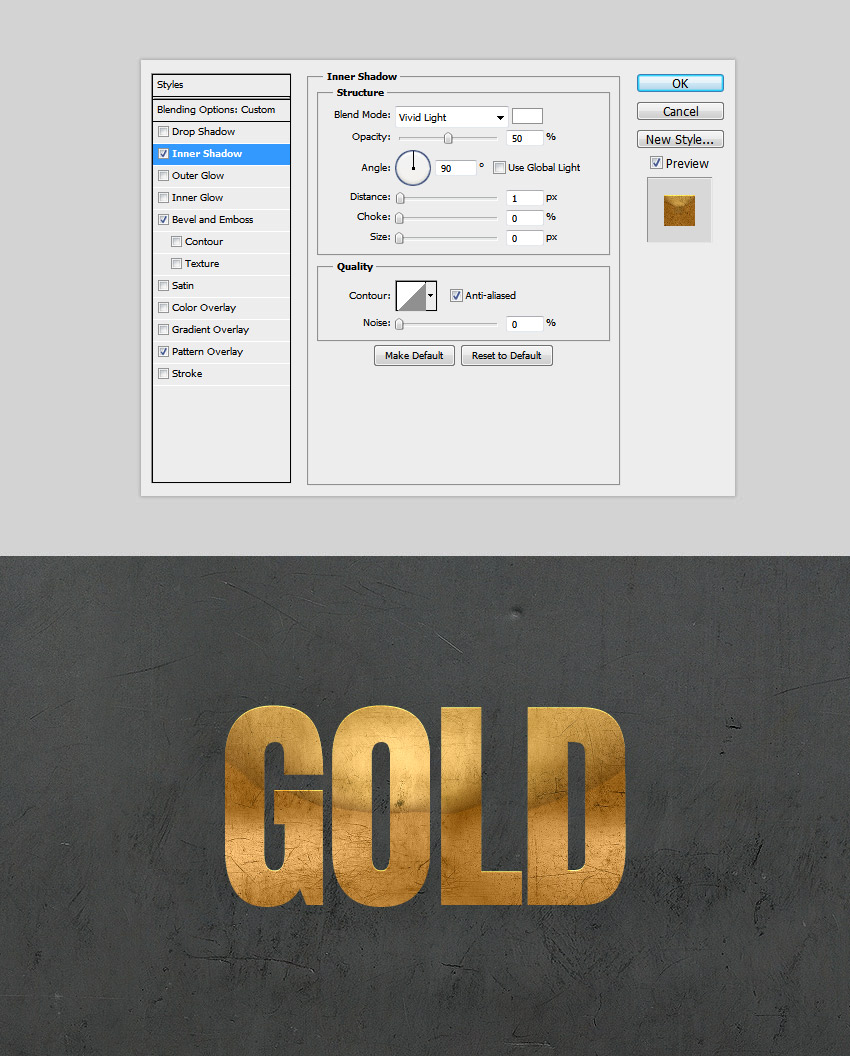
Step 3
Go to Layer Style > Inner Shadow and use the settings shown below to brighten up the edges.
- Blend Mode: Vivid Light
- Opacity: 50%
- Color:
#ffffff - Angle: 90º
- Use Global Light: Unchecked
- Distance: 1 px
- Choke: 0%
- Size: 0 px
- Contour: Default
- Anti-aliased: Checked
- Noise: 0%
Step 4
Go to Layer Style > Inner Glow and use the settings shown below to emphasize the brightened edges.
- Blend Mode: Color Dodge
- Opacity: 20%
- Noise: 0%
- Color:
#ffffff - Technique: Softer
- Edge: Checked
- Choke: 0%
- Size: 3 px
Now, we are going to add the previously installed “CustomContours.shc” file. Click on the Contour drop-down icon and then select the contour named “CustomContour02“.
Now we can continue:
- Anti-aliased: Unchecked
- Range: 50%
- Jitter: 0%

Step 5
Now we are going to emphasize the highlights to give more realism to the metal effect. Go to Layer Style > Satin and use the settings shown below.
- Blend Mode: Color Dodge
- Color:
#fffae6 - Opacity: 20%
- Angle 90º
- Distance: 150 px
- Size: 230 px
Now, we are going to add the previously installed “CustomContours.shc” file. Click on the Contour drop-down icon and then select the contour named “CustomContour03“.
Now we can continue:
- Anti-aliased checkbox: Checked
- Invert checkbox: Unchecked

Step 6
Now we are going to create a gradient overlay, which will give a softer gold effect. Open the Layer Style again and modify the Gradient Overlay setting to the following values.
- Blend Mode: Darken
- Opacity: 100%
- Reverse: Unchecked
- Style: Linear
- Align with Layer: Checked
- Angle 90º
- Scale: 100%
Click on the Gradient Bar and make a gradient with these settings:
Tip: To create a new point in the gradient, you have to click under the gradient bar. Clicking each one of the color stops allows you to modify the Location and Color.
- First Stop Color:
#8e6617 - First Stop Position: 0%
- Second Stop Color:
#876b2c - Second Stop Position: 25%
- Third Stop Color:
#997a35 - Third Stop Position: 45%
- Fourth Stop Color:
#e0b545 - Fourth Stop Position: 67%
- Fifth Stop Color:
#947632 - Fifth Stop Position: 83%
- Sixth Stop Color:
#886218 - Sixth Stop Position: 53%


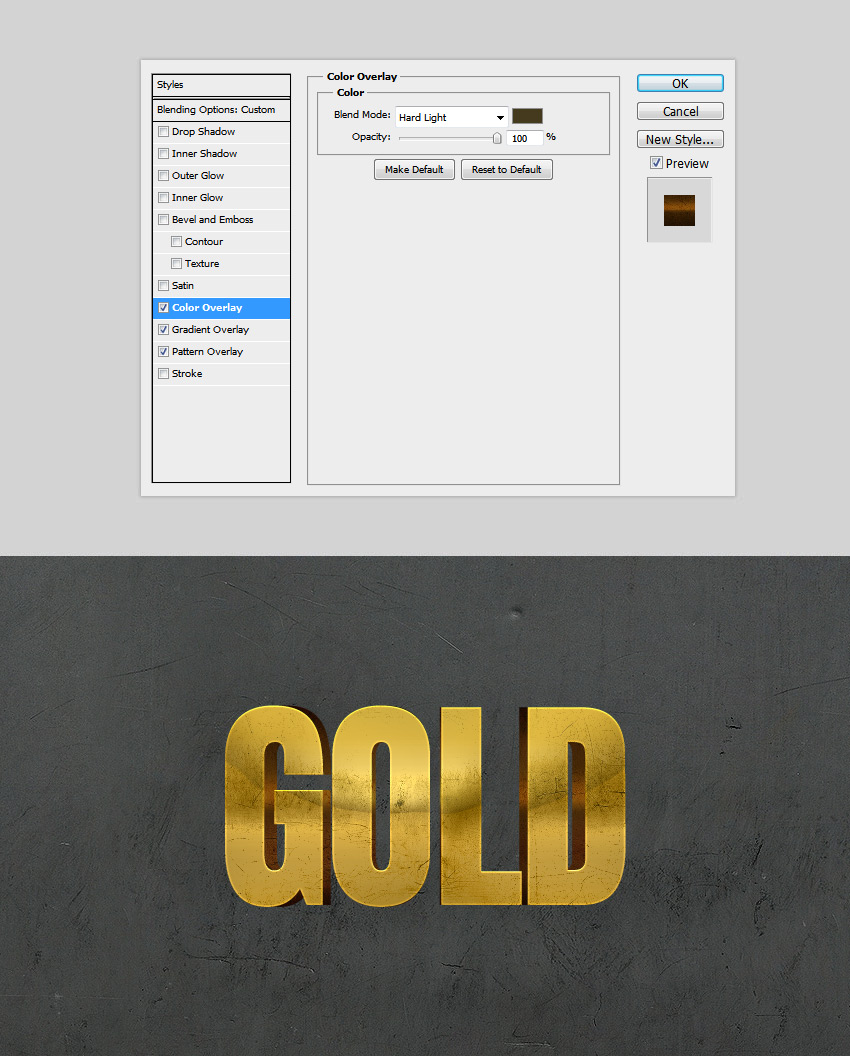
Step 7
To achieve a realistic gold color, go to Layer Style > Color Overlay and set the following values.
- Blend Mode: Hue
- Color:
#fff0c9 - Opacity: 100%

4. Styling the Second Layer
Step 1
We’re going to work with the GOLD B layer, so make sure you select it!
This is an important step to get the 3D central perspective effect.
Use the Control-T keyboard shortcut to transform the width by setting the Horizontal scale to 92%. Then press Enter.

Step 2
We are going to add the same pattern to match the texture and color of both text layers. Go to Layer Style > Pattern Overlay, click on the Pattern box, and choose Pattern02 from the list. This texture will work as a base for the 3D effect.
Now set the following values:
- Blend Mode: Normal
- Opacity: 100%
- Scale: 100%
- Link with Layer: Checked

Step 3
Now we are going to create a gradient overlay, which will give a deep 3D effect. Open the Layer Style again and modify the Gradient Overlay setting to the following values:
- Blend Mode: Overlay
- Opacity: 100%
- Reverse: Unchecked
- Style: Linear
- Align with Layer: Checked
- Angle 90º
- Scale: 100%
Click on the Gradient Bar and make a gradient with these settings:
Remember: To create a new point in the gradient, you have to click under the gradient bar. Clicking each one of the color stops allows you to modify the Location and Color.
- First Stop Color:
#1a1b1e - First Stop Position: 0%
- Second Stop Color:
#525458 - Second Stop Position: 15%
- Third Stop Color:
#83878c - Third Stop Position: 31%
- Fourth Stop Color:
#eff0ee - Fourth Stop Position: 41%
- Fifth Stop Color:
#ffffff - Fifth Stop Position: 46%
- Sixth Stop Color:
#797d82 - Sixth Stop Position: 53%
- Second Stop Color:
#5d6063 - Second Stop Position: 59%
- Third Stop Color:
#4e5057 - Third Stop Position: 65%
- Fourth Stop Color:
#3c3e45 - Fourth Stop Position: 72%
- Fifth Stop Color:
#4e5057 - Fifth Stop Position: 82%
- Sixth Stop Color:
#1a1b1e - Sixth Stop Position: 100%


Step 4
To match the realistic gold color, go to Layer Style > Color Overlay and set the following values.
- Blend Mode: Hard Light
- Color:
#443a1d - Opacity: 100%
5. Making the Shadows
Step 1
We are going to add some “rusty shadows” to the bottom text layer. Go to Layer Style > Inner Shadow.
Use the previously installed “CustomContours.shc” file. Click on the Contour drop-down icon and then select the contour named “CustomContour04“.
Use the values shown below to finish the Inner Shadow:
- Blend Mode: Soft Light
- Color:
#000000 - Opacity: 20%
- Angle: -41º
- Use Global Light: Unchecked
- Distance: 28 px
- Choke: 100%
- Size: 0 px
- Anti-aliased: Checked
- Noise: 100%

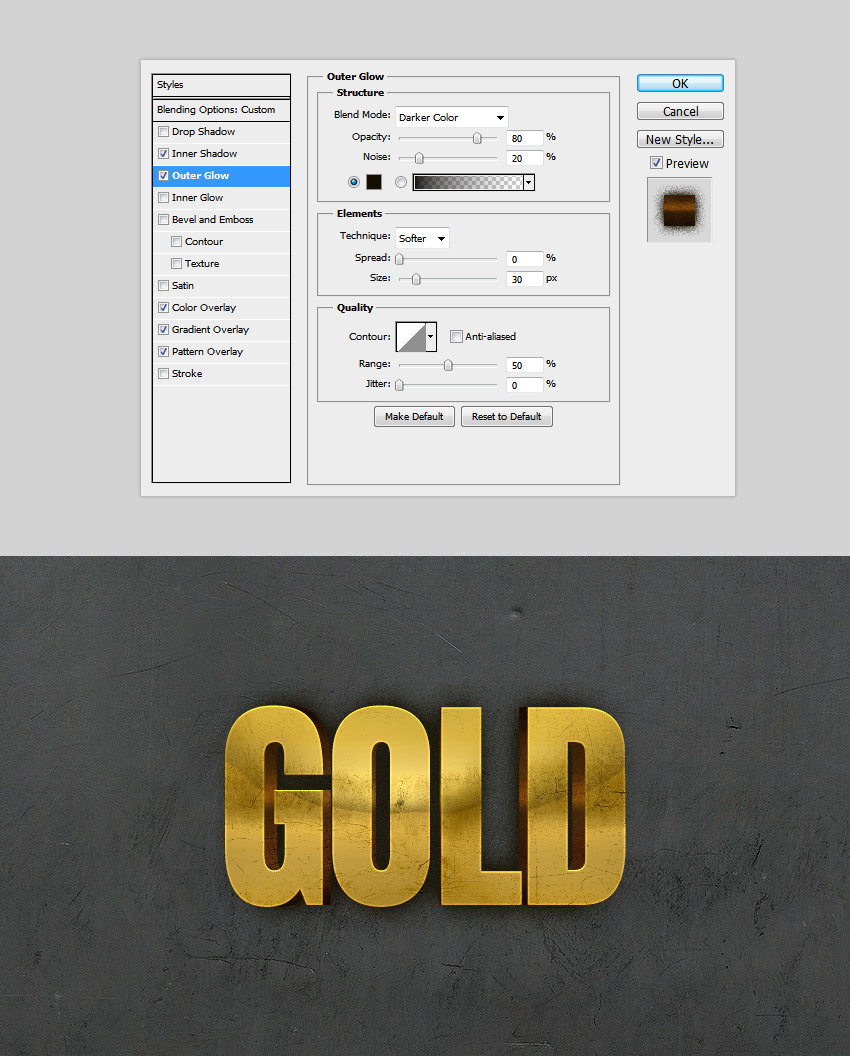
Step 2
We need to add some shadows to separate the text from the background. Go to Layer Style > Outer Glow and use the values shown below.
- Blend Mode: Darken Color
- Opacity: 80%
- Noise: 20%
- Color:
#000000 - Technique: Softer
- Spread: 0%
- Size: 30%
- Contour: Default
- Anti-aliased: Unchecked
- Range: 50%
- Jitter: 0%
Step 3
This is the final step! We are going to add some sharp shadows to get a fancy illuminated look and feel. Go to Layer Style > Drop Shadow and use the values shown in the image below.
- Blend Mode: Normal
- Color:
#010101 - Opacity: 20%
- Angle: 90º
- Use Global Light: Unchecked
- Distance: 20 px
- Spread: 100 px
- Size: 5 px
- Contour: Default
- Noise: 0%
- Layer Knocks Out Drop Shadow: Checked

Final Image

Great Job, You’re Done!
In this tutorial, I showed you how to create a realistic 3D golden metal text effect. I hope that you enjoyed this tutorial and can use what you’ve learned for your own projects.
Please feel free to comment and show me your results!.
30 Chrome & Crystal Photoshop Styles [BUNDLE]
If you are looking for some more 3D gold text effect inspiration, you can use this “one layer style fx” which looks realistic with just one layer.

3D Gold Text Effects
Here is a concentric 3D style with a very realistic metallic paper as the texture. Thinking outside the box can help you improve on my previous tutorial idea (there is a challenge!).

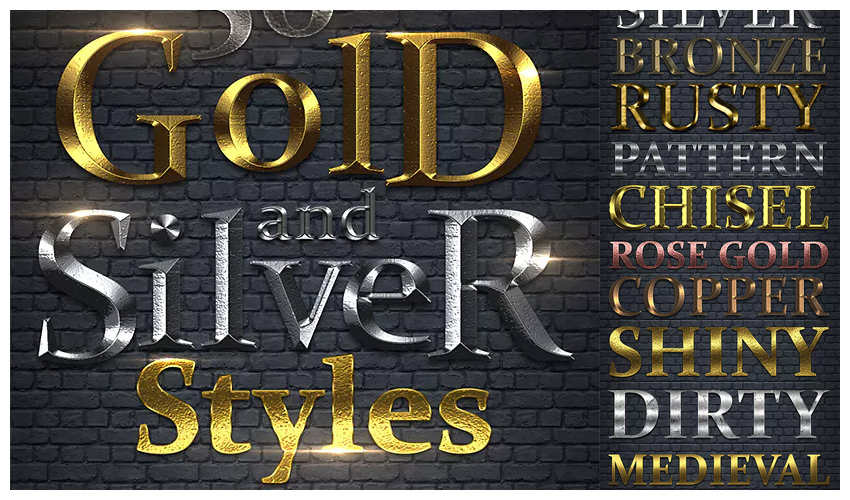
50 Gold & Silver Styles
Or maybe you can turn gold to silver, copper, etc., like this one.
Gold Text Effects
Finally, I show you this flat but totally real golden text effect. Please remember, be creative in all your work!

There are plenty more metal 3D text effects at GraphicRiver, so check out the full range to find one you like.
You can also follow another tutorial to reinforce your new skills in making them. Remember, think about how it looks and try to replicate the effects. You can always make your own effects, but the first time it’s a case of following another example to learn the right way.