
In this tutorial, you will learn how to create a vintage Photoshop effect using such Photoshop effects as smart filters, adjustment layers, and overlay textures.
If you want to create this fade Photoshop effect in a few simple clicks, check my Faded Presets with different overlay textures and a greater number of color photo effects.

Tutorial Assets
The following assets were used during the production of this tutorial:
1. How to Prepare the Document
Step 1
Press Control-N to create a new document and use the following settings: 3000 x 2000 px; 300 dpi.

Step 2
Go to File > Place and put your image inside the document.

Step 3
Resize your image to the borders of the document and hit Enter.

Step 4
After that, Right-Click on the layer and then Convert to Smart Object.

2. How to Create a Vintage Photo Effect
Step 1
Select the smart object and then go to Filter > Noise > Add Noise and use the following settings:
- Amount: 2%
- Distribution: Uniform
- Monochromatic: On

Step 2
After that, go to Filter > Filter Gallery > Texture > Grain. Use the following settings:
- Intensity: 15
- Contrast: 59
- Grain Type: Regular
Step 3
Place the overlay texture above the smart object and change the Blending Mode of this new layer to Screen.

3. How to Create a Fade Photo Effect
Step 1
Now let’s start to create our fade effect. Go to Layer > New Fill Layer > Gradient.
Step 2
Double Click on the Gradient Fill layer and use the following settings:
- Style: Linear
- Angle: 135°
-
Color:
#f7ff00; Location: 0%. -
Color:
#912a00; Location: 100%.

Step 3
Change the Blending Mode of the gradient fill to Soft Light and the Opacity to 35%.
Step 4
Create another gradient fill layer with the following settings:
- Style: Linear
- Angle: -3,58°
-
Color:
#252b45; Location: 0%; Opacity: 0%. -
Color:
#f7ae8e; Location: 100%.; Opacity: 100%.
Step 5
Change the Blending Mode of the gradient fill to Hard Light and the Opacity to 35%.
Step 6
Go to Layer > New Adjustment Layer > Gradient Map and then Double Click on the gradient map icon and create a gradient with the following settings:
-
Color:
#313059; Location: 0%. -
Color:
#4c4b75; Location: 29%. -
Color:
#ba6167; Location: 55%. -
Color:
#ff7038; Location: 93%.
Step 7
Change the Blending Mode of the gradient map to Soft Light and the Opacity to 60%.
Step 8
Create another gradient map with the following settings:
-
Color:
#1a535d; Location: 0%. -
Color:
#32d49d; Location: 100%.
Step 9
Change the Blending Mode of the gradient map to Overlay and the Opacity to 25%.
Step 10
After that, go to Layer > New Adjustment Layer > Curves and use the following settings:
Step 11
Go to Layer > New Adjustment Layer > Brightness/Contrast and create a new layer with the following settings:
- Brightness: 5
- Contrast: 35
Step 12
Now we need to create the last gradient fill with the following settings:
- Style: Linear
- Angle: 45°
-
Color:
#313067; Location: 0%;. -
Color:
#b03d11; Location: 100%;
Step 13
Change the Opacity of the layer to 15%.
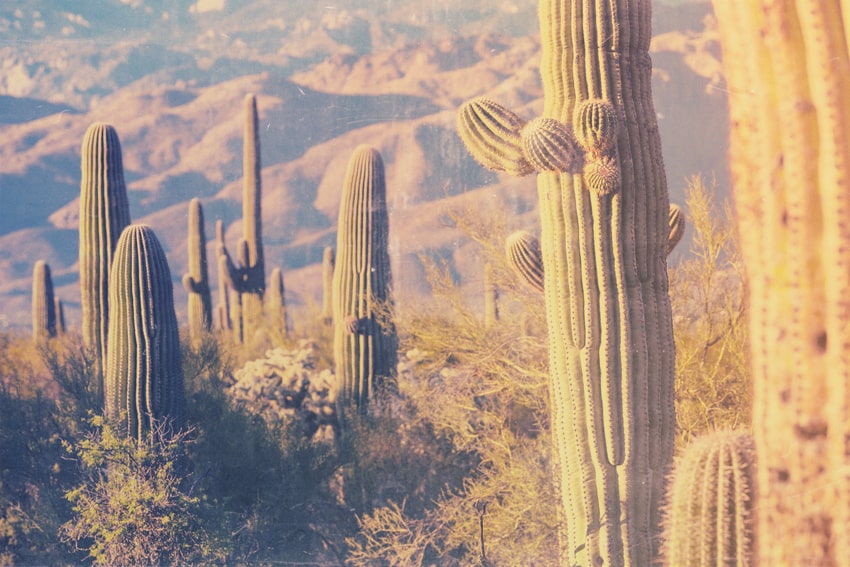
Awesome Work, You’re Now Done!
In this way, we can create an atmospheric-looking image using overlay textures, adjustment layers, and gradients. Feel free to contact me for any help with the techniques we covered.

If you want to create similar effects using Photoshop actions, you can also check my Faded Presets. This fade effect Photoshop action has a great number of overlay textures and plenty of color Photoshop effects.
If you’d like to know more about vintage effect Photoshop techniques, check these tutorials: