We’re going to design a scheduling app in Figma! In doing so we’ll work with Figma’s Inspect panel, explaining how to export a Figma design to code, how to inspect a Figma design system, and how to use Figma to inspect any element from a design.
What You Will Learn in This Figma Tutorial
- How to Inspect frames in Figma
- How to Inspect Auto Layouts in Figma
- How to Inspect Components in Figma
- How to Move from Design to Code in Figma
For more inspiration on how to adjust or improve your final Figma design system you can find plenty of resources on Envato Elements. Elements is home to thousands of UI and UX kits, compatible with your favorite design tools (including Figma) for one single subscription price!
1. How to Use Figma’s Inspect Panel
Step 1
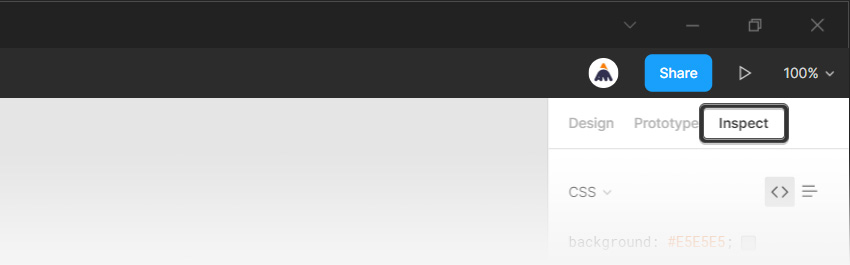
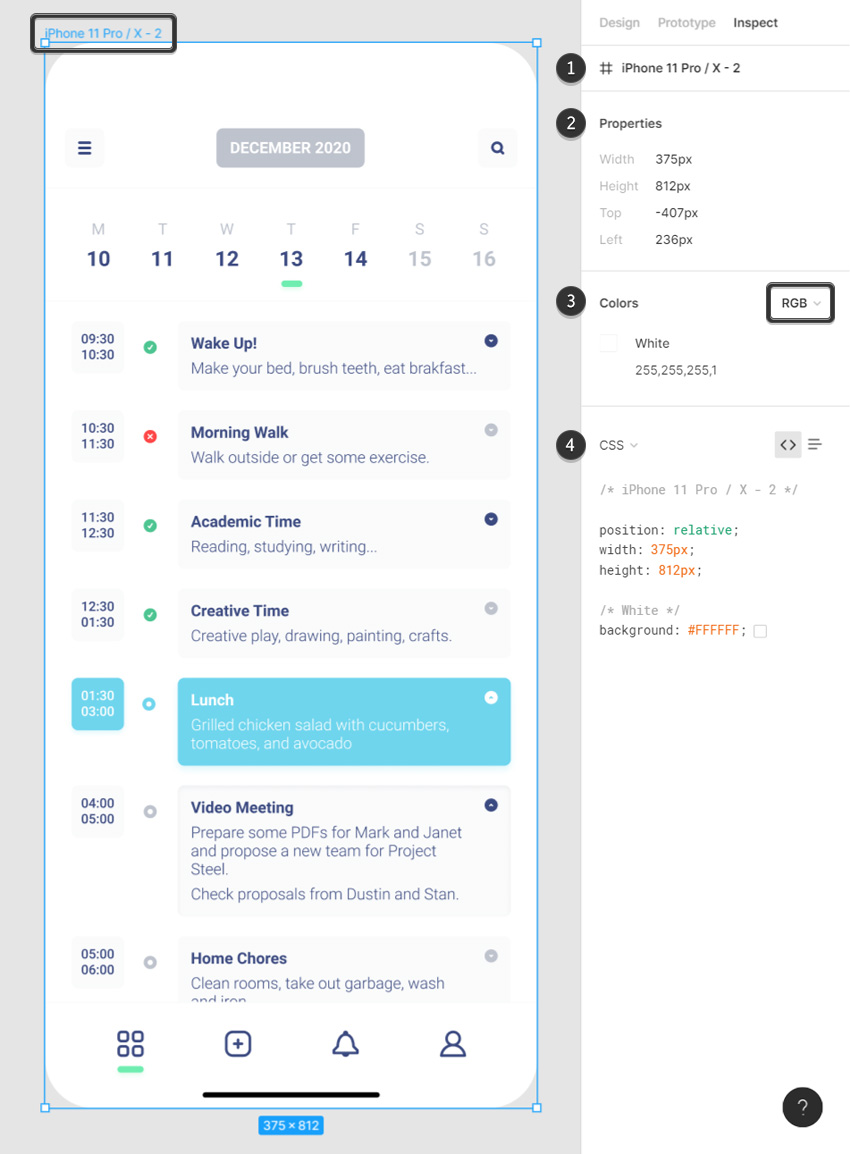
The Inspect panel can be opened from the right sidebar with a simple click on the Inspect tab at the top.
Using this panel you can easily inspect the properties of any element from your design.
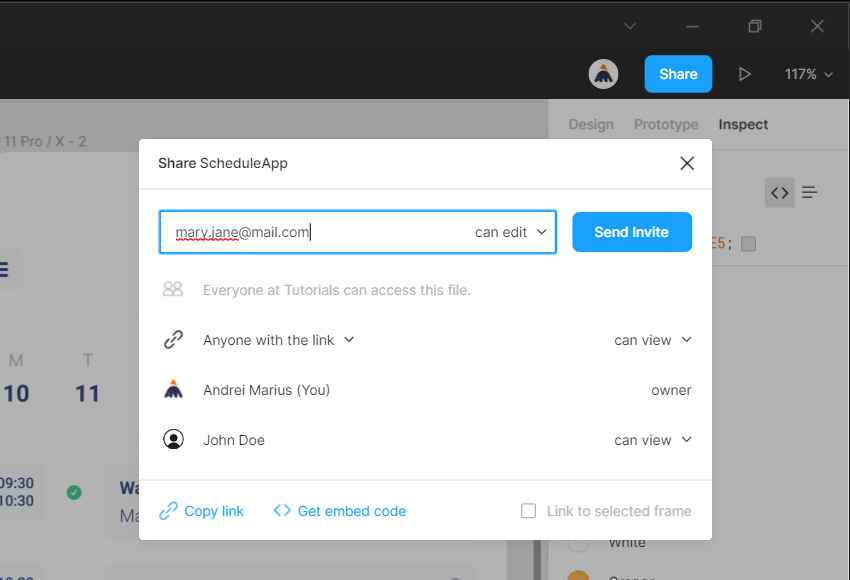
The Inspect panel can also be used by collaborators with whom you share a file.
Both can edit and can view access to a file grant access to collaborators to the the Inspect panel.
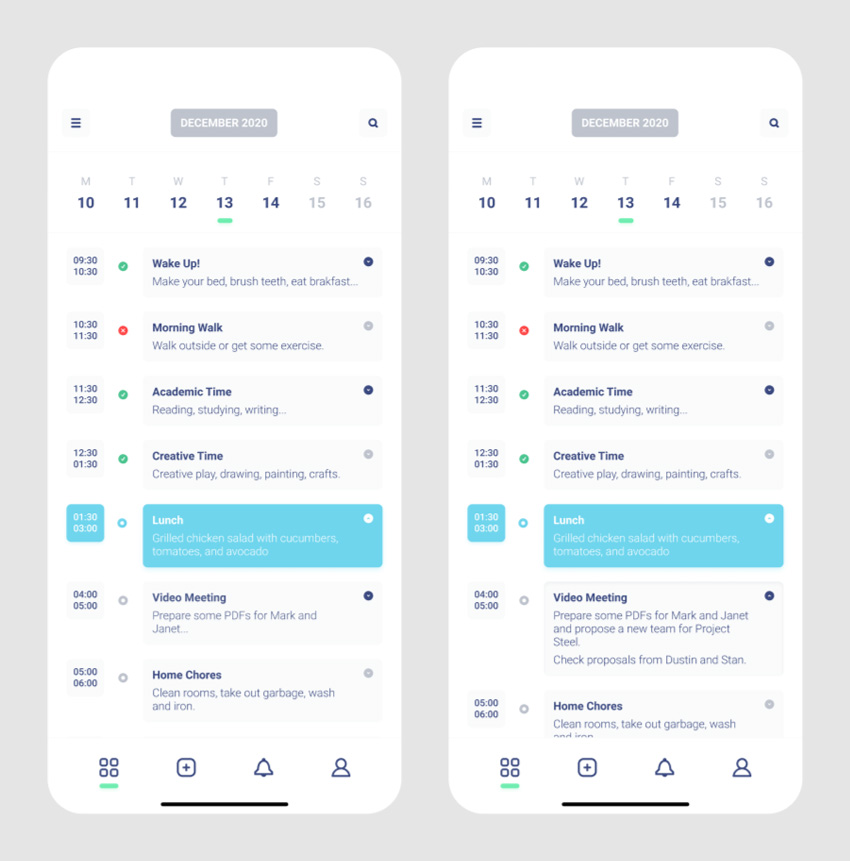
We’ll use this scheduling app design to see how you can easily inspect different elements from a design.
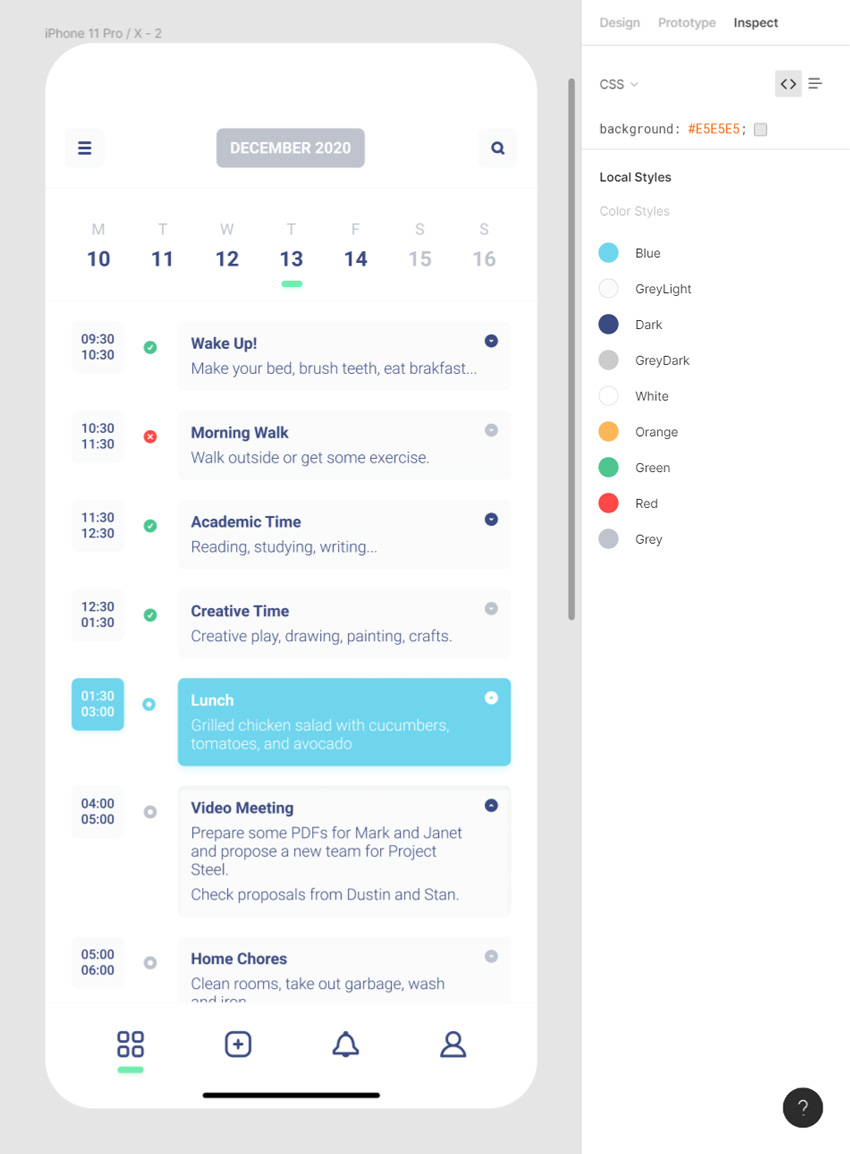
Having nothing selected, the Inspect panel gives you information about the background color, the saved styles, or any other elements from your Figma design system.
Does Figma generate code? Figma does generate code, making it really easy to switch from your Figma design to code. In the next steps I will show you how this can be done and what are your options.
2. How to Use Figma to Inspect Frames
Click the name of a frame to inspect it. In the Inspect panel you’ll get access to:
- The name of the frame
- The size and position of the frame
- The color of the frame. In this case, you can see the name of color style used and the color code. Using the drop down menu you can change the color mode to: HEX, CSS, HSL or HSB.
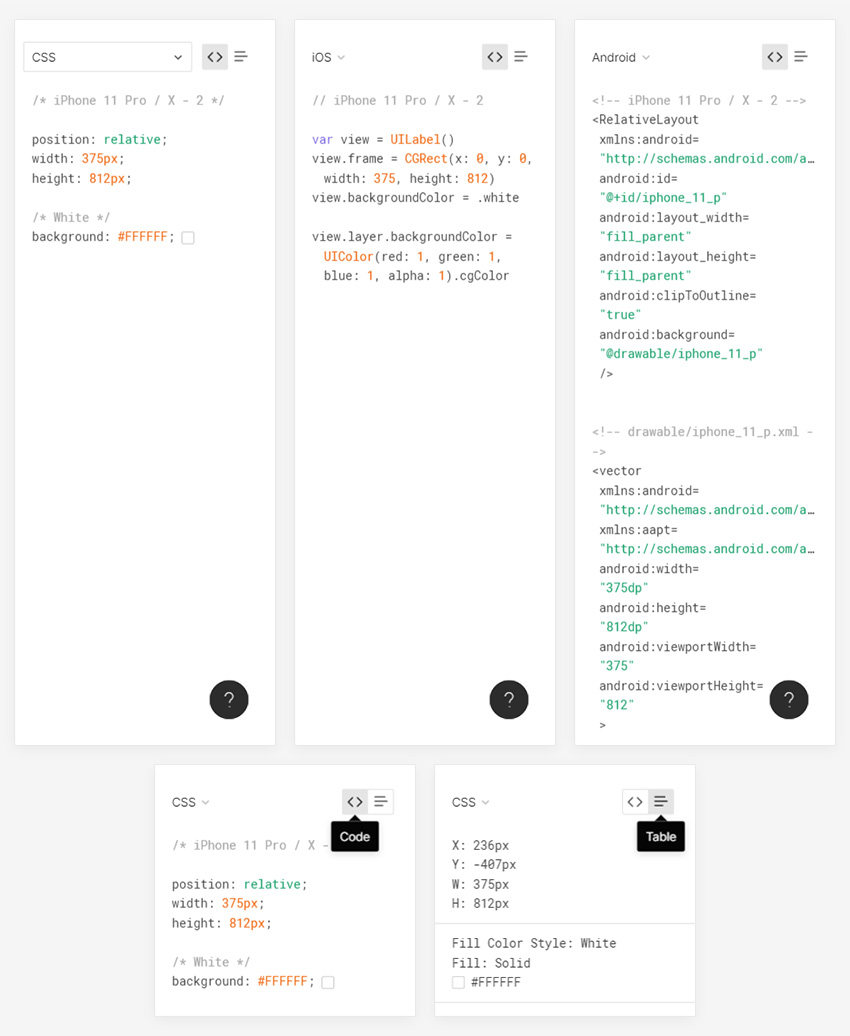
- The Code section from the Inspect panel shows you how to replicate any selected element in code making it a lot easier to switch from your Figma design to code.
Using the drop down menu you can choose between CSS, iOS(Swift), and Android (XML) formats and with those icons you can switch between Code view and Table view. Keep in mind that you can’t export to HTML in Figma.
3. How to Use Figma to Inspect Text
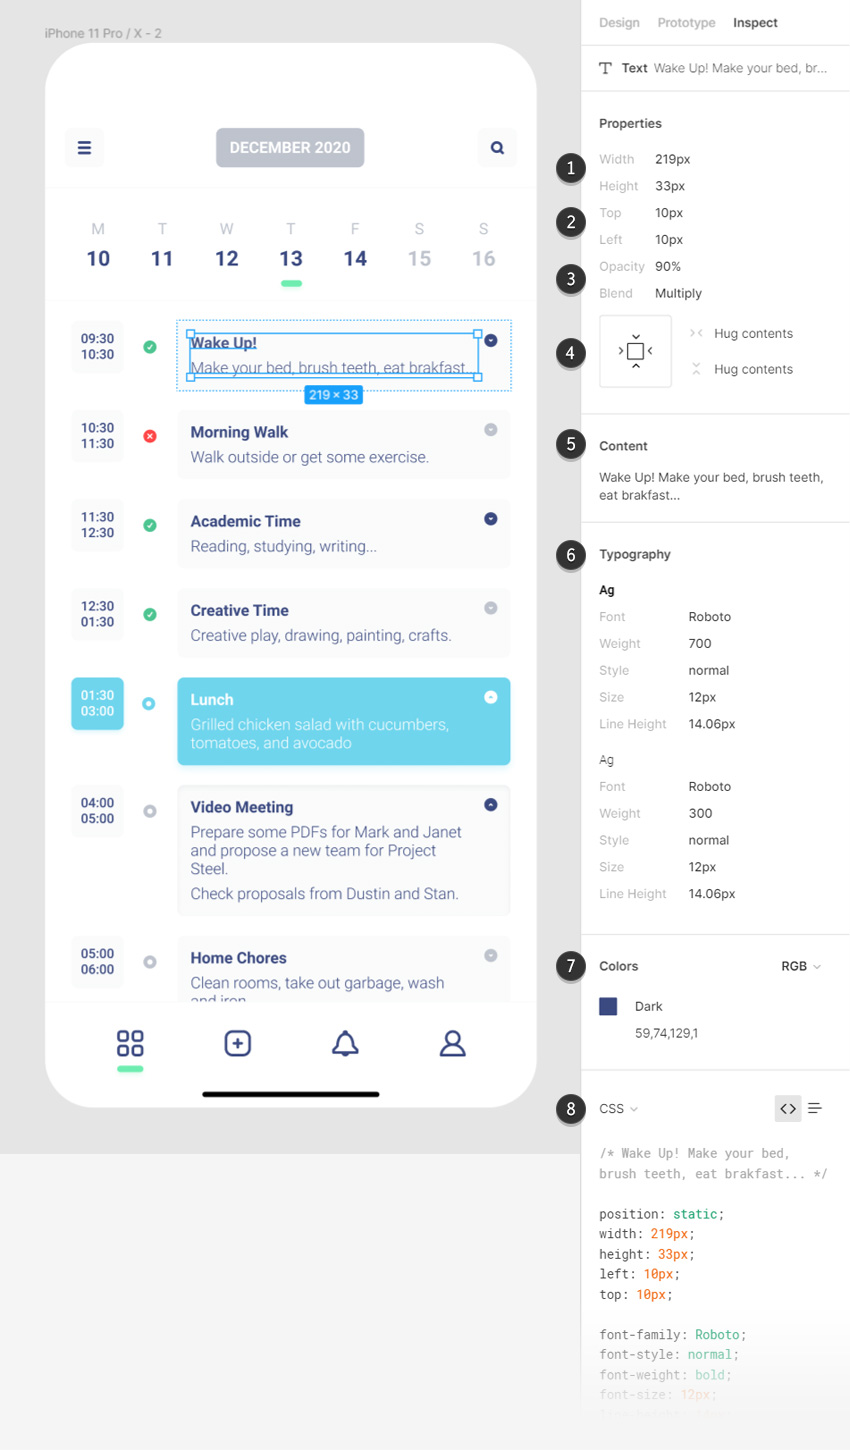
Having this text container selected, the Inspect panel will give you access to:
- The size of the text container
- The top and left margin settings
- The opacity and blend mode
- The resizing settings
- The text inside the text container
- The text settings. When you select a text container with multiple text settings, the Inspect panel displays all styles separately
- The color of the text
- The code that you need to replicate the Figma design to code
Besides these attributes, depending on the type of text that’s selected, you can also inspect: stroke settings and effects settings.
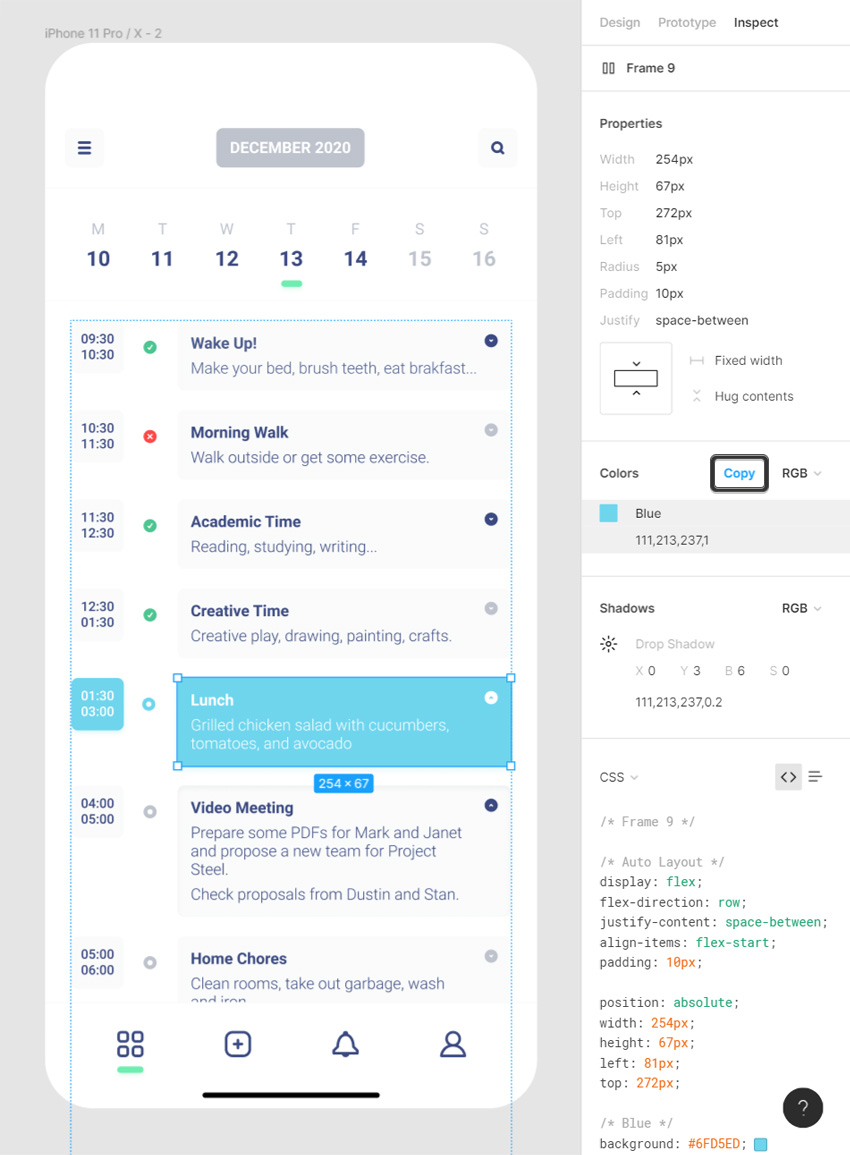
4. How to Use Figma to Inspect Shapes, Groups and Auto Layouts
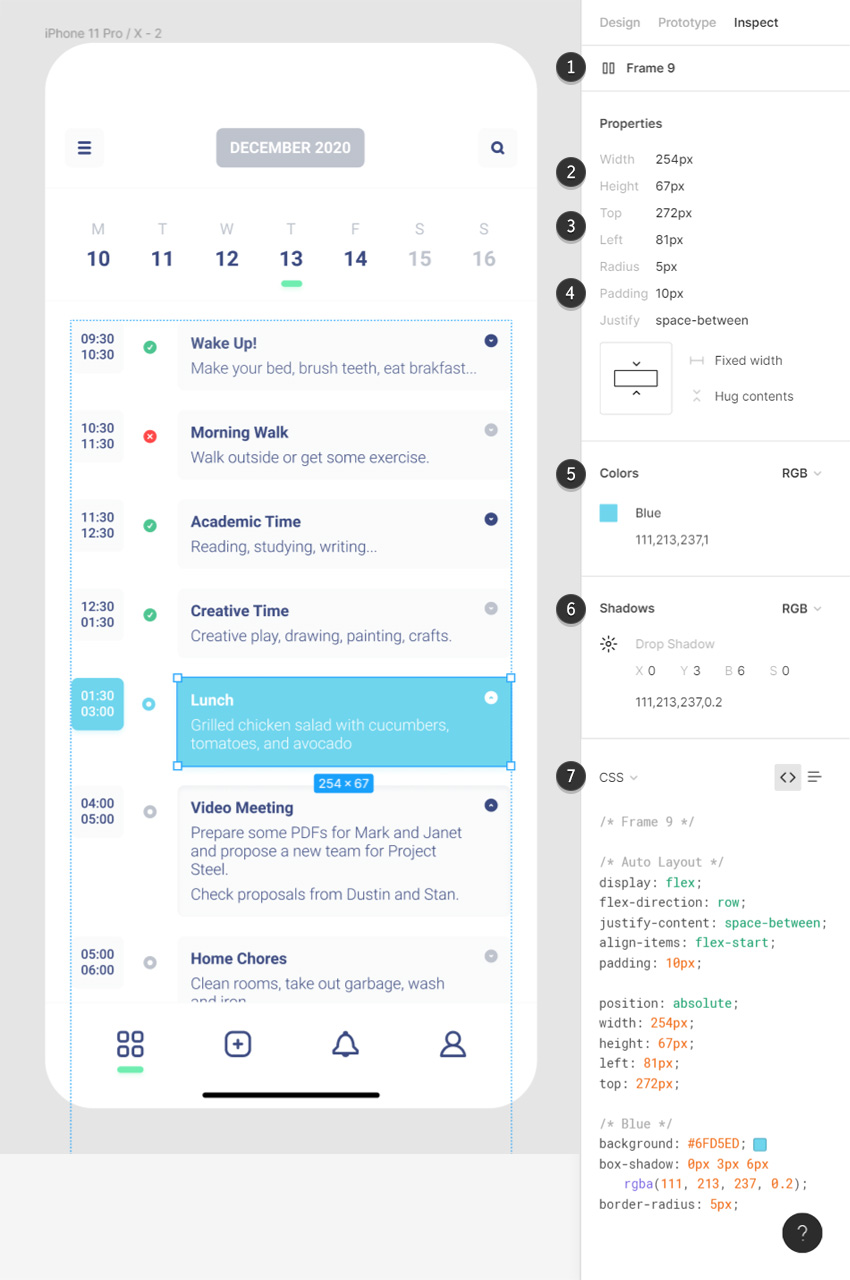
Having this blue rounded rectangle selected, the Inspect panel will give you access to the following:
- Thanks to that tiny icon you can tell that you are dealing with an auto layout and that the name given inside the Layers panel is, Frame 9
- The size of the auto layout frame
- The distance to the top and the left edge of the artboard
- The corner radius, the padding and the spacing settings
- The fill color used for the auto layout
- The settings of the applied Drop Shadow effect
- The code that you need to replicate this Figma design to code
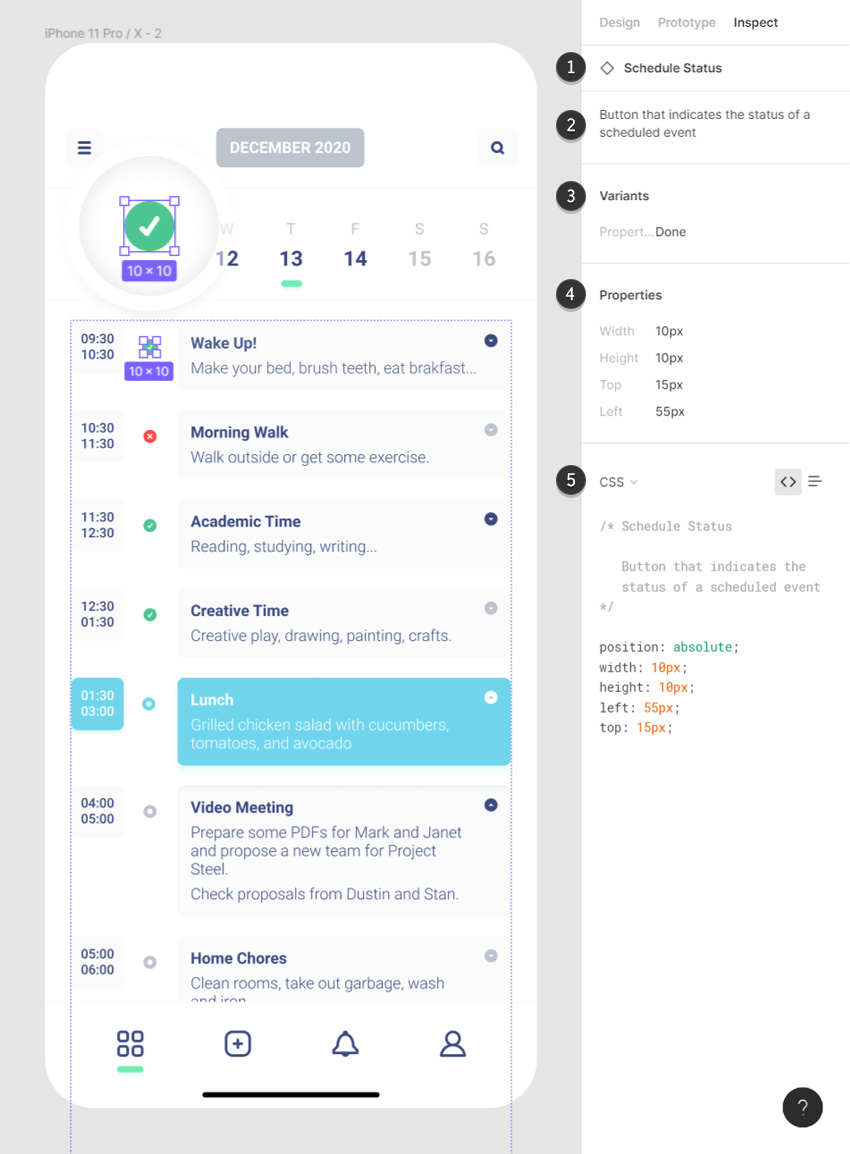
5. How to Use Figma to Inspect Components
Having this component selected, the Inspect panel will give you access to the following:
- Thanks to that tiny icon you can tell that you are dealing with an instance of a component, not the main component, and that the name given inside the Layers panel is Schedule Status
- The description of the component
- The active variant of the component
- The size and position of the component
- The code that you need to replicate the component in code
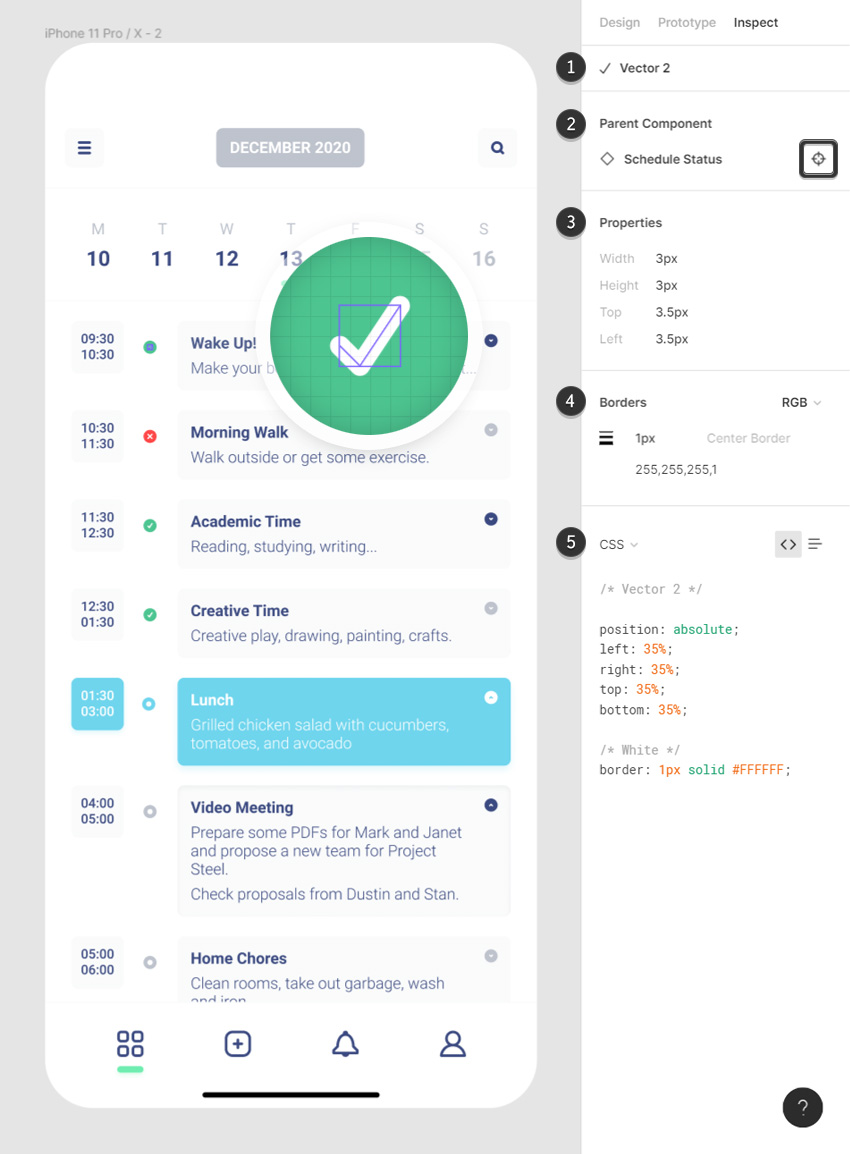
You can also inspect objects that make up a component. As I further double-click this component and inspect the check mark I can get access to:
- The name give to this path in the Layers panel
- The name of the parent component. Click the bullseye icon to get back to the settings of the component
- The size, and the top and left margin values
- The stroke settings
- The code that you need to replicate this circle
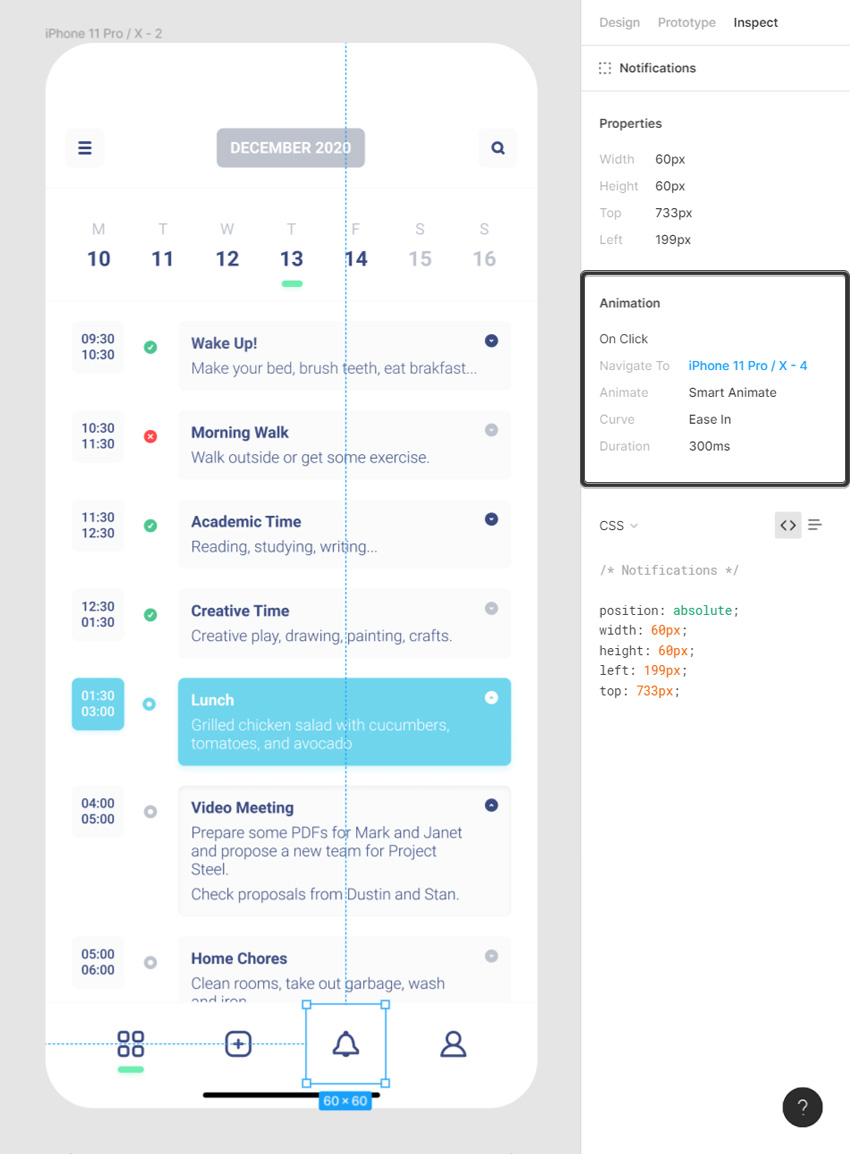
6. How to Use Figma to Inspect Animations
Besides design specifications, the Inspect panel also shows you values for prototype animations.
Having this notifications icon selected, in the Animation section of the Inspect panel you’ll get information about:
- On Click: The animation trigger
- Navigate to: The prototype action and the linked destination
- Animate: The animation type
- Curve: The animation type of ease
- Duration: The animation duration
7. How to Copy Properties from the Inspect Panel
As you hover over most of the settings from the Inspect panel you’ll notice a blue Copy button. Clicking this button will copy the values from that section. You’ll then be able to paste the copied values anywhere you need.
Congratulations! You’re Done!
I hope you’ve enjoyed this tutorial and can apply these techniques in your future projects. Don’t hesitate to share your final result in the comments section.
Feel free to adjust the final design and make it your own. You can find some great sources of inspiration at Envato Elements, with interesting solutions to improve your design.

Figma Tutorials on Tuts+
We have loads of tutorials on Tuts+, beginner to intermediate level, take a look!
 FigmaHow to Create a Medical Website Design in Figma
-
FigmaHow to Turbocharge Your Components with Figma Variants
-
FigmaHow to Work with Auto Layouts, Components, and Dynamic Content in Figma
-
FigmaHow to Create Onboard and Login Screens for a Dating App Template in Figma
-
FigmaHow to Use the New Figma Auto Layout Features
-
FigmaCreating a Figma Design System: Typography, Spacing, and Sizing
-
FigmaEssential Figma Shortcuts for Working Efficiently
-
FigmaHow to Change Multiple Colors at the Same Time in Figma
-
FigmaHow to Fix Cropped Shadows or Overflowing Elements in Figma
-
Figma20 Figma UI Kits for Designers