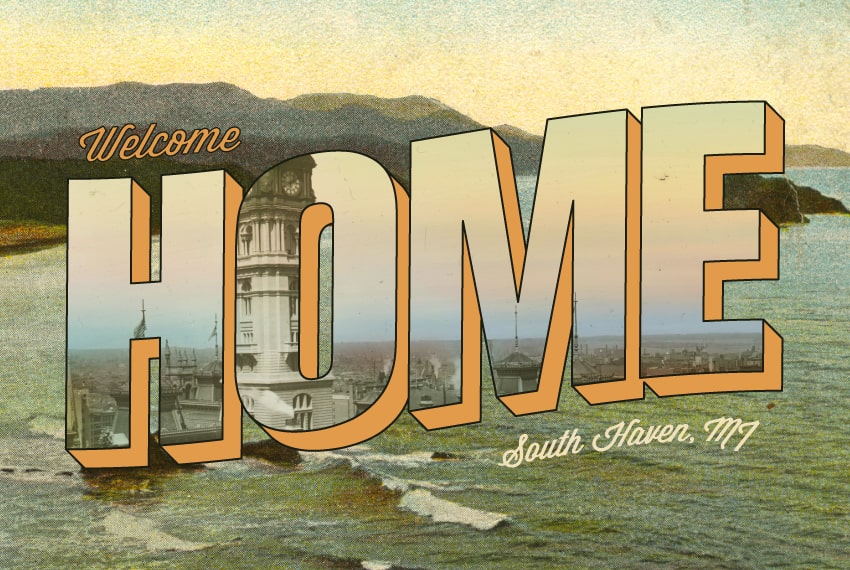
In the following steps, you will learn how to design a vintage postcard in Adobe Illustrator. Harken back to an era when postcards were all the rage with this friendly type style. The tutorial will delve into clipping masks, using bitmap images, working with layers, effects, and blends.
What You’ll Learn in This Illustrator Tutorial
- How to create 3D text in Illustrator
- How to warp text in Illustrator
- How to design a postcard
- How to incorporate photos in a vintage postcard template
For more inspiration on how to adjust or improve your final postcard template designs, you can find plenty of resources at Envato Elements.
Follow along with us over on our Envato Tuts+ YouTube channel:
What You Will Need
You will need the following resources in order to complete this vintage postcard template:
- Image 1: Philadelphia from Pennsylvania Building
- Image 2: Cannon Beach on the Oregon Coast
1. How to Add 3D Text in a Postcard Design
Step 1
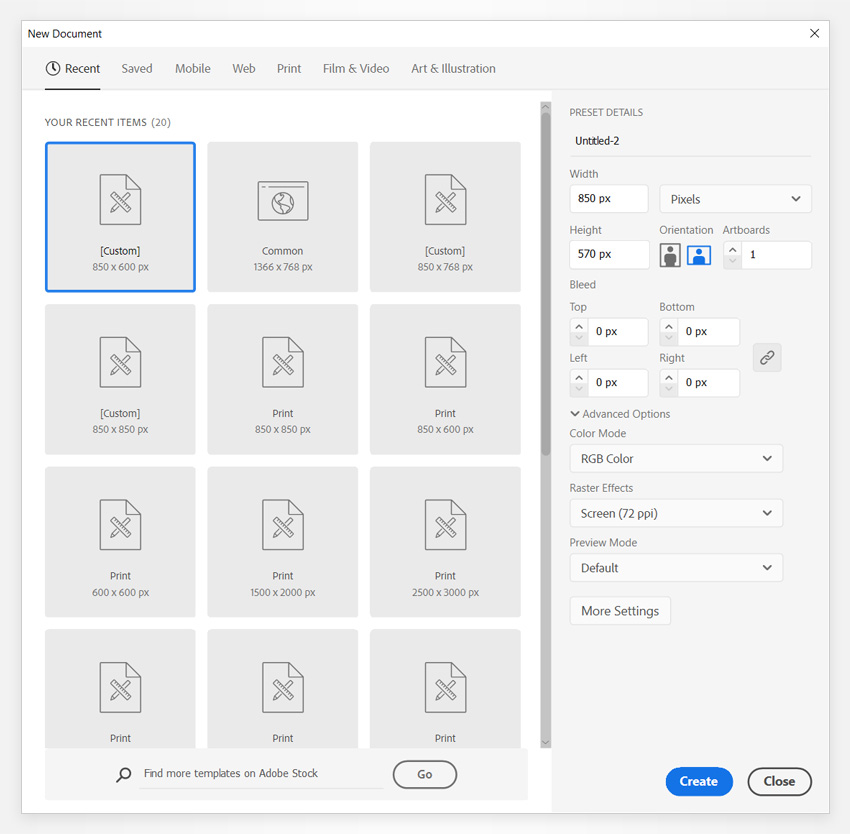
Hit Control-N to create a new document. Select Pixels from the Units drop-down menu, enter 850 in the width box and 570 in the height box, and then click that More Settings button. Select RGB for the Color Mode, set the Raster Effects to Screen (72 ppi), and then click Create Document. Now let’s learn how to design a postcard.
Step 2
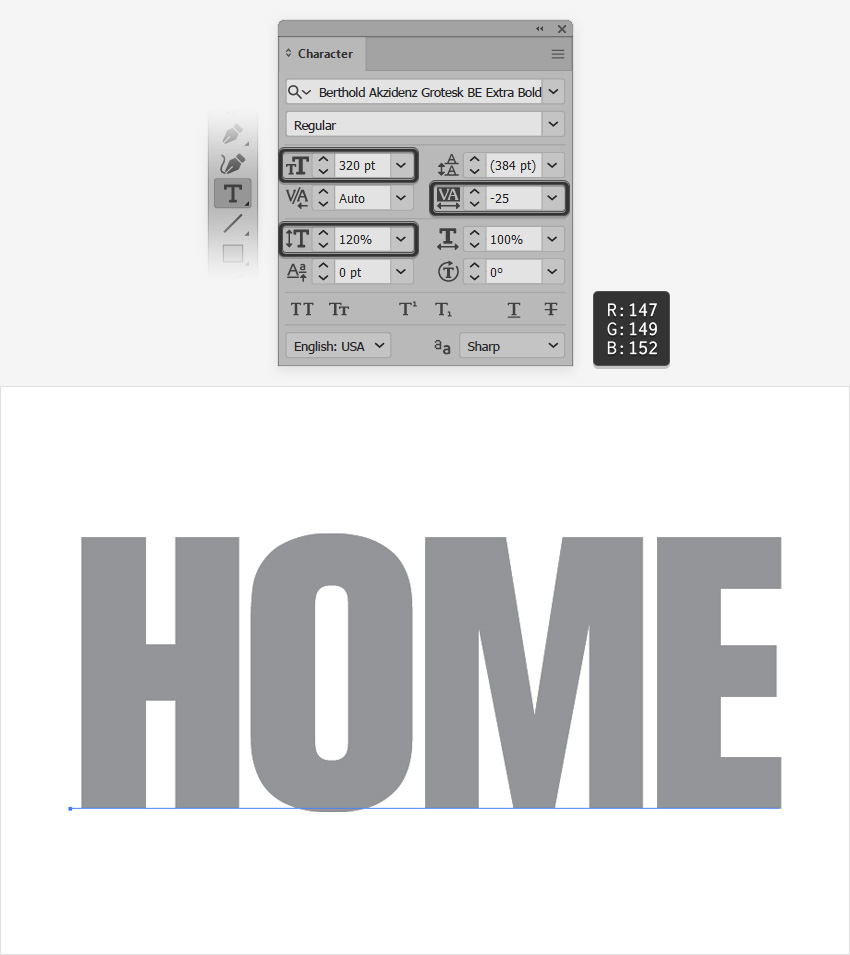
Select the Type Tool (T) from your toolbar and open the Character panel (Window > Type > Character).
Select the Berthold Akzidens Grotesk Extra Bold font and set the size to 320, the tracking to -25, and the vertical scale to 120%.
Simply click on your artboard to type in “HOME” and change the color of this text to R=147 G=149 B=152.
Step 3
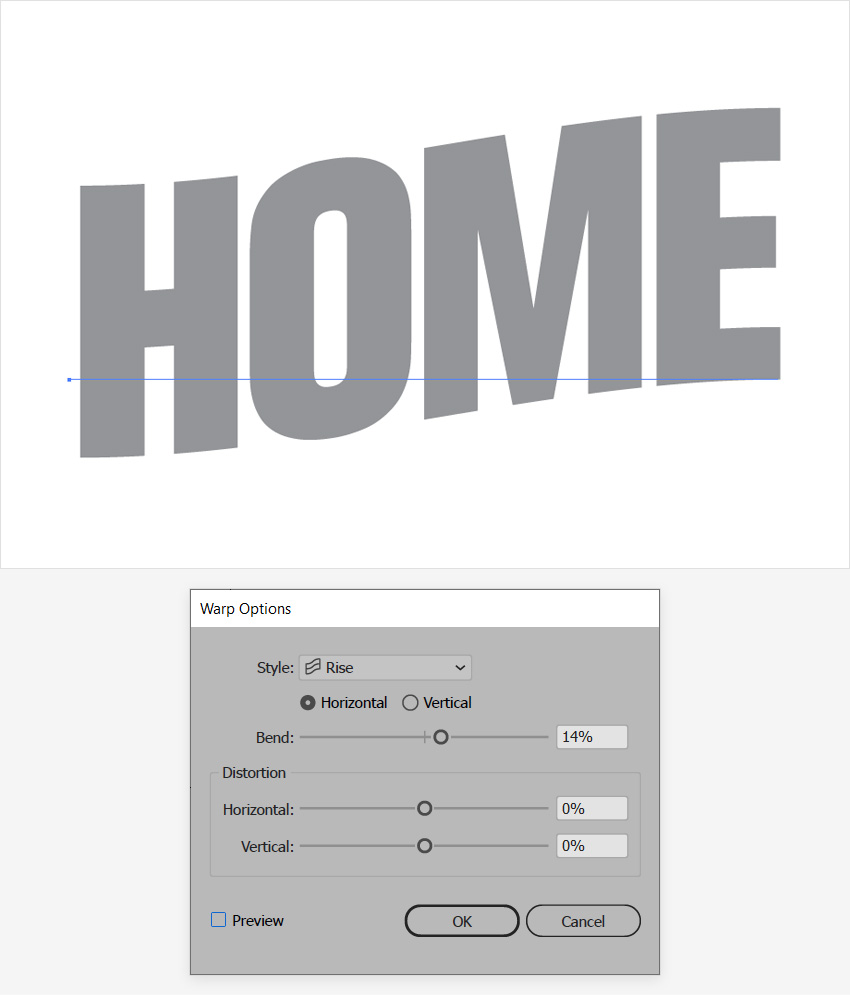
Make sure that your text stays selected and go to Effect > Warp > Rise. Check the Horizontal box and move the Bend slider to 14%, and then click OK.
Step 4
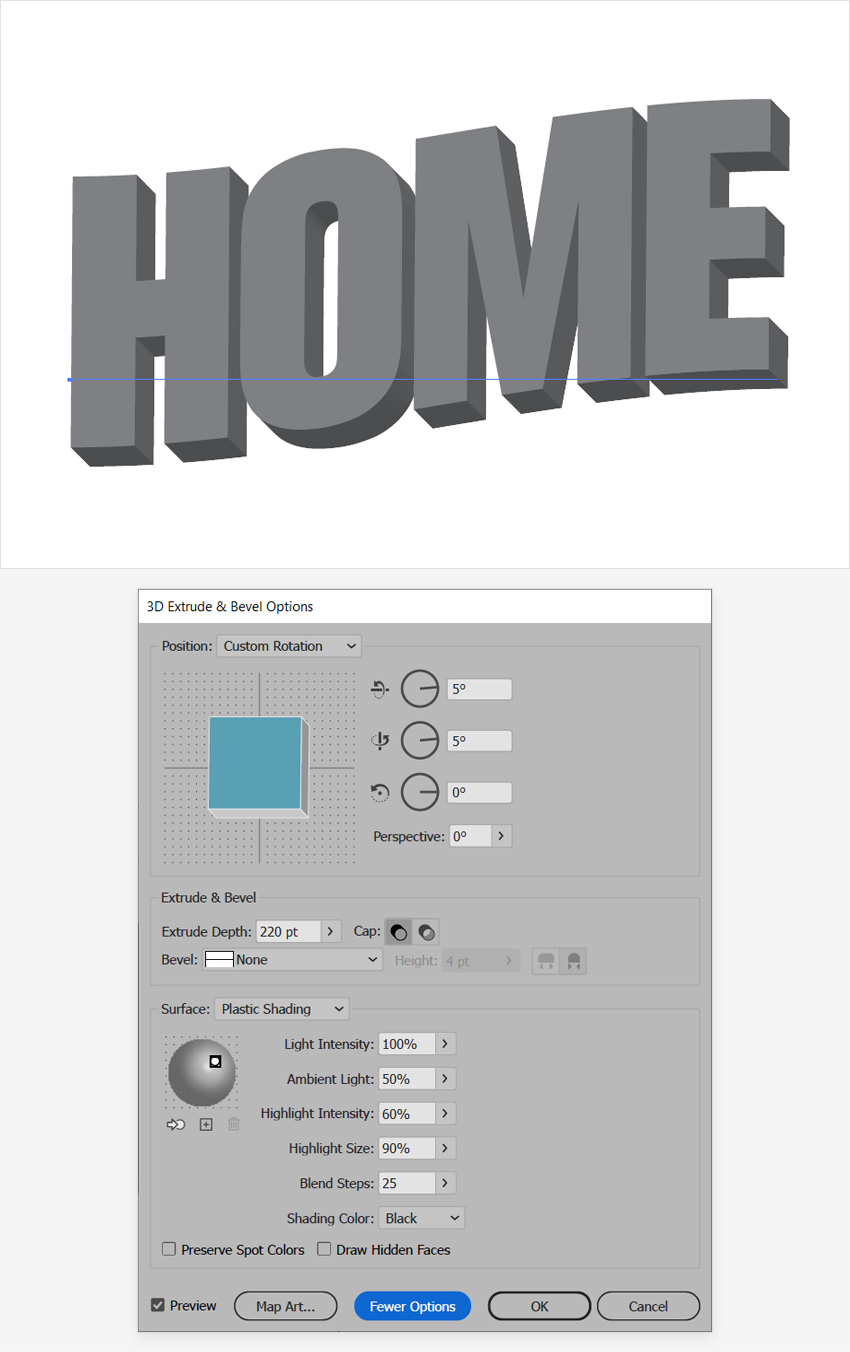
With your text still selected, go to Effect > 3D > Extrude & Bevel. Enter all the settings shown in the following image and click OK.
Step 5
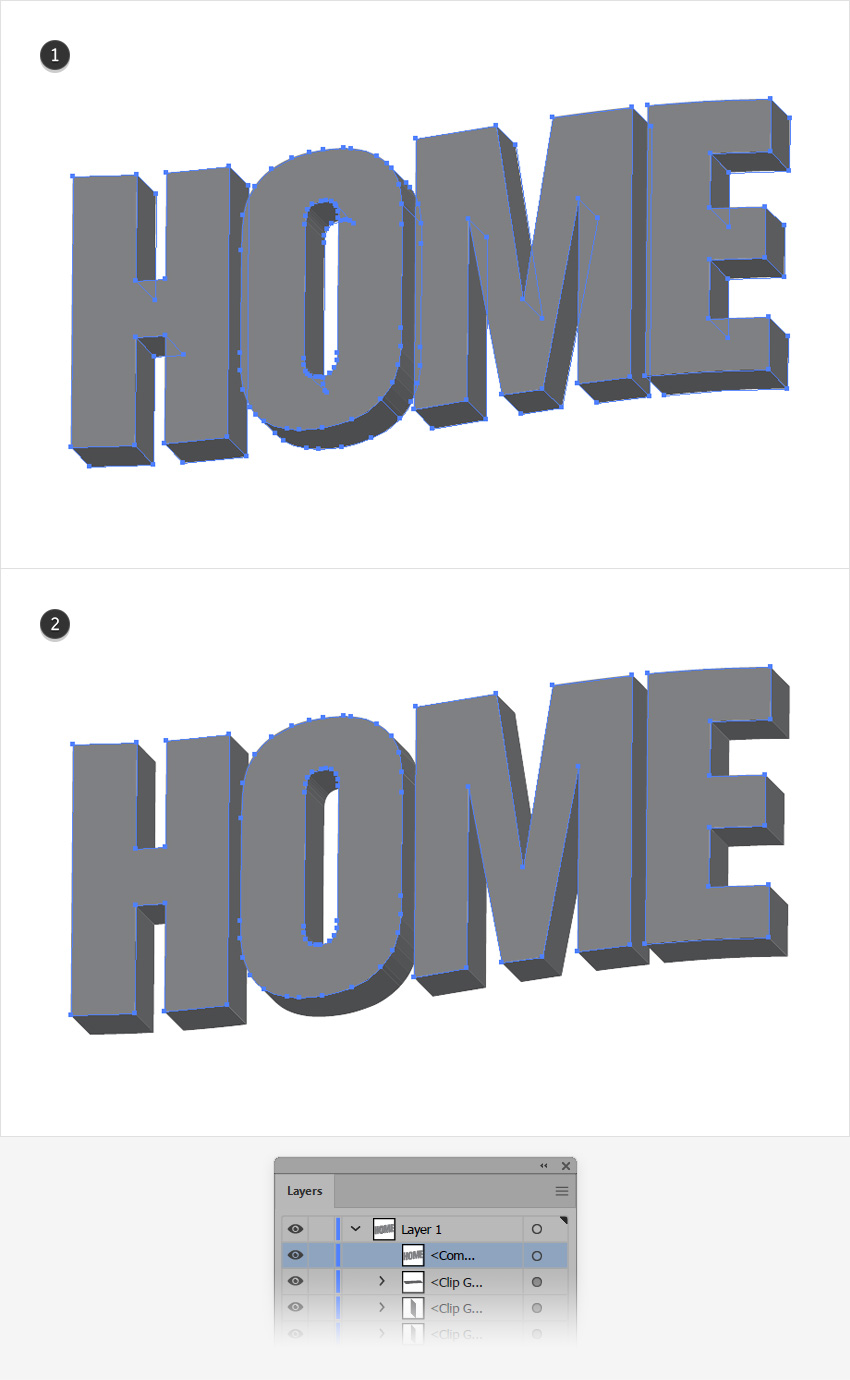
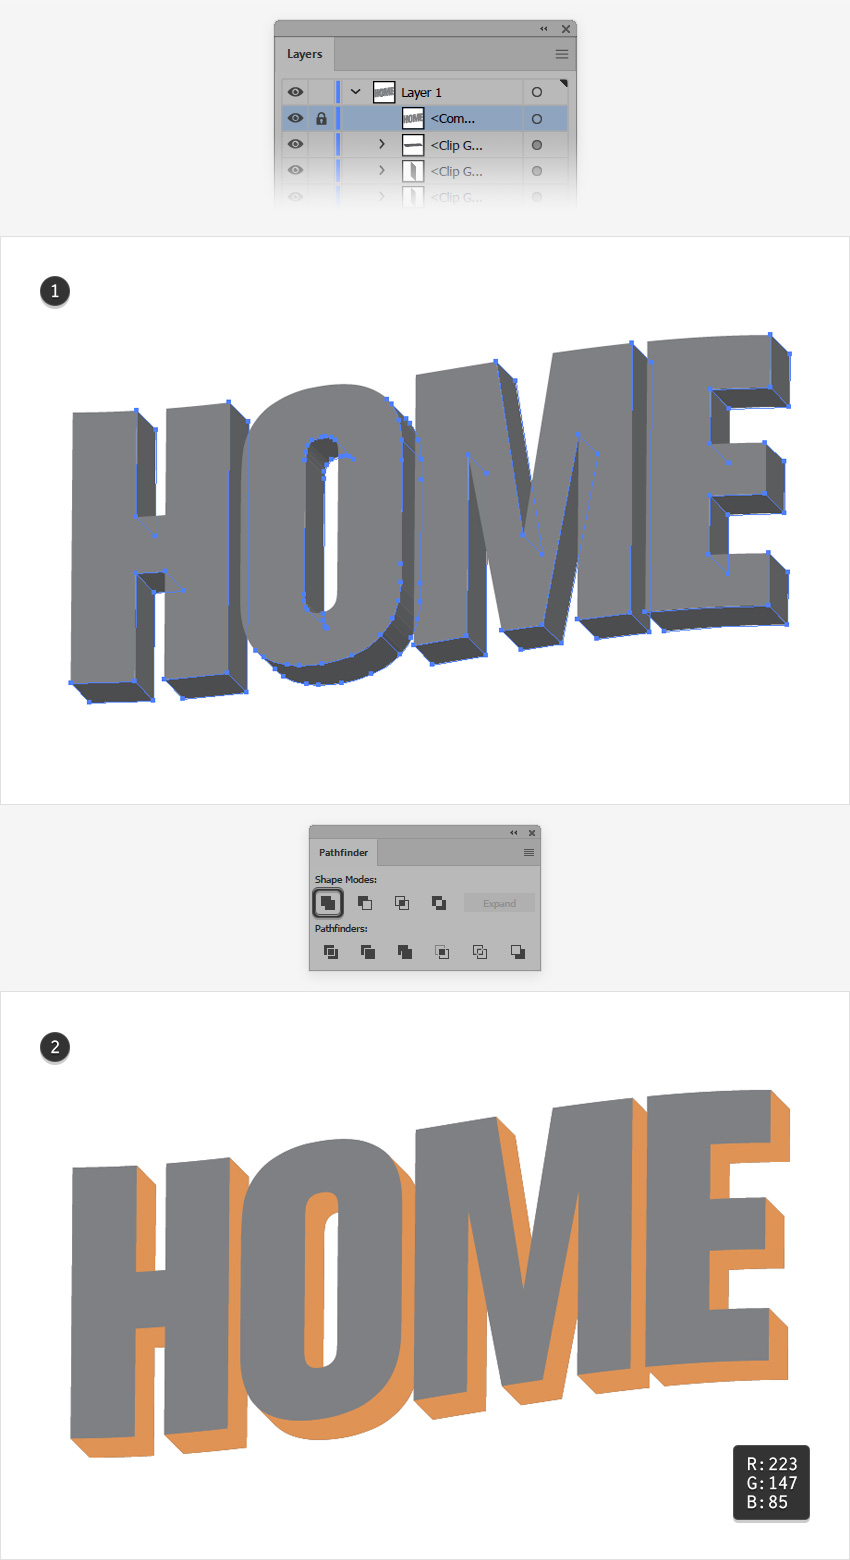
Make sure that your text is selected and go to Object > Expand Appearance to turn your 3D text into a group of vector paths.
Press Shift-Control-G three times to Ungroup all those groups and subgroups. You can open the Layers panel (Window > Layers) to have a look at all your shapes.
Switch to the Move Tool (V) to select the front letter shapes, and then go to Object > Compound Path > Make or use the Control-8 keyboard shortcut to turn your letter shapes into one compound path. Drag this compound path to the top of the Layers panel.
Step 6
Keep focusing on the Layers panel to lock your compound path, and then select the rest of the shapes that make up your 3D text.
Open the Pathfinder panel (Window > Pathfinder) and click the Unite button, and then turn the resulting shapes into a compound path (Control-8). Change the color of this new compound path to R=223 G=147 B=85.
Step 7
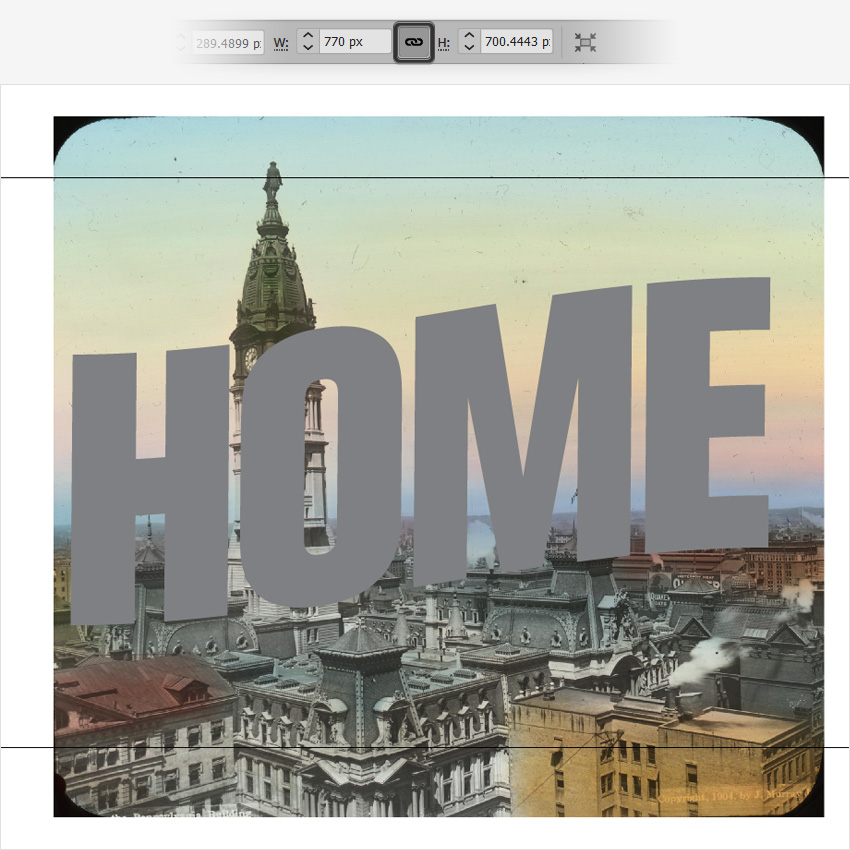
Download the 2048 by 1863 px version of this Philadelphia from Pennsylvania Building photo and drag it inside your postcard design.
Select it and press the Shift-[ keyboard shortcut to easily move it behind the text compound path, and then focus on the control panel to adjust the size. Don’t forget to check the Constrain Width and Height Proportions button, set the Width to 770 px, and then place your photo roughly as shown in the following image.
Step 8
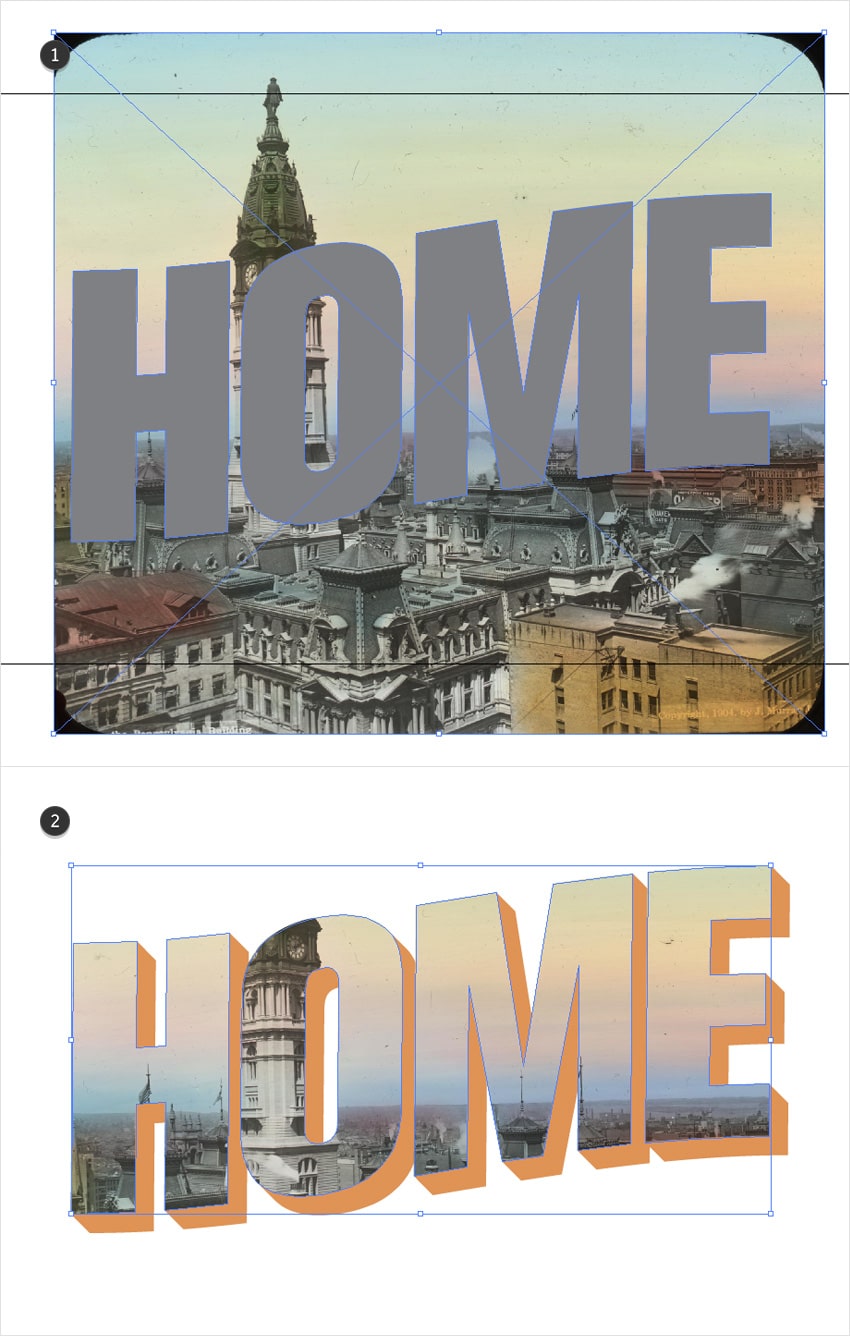
Select your photo along with the text compound path and go to Object > Clipping Mask > Make (Control-7).
Step 9
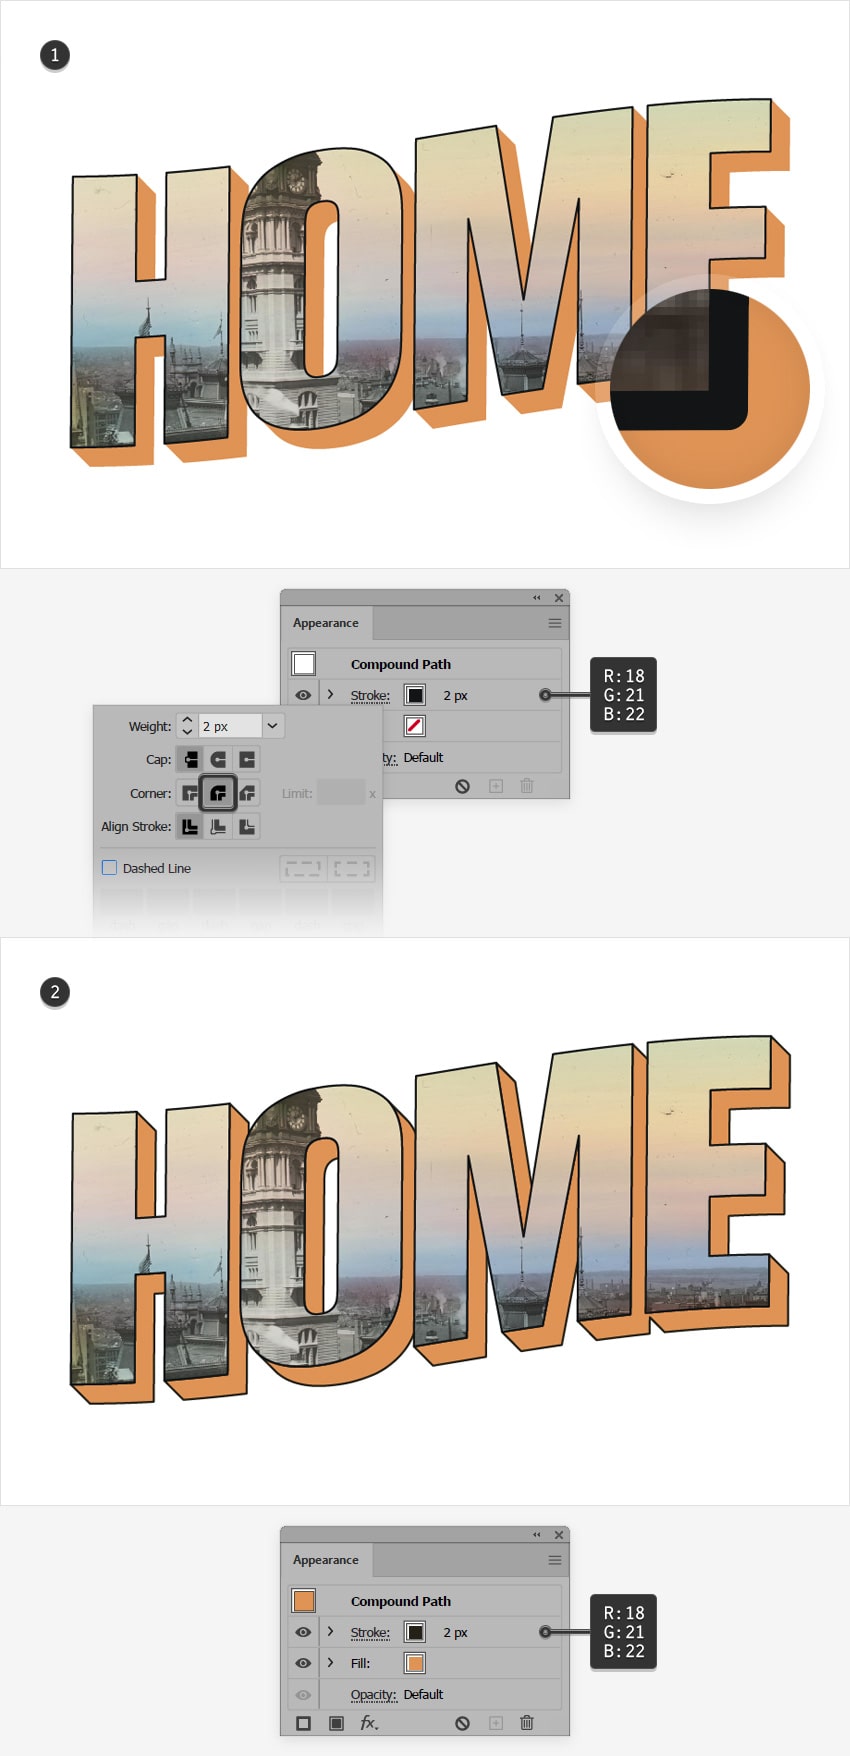
Focus on the Layers panel to open your clip group, select that compound clipping path, and move to the Appearance panel (Window > Appearance).
Select the stroke and set the color to R=18 G=21 B=22, and then click that “Stroke” text to open the Stroke fly-out panel. Increase the Weight to 2 px, and don’t forget to check the Round Join button.
Select that other compound path and add the same stroke.
Step 10
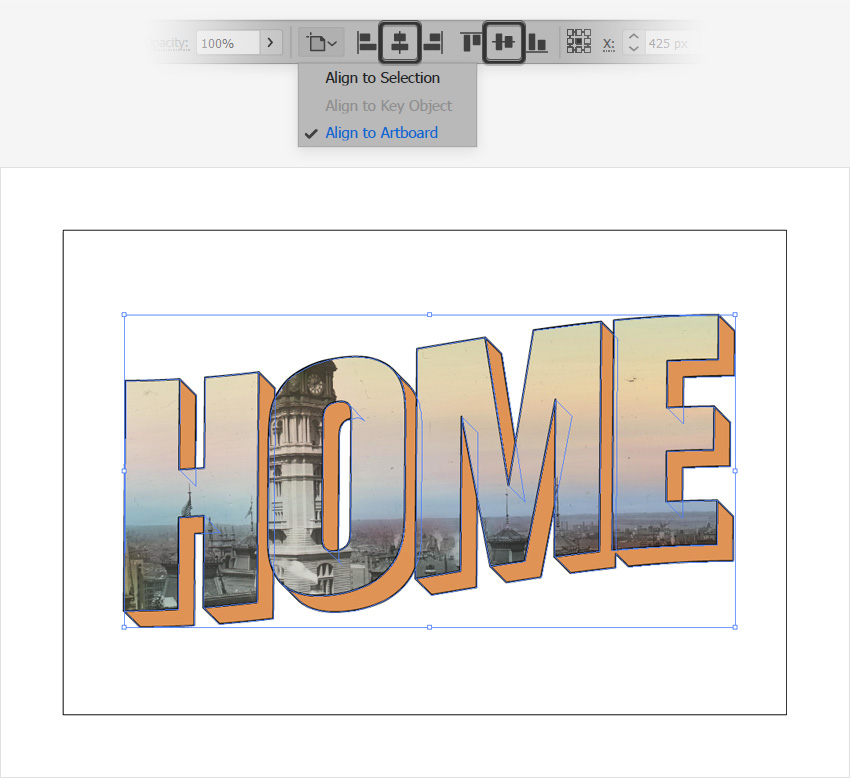
Select your clip group along with the compound path and Group them (Control-G). Make sure that this group stays selected and focus on the control panel.
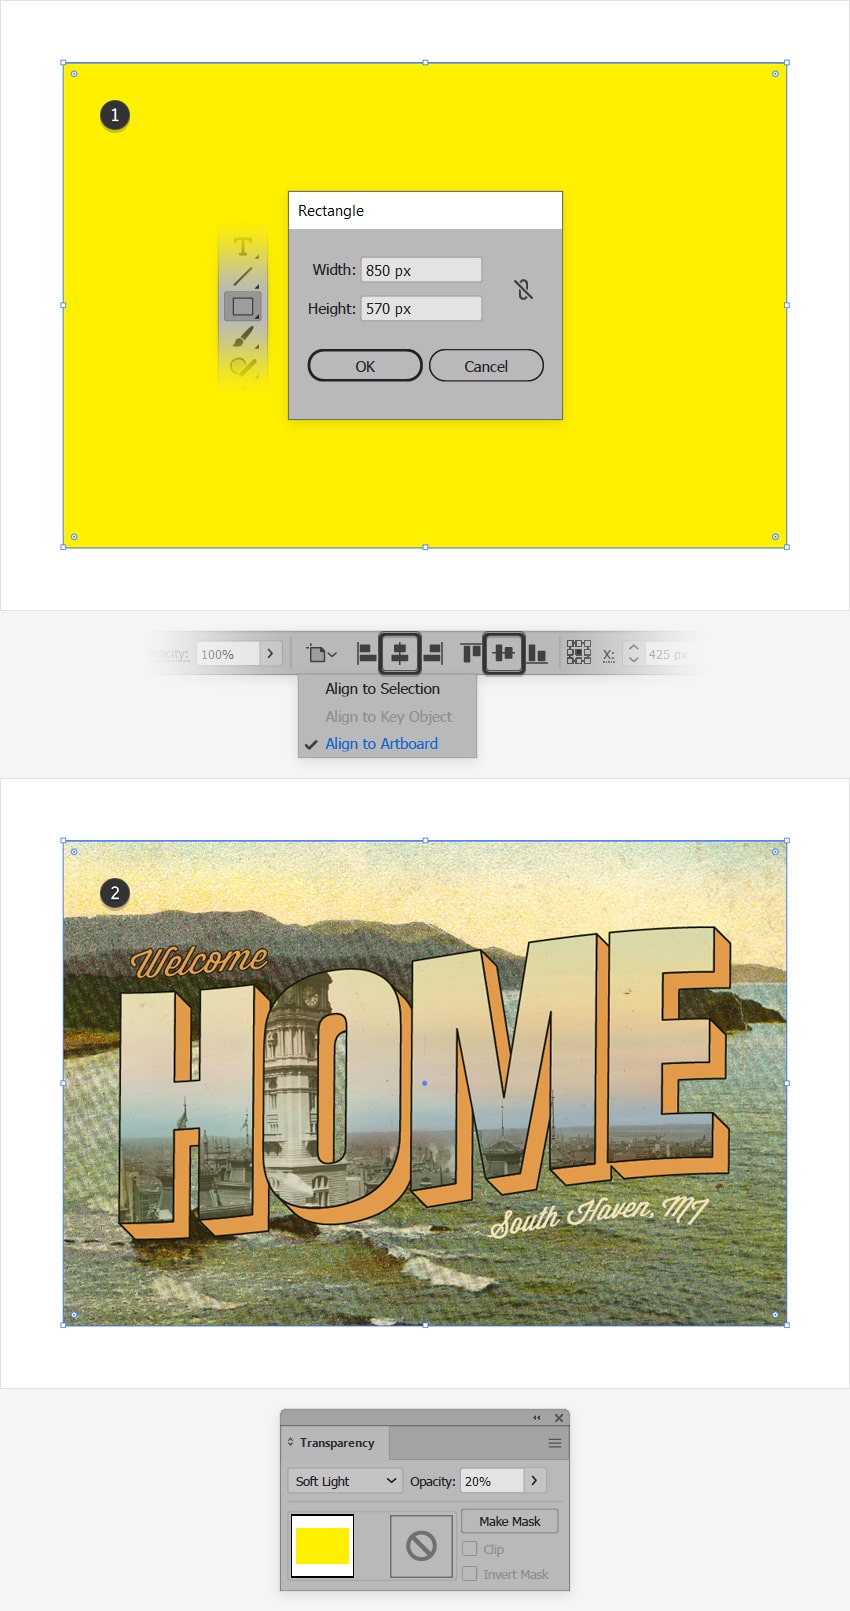
Set the Alignment to Artboard, and then click the Horizontal Align Center and the Vertical Align Center buttons to easily move your selection to the center of the artboard.
2. How to Add Warped Text in a Vintage Postcard Design
Step 1
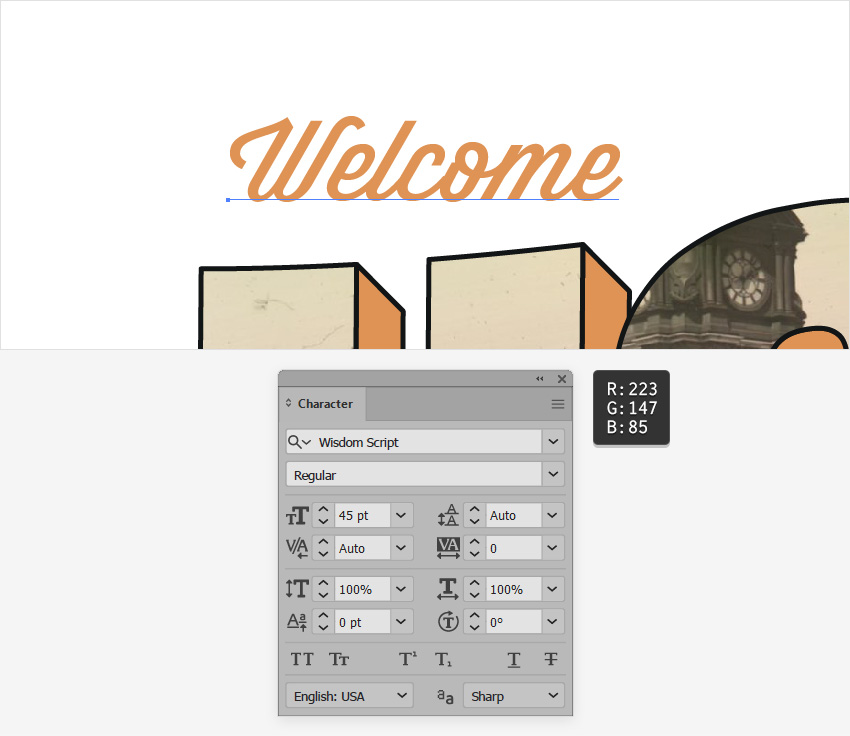
Reselect the Type Tool (T) from your toolbar, select the Wisdom Script font, and set the font size to 45.
Add the “Welcome” piece of text and change its color to R=147 G=149 B=152.
Step 2
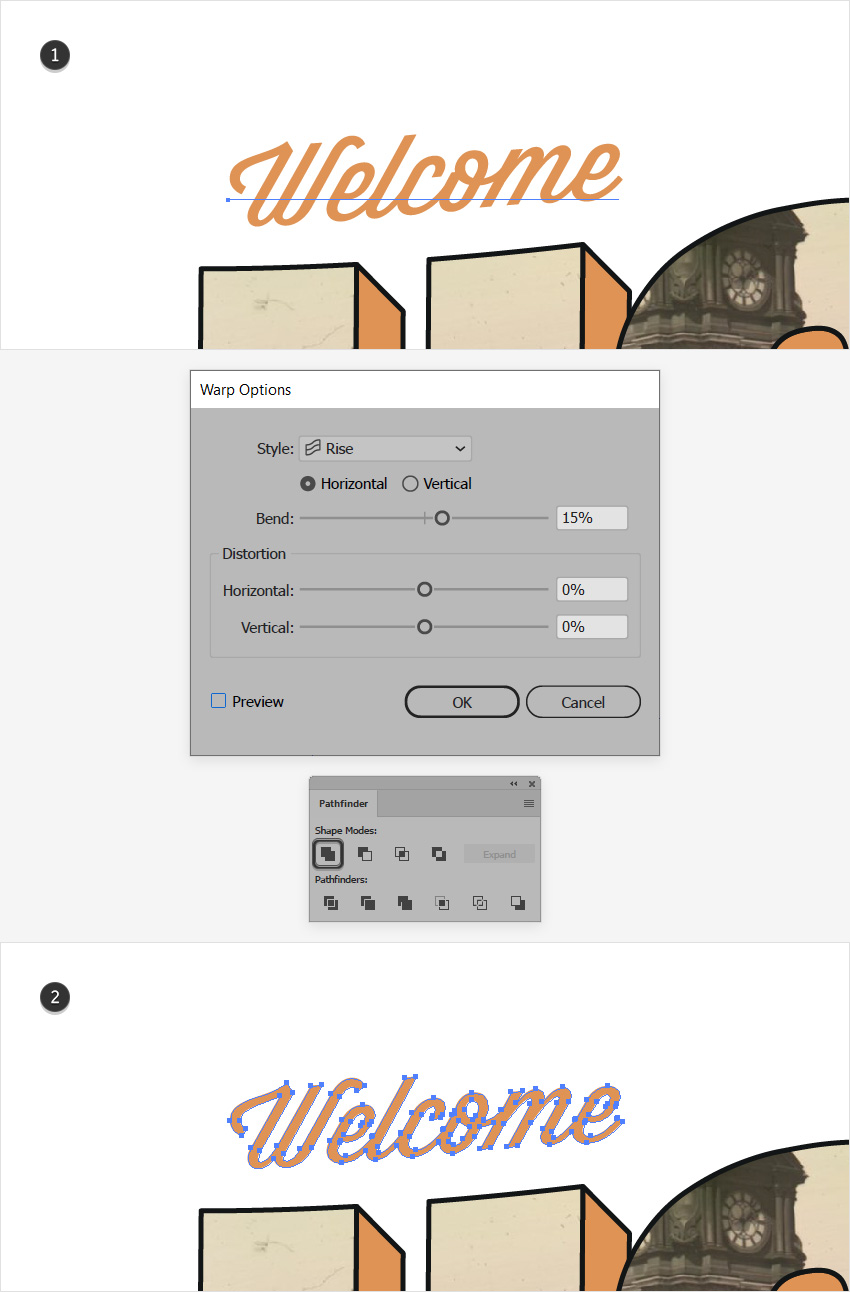
Make sure that your new text stays selected and go to Effect > Warp > Rise. Enter the settings shown below, click OK, and then go to Object > Expand Appearance.
Click the Unite button from the Pathfinder panel and then turn the resulting group of shapes into one compound path (Control-8).
Step 3
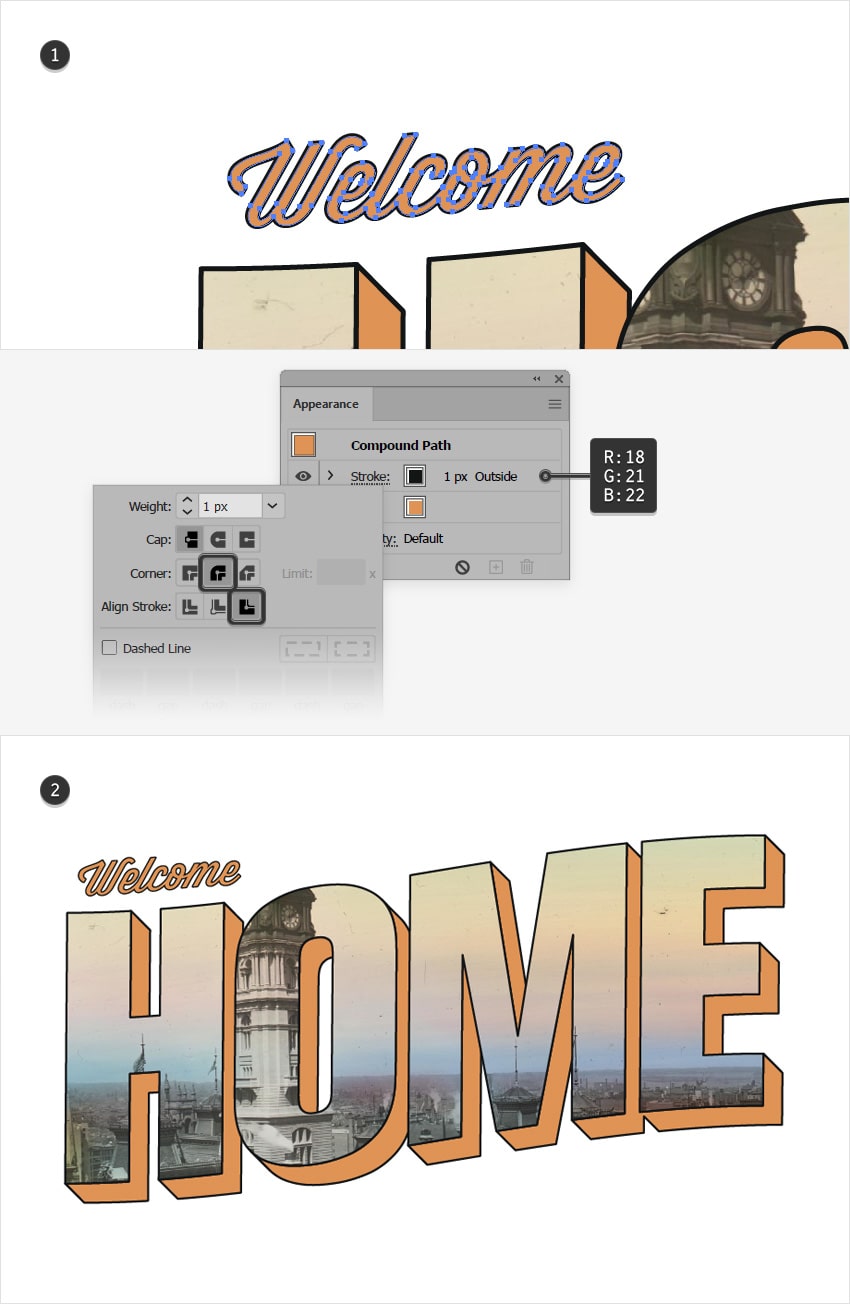
Make sure that your new compound path is still selected and focus on the Appearance panel.
Select the stroke and set the color to R=18 G=21 B=22, and then open the Stroke fly-out panel and check the Round Join and the Align Stroke to Outside buttons.
Once you’re done, place this compound path roughly as shown in the second image.
Step 4
Reselect the Type Tool (T) from your toolbar, select the Wisdom Script font, and set the font size to 33.
Add the “South Haven, MI” text and change its color to R=238 G=222 B=196.
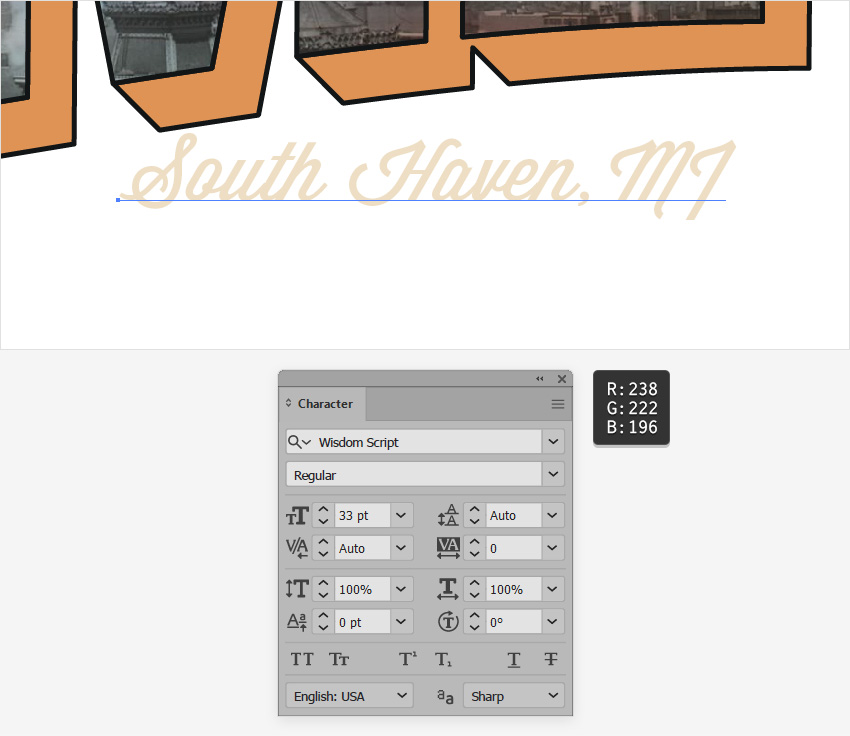
Step 5
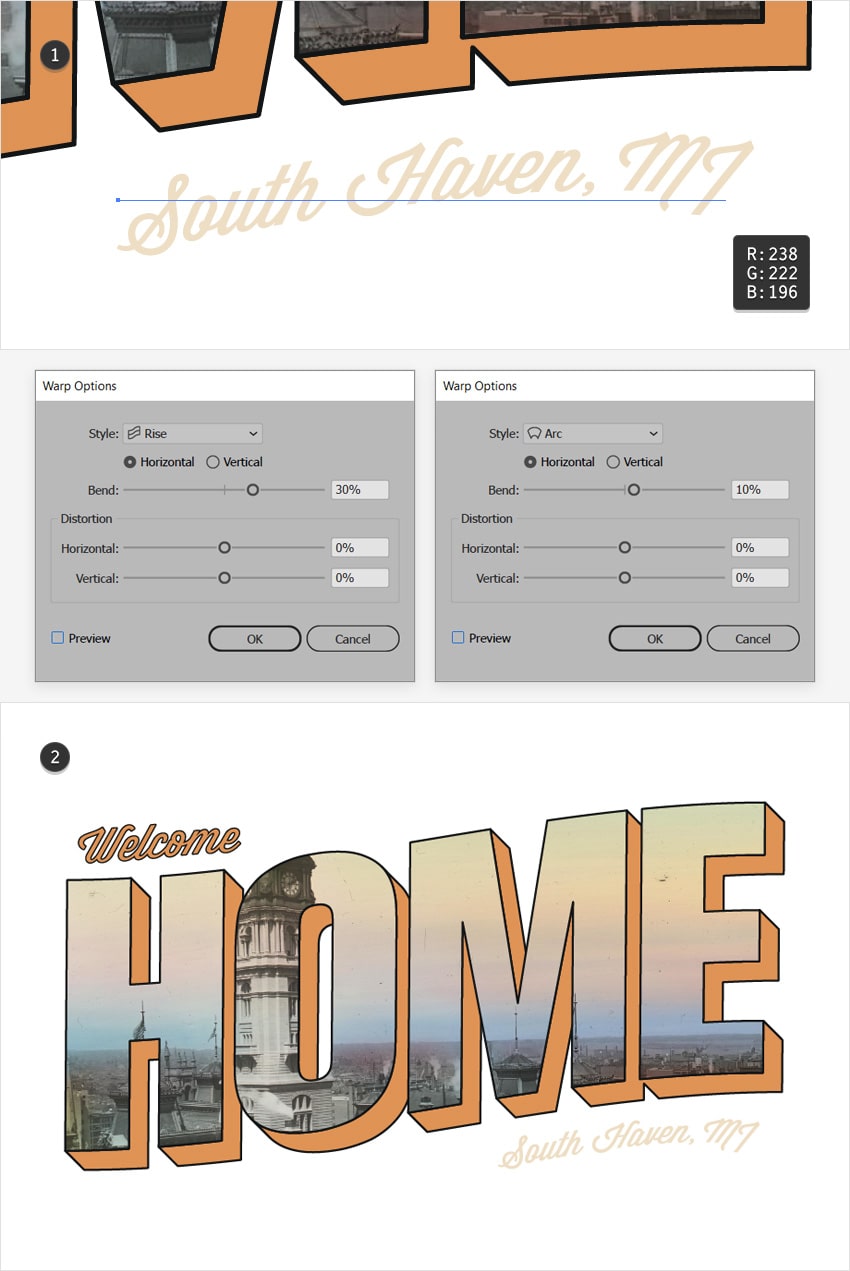
Make sure that your new text stays selected and go to Effect > Warp > Rise. Enter the settings shown below, click OK, and then go to Effect > Warp > Arc. Enter the attributes shown in the following image, and then click OK.
Once you’re done, place this text roughly as shown in the second image.
3. How to Add a Background to a Vintage Postcard Design
Step 1
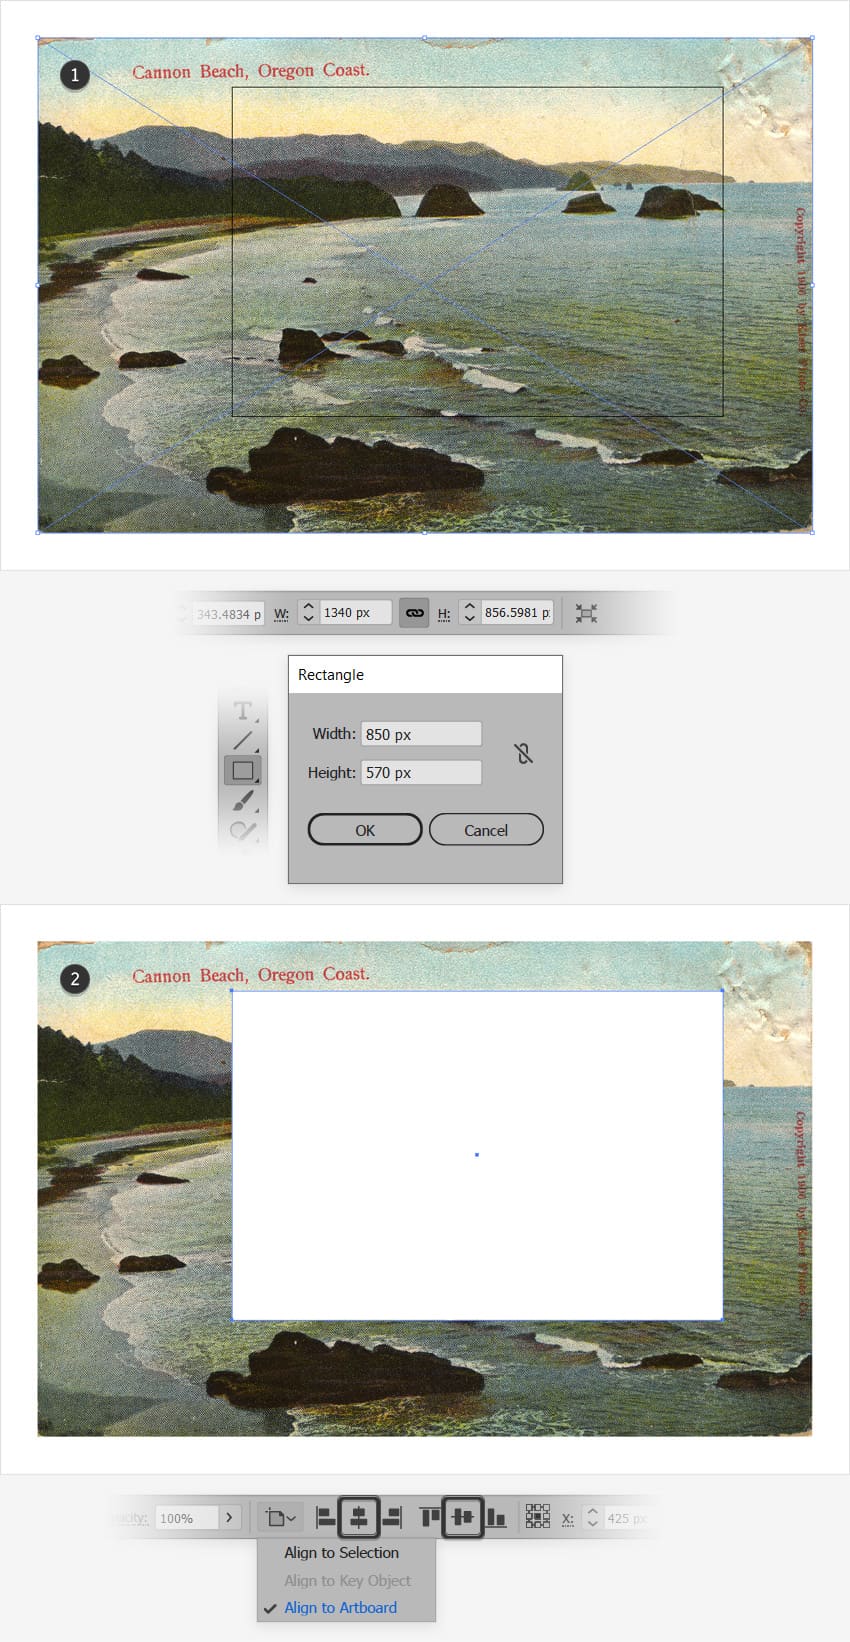
Download the 4280 by 2736 px version of this Cannon Beach on the Oregon Coast photo and drag it inside your postcard design.
Select it and focus on the control panel. Remember to check the Constrain Width and Height Proportions button, set the Width to 1340 px, and then place your photo roughly as shown in the first image.
Pick the Rectangle Tool (M) to create a rectangle the size of your artboard. Click on your artboard to open the Rectangle window, set the Width to 850 px and the Height to 570 px, and then click OK. Use the align buttons from the control panel to perfectly fit this rectangle on the artboard.
Step 2
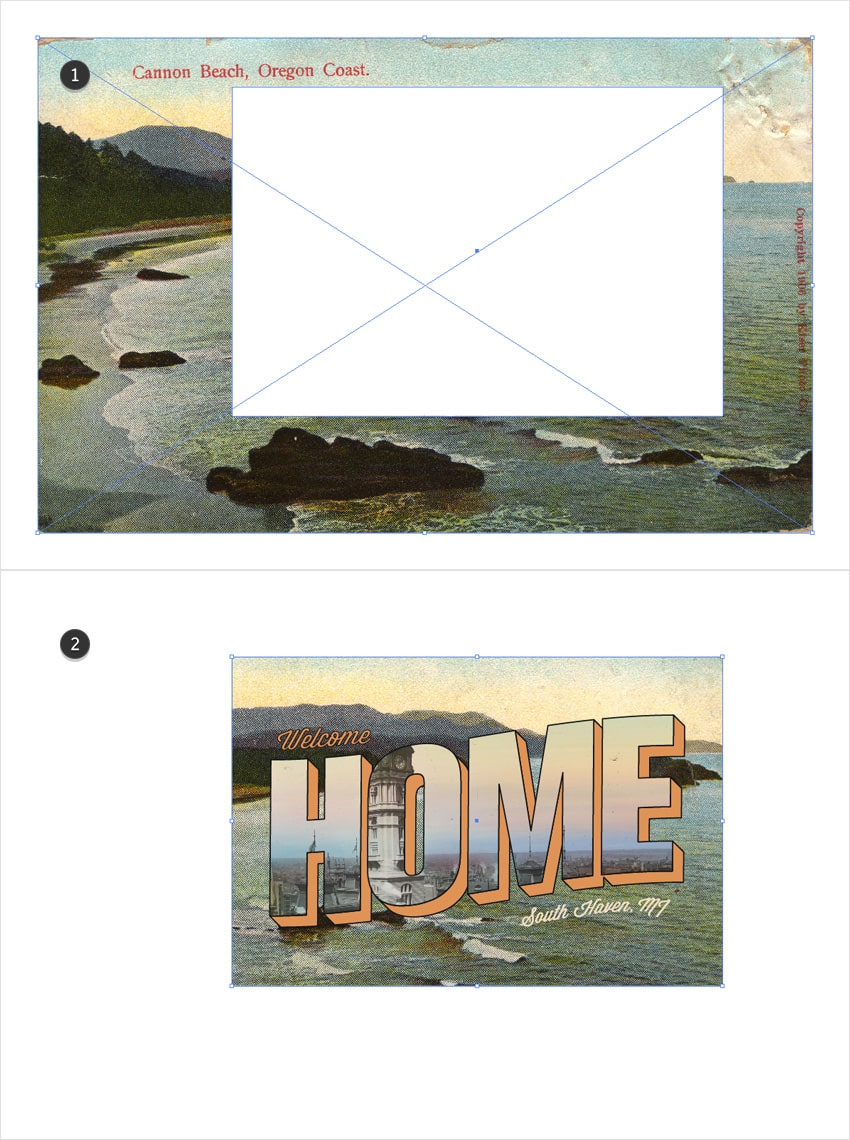
Use the rectangle made in the previous step to clip that photo. Select both objects and go to Object > Clipping Mask > Make (Control-7).
Step 3
Finally, let’s use some basic blending techniques to emphasize the vintage look of this postcard design.
Pick the Rectangle Tool (M) to create a new rectangle the size of your artboard. Center it using the align buttons from the control panel and set the fill color to R=255 G=242 B=0. Lower the Opacity to 20%, and change the Blending Mode to Soft Light.
Congratulations! Your Vintage Postcard Is Complete!
Here is how your vintage postcard template should look. I hope you’ve enjoyed this tutorial and can apply these techniques in your future projects. Don’t hesitate to share your final result in the comments section.
Feel free to adjust this postcard design template and make it your own. You can find some great sources of inspiration at GraphicRiver, with interesting solutions to improve your postcard template.

Want to Learn More?
We have loads of tutorials on Envato Tuts+, from beginner to intermediate level. Take a look!
 VintageHow to Create a Vintage Card With Mistletoe in Adobe Illustrator
 Book CoverHow to Design a Vintage Book Cover
 PostcardHow to Create a Postcard Template in InDesign
 BrushesHow to Design a Naw-Rúz Floral Card in Adobe Illustrator
 Global InfluencesCelebrate Children’s Day in Mexico With a Colorful Postcard!
 ChristmasHow to Design a Retro Christmas Postcard in Adobe Illustrator
 Adobe IllustratorHow to Design a Krishna Janmashtami Postcard in Adobe Illustrator
 DesigningCreate a Floral St. Valentine’s Postcard in Adobe Illustrator
- Photo EffectsHow to Create a Vintage Photo Effect in a Sergey Prokudin-Gorsky Style
 RetroHow to Create a Vintage Soviet Space Travel Poster in Adobe InDesign
