


In the following tutorial, you will learn how to create a paint-dripping effect in Adobe Photoshop. I’ll take you through the whole process step by step.
If you don’t have the time to make this dripping-paint text, then Envato is the solution. This subscription-based marketplace has thousands of add-ons you can download without restrictions! You can find plenty of Photoshop text effects to inspire you.
What you’ll learn in this Photoshop text effect tutorial
- How to add effects to text in Photoshop
- How to add dripping paint effects
- How to add spray-paint drip effects
- How to mask and stylize dripping paint
- How to save a dripping paint pattern
What you’ll need
You’ll need the following resources to complete this Photoshop text effect:
1. How to create a new document and set up the background
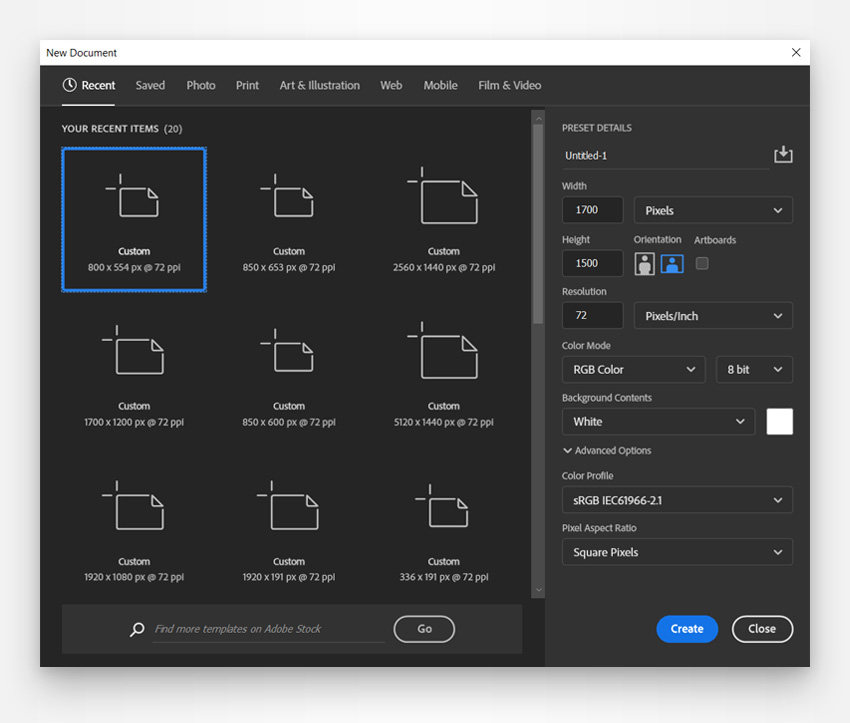
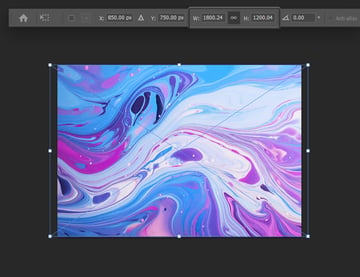
Step 1
Create a new document (Control-N), setting the Width to 1700 px and the Height to 1500 px.
Step 2
We’ll start with the background. You’ll need image #3 from this pack of Acrylic Paint Backgrounds. Simply drag it into your Photoshop document, focus on the Options bar (Window > Options), and set the Width to about 2300 px.
To center this photo, you can press Control-A to load a selection around your entire canvas, pick the Move Tool (V), and then click the Align horizontal center and Align vertical center buttons from the Options bar.


2. How to add the text
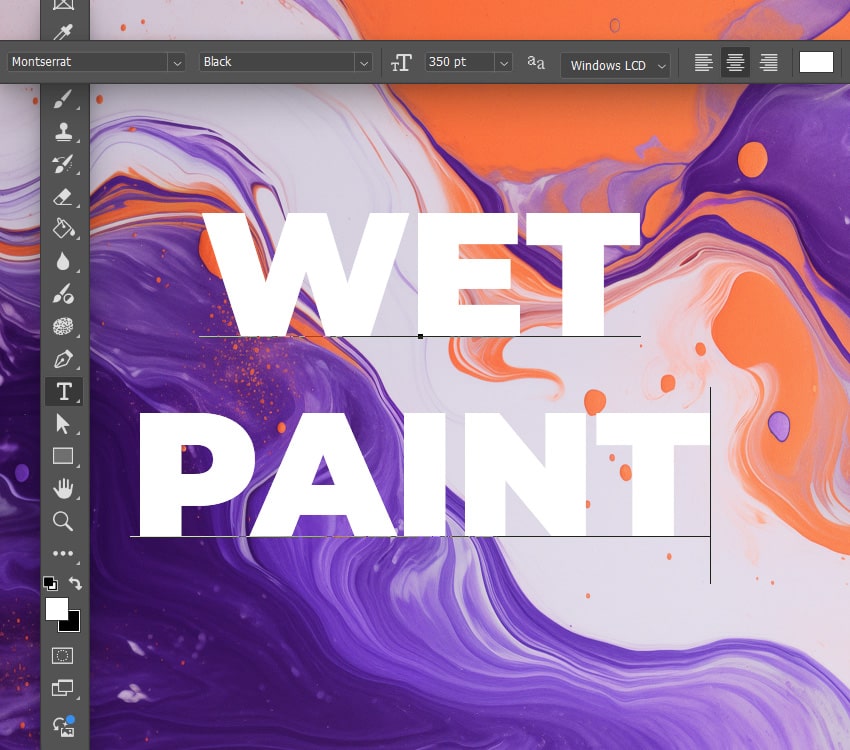
Step 1
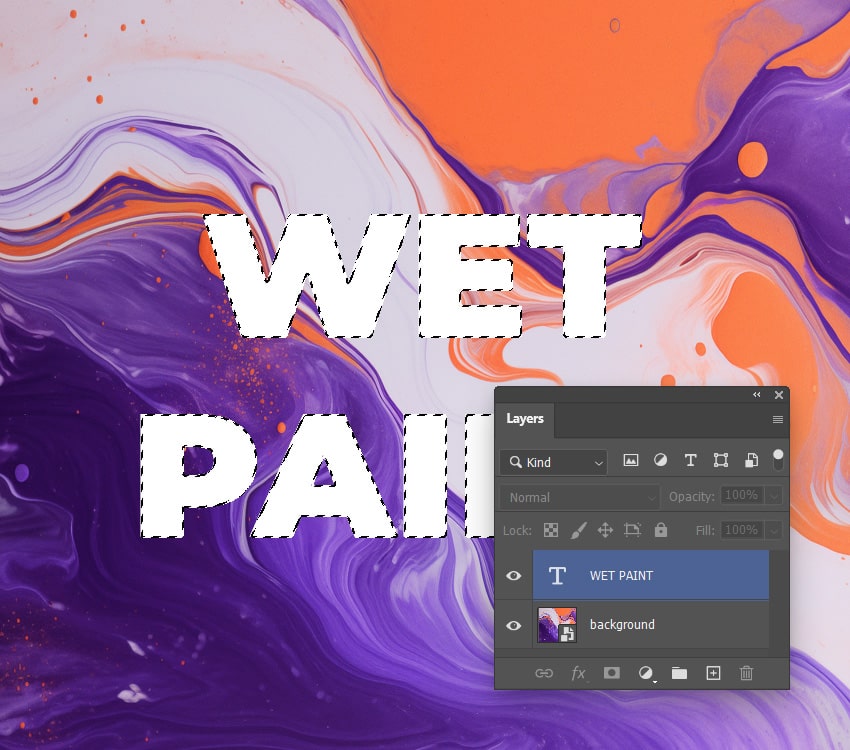
Pick the Horizontal Type Tool (T) from your toolbar, and make sure that the Foreground color is set to white (R=255 G=255 B=255).
Move to the Options bar to choose the settings for the text that you’re about to add. We’ll use the Montserrat font. Select the Black style and set the Size to about 350 pt, and don’t forget to check that Center Text button.
Once you’re done, just click on your canvas and type in your text. We’ll use “WET PAINT” for this example, but feel free to add your own text.


Step 2
Focus on the Layers panel (Window > Layers), hold down the Control key, and click your text to load a selection around it.


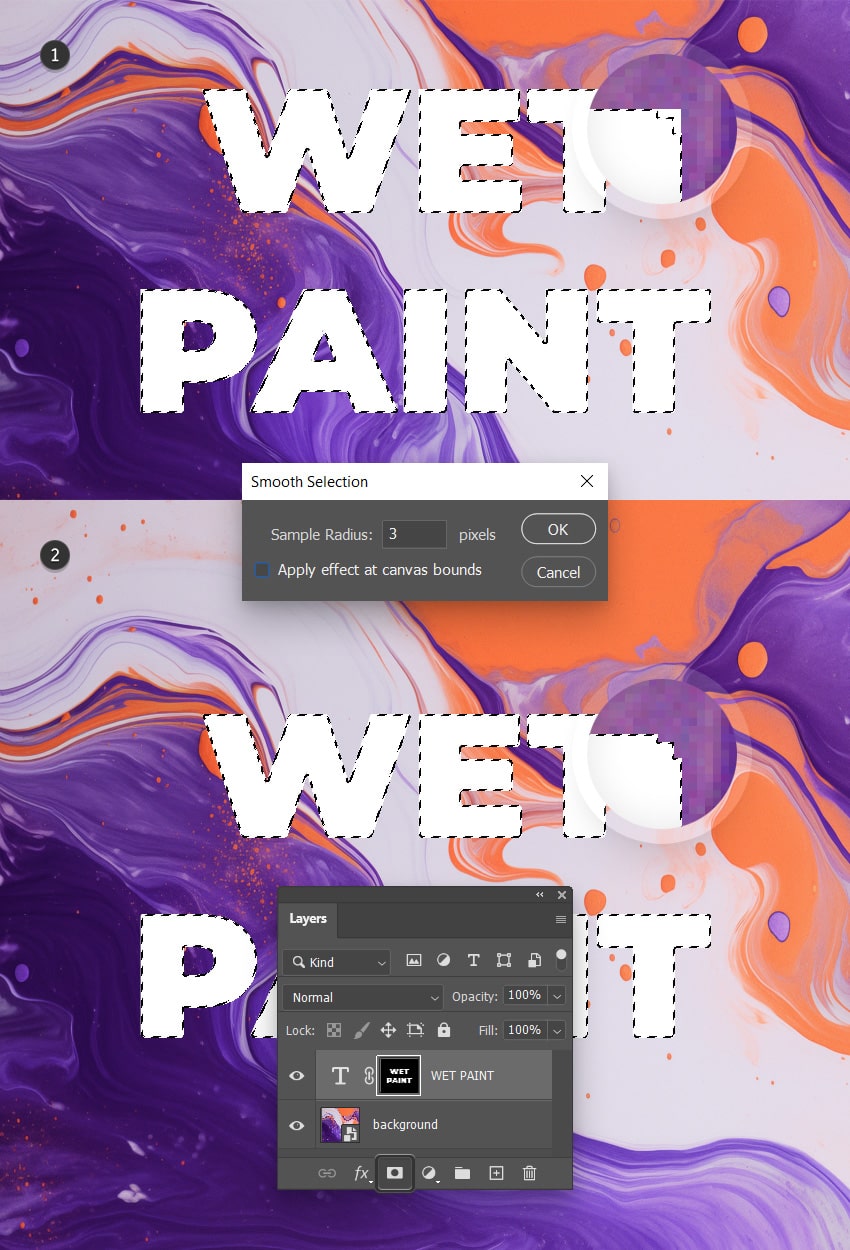
Step 3
With the selection around the text still active, go to Select > Modify > Smooth. Set the Radius to 3 px and click OK.
Return to the Layers panel, make sure that your text is selected, and click the Add layer mask button. The mask will add a subtle roundness to the corners of your text.


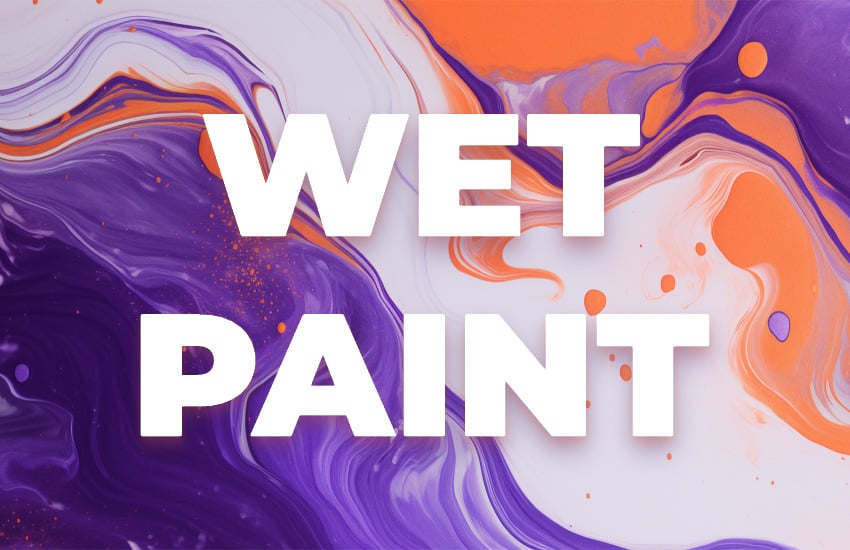
Step 4
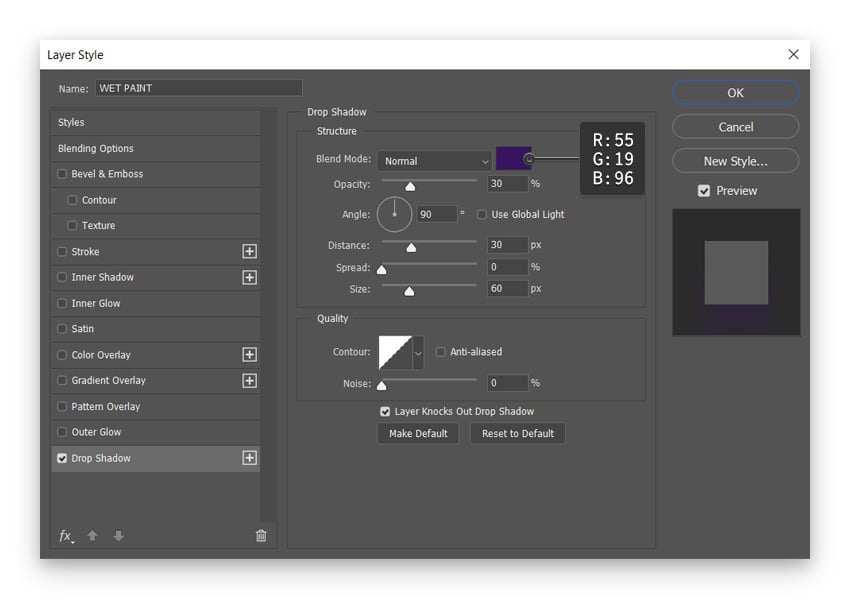
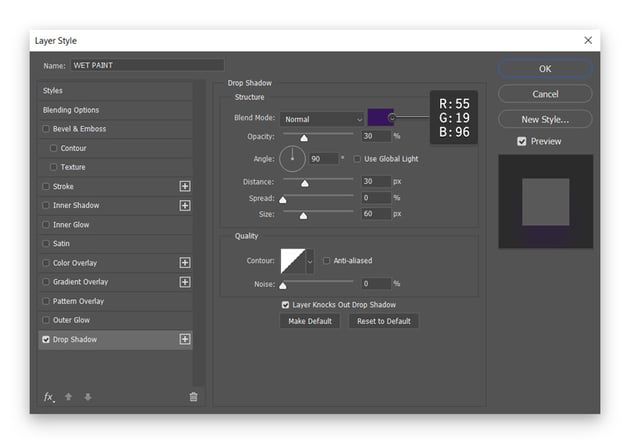
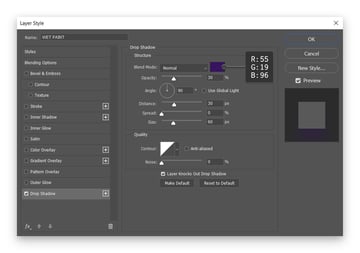
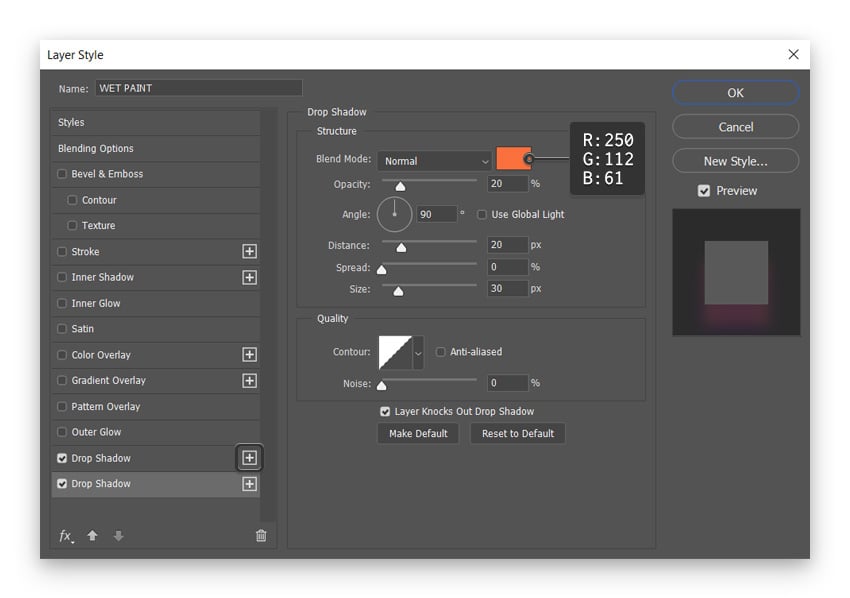
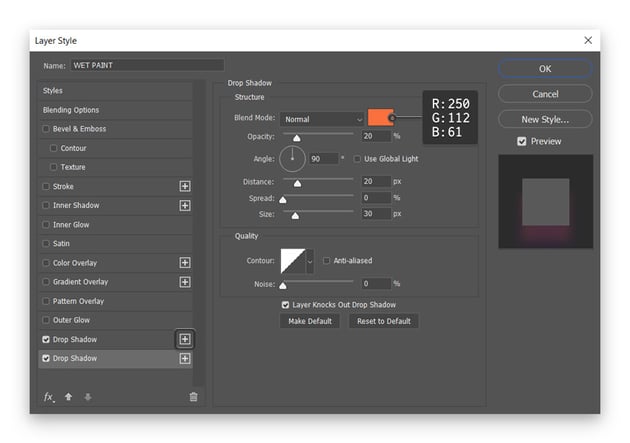
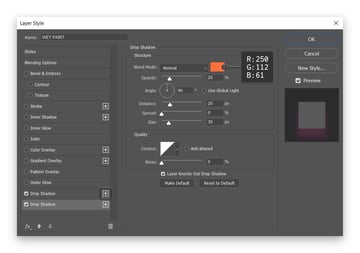
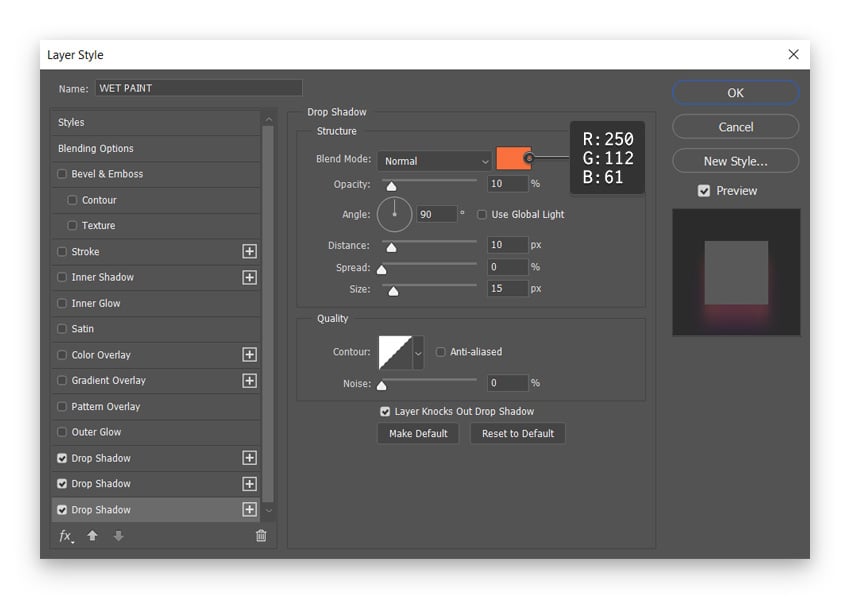
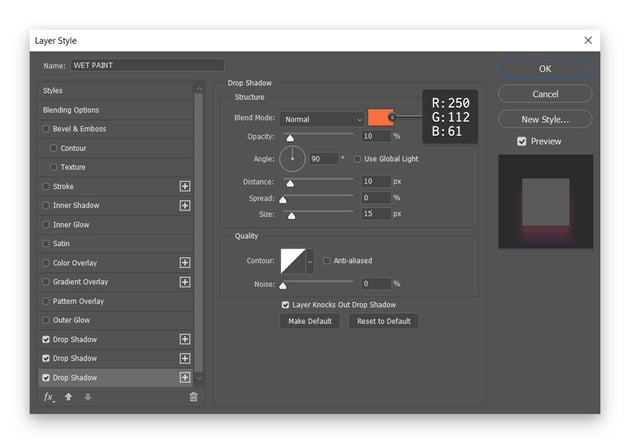
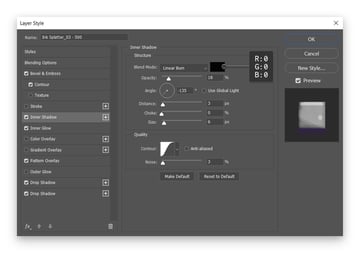
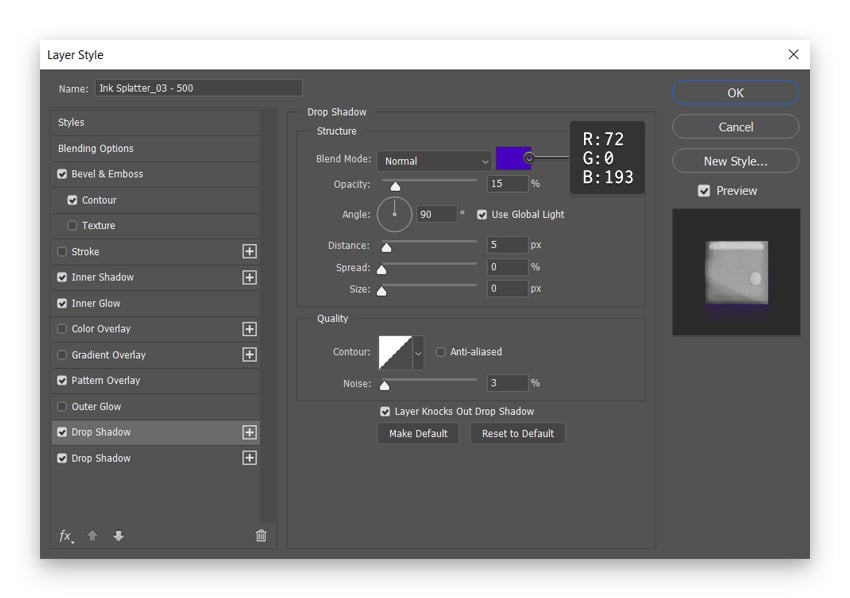
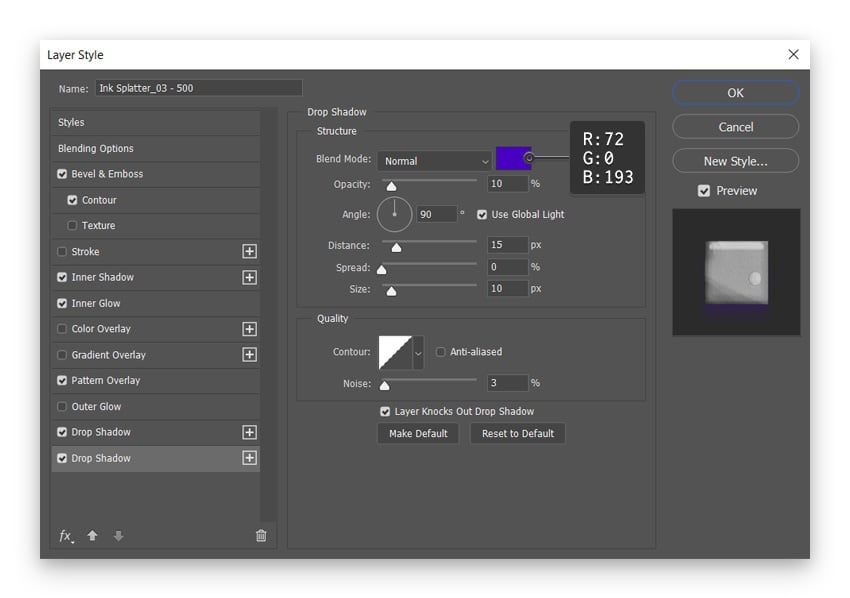
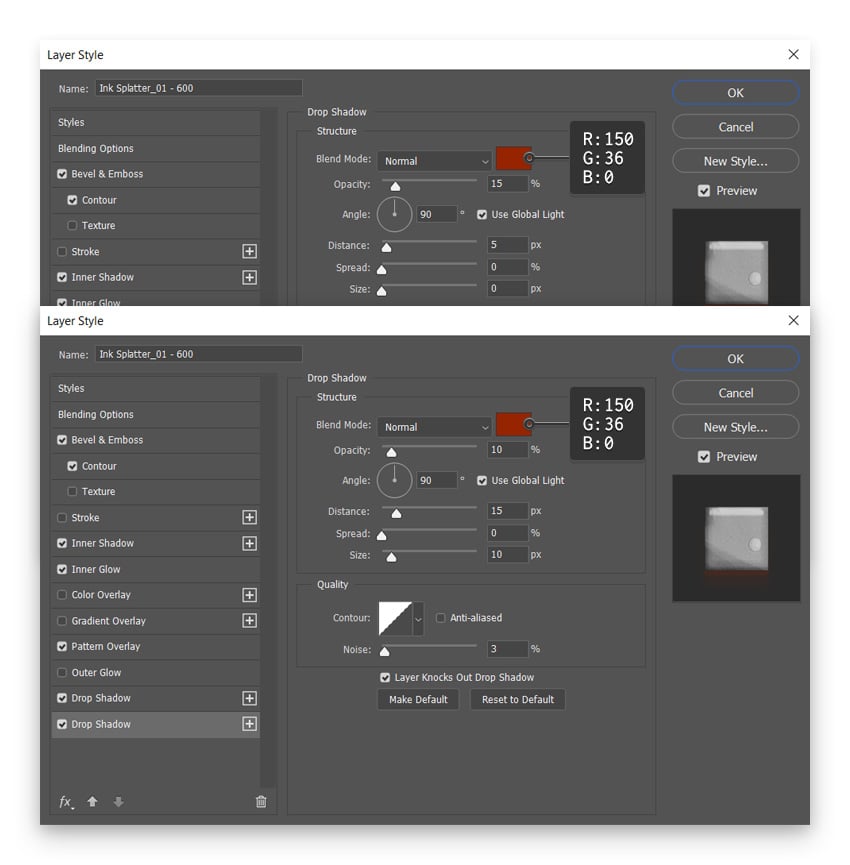
Now let’s add some Drop Shadows to the text. You can either double-click it (in the Layers panel) or go to Layer > Layer Style > Drop Shadow.
Use the plus button to add another two Drop Shadows below the existing one, and then enter the settings shown in the following images.


3. How to add the dripping paint
Step 1
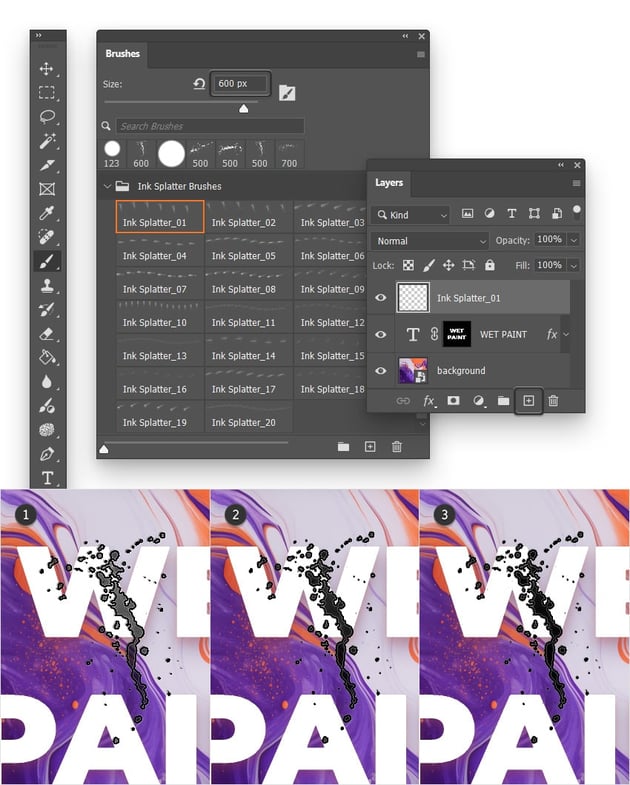
For the drip paint effect, we’ll use several brushes from this set of Ink Splatter Brushes. Download the ABR file and double-click it to load the brushes in the Brushes panel (Window > Brushes).
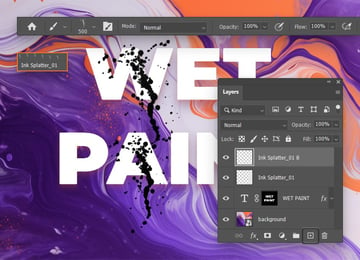
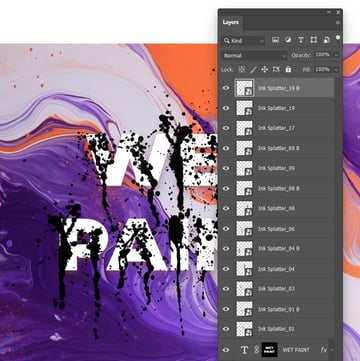
We’ll start with “Ink Splatter_01”, but first go to the Layers panel and add a new layer using the Create a new layer button. Name it “Ink Splatter_01” to distinguish it. Keep in mind that you’ll need to add new layers whenever you add a new brush to your design. Keep naming the layers with the names of your brushes.
Keep your “Ink Splatter_01” layer selected, pick the Brush Tool (B), and set the foreground color to black (R=0 G=0 B=0).
Select the “Ink Splatter_01” brush from the Brushes panel and set the size to 600 px. Use the left and right arrow keys to rotate your brush until you get to the angle shown below. Finally, click a couple of times (three should be enough) in the same spot to diminish the transparency of the brush.


Step 2
Add a new layer and name it “Ink Splatter_01 B”. As the name suggests, we’ll use the “Ink Splatter_01” brush again.
Lower the size to 500 px and add a second dripping paint effect, as shown below. Don’t forget to click three times in the same spot to diminish the brush transparency.


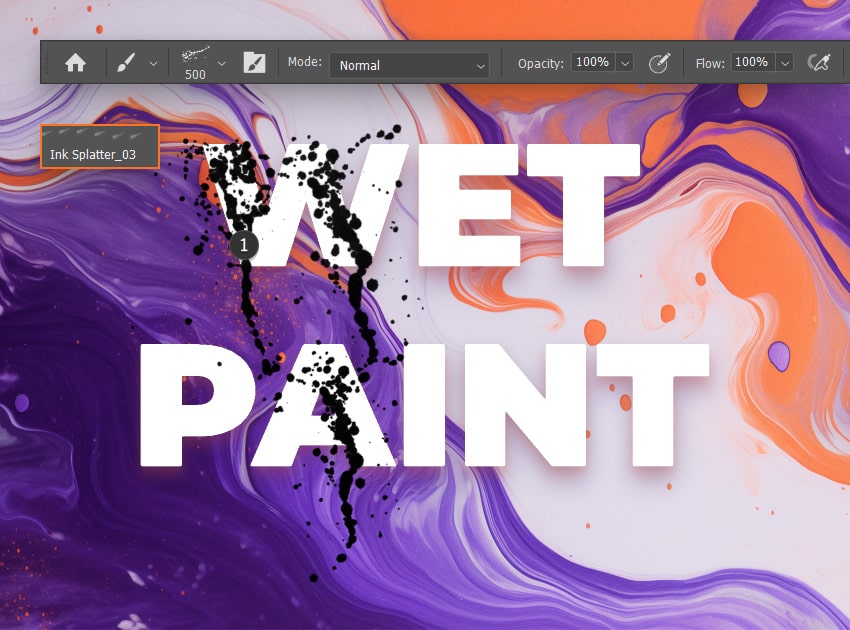
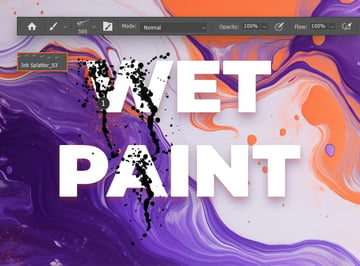
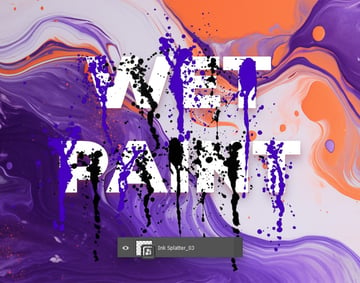
Step 3
Continue with “Ink Splatter_03” after you add a new layer and name it accordingly. Set the Size to 500 px and apply the brush as shown below.

Step 4
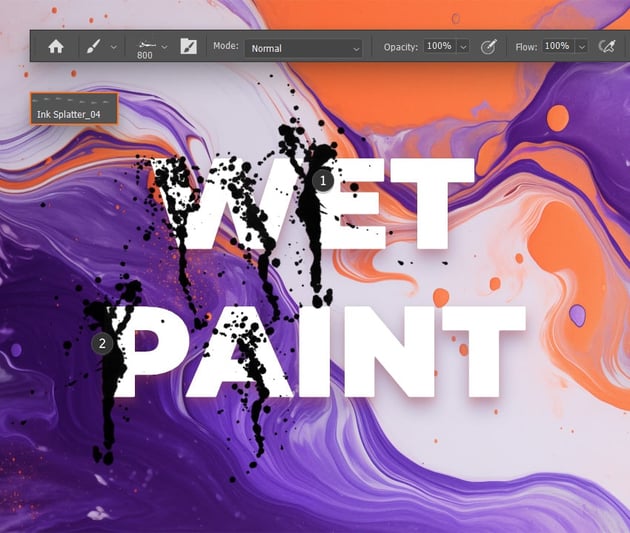
Continue with “Ink Splatter_04” and add two new layers as we’re going to use this brush twice. Set the Size to 800 px and apply the brushes as shown below.
Before we continue, you need to flip the second instance of this brush. Just select its layer and go to Edit > Transform > Flip Horizontal.


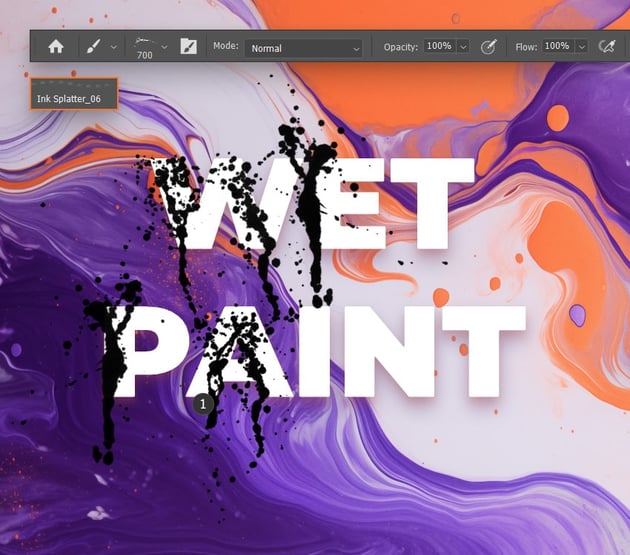
Step 5
Move on to “Ink Splatter_06”. Add a new layer and name it accordingly. Set the Size to 700 px and apply the brush as shown below.


Step 6
Again, add two new layers as we’re going to use “Ink Splatter_08” twice. Add the two brushes as shown below, using the indicated Size values. Once you’re done, select just the bottom one and flip it horizontally (Edit > Transform > Flip Horizontal).


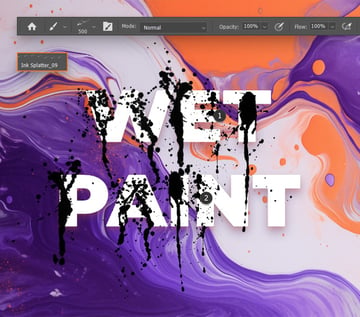
Step 7
Continue with “Ink Splatter_09” and add a new layer. Set the Size to 500 px and apply the brush as shown below.


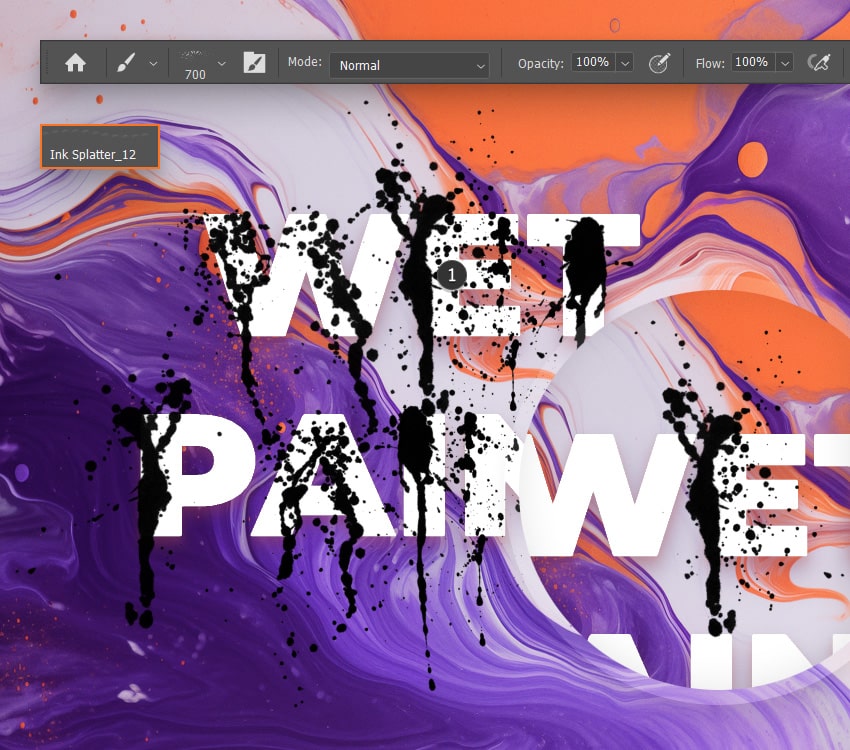
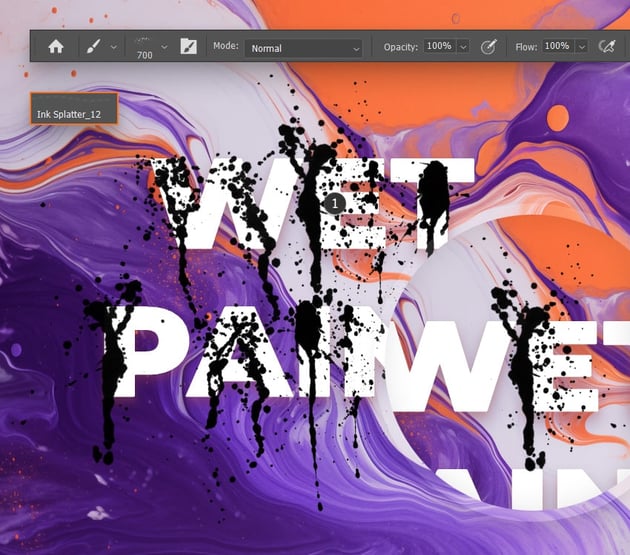
Step 8
Next, you’ll need “Ink Splatter_12”. Instead of adding a new layer, select your first “Ink Splatter_04” layer. Set the Size to 700 px and apply the “Ink Splatter_12” brush on top of the existing one, as shown below.

Step 9
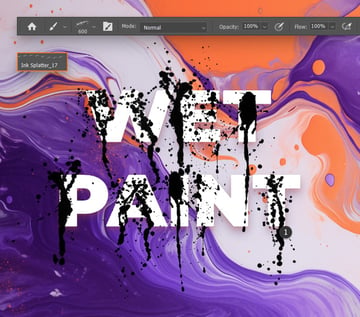
Continue with “Ink Splatter_17”. Set the Size to 600 px and add a new layer, and then apply the brush as shown below.

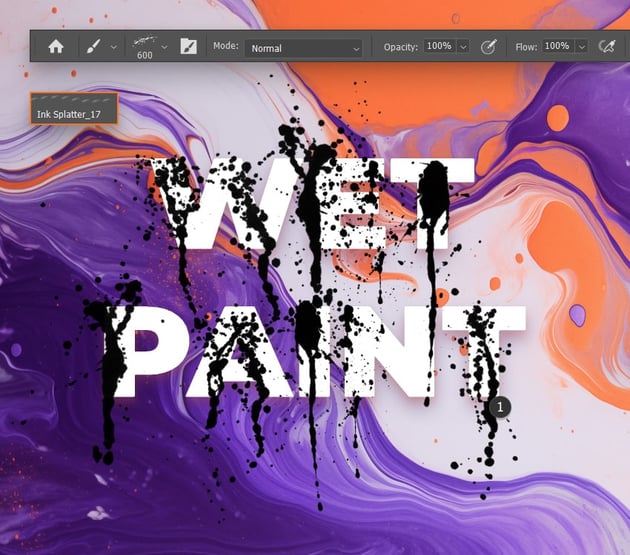
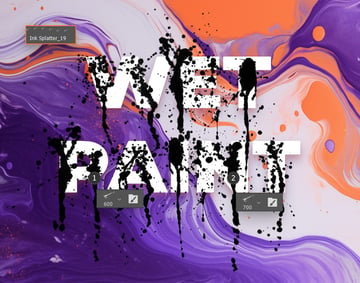
Step 10
Finally, add another two layers as we’re going to use “Ink Splatter_19” twice. Apply the two brushes as shown below, using the indicated Size values.


4. How to color the dripping paint
Step 1
Select each “Ink Splatter” layer and turn it into a smart object. A simple right-click followed by Convert to Smart Object will turn any layer into a smart object.


Step 2
Now that you have your smart objects, let’s make some color adjustments for approximately half of these brushes.
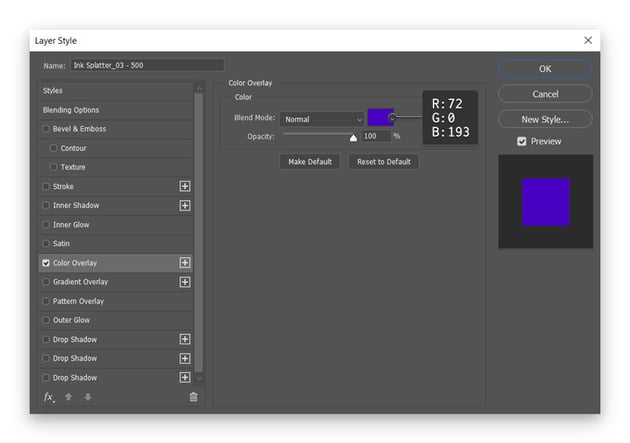
Focus on one of your smart objects (in the Layers panel) and double-click it to open it in a separate window and adjust its color. Open the Layer Style window for the existing layer, apply a Color Overlay, and set the color to R=72 G=0 B=193. Repeat the same technique for roughly half of your brushes, as shown below.


Step 3
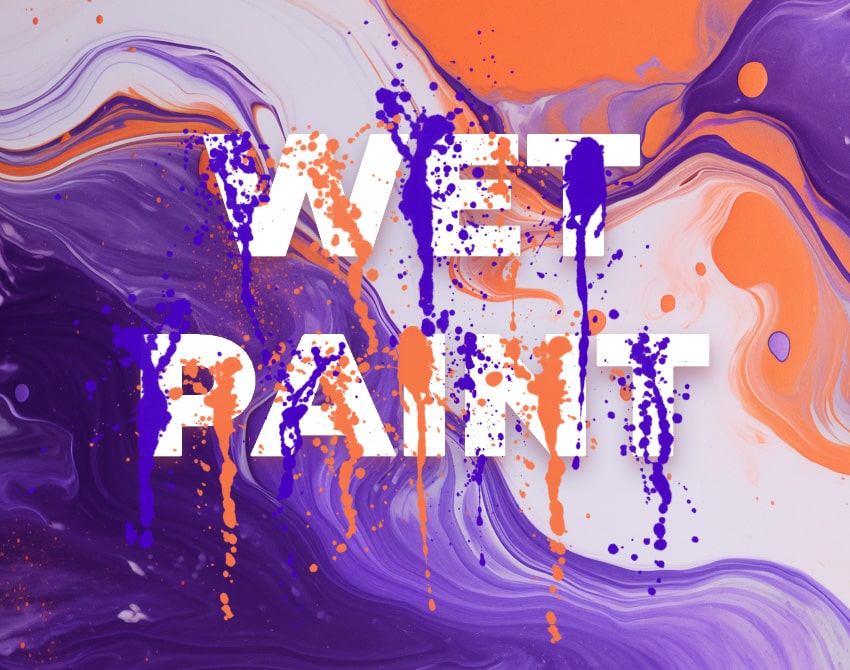
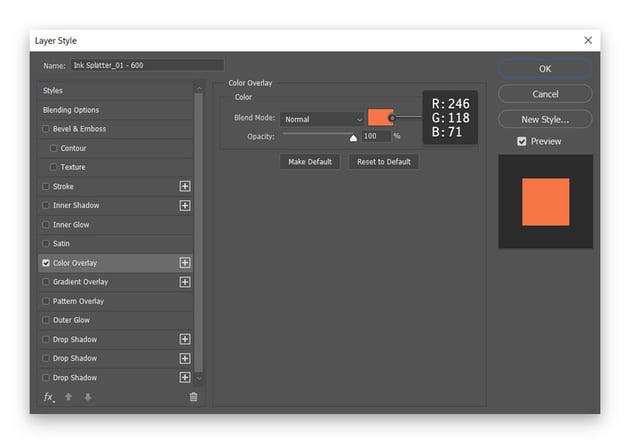
Focus on the remaining black brushes. Apply the same Color Overlay effect, but this time set the color to R=246 G=118 B=71.


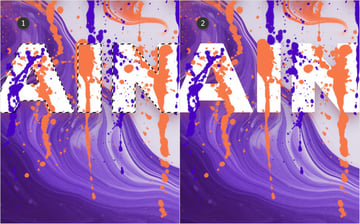
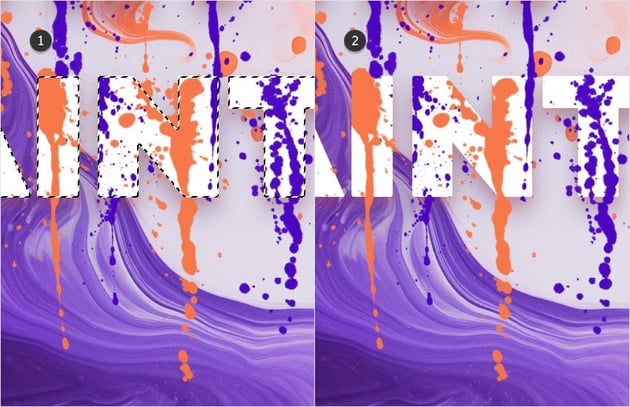
5. How to mask the dripping paint
Step 1
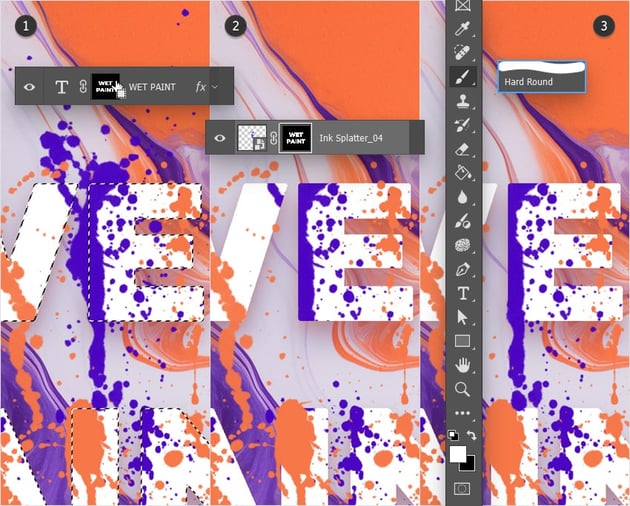
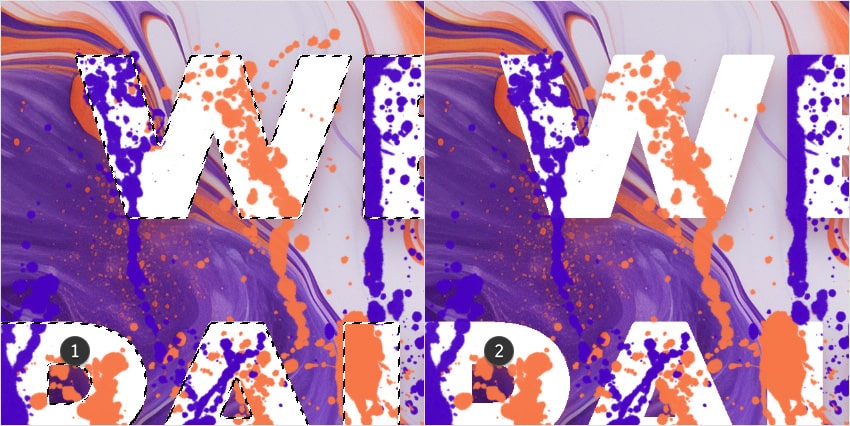
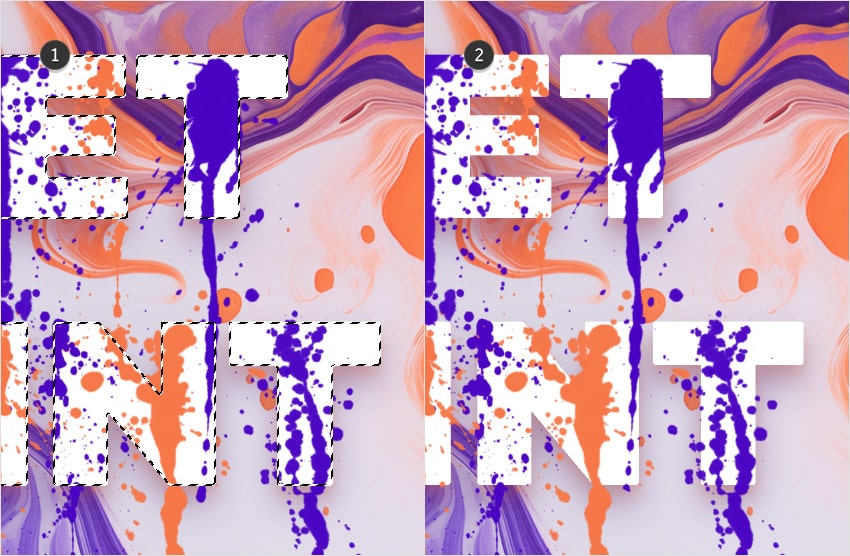
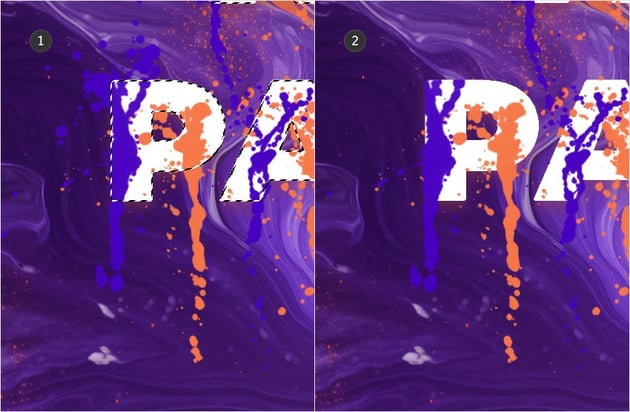
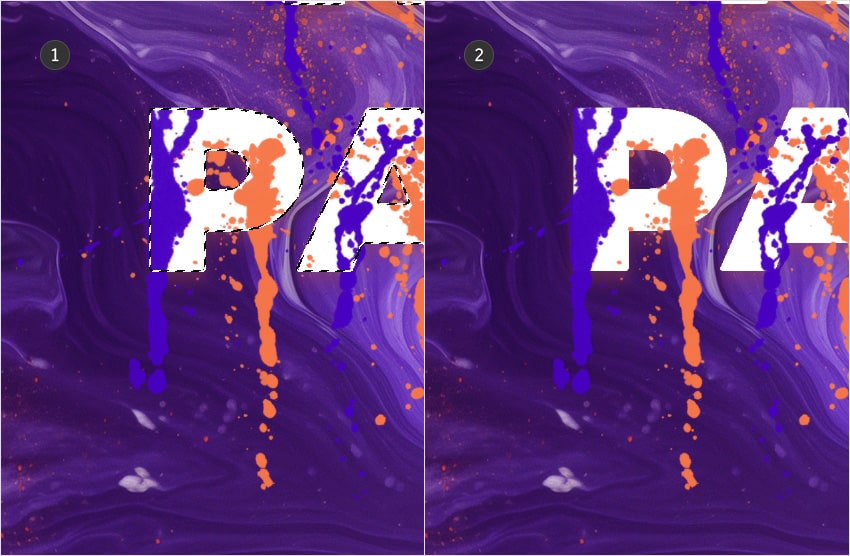
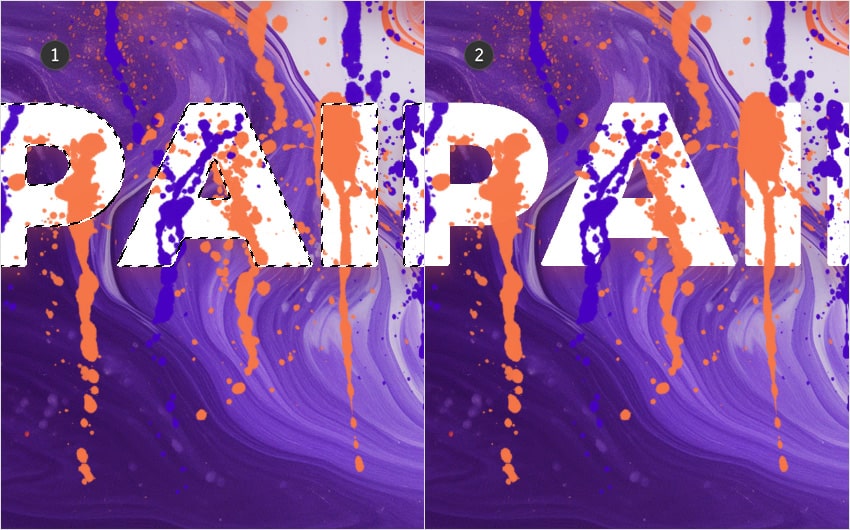
Now that we’ve colored the brushes, let’s mask them. Have a look in the Layers panel and get to your text. Hold down the Control key and click the mask to load a selection around it.
Select one of your smart objects from the Layers panel and click the Add layer mask button. This will hide the parts of the brush that do not overlap with the text.
Keep this new mask selected, and grab the Brush Tool (B). Pick a Hard Round brush from the Brushes panel, and make sure that the Foreground Color is set to white. Now, simply paint the bottom area of your masked brush to make it visible again. To hide a specific region again, set the Foreground Color to black and then paint that region. Keep in mind that you can use the D key to reset the Foreground Color and the Background Color to black and white. Using the X key, you can easily swap the Foreground and Background colors.


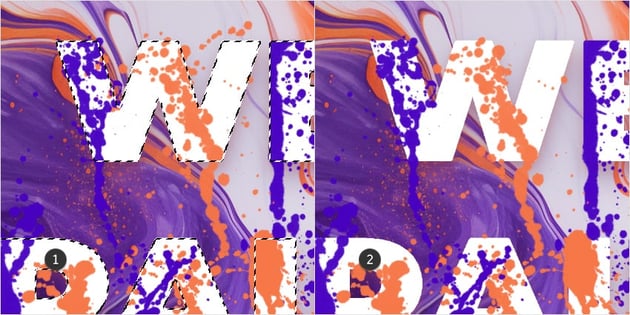
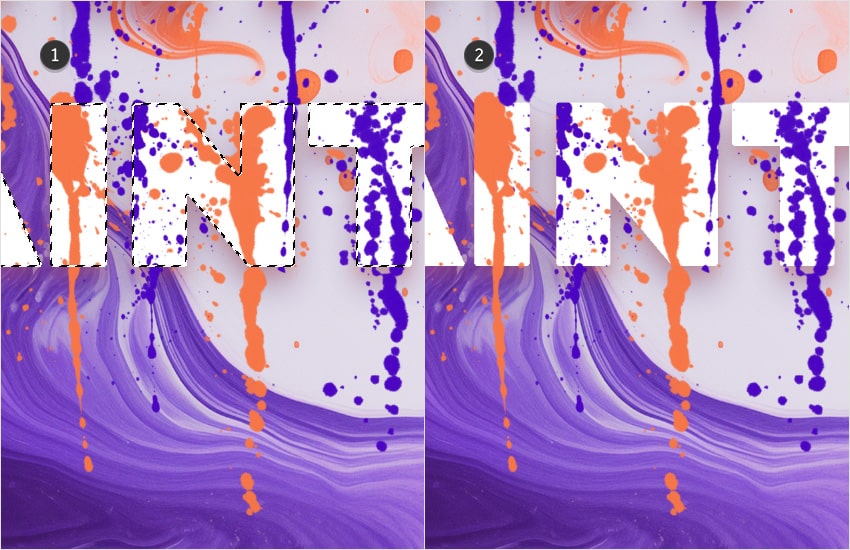
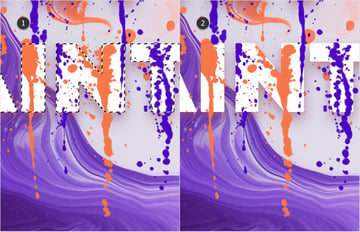
Step 2
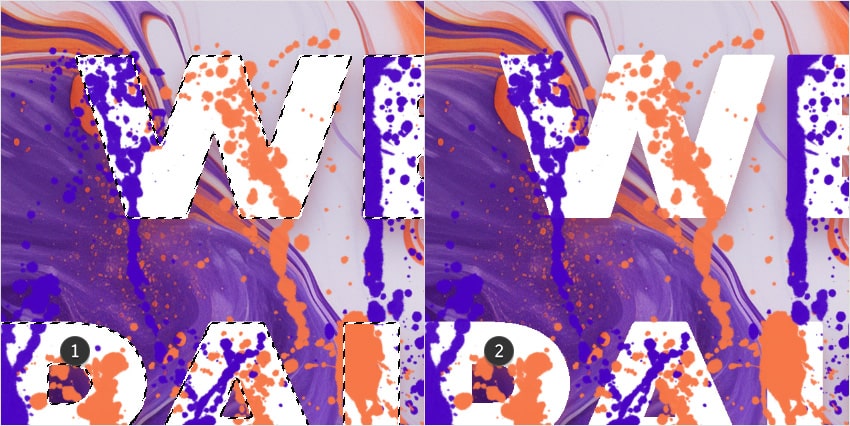
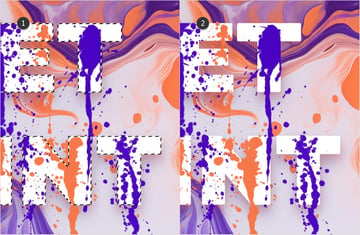
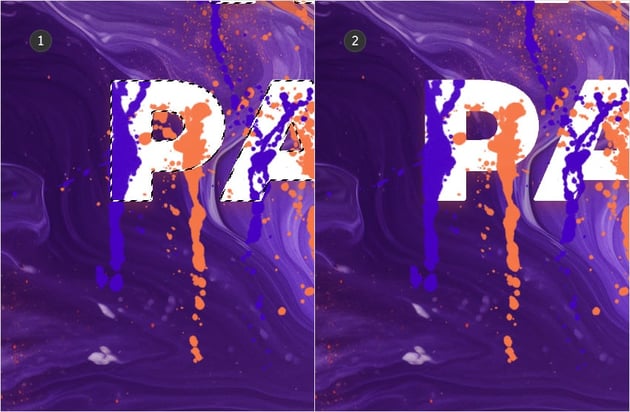
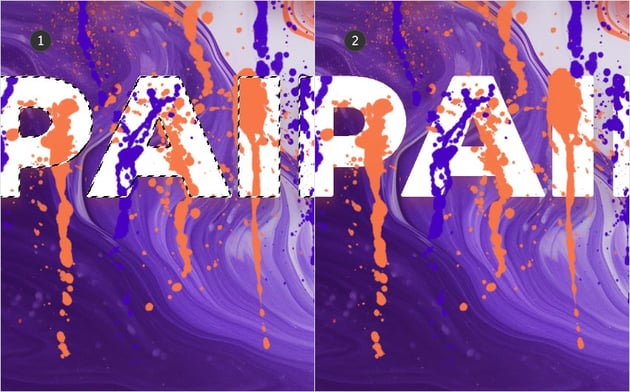
Let’s continue masking the rest of the brushes. Again, load a selection around the mask of the text, and then use it to mask the brush.
Once masked, use the Brush Tool (B) to make the dripping parts visible again, as shown in the second image.
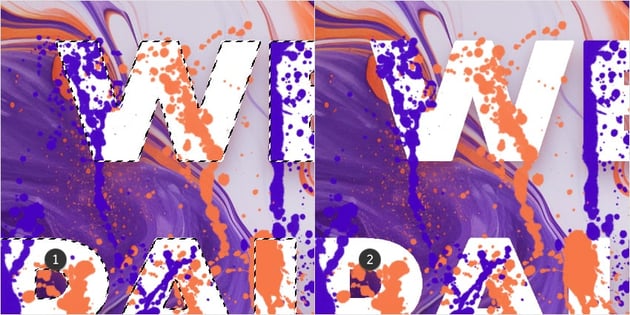

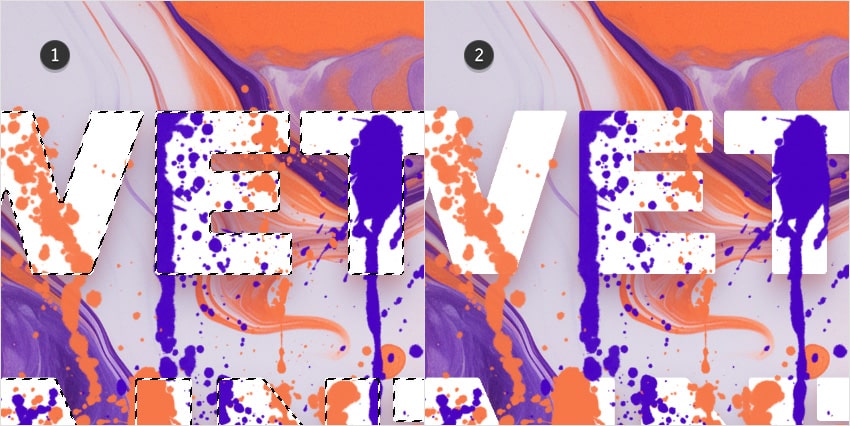
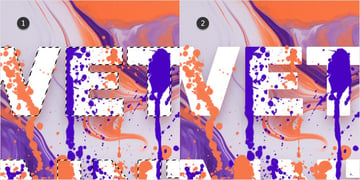
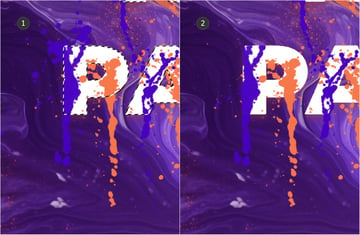
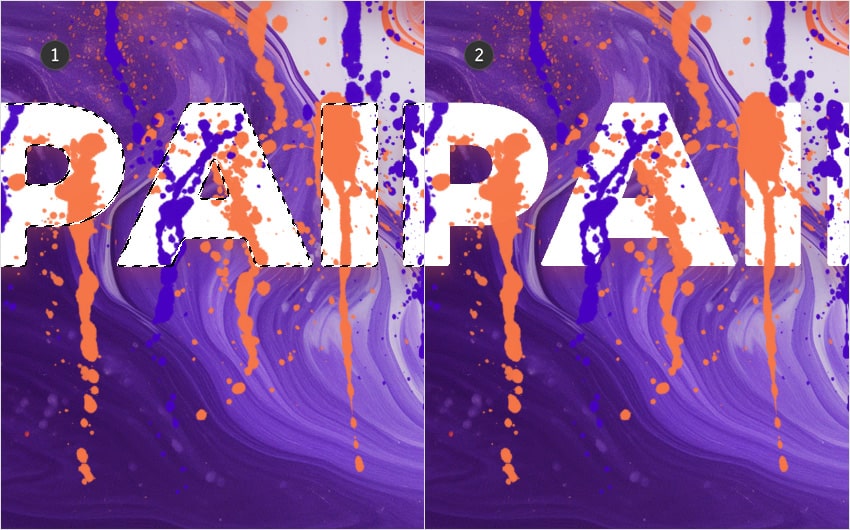
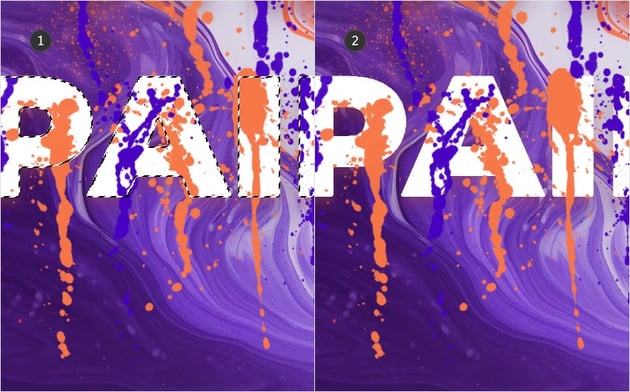
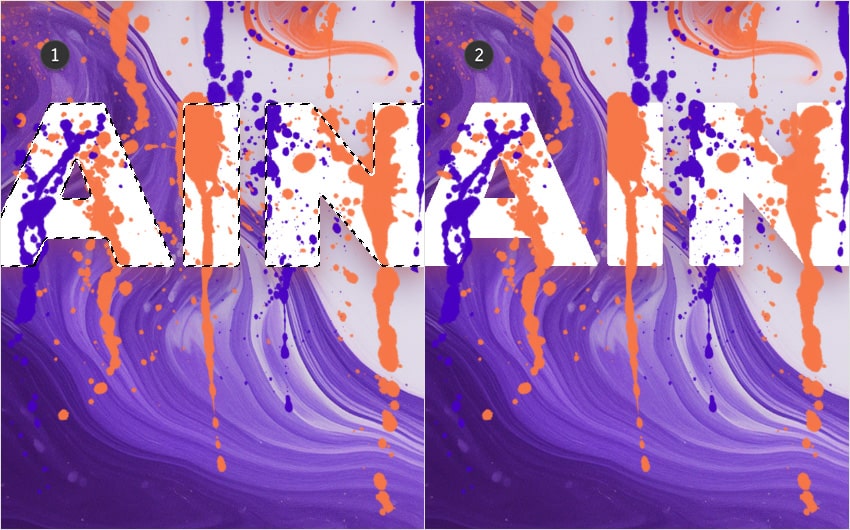
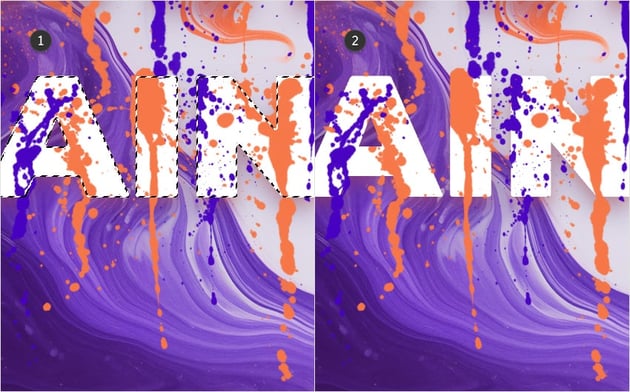
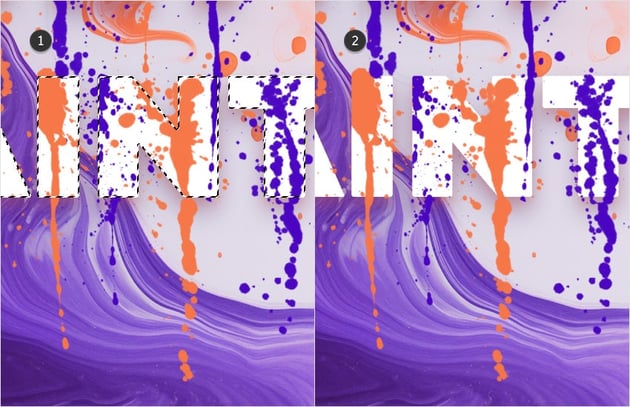
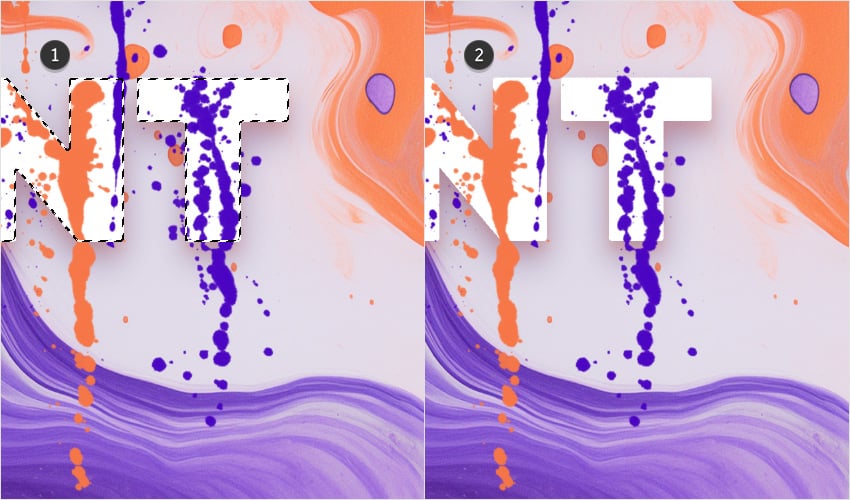
Step 3
Now comes the more repetitive part. Mask the rest of your brushes as we did with the first two, and use your creativity when deciding which part should remain visible.


6. How to save a dripping-paint pattern in Photoshop
Step 1
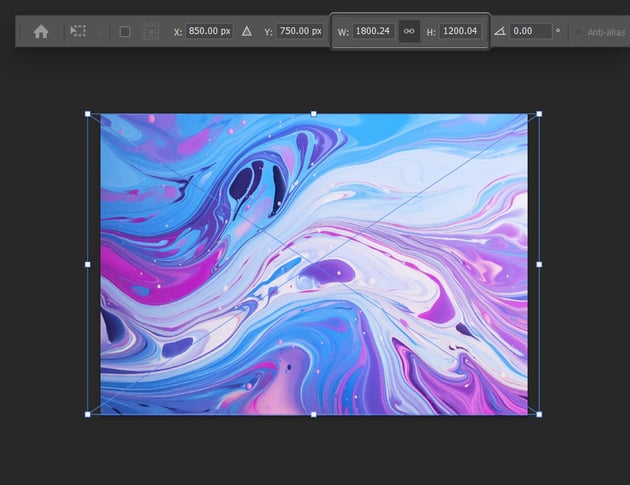
Before we continue with the final touches for this paint-dripping text, let’s save a pattern.
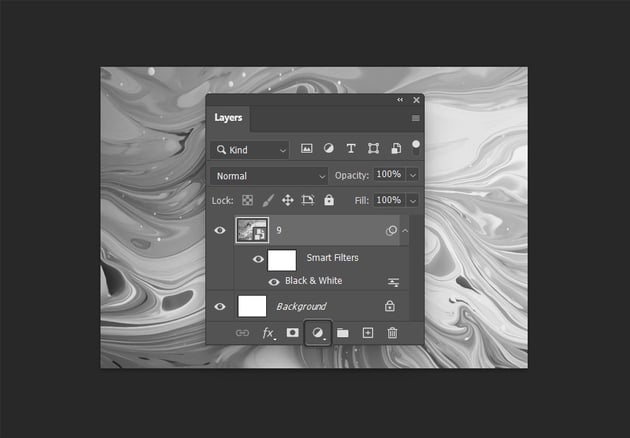
First, create a 1700 x 1200 px new document. You’ll need image #9 from Acrylic Paint Backgrounds. Drag it inside this new document, set the Height to 1200 px and don’t forget to center this image.

Step 2
Convert your image into a smart object, and then go to Layer > New Adjustment Layer > Black & White.


Step 3
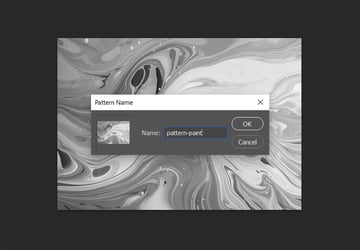
To save this black and white image as a pattern, go to Edit > Define Pattern. Give it a name and click OK. We’ll use this pattern shortly.


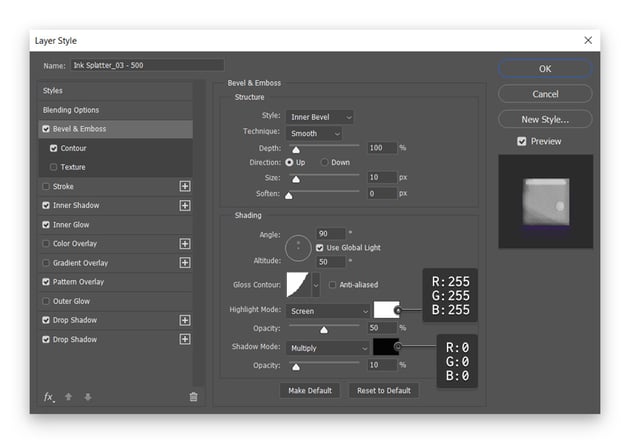
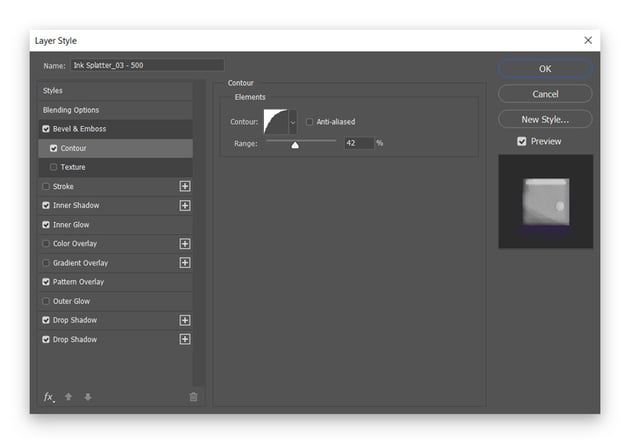
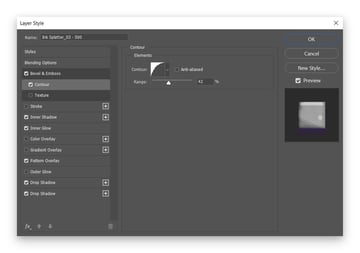
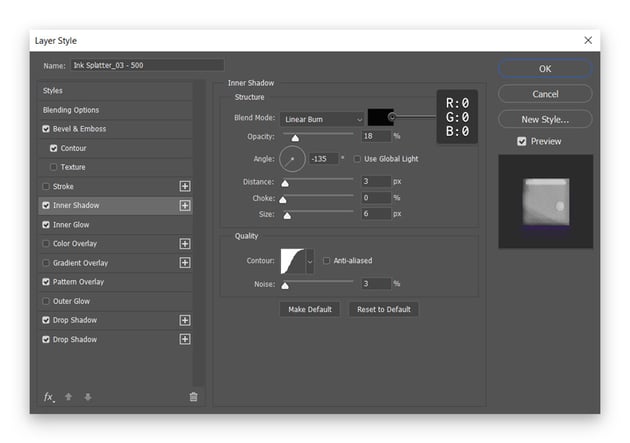
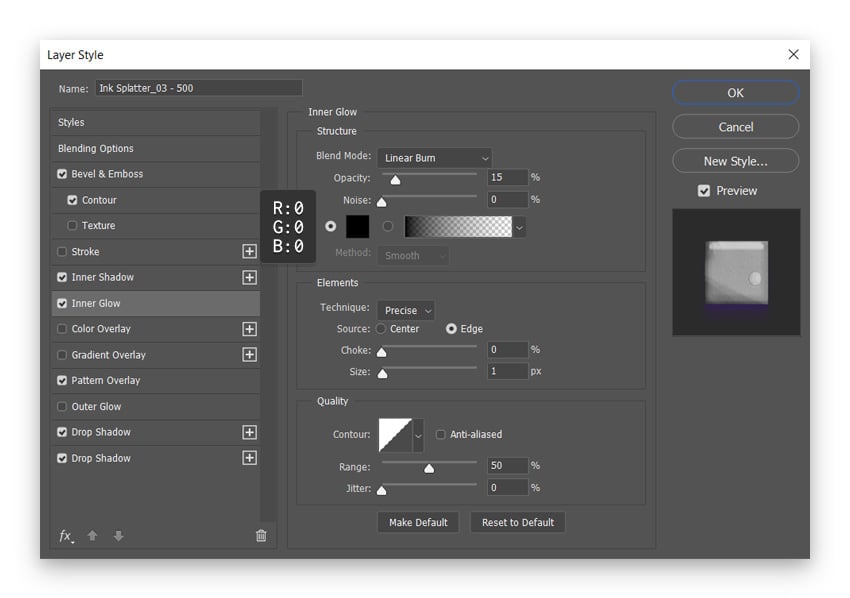
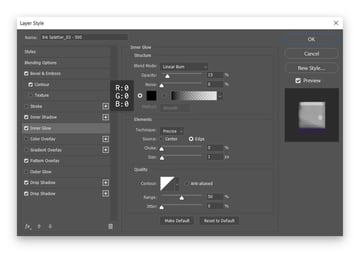
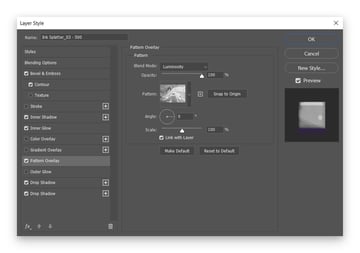
7. How to stylize the dripping paint
Step 1
Now it’s time to stylize these paint drip effects.
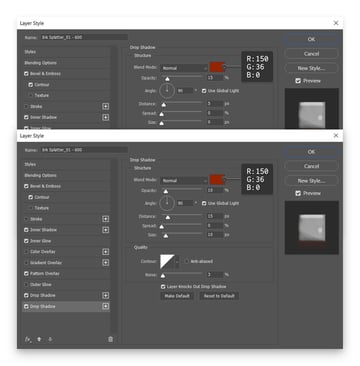
Open the Layer Style window for one of your purple brushes, and apply all the effects shown in the following images. Use your saved pattern when you get to the Pattern Overlay section.
Once you’re done, right-click your stylized dripping paint (in the Layers panel) and go to Copy Layer Style. Select the rest of your purple brushes, right-click one of these, and go to Paste Layer Style.


Step 2
Use the same Layer Style settings for your orange brushes, but change the colors used for the two Drop Shadow effects.


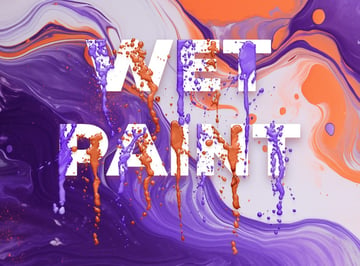

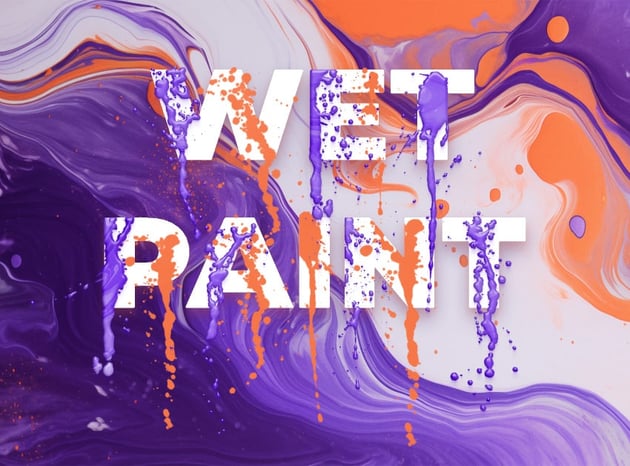
Congratulations! You’re done!
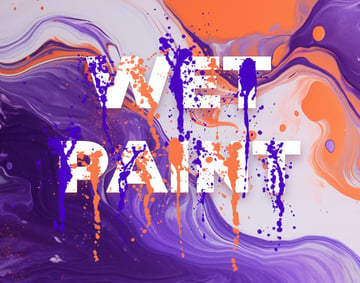
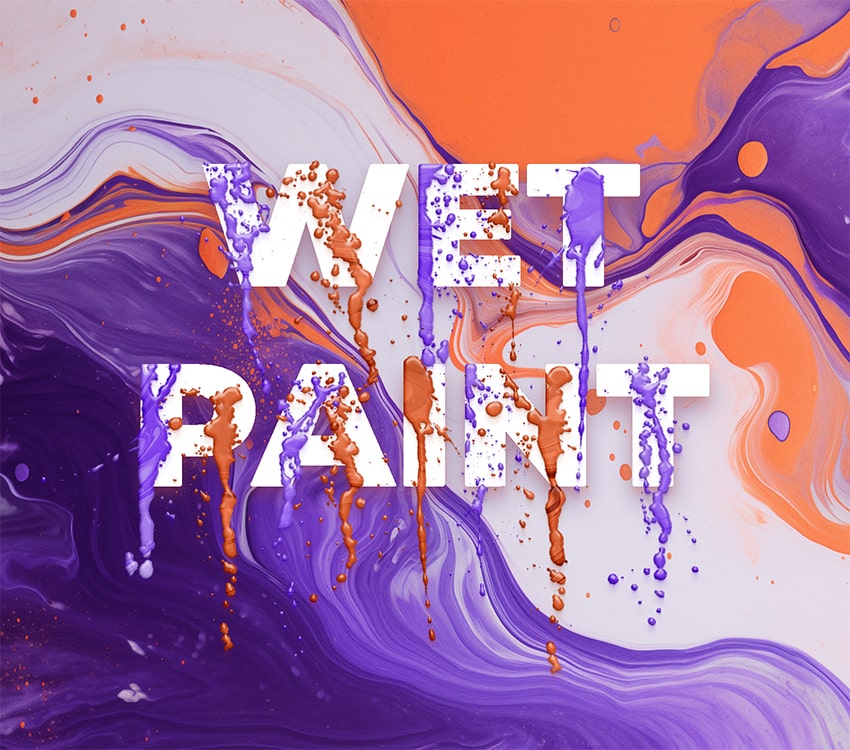
Here is how your painting drip effect should look. I hope you’ve enjoyed this tutorial and can apply these techniques in your future projects.
Feel free to adjust the final Photoshop text effect and make it your own. You can find some great sources of inspiration at Envato, with interesting solutions to improve any 3D text effect in Photoshop.


Popular dripping paint assets from Envato
Envato is an excellent resource for cool Photoshop text effects. Here’s a short list of some of the most popular painting drip effects that you can find.
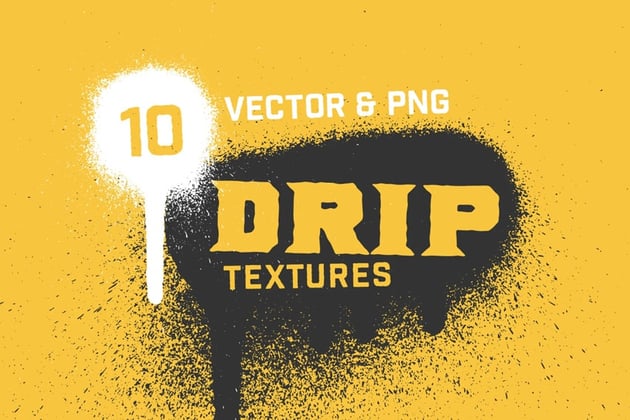
Spray paint drip textures (EPS, AI, PNG)
Here are some authentic spray paint drip textures! These vector paint drip textures are ready to be dropped into your design project with ease.


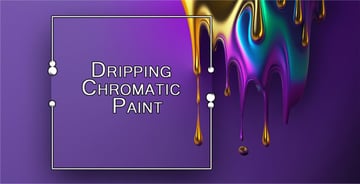
Dripping paint effect (JPG)
Looking to create a cool text effect in Photoshop? Well, this chromatic dripping paint effect might be the perfect fit.


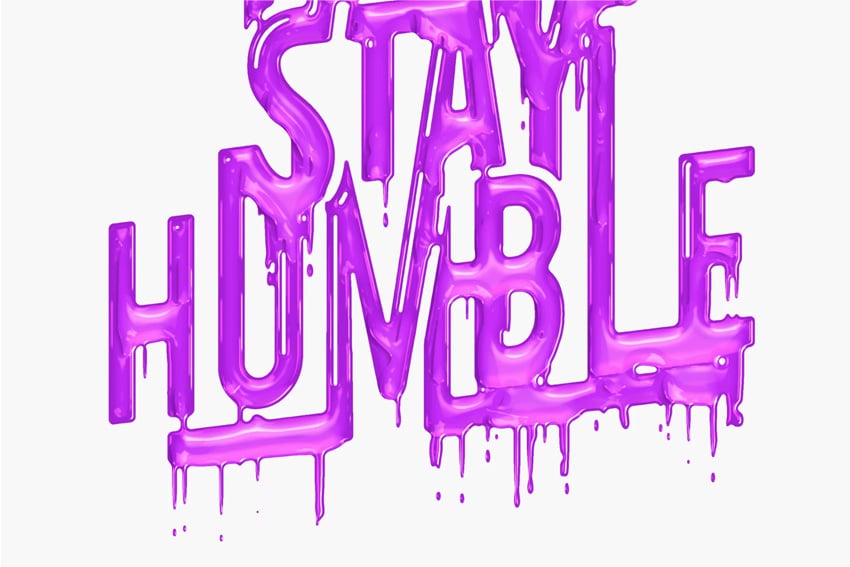
3D paint text effect (ATN)
Cut the hassle of learning how to add effects to text in Photoshop, and use this action to create your own 3D paint text effect.


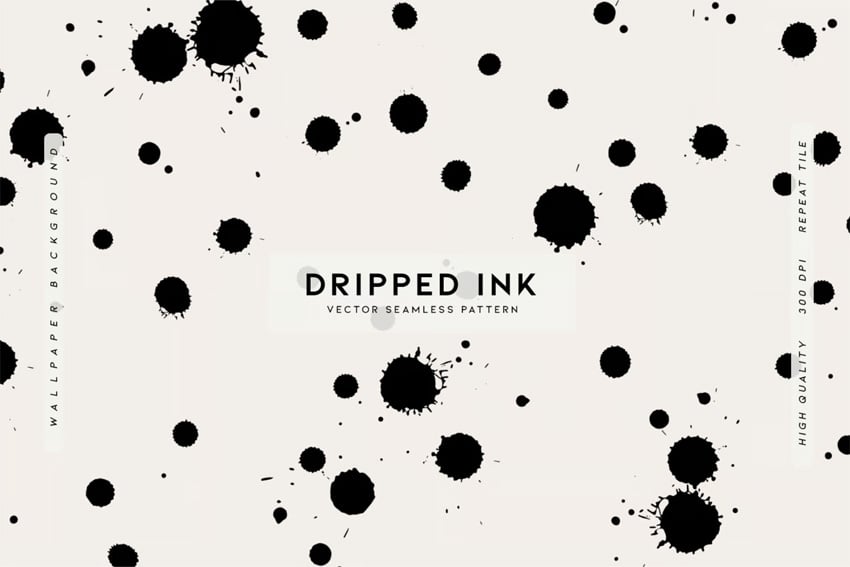
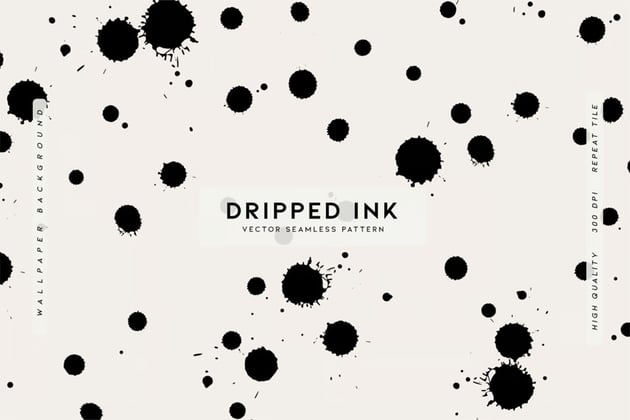
Vector paint drip pattern (AI, EPS, JPG, SVG)
Keep it smooth and simple with this vector paint drip pattern. These spray-paint drips could be the perfect solution if you’re looking to put together a simple design.
Cartoon Paint Dripping Effect (ATN, PDF)
Here’s another cool technique that you can use to make a design stand out using a dripping paint effect.


Want to Learn More?
We have loads of Photoshop text effects tutorials on Envato Tuts+, from beginner to intermediate level. Take a look!