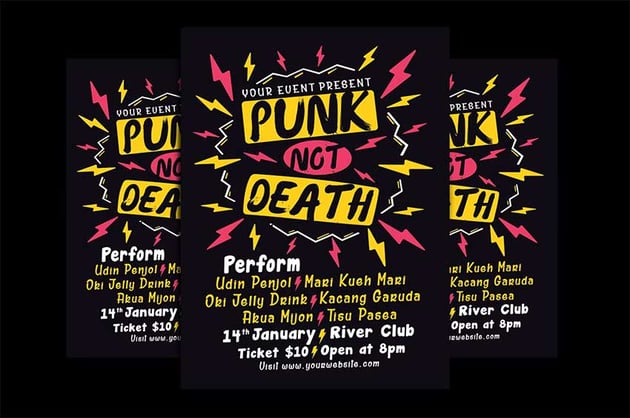
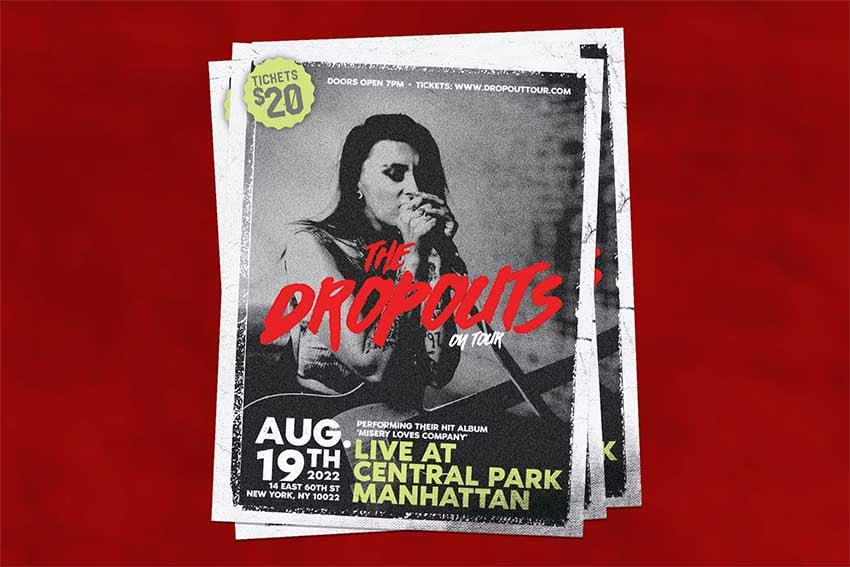
In this tutorial, you’ll learn how to create an authentic 80s punk flyer with a ragged, rough, and messy look.
If you’ve been wondering how punk influenced graphic design, the answer is that it broke many rules that came from classic and minimalist styles, and punk culture has had a big impact in other areas like art and fashion. During that era, it was normal to go the DIY route, and artists created their own poster designs and fashion pieces. In this tutorial, you’ll learn how to recreate the punk design style. This flyer is everything rebellious design stood up for after the minimalist era.
If you are looking for punk posters, Envato Elements should be your go-to resource. Elements offers thousands of premium mockups, graphic templates, logos, photos, fonts, and much more. And you can download as many of these digital assets as you like, as often as you like, for one low monthly fee.

Interested in a video tutorial instead? Take a look at this new video from the Envato Tuts+ YouTube channel and learn how to create 80s punk flyers:
What You’ll Learn in This Punk Flyer Tutorial
In this 80s punk flyer tutorial, you’ll learn to:
- properly set up an InDesign file
- edit images in Photoshop for InDesign
- create an organized InDesign file with Layers
- export a PDF file for web and print
What You’ll Need for This Punk Poster Tutorial
For this tutorial, you’ll need:
Download the assets, install the fonts, and you’re ready to begin this punk flyer tutorial.
1. How to Set Up an 80s Punk Flyer in Adobe InDesign
Step 1
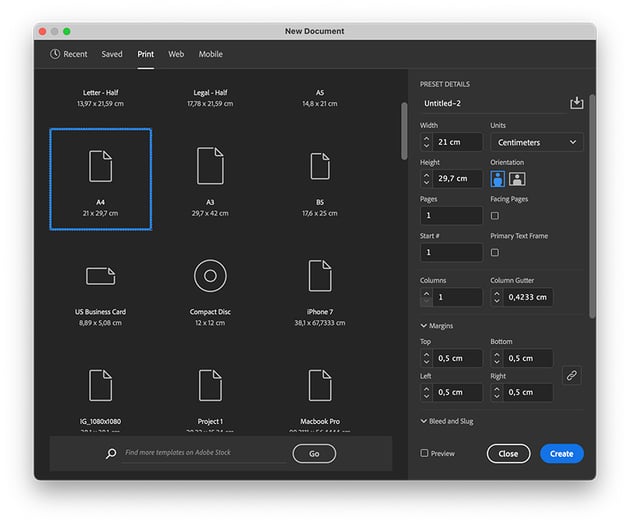
In InDesign, create a New Document. Select Print from the top menu and choose the A4 preset. Uncheck Facing Pages. Set the Margins on all sides to 0.5 cm. Click OK.

Step 2
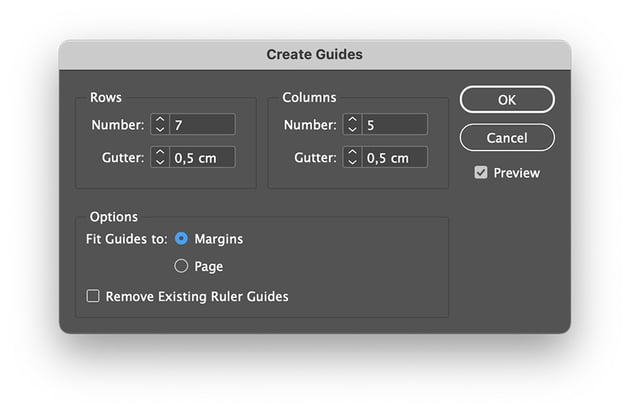
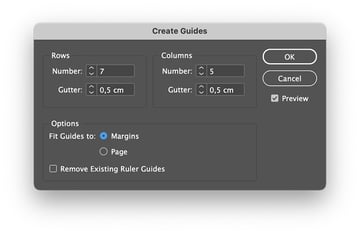
Go to Layout > Create Guides.
In the popup window, set the Rows to 7 and the Columns to 5. Set the Gutter to 0.5 cm. Under Options, set Fit Guides to: Margins.
Click OK.

Step 3
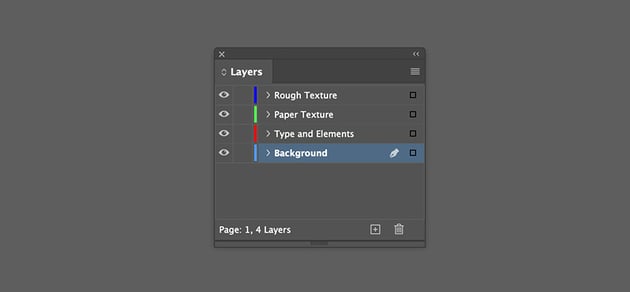
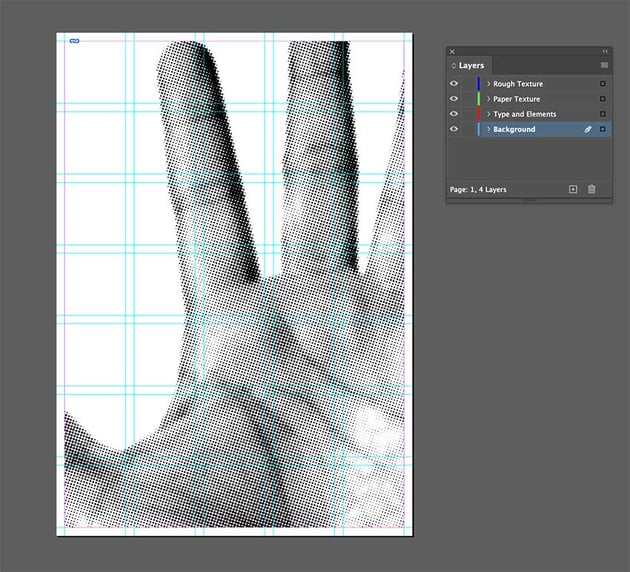
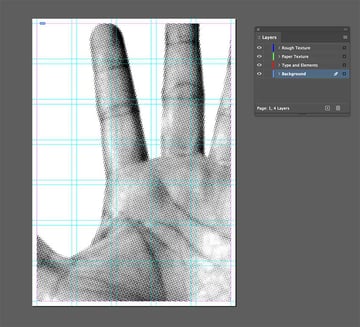
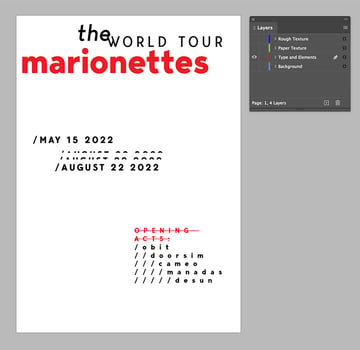
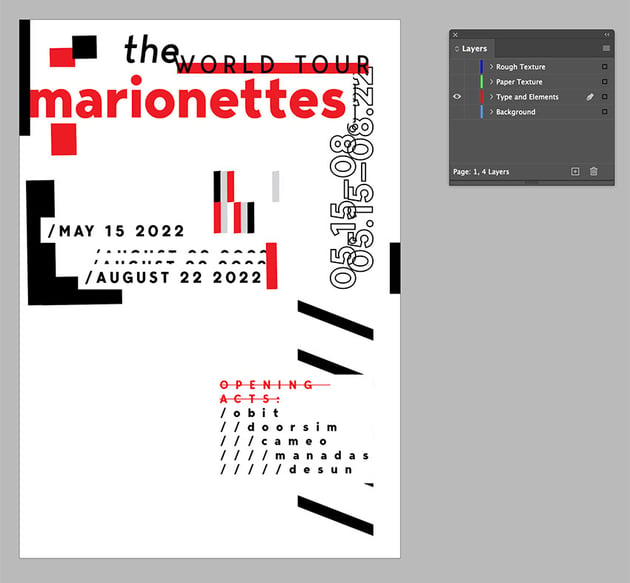
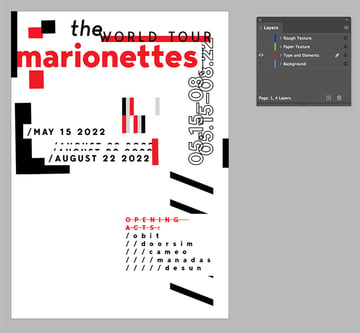
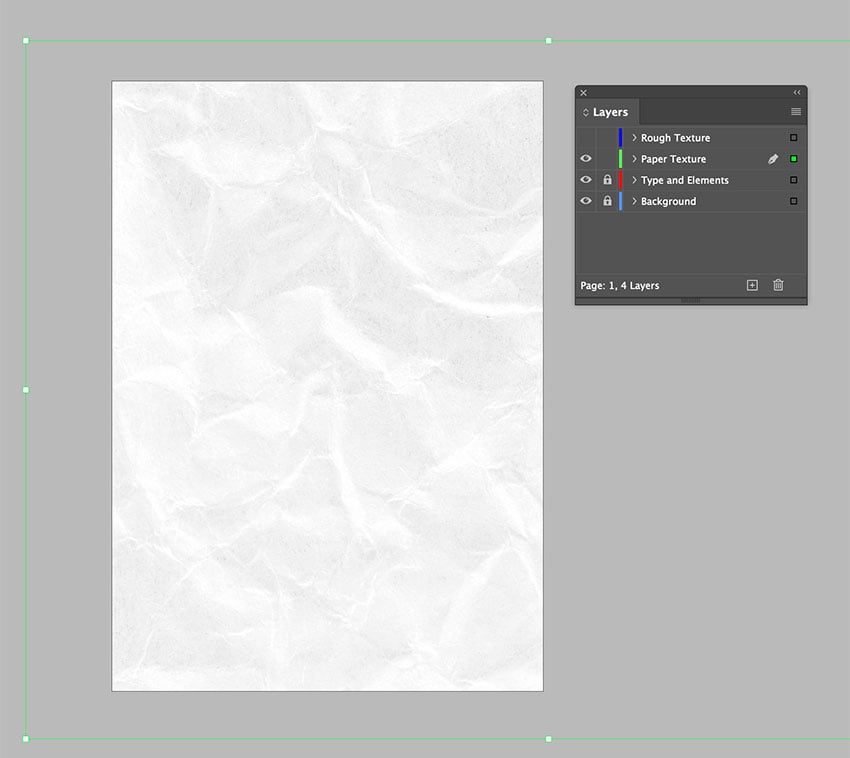
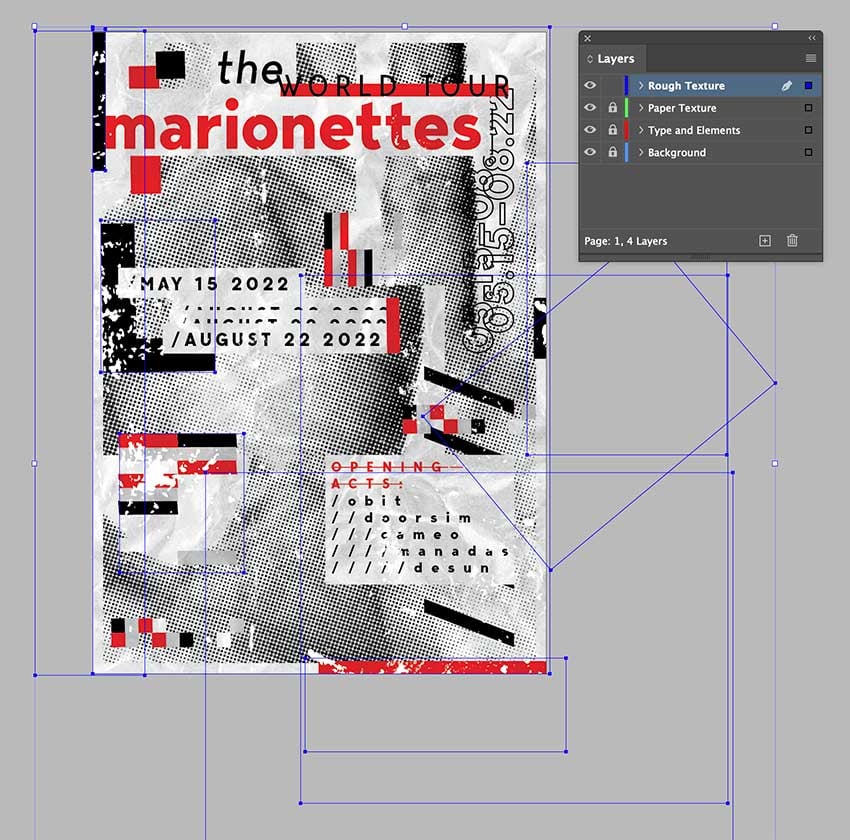
In the Layers panel, create new layers to keep the file organized. Name the layers Background, Type and Elements, Paper Texture, and Rough Texture.


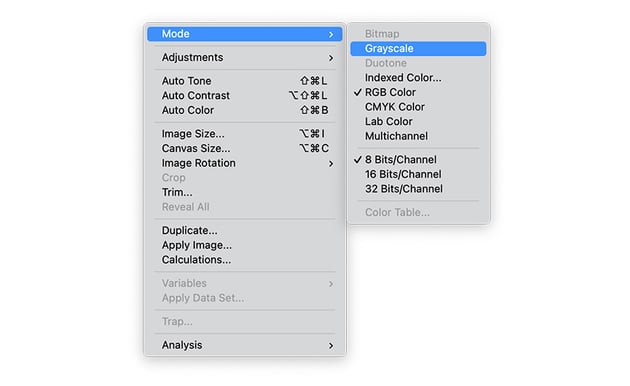
2. How to Edit a Punk Design Style Background in Photoshop
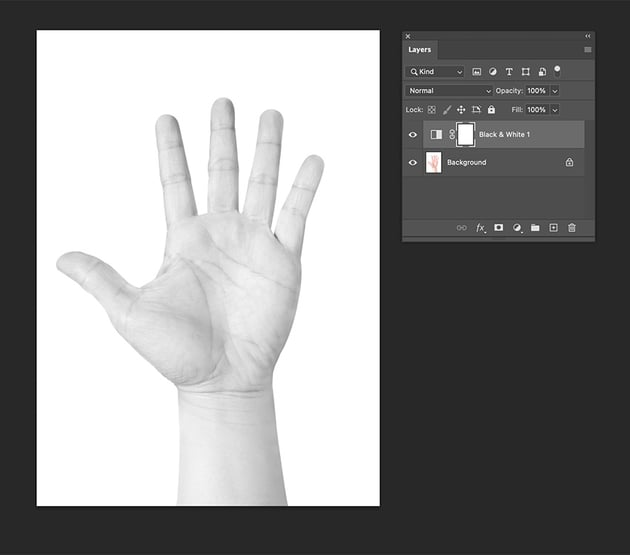
Step 1
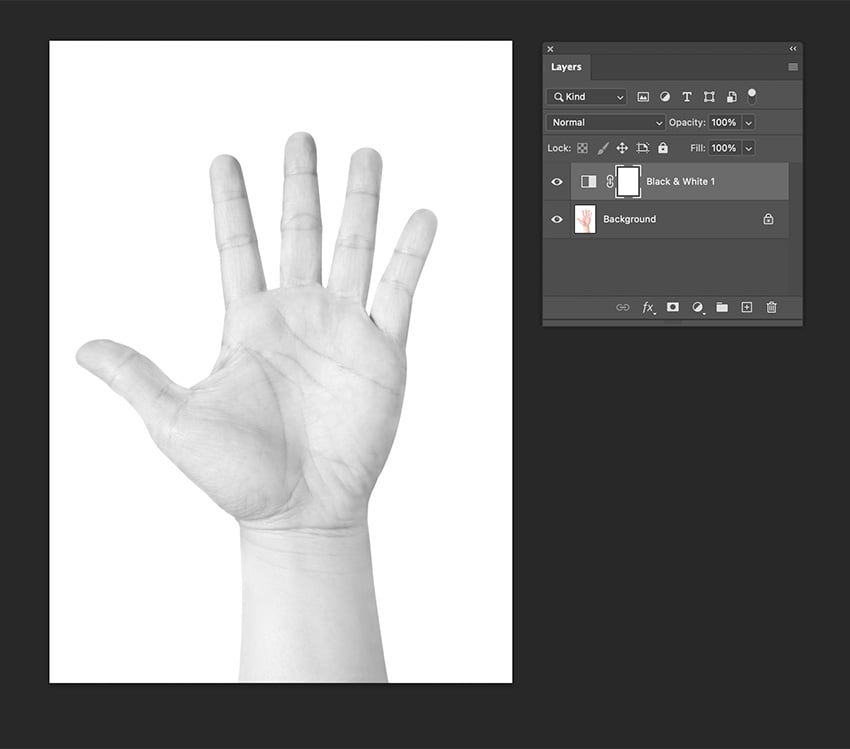
Open the hands image in Photoshop.
In the Layers panel, go to Create New Fill or Adjustment Layer > Black & White. We use these layers to preserve the integrity of the image.

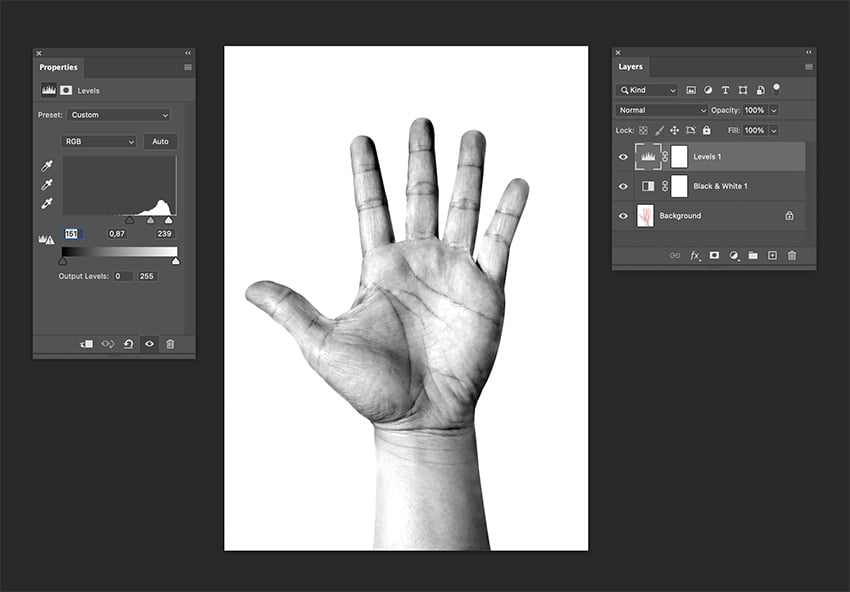
Step 2
In the Layers panel, go to Create New Fill or Adjustment Layer > Levels.
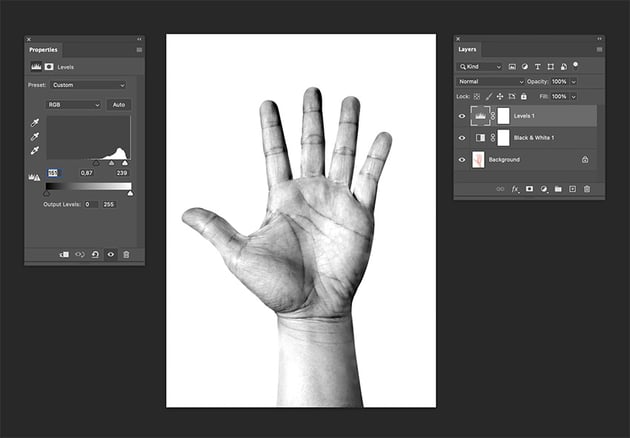
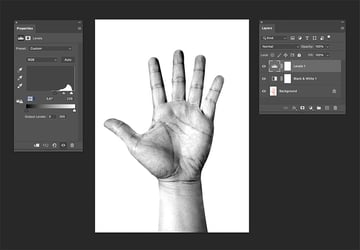
Customize the Levels on the Properties panel to achieve an image with hard shadows. Set the Black point to 151, Grey to 0.87, and White to 239.
Save the image as a JPEG.
Step 3
Open the JPEG image saved in the last step in Photoshop. Go to Image > Mode > Greyscale. This will help to create the type of color halftone we need.


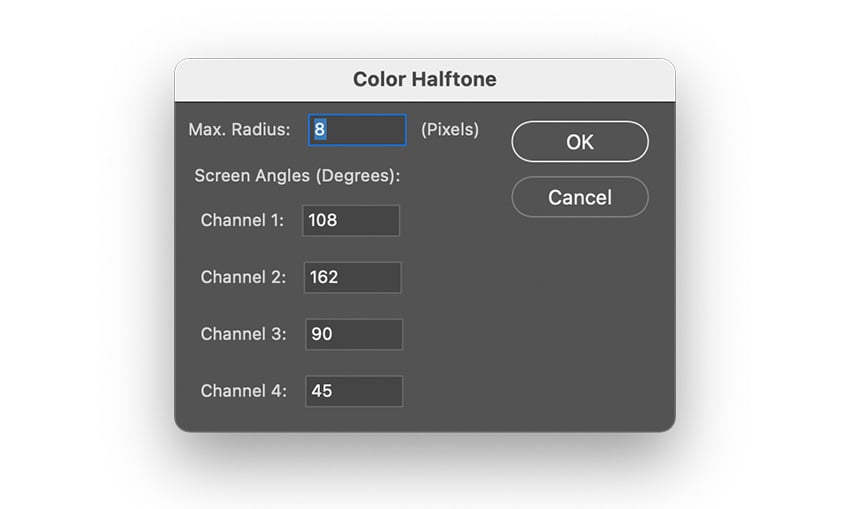
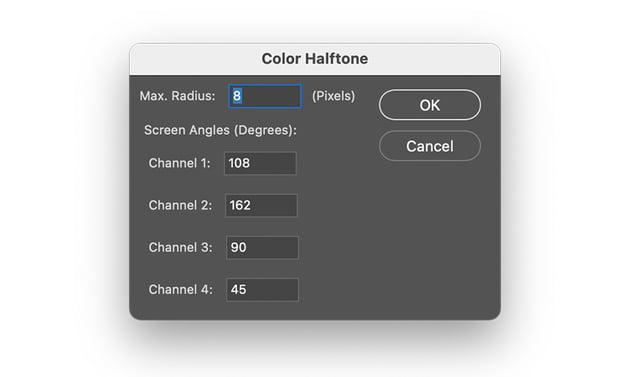
Step 4
Go to Filter > Pixelate > Color Halftone. Use the default settings, in this case:
- Max. Radius: 8 Pixels
- Channel 1: 108
- Channel 2: 162
- Channel 3: 90
- Channel 4: 45
Save the image as a JPEG.

3. How to Design an 80s Punk Flyer Background
Step 1
Head over to Adobe InDesign.
Select the Background layer from the Layers panel.
Using the Rectangle Frame Tool (F), create a rectangle that fits within the margins of the 80s punk flyer.
Drag the hand image edited in Photoshop into the frame. Use the Direct Selection Tool (A) to resize the image. Feel free to resize it as big as you want it and reposition it.

Step 2
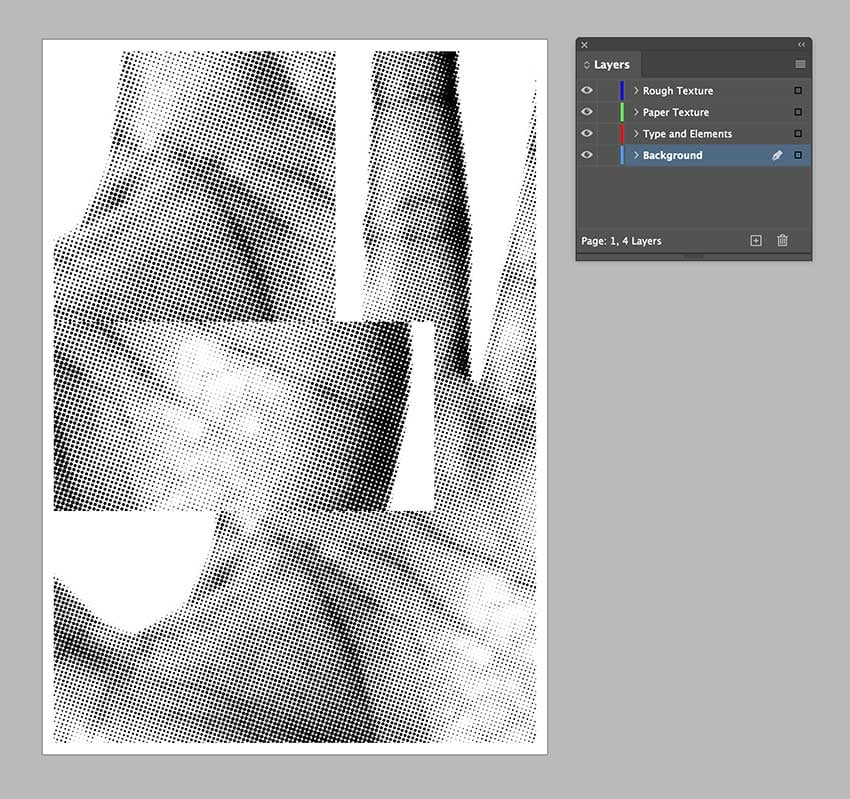
Duplicate the image frame by pressing Option and clicking to drag. Resize the image frame and reposition the image with the Direct Selection Tool (A).
In this case, I duplicated the image in the top left corner and added a second just below it. The effect is a superimposed collage of a zoomed-in image.


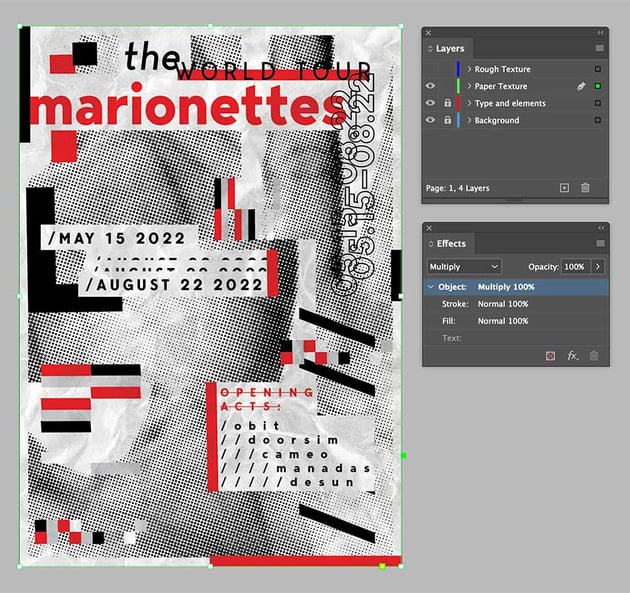
4. How to Add Punk Design Elements
Step 1
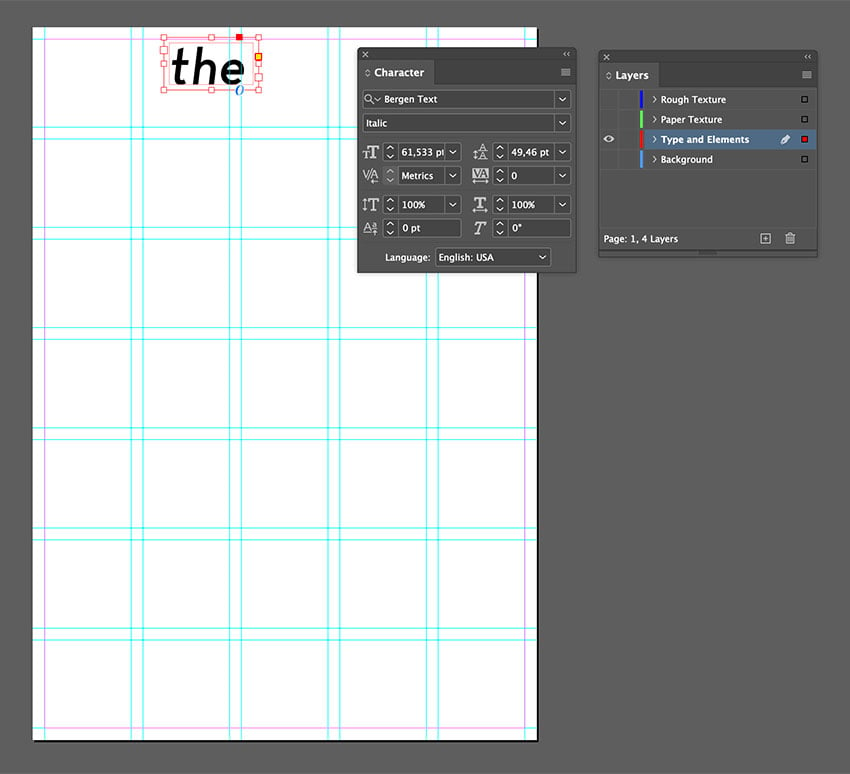
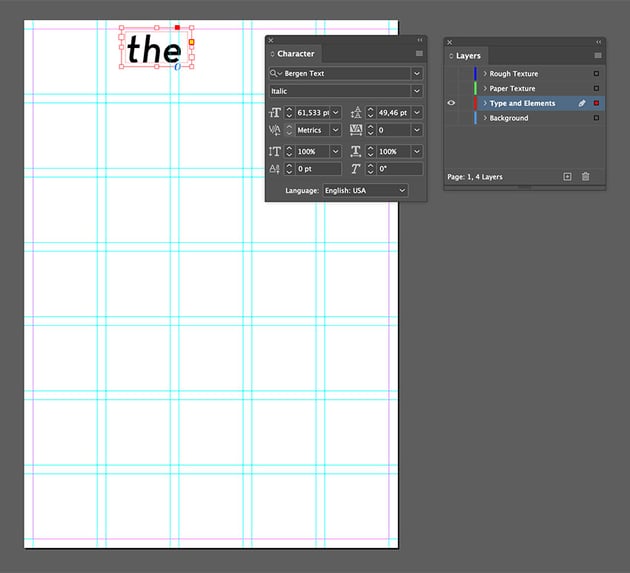
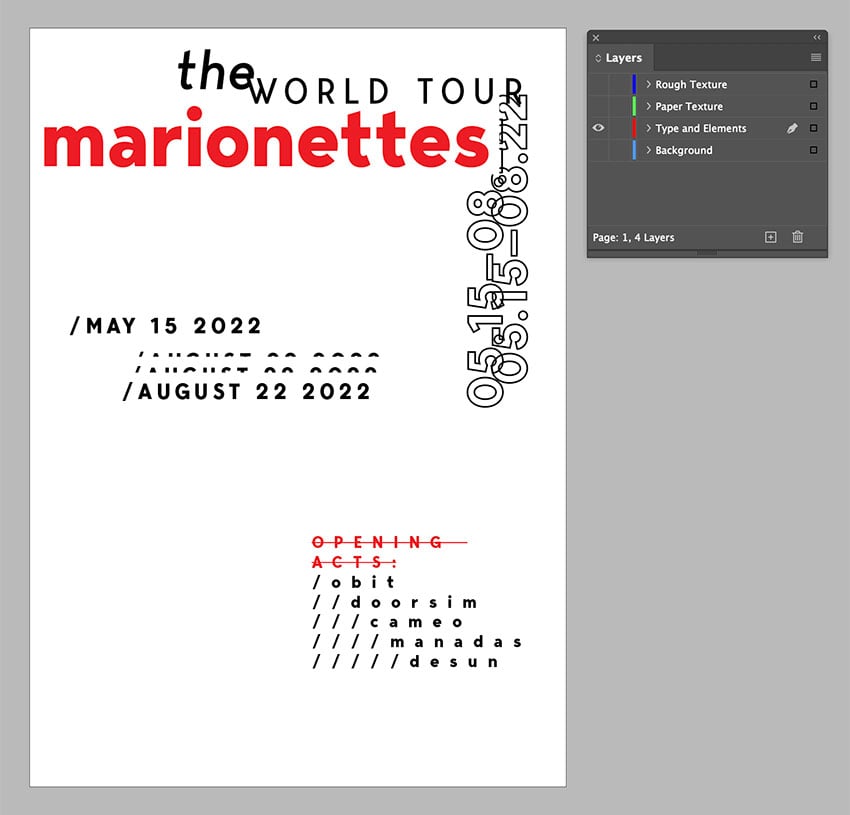
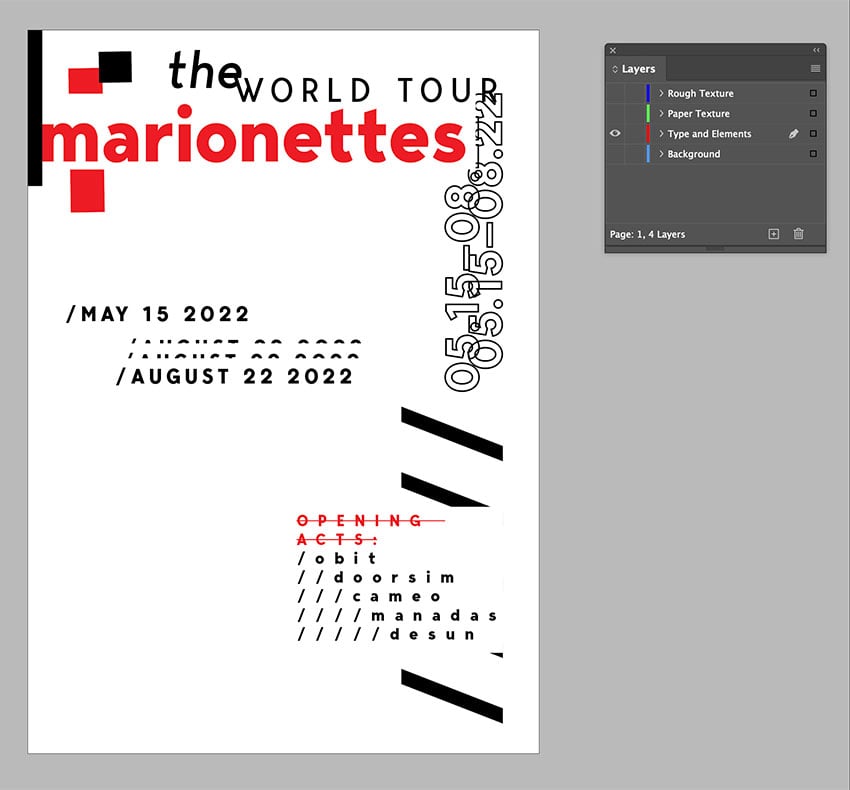
On the Layers panel, hide the Background layer so we don’t get confused with the background for now. Select the Type and Elements layer.
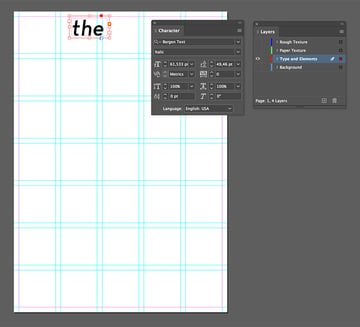
Using the Text Tool (T), create a text frame and add the word “the”. Use the following settings:
- Font: Bergen Text Italic
- Size: 61 pt
In the Control panel, set the text Fill Color to Black. Place the text frame on the second column and at the top of the punk flyer. Set the Background Color to White.
Step 2
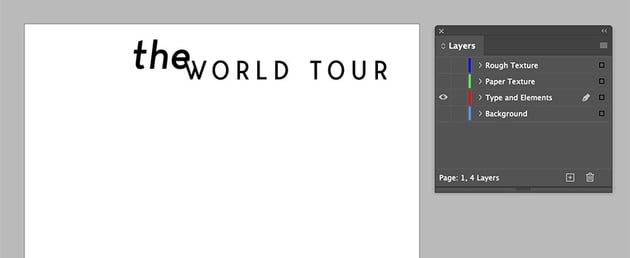
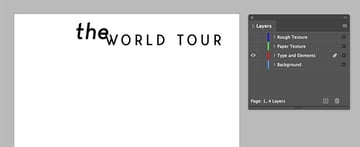
Punk flyers were full of mix-and-match uppercase and lowercase fonts. For this second text frame, we’ll use all caps.
Create a new text frame and add the words “WORLD TOUR”. Use the following settings:
- Font: Bergen Text Regular
- Size: 40 pt
- Tracking: 200
In the Control panel, set the text Fill Color to Black. Place this text frame just below the first row on the right side of the punk flyer.

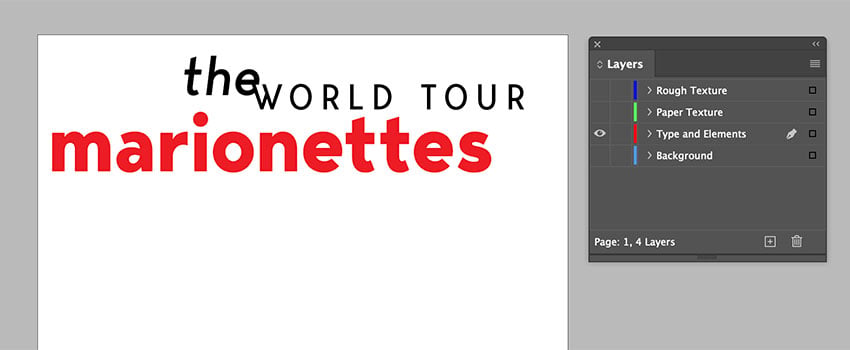
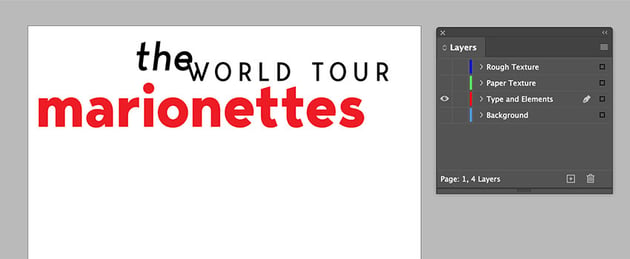
Step 3
Create a new text frame and add the word “Marionettes”. Use the following settings:
- Font: Bergen Text Bold
- Size: 85 pt
- Tracking: 200
In the Control panel, set the text Fill Color to #ed1c24 and the frame color to White. Place the text frame between the first and second rows.
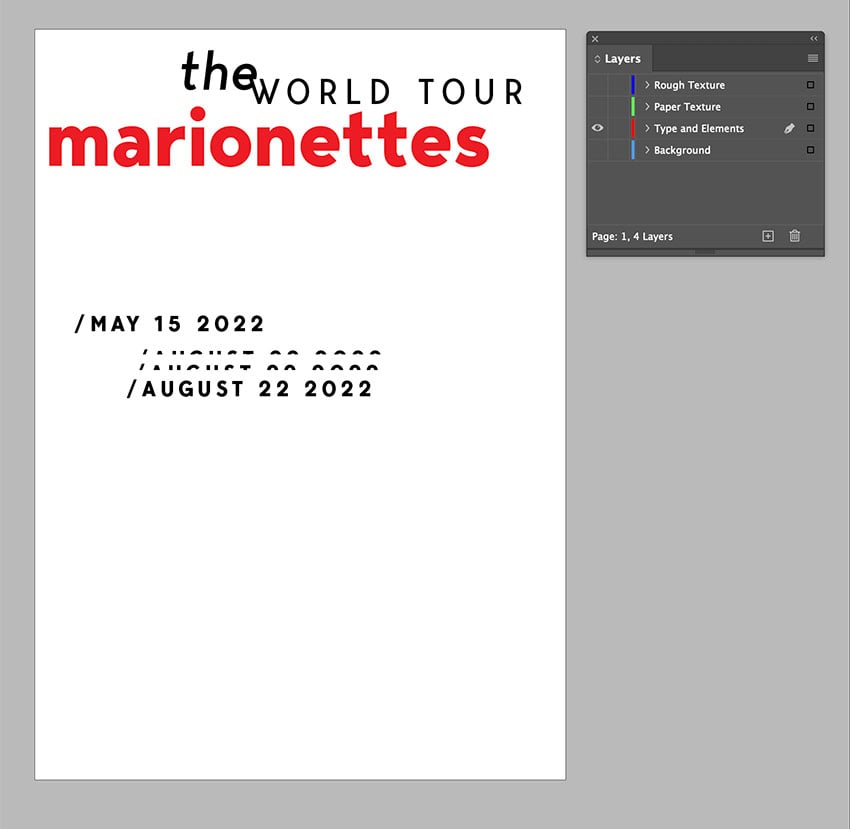
Step 4
Create a new text frame and add a starting date to the punk flyer. Use the following settings:
- Font: Bergen Text Bold
- Size: 24 pt
- Tracking: 200
In the Control panel, set the text Fill Color to Black. Set the text frame Color to White.
Create another text frame and add an ending date to the punk flyer with the same settings. In the Control panel, set the text Fill Color to Black. Set the text frame Color to White.
Duplicate this second frame a few times and superimpose the copies. Place these text frames between the third and fourth rows of the punk flyer.


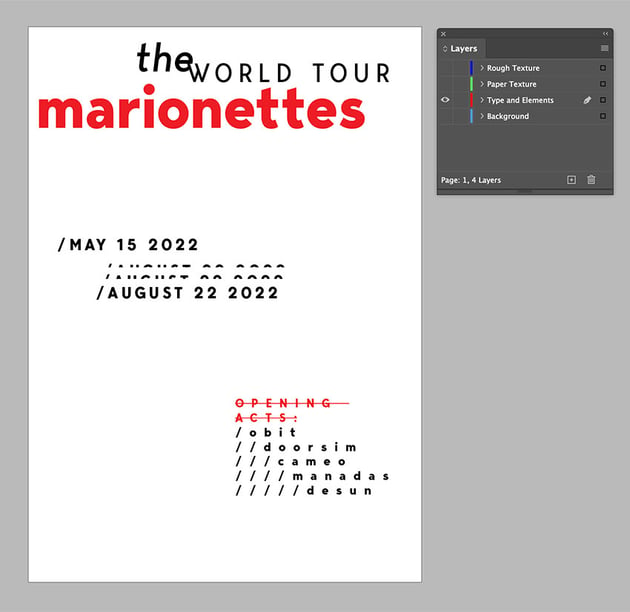
Step 5
Create a new text frame and add band names for the opening act to the punk flyer. Feel free to add different symbols to enhance the text. Use the following settings:
- Font: Bergen Text Bold
- Size: 18 pt
- Tracking: 620
In the Control panel, set the “Opening Acts:” text Fill Color to #ed1c24 and the band names to Black. Set the text frame Color to White.
Place the frame on the sixth row and third column of the punk flyer.

Step 6
Eighties punk flyer collages included many elements, sometimes even repeated ones. For this step, create a new text frame and add the dates again in a different format. Use the following settings:
- Font: Bergen Text Bold
- Size: 53 pt
In the Control panel, set the text Fill Color to White and the Stroke to Black.
Duplicate this text frame and place one slightly off the other one. Then select both frames, right-click, and select Arrange > Bring Back.
Step 7
Create a new text frame and add multiple backlash symbols (/). Use the following settings:
- Font: Bergen Text Bold
- Size: 135 pt
Rotate the frame with the Rotate Tool (R), and press Shift while rotating to achieve an even rotation. Rotate the frame 90°.
Step 8
Select all the elements, right-click, and select Lock.
For the graphic shapes, we’ll be using red, black, and grey colors. Feel free to explore and use your own combination. To create dimension and emphasis, use different rectangular shapes.
Let’s start with the top left side of the punk flyer. Using the Rectangle Tool (M), create rectangles that emphasize the name of the band. In this case, I chose to add a black vertical bar and a couple of other elements in black and red.
To emphasize “WORLD TOUR”, I added a red bar behind the text.


Step 9
For the third and fourth rows, add a black element to the left to emphasize the date. Complete this part by adding a red rectangle on the other side of the date.
To add a punk flair, create a black, white, red, and grey rectangle grid. Place it over the date. Finish this section by adding a black block on the very right margin. This will add balance.

Step 10
Duplicate the same grid you created in the step above by pressing Option and dragging. Feel free to resize and stretch the grid. I placed a bigger grid on the left side to fill up the space. The second grid is placed over the “OPENING ACTS” text to add emphasis.

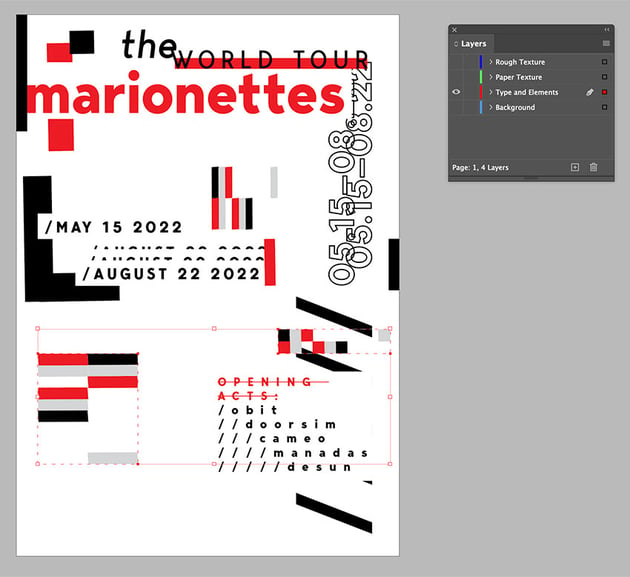

Step 11
To complete the poster, duplicate another grid to place in the bottom left corner. Add a red bar to the bottom right corner to add balance and stability.


5. How to Add Details to Your 80s Punk Flyer
Step 1
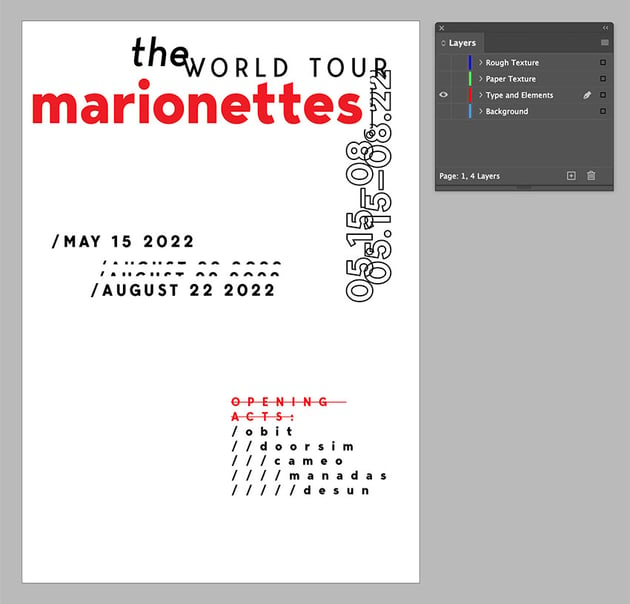
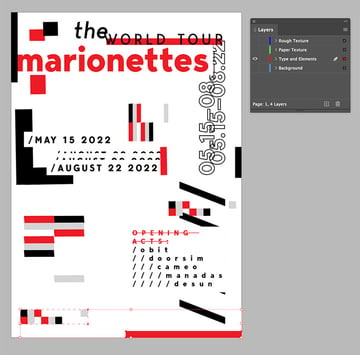
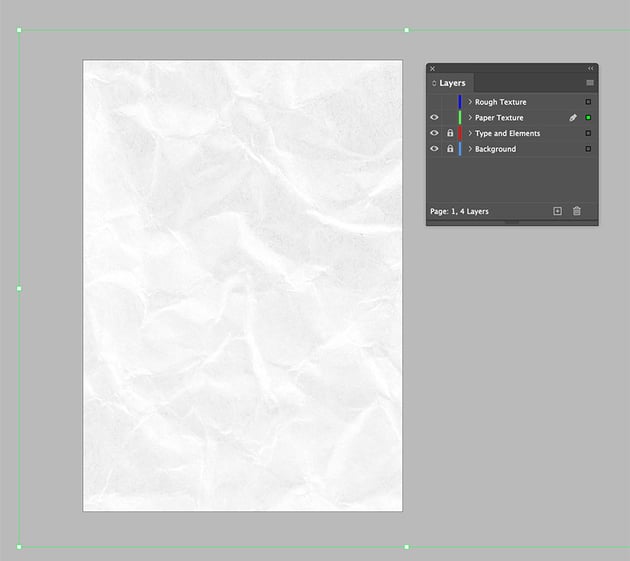
The real 80s punk flyers collages were rough, so for this one we’ll add a rough, crumpled paper texture. In the Layers panel, select the Paper Texture layer. Lock the first two layers.
Locate the paper textures on your computer. Select the White Invert folder and the BG _10.JPG file. Drag the file into InDesign.
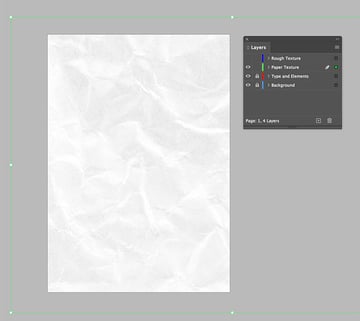
Step 2
In the Control panel, set the Size to 65%.
Open the Effects panel and set the Blending Mode to Multiply.
Duplicate the same image by pressing Command-C and Command-V.

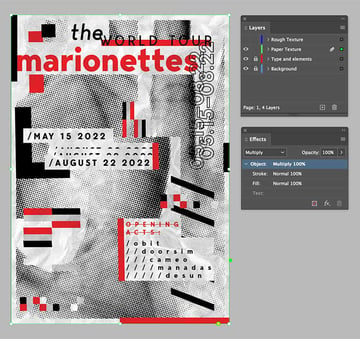
Step 3
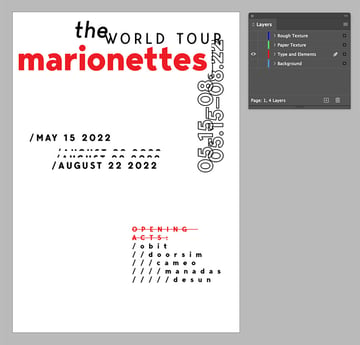
In the Layers panel, lock the Paper Texture layer and select the Rough Texture layer.
Locate the Edgeless Scuff Textures folder on your computer. I used Scuff-A4.png, Scuff-B3.png, and Scuff-C1.png. Bring those three into InDesign.
Feel free to resize, multiply, and place the images anywhere you want—ideally places where it makes sense, for instance, over bigger blocks of color to achieve the rough effect.


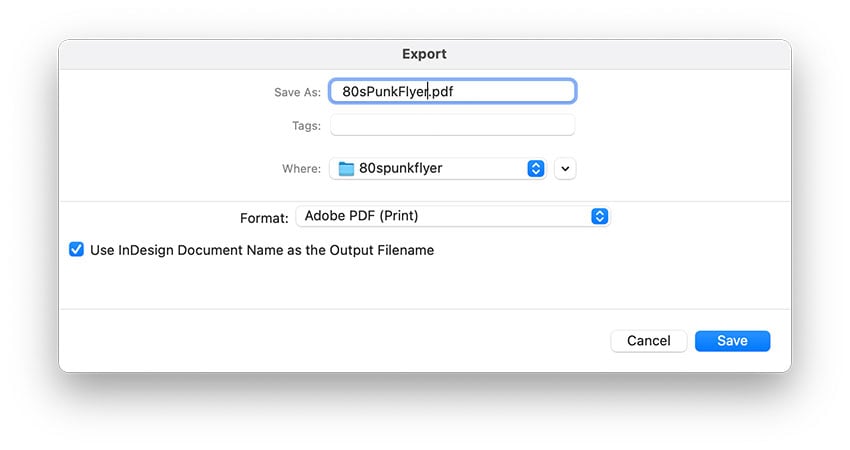
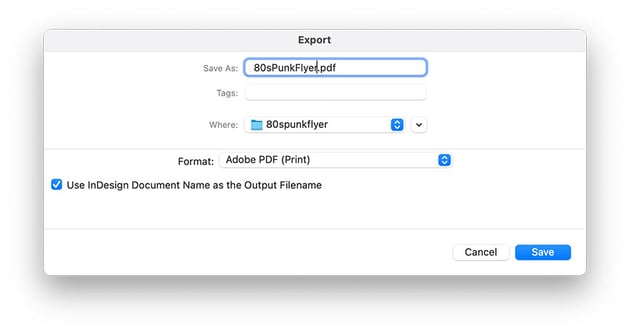
6. How to Export the 80s Punk Flyer
Step 1
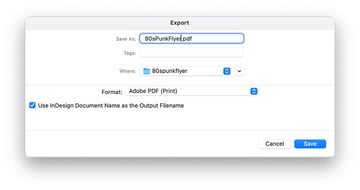
To export a file for printing, go to File > Export.
Select the desired location, rename the file, and set the Format to Adobe PDF (Print). Click Save.
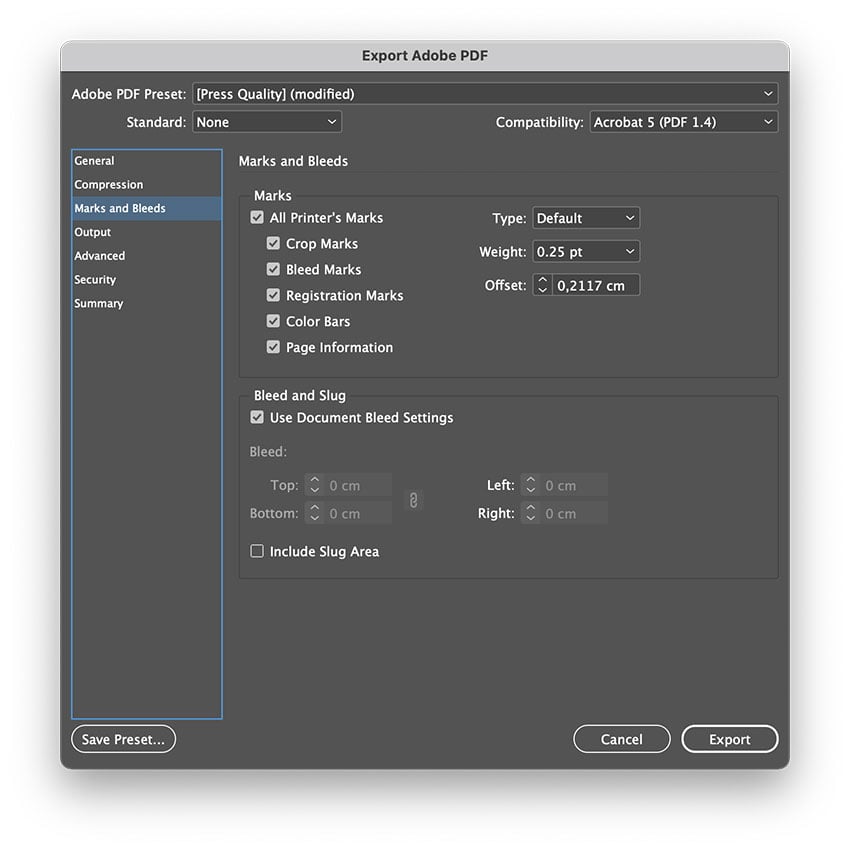
Step 2
Set the Adobe PDF Preset to Press Quality.
Select the Marks and Bleeds option from the left side menu. Check All Printer’s Mark and Use Document Bleed Settings.
Click Export.

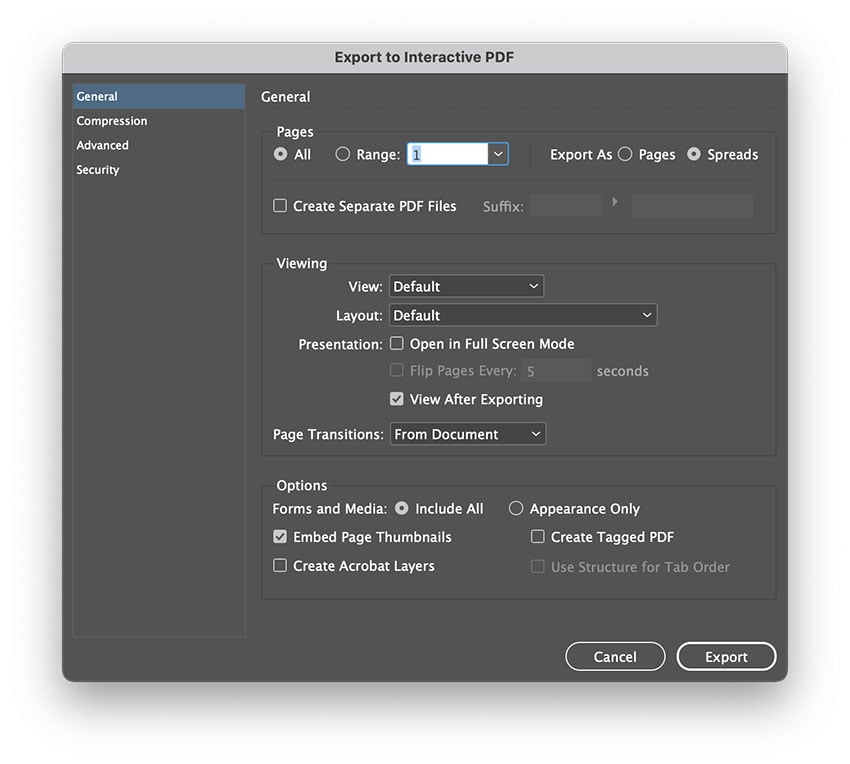
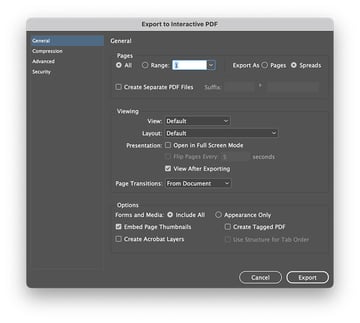
Step 3
To export your file for the web, go to File > Export. Select the desired location, rename the file, and set the Format to Adobe PDF (Interactive). Click Save.
In the Export for Interactive PDF window, click Export.

5 Top Punk Show Flyers at Envato Elements
Indie Rock Fest Flyer (PSD)

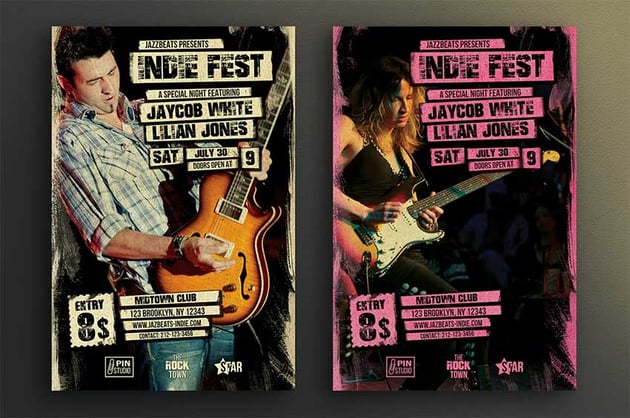

This indie rock flyer includes the essence of 80s punk posters, with the rough edges, scuffs, and slightly rotated content. The images hold energy, just like the punk design style photography. This flyer is easy to edit and print-ready.
Rock Music Flyer Template (PSD)

Punk graphic design stood out for lacking grids and placing elements spontaneously. This template has the same vibe as old punk flyers. The subdued and limited color palette makes it look simple, but the elements are more interesting in shape.
Pop Punk Flyer (AI, EPS, PNG)
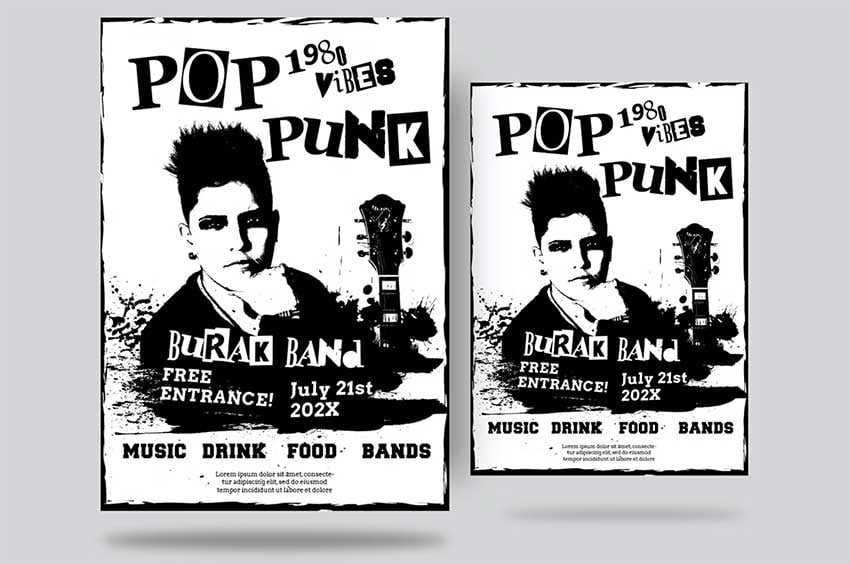

This fully editable PDF includes the very famous photocopy punk design style. Photocopying was popular during this era because it was affordable and easy. Eighties punk posters then developed a very inky look that added contrast with the background.
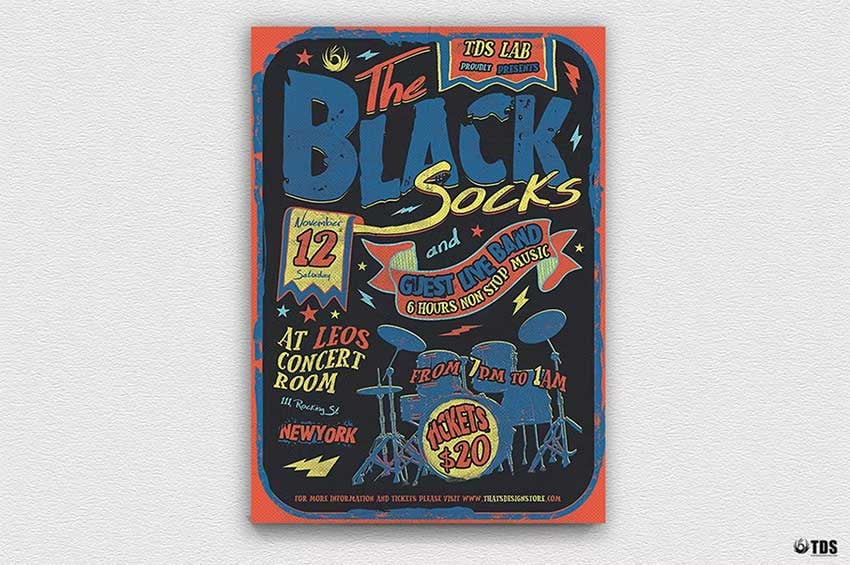
Punk Rock Flyer Template (PSD)

Punk show flyers are famous for looking rough and worn out. This 80s punk flyer template is the perfect balance of rough and order. The punk design style is shown with the scuff marks, the halftone image, and the rough typography, while the order is created with the organized and super legible font.
Emo Punk Band Flyer (PSD)

A true punk graphic design poster like this is perfect for a rock concert. Punk show flyers sometimes feature fonts that aren’t from the era, but this poster is great. The font is energetic and creates a base for rebellious design.
That’s It!
In this tutorial, you learned how punk influenced graphic design and how to design an 80s punk flyer. This iconic subculture revolutionized different design disciplines that were in need of a shake-up. Old punk flyers were famous for their DIY quality, and we have applied that to this rebellious design. Punk graphic design is still around and evolving, and while it isn’t as popular as it once was, punk posters still live on.
If you are looking for 80s punk flyers, Envato Elements should be your go-to resource. Elements offers thousands of premium mockups, graphic templates, logos, photos, fonts, and much more. And you can download as many of these digital assets as you like, as often as you like, for one low monthly fee.
If you liked this tutorial, you might like: