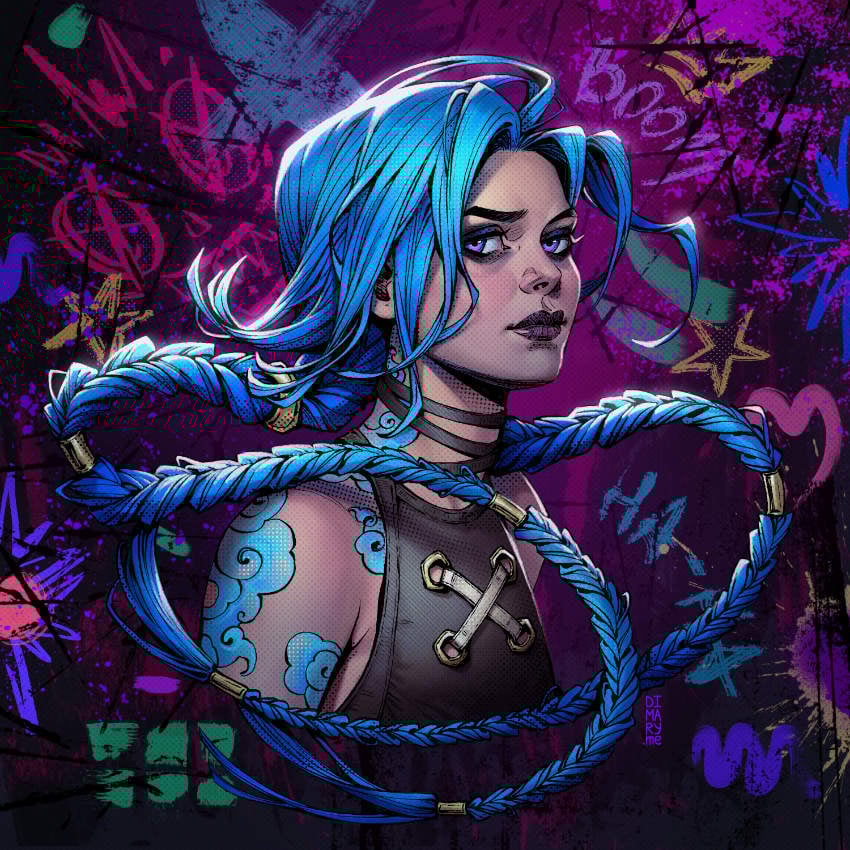
In this tutorial, we’ll learn how to draw a portrait in Procreate from scratch. We’ll draw Jinx from Arcane series, and we’ll take some inspiration from comics and Art Nouveau styles.
We’ll explore different drawing techniques, and we’ll learn to use textures to make your fan art portrait expressive and vibrant. Creating a fan art portrait in Procreate is a very fun process, especially using some cool brushes. We’ll use a few Procreate brush sets from Envato with great ink brushes, stamps, and halftones.
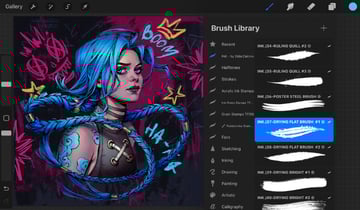
Before starting our portrait, we need to download and install these brush sets:
1. How to make a sketch
Step 1
The first step in learning how to draw a portrait in Procreate is making a sketch. Start by creating a New Canvas for our work. Tap to Create Custom Canvas and create a 3000 x 3000 px canvas size, RGB, 300 DPI resolution.


Step 2
It’s best to start the process by gathering reference images to take some inspiration. Since we’re drawing a fan art portrait, I relied on screenshots from the series, so as not to miss all the details characterising the character. In our case, it’s Jinx from Arcane.
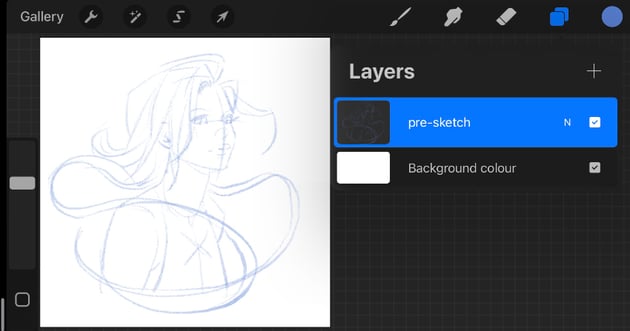
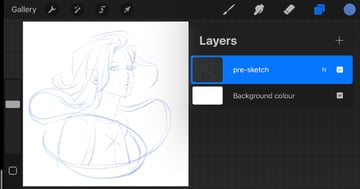
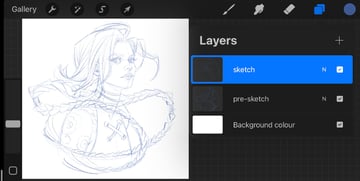
Let’s start with pre-sketching. It’s a great way to experiment with different ideas and techniques. Also it helps us to find harmonious proportions for each element and create a balanced composition.
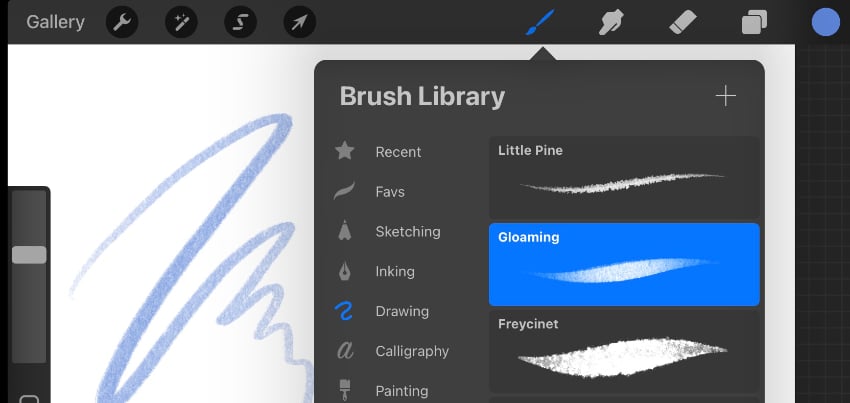
Open the Layers panel, tap “Layer 2”, and rename it “pre-sketch“. Choose any color you like from the Color menu in the top-right corner, and any brush from the Brush Library. I like to use blue or red and large textured brushes for this stage. So I choose a default Procreate brush, the Gloaming brush from the Drawing set, for this pre-sketch.

Start by sketching a general shape of the silhouette, keeping the image loose and simple. Don’t focus on any small details at this stage.

Step 3
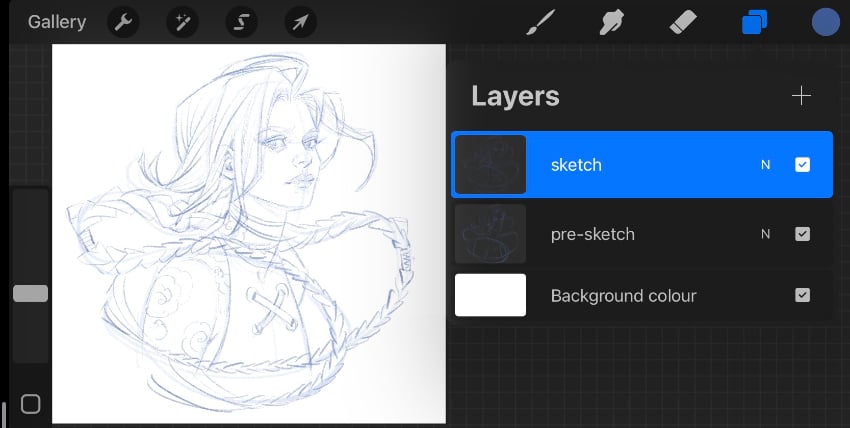
Create a New Layer for the detailed sketch on top of the “pre-sketch“ layer.
Let’s refine the sketch using a smaller brush. You can make your brush size smaller by moving down the top slider on the left side of the screen, or just choose another brush you prefer to use for detailing. Start by drawing Jinx Arcane’s facial features in more detail.
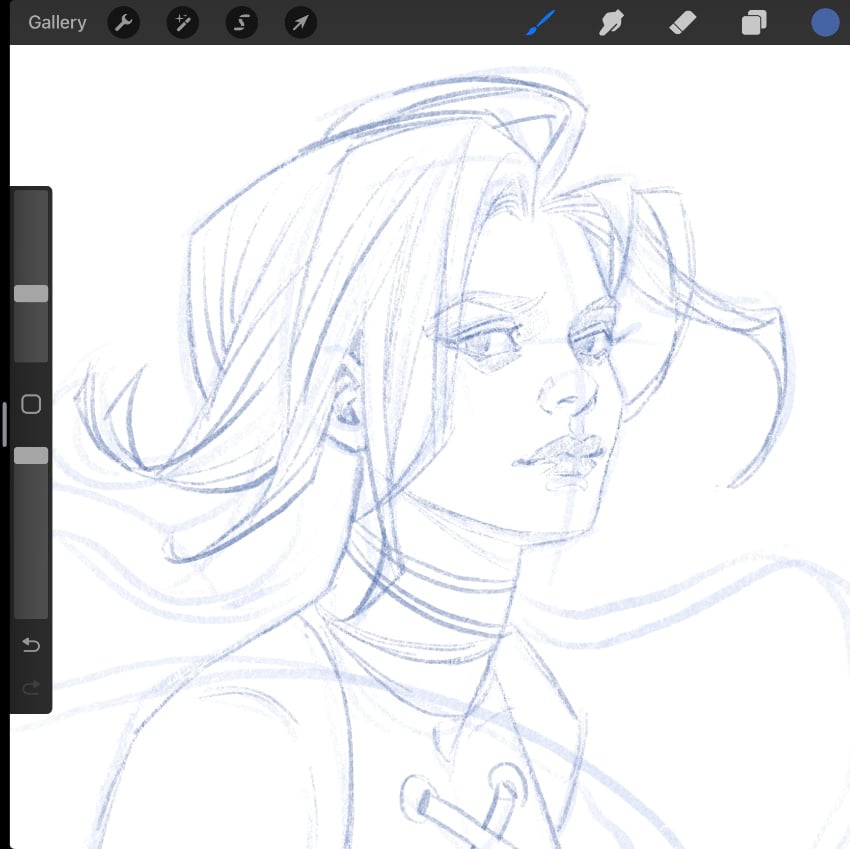

While refining our sketch, we still work loosely. This version need to be a bit more detailed than our pre-sketch, but clear enough to help us to work on the next steps quickly and easily.

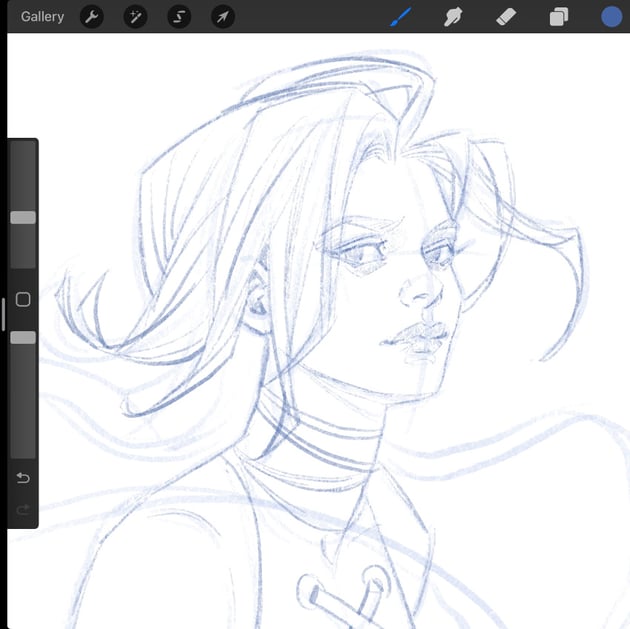
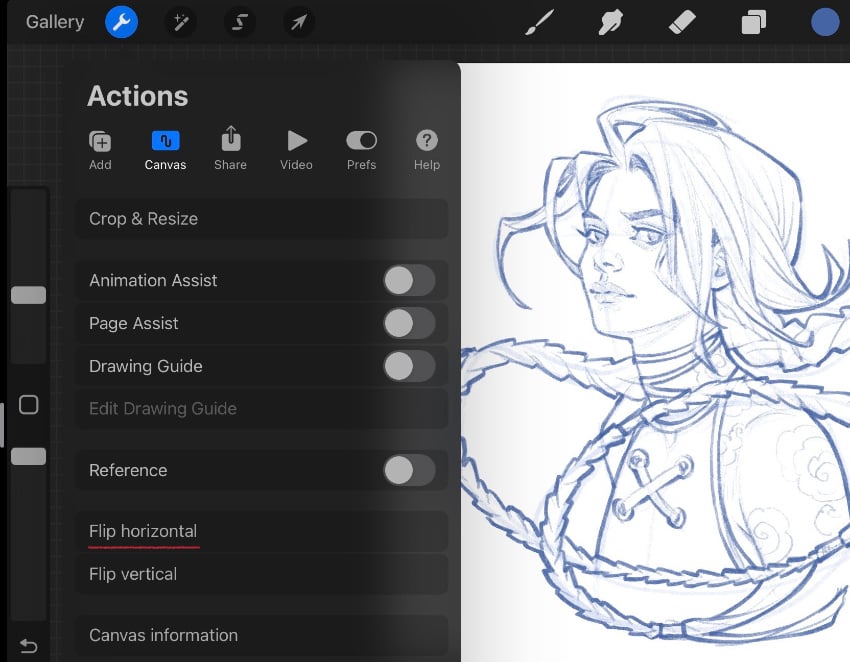
Draw the outline of the entire portrait so that we can check if the silhouette of the character looks balanced and cohesive.
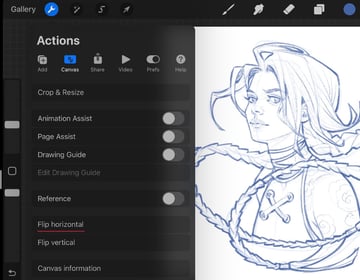
It’s also going to help us to flip our canvas horizontally and fix the proportions if needed using the Liquify tool from the Adjustments menu. Just push the areas you need to shift.


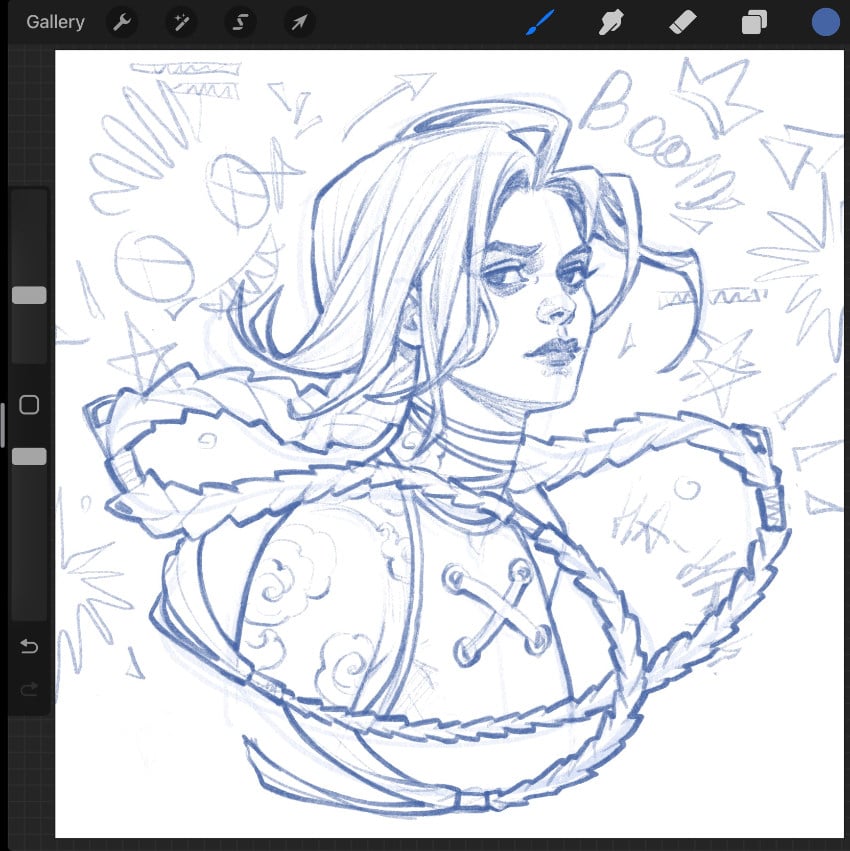
Finally, let’s add some graffiti to the background. We can make it quite random at this point.


2. How to create the line art
Step 1
Once we’re done with the sketch of our Jinx Arcane art portrait, let’s focus on polishing the drawing with a clean line.
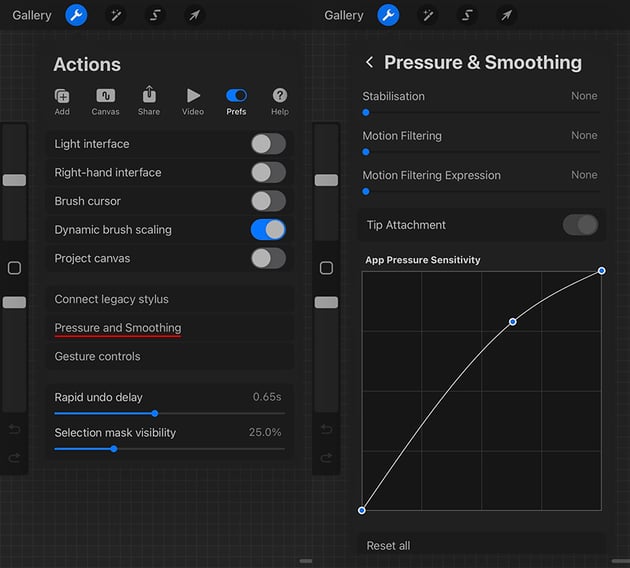
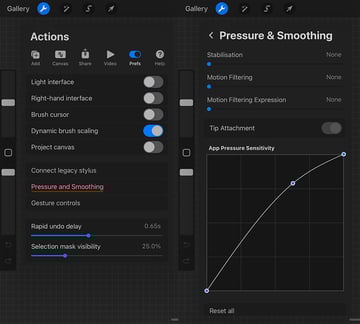
But first, let’s change the pressure of the pen so that we can use a very light touch for the line work. The pressure is key for good line art, especially for high-quality and detailed work. It helps to create a variety of line weight and makes your line art more fluent.
Go to Action in the top panel and tap the Preferences icon. Choose Pressure and Smoothing from the drop-down list. Change the curve as shown below.

Step 2
Now we’re ready to start creating our line art.
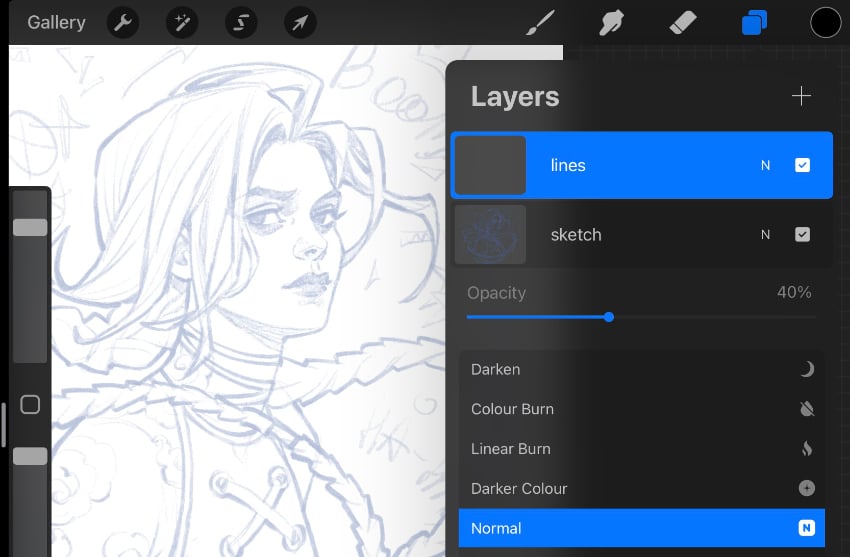
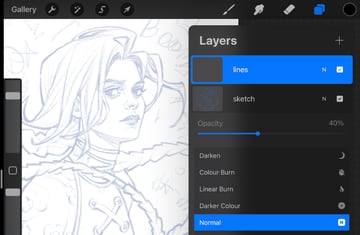
First, lower the Opacity of the sketch layer to about 40% and create a New Layer for the lines on top.

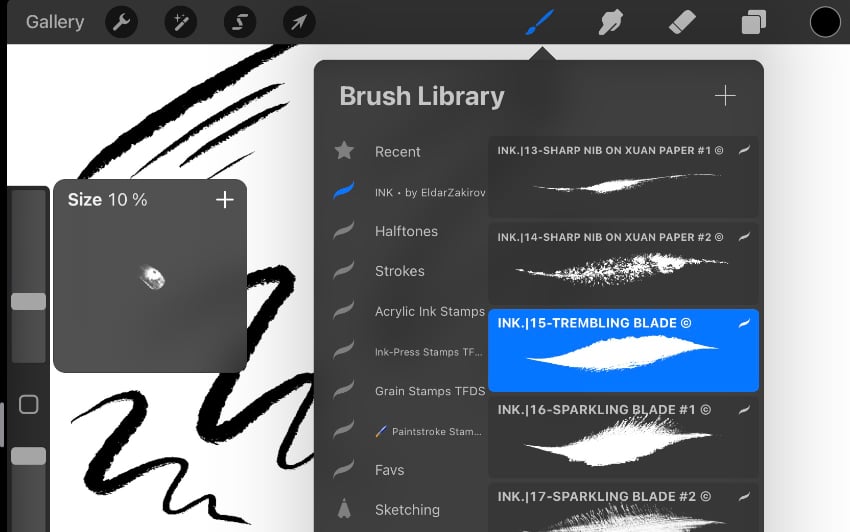
We’ll work with ink brushes, so let’s choose the perfect one for our line art. Find the Ink.15-Trembling blade brush from the Ink by Eldar Zakirov set. This textured brush is perfect for drawing clean line art and tiny details.
Set the brush Size to about 10% with 100% Opacity. The thickness of the lines depends on the pressing force of the stylus.


Step 3
Start by drawing Jinx Arcane’s face with clean lines, following your sketch. You can modify any features in the process to create an interesting look and add emotion. Create confident lines by varying the line weight. It will give more life to your drawing.


Now let’s draw Jinx Arcane’s hair, starting with the main lines and then adding more details with tiny strands.


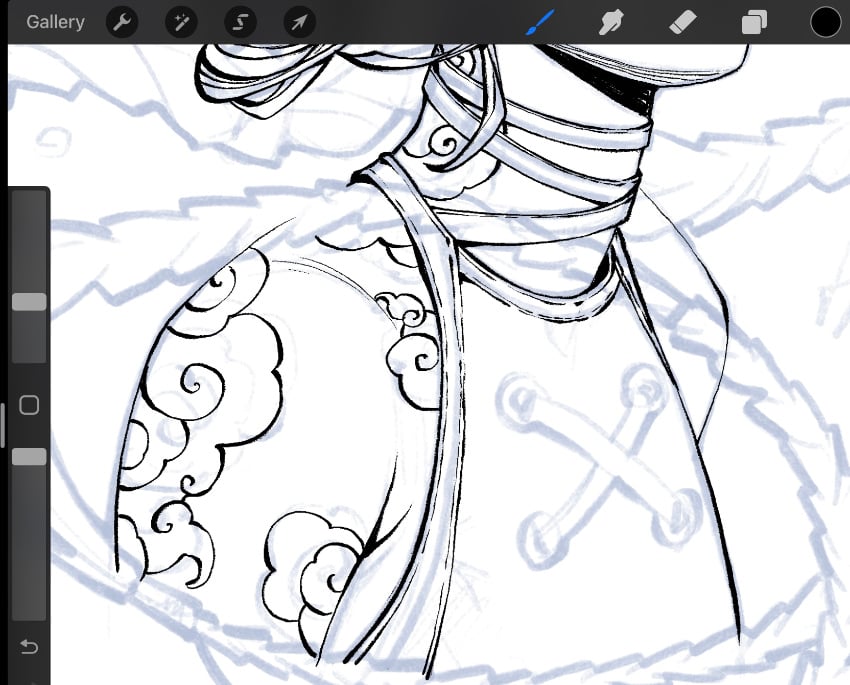
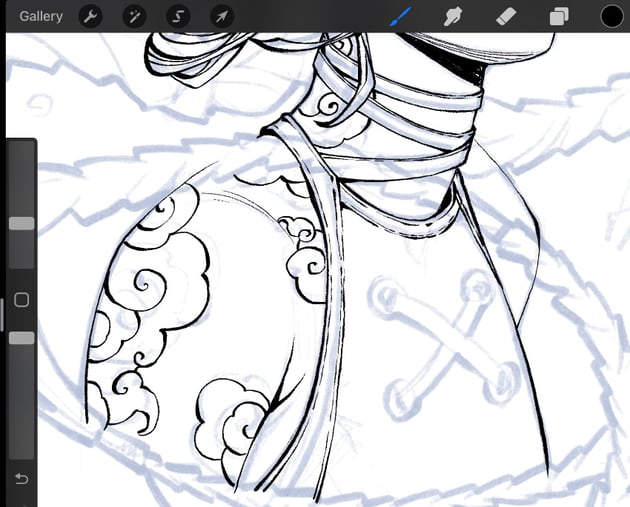
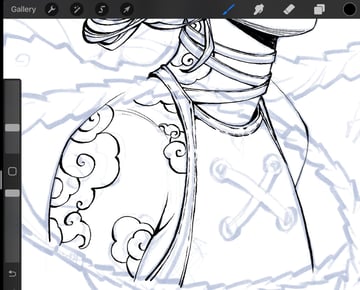
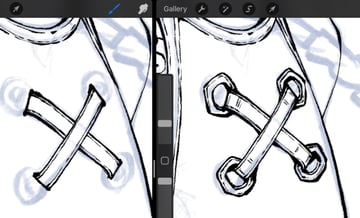
Draw the body shape, tattoo, tank top, and decorative elements using the same principles. Don’t hesitate to use photo references to help you make the details accurate.
Step 4
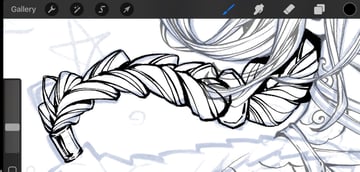
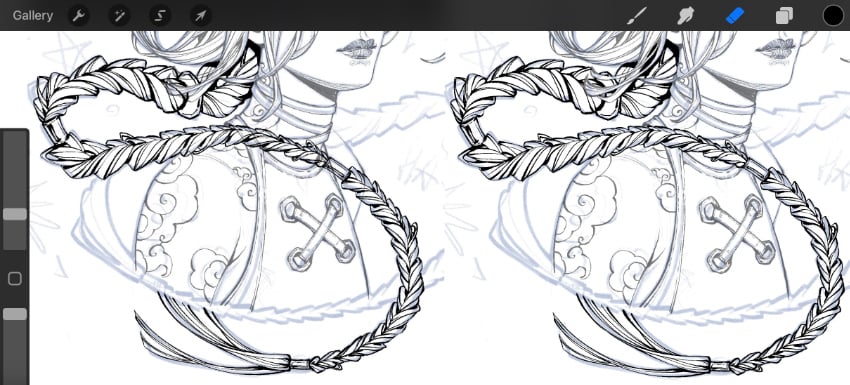
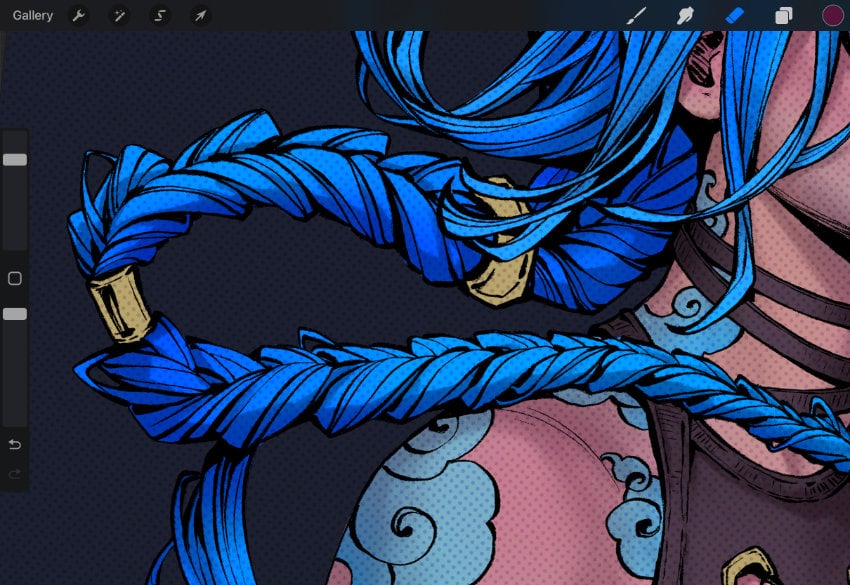
Now that the main figure is done, it’s time to complete the portrait by drawing Jinx’s gorgeous braids.
But first, let’s reduce the Opacity of the “lines” layer to about 50% to make our work on the braids easier.

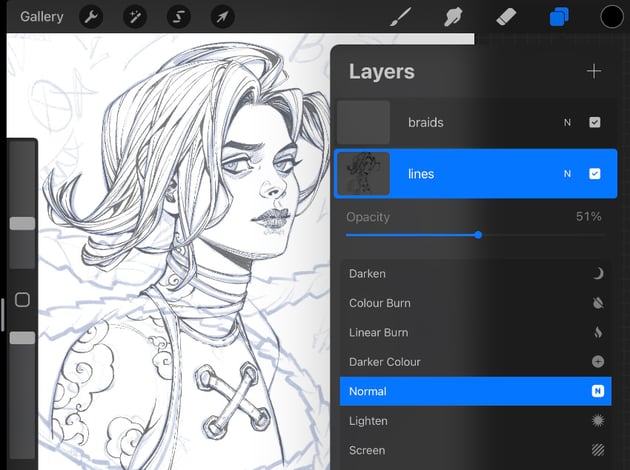

Create a New Layer on top of the “lines“ layer and start drawing Jinx Arcane’s hair, following the movement of the braids. Try to keep all the expressiveness of the original sketch.

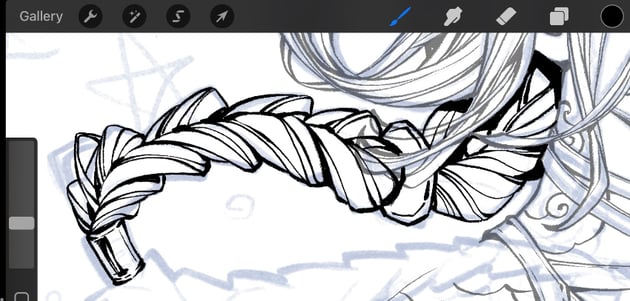
Now that we’ve finished drawing the first braid, we can clean up the lines that intersect with other shapes and that shouldn’t be visible in the final drawing. We can use the Eraser tool, keeping the line work on these two layers separate. This method is very helpful in the line art process.
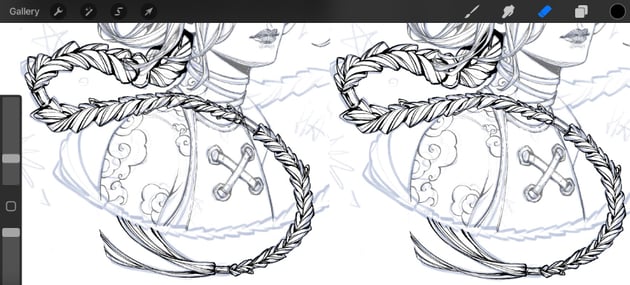
When the work on the braids is complete, let’s merge the “braids” and “lines” layers together.


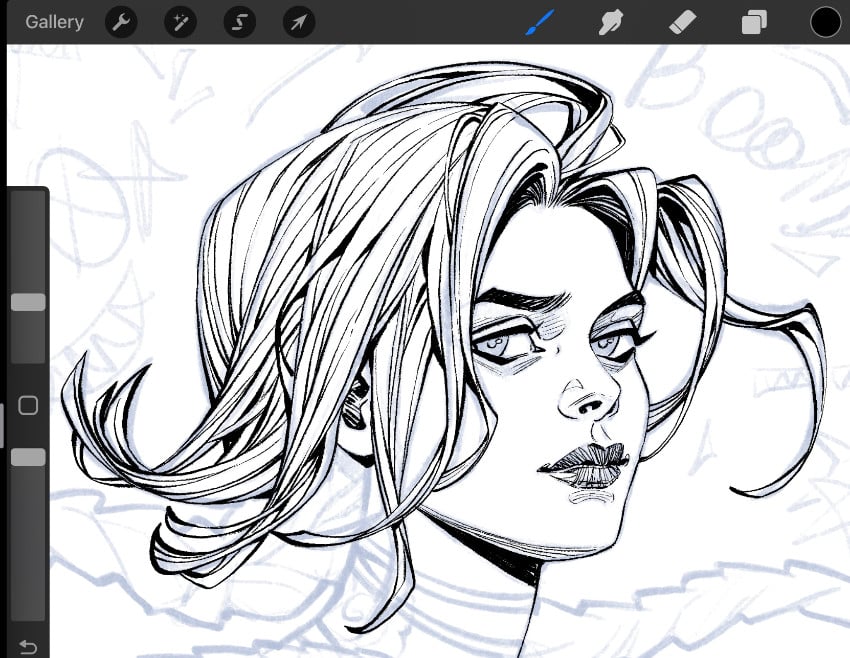
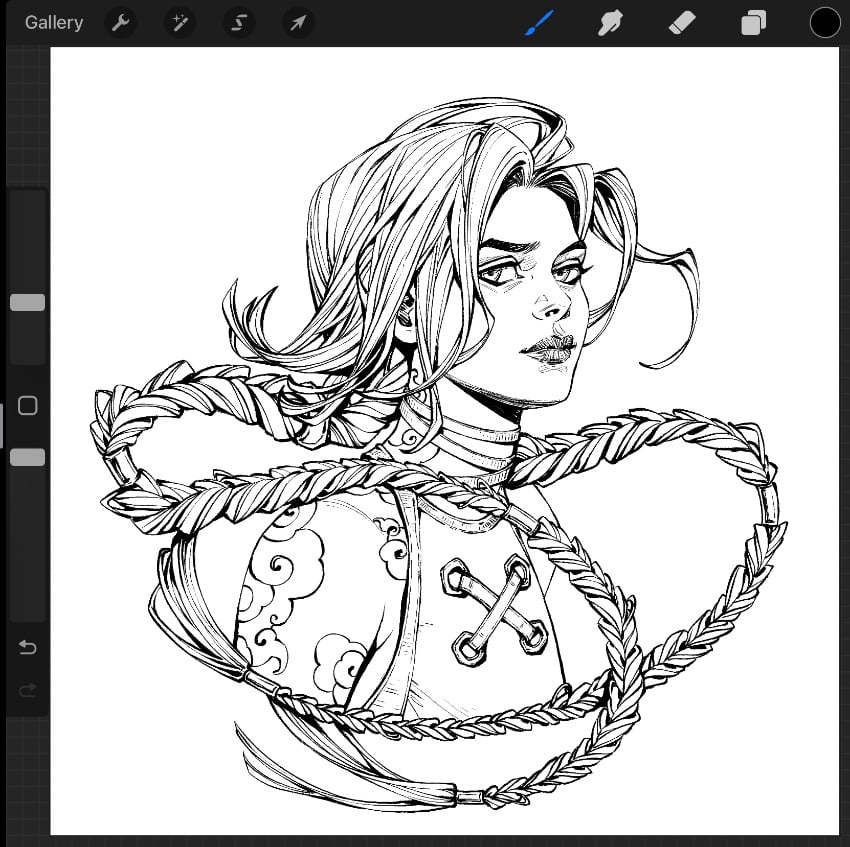
Finish your line art by blacking out the areas wherever the shadows of the character would be. Those small spots of black help to make the portrait more expressive.
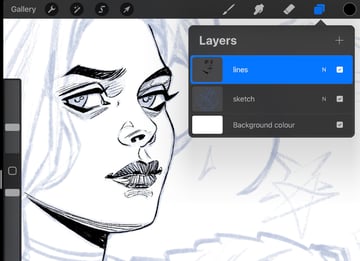
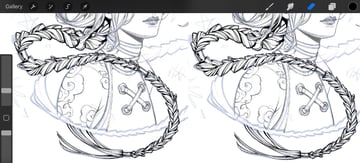
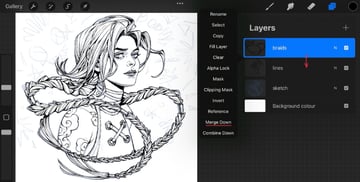
Turn off the “sketch” layer, and admire the result of your line work.


3. How to block in the base colors
Step 1
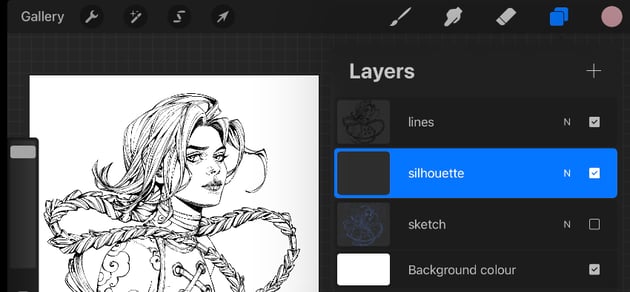
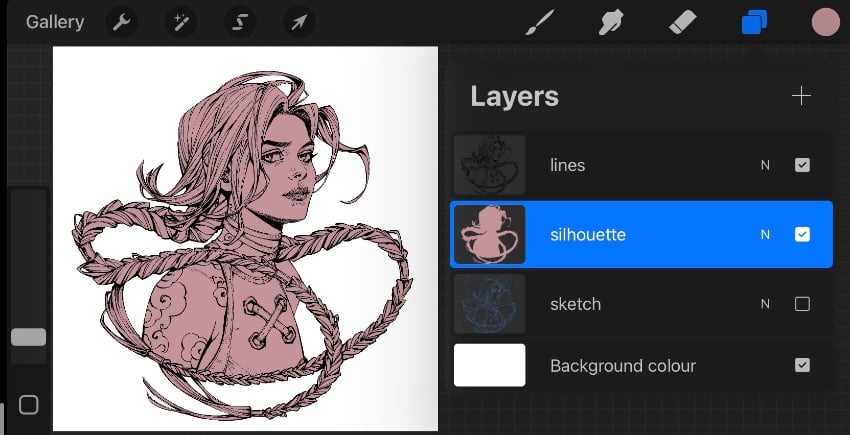
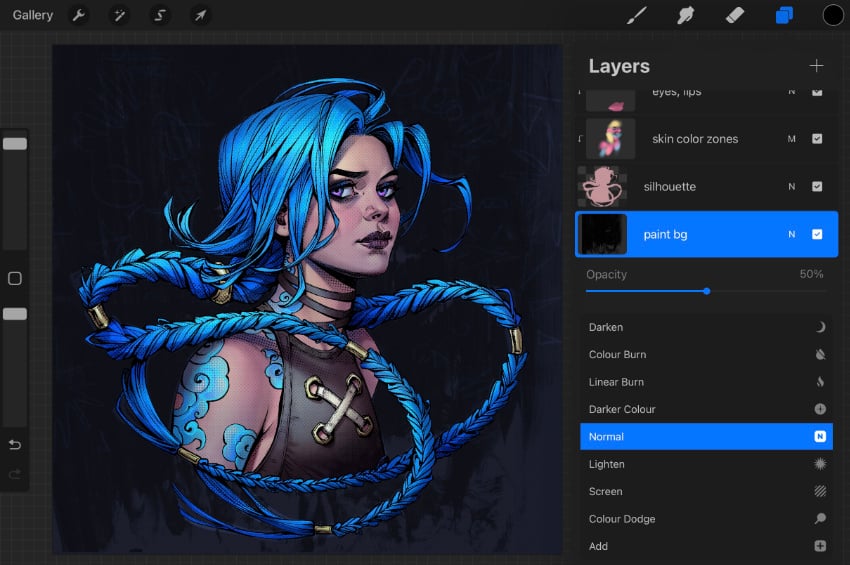
First, let’s create a New Layer for the base shape of our Jinx Arcane drawing under the “lines”. Name it “silhouette”.


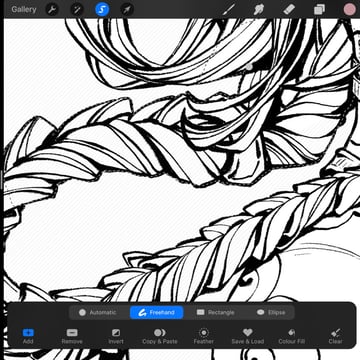
Now, tap the Selection Tool with the Freehand option, and start selecting the areas you need to fill with color. We’ll follow the outer edge of the drawing.
Use the Add button on the panel to add more selection areas if needed.


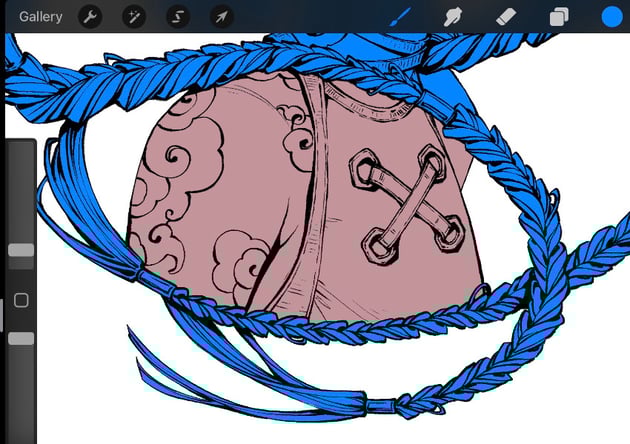
Now that the selection is done, pick a midtone for the base color from the Colors menu in the top-right corner (we’ll use it as a skin color hereafter), and drag it to the selected area.
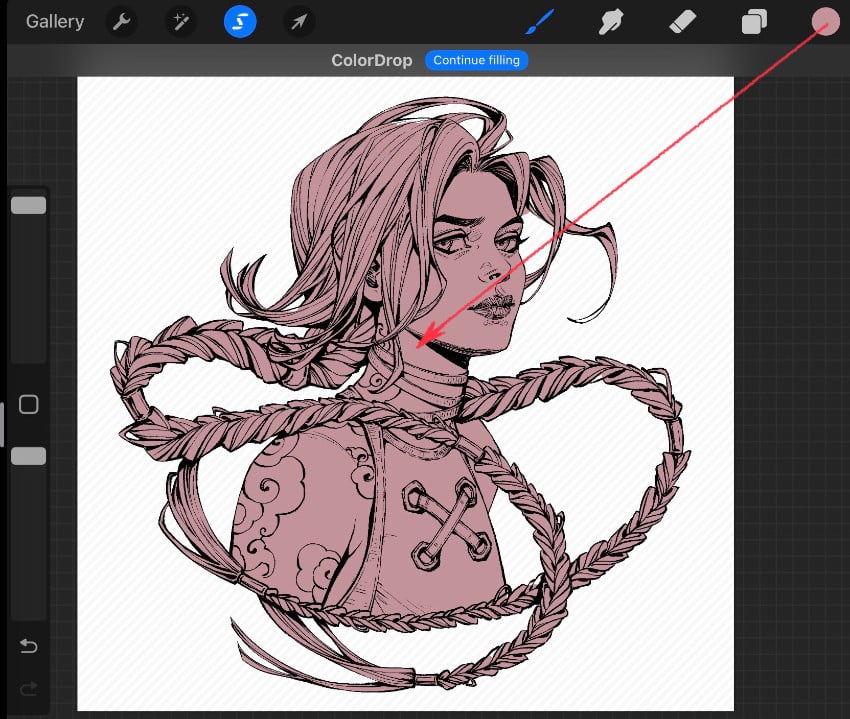


Refine the edges and fill the empty areas with color if needed. Now the shape of the silhouette is done!


Step 2
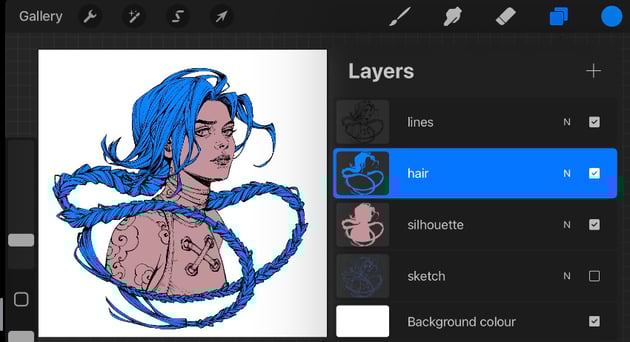
Now we need new layers for each object. Let’s start with Jinx Arcane’s hair.
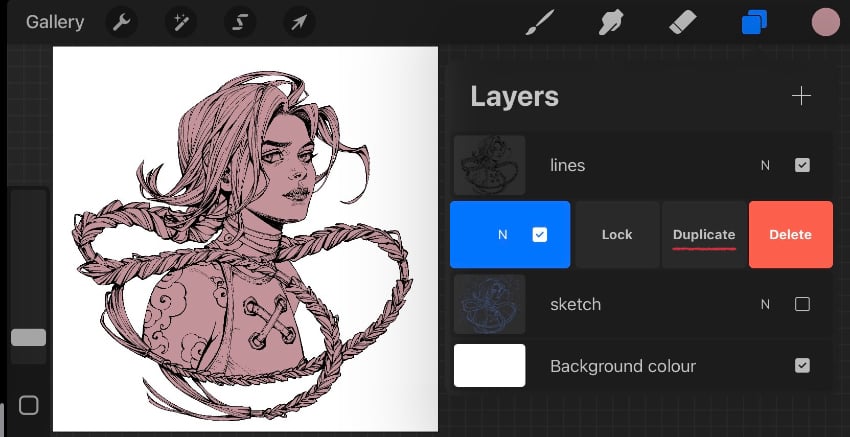
Swipe the “silhouette” layer left and tap Duplicate. Rename the layer “hair”, and fill the shape with blue.


Now we need to clean the area outside the hair shape. We’ll use the Selection Tool, as we did before. First, select the area you need to delete. Then, swipe down with three fingers, and choose Cut from the menu. As a result, you’ll get an absolutely clean area.
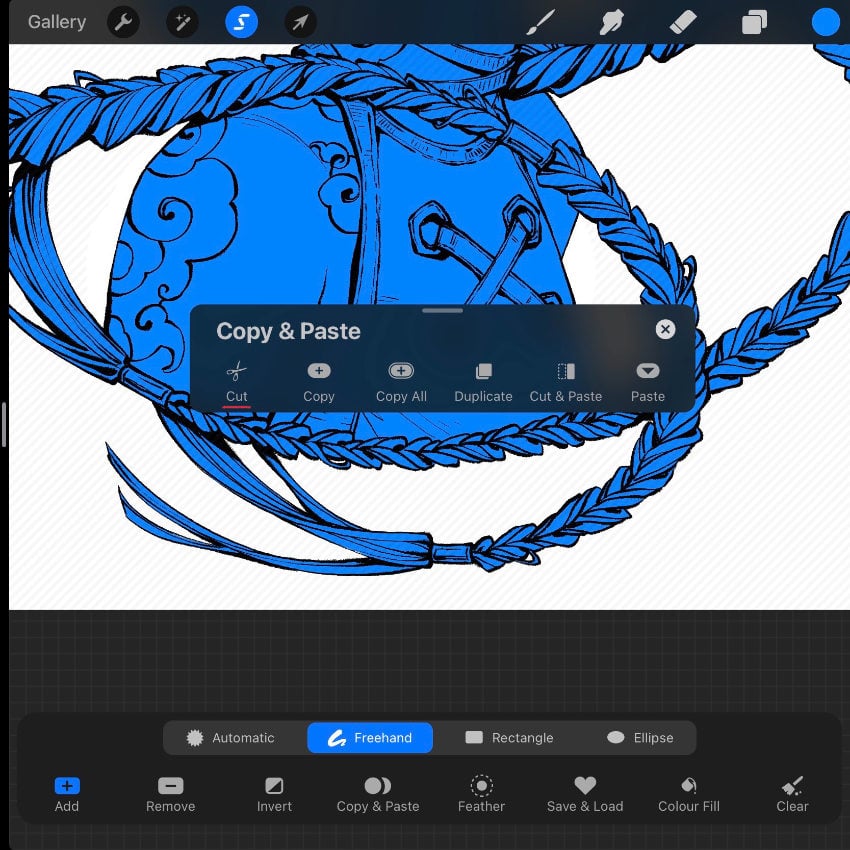

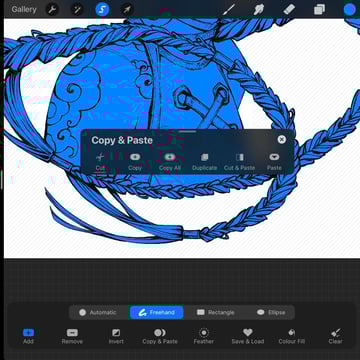


Refine the edges using the Selection Tool or the Eraser Tool for your convenience.

Step 3
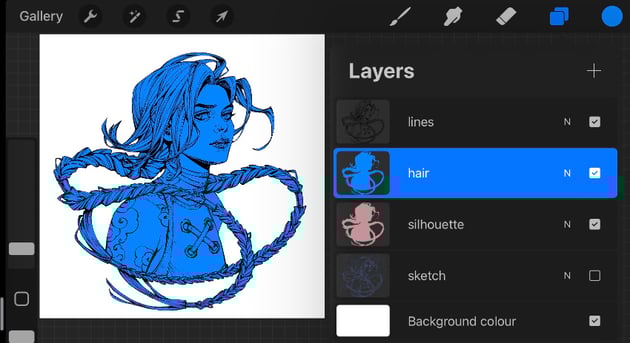
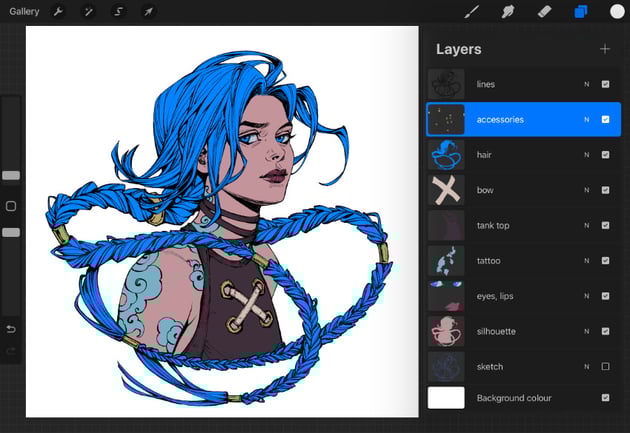
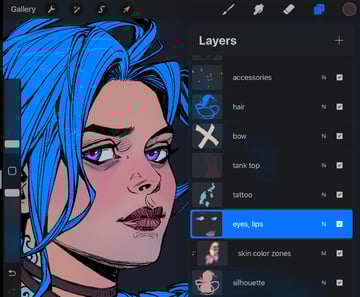
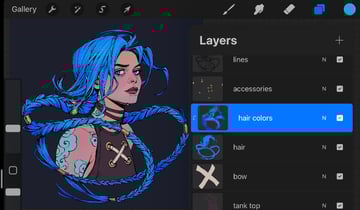
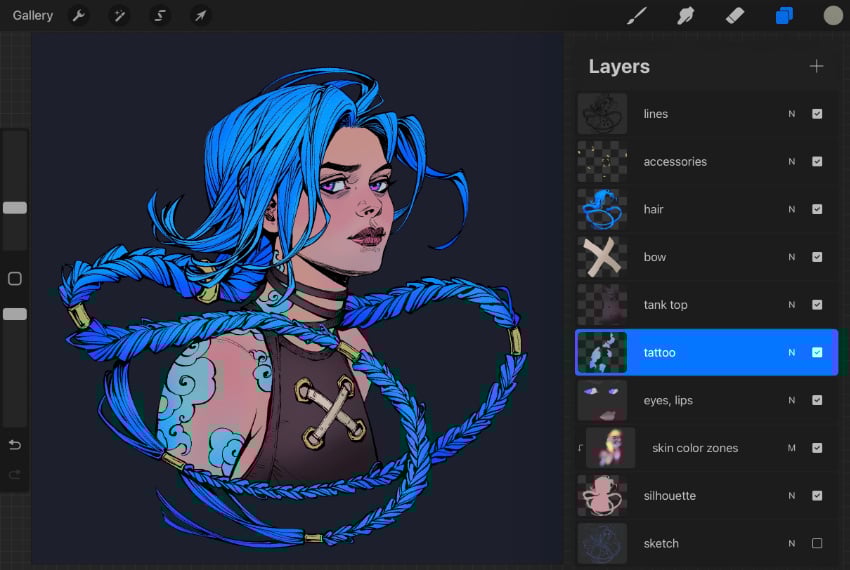
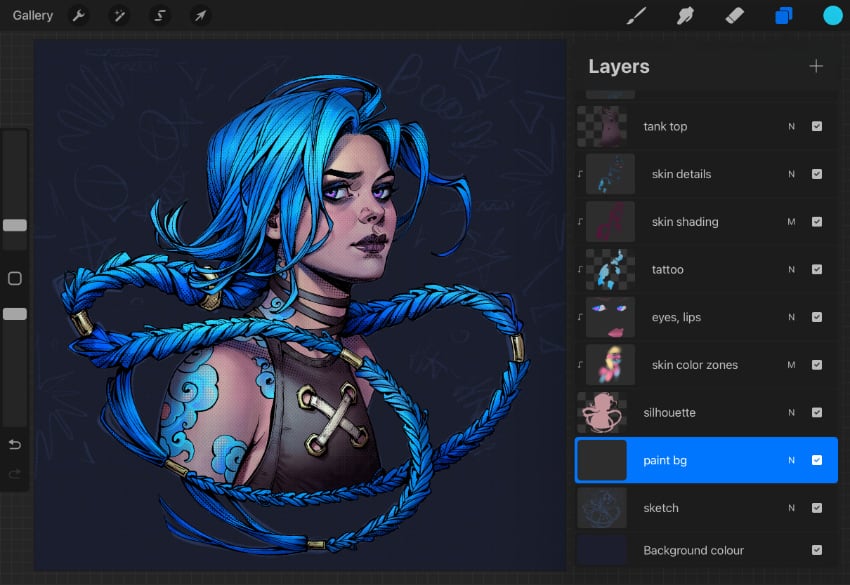
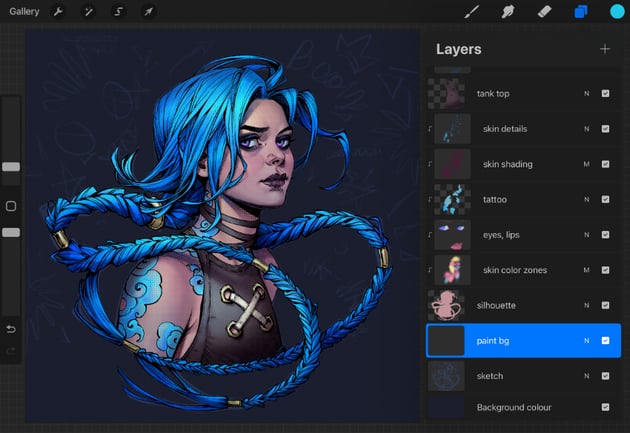
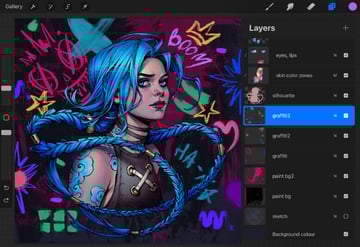
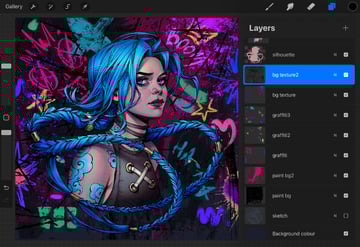
Create new layers for each object and fill them with basic colors, using the same method with the Selection Tool. Keeping them separate gives you the freedom to adjust the colors independently. Organise the layers as shown below.


Step 4
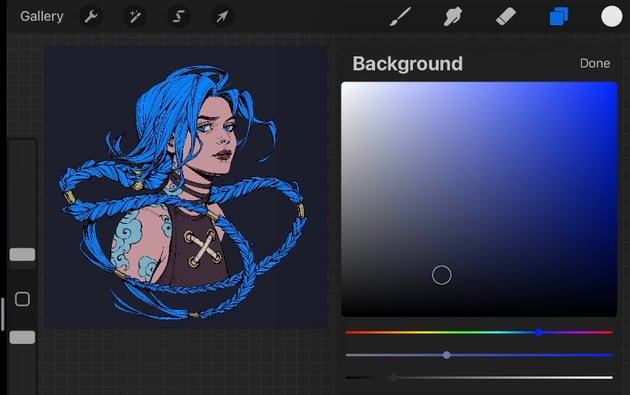
Now, let’s set the background color by tapping the “Background color” layer, which we already have by default. Select a dark blue color on the Color menu. A dark background allows us to create a good range of contrast and make the character more expressive.


Step 5
Let’s add some color variations to the skin.
Create a New Layer for the skin color zones on top of “silhouette”. Tap on the layer and choose Clipping Mask from the drop-down list. It will allow us to draw on the “skin color zones” layer just inside the silhouette shape.
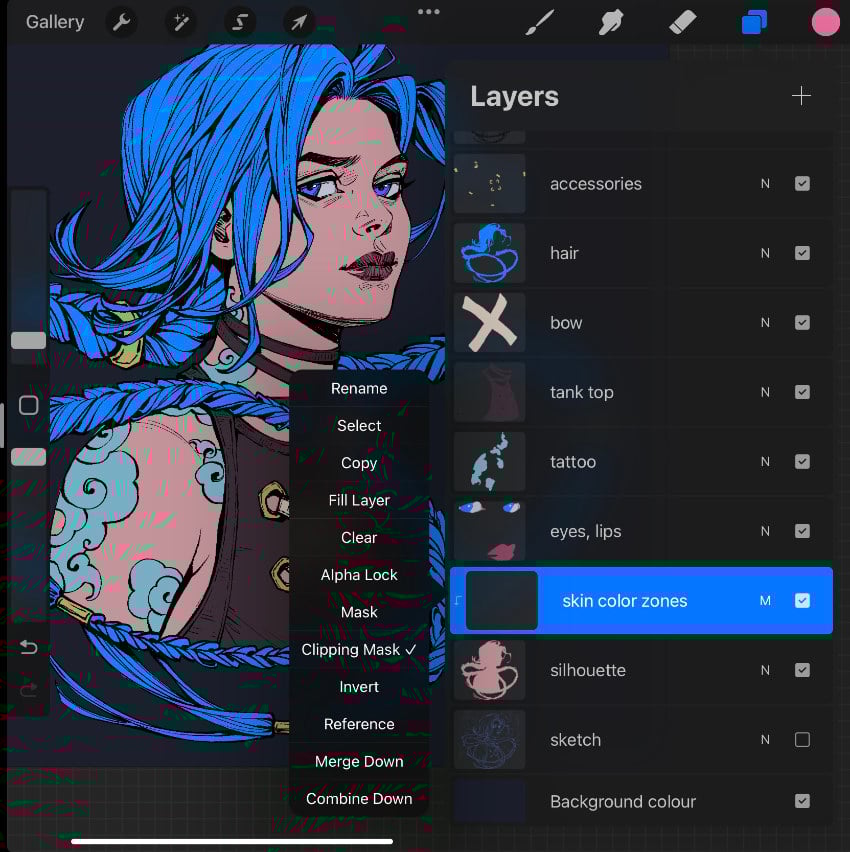


Now we need to add some variation to the colors in Jinx Arcane’s face, which will make the skin more natural-looking. The forehead is usually yellow-toned, the cheeks and nose are reddish, and the under-eye area and the jawline are cooler.
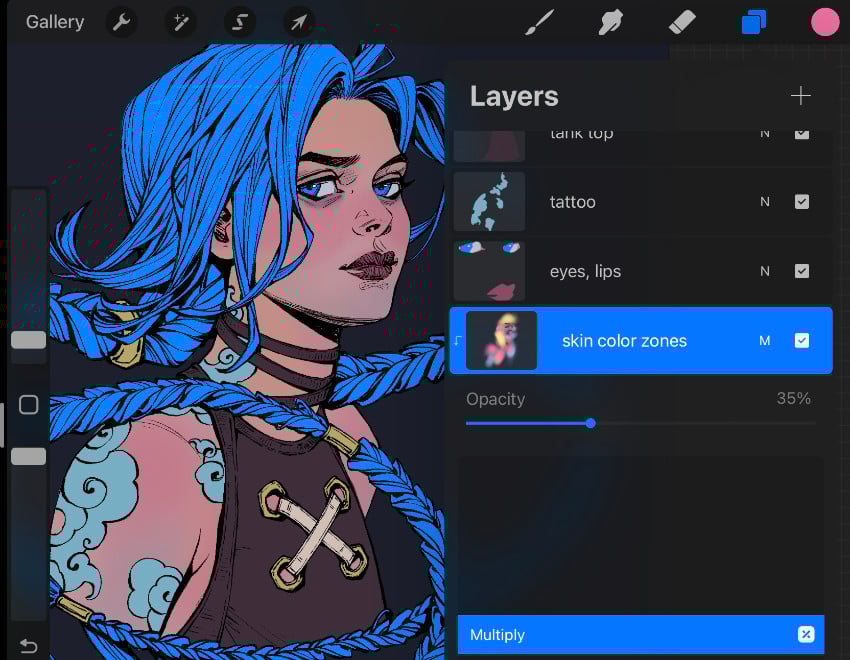
Pick the Soft Brush or Medium Brush from the Airbrushing set. Paint some soft gradients using yellow, pink, and blue, adding some nuance to the colors in each area.
Change the Blending Mode of this layer to Multiply. Reduce the Opacity to about 35%. You can play around with the Opacity until you’re happy with how it looks.

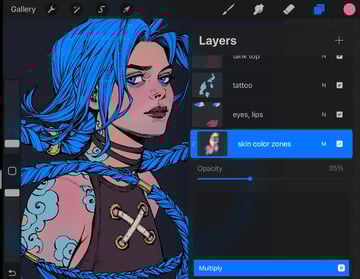
Add some color variation to the eyes and lips as well.


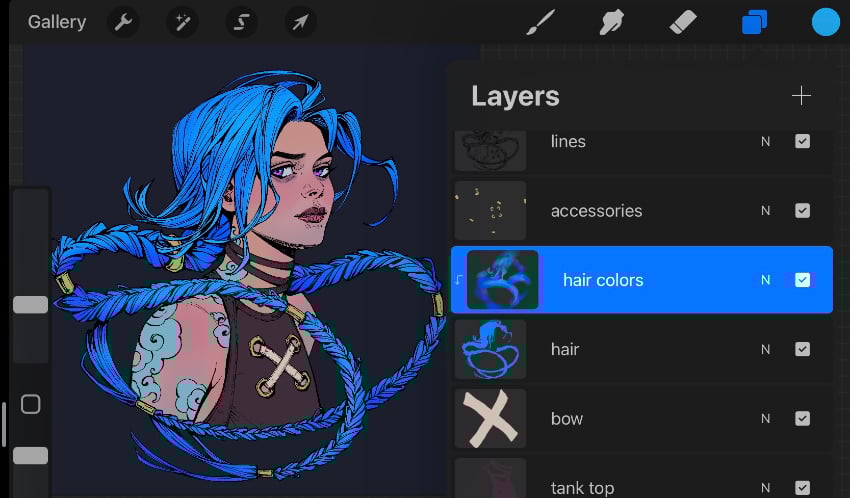
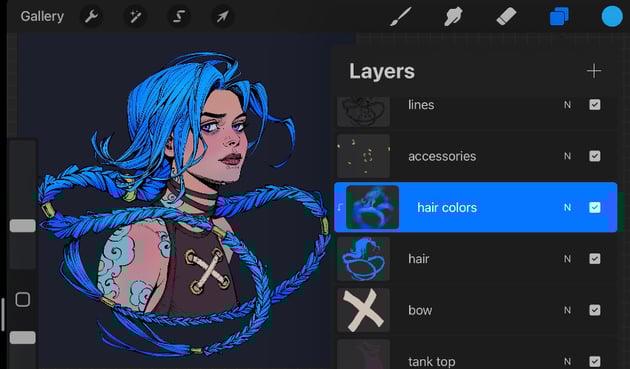
Step 6
Using a new Clipping Mask layer, add some dark and light shades of blue to Jinx Arcane’s hair. You can merge these layers when you’re happy with the result.
Step 7
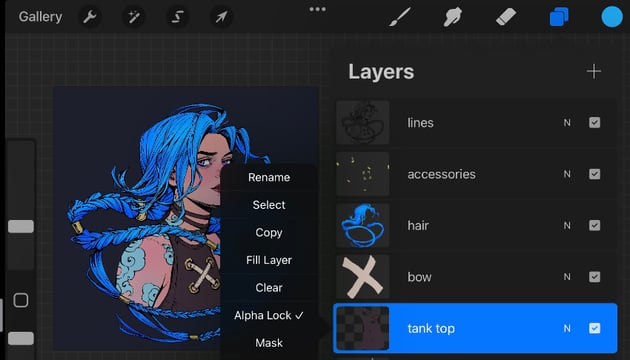
We can use an Alpha Lock option to add some color variation to the smaller objects.
Let’s start with the “tank top”. Tap the layer and select Alpha Lock from the drop-down list. It will help us to paint inside the shape without crossing over onto surrounding areas.

Add some gradients from light to dark to make the tank top less flat.

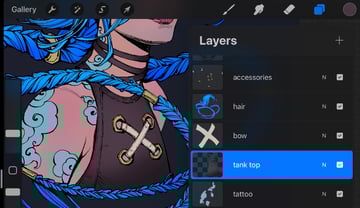
Apply the Alpha Lock to the rest of the layers, and add some more gradients to each object as well.


Step 8
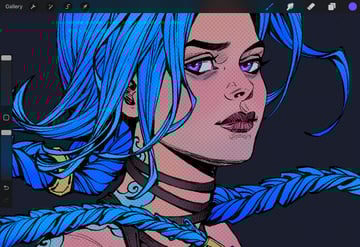
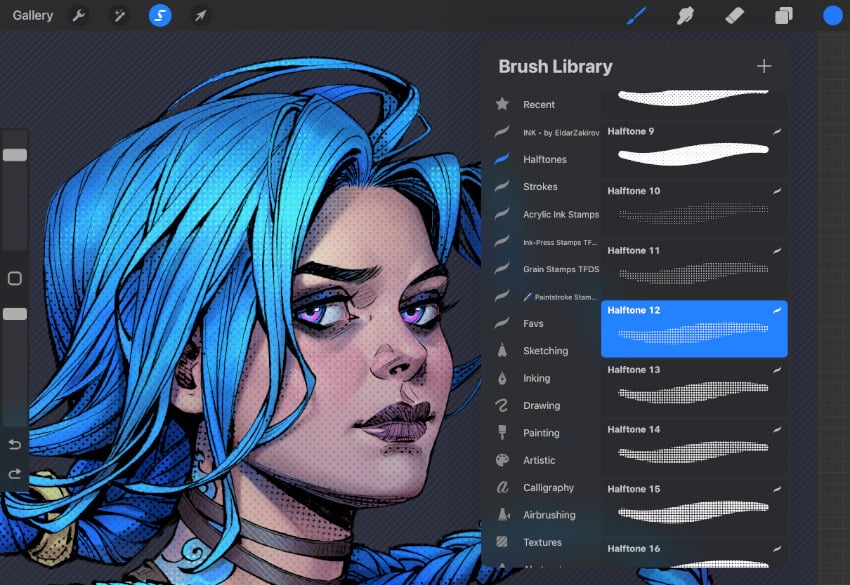
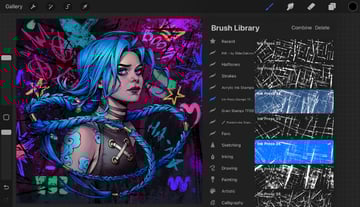
As a final touch at this stage, let’s add some texture to the entire piece. Pick the Halftone 3 brush from the Halftones set we downloaded earlier.

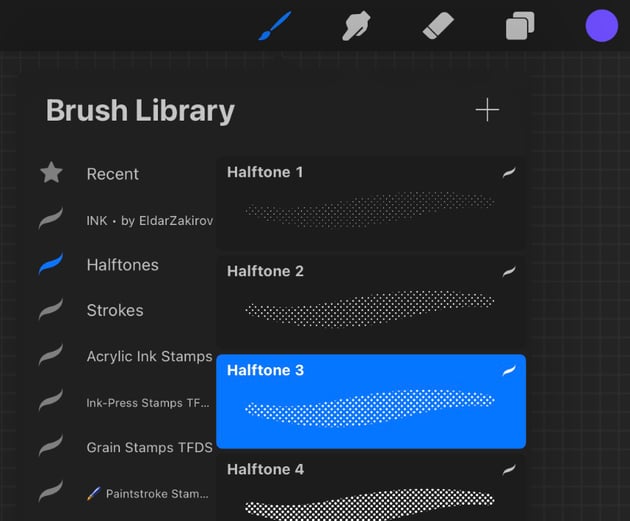
Create a New Layer on top of the “lines”. Pick a lavender color to cover the entire canvas with texture using the Max Size of the brush. Change the Blending Mode to Colour Burn and reduce the layer Opacity to about 20%.
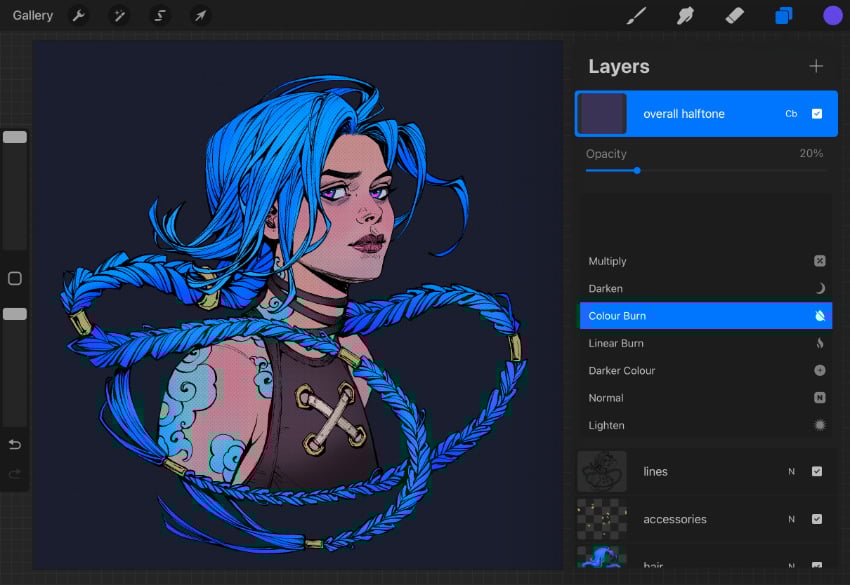

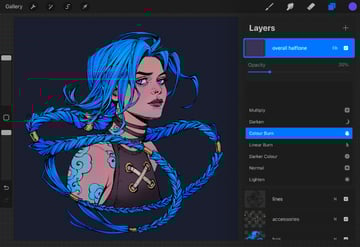
This halftone effect will add some texture and color vibrancy to our Jinx Arcane art drawing.


At this point, your Jinx fan art drawing looks good enough to call it complete, but if you’d like to take it to the next level, let’s continue.
4. How to add shadows and highlights
Step 1
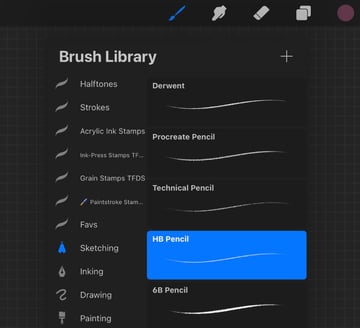
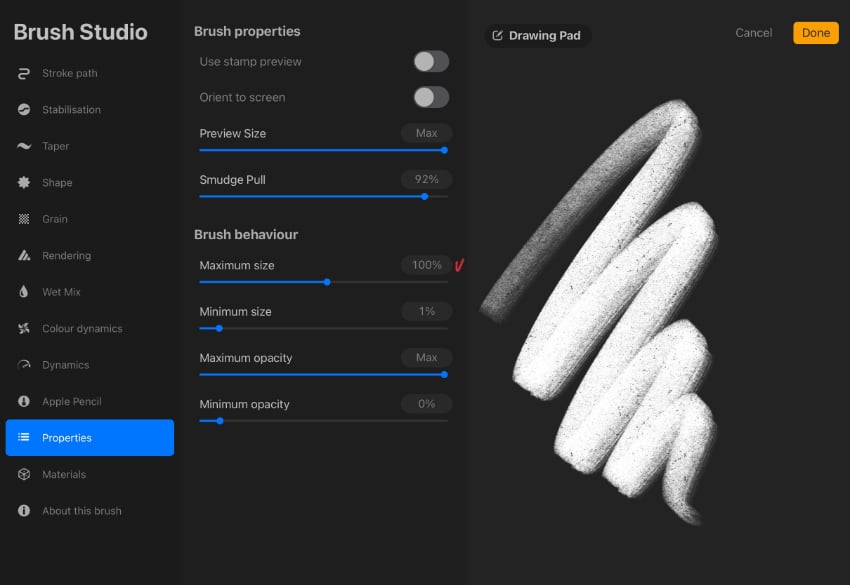
Let’s start by finding a suitable brush for the Jinx Arcane drawing. One of my favorites is the HB Pencil brush from the Sketching set. I like using this brush because of the softness and its subtle texture. Also, it has a painterly quality, and I can achieve hard and soft edges by changing the pressure of the brush.

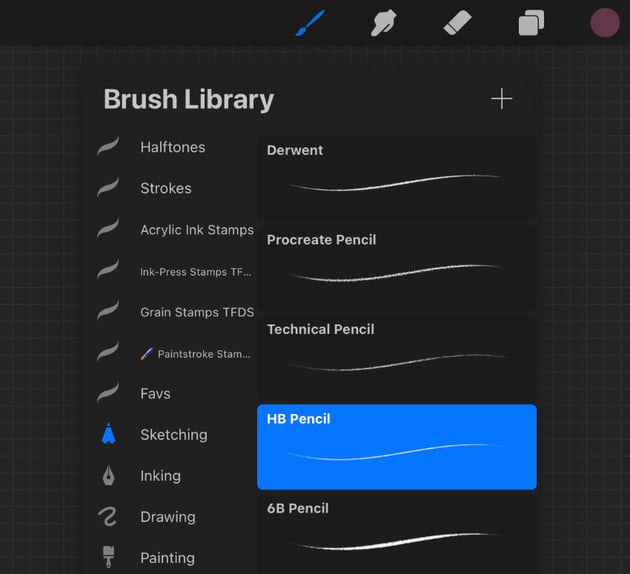
Let’s modify this brush in the Brush Studio to get more flexibility in the painting process. Tap the HB Pencil icon, and the Settings of the brush will appear. Go to the Properties and change the Maximum Size of the Brush behaviour to 100%. This will allow us to make larger brush strokes, especially if we’re working on a large canvas.


Step 2
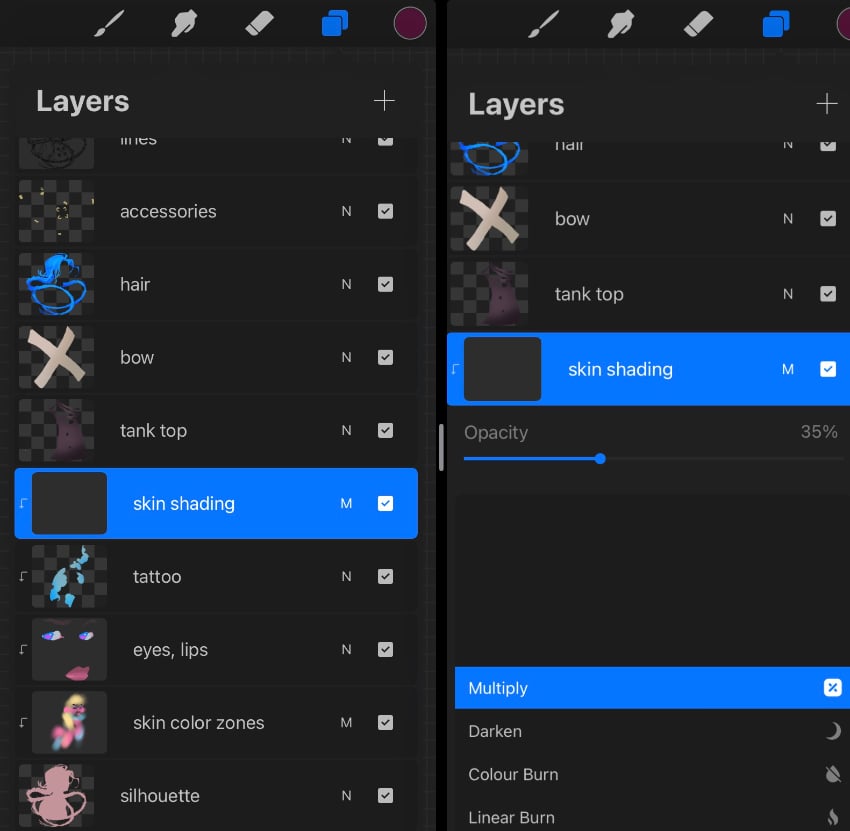
Apply a Clipping Mask to all the layers above the “silhouette” related to the skin, and create a New Layer for the skin shading with the Clipping Mask. Change the Blending Mode of this layer to Multiply with 35% Opacity.


On the “skin shading” layer, start building subtle shadows on the face, neck, and shoulders using dark purple. Define the character’s features by planning the direction of the light. In our case, it’s coming from the top left.
The separate layer allows us to refine the shadows using the Eraser Tool. Change the size and opacity of the eraser in the process.


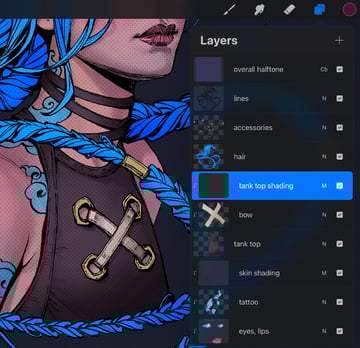
Step 3
Add some dark shadows to the tank top using this method. Create a New Layer with a Clipping Mask as well, setting it to Multiply with 35% Opacity. Use the same color, and vary the brush Size in the process as you like.


Step 4
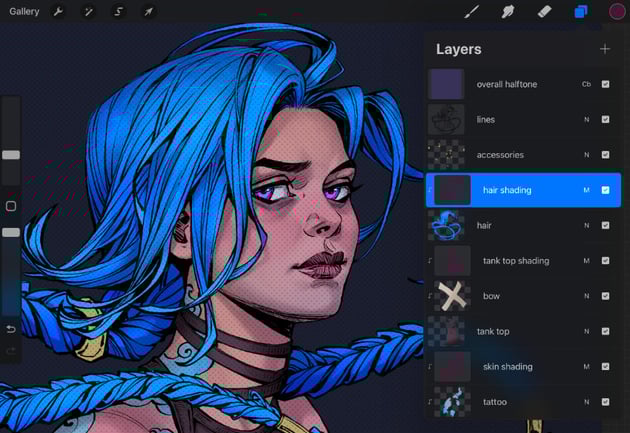
It’s time to form the hairstyle. Again, create a New Layer with a Clipping Mask on top of the “hair”. Set it to Multiply and reduce the Opacity to 35%.
Using the same method (adding shadows with large strokes and refining them with Eraser Tool), add some volume to the hairstyle. And don’t forget about the light source!


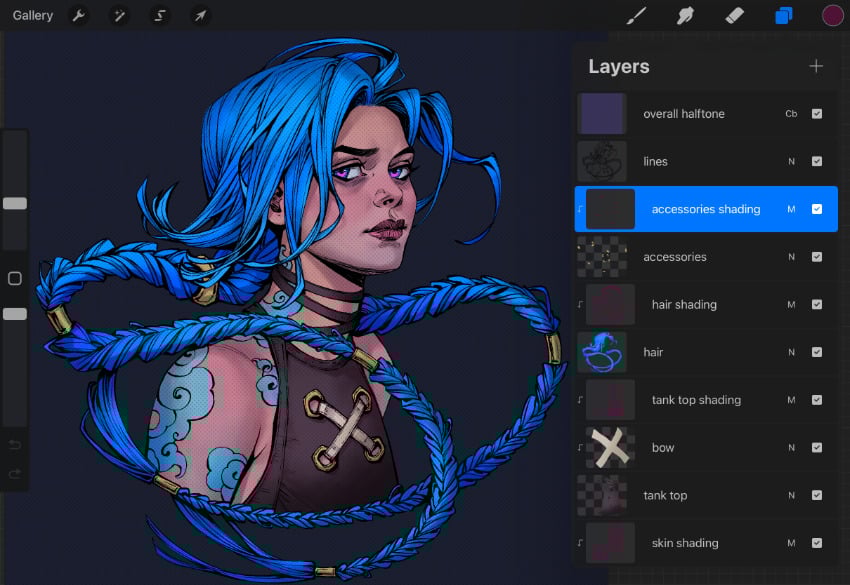
Add some shading to the accessories as well.


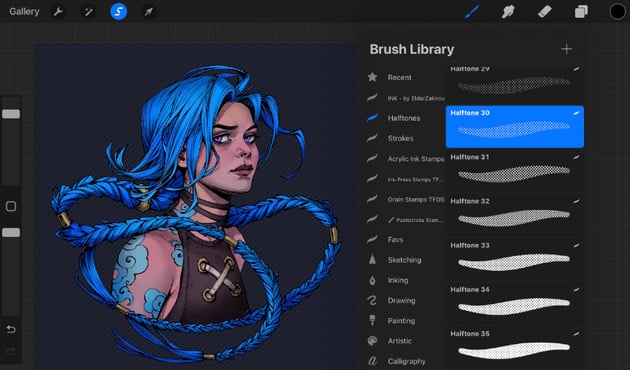
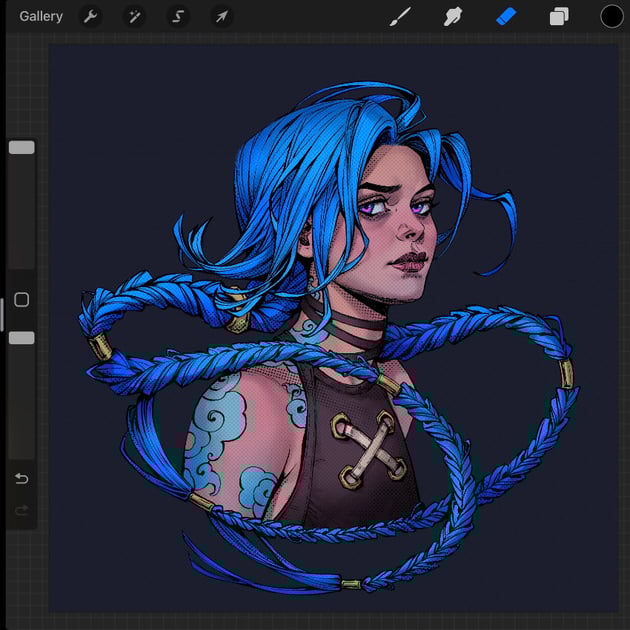
Step 5
Now let’s make the shadows a bit more intense and add some texture with halftones in our Jinx Arcane fan art portrait. Create a New Layer for the halftone shading just under the “lines”.
Now, pick the Halftone 30 brush from the Halftones set and add some dark shadows on top of the shadows we just drew. Draw some shadows on the roots of the hair and on the shadowy area of the braids.

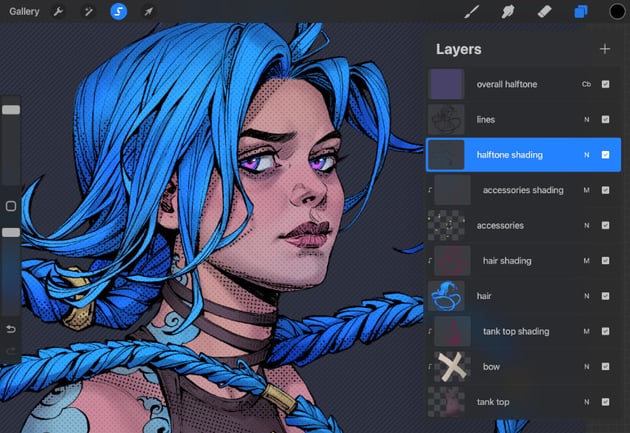


Use the Eraser Tool to soften the edges of the shadows.

Step 6
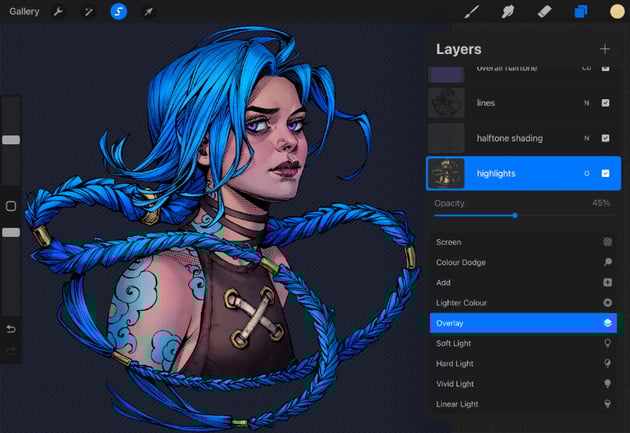
It’s time to introduce proper lighting, keeping in mind the light source. Highlights are a very effective tool in the rendering process, helping to give a three-dimensional effect to the drawing.
Create a New Layer for the highlights under the “halftone shading” layer. Set it to Overlay. We’ll draw all the highlights on a single layer.
Pick the HB Pencil brush with any light color (we’ll change it later), and paint subtle highlight strokes on the lightened area of the face and body, hair, accessories, and tank top.
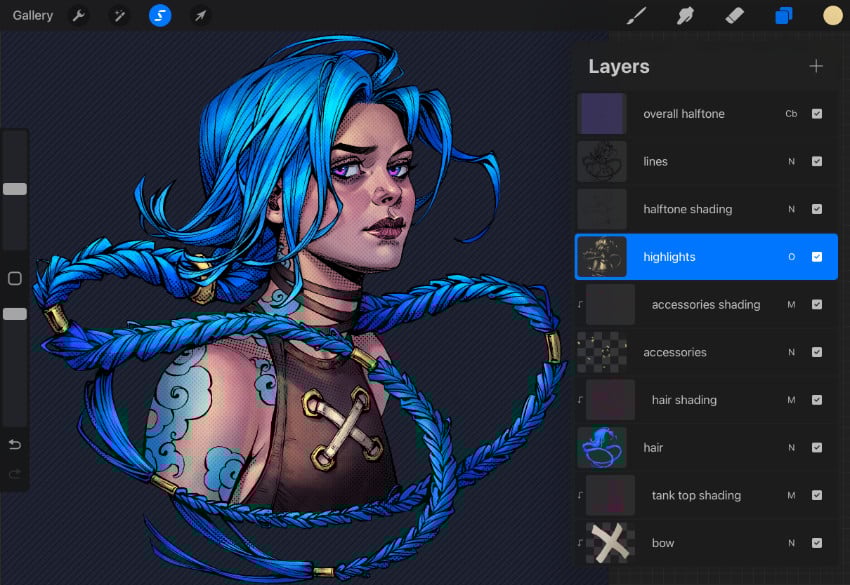

To make the Jinx Arcane drawing more refined with the halftones, reduce the Opacity of the layer to about 45%.
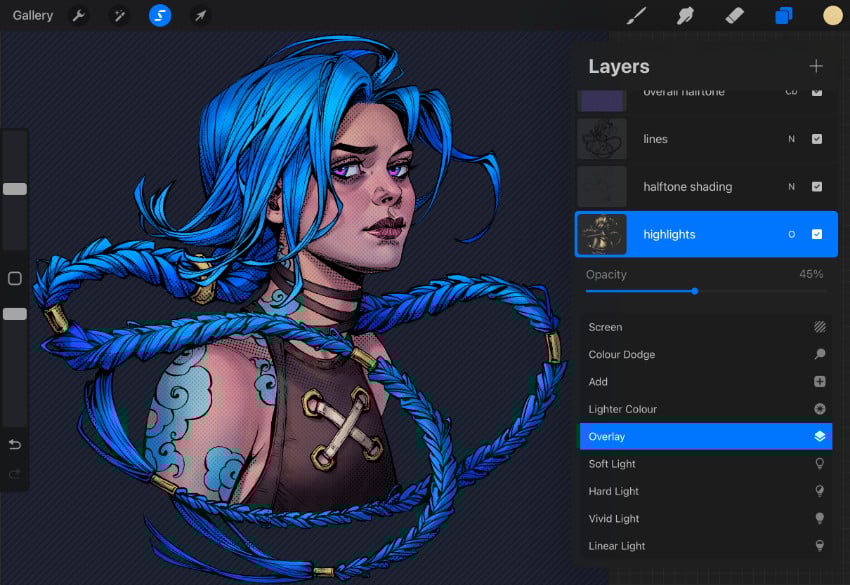

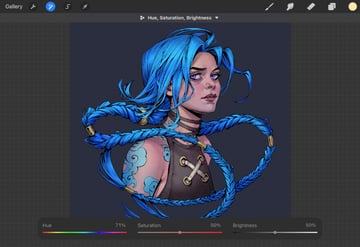
If you’re not happy with the highlight color, you can change it easily. Just tap the Adjustments icon and choose Hue, Saturation, Brightness from the drop-down list. Move the Hue slider until you get the desired result.


Step 7
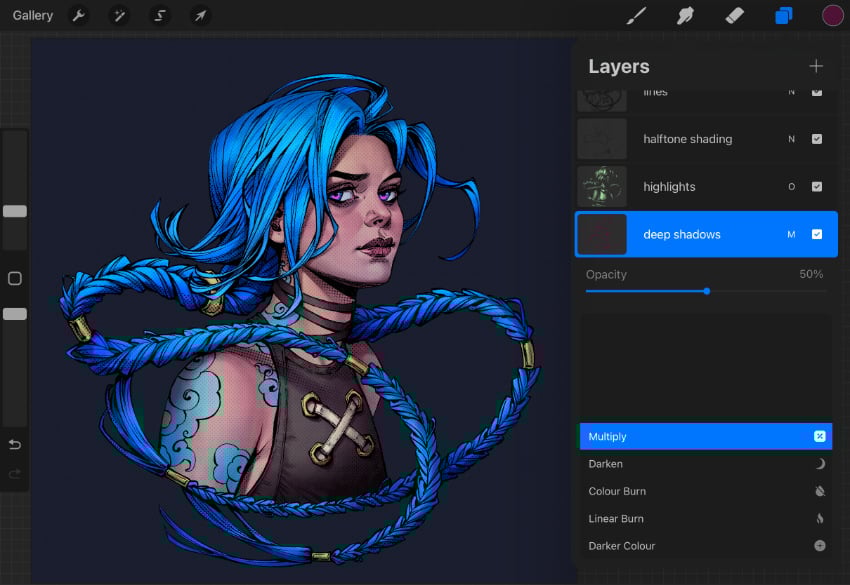
Let’s bring our drawing of Jinx from Arcane into focus by adding some contrast to some of the features, while leaving others soft.
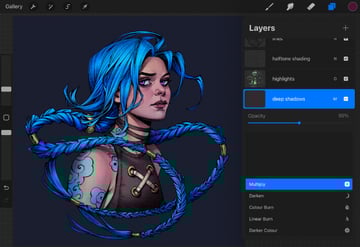
Create a New Layer for the deep shadows under “highlights”. Set it to Multiply with 50% Opacity.
Pick the same dark purple color, and using the same brush but smaller, draw deep shadows following the halftone shadows.

Now let’s make the look more expressive by adding some intense highlights.
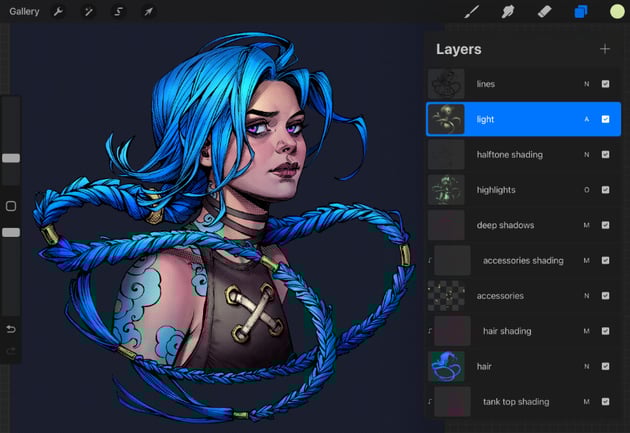
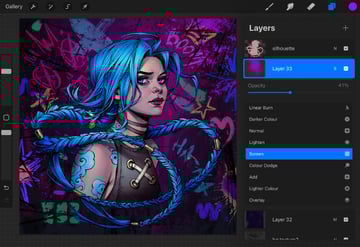
Create a New Layer for the light just under “lines”. Set it to Add and reduce the Opacity to about 23%.
We need to select the “silhouette” layer first, so we can draw just inside this shape. Then go to the “light” layer and use a Soft Brush to add some yellowish highlights to lighten certain areas, creating a focal point.


Step 8
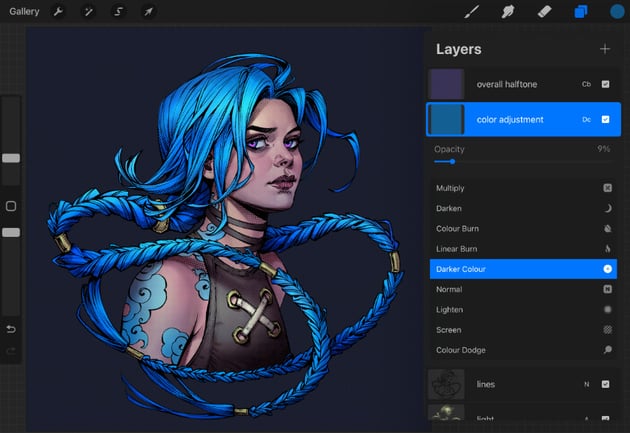
Let’s make some color adjustments to the entire Jinx Arcane art piece. The easiest way to harmonize colors is to add some kind of filter on top of the drawing.
Create a New Layer under “overall halftones”. Fill the layer with blue color and set it to Darker Colour with 9% Opacity.
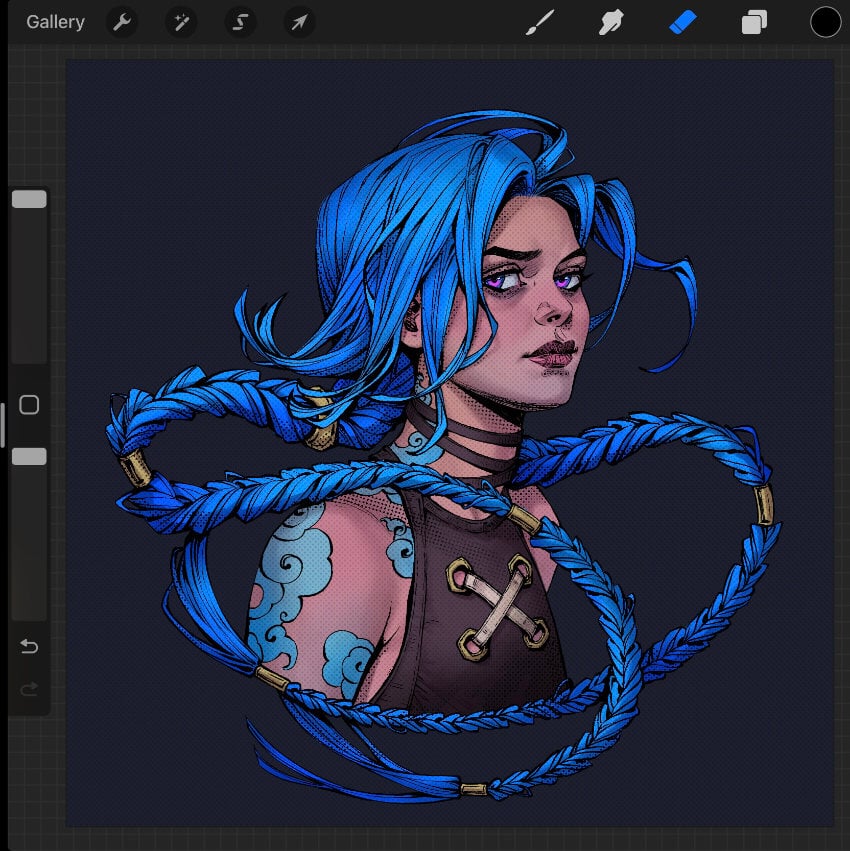
Now all the colors have come together, and the portrait looks much better.

Step 9
Once we’re happy with the shadows and highlights, let’s add some more texture and details to the character.
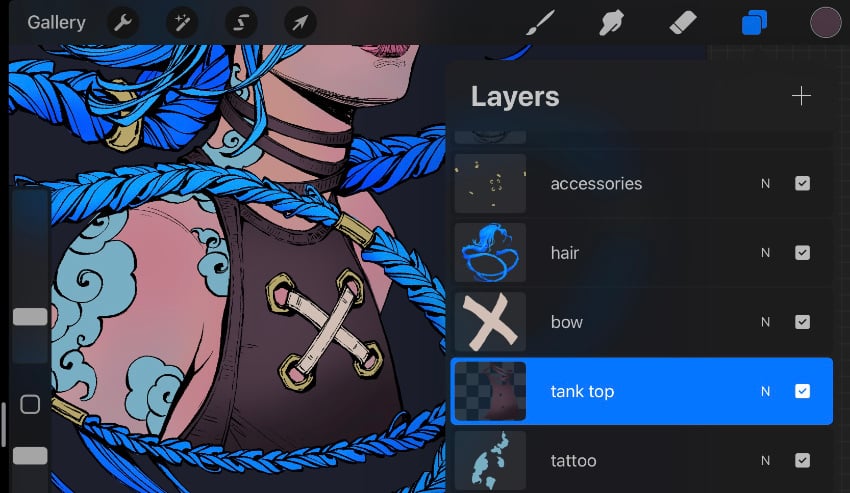
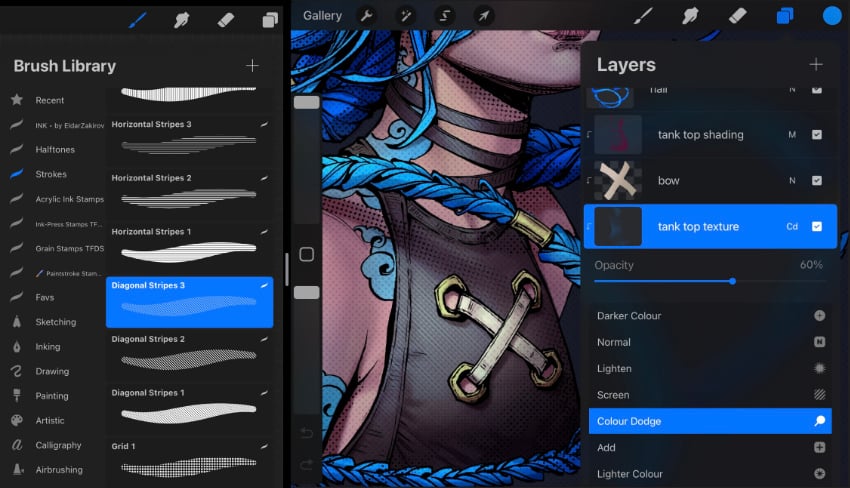
Let’s start with the tank top. Create a New Layer for the tank top texture between the “tank top” and “bow” layers. Pick a bright blue color, and use the Diagonal Stripes 3 brush from the Strokes set to add a striped texture to the lightened area of the tank top.
Change the Blending Mode of the layer to Colour Dodge and reduce the Opacity to 60%.


Now, let’s add some details to the skin on a New Layer, just above the “skin shading”. We’ll refine the facial features by adding some makeup to the eyes and lips and adding some pink blush texture to the cheeks with the Halftone 12 brush.
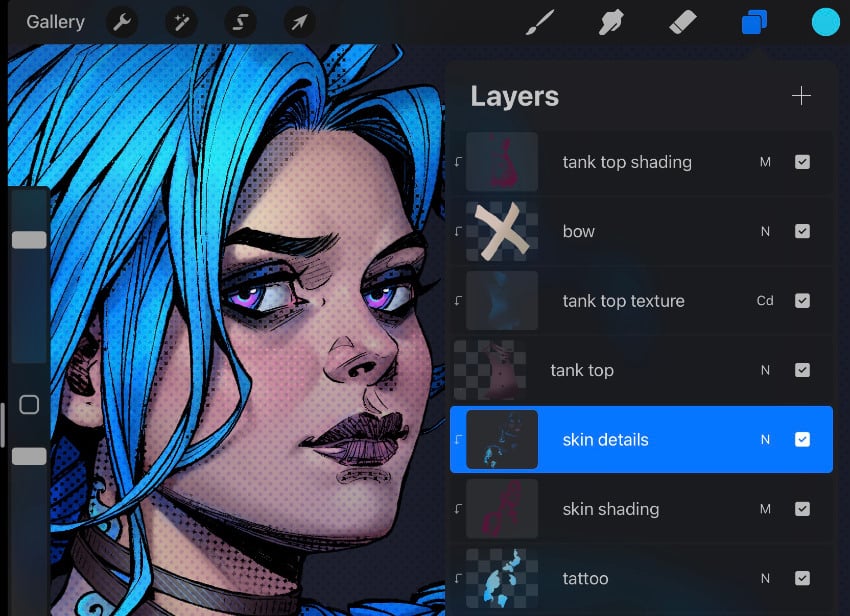
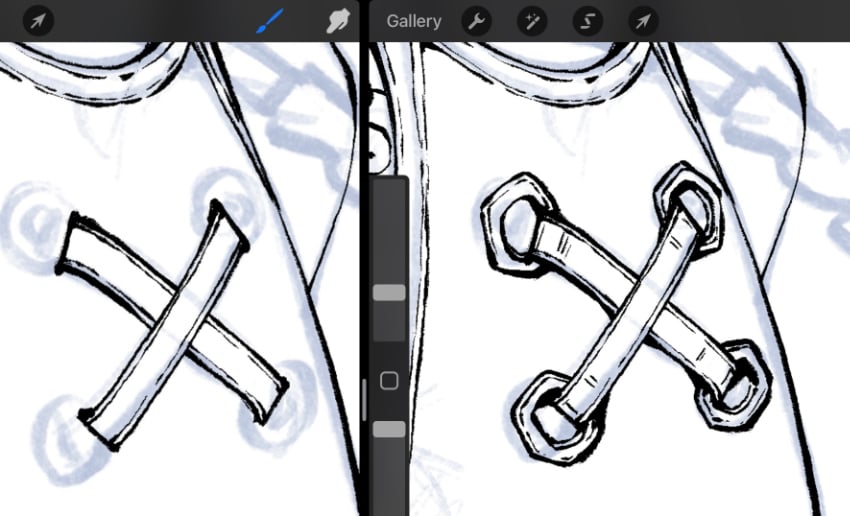
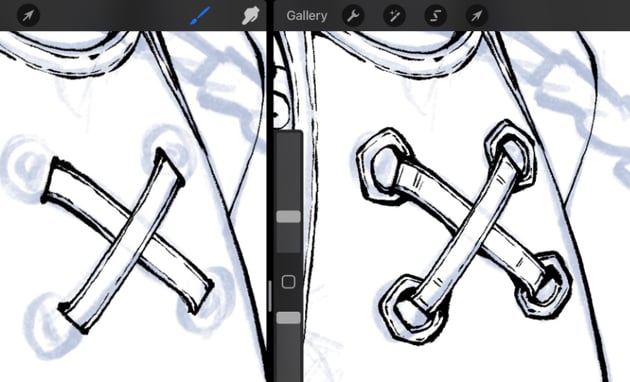
Also, we’ll add some volume to the tattoo by making it more detailed using the HB Pencil brush.
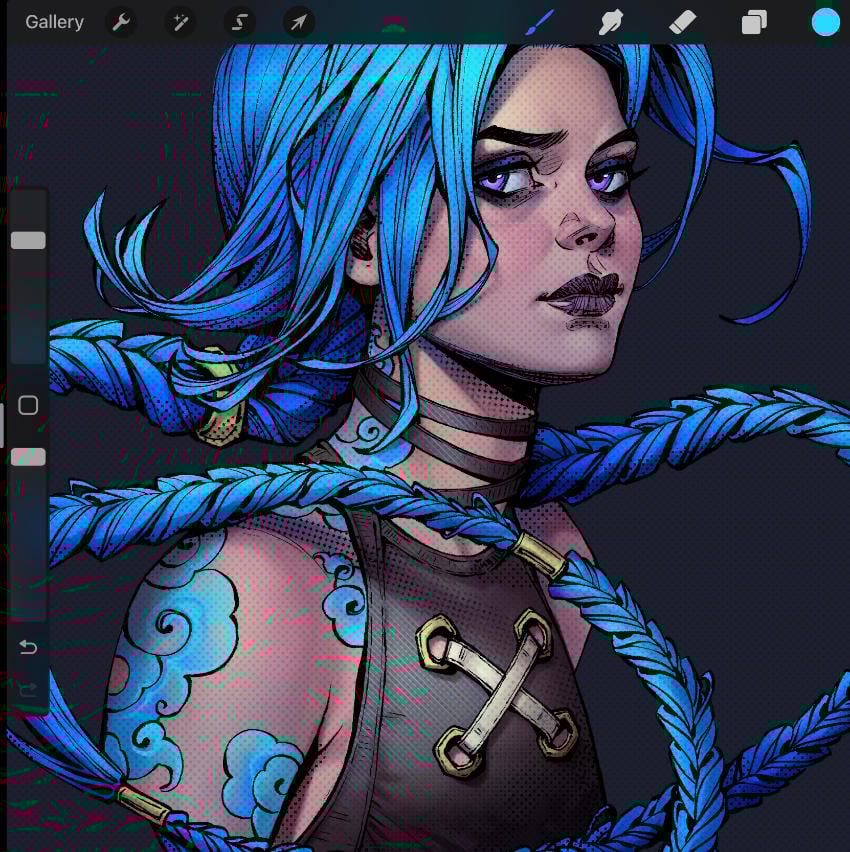


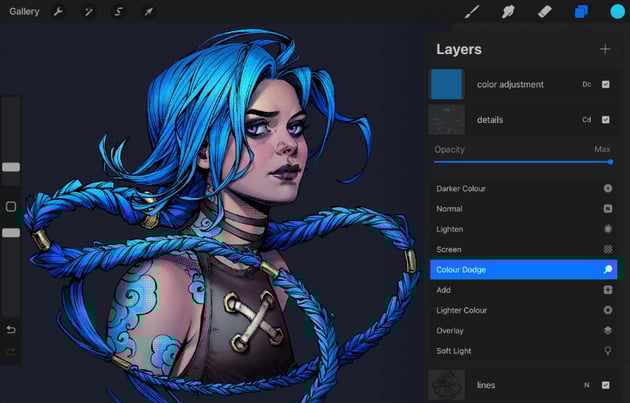
Complete the Jinx Arcane fan art portrait by adding some more details on a New Layer just under “color adjustment”. Set it to Colour Dodge with 100% Opacity.
Use the same Halftone 12 brush to add some crisp texture to the highlights on Jinx Arcane’s hair, tattoo, and accessories. In the end, add some gloss to the shiny objects too, using the small size of the HB Pencil brush.


5. How to create a graffiti background
Step 1
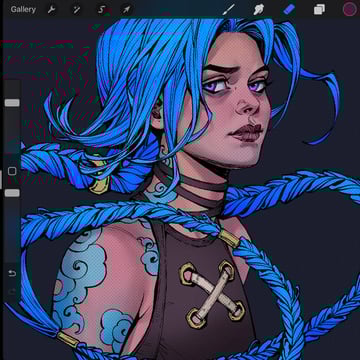
Our portrait of Jinx from Arcane has come along nicely, so let’s continue by placing our character in the appropriate background.
Turn on the “sketch” layer and create a New Layer for the background just on top of it.

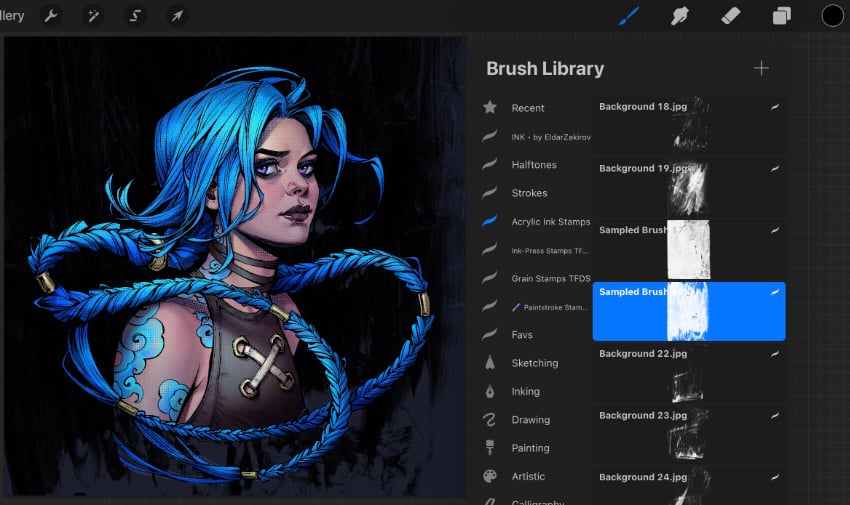
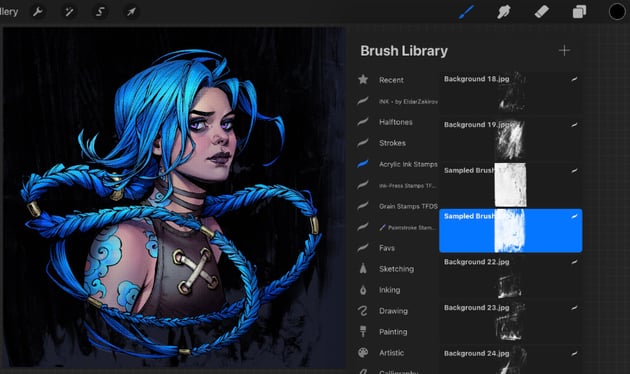
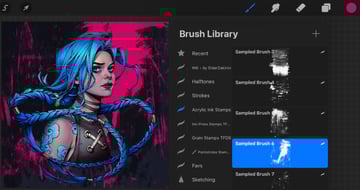
Let’s set a painterly textured background first. I found the Sampled Brush 18 brush from the Acrylic ink Stamps set, which is perfect for creating a traditional-looking texture.
Use the Max Size of the brush, and cover the background with a black stamp texture.
You can make the texture softer by reducing the Opacity of the layer to about 50%.


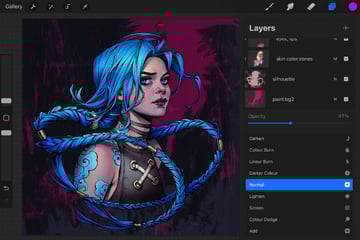
Now let’s add some color to the background. On a New Layer, using Sampled Brush 6 and crimson color, add some texture to the background.
Feel free to use any other stamps to cover the background with texture. These stamp brushes are perfect for achieving a painterly look. Play around with them until you get the desired result.


Reduce the Opacity of the layer to about 40% to tone down the color slightly.


Step 2
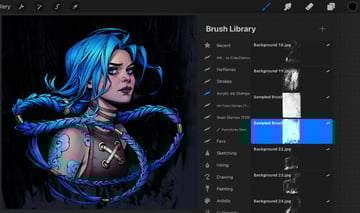
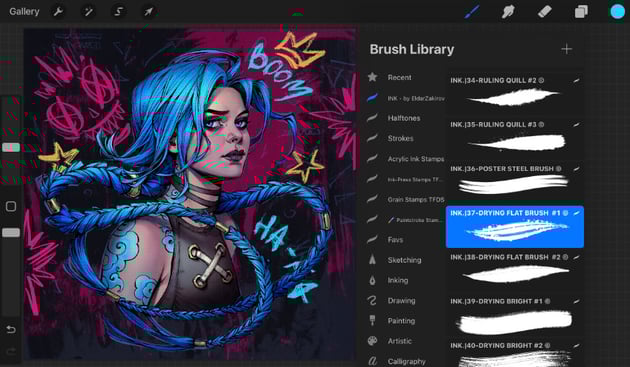
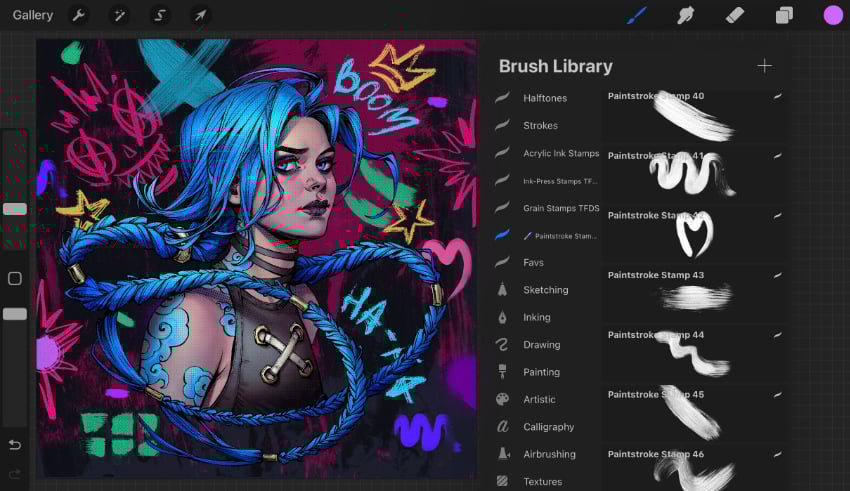
Now that the painterly textured background is done, let’s start adding some cool graffiti drawings to the background. Create a New Layer and pick the Ink.35-Ruling Quill brush from the Ink by Eldar Zakirov set to paint stylised figures. Use your sketch as a reference for placing them.


Also, let’s create some new graffiti writings using the Ink.37-Drying Flat Brush from the same set. Draw them on a New Layer again—it will help to transform or move them if needed.

Step 3
Now we come to the most fun part of the process of drawing a portrait. We’ll use some cool stamps and a variety of juicy colors to place them randomly on the background.
Go to the Paintstroke Stamps set, choose any stamps you like, and fill the empty spaces with different figures in whatever manner you find best. You can play around with the colors and the figure sizes until you’re happy with how it looks.

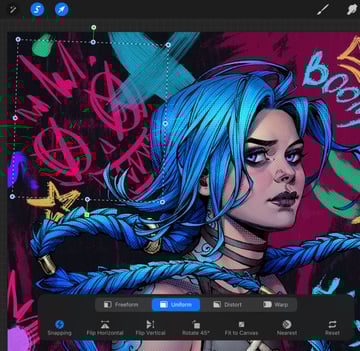
Now that all the graffiti drawings are done, we can transform and recolor any figure if needed.
Tap the Selection tool, and select the figure you want to transform on its layer. Then tap Transform, and now you can move the object, resize it, or change the color.

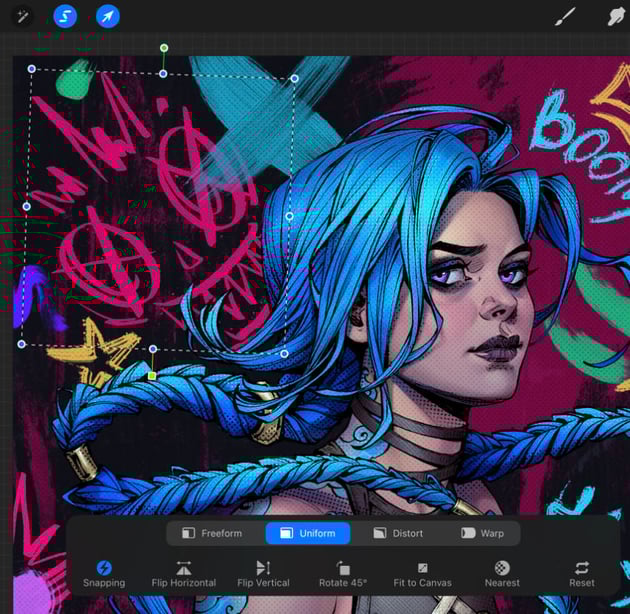
Now we can call our work complete.


Step 4
Let’s add a couple more textures to the background to make it a bit messier.
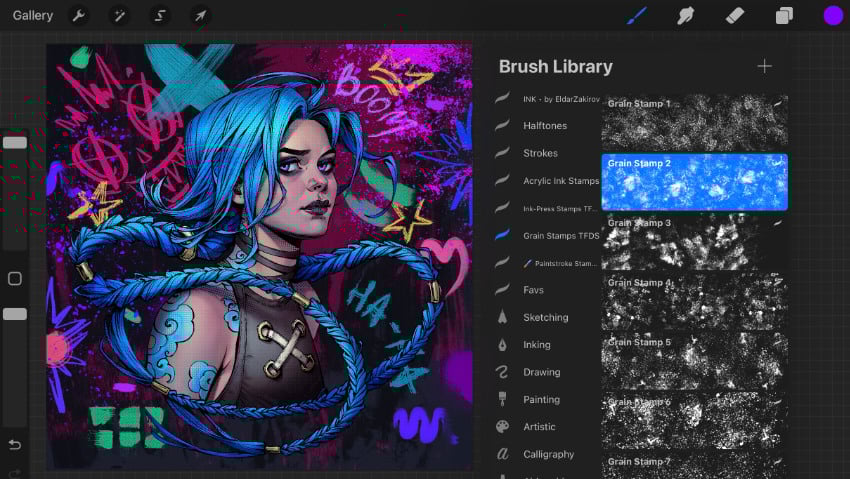
First, create a New Layer on top of the “graffiti” layers. Open the Grain Stamps set and pick the Grain Stamp 2. Increase it to Max, and place it on the edges and corners of the canvas randomly using pink and purple. Feel free to experiment with other textures and colors to get the desired effect.


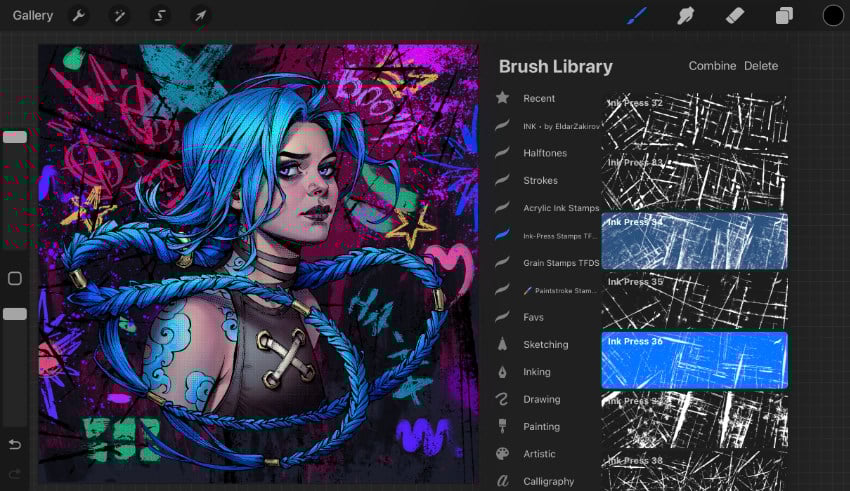
Create a New Layer for one more texture. Open the Ink-Press Stamps set and use Ink Press 34 and 36 to add some black texture to the background. You can rotate the texture or increase it as you like to cover the canvas.


Step 5
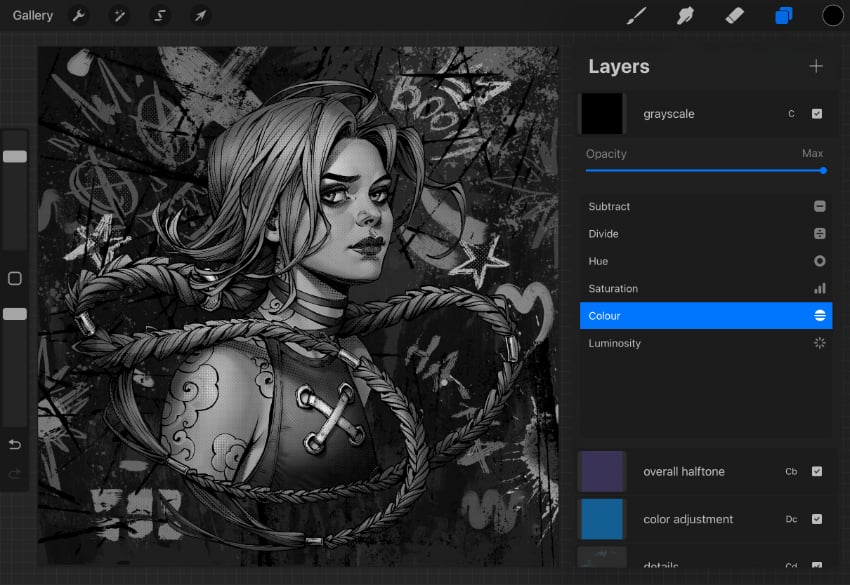
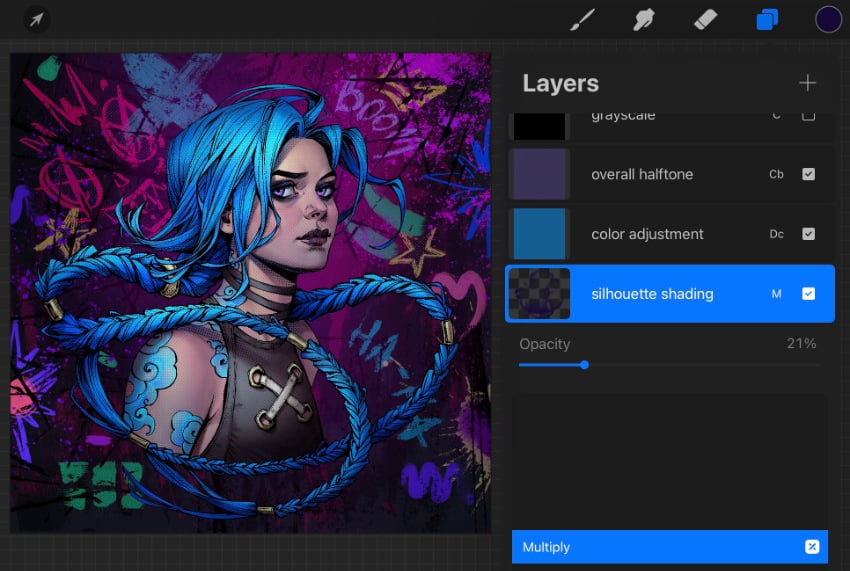
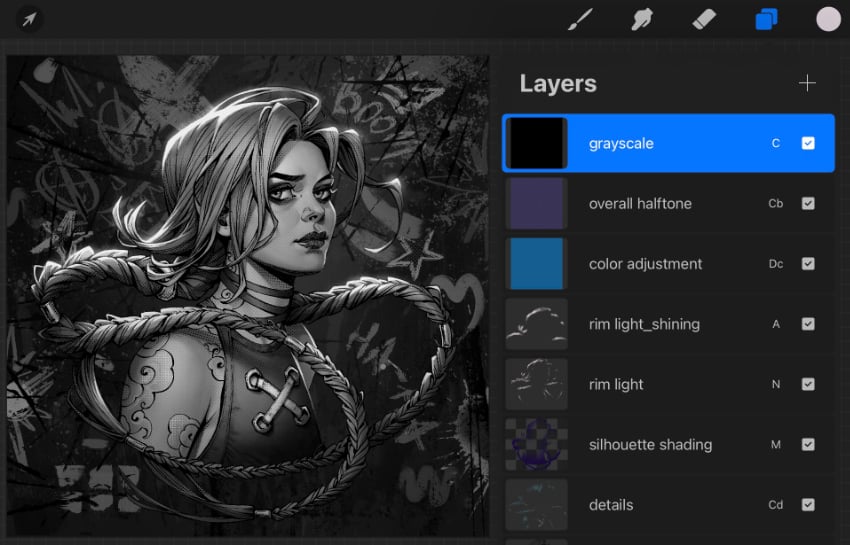
Now that our Jinx Arcane art piece is almost finished, let’s check how it looks in grayscale. This step is very important because it shows the tonal values of the artwork, which help with composition, showing the lightness or darkness of the colors and the dimensions of the piece.
Create a New Layer on the very top of all the layers. Fill it with black and set it to Colour Blending Mode.


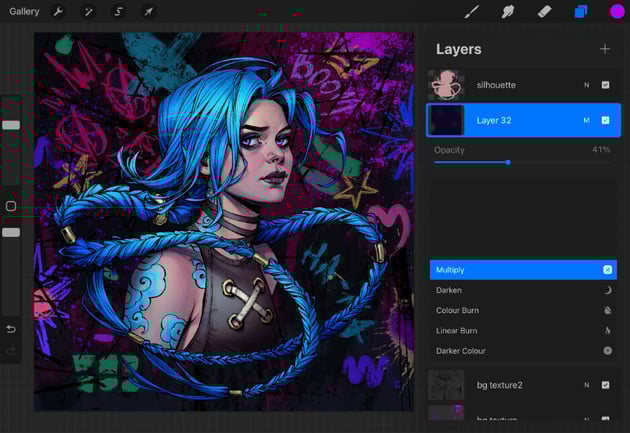
Now we can see that our character is getting a little lost in such a bright background, and we want the character to pop a bit more. Too much detail all over the canvas can be overwhelming, so let’s make our composition more balanced and fix it by darkening the background a bit.
Create a New Layer on top of all background layers. Fill it with dark blue and set it to Multiply with about 40% Opacity.


Now we need to blend the graffiti drawings behind the character’s face.
Create another New Layer and make a few large purple strokes just behind the character using a Soft Brush. Change the Blending mode to Screen and reduce the Opacity to about 40%.


Let’s define the focal point of the piece.
Create a New Layer between the “details” and “color adjustment” layers. We’ll add some silhouette shading to the character.
Select the “silhouette” layer, and then go to “silhouette shading”. Using the same brush, just make it as large as possible, and add some shading to the bottom and sides of the character, leaving the face and center of the silhouette lightened. This helps to bring the focus to the top part of the character, and this will be the focal point of our piece. Set the layer to Multiply with about 20% Opacity.


Step 6
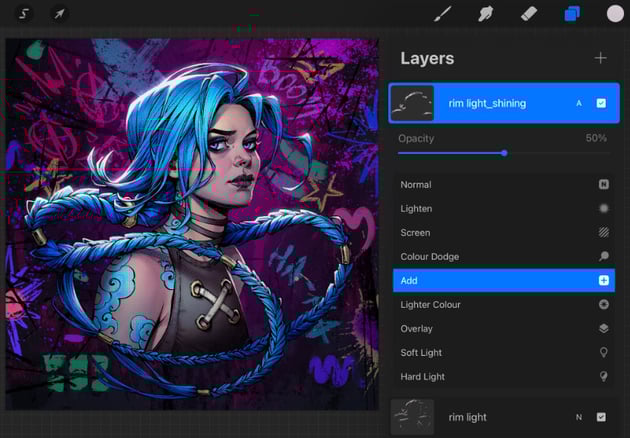
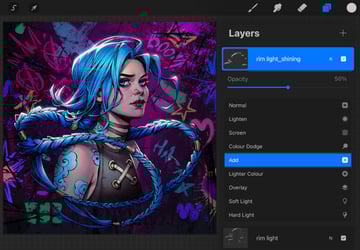
As a final touch, let’s make our character more lively and expressive by adding some intense highlights as a rim light. It’s a very effective tool for using light to create a three-dimensional effect.
Create a New Layer below the “color adjustment” layer. Using the HB Pencil brush, add a bright rim light to the top and a bit to the sides of the hair, braids, and facial contours. This light effect helps to separate our character from the background.


On a New Layer, let’s add a shining effect to the rim light using a Soft Brush. Set the layer to Add with 50% Opacity.

Finally, let’s do a last check of the piece with the “grayscale” layer. And if we’re satisfied with how it looks in grayscale, we can call our work complete.

We’re finished!
Congratulations on completing this tutorial on how to draw a portrait in Procreate. It was a time-consuming process, but I hope it was interesting as well. Thank you so much for joining me in this tutorial, and I hope you enjoyed the process.