Do you want to extend the background of a photo to give your image more breathing room or a different aspect ratio? This quick tutorial will show you how to achieve fast, professional results using the AI tools in Envato’s ImageEdit and the latest features in Adobe Photoshop—no advanced skills required!
We’ll cover how to seamlessly expand your photo’s background while preserving the image’s authenticity. Whether you need to adjust a portrait photo or adapt images for various platforms, knowing how to extend the background of an image is essential.
What you will learn in this tutorial on extended photo backgrounds
Method 1: How to use Envato’s ImageEdit to extend backgrounds
Do you know how to extend the background of a photo without Photoshop? Follow these quick steps.
Step 1
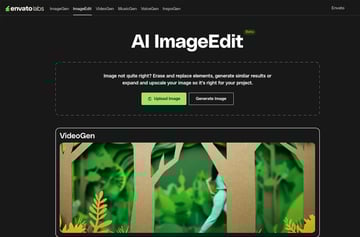
Head over to Envato’s ImageEdit. There you can import your image into the editor by clicking Upload Image or by dragging and dropping it onto the canvas.


Step 2
ImageEdit allows you to upload your own images or use photos from Envato. You can select the Edit with AI (Beta) option if you are on Envato.


Step 3
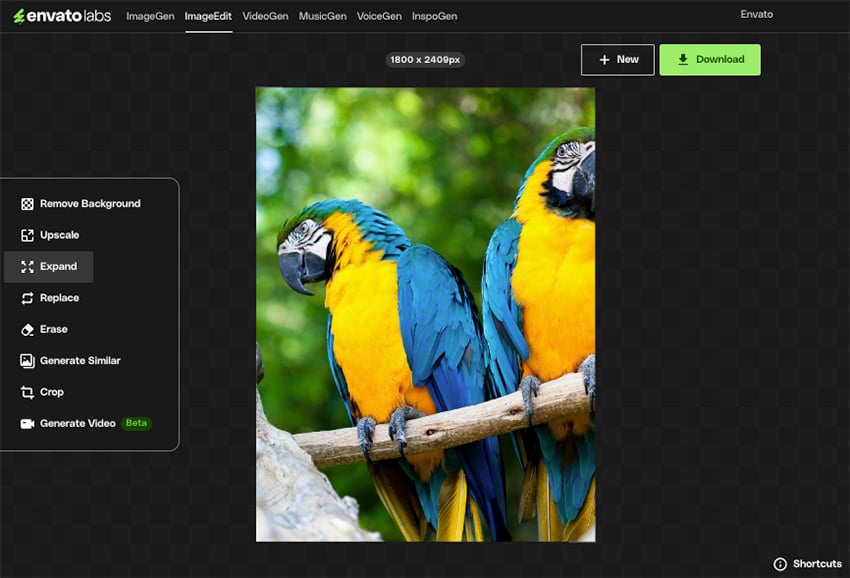
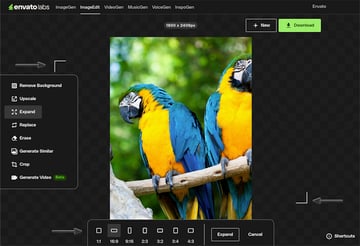
Once your image is uploaded to the editor, select Expand from the editing option panel on the left. This is the key to expanding your background.
Dispayed on the top of the image, you will see the current image’s canvas size, set here at 1800 x 2409 px.

Step 4
ImageEdit will present various aspect ratios (1:1, 16:9, 9:16, 2:3, 3:2, 4:4, and 4:3) to choose from. Choose how much you can extend the canvas, whether wider or taller. For this tutorial, I choose 16:9.
Once you’ve picked the aspect ratio, you will spot the appearance of crop marks around the image to present those expansion dimensions. When ready, select Expand from the bottom panel.


Step 5
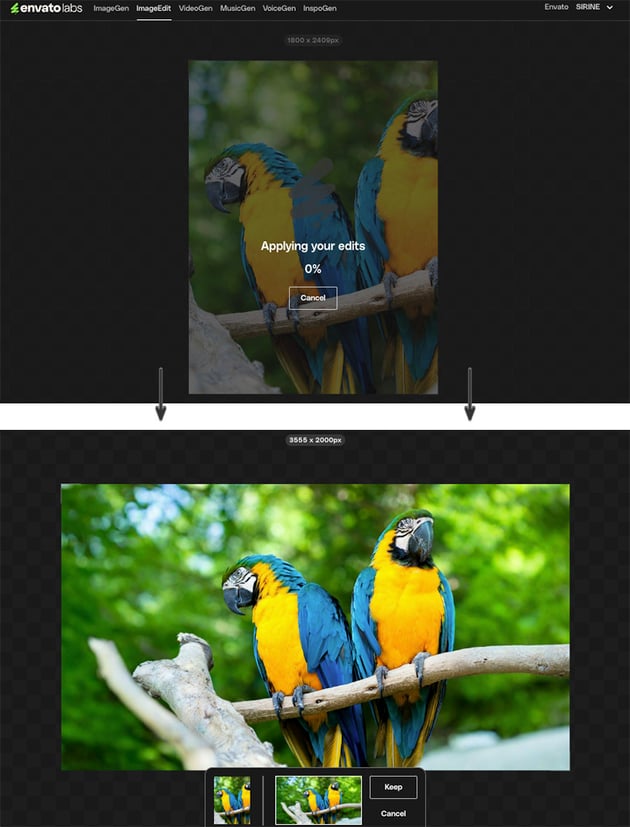
After you select the expansion you want, AI will generate a preview of the extended background to match the scene. The new dimensions are 3555 x 2000px, and the new AI-generated image fills the scene seamlessly.
Select Keep if you are satisfied with the expansion results.


Step 6
Once you’re satisfied with the results, Download the edited image, because edited images are not automatically saved on the platform.
Don’t be afraid to try the Expand with different aspect ratios, or even upload the image again to produce varied results.
Now you know how to extend the background of a photo without Photoshop!


Method 2: How to extend the background of a photo using Photoshop
Step 1
Open your selected image in Adobe Photoshop (File > Open).
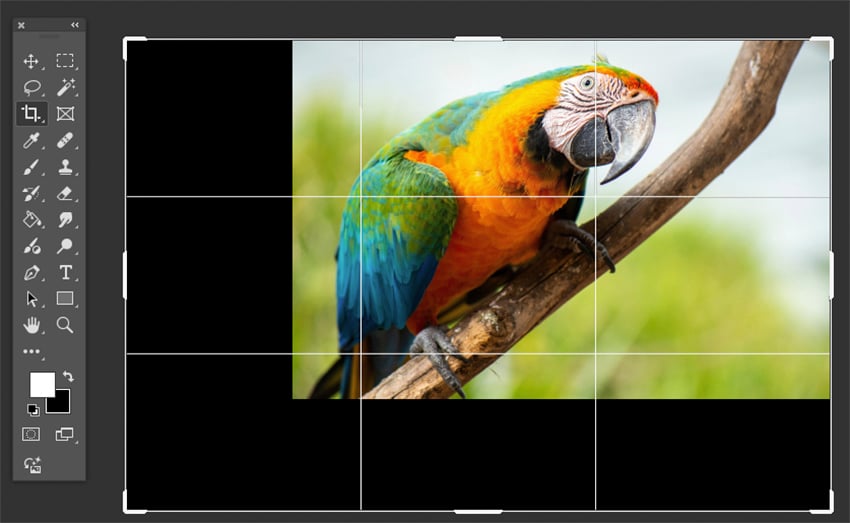
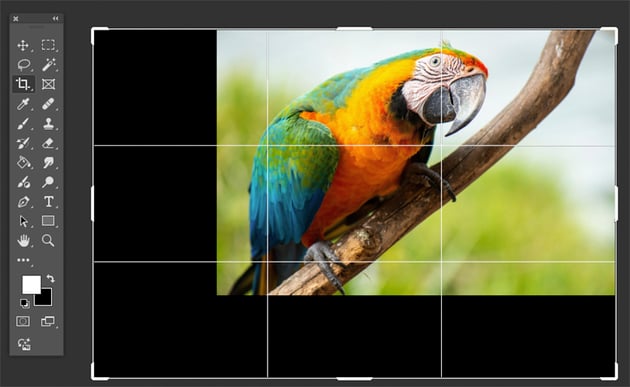
Then select the Crop Tool (C) to extend the background of the photo. Expand the dimensions of the cropbox outwards in the direction you want to extend the photo.
Alternatively, suppose you are placing the image onto a canvas size that doesn’t fit. In that case, you can use the Marquee Tool (M) or Magic Wand Tool (W) to select the area you want to enlarge.

Step 2
With the empty canvas area showing, Photoshop’s contextual taskbar should appear. Select the Generative Expand option.


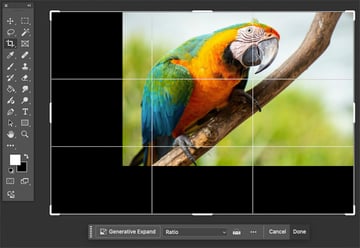
Step 3
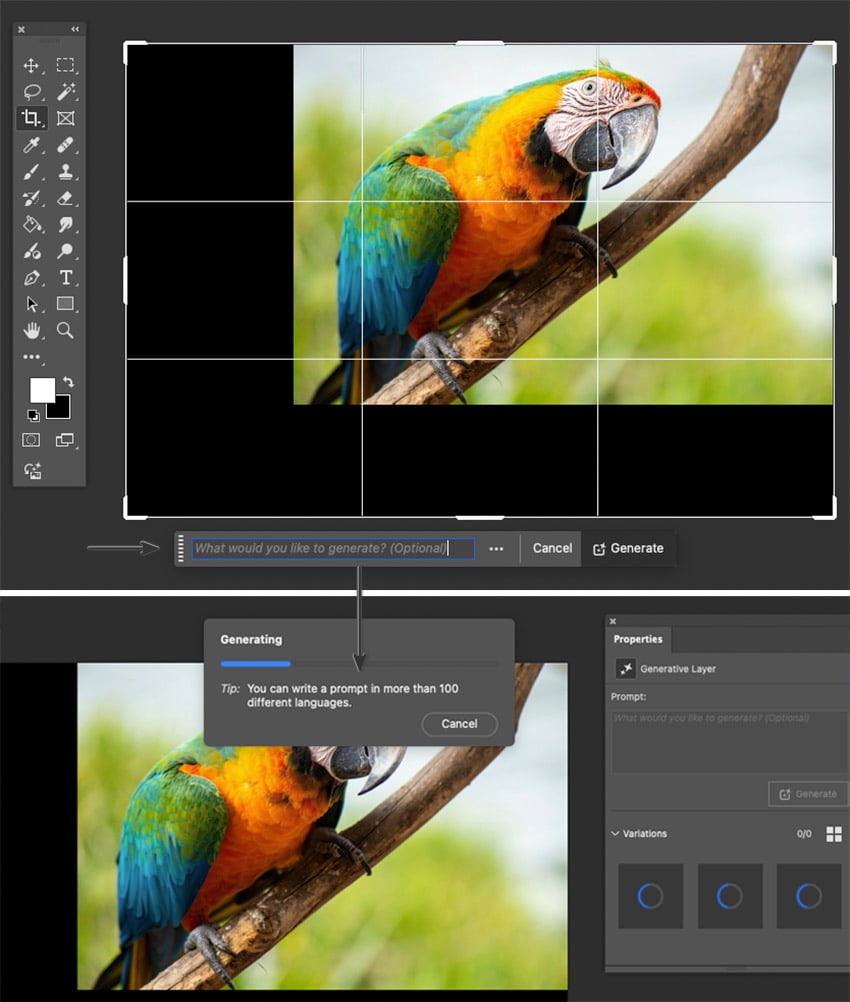
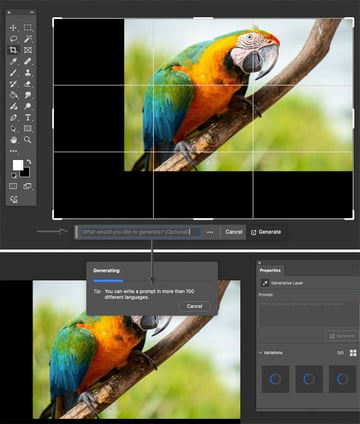
Once you click Generative Expand, you can type in a prompt for what you’d like to be generated or leave it blank for automatic generation, and then click Generate.
You can preview the three generated images in the Properties Panel > Generative Layer tab.

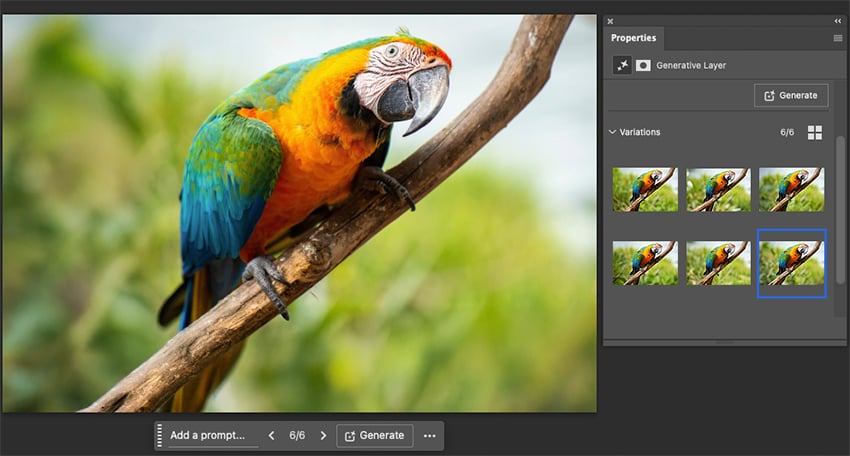
Step 4
Select your preferred image generation variation from the Generative Layer tab.

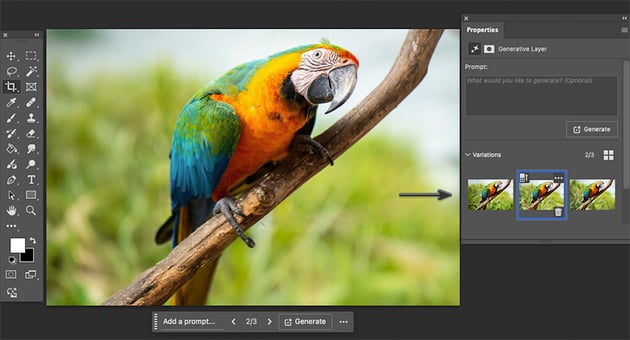

Step 5
Review the variations and choose one that works for you. If you don’t like any, click Generate again to generate a new set of variations.
Once you’ve chosen the best pic, go ahead and File > Save.


Congratulations! You know how to extend a photo’s background in two methods
You’ve now learned how to extend the background of a photo using Envato’s ImageEdit and Photoshop, easily and without losing quality. Whether you want to expand the background of an image for social media, design layouts, or prints, these tools make the process faster and seamless, with or without Photoshop!
You can follow up this tutorial with How to Resize an Image in Photoshop, How to Remove Backgrounds in Canva , or How to Extend a Background in Photoshop.


AI editing tools and AI image generation continue to develop. Take the opportunity to learn and enhance your skills through these tutorials and tips.