There’s nothing like a fresh cup of coffee in the morning. Learn how to create a coffee cup mockup in Adobe Photoshop. During this tutorial, you will discover how to create a smart object for your coffee logo and apply effects to generate a realistic cup mockup.
What You’ll Learn in This Coffee Cup Mockup Tutorial
- How to create a Smart Object for a plastic cup mockup
- How to create a cup mockup
Tutorial Assets
1. How to Create a Smart Object for a Plastic Cup Mockup
Step 1
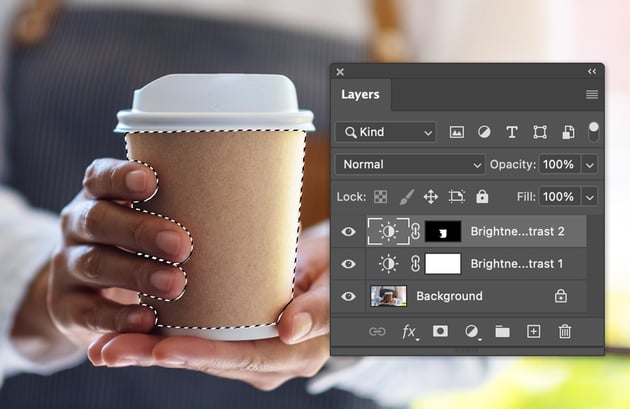
File > Open the paper cup of coffee photo in Photoshop. Add a Brightness/Contrast adjustment layer and change the Brightness to 30.


Step 2
Add another Brightness/Contrast adjustment layer. Use the Pen Tool (P) to make a selection around the coffee cup. Make a Selection and apply a mask so that the effect is only applied to the paper cup. Change the Brightness to 55.


Step 3
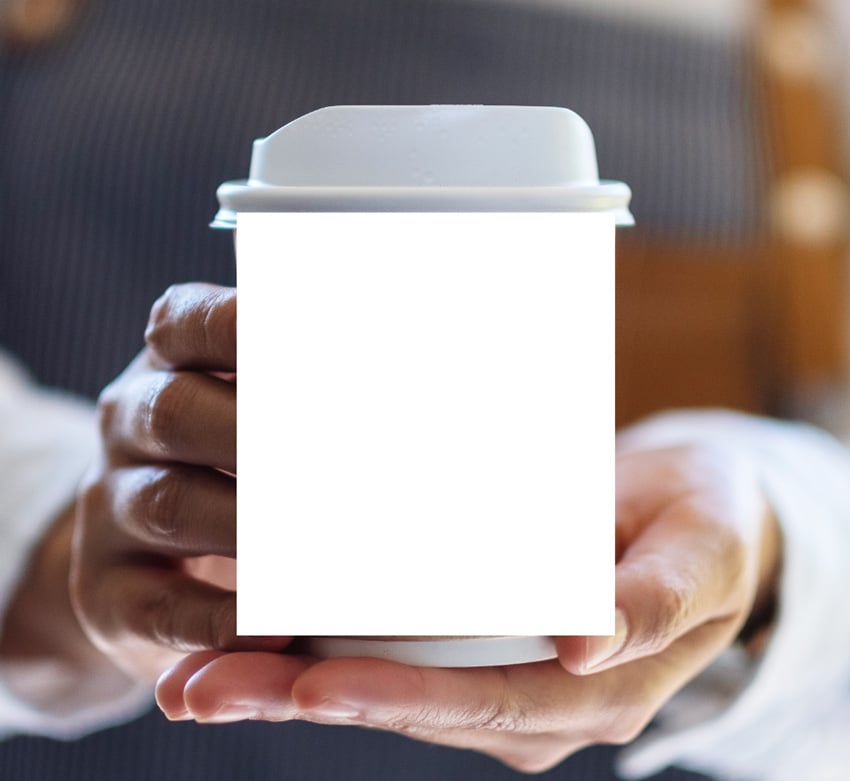
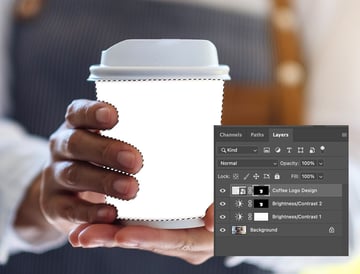
Use the Rectangle Tool (U) and make a 1243 px x 1390 px shape that will cover the surface of the cup mockup. Name this layer Coffee Logo Design.


Step 4
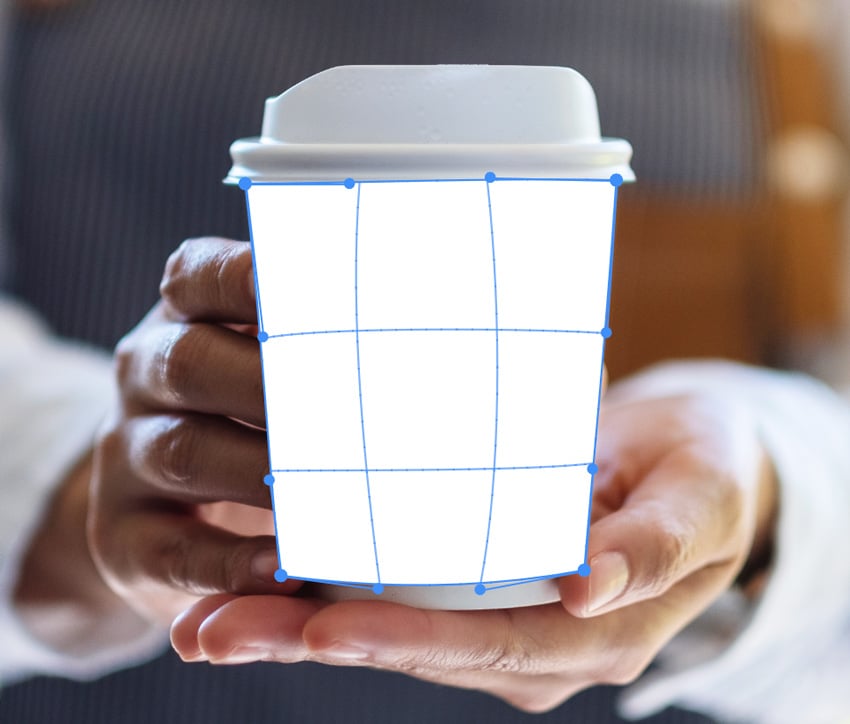
Right-Click the Coffee Logo Design layer in the Layers panel and Convert to Smart Object. Go to Edit > Transform > Warp to fit your smart object layer to the coffee cup mockup.
Decrease the Opacity of this layer in the Layers panel to help with warping.


2. How to Create a Cup Mockup
Step 1
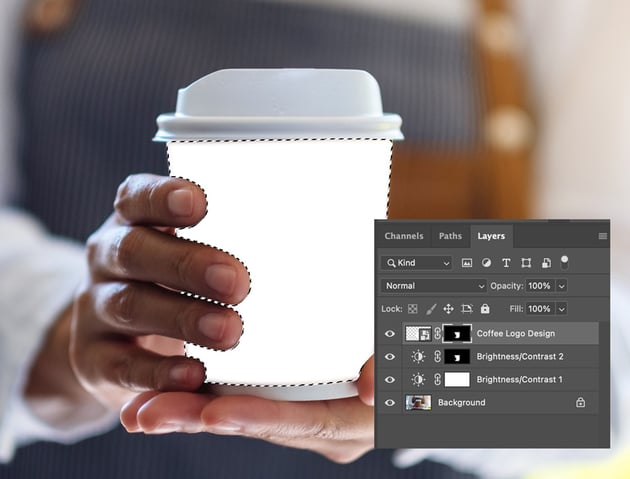
Activate the Selection from the second Brightness/Contrast layer mask (Command-Click the mask thumbnail) and create a mask on the Coffee Logo Design smart object layer.

Step 2
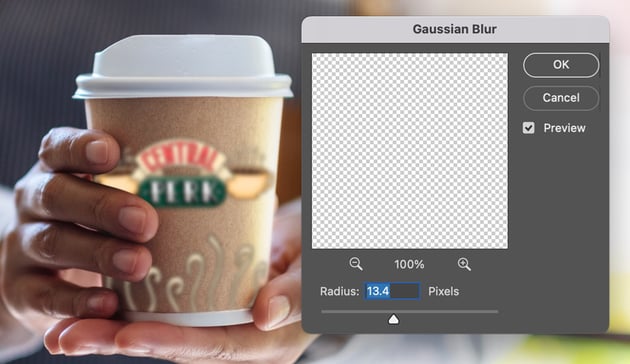
Double-Click the thumbnail on the Coffee Logo Design layer. This should open a new file window. Copy (Command-C) and Paste (Command-V) the Central Perk logo. Go to File > Save, and the smart object will automatically update. You can now close this new window.


Step 3
Go to Filter > Blur > Gaussian Blur and change the Radius to 13.4.

Step 4
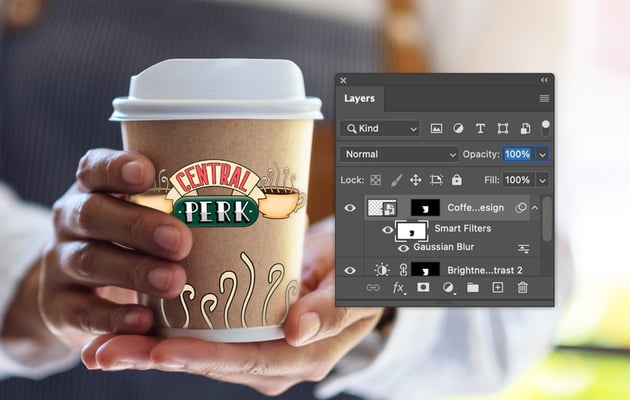
On the Smart Filters mask, use a soft brush using the Brush Tool (B) and mask away the filter from the center of the coffee cup.


Step 5
Create a new layer above the Coffee Logo Design layer. Change the foreground color to #d6cdbb. Select the Brush Tool (B) and use a soft brush to highlight the right side of the 3D cup mockup. Right-Click this highlight layer in the Layers panel and select Create Clipping Mask. Change the Blend Mode to Screen.
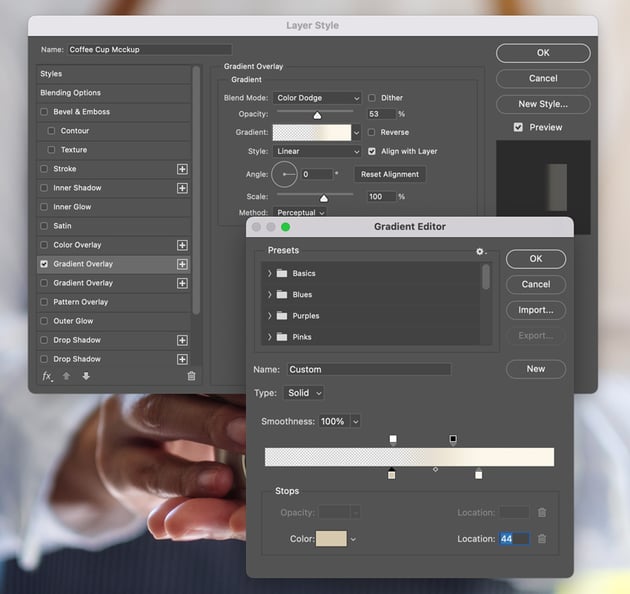
Step 6
Place the Coffee Logo Design and Highlight layer within a Group in the Layers panel. Add a Gradient Overlay to this group by Double-Clicking this Group layer to bring up the Layer Styles. Use these settings:
- Blend Mode: Color Dodge
- Opacity: 53%
- Style: Linear
- Angle: 0
- Color #1:
#d1c7ae, Opacity 0% - Color #2:
#faf6ea, Opacity 100%


Step 7
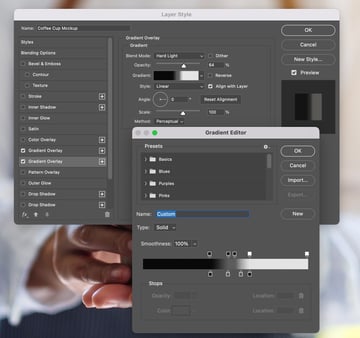
Add another Gradient Overlay Layer Style to this Group. Use these settings:
- Blend Mode: Hard Light
- Opacity: 63%
- Style: Linear
- Angle: 0
- Color #1:
#111111, Opacity 100% - Color #2:
#5c5c5c, Opacity 100% - Color #3:
#5c5c5c, Opacity 0% - Color #4:
#000000, Opacity 0%


That’s It! You’re Done!
Start creating various mockups like a plastic cup mockup or a coffee cup sleeve mockup with this tutorial as the foundation.


Become a Mockup Pro!
Now that you’ve blazed through this 3D cup mockup like a pro, show off your skills with these mockup tutorials from Envato.