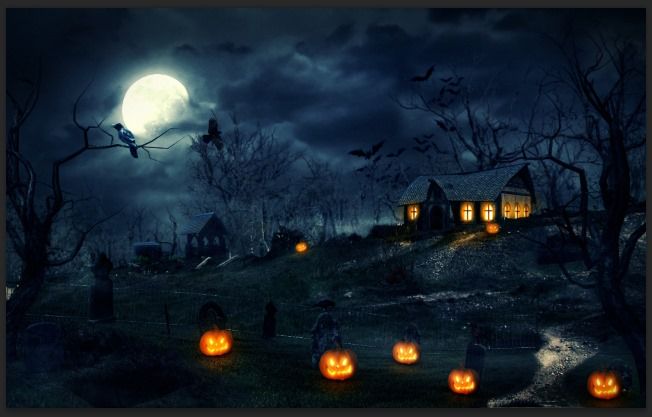
Preview of Final Results
Tutorial Resources
- Pumpkin – by TheKaykat-Stock
- Tombstones – by wolverine041269
- Dead Trees – by Free-Stock-By-Wayne
- Grave House – by Free-Stock-By-Wayne
- Dig Sites – by Free-Stock-By-Wayne
- Ravens & Crows – by FairieGoodMother
- Hayswagon – by CHEYENNE75
- Bat Brush – by radroachmeat
- Fog – by Moonglowlilly
- HOUSE 07-03 – by CHEYENNE75
- Pumpkin On Hayswagon – Pixabay
- Moon Sky – Pixabay
- Dark Cloud Sky – Pixabay
- Dead Forest – SXC.HU
- Hill – SXC.HU
- Fence – SXC.HU
- Field – CGTexture (you need to resigter a free account in order to download)
Step 1 – Create A New File
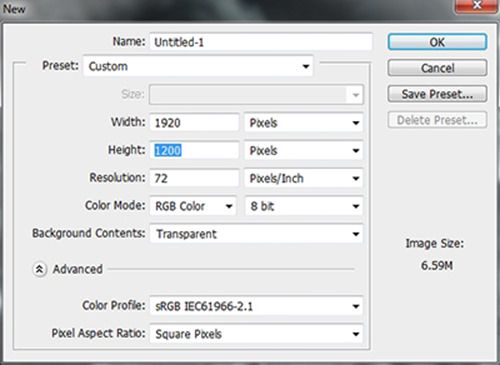
Open Photoshop and create a new document with Width 1920 and Height 1200, leave the Background Contents as Transparent.
Step 2 – Create The Sky
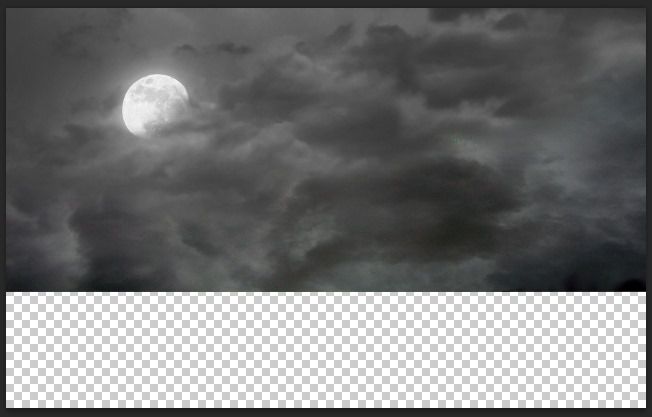
Firstly we will work on the sky first by combining two different images : Moon Sky and Dark Cloud Sky. Place the Dark Cloud Sky into the document first by go to File -> Place, by doing this the image will be set as Smart Object – allows you to work with it indestructibly, this step should be used all along this tutorial for every images. You can also transform any normal layer to Smart Object by right clicking on it and select Convert to Smart Object.
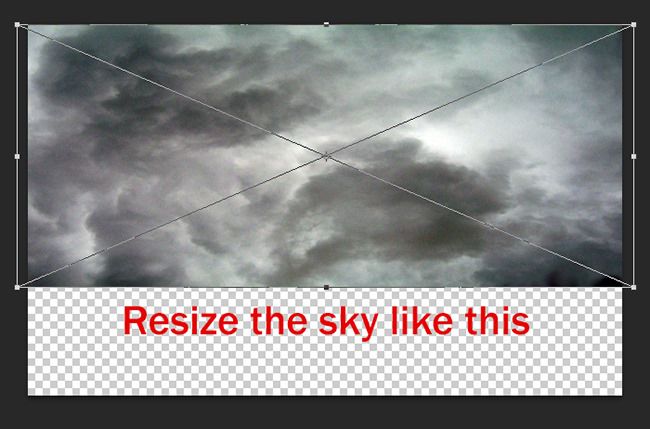
Resize the Sky like below. (Ctrl + T to open Transform tool)
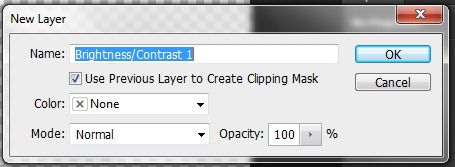
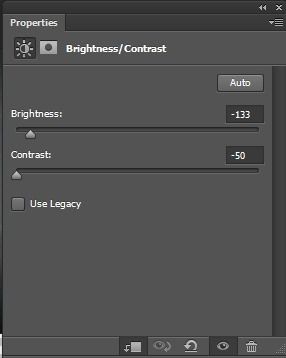
Adjust the Sky a little bit with Brightness&Contrast (Layer -> New Adjustment Layer -> Brightness&Contrast). Remember to tick on the box “Use Previous Layer To Create Clipping Mask“, by this way the adjustment layer will only be used on the Sky layer without affecting other layers below.
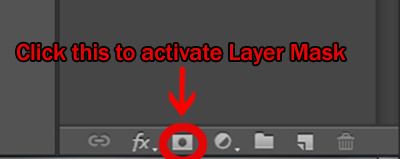
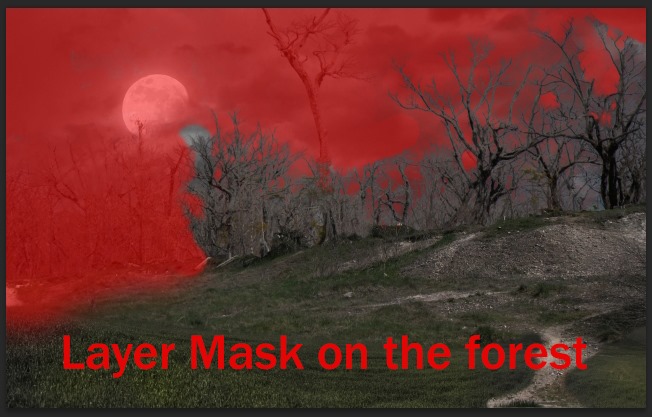
Next, open the Moon Sky image and apply Layer Mask. Layer Mask is a great way to erase unneccesary part on an image and you can still restore the erased part after that if you need to. Quick access to Layer Mask via the panel below the layer area.
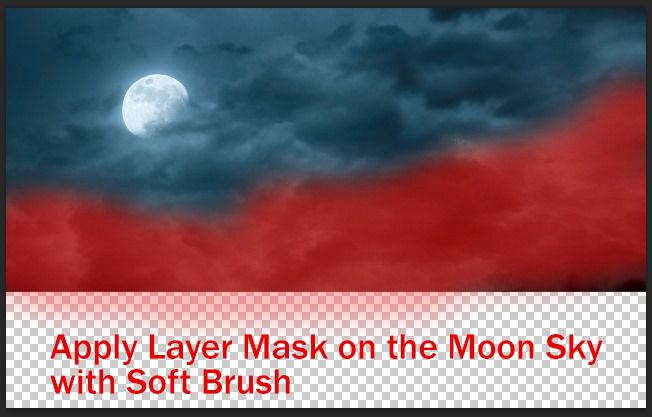
Now grab a big Soft Brush with Black color and start painting on the Moon Sky’s layer mask, the masking part will be indicate with red color. Mask all the white part of this Moon Sky layer.
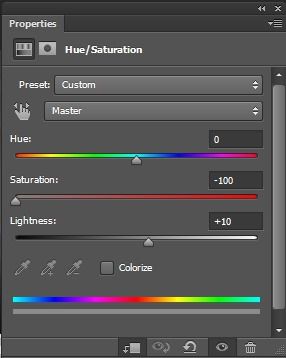
Apply Hue/Saturation adjustment layer to the Moon Sky layer.
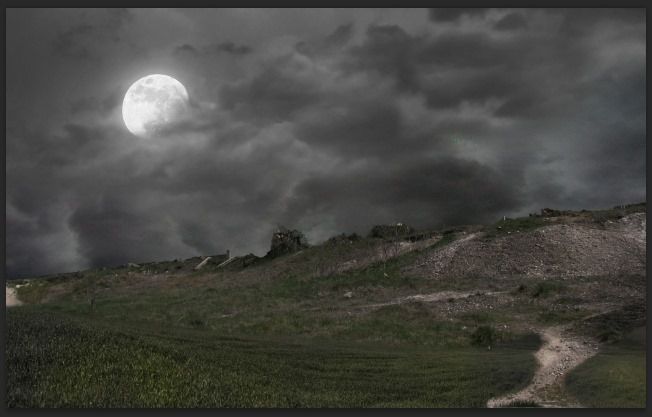
And we’re done with the sky, here is the result.
Step 3 – Create the Ground
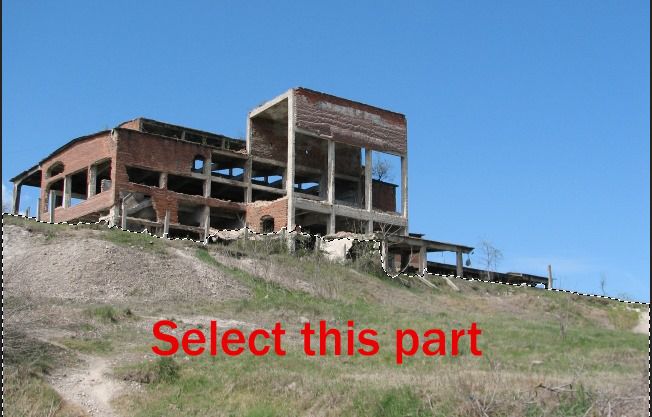
Now we will make the ground with a Hill part and a Field part. Open the Hill image first, use Quick Selection Tool and select the hill like this.
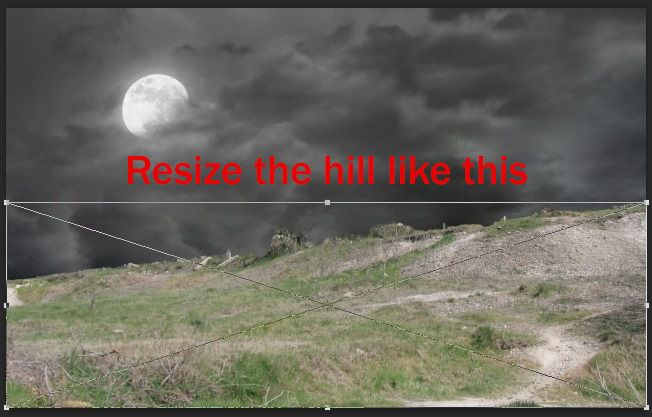
Place the selected part into our document, rotate it to the right like this.
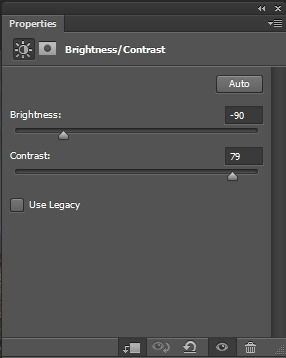
Apply these following adjustment layers to the Hill.
Brightness/Contrast
Hue/Saturation
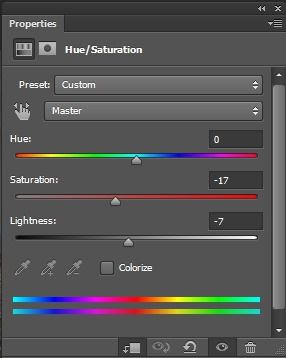
And we will have the Hill look like this
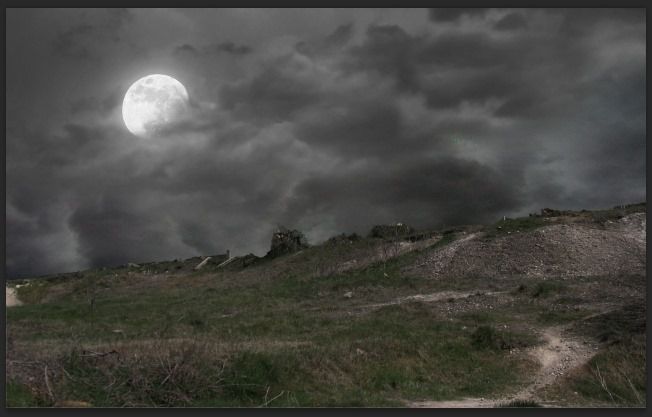
Step 4 – Adding the Field
Open the Field image and select the field like this.
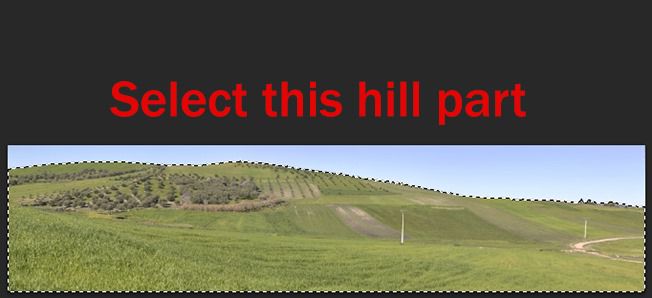
Place the selected part into the document
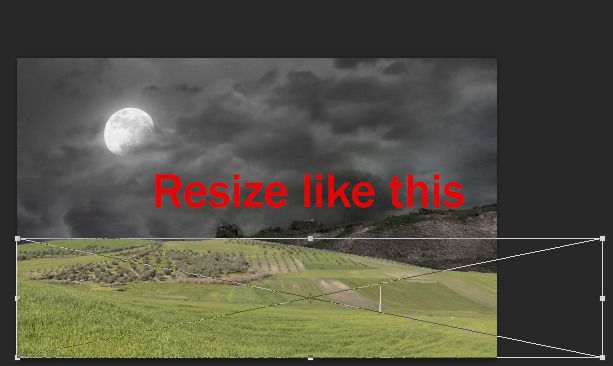
Apply Layer Mask to the Field image.
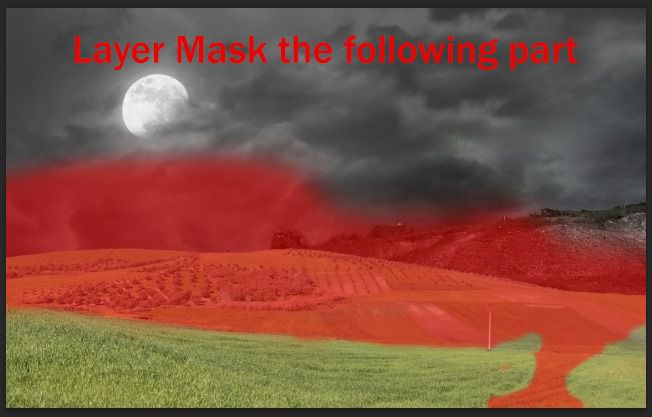
Continue adding some adjustment layers to the Field.
Curves – Hue/Saturation – Brightness/Contrast
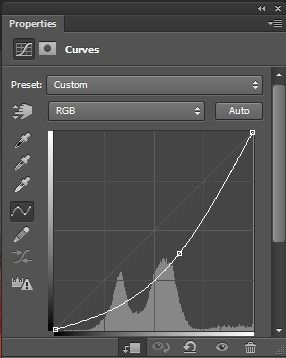
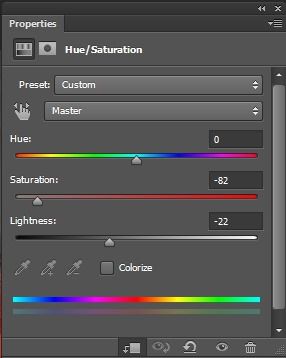
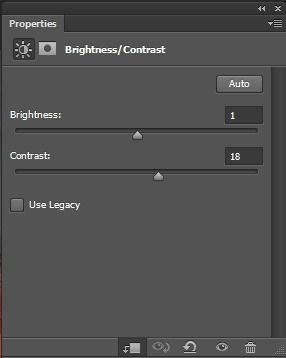
And we’re done with the basic background image for this piece.
Step 5 – Extracting the Dead Forest
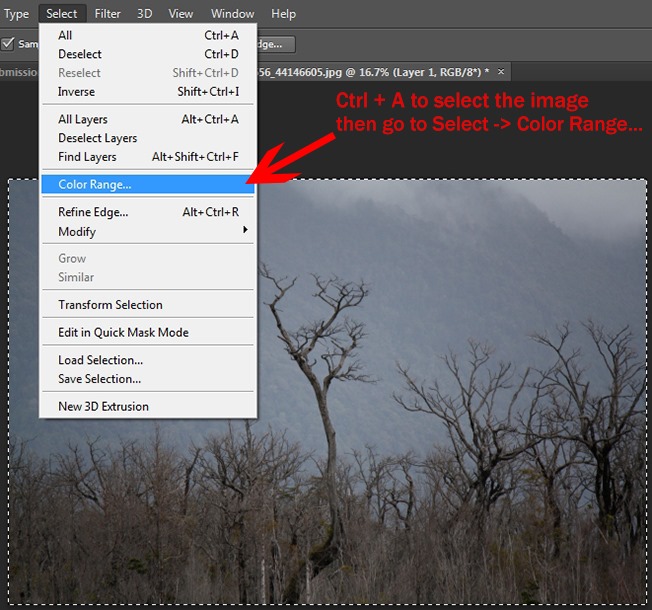
We will learn how to extract this Forest from the image which you can’t simply use Quick Selection or Magic Wand tool to get the forest part, instead we will use Color Range to solve this puzzle. Open the Dead Forest image and hit Ctrl + A to select the whole image, then go to Select -> Color Range…
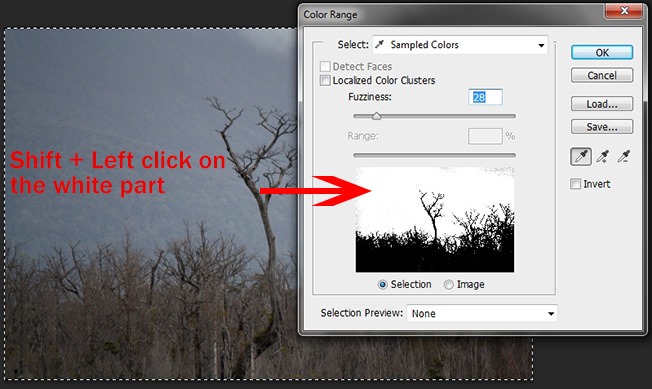
Here comes a little tricky part. Adjust the Fuzziness meter to the point where you can begin seeing the forest part as black color, the other as white and grey color. Hold Shift and left click on the white and grey part until they all turn into white like the image below.
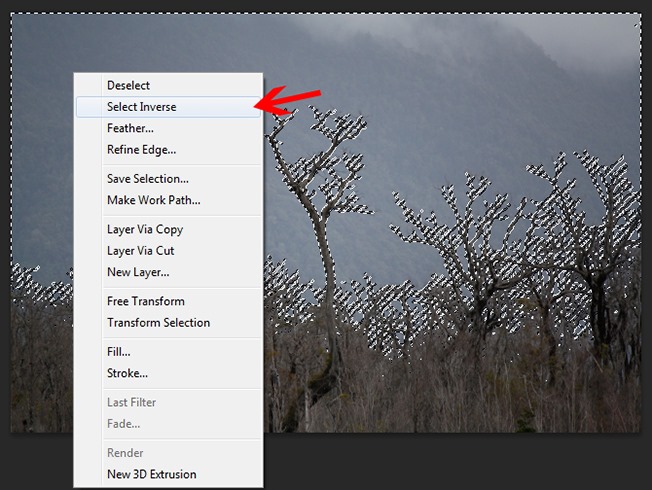
After you can see the forest part clearly in black, click OK. Photoshop will automatically select the white part after that. Right click on the image and choose Select Inverse to switch to the forest part.
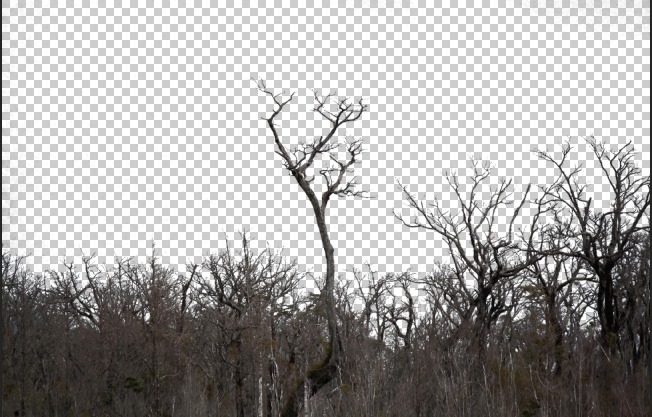
Hit Ctrl + J and bam! You have the forest extracted clean and nice.
Step 6 – Place The Forest
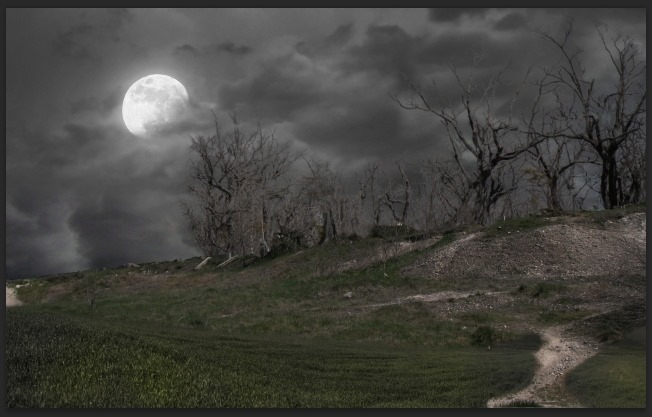
Having our forest extracted, place it into our document, behind the Hill. Layer Mask some part of the forest like below.
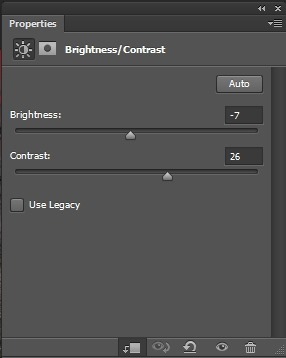
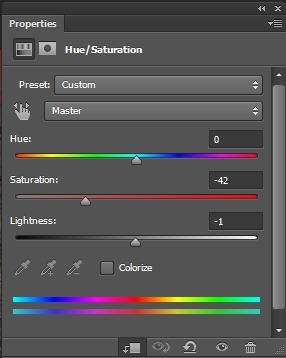
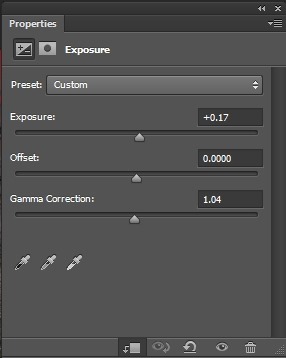
Apply following adjustment layers to the forest.
Brightness/Contrast – Hue/Saturation – Exposure
And this is what we have
Step 7 – More Dead Forest!
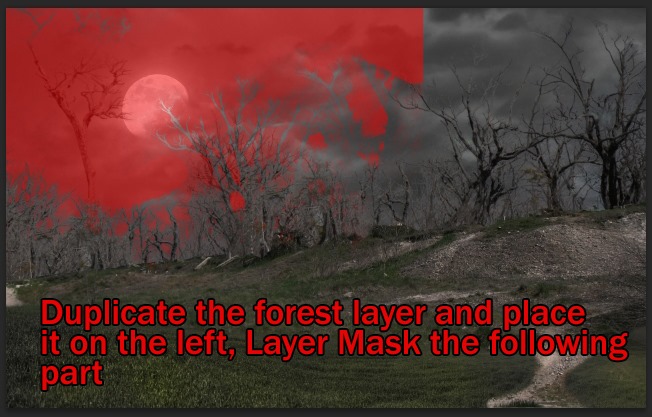
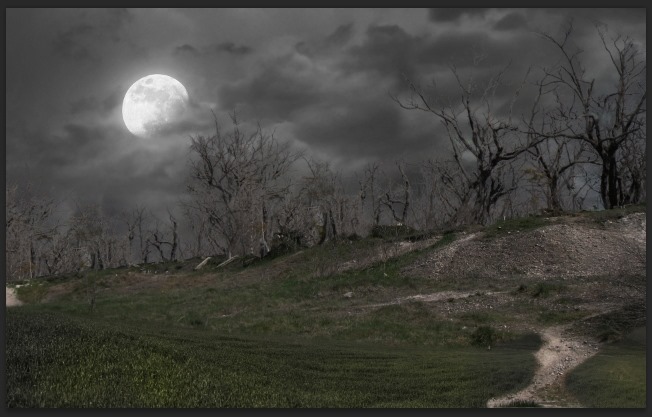
Duplicate the Forest and place it to the left, erase some part of it like this
We’re done with the forest, lets move on!
Step 8 – The Witch House
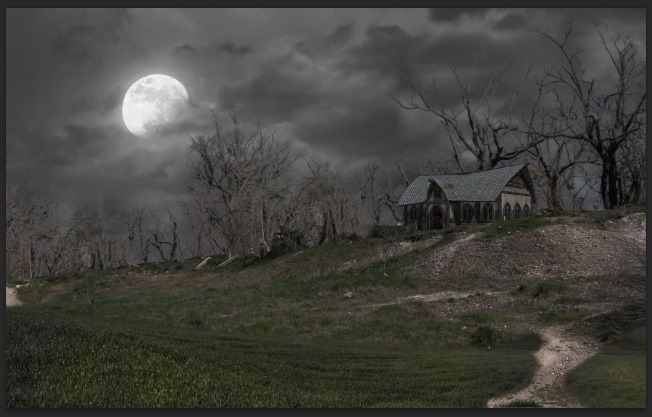
Place the Witch House image like below, place it under the Hill layer.
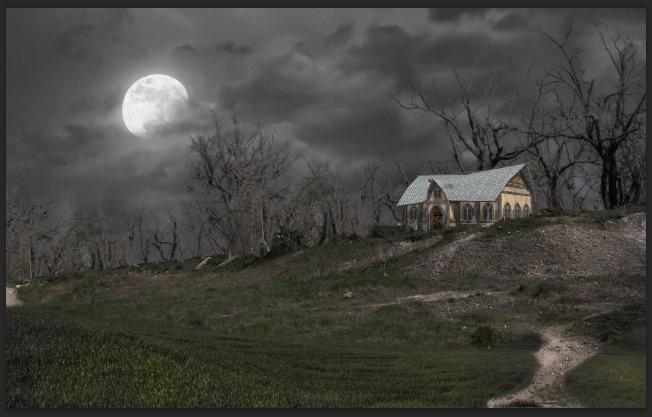
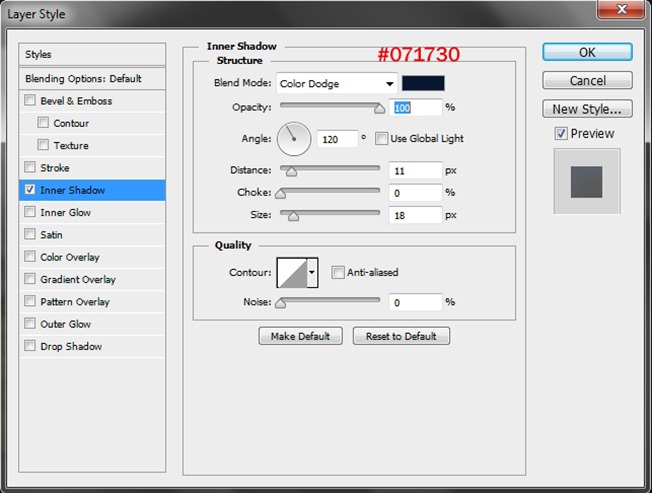
Go to the House layer’s Blending Option and do a little change to Inner Shadow.
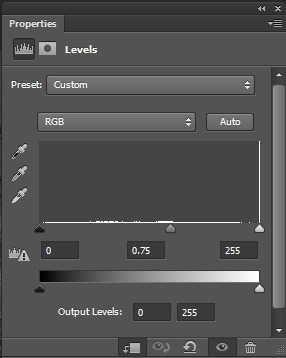
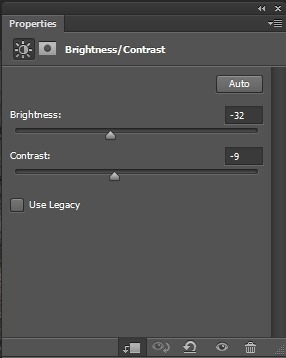
And some adjustment layers, of course!
Levels – Brightness/Contrast – Hue/Saturation

The Witch House has been greatly blended with the whole image.
Step 9 – Create Light From The House
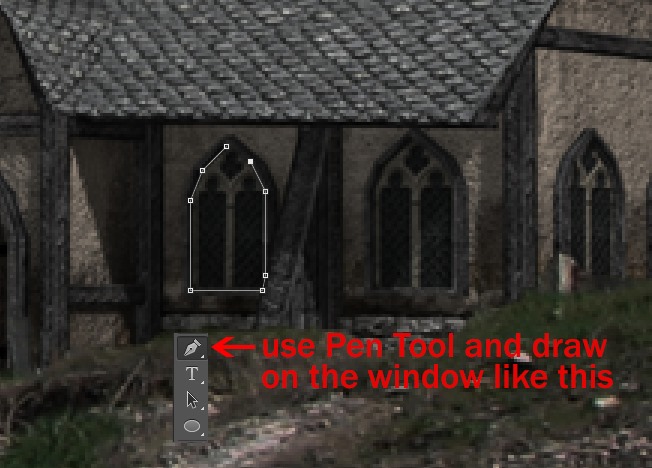
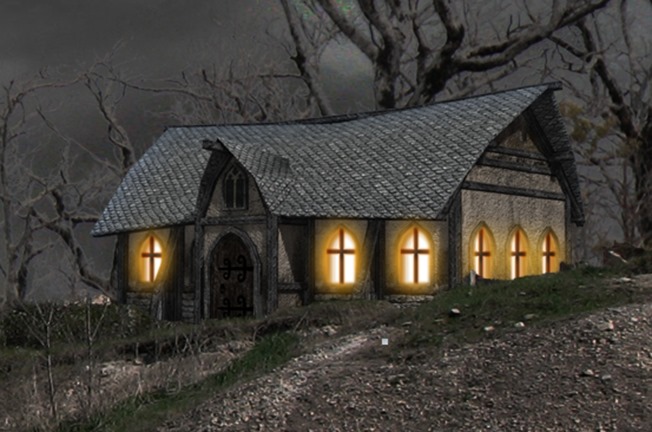
We will add some nice touch for the house by creating glowing light from the house’s windows. Create a new layer, grab the Pen Tool and start draw the window-shape on the house’s window.
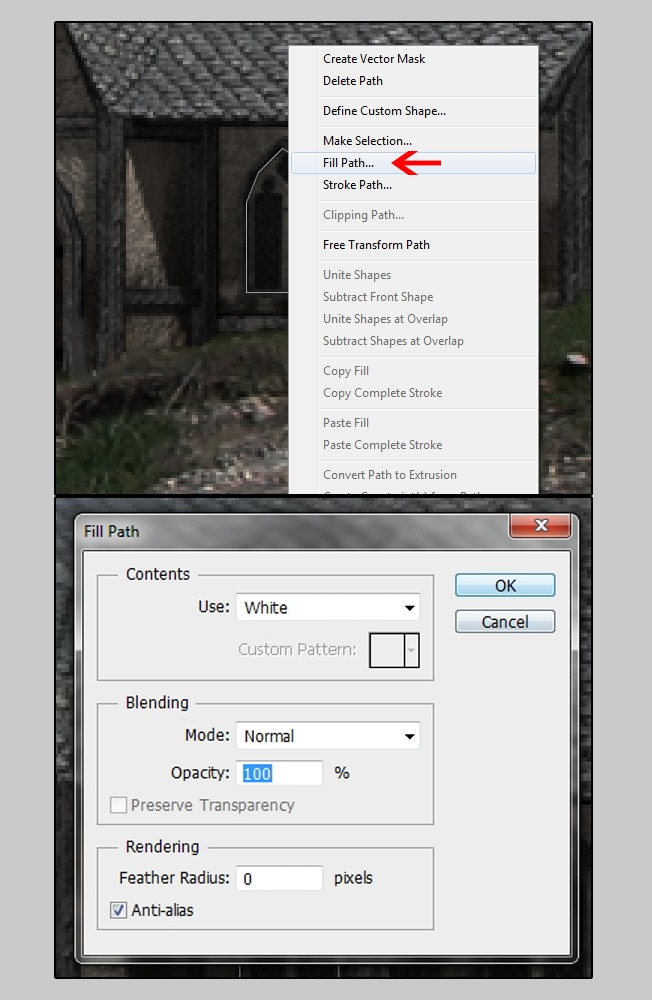
Fill the path you’ve just drew with White color by right click on the path and choose Fill Path, choose White as Content Use.
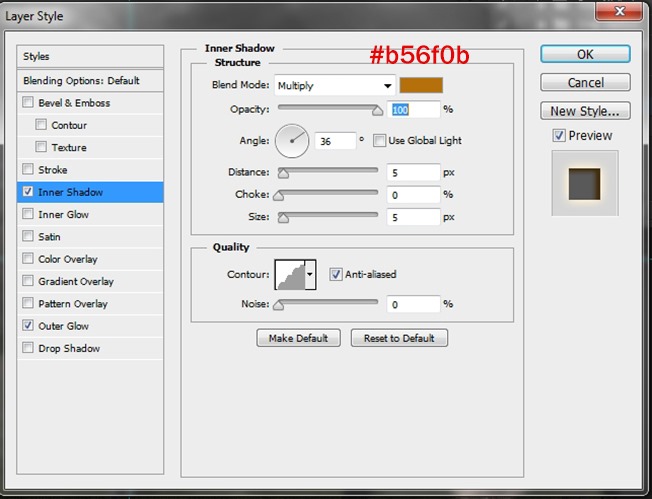
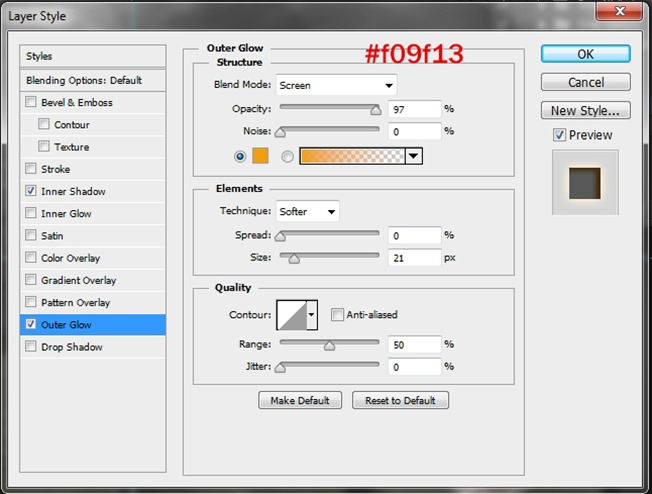
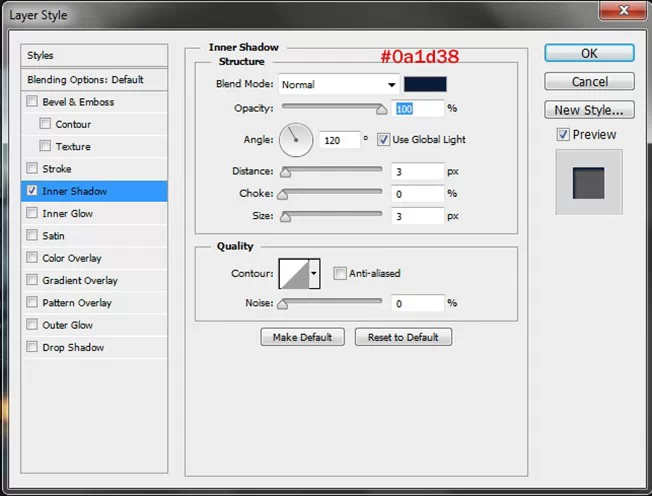
Go to the layer’s Blending Option and do some changes to Inner Shadow and Outer Glow.
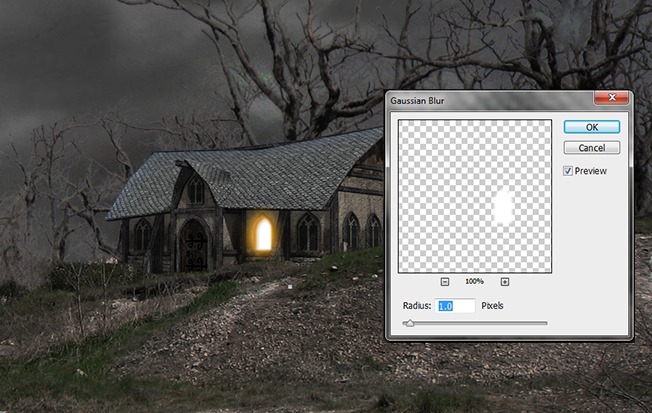
After that, go to Filter -> Blur -> Gaussian Blur, apply 1px and this is what we will have
Step 10 – Create A Windowpane
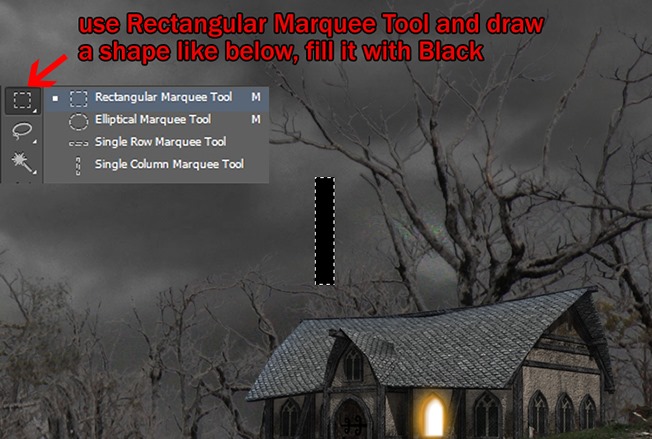
We just can’t leave the bare window like that so that’s why we will make a windowpane. Grab the Rectangular Tool and draw a rectangular shape, fill it with Black.
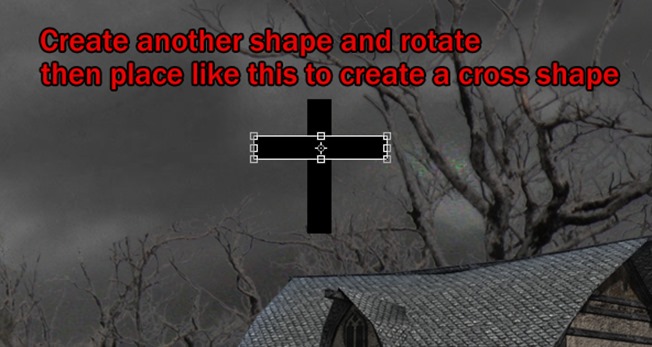
Repeat the previous step but rotate the shape to horizontal to create a cross shape.
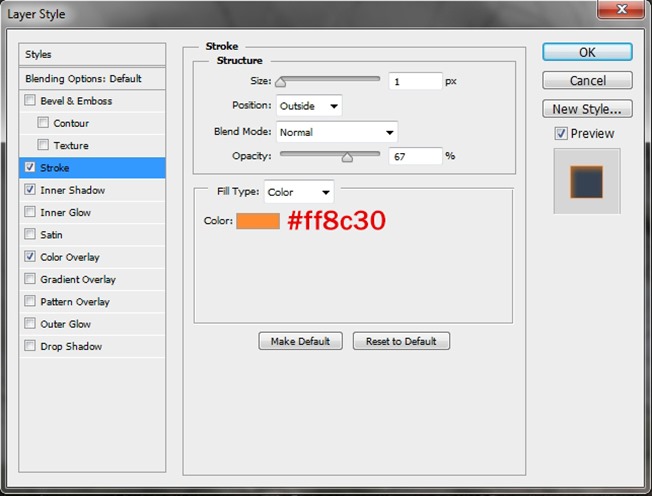
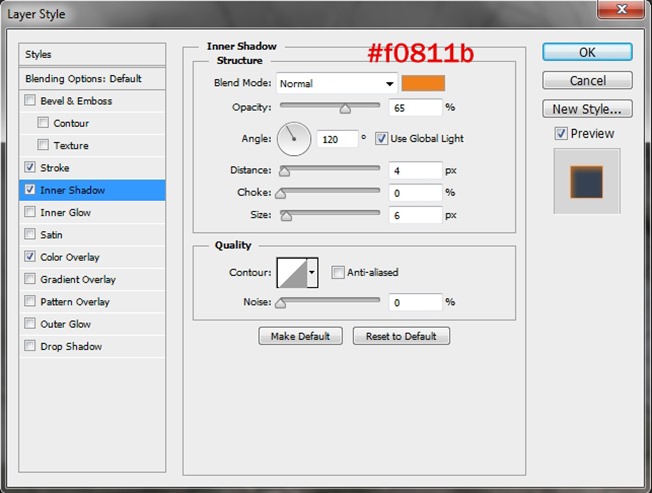
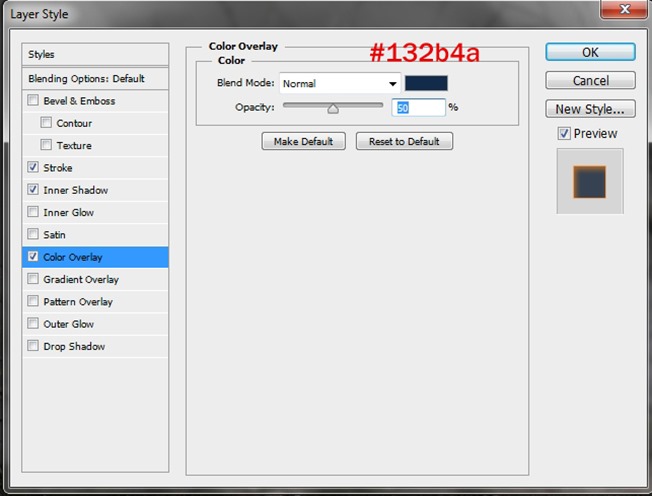
Merge 2 shape layers into one by holding Ctrl + left click on those two and right click, choose Merge Layers. Apply some Blending Option to the layer.
Stroke
Inner Shadow
Color Overlay
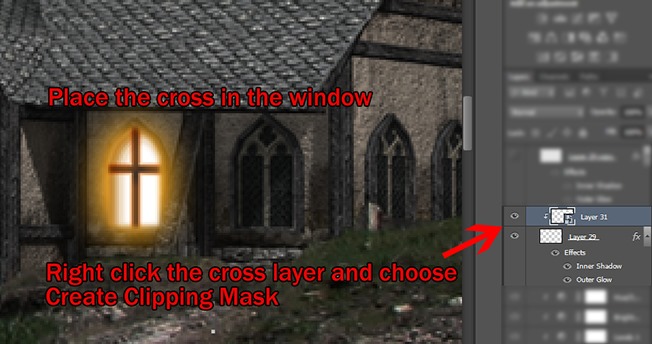
After that place the Cross Shape layer on the window, right click on the layer and choose Create Clipping Mask so that the cross will stay inside the window.
Step 11
Repeat Step 9 and 10 with all the other windows.
Create a new layer and grab a soft brush with color #f59d12 and paint on all the windows.
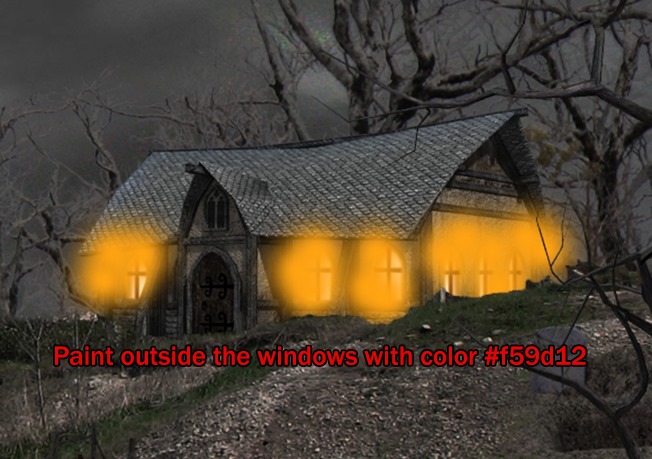
Change the Blend Mode to Soft Light, reduce the Opacity to 50 – 60%
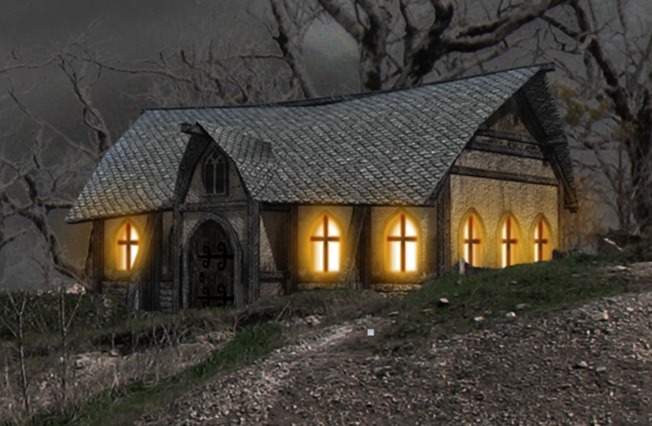
Step 12 – Light Reflection From The House
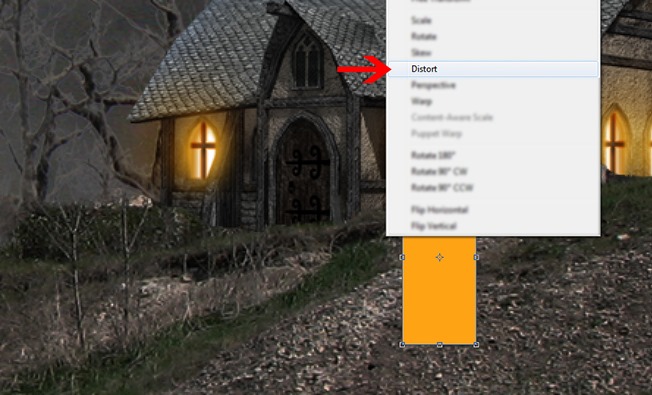
We need to add one more light effect for the house. Create a new layer and get the Rectangular Tool again too draw the following shape, fill it with color #f39e14.
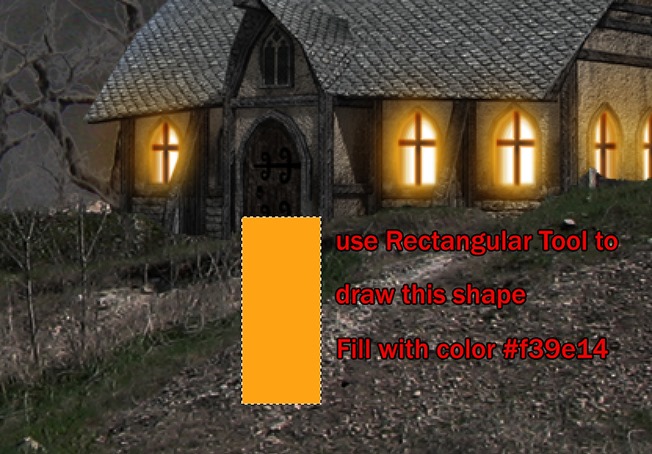
Hit Ctrl + T to open Transform Tool, use Distort to bend the shape like this
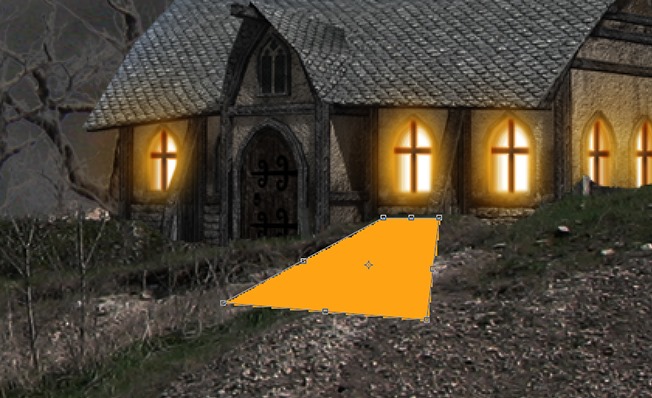
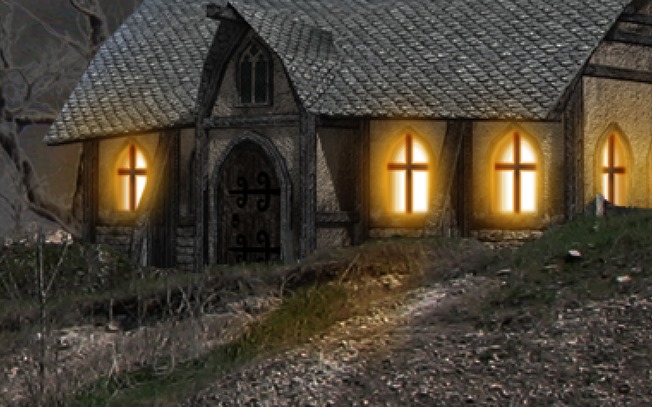
Then go to Filter -> Blur -> Gaussian Blur with 3.0px Radius. Change the Blend Mode to Soft Light with 50% Opacity.
Step 13
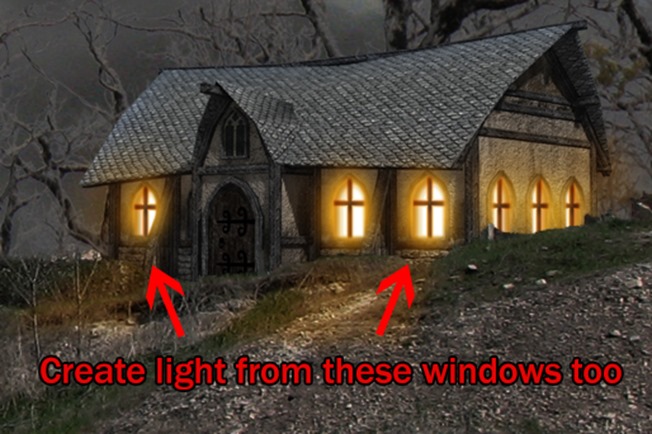
Duplicate the light we just created and place it near the other two windows.
Step 14 – The Grave House
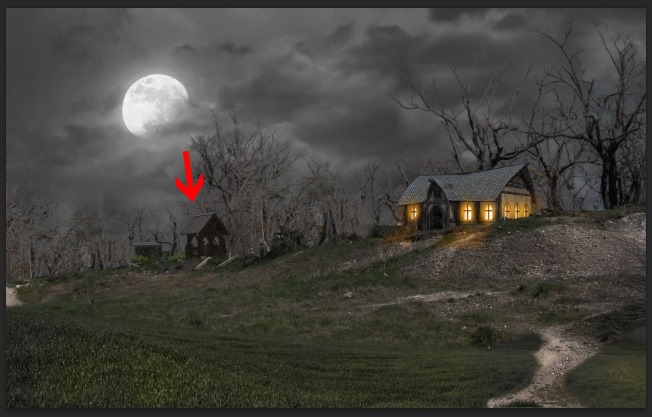
Place the Grave House image at here.
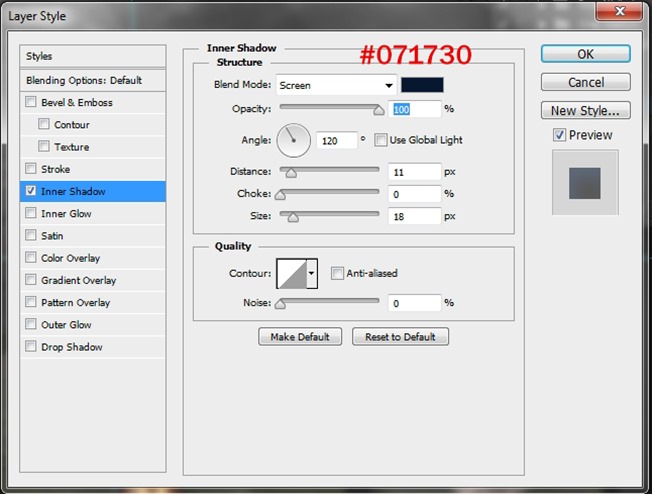
Change the Inner Shadow in Blending Option of the Grave House to create a blue light reflects on it. This will serves as reflection for the light source we will create later.
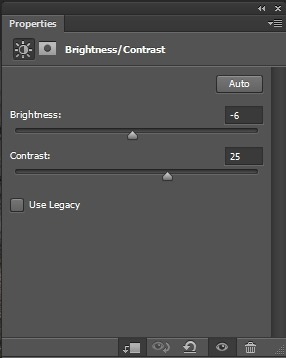
Brightness/Contrast
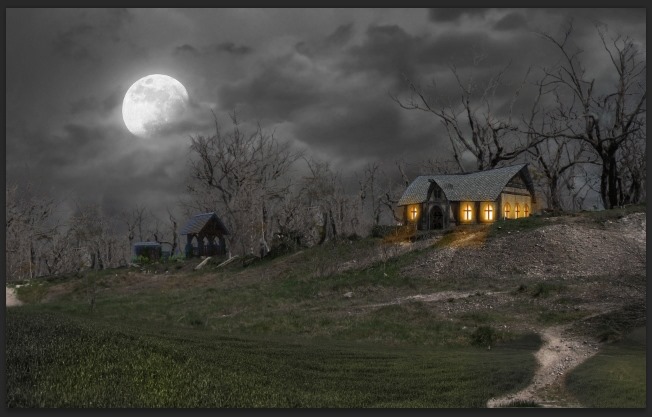
Here is the result
Step 15
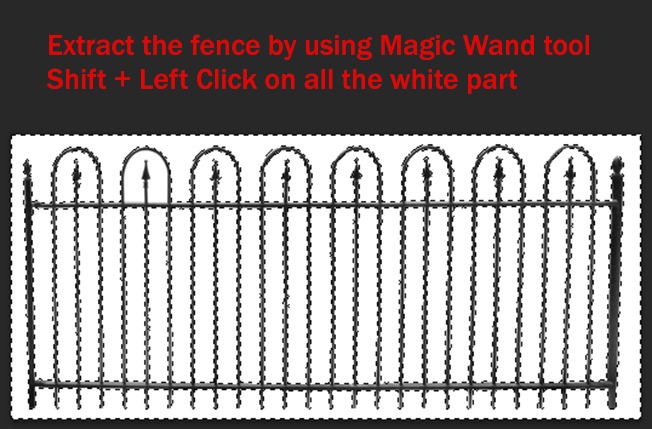
Open the Fence image, use Magic Wand Tool and select all the white part and delete to extract the fence.
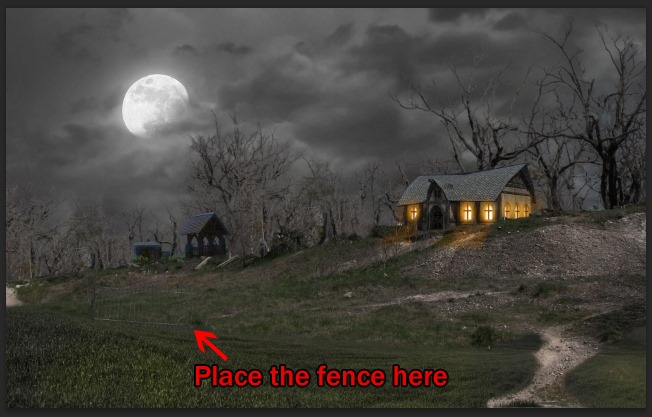
Place the fence on the hill. Friendly reminder : turn it to Smart Object before proceed.
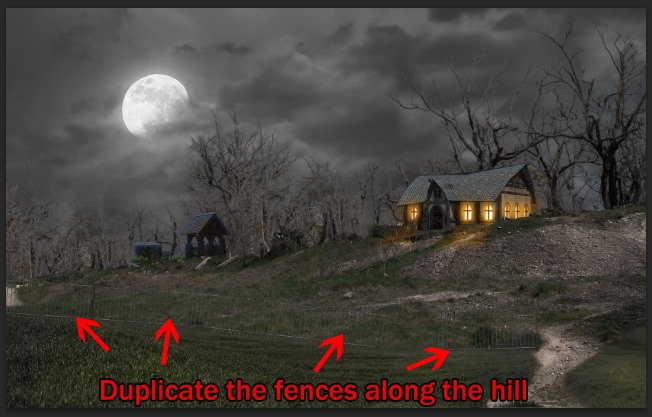
Duplicate the fence a few times and place it along the hill.
Step 16
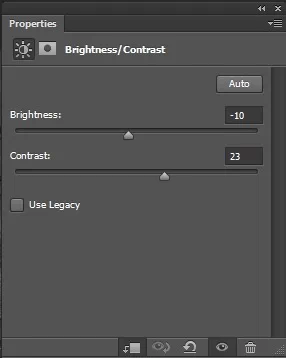
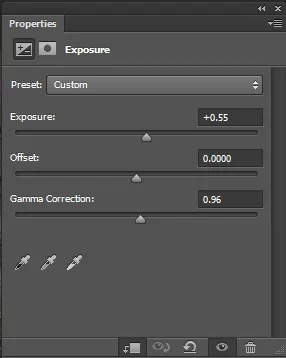
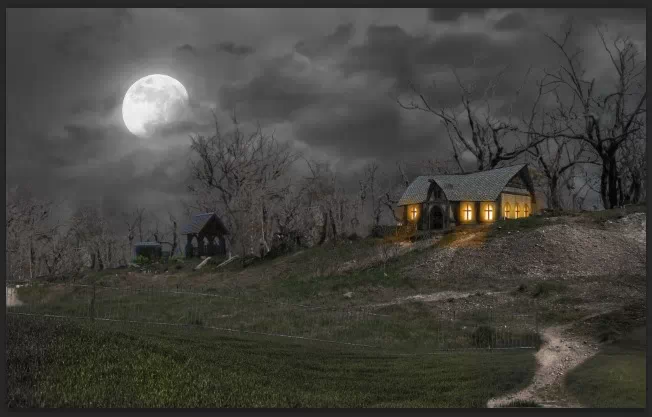
Apply adjustment layers to the fences. You can do it quickly by grouping all the fence layers, select all the layers and hit Ctrl + G then place the adjustment layers on top of it with “Create Clipping Mask“
Step 17 – Object Placing Time!
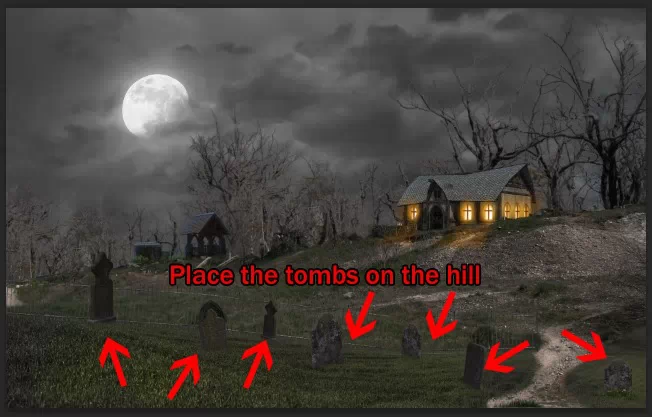
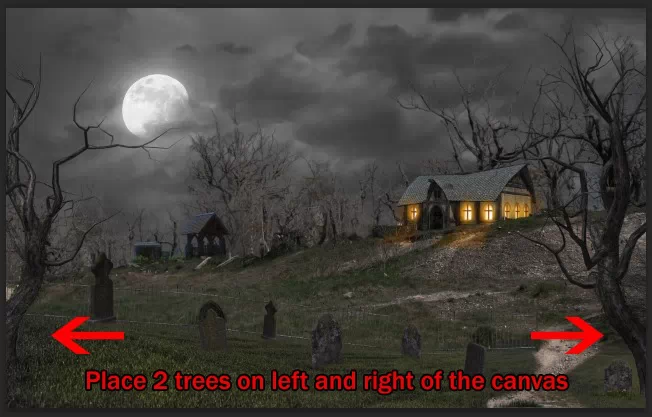
Time to fill up our document with some spooky objects! Open the Tombstones and Dead Tree image and start dropping them into the image.
Step 18
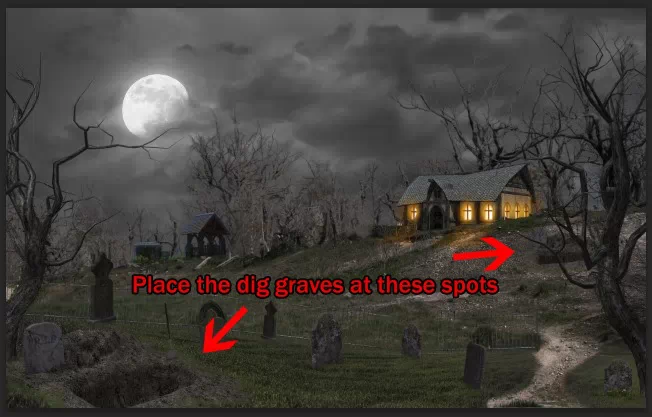
Open the Dig Grave image and place it in these spots
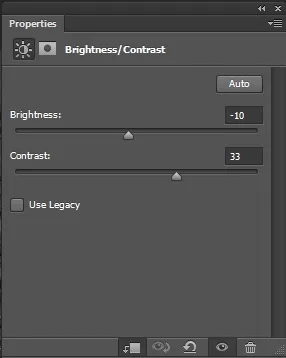
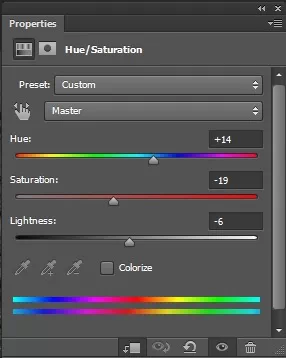
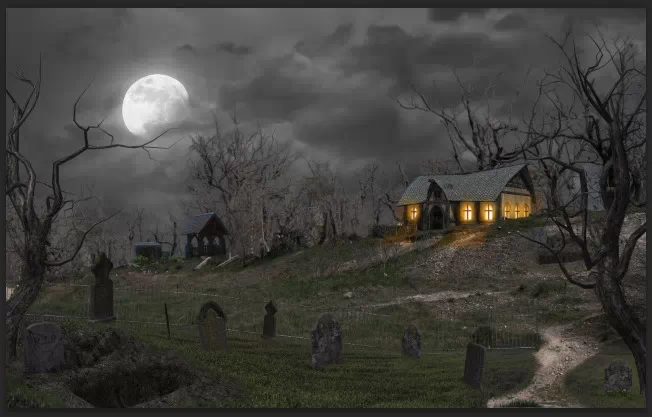
Apply these adjustment layers to the dig grave near the tree outside.
Step 19 – The Ravens, The Crows!
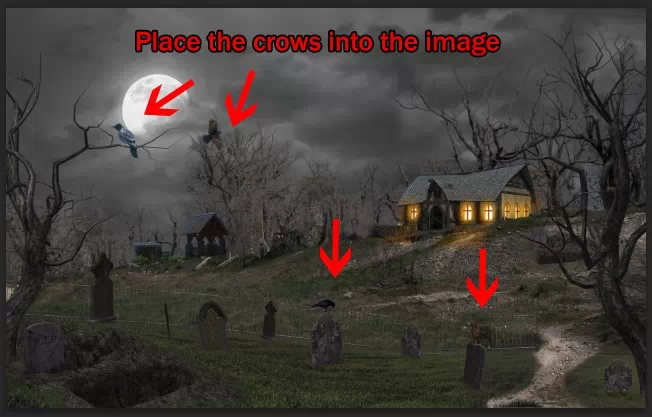
Open the Ravens & Crows image, pick some of them and place them on the tree, on the tombstone, or just let them fly as you desire!
Step 20
Place the Hayswagon into our document and apply some adjustment changes.
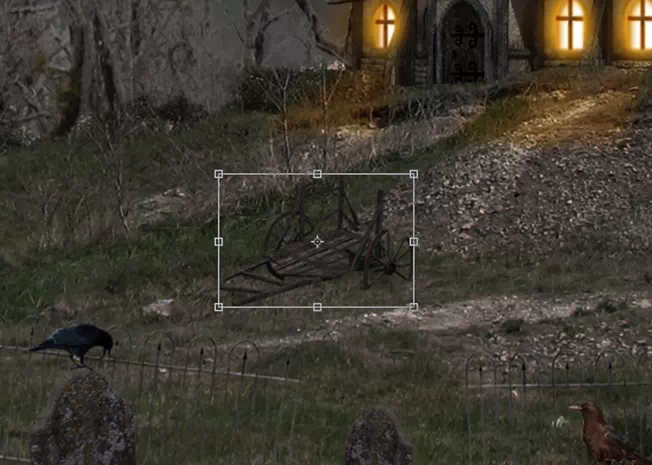
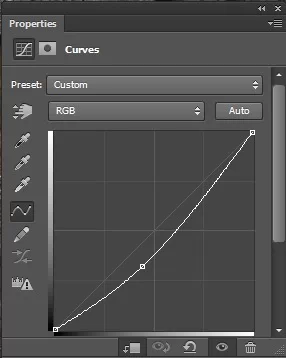
Brightness/Contrast – Curves

Step 21
We need some pumpkins on that hayswagon cause empty hayswagon looks sad! Open the Pumpkin On Hayswagon image and extract the pumpkin.
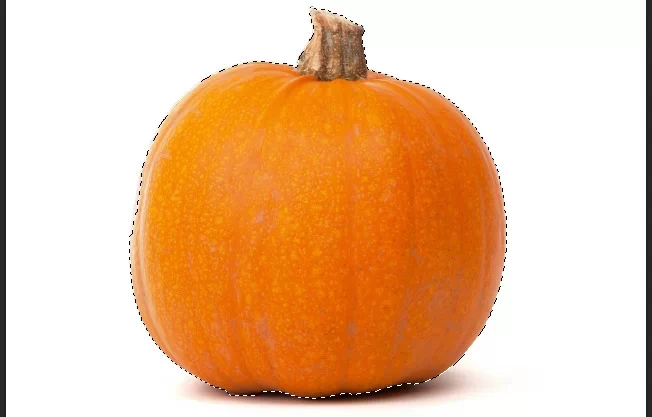
Place it on the hayswagon. Duplicate a few more pumpkins on it.
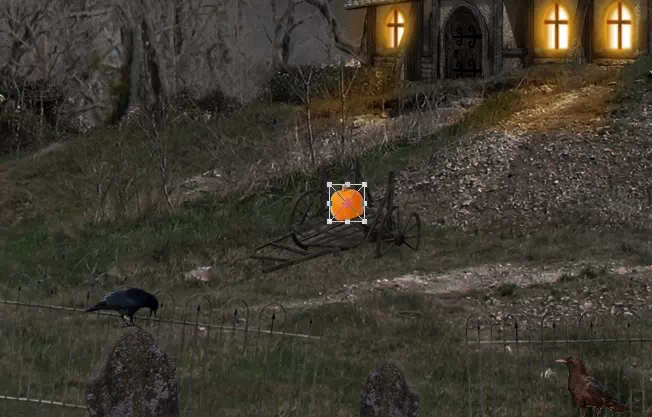
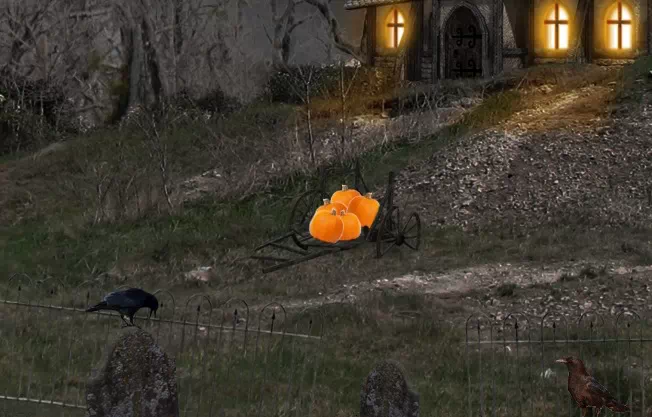
Group all the pumpkin layers into one group and apply these adjustment layers.
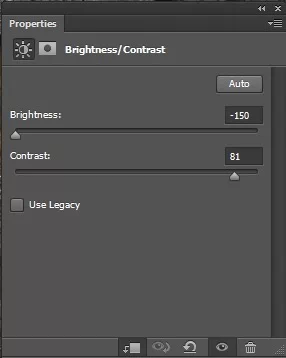
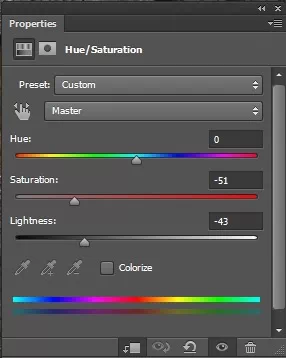
Step 22 – Evil Pumpkin Arrives!
Now to the main character of this piece! Open the Pumpkin image and extract the pumpkin.
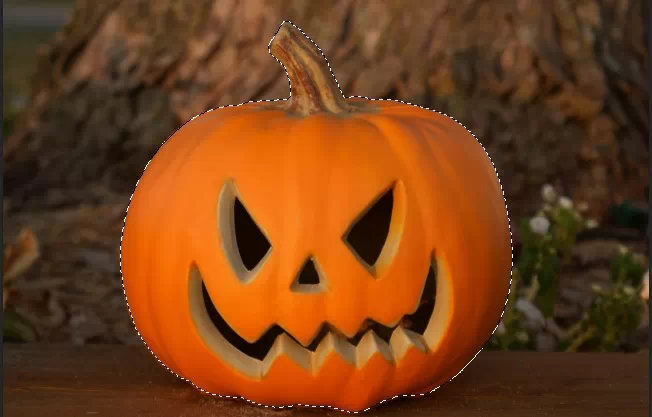
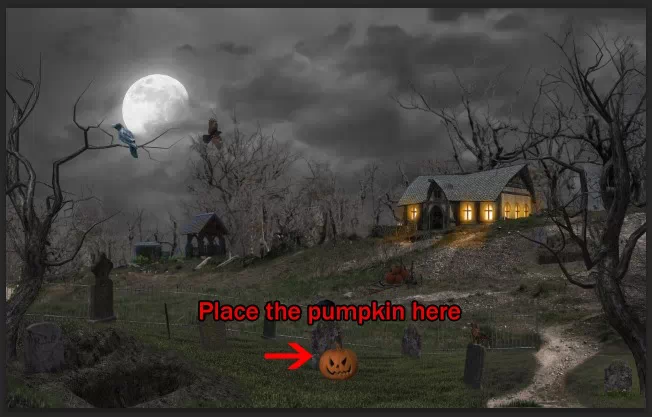
Place it into our document, near the tombstone.
Step 23
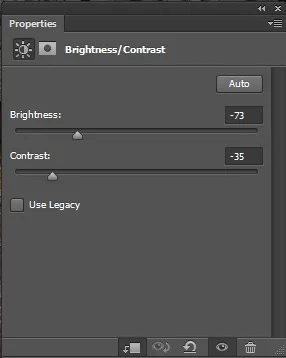
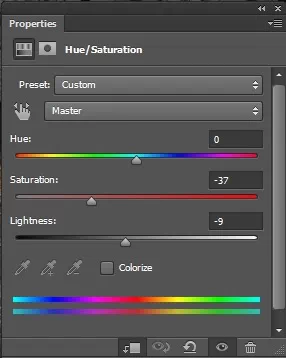
Apply the following adjustment layers for the pumpkin layer.
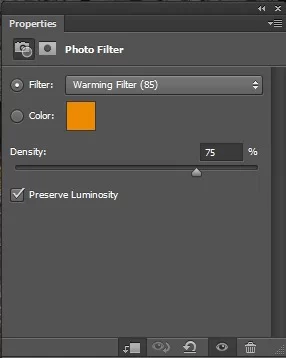
Step 24 – Light It Up!
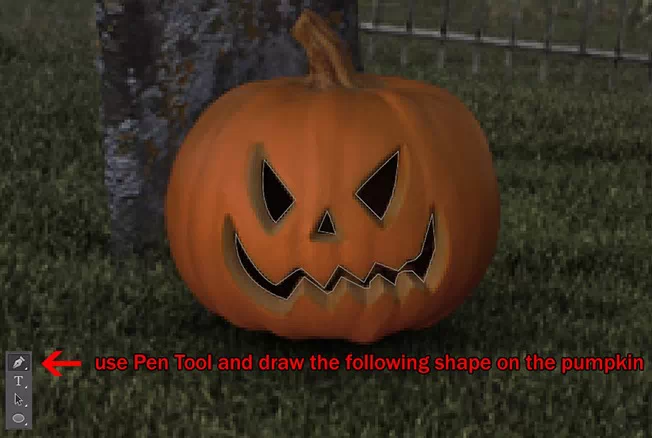
We will create a glowing light effect for the pumpkin. Create a new layer and grab the Pen Tool, draw the pumpkin’s mouth, nose and eyes like this.
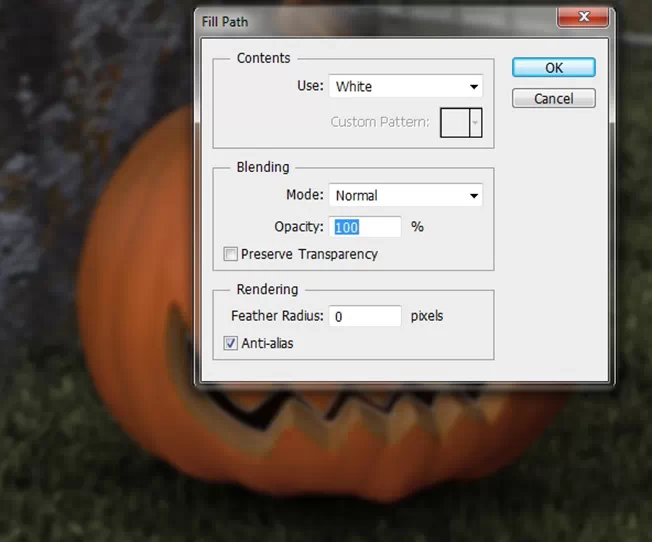
Fill the path with White color.
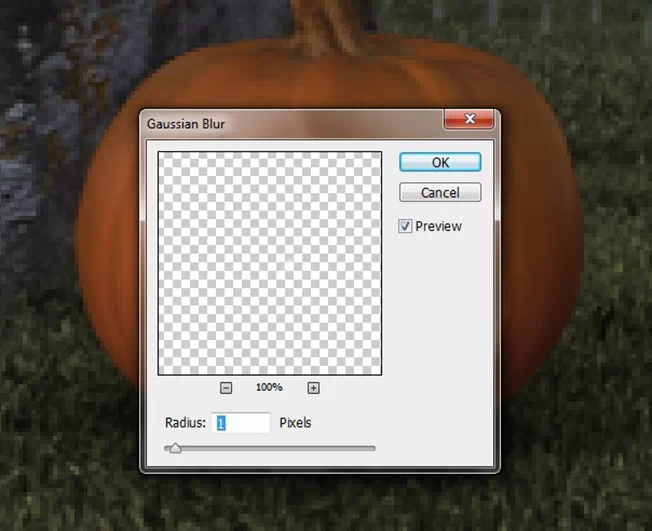
Apply Gaussian Blur.
Step 25
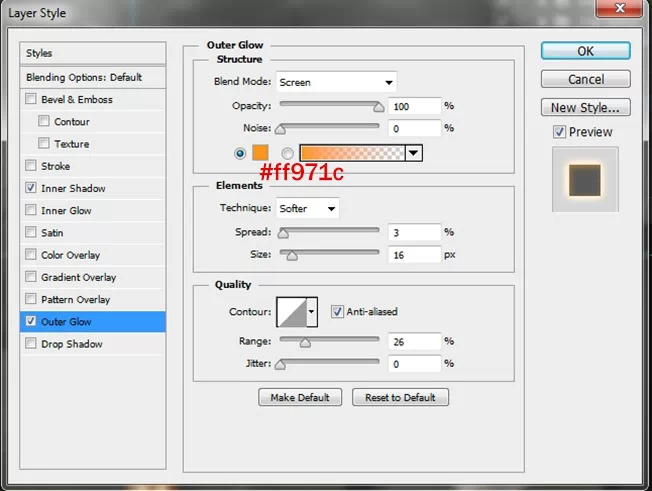
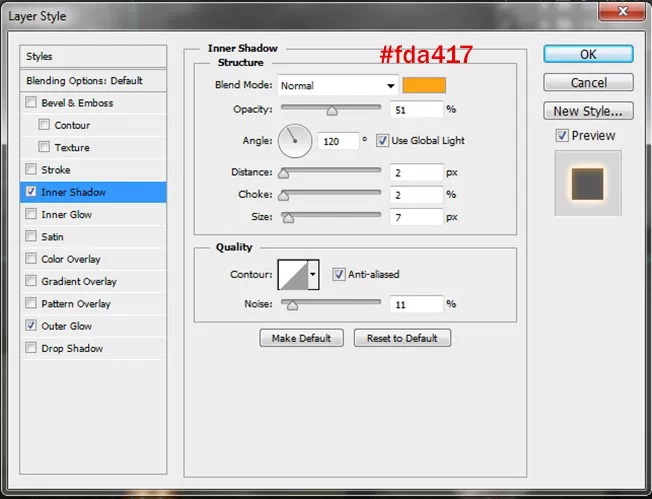
Apply these changes to the layer’s Blending Option.
Outer Glow
Inner Shadow
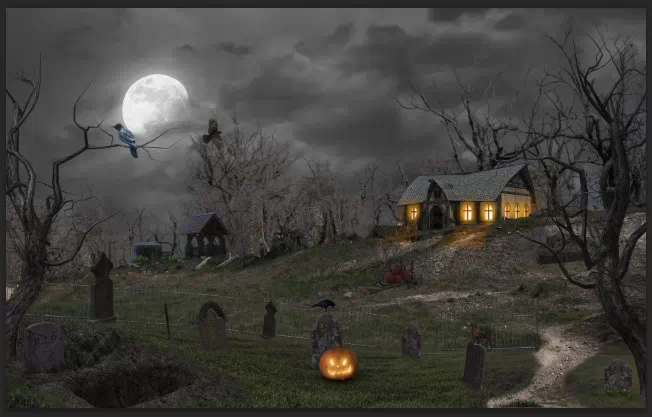
And here’s the result : a scary glowing pumpkin!
Step 26
Duplicate a few more pumpkins and place them around, resize and transform them to fit with the positions.
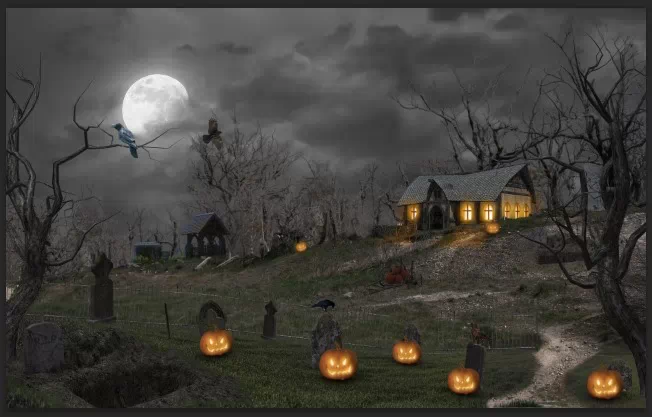
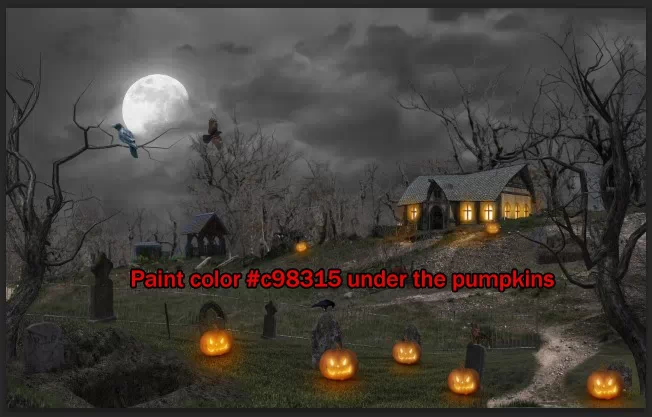
Create a new layer and use a Soft Brush with color #c98315 and paint under the pumpkins. Change the Blend Mode to Soft Light with 70% Opacity.
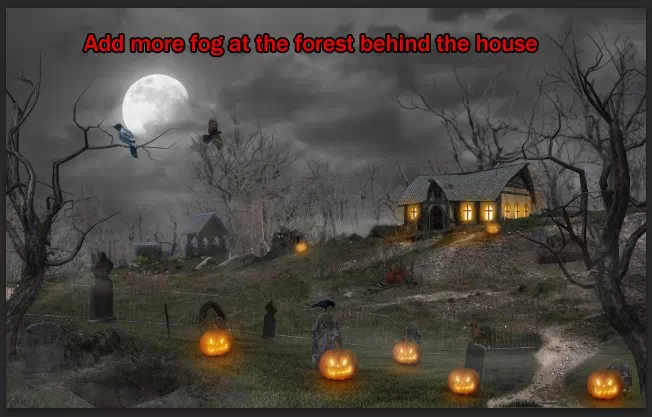
Step 27 – The Mist Comes.
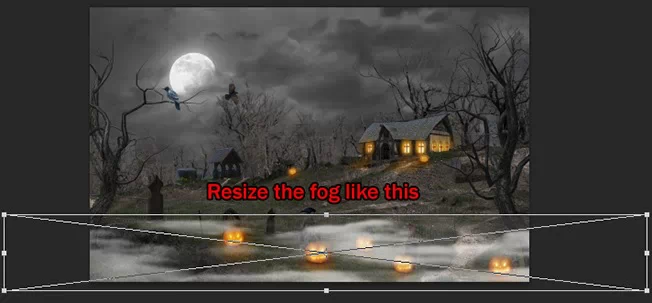
Place the Fog image into our document, resize it like below.
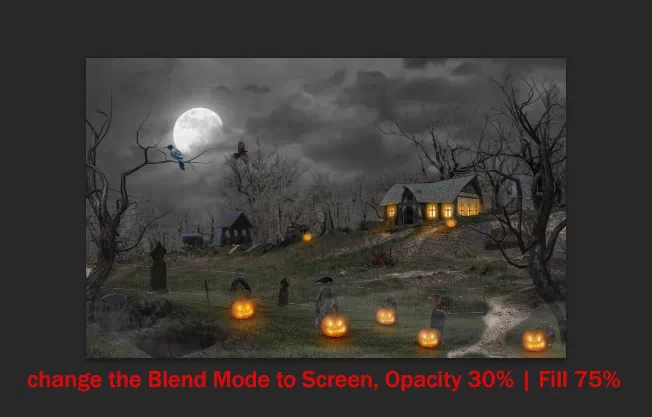
Change the Blend Mode of the fog layer to Screen with 30% Opacity, 75% Fill
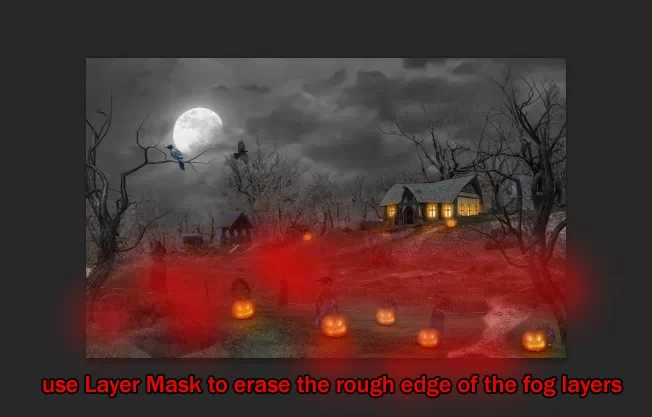
You will notice there’re rough edges from the Fog layers still around, so apply Layer Mask to get rid of them.
Keep adding more fog into the image, place some behind the house too.
Step 28
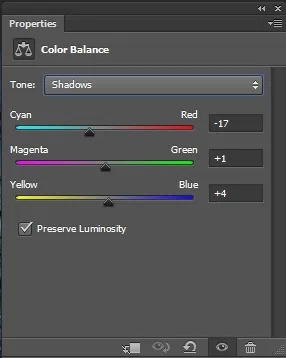
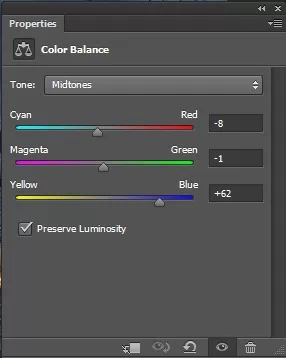
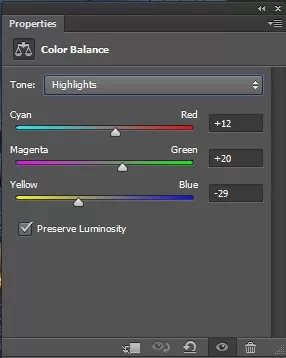
We’re almost done! Its time for some color tuning! Apply these chain of adjustment layers for the whole image.
Step 29
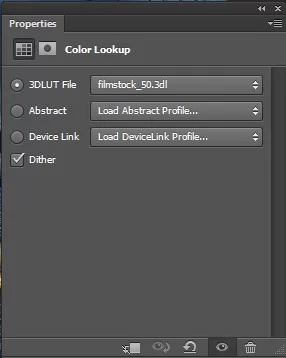
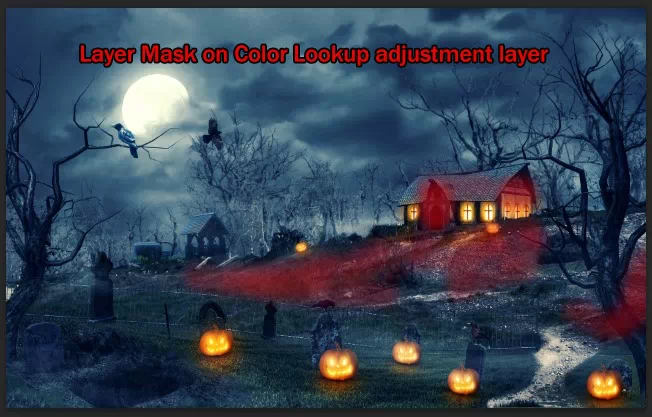
I use Color Lookup with “filmstock_50.3dl” to drastically shapern up the image. Color Lookup provides variety of color tuning effects to use in many situations. Reduce the Opacity to 60% and also apply some Layer Mask.
Step 30
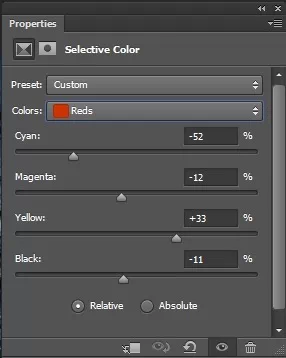
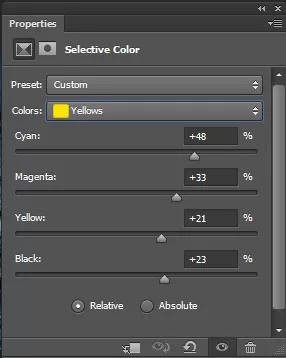
Continue tuning the color with Selective Color. Drop the Opacity down to 80%.
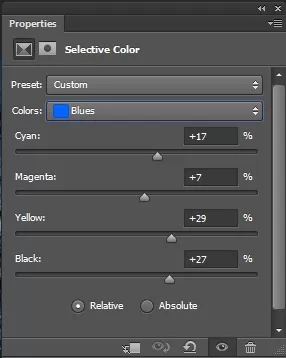
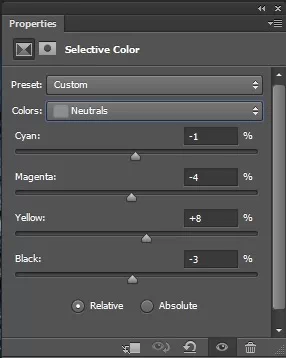
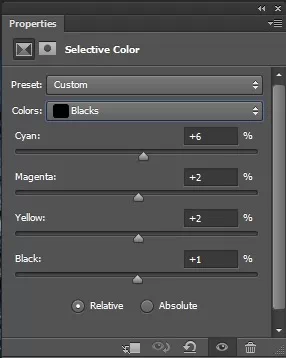

Step 31 – Where is the bats ?
Oops we almost forget about our bats! Open the Bat Brush and paint some bat like this.
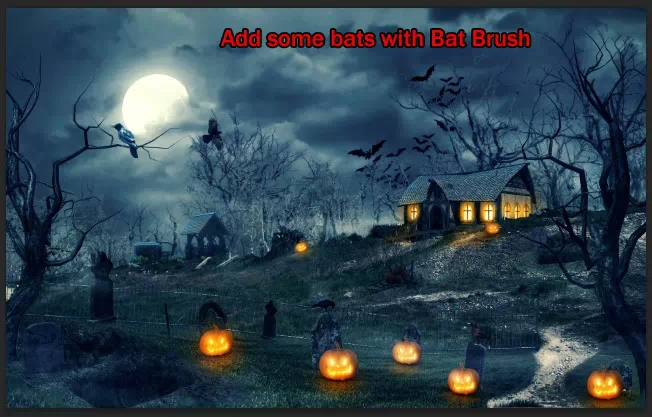
Apply a little change on Blending Option.
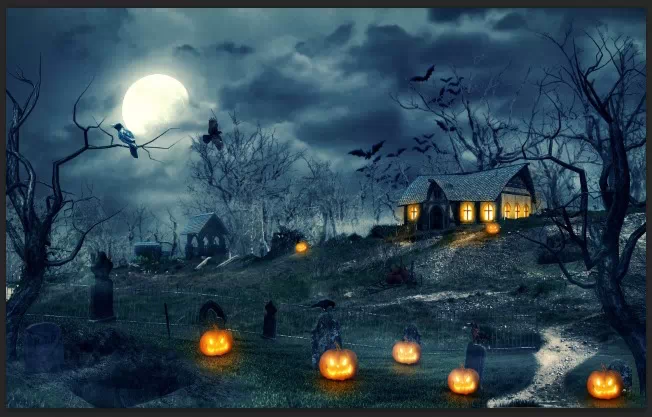
And the bats are in the party!
Step 32
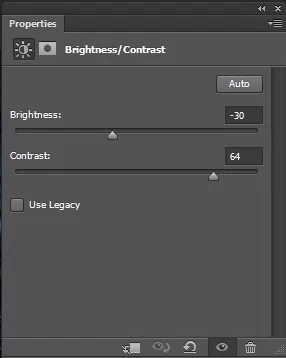
Apply one last adjustment layer for our image : Brightness/Contrast
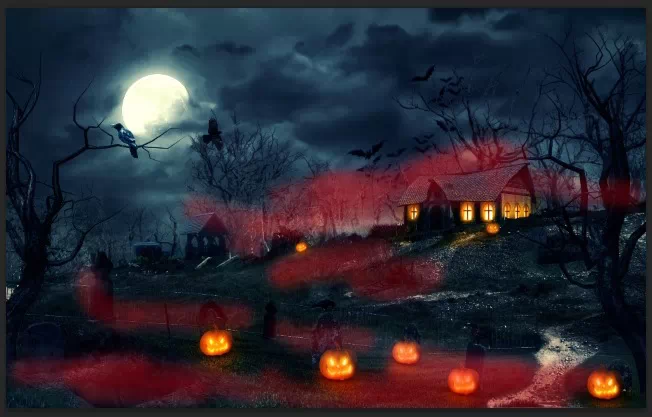
Layer Mask on the Brightness/Contrast adjustment layer.
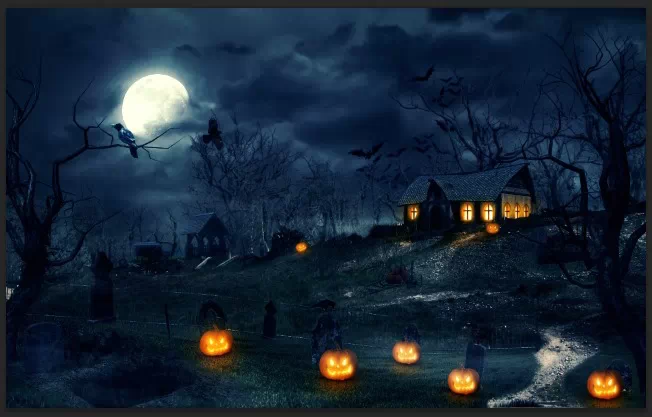
Step 33
Just a little change and we will finish this piece. I recommend you save your working file now then merge everything into one image. You can do so by right click on any layer and choose Flatten Image.
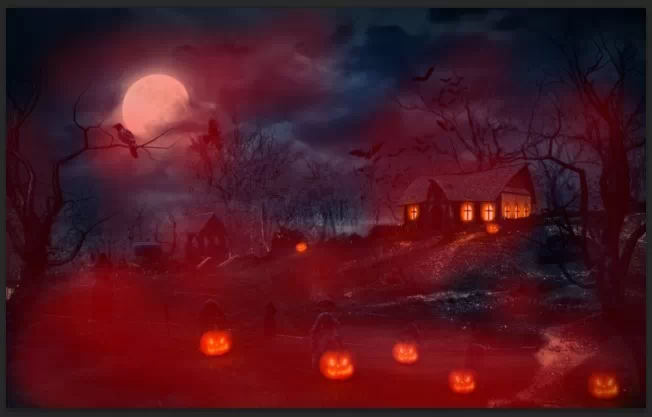
After that, duplicate the image and apply some Gaussian Blur.
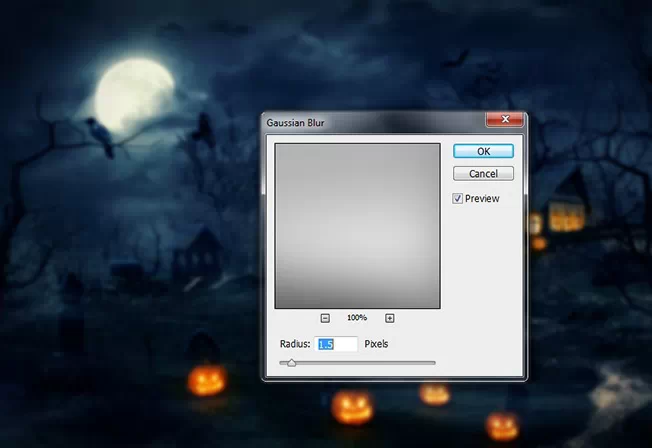
Layer Mask
Step 34
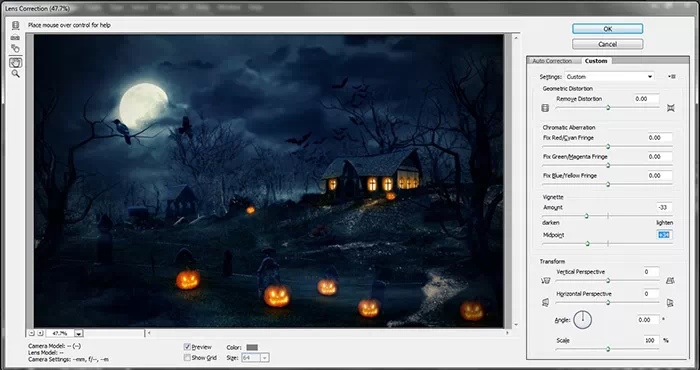
Now hit Ctrl + Shift + R to open up the Lens Correction panel, adjust the Vignette a little bit.
Final Results
![result[1] result[1]](https://cdn.idevie.com/wp-content/uploads/2013/10/652x417xresult11.jpg)
