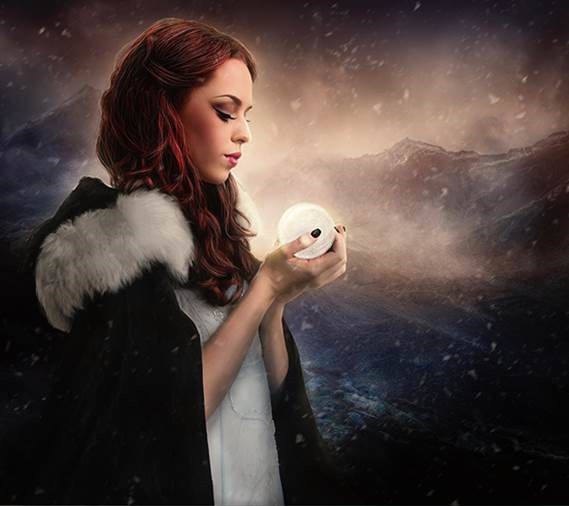
Preview of Final Results
Tutorial Resources
- Model – faestock
- Mountains – Burnt
- Sky – salsolastock
- Ball – rivendell-photostock
- Colors – needanewname
- Snow Brush – carocha
Step 1 – Open a new file
![image007[6] image007[6]](https://cdn.idevie.com/wp-content/uploads/2013/10/e40dd_photoshop_image0076-1.jpg.pagespeed.ce.L4fcDL3-Fm.jpg)
Open Photoshop and ant the top of the screen select the option File – New. The size has to be Width: 2249 and Height: 2000
Step 2 – Model
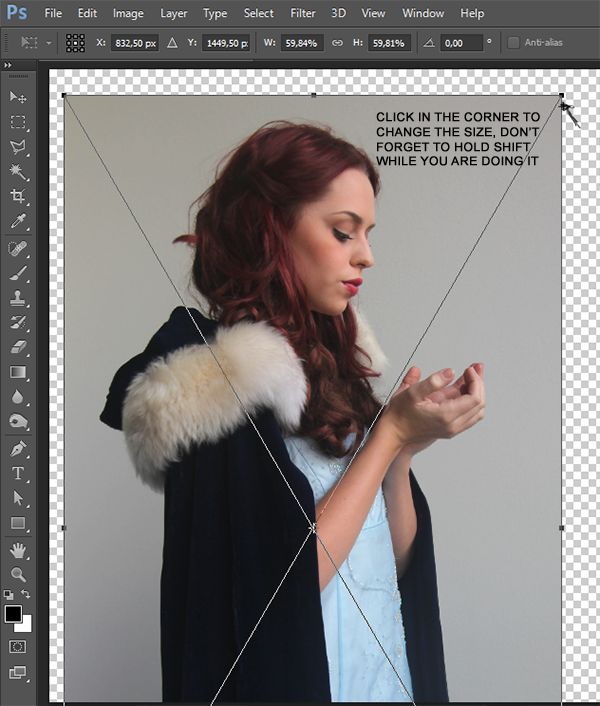
Place the model in the new file and resize it if is necessary. I resize it here pressing Ctrl+ T and holding shift change the size. Is important that you hold Shift because in that way the image will not distort.
Step 3 – Selection
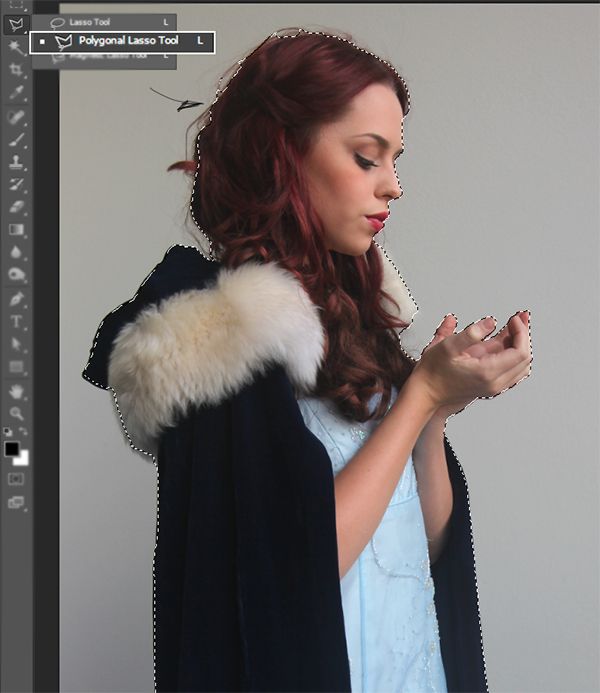
You can select the model with pen tool or polygonal lasso tool.
Step 4 – Layer Mask
Now add a layer mask to hide the model’s background, you will have something like this. You will find the layer mask button at the botton of the layer’s menu.
![image010[6] image010[6]](https://cdn.idevie.com/wp-content/uploads/2013/10/da78e_photoshop_image0106-1.jpg.pagespeed.ce.A9jtLG2JO-.jpg)
Step 5 – Duplicate
Duplicate the model’s layer and change the layer mode to Soft light to add more contrast to the model. Change the opacity to 60% and the fill to 85%.
![image011[6] image011[6]](https://cdn.idevie.com/wp-content/uploads/2013/10/e80c4_photoshop_image0116-1.jpg.pagespeed.ce.vEDV-D1iIs.jpg)
Step 6 – Skin
Select only the model’s skin with lasso tool like you did before.
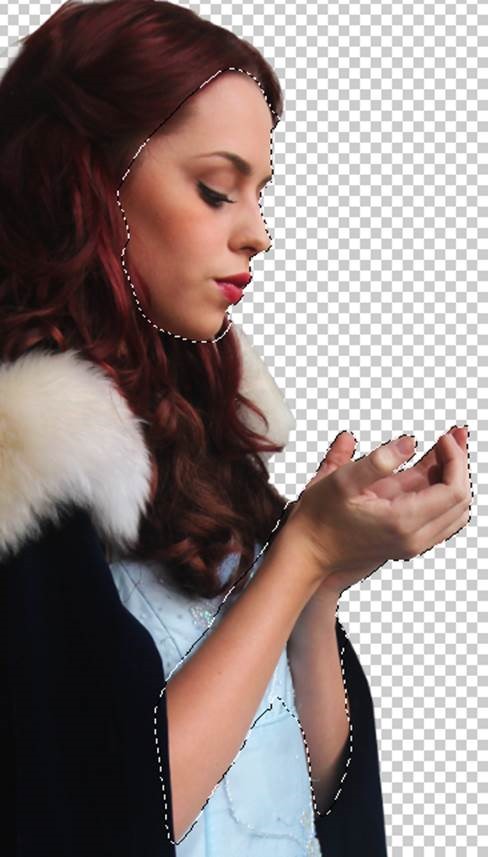
Now change the saturation of the skin to get a pale tone. Press Ctrl + U and in the option saturation reduce it to -25 like this:
![image015[6] image015[6]](https://cdn.idevie.com/wp-content/uploads/2013/10/3dee2_photoshop_image0156.jpg.pagespeed.ce.OuHVfPpjuN.jpg)
The result is this one:
![image016[6] image016[6]](https://cdn.idevie.com/wp-content/uploads/2013/10/52eac_photoshop_image0166-1.jpg.pagespeed.ce.oQ55sqJ3B2.jpg)
Step 7 – Coat
Now you have to desaturate the coat. To do this is the same process as the skin, go to the model original layer and using lasso tool select only the coat, then press Ctrl+J to duplicate the layer.
![image017[6] image017[6]](https://cdn.idevie.com/wp-content/uploads/2013/10/ee80d_photoshop_image0176-1.jpg.pagespeed.ce.ugZuwbItuO.jpg)
Step 8 – Coat Saturation
Press Ctrl+U to se the color menu and reduce the saturation completely. Press ok to save the changes.
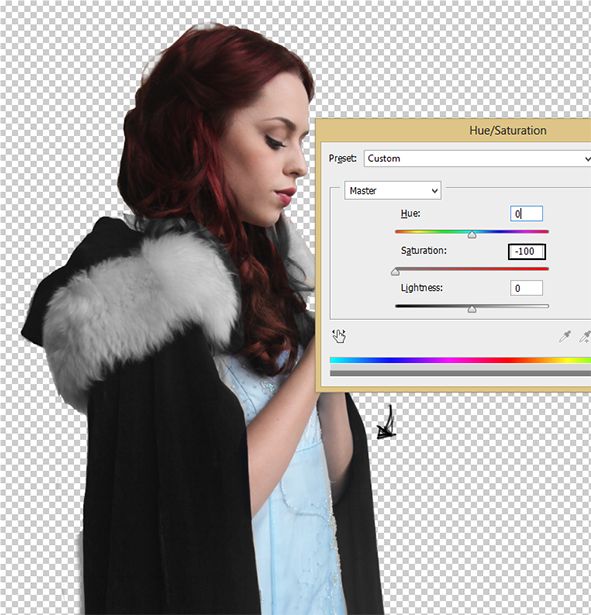
Step 9 – Coat details
Duplicate the coat layer Ctrl+J. To give the coat movement press ctrl+T and choose the option warp to modify the coat. Don’t worry if it doen’t look perfect you can hide undesired parts passing a black brush over the layer mask.
![image019[6] image019[6]](https://cdn.idevie.com/wp-content/uploads/2013/10/edf35_photoshop_image0196-1.jpg.pagespeed.ce.I5AzLYxXRa.jpg)
Step 10 – Darker
To make the coat darker you have to duplicate the coats layer and change the mode to soft light to have something like this:
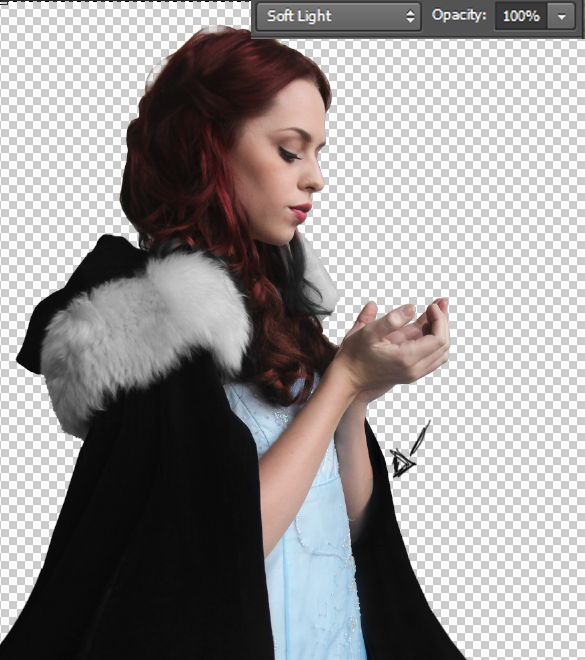
Step 11 – Background
Tip: Before you continue with the model is important to add the background. You may asked yourself why? Well if you have the background you will know where the light is coming, remember that lighting is something that will make your art realistic.
Star with a base color, in this case since is a winter art blue is a great color you can create a gradient like this:
![image022[6] image022[6]](https://cdn.idevie.com/wp-content/uploads/2013/10/305d9_photoshop_image0226.jpg.pagespeed.ce.EfrfJXLX8-.jpg)
