Resources
- Gothic Lolita – Kechake-stock
- Floor – SkyesStock
- Dress form – JinxMim
- Clocks – JinxMim | Alternative
- White Rabbit – Tilt-Stock
- Stormy Sky – EvanescentStock | Alternative
- Wall Crest – AshenSorrow
- Texture – SXC.hu
Step 1
Create a new file, 2000x2000px 300dpi.

Step 2
Now take the floor stock and paste it on the canvas.

Hit Ctrl + T and stretch it from the corners so that it’s large enough to cover it.

Then pull it down from the upper border to get a realistic-looking floor. Hit Enter to exit the Transform.

Step 3
Now take the wall crest and place it in the middle. Resize if needed. Be sure to keep it on a separate layer.

Step 4
Take the wallpaper tile and enlarge it so that you can see the pattern better. The wallpaper layer should be under the wall crest layer.

Duplicate the tile (Layer > Duplicate Layer) and move it beside the first one – make sure there are no gaps between tiles!

Merge the tiles together. (Select both layers on the layer palette and press Ctrl + E)

Step 5
Duplicate the layer with two tiles and place the duplicate under them. Again, look out for gaps where the background is showing.

Step 6
Keep working on the pattern by duplicating and merging them the tiles together. You can also make it a bit larger. (Ctrl + T and then stretch from the corners)

Step 7
Now the whole wall is done – but just to be sure, zoom in to 100% to make sure there are no spaces. All tiles must be merged together on one layer.

Step 8
Go back to the wall crest layer and click on the area around the crest with the Magic Wand Tool (W). You should have a similar selection. Make sure the contiguous box is checked when you select.

Step 9
Now go to the wallpaper layer and hit Ctrl + Shift + I and your selection will invert. Hit Delete to clear the area inside the wall. Finally, press Ctrl + D to release the selection.

Step 10
Place stormy sky on a new layer under the crest. Resize it a little until the clouds look pretty.

This is the result you should be seeing.

Step 11
For color correcting, go to Image > Adjustments > Brightness/Contrast and move the sliders to settings shown (-150 and -35). Also move the Vibrance slider to -60.

Step 12
Now take the Burn Tool with settings provided and burn the areas marked with red.

Your wall should look like this now.

Step 13
Now to the floor layer. To get the colours match, go to Image > Adjustments > Hue/Saturation and take Hue to -163, Saturation to -100 and Lightness to -43. Burn the red areas with previous Burn Tool settings.

Step 14
Your floor should look like this now – with an annoying white gap.

Go to the background layer, hit D on your keyboard to get black as your main colour and take the Paint Bucket tool (G) and paint the background black with one simple click.

Step 15
Go to Wall Crest layer and add a Drop Shadow layer style for the “window effect”. Then choose -85 and -63 as its Brightness and Contrast (Image > Adjustments > Brightness/Contrast).

Your room should look like this now.

I darkened the sky very little bit.

Step 16
Open the model image and select her with the marquee tool. Press Ctrl + C to copy. Don’t select the legs as she is going to be a creepy doll and people without legs intensify the “freaky” feeling. Paste the model on top of all the other layers (Ctrl + V). Fun fact: the model is my best friend Birgitta, wearing my graduation dress in an abandoned machine factory.

Step 17
Grab the Pen Tool (P) and make sure these settings are used. Carefully go over the outlines of the model. I prefer the Pen Tool because it gives you effortless and fast selecting – and if you misclick, you can just press Ctrl + Z and continue (unlike the Lasso Tool).

Leave the veil as is, it’s almost humanly impossible to cut it out (and it’s not the point of this tutorial either).

Step 18
Here the ends meet – click on the first point to complete the path.

You will have a nice line that indicates your path is closed. Now right click anywhere on the image and choose “Make Selection” from the drop-down menu. Make sure you use the settings shown for the feather radius.

This is your selection now; hit Ctrl + Shift + I and then Delete. I usually press Delete twice.

Step 19
This is how it looks when cut out.

Step 20
Take the dress form and place it on a new layer under the model.

Step 21
Now select models head (since it’s an unimportant selection, you can use Lasso Tool – you don’t have to worry about the exact edges etc). Then right click and choose “Layer via Cut” to behead the model… for a few minutes. After that, press Ctrl + D to release the selection.

Step 22
Press Ctrl + T to enter Transform and make her head larger by stretching from the corners.

Step 23
Go to Filter > Liquify and enlarge her eyes with the Bloat Tool.

Add more doll features – tiny nose, small and full lips, pointy jaw.

Step 24
Retouch skin with the Healing Brush. A slight plastic-perfect look is even good here.

Step 25
Now go to the neck part and erase the sharp corners to make her neck really slender.

Neck looks like this now.

Step 26
Paint the gap by picking colours from the skin areas around the gap. You don’t have to be precise, just make sure the lighting is right.

Merge the head and body layers together and use the healing brush to blend everything.

The cheeks looked strange so I went back to Liquify and fixed them.

Step 27
Looks like this…

Step 28
Time to colour correct the doll. Move the Vibrance slider to left (-50). Then go to Image > Adjustment > Hue/Saturation and choose “Reds” from the drop down menu. Move the sliders to make the skin more pale.

Step 29
The eyes have too little contrast. Use the Dodge Tool on Midtones and low Exposure (10-20%) to lighten the areas painted blue; and the Burn Tool (also set to Midtones and low Exposure) to darken the red areas. You should use a small brush, something around 5-15 px. Make sure it’s soft rounded.

Makeup enchanced!

Step 30
Looks like this so far.

Step 31
Create a new layer on top of the model layer and grab a soft round brush. Paint the red areas with a greyish blue colour (#567190 is good, for example). Set the layer mode to Overlay.

Blue eyes.

Step32
Create another new layer and paint the shape of the lips with a greyish pink tone (#84675d). Then set the layer to Soft Light.

Pretty pink doll lips.

Step 33 (optional)
If you have a tablet, take a slightly darker colour (like #756259) and paint the jawline. It’s not an important step, but it helps to define the face.

Step 34
Now go back to the model’s layer and select the skirt with the Marquee Tool.

Go to Filter > Liquify and make the skirt more puffy by pulling it outwards.

Puffy skirt.

Step 35
Grab the Burn Tool, set it on low Exposure (20%) and burn the areas marked with red.

Step 35
Go to the dress form layer (aka legs) and make it darker.

Click anywhere on the area around the form with the Magic Wand tool (W).

Go to Select > Modify > Expand. Expand by 1px, click OK. Hit Delete. Press Ctrl + D to release the selection.

Legs darkened.

Step 36
Go to the doll body layer. Go to Image > Adjustments > Replace Color and click on the dress so that the image in the black box turns partly white, bringing out the black areas. Move the sliders so that you get a bit different black hue.

Colours are matching better now.

Step 37
Go back to the legs layer and duplicate it. (Layer > Duplicate Layer).

Go to Edit > Transform > Flip Vertical.

Now move them to the bottom so that the ends meet and set layer opacity to 50%.

Step 38
Take the other pattern and create this shape by duplicating the tiles and merging them together. Place the finished pattern on top of the model.

Set layer mode to Multiply.

Step 39
Go back to the model layer and click on the area around her with the Magic Wand Tool. Go back to the pattern layer. Hit Delete to get rid of excess pattern. Press Ctrl + D to release selection.

Step 40
While still on the pattern layer, take a hard round eraser and erase the pattern from her sleeves and hands.

Step 41
This is the dress with a nice pattern.

I lowered the opacity to 65%.

Step 42
Take this watch and reduce its size.

Cut off the top with the eraser, pen tool, lasso… whichever you prefer.

Watch without top.

Go to Hue/Saturation, but this time select “Yellows” from the drop down menu and move the Saturation and Lightness sliders all the way to left. Then lower Vibrance by -50.

Clock has now matching colours. However, it has a white border.

Step 43
Like with the legs, select area around the clock, go to Selection > Expand, but this time expand by 2px. Hit Delete. Press Ctrl + D to release selection.

No white borders!

Add drop shadow to the clock to make it blend in better.

Do the same with other clocks.

Step 44
Go back to the wallpaper layer and select this area with the Marquee Tool.

Right-click and choose “Layer via Copy”, then flip vertically (just like with the legs).

Set layer opacity to 35% for a slight reflection.

Step 45
Paste the rabbit on a new separate layer and resize if needed to keep realistic proportions.

Cut the rabbit out with the Pen Tool.

This how it looks with the rabbit… time to blend it in.

Step 46
Go to Hue/Saturation and make the yellow tones lighter by +100.

Take the Burn Tool, but this time set the range to “Shadows” and click a few times around the eye to make it pop. Then take the Sponge Tool and choose “Saturate” from its drop-down menu. Click a few times on the eye.

For the shadow, create a new layer under the rabbit and using a soft round brush with black colour, draw this shape. The larger your brush is, the smoother the edges of the shadow will be.

Go back to bunny’s layer and reduce Vibrance by -50. Also add some Brightness (+15).


Step 47
Now the reflection. It has to be very subtle. Go to Layer > Duplicate Layer and make a copy of the bunny. Flip it vertically and place it under the white fluffy creature so that the noses touch.

Go to Edit > Free Transform and then click the little arch that appears to enter the warping mode. Warp the reflection until the paws touch as well.

Go back to the bunny layer and select the paw. Right-click and “Layer via Copy”.

Flip it vertically and warp a little bit so that the paw on the reflection is flat. Then take a soft round eraser and blend the paw in.

Darken the reflection’s stomach with the Burn Tool.

Lower the reflection layer’s opacity to subtle 25%.

Finally, add this Gradient Overlay.

Step 48
With bunny!

Step 49
Paste the wall texture on a separate layer right above the wallpaper layer. Resize it so that it fits the area.

Texture is now set on Soft Light. I also desaturated it and set the Lightness to -15.

With a slight reflection.

Step 50
Finally, colours! This is the fun part. Use settings provided and you should have a nice blue-toned image.

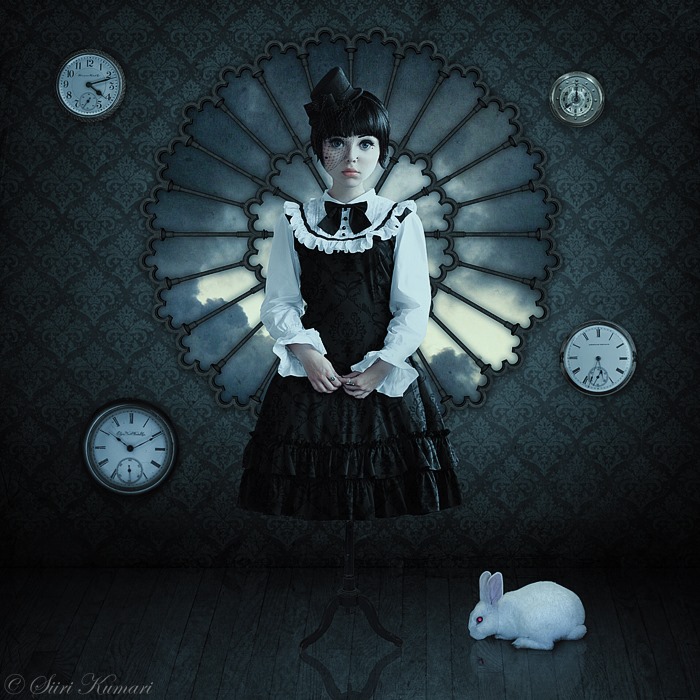
Final Result
