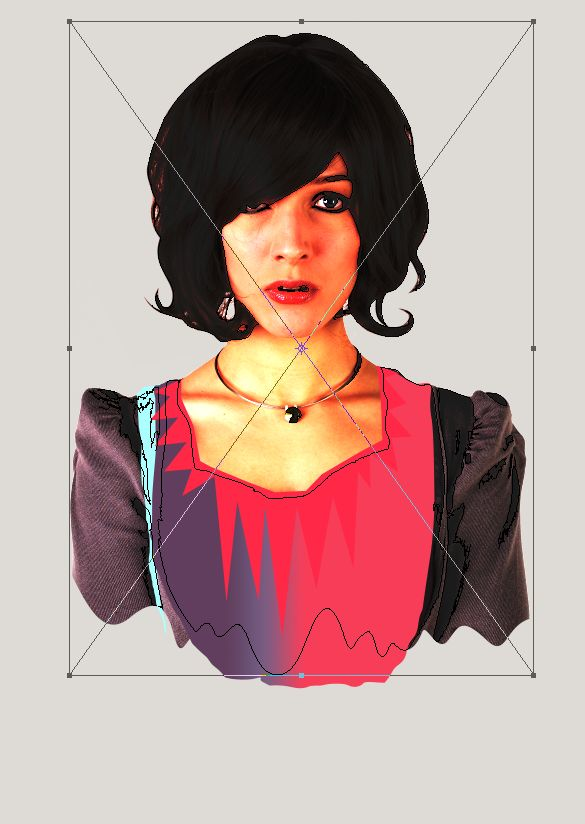
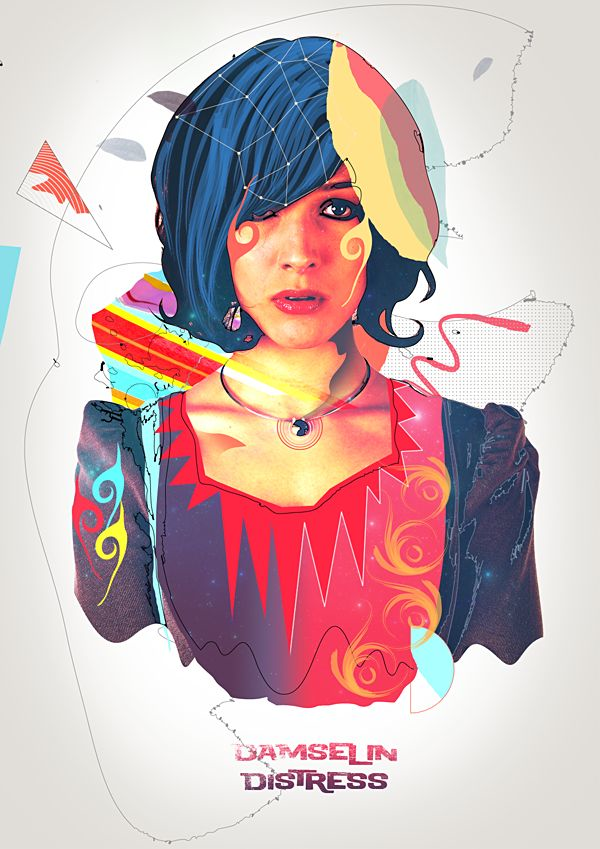
Resources
Step 1
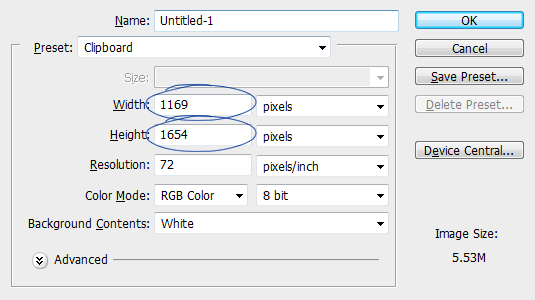
First is first. We need an empty canvas to begin working. Here is my canvas size of the finished design. So you can use it simply.
Step 2
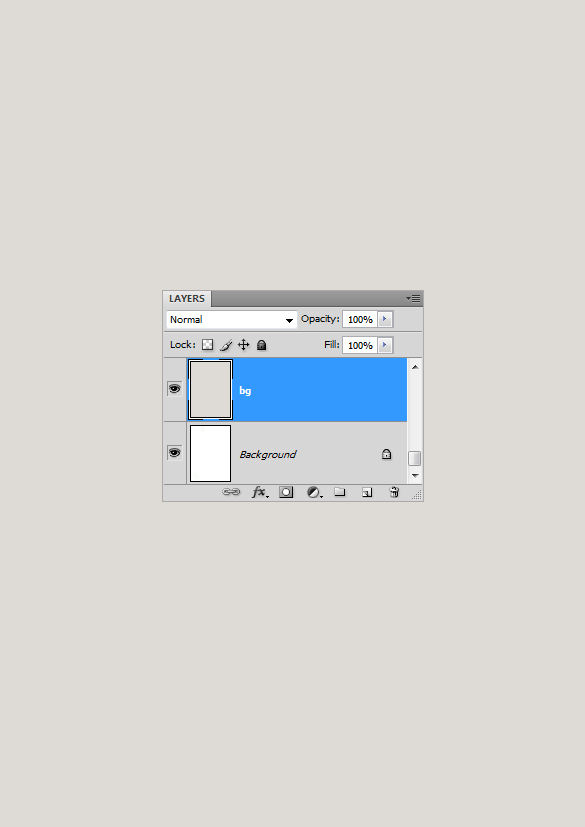
Photoshop just presented us with a blank, white canvas. We are going to set a more neutral colored backdrop for our design. So I created a new layer above the background layer and filled it with #e0ddd8.
Step 3
Here we have the single most important stock image for our design. I liked the look of her, she is a bit worried, uncertain and concerned, you know I thought this is a good one for our purpose. It has nice and soft tones, no strong shadows and a bit mild, it looks we can play a bit.
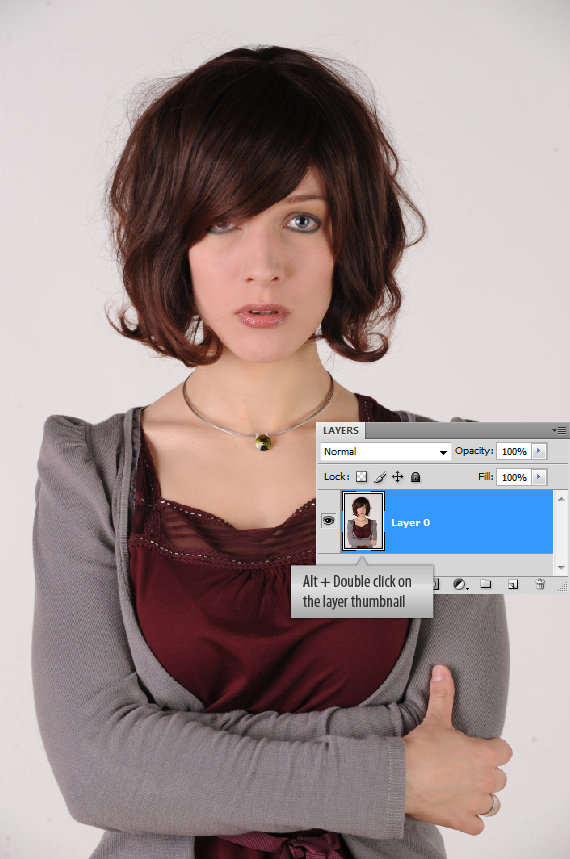
Step 4
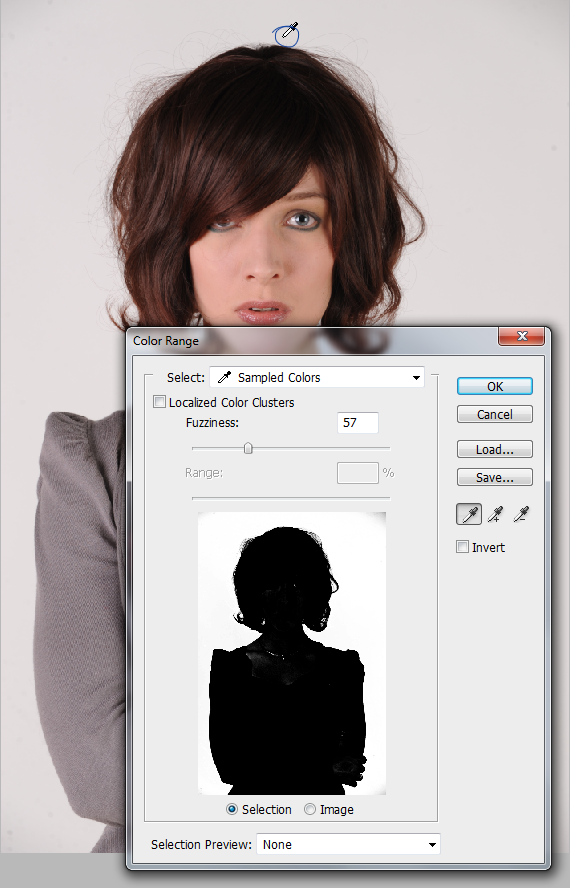
First of all we need to isolate her from the background. We can use different Tools for this purpose. But I am going with the Color Range command (Menu > Select > Color Range). It does a great job when selecting plain backgrounds. Load up the Color Range box, sample the background color using the color picker. You can see the thumbnail of the image inside the Color Range box, the white part in the thumbnail represents the area selected by the command. You can also see some grey areas left on the corners and on the subject. We will deal with it in the next few steps. Press Ok to confirm.
Step 5
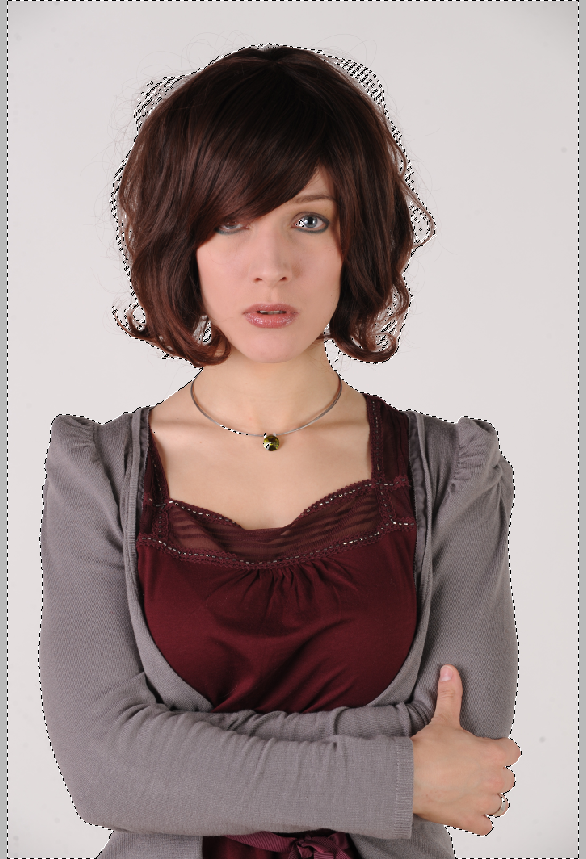
Your selection should look something like this. The color range command does a decent job.
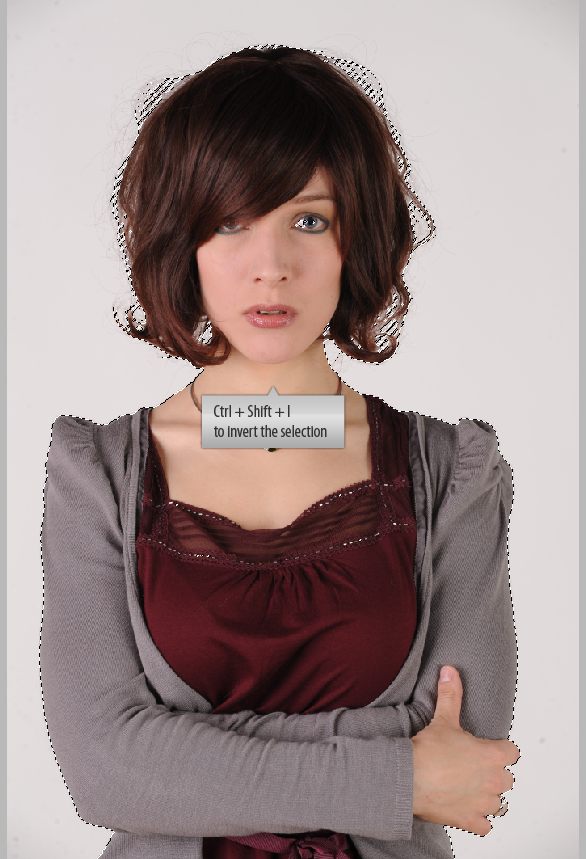
Invert the selection (Ctrl + Shift + I). This will now select the model.
Step 6
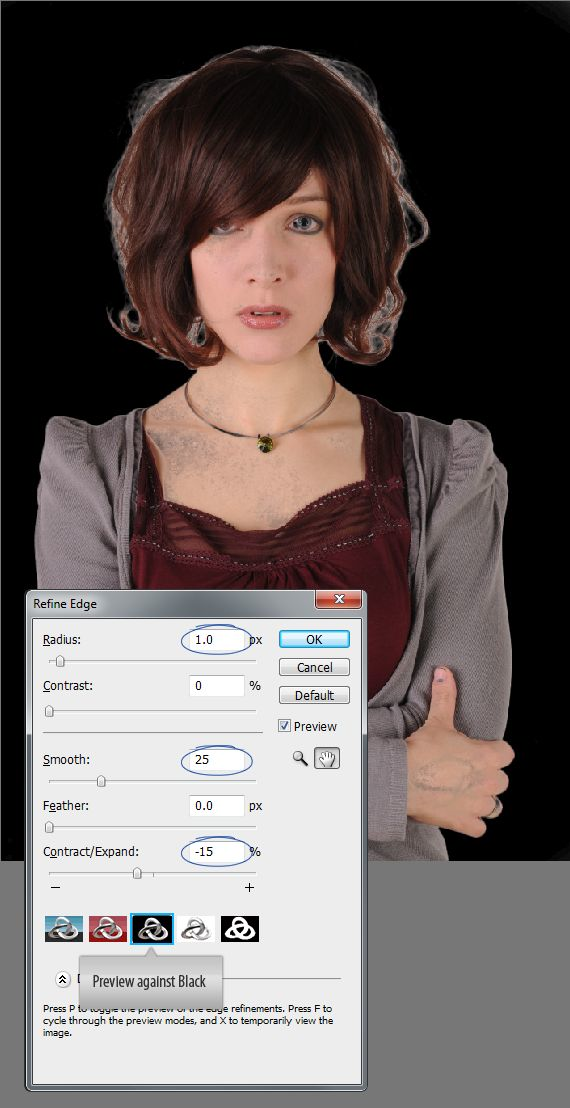
Let’s fine tune our selection using the powerful Refine Edge command. (Menu > Select > Refine Edge or just press Ctrl + Alt + R). It’s like a one stop solution. We can contract or expand the selection, feather the selection, smooth it and so on. Click on the On Black thumbnail which lets you the preview the selection against a black background. I slightly smoothed the selection and contracted it a bit. Press OK when you are done.
Step 7
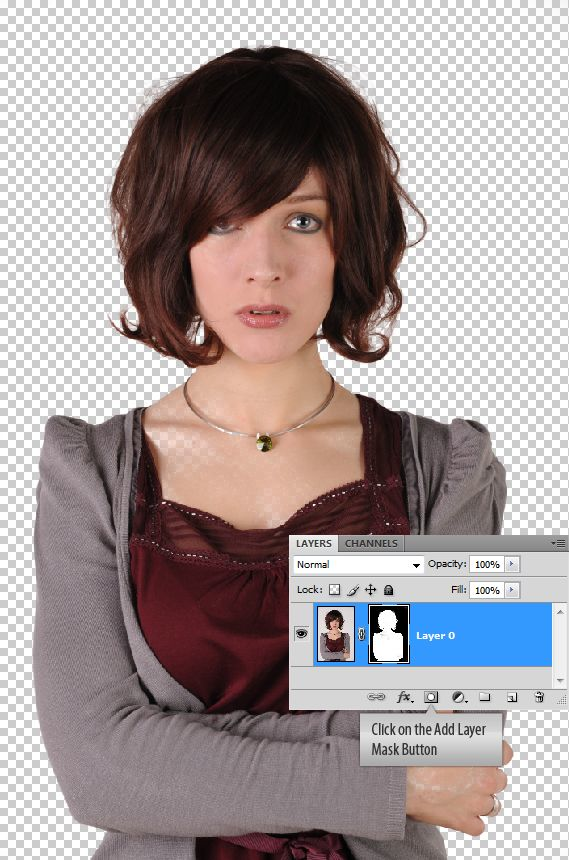
We just refined our selection. So let’s use it to mask out the model. While the selection is on, click on the Add Layer Mask button located at the bottom of the Layers Palette.
Step 8
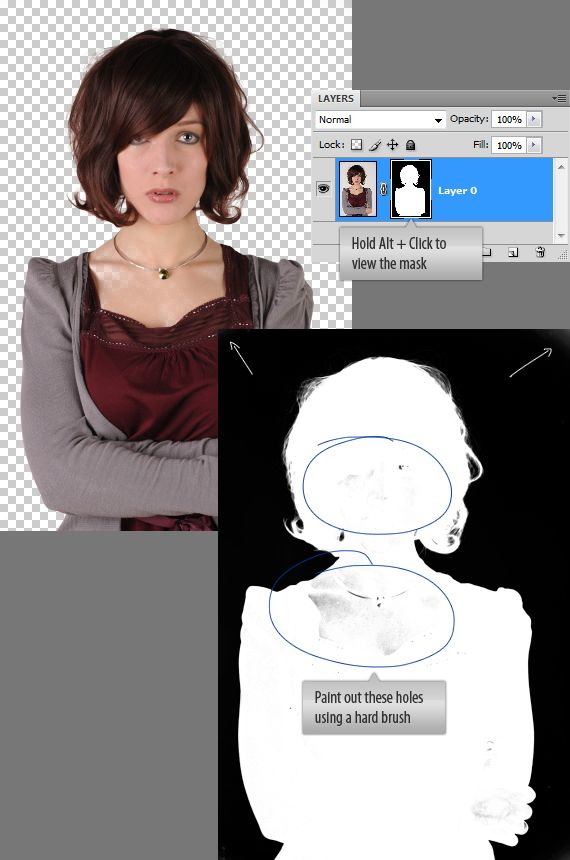
Now let’s deal with the holes in the mask. To view the mask hold Alt key and click on the layer mask thumbnail. Now you are inside the mask. Notice, there are some grey areas inside the white area and at the corners of the mask. Those are holes and we need to get rid of them. Pick a hard brush, color set to white and paint out. Now change the brush color to black and paint out the corners. Make sure you didn’t left any greys.
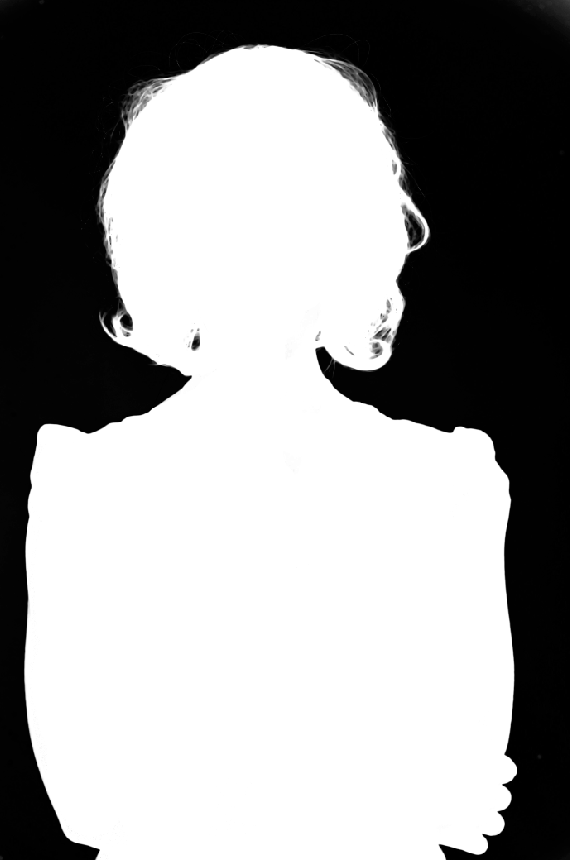
Here is the perfect mask after the corrections.
Step 9
Examine the image once again. There are lots of strands of hair which can cause problems. I want to remove them. Select them using the Pen Tool. Since lot of curves involved Pen Tool is the best choice. Select the “Paths” option for the Pen Tool on the Options Panel.
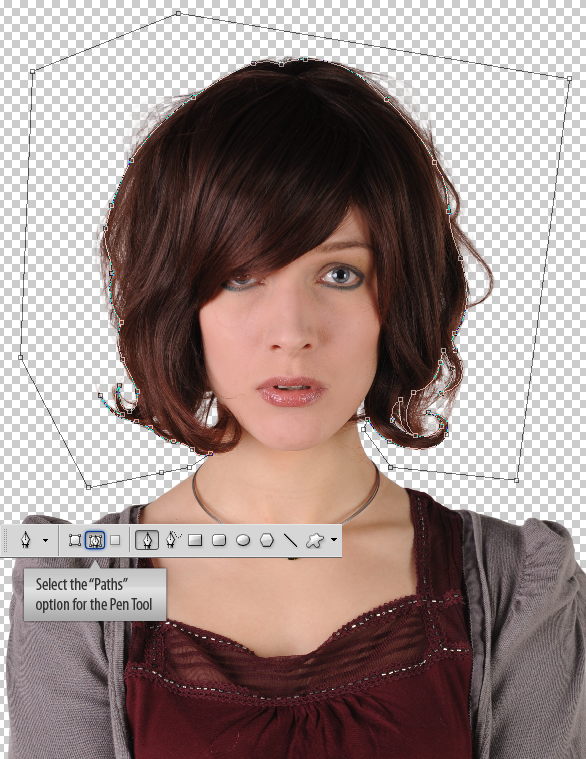
Try to be as good as you can. Just leave of those strands of hair.
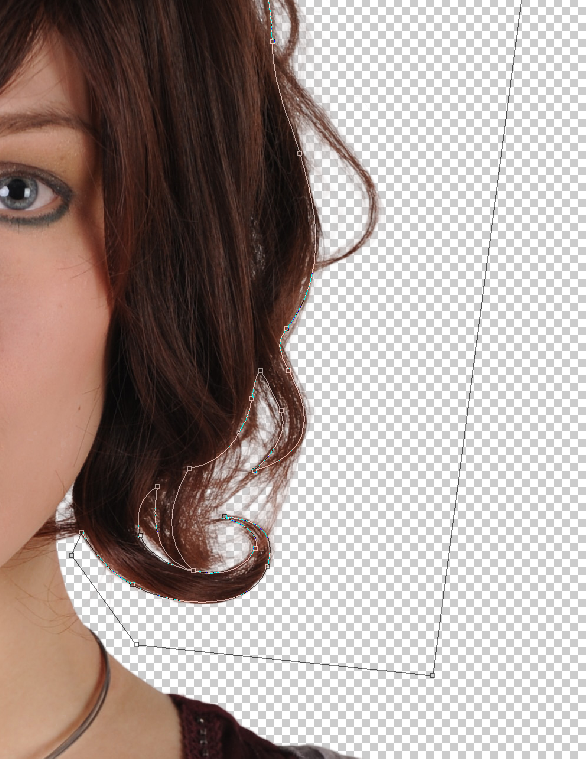
Step 10
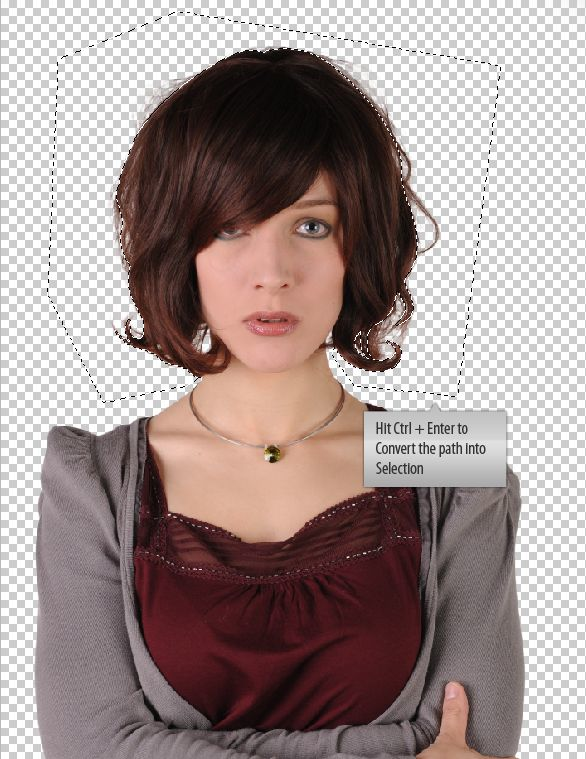
If you finished drawing the path. Convert it into a selection. Hit Ctrl + Enter or just right click on the path and choose Make Selection.
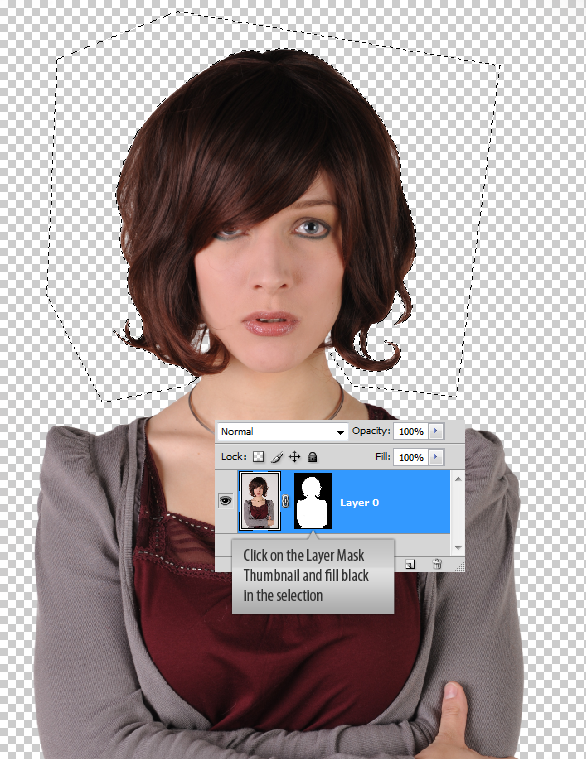
Now use the selection to hide those strands of hair. Remember we already have a mask associated with the model. Now click on the Layer Mask. Set the foreground color to #000000 and hit Alt + backspace to fill the selection. That is the great thing about layer masks. We can hide or reveal as we need! totally non destructive.
Step 11
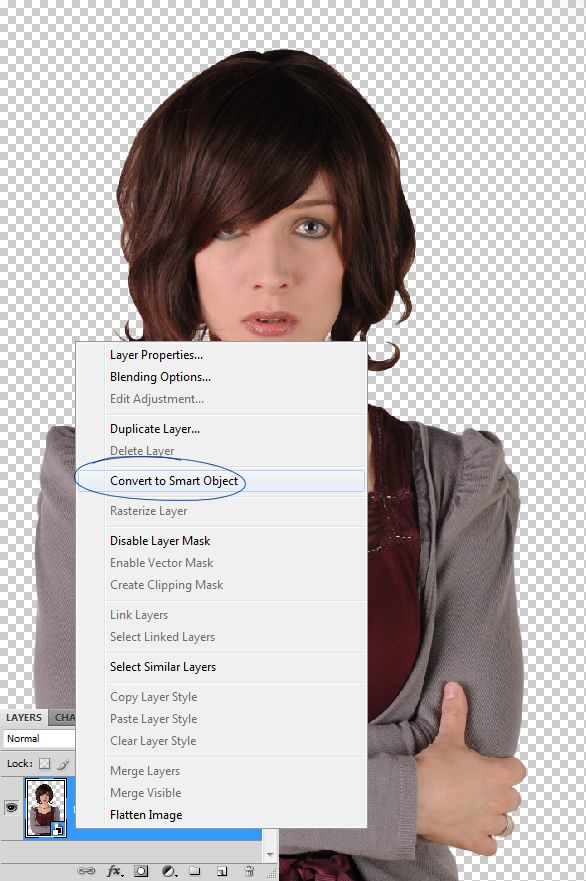
One final step before we drag the model into our main document. Convert this layer into a smart object. Right click on the layer and choose Convert to Smart Object from the context menu. This is just a good practice with numerous benefits. we can transform smart objects freely and apply filters to them without destroying the original, can apply layer masks to them and all those good things. And at any point of time we can revert to our original image.
Step 12
Ok we are done with the model and we are ready to go. Drag the model smart object layer into the main document. You need to resize her and position her properly on the canvas. We are not going to use the whole of the image. Hide the bottom portion of the image. Grab the Pen Tool and make the selection. Make it a bit organic with curves. It should look something like the below one.
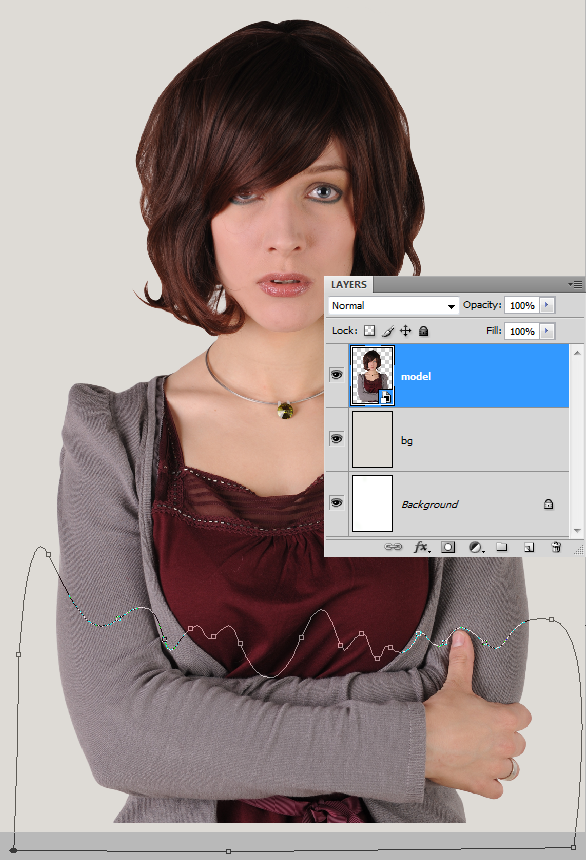
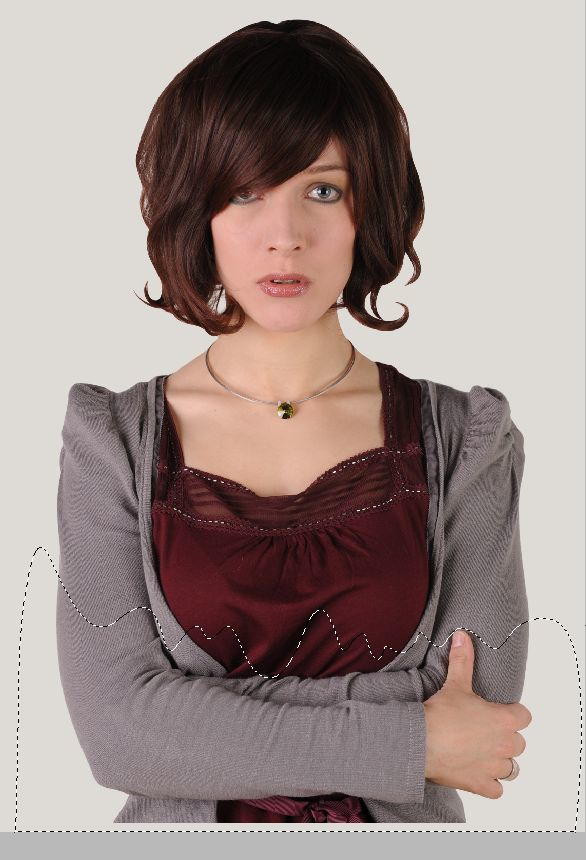
Ctrl + Enter to turn the path into a selection.
Step 13
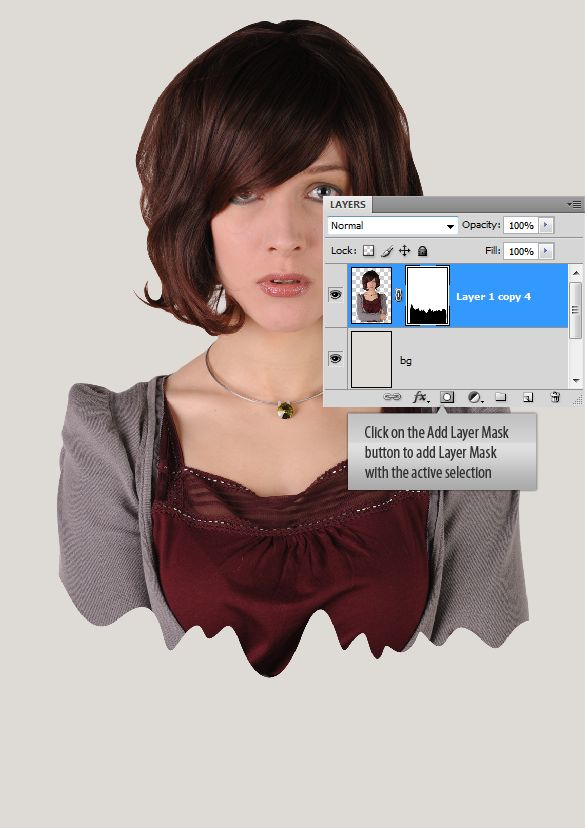
Add Layer Mask with the selection like earlier.
Step 14
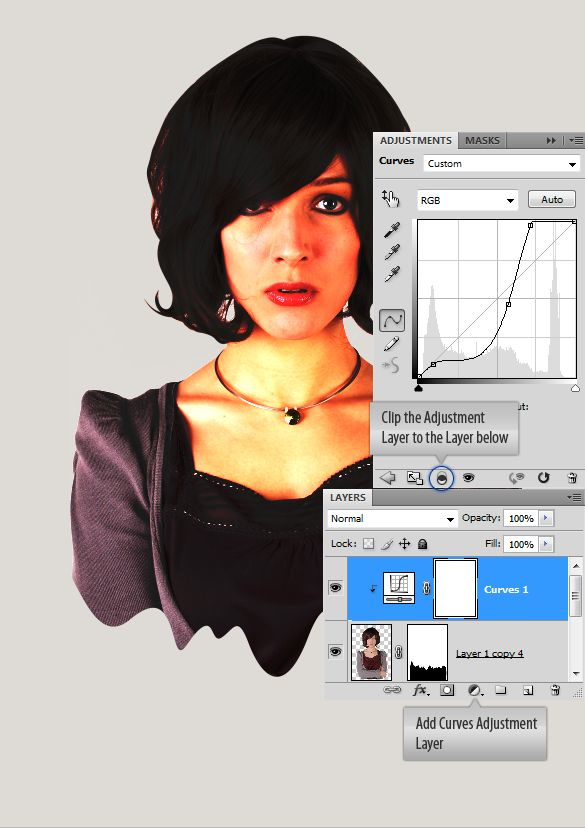
Here everything is going to happen. We are going to create the mood, you know that is a bit retro and set the tone for us. Add a Curves Adjustment Layer above the model layer. Modify the curve to get the below result with nice saturated tones. If you feel we are abusing it, don’t worry it’s going to be fine.
Step 15
Not so brilliant at this point. But from now on everything we do is going to make the design come alive. We progressively add different elements to our design. Remember we are aiming for some organic look with a retro feel in terms of color and shapes. We are not after nice round smooth finishing. A mix of all those elements would do the job. So keep in mind our objective so we can abide by it.
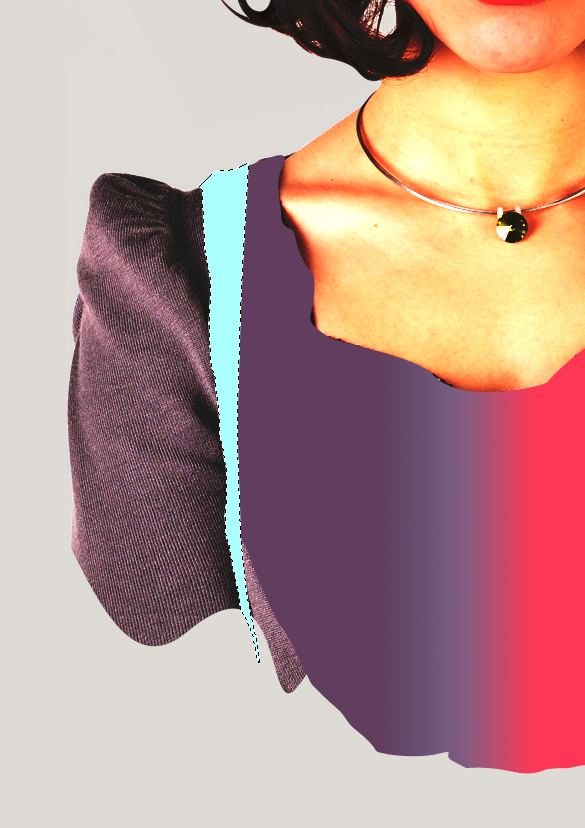
Lecture is over, just grab the Pen Tool and draw this outline. This is going to serve her jacket. Remember don’t make a perfect selection we are not looking for it.
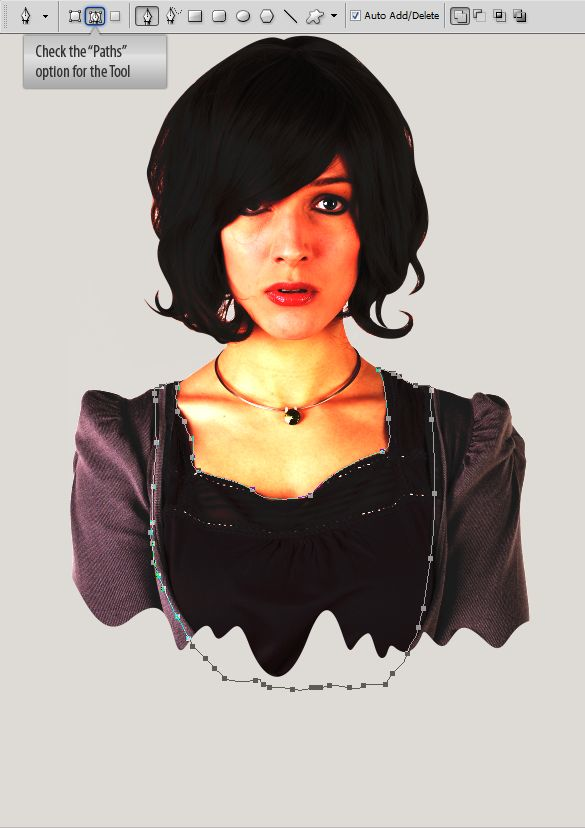
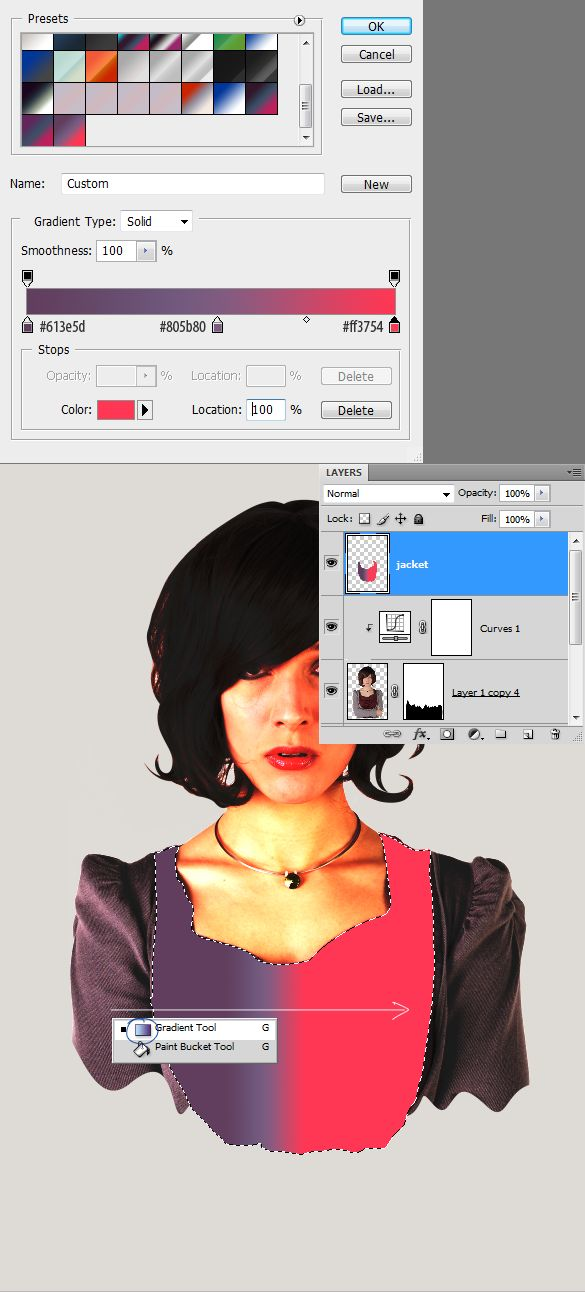
Convert it into a selection. Create a new layer above the model layer. Create this gradient in the gradients palette. Draw the gradient inside the selection.
Step 16
Draw another shape with the Pen Tool.
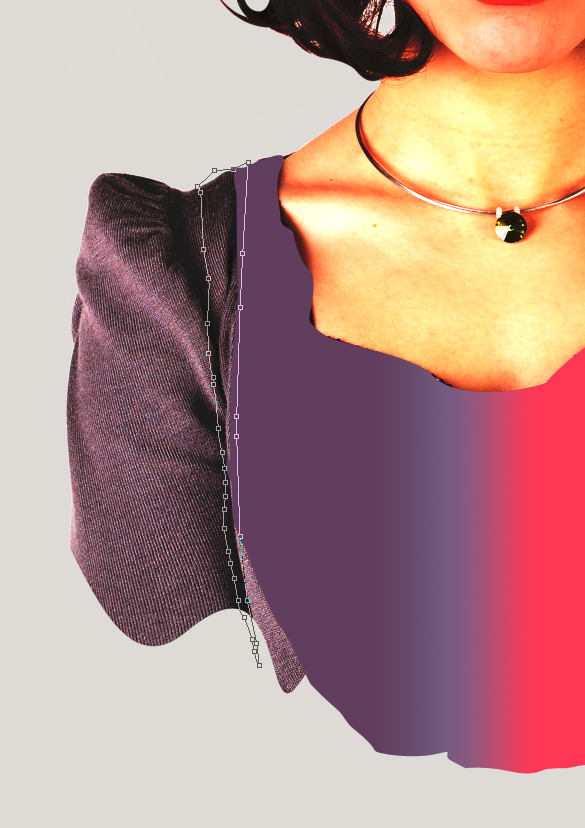
Convert into selection and fill color.
Step 17
Draw this shape using the Pen Tool just above her jacket. Select the Shape Layers option on the Options Panel before you start drawing. Shape layer is defined a vector path, so it is vector. We can do lot of things with it.
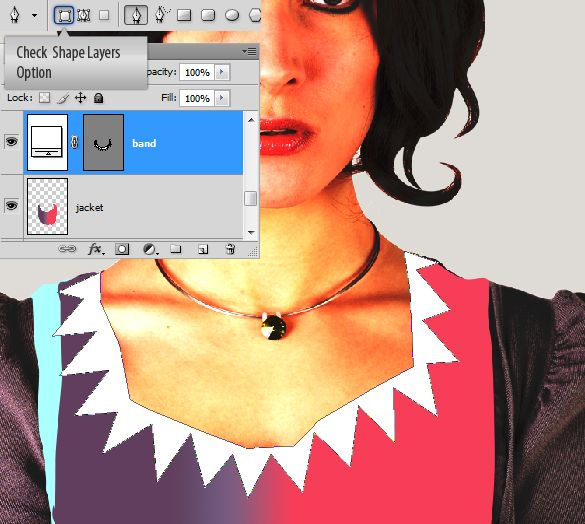
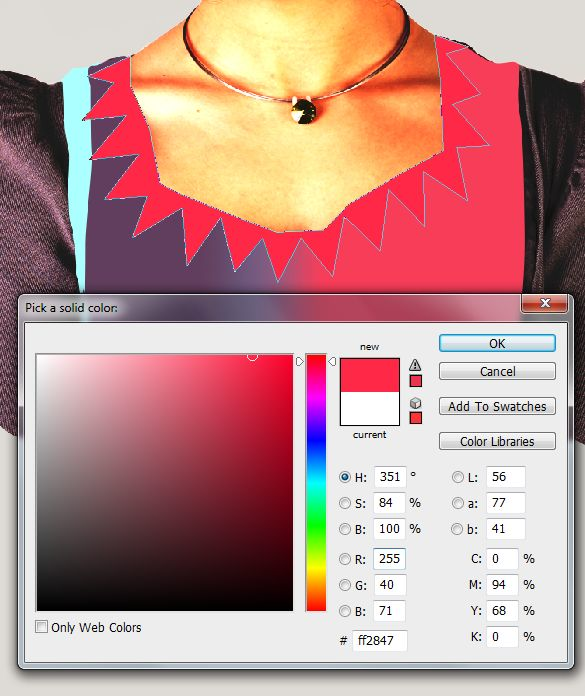
Double click on the shape layer thumbnail. Set the color to a nice pinkish red (#ff2847). This is one of those benefits comes with the shape layers.
Step 18
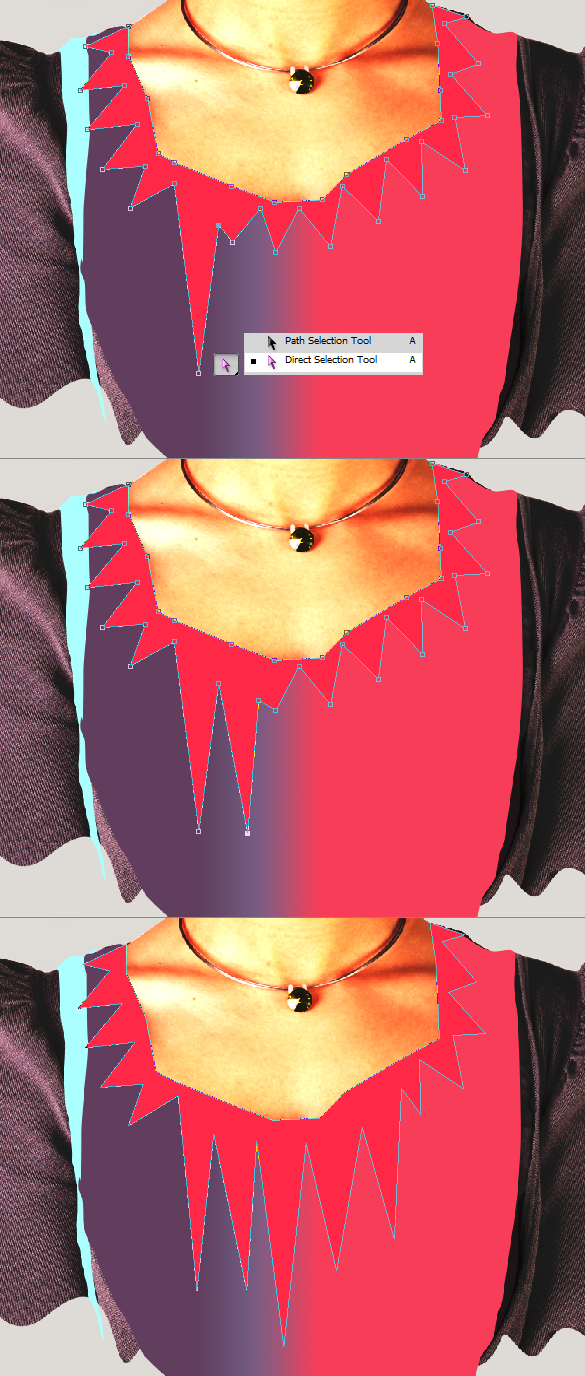
Now Make the shape more interesting. Select the Direct selection Tool. Click on the Vector Mask of the shape layer. Now you can grab those anchor points and work with them. Pull some of the anchor points downwards until you got the desired look.
Step 19
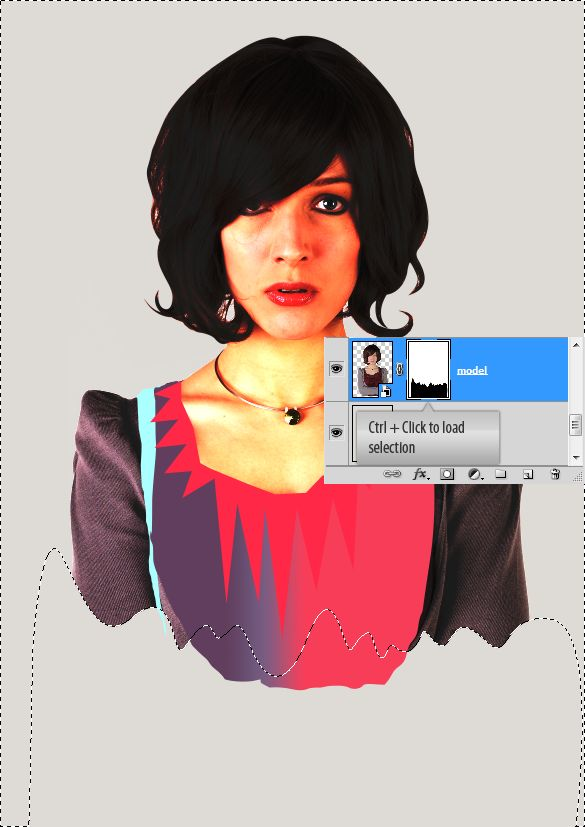
We have some work in Illustrator. And we need to take the model into Illustrator. To do this Ctrl + click on the model’s Layer Mask. You have the selection now, press Ctrl + C to copy.
Step 20
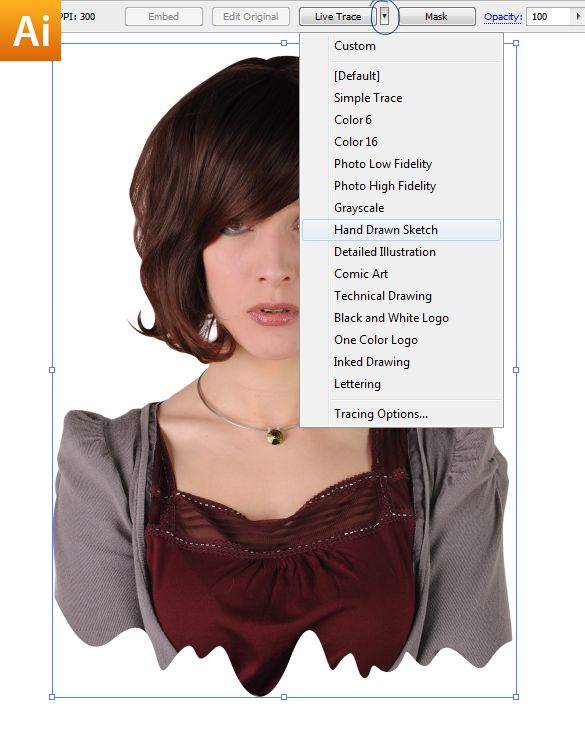
Now open up Illustrator, create a new document and press Ctrl + V to paste. Select the image. On the Options Panel you can find Live Trace button. Click on the small triangle next to it and you will get dropdown menu with tracing presets. Choose Hand Drawn Sketch from the list.
Step 21
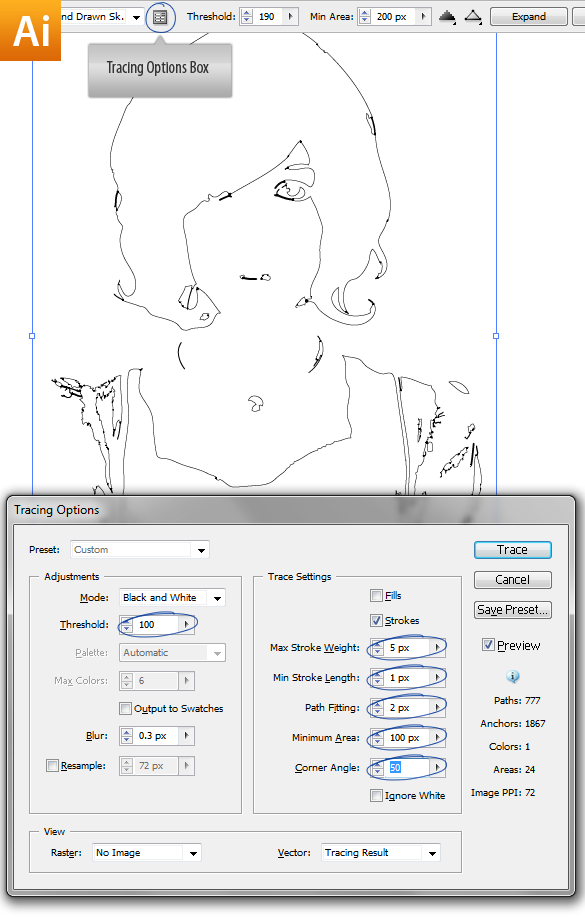
Once the tracing is completed you can fine tune the trace using the Tracing Options box. which can be found on the Options Panel.
Step 22
Copy and paste the trace into Photoshop. We can simply copy and paste items into these programs so easily and they work very well together. Now Place the trace layer the model layer.
