
Incorporating retro elements into your design work is an effective way to add strong nostalgic appeal and garner the attention of a large, worldwide demographic of strong spenders. Few adults can look at an old piece of technology without conjuring up a few fond memories, and this reaction can translate to a positive impression and an emotional attachment to your brand and message.
In this tutorial, I’ll show you how to illustrate a retro cassette tape in Photoshop. We’ll use various shape tools, layer styling techniques, and a few filters to achieve the final result. You will also learn how to apply custom textures for a very realistic, convincing outcome. So, let’s get started.
Resources:
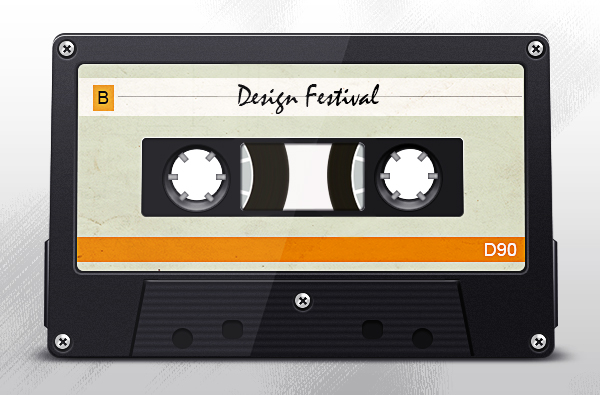
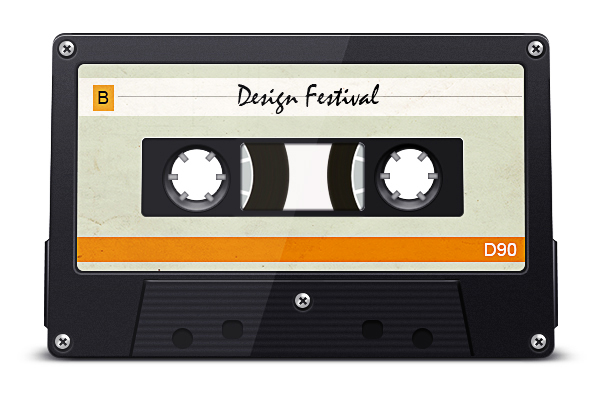
Final result: (Download the completed PSD file.)
Step 1
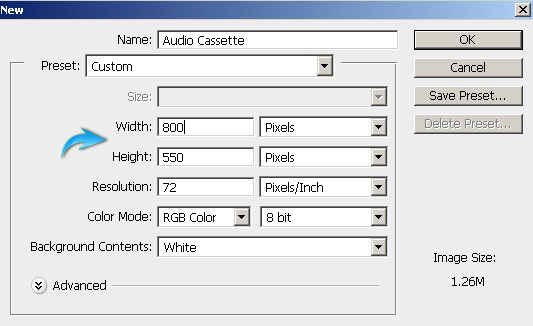
Create a new document in Photoshop with an 800px width and a 550px height.
Step 2
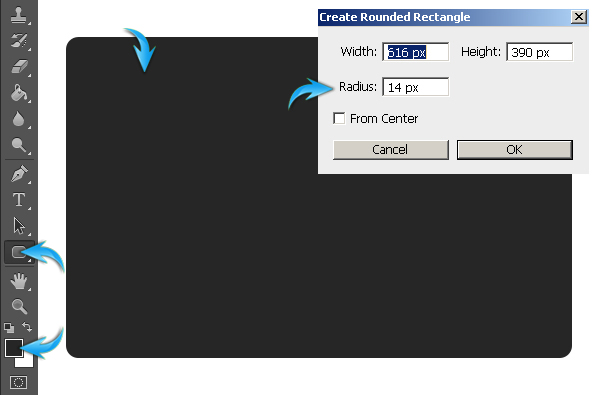
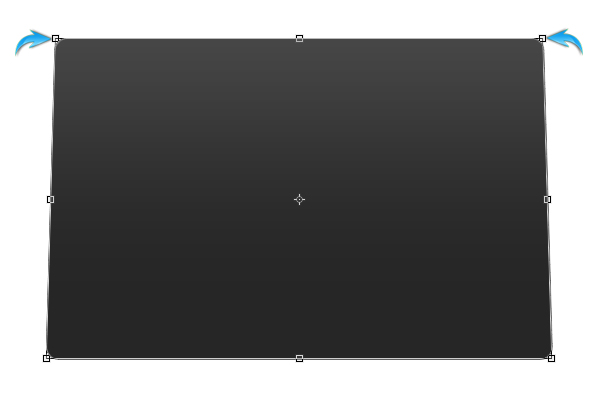
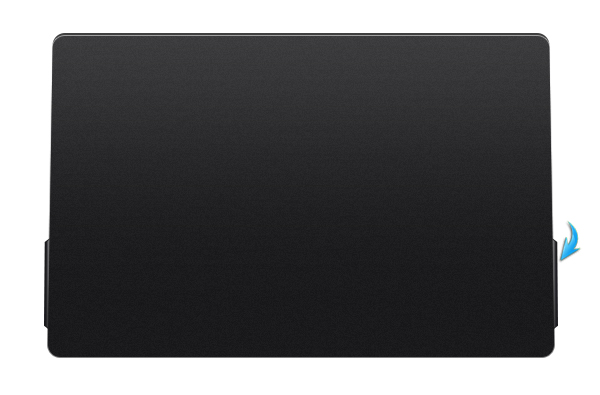
We’ll start by drawing the basic cassette shape. Set #262626 as your foreground color. Now, pick up the rounded rectangle tool and click the canvas to open the options window. Use the following settings to draw the rectangle.
Step 3
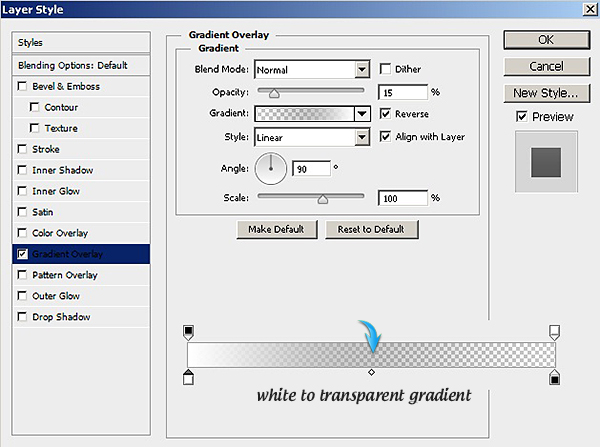
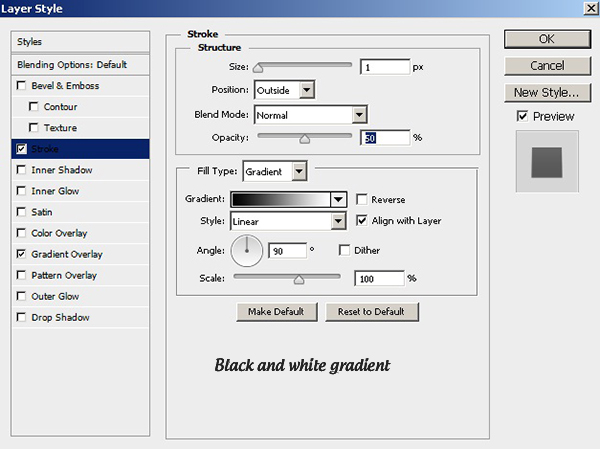
Double-click on the rectangle layer to open the “Layer Style” window and apply the following settings as a gradient overlay.
Now, go to “Edit” > “Transform Path” > “Perspective” and drag the top corners of the rectangles towards each other slightly.
Step 4
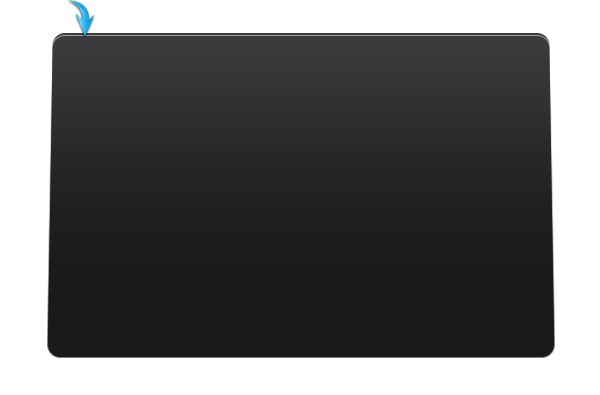
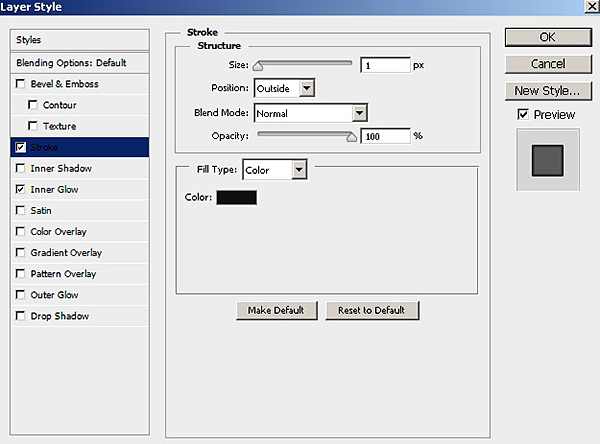
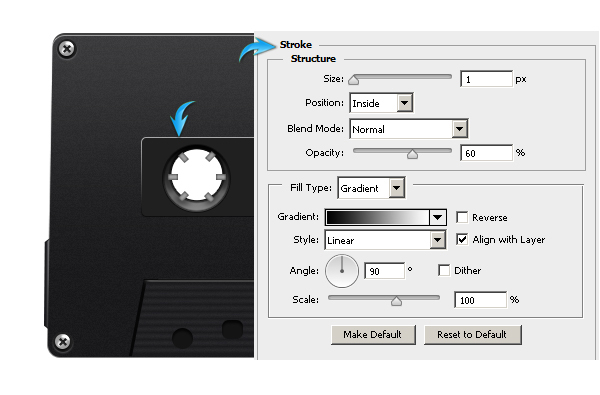
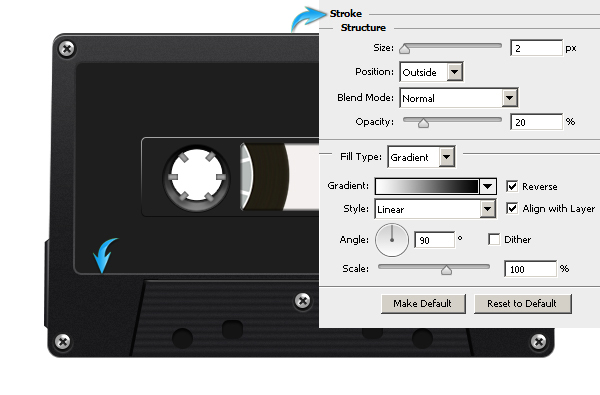
Duplicate the rectangle layer by going to “Layer” > “Duplicate Layer.” Label this layer as “Base” and drag it downward by tapping the downward arrow key three times. Double-click the base layer and apply the following settings for stroke.
Step 5
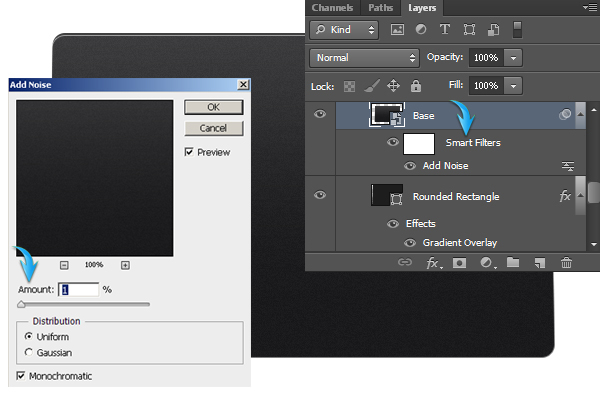
Right-click the base layer and choose the option to “Convert to Smart Object.” Now go to “Filter” > “Noise” > “Add Noise,” and apply the following values.
Step 6
Set #1a1a1d as the foreground color and draw a rectangle using the rectangle tool just above the background layer. After that, use the perspective tool to take its right-sided corners apart. Now press Ctrl + <click on the rectangle layer> to make selection around it, and go to “Layer” > “New Layer” to create a new layer just above it.
Next, we’ll create a highlight over the cassette. Select the soft round brush with a 4-5px size and pure white as your foreground color, and drag it vertically within the selection on this new layer. Hold the “Shift” key while using the brush to get a perfectly straight line. Once you are done, reduce the opacity of this new highlight layer to 50%. Collect both the shape and highlight layer into a single group, duplicate it, and flip it horizontally by going to “Edit” > “Transform” > “Flip Horizontal.” Position this copy behind the right side of the previously-formed rectangles.

Step 7
Make the following shape by drawing a rectangle and using the perspective tool to drag its lower corners apart.
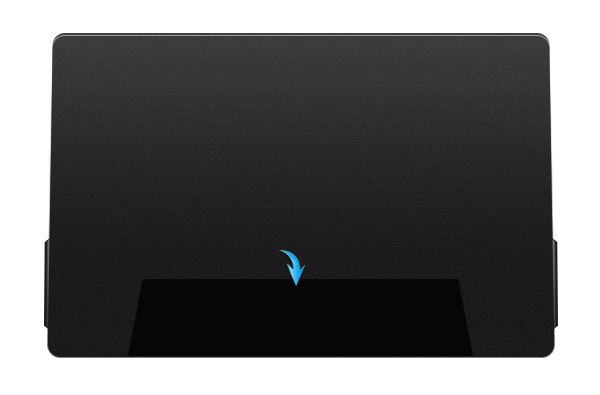
Duplicate this new shape and decrease its size a bit using the free transform tool (Ctrl + “T”). Change its color to #1a1a1c and position it as shown below. Convert it into smart object and add noise using the same method that we used in step 5.
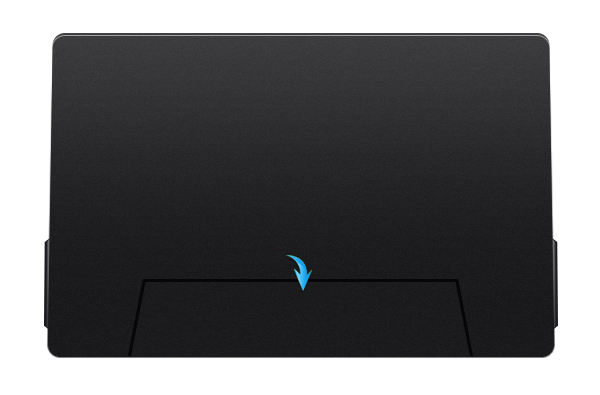
Press Ctrl + <click on the original black shape layer> to make selection around this new shape. Now, create a new layer above it and apply a hard round brush in white at the top border to achieve the desired highlighting effect. Reduce the opacity of this highlight to 50%.
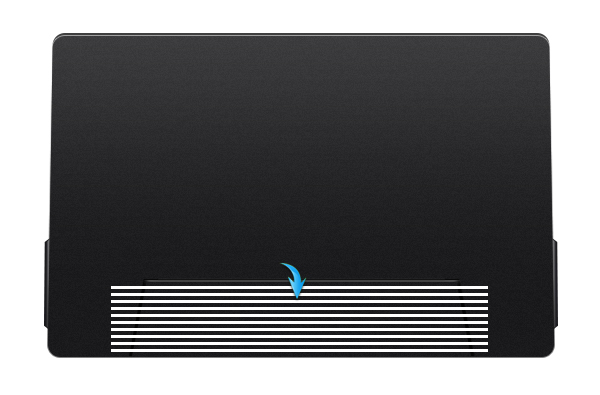
Step 8
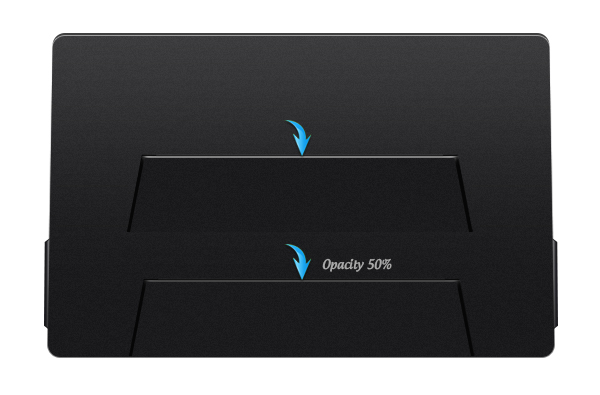
Next, to add texture to the shape, draw a thin white rectangle above the rest of the layers, duplicate it few times, and arrange these copies as shown below. Select all these rectangles, right-click and choose “Rasterize layers.” Then, right-click and choose “Merge layers.” Label this layer as “stripes.”
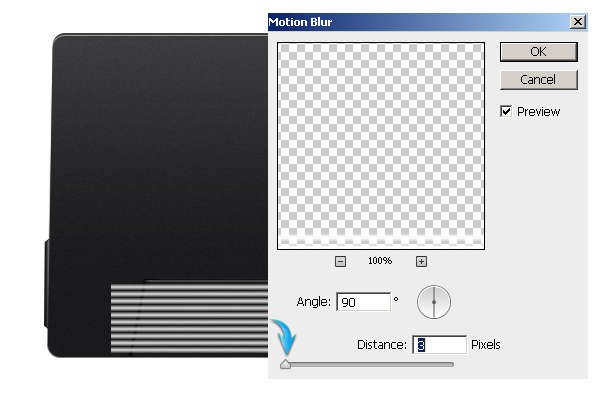
Now go to “Filter” > “Blur” > “Motion Blur,” and apply the following settings here to blur the stripes.
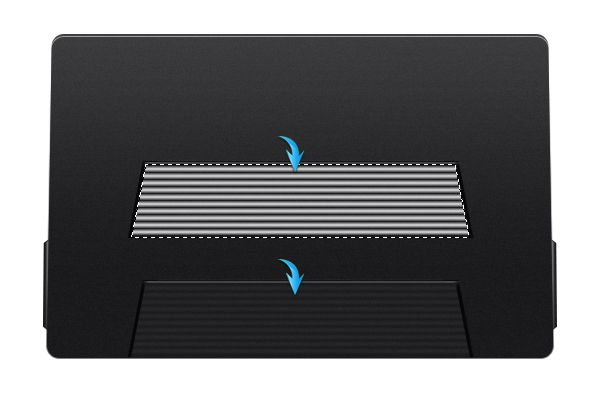
After that, click on the stripes layer to select it and press Ctrl + <click on the shape created in step 7> to make selection around it; we’ll want to confine the stripes to this selected shape. Now, click on the “Add Layer Mask” icon, which is present at the bottom of the layers panel. Change the blending mode of stripes layer to “Overlay” and reduce its opacity to 50%.
Step 9
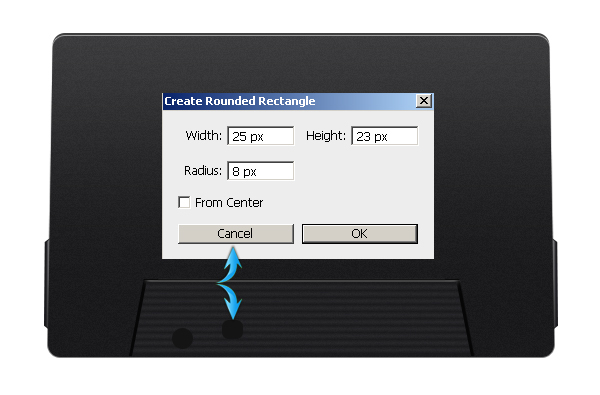
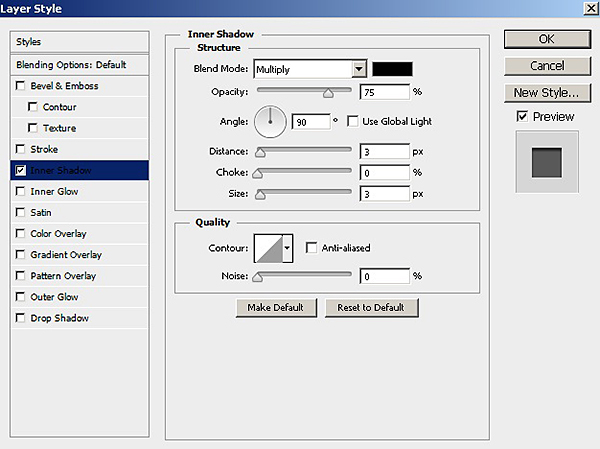
Set #141414 as the foreground color. Make an ellipse using the ellipse tool and a rectangle using the rounded rectangle tool. Use the following settings.
Apply the settings below to create an inner shadow on both the ellipse and the rectangle. Collect them into a single group, duplicate this newly-formed group, and flip horizontally.
Step 10
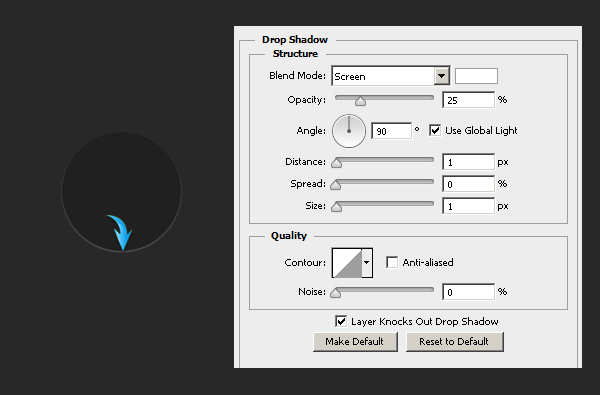
Next, we’ll make a screw. Draw an ellipse using color #202020 and apply the following drop shadow settings onto the elipse.
Step 11
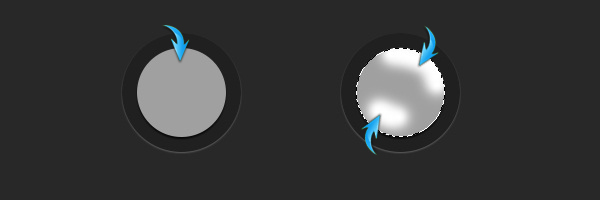
Make a second, smaller ellipse over the previous one using color #a0a0a0. Press Ctrl + <click on the new, smaller ellipse layer> to select it. Create a new layer and create highlights using the soft round brush tool, as shown below.
Step 12
Draw a small rectangle using color #424242, duplicate it, and rotate it 90⁰ by choosing “Edit” > “Transform” > “Rotate 90⁰.” Select both rectangles and press Ctrl+ “T” to activate the free transform tool. Rotate them 45⁰ in either direction. Now right-click and choose “Merge shapes.” Finally, apply the same inner shadow settings that we used in step 9.
Collect all of the screw layers into a group, duplicate this group few times, and arrange the duplicates as shown below.
Step 13
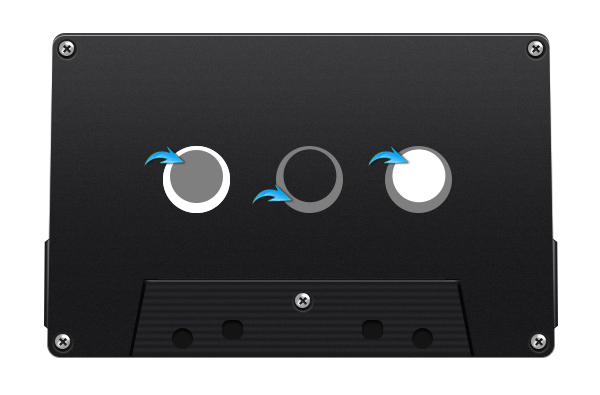
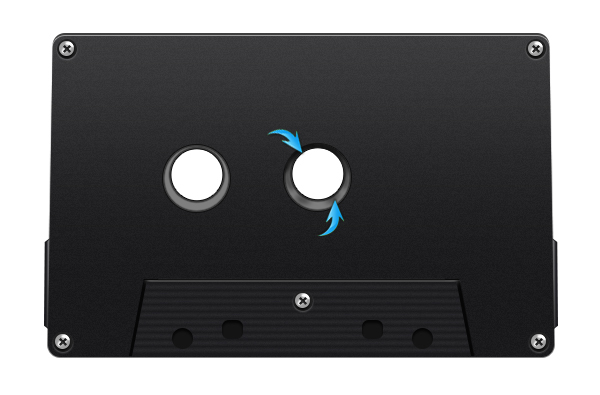
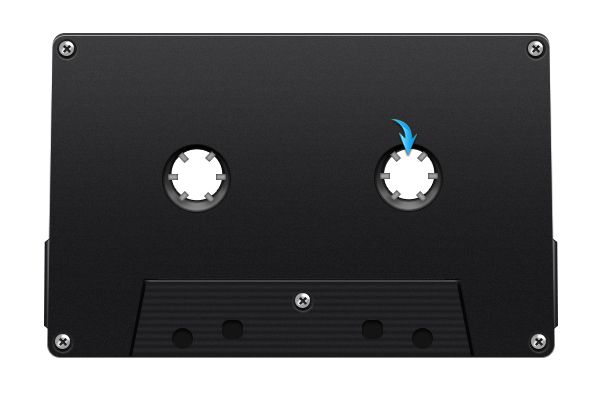
Next, draw a white ellipse. Make a smaller ellipse over it using color #7f7f7f, and arrange the two ellipses as shown below. Select both ellipses and go to “Layer” > “Combine shapes” > “Subtract Front Shape.” Label this layer as “ring.” Make a white colored ellipse below the ring layer to cover the hole.
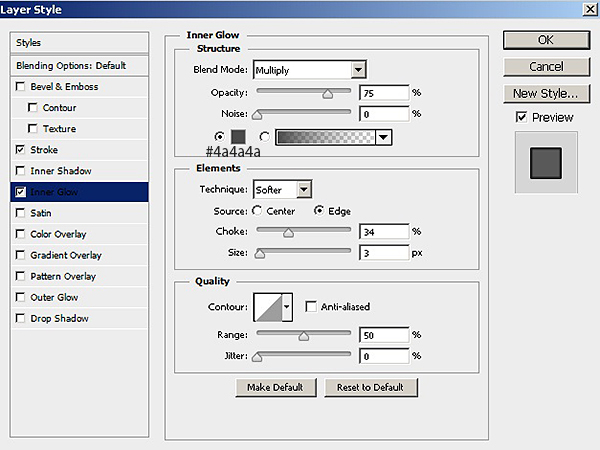
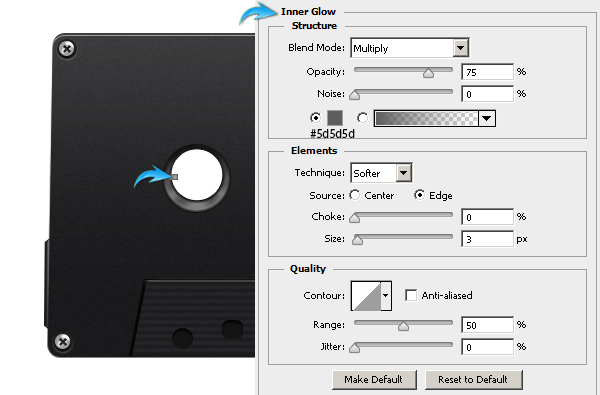
Step 14
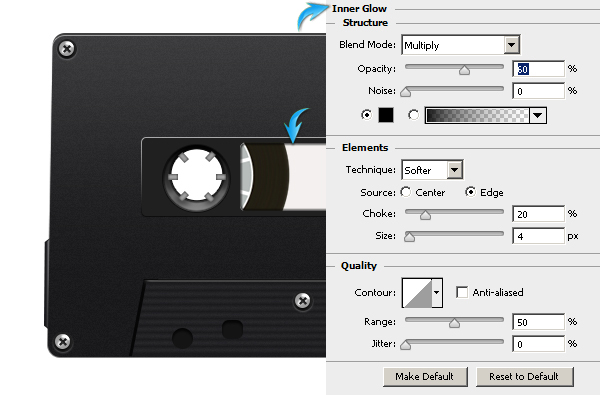
Apply the following settings for stroke and inner glow on this newly-created ring layer.
Create shading over the ring using a soft round brush tool in black using the same technique that we employed to create the highlight over the screw in step 11.
Step 15
Make a small rectangle using color #a1a1a1 and apply the following inner glow values to it.
Duplicate this rectangle several times and arrange it around the circle as shown below using the free transform tool (Ctrl + “T”). Collect these layers into a group, duplicate the group, and position the duplicates over the right side of the cassette.
Step 16
Draw a rectangle in color #202020 using the rounded rectangle tool with a 4px radius.

Apply the following settings as a stroke layer style.
Step 17
Make a smaller rectangle in the center of previous one using color #f4f0ef.
Next, we’ll make the supply reel. Draw an ellipse in color #231e14, duplicate it, make a selection around it, and add noise to it. Look below for clarity.
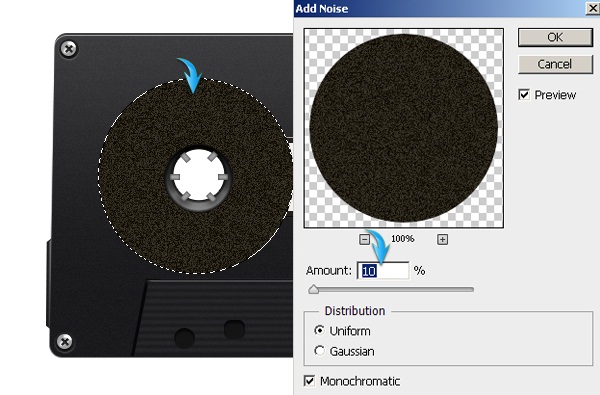
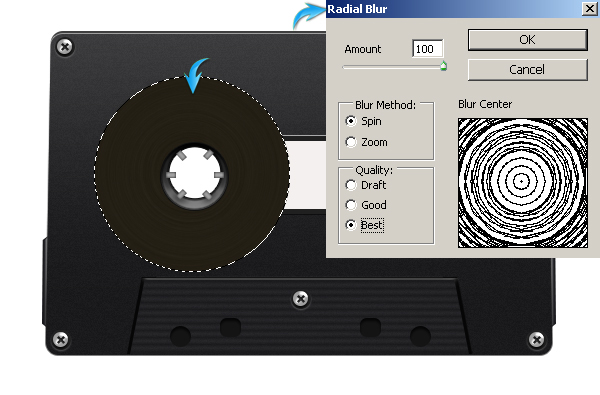
While the selection is still active, go to “Filter” > “Blur” > “Radial Blur” and apply the following radial blur settings.
Collect both ellipse layers into a group, duplicate the group, and decrease its size. Now position it over the right side. This will serve as the cassette’s take up reel.
Step 18
Draw a gray ellipse in color #b7bdbb with a 2px white stroke. Make two thin white rectangles and arrange them inside this circle shown below. Duplicate these white stripes and flip them horizontally to get the equivalent parts for the take up reel.
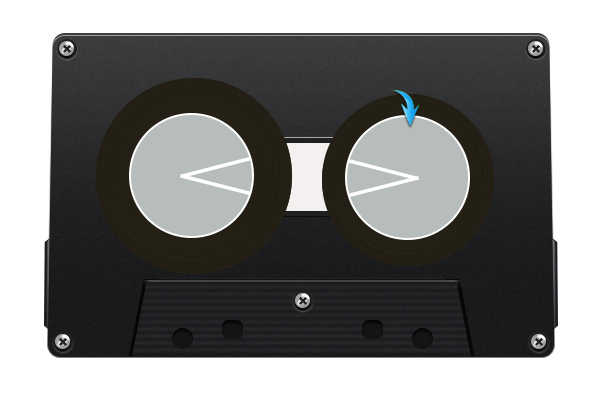
Merge all layers forming the reel. Now press Ctrl + <click on the white rectangle layer formed in step 17> and add a layer mask to the reel layer.
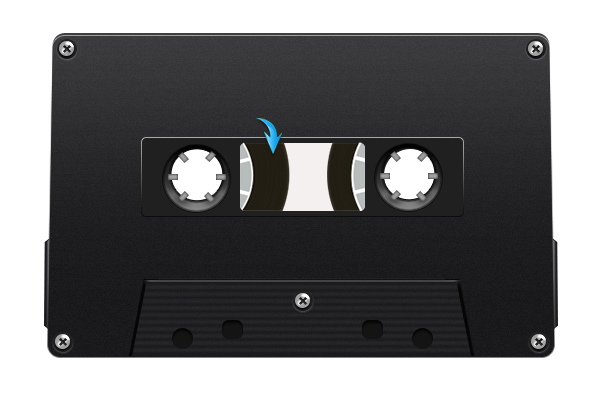
Step 19
Duplicate the white rectangle, bring this copy above the reel layer, set its fill to none, and apply following layer style settings to it. This will serve as the clear plastic window of the cassette.
Step 20
Draw a rectangle using the rounded rectangle tool with a 4px radius and color #1e1e1e. Apply the stroke settings shown below.
Make a smaller rectangle inside it using color #d4dcc9.
Step 21
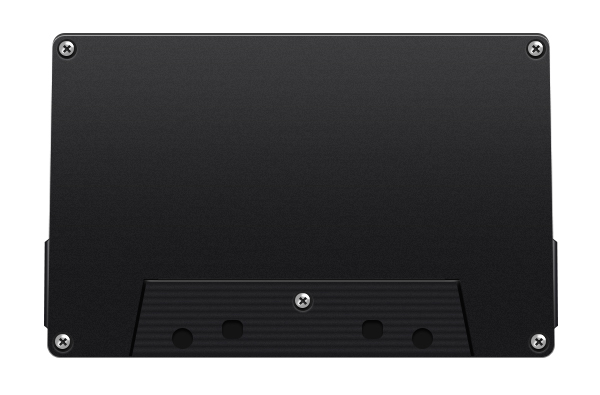
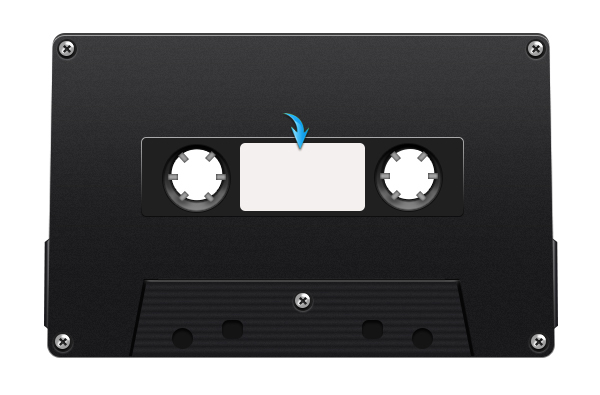
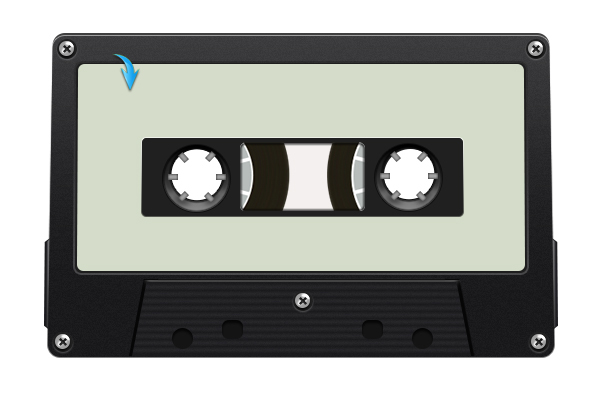
Our cassette is almost ready; you can add additional details if you want. There are so many ways to manipulate it further. I’ve add few rectangles and some text to make the classic retro sticker and label.
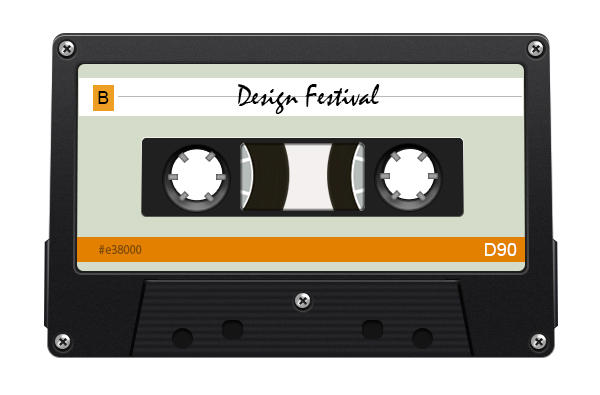
To give some texture to the paper, go to “File” > “Place” > “Select the paper texture.” Confine it to the paper area by adding a layer mask to it. Then, change its blending mode to “Multiply” and reduce its opacity to 60 – 70%.
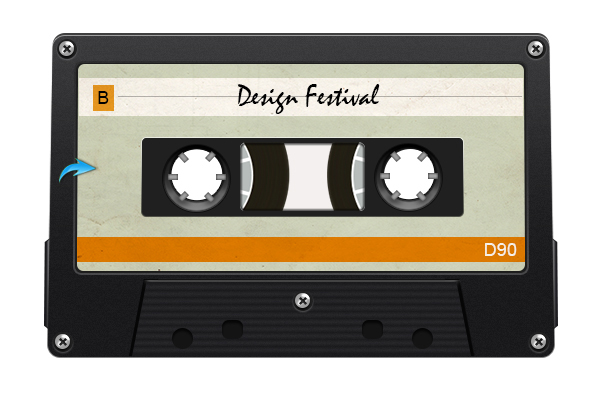
Step 22
To add a light reflection, draw the following shape using the pen tool above the rest of the layers.
Add a layer mask to it to confine it to the base layer of cassette and reduce its opacity to 8 – 10%.
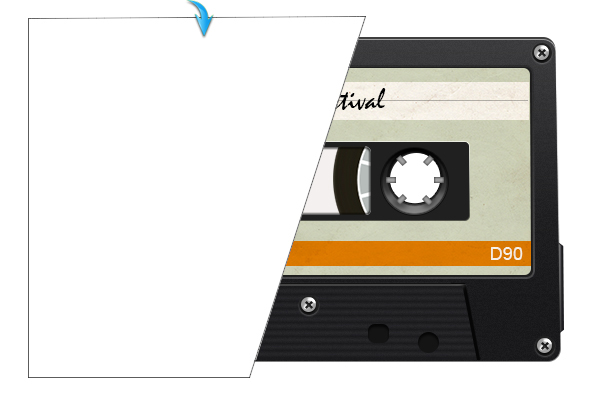
Step 23
Next, we’ll make cassette’s shadow. Draw a rectangle in black using the rounded rectangle tool. After that, apply a 4.5px Gaussian Blur filter to it, followed by motion blur filter with the following settings.

That’s it! I hope you learned something interesting. Experiment with your cassette and share!