Preview of Final Results


Step 1
Start by creating a new 1920×1200 pixels document. Select the Text tool and type in your inspirational text. The font we’re using is Bebas Neue and Pacifico. These fonts are free. Adjust the font size and leading to your likings. Use the Free Transform tool (Ctrl/Cmd+T or Edit > Free Transform) to scale your text then position the text in the middle.

To position your text perfectly in the center, select your text and background layers, switch to the Move tool, then click on the align center buttons in the options bar.

Step 2
Next we’re going to convert the text to 3D. To do this, right-click on the text layer and choose New 3D extrusion from layer.
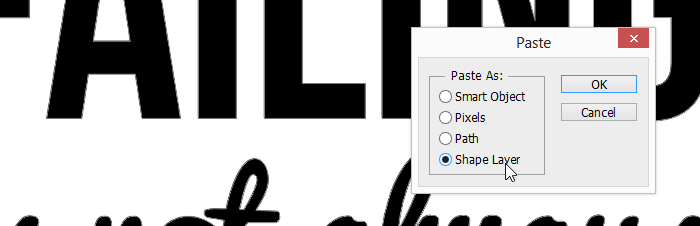
Depending on how complicated your text is, Photoshop might give you a message that your text is too complicated for it to process. If this happens, you need to convert it to a path and use Adobe Illustrator to simply the path. To do this, right-click on the text layer and select Convert to Shape. Copy the shape layer to your clipboard then paste it into a new document in Adobe Illustrator. In Illustrator, go to Object > Path > Simplify. Checkmark the preview option then adjust the settings so that you get the least amount of points without distorting the text much. Copy and paste the text back into Photoshop. When you paste, Photoshop will ask how you want to paste your text as. Select Shape Layer then click OK. Delete the other text layer then right-click on the new shape layer and select New 3D Extrusion from selected layer.

Step 4
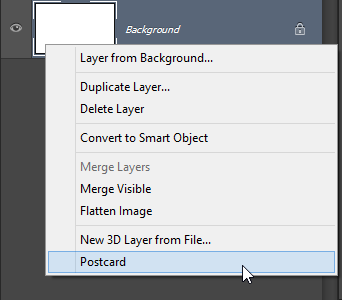
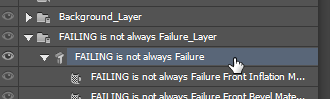
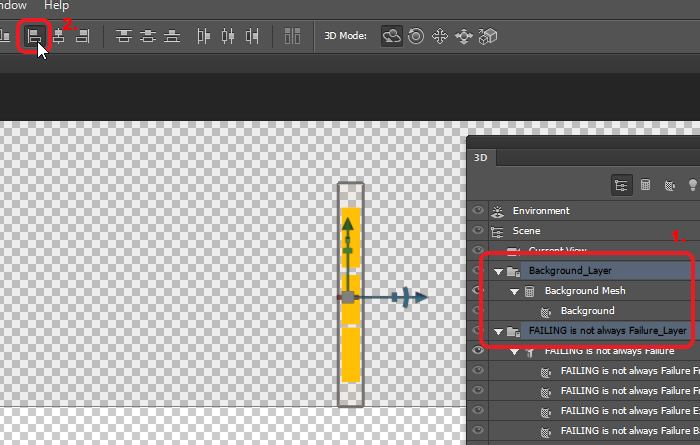
Once you convert your text into a 3D extrusion, Photoshop will switch you to the 3D interface. Go back into the Layers panel and select the background layer. We’re going to convert this to a 3D object so that we can use it as a wall for the 3D text. Right-click on the background layer and select Postcard. Switch back to the Layers panel and select the two layers. Merge the layers into a single 3D layer by pressing Ctrl/Cmd+E.
Step 5
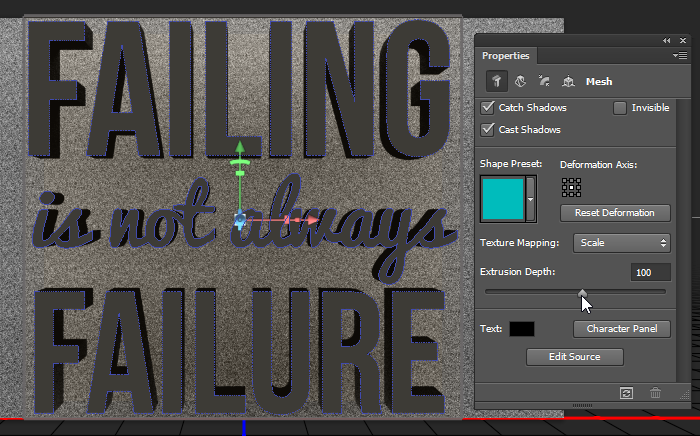
We’re going to start by reducing the thickness of the 3D text. Select the 3D text layer in the 3D panel
In the Properties panel, reduce the Extrusion depth setting. You can get a better preview by going to 3D > Render to do a quick render of the scene. Photoshop will start rendering the picture and when it looks good enough, click anywhere to stop the render. Keep adjusting the setting and rendering until you get the results that you like. For my text, I used an extrusion depth of 100.
Step 6
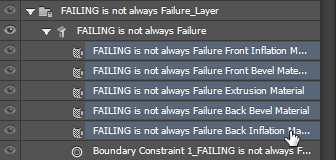
Now we’re going to make the 3D text look gold. Select text material layers in the 3D panel. You can select multiple layers by clicking on the top material layer then holding the shift key and pressing on the last materials layer.
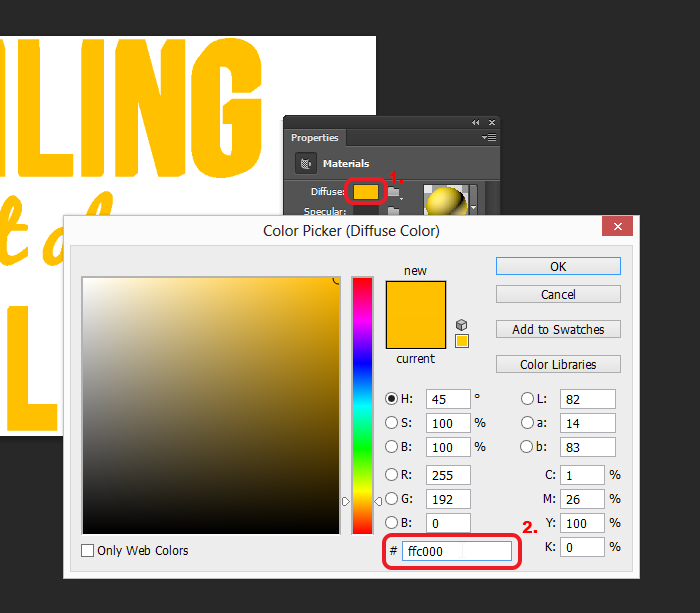
Your Properties panel will switch to the Materials settings. Start by setting the Diffuse color to a yellow-orange color. The color I’m using is #FFC000.
Step 7
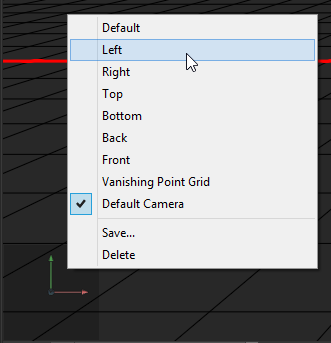
We’re going to work on the rest of the materials later when we have everything else set up. For now, we’re going to align text layer with the background layer. Change your camera view to Left by right-clicking on the view box on the bottom-right corner and choosing Left.
Next, select the text and background layer groups. You can select multiple layers by holding the Ctrl or Cmd key. Select the Move tool then click on the align left edges button in the options bar. Now your text is aligned with the background and you can switch your view back to the Default Camera view.
Step 8
Render your scene by pressing Alt+Shift+Ctrl+R (Option+Shift+Cmd+R on Macs) to get a preview of how your text looks like. Everything looks pretty flat and if you like it this way, you can let Photoshop render the entire scene and save your image. We can do a lot more to make our quote look more dramatic by adding some lights. Lighting is a huge subject and it plays a large part in how your 3D text will look. There are many ways to light your 3D text but we’ll show you an easy one that uses just one light.

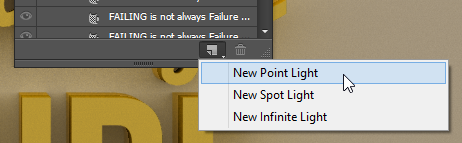
To add a light to your scene, click on the New Light button in your 3D panel and choose New Point Light.
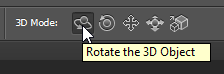
We’re going to position this light on the top-right corner of the text and have it cast a shadow diagonally. Moving a light to the perfect spot takes a bit of experience with 3D but there’s an easier way to do this. Select the Move tool and set the 3D mode to Rotate in the options bar.
In the view box located on the bottom left of your screen, drag to reposition your view so that you are looking at your 3D text from the top-right corner. Think of it like playing a first person shooter game – you want to reposition yourself so that you can shine your flashlight from the upper-right side of the text. Once you’re in the right angle, switch your 3D mode to Slide and position yourself so that you’re further away from the 3D text. When you’re in the right position, click on the Move to View button in the Properties panel to move your point light to your current view. To make your shadow more noticeable, increase your intensity. We’ll readjust this setting later. Switch back to the Default Camera view then render the scene to preview your lighting. Play around with the camera view and light intensity to get the results that you like.