Step 5
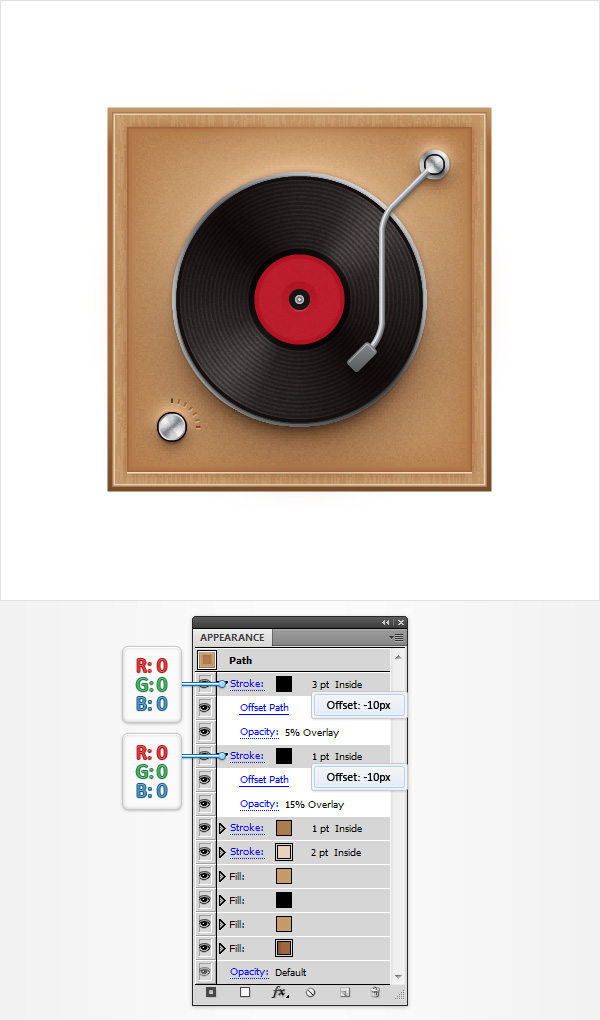
Make sure that your “main” shape is still selected, focus on the Appearance panel and add a third stroke. Select it, set the color at black, make it 1pt wide, align it to inside, change the Blending Mode to Overlay, lower its Opacity to 15% and go to Effect > Path > Offset Path. Enter a -10px Offset and click OK. Return to the Appearance panel and add a fourth stroke for your “main” shape. Select it, set the color at black, make it 3pt wide, align it to inside, change the Blending Mode to Overlay, lower its Opacity to 5% and hit Shift-Control-E to apply that same -10px offset effect.
Step 6
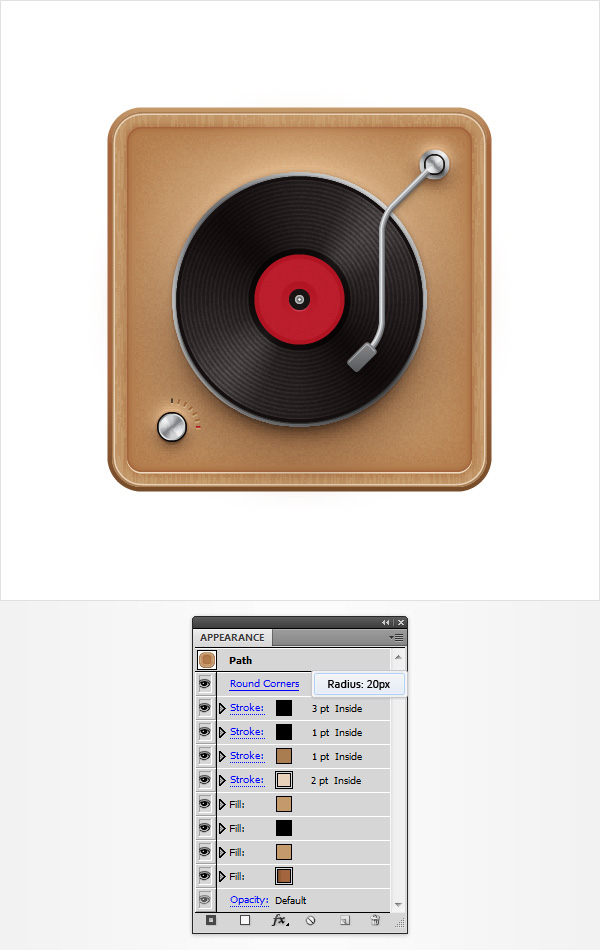
Make sure that your “main” shape is still selected and focus on the Appearance panel. Select the entire path and go to Effect > Stylize > Rounded Corners. Enter a 20px Radius and click OK.
Step 7
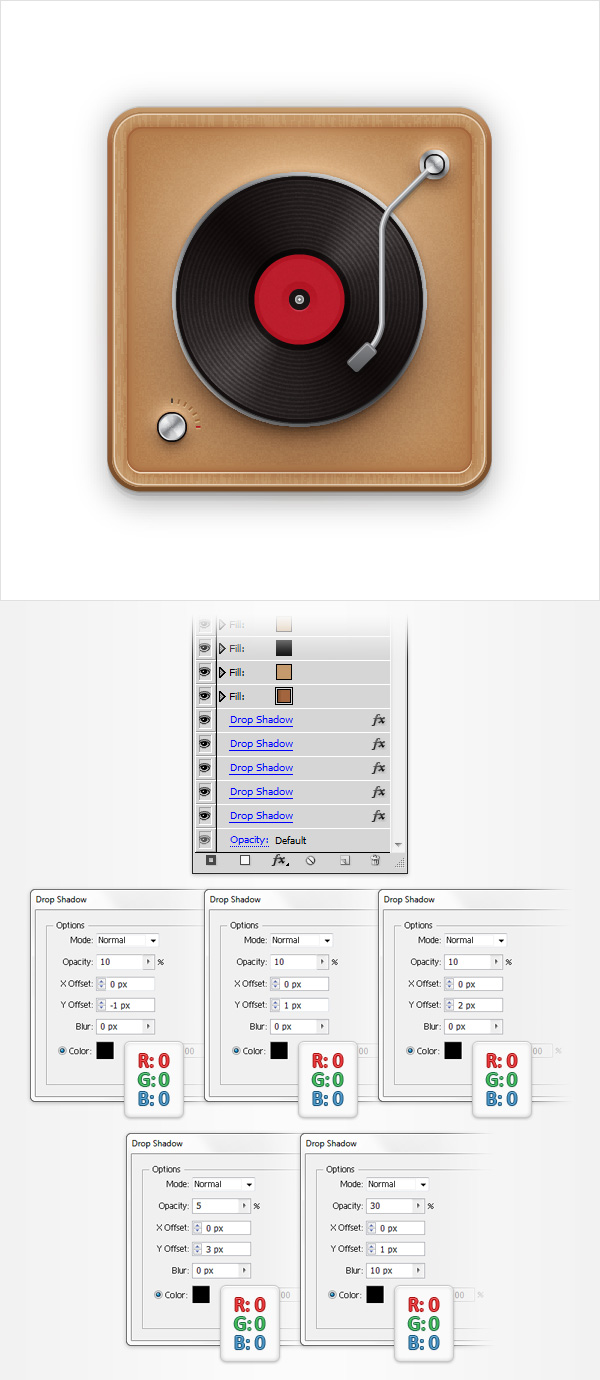
Make sure that your “main” shape is still selected and focus on the Appearance panel. Select the entire path and simply add the five Drop Shadow effects (Effect > Stylize > Drop Shadow) shown in the following image.
7. Add a Simple Background
Step 1
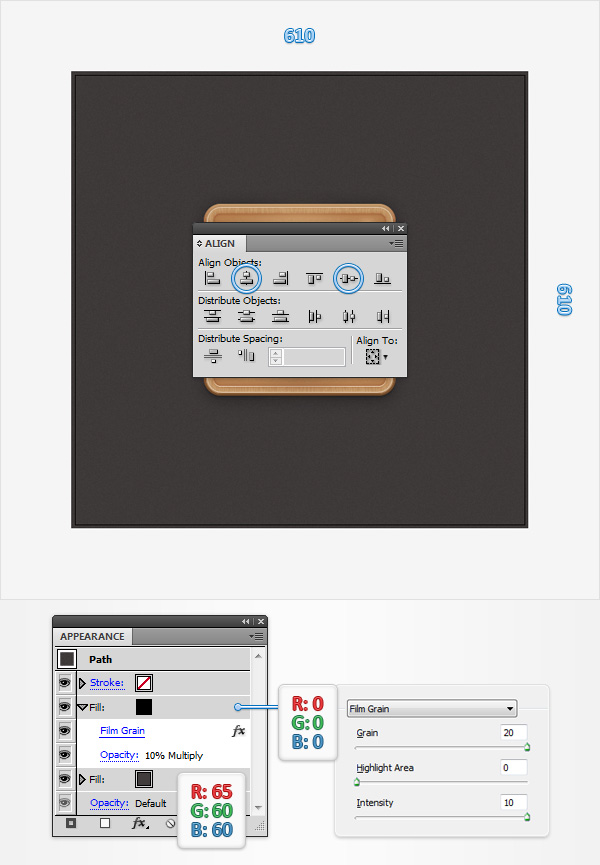
Using the Rectangle Tool (M), create a 610px square, set the fill color at R=65 G=60 B=60 and center it using the Horizontal Align Center and Vertical Align Center buttons from the Align panel. Make sure that this new shape stays selected, send it to back (Shift-Control-[ ) then focus on the Appearance panel. Add a second fill for this square and select it. Set the color at black, lower its Opacity to 10%, change the Blending Mode to Multiply and go to Effect > Artistic > Film Grain. Enter the properties shown in the following image, click OK and you’re done.
Congratulations! You’re Done!
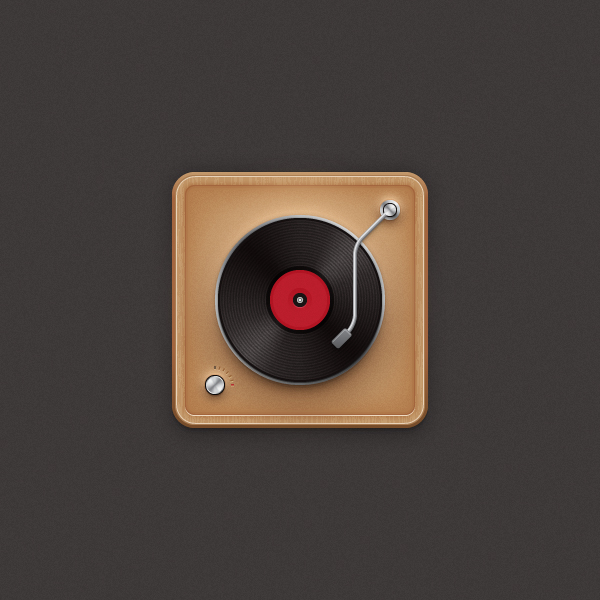
Here is how it should look. I hope you’ve enjoyed this tutorial and can apply these techniques in your future projects.
