In this tutorial we will learn how to create a cute Teddy Bear and some school themed items. We’ll be using basic shapes and the Pathfinder panel, so you don’t need a graphic tablet or advanced drawing skills for making up such character. Let’s dig in!
1. Form the Bear’s Head and Face
Step 1
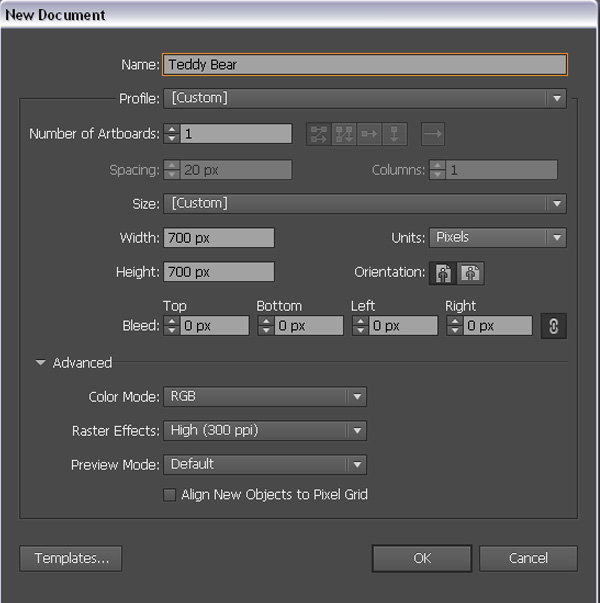
Create a New document of 700 x 700px size and Color Mode – RGB.
Step 2
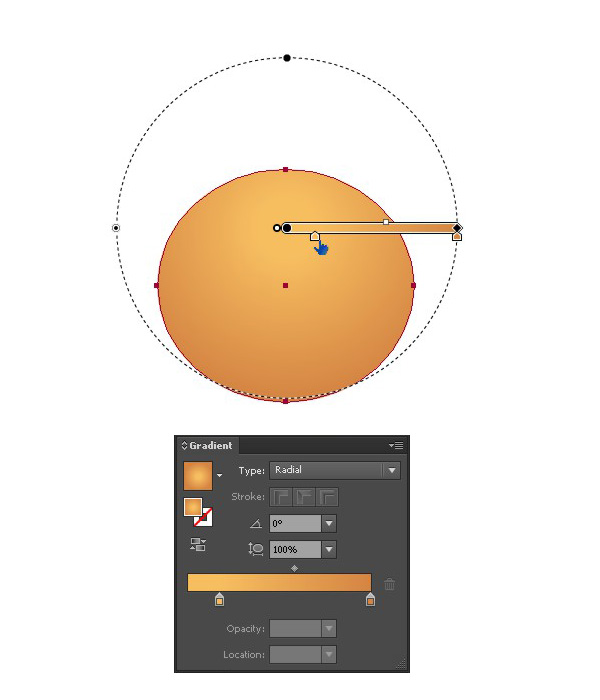
We’ll start with the Teddy’s head. Grab the Ellipse Tool (L) and make a circle. Allow it to be a bit squashed, don’t make it perfectly round. Fill the circle with radial gradient from light brown (R=247, G=190, B=96) to darker brown (R=212, G=132, B=67). Move the center point of the gradient up a bit to make it look like the light source is somewhere above our Teddy Bear.
Step 3
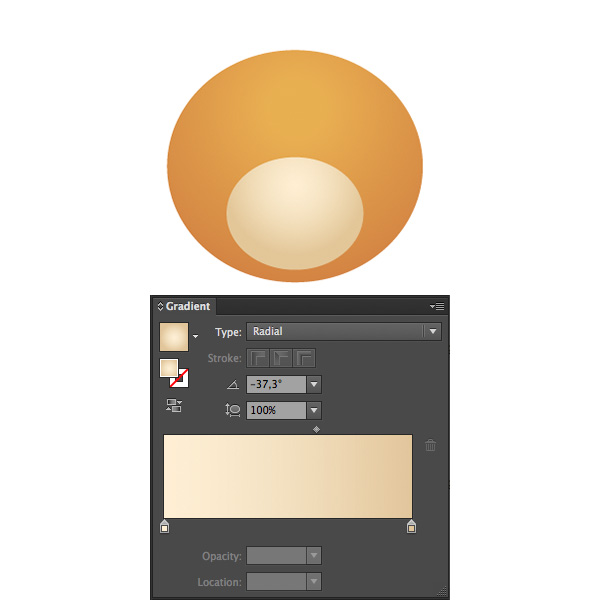
Go on and add a second circle in the muzzle area of the Bear’s head. Fill it with radial gradient from light beige (R=254, G=238, B=211) to the darker one (R=227, G=199, B=152).
Step 4
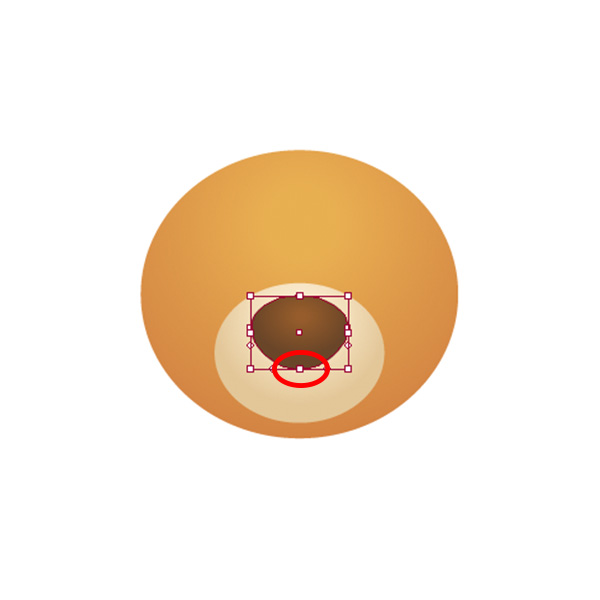
Add a smaller squashed ellipse for the nose and fill it with another radial gradient of lighter (R=150, G=92, B=43) and darker (R=106, G=69, B=40) shades of brown color.
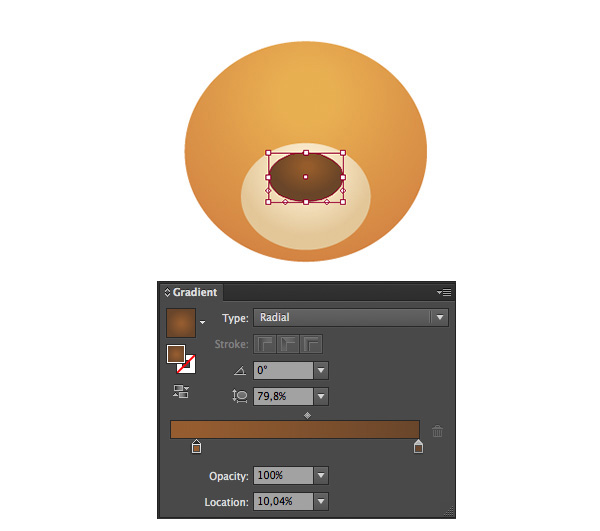
Take the Direct Selection Tool (A), select the lower anchor point and move it down a bit to make a shape more triangle.
Step 5
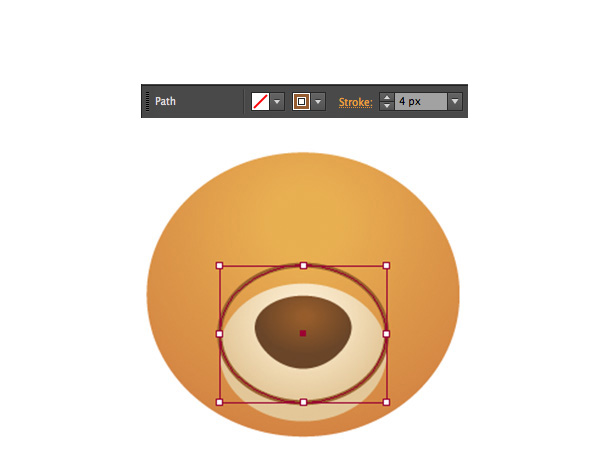
Let’s move on and add a smiling mouth to our bear. Create a circle around the nose with no fill. Set Stroke (X) color to dark brown (R=106, G=69, B=40) and Stroke Weight to 4pt.
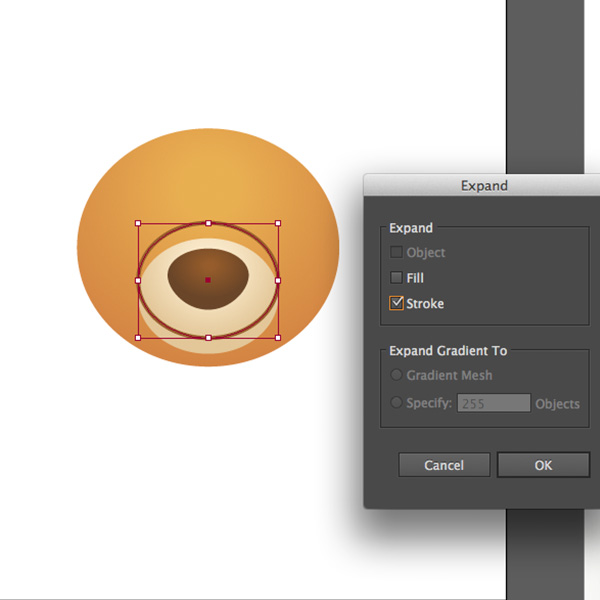
Go to Object > Expand, select Stroke check box in the pop-up menu and hit OK therefore turning the stroke into separate object with brown filling.
Step 6
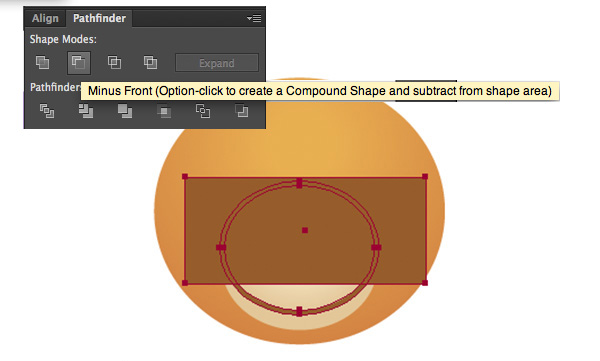
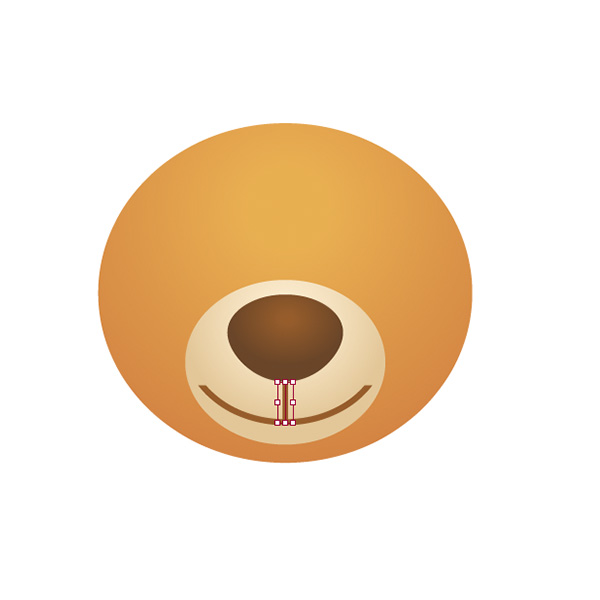
Now we need to form a smile out of this shape. Draw a rectangle with the help of the Rectangle Tool (M) above the circle that we’ve just created. Select both shapes and click Minus Front in Pathfinder panel (Window > Pathfinder).
Step 7
Our faceless head is smiling. Add a small vertical line between the nose and the mouth using Line Segment Tool (\) and holding down Shift button. The Stroke Weight and Stroke color are the same as we did for the mouth circle.
Step 8
At this step we’ll add a pair of cute eyes. Draw a circle using the Ellipse Tool (L) and holding down Shift button. Set Fill color to dark brown (R=106, G=69, B=40).

Keeping the selection, press Alt + Shift and drag the circle to the left side of the face to make a copy of the eye.

2. Add Fancy Ears to Your Bear
Step 1
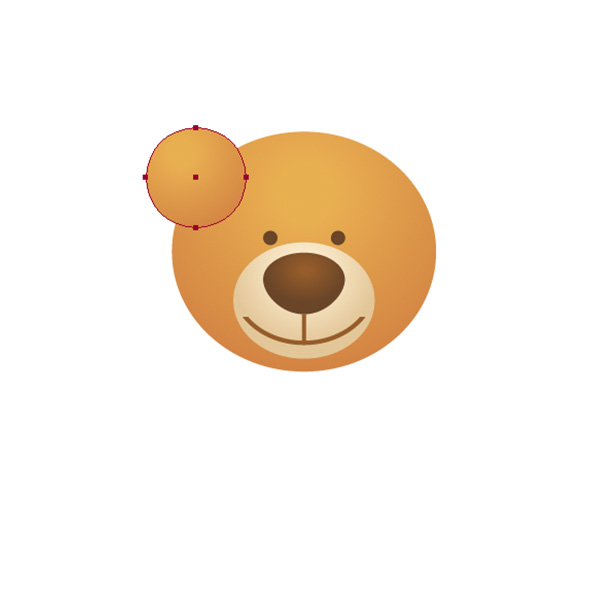
Our bear definitely needs some ears. Draw a circle on the left side of his head. Keeping it selected, use the Eyedropper Tool (I) and take the color from the Bear’s head.
Step 2
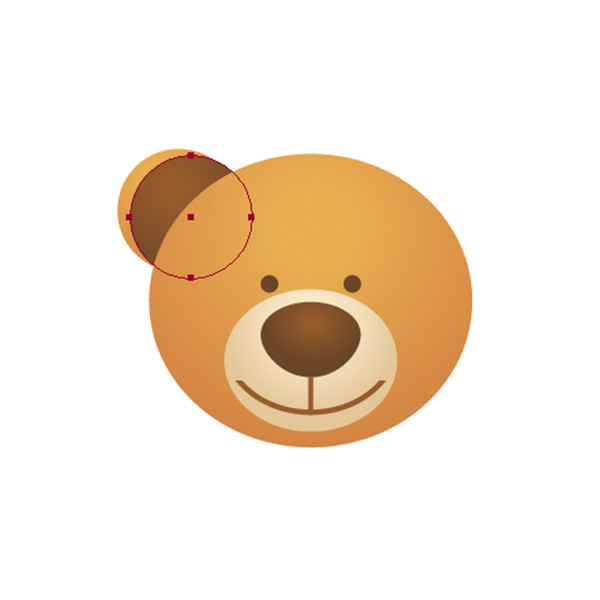
Copy and Paste in Front (Control + C > Control + F) your circle, make it smaller and place it in the middle of the ear. Fill it with the dark-brown linear gradient from light (R=150, G=92, B=43) to dark (R=106, G=69, B=40). Use Control + Shift + [ to move the ear behind the head.
Step 3
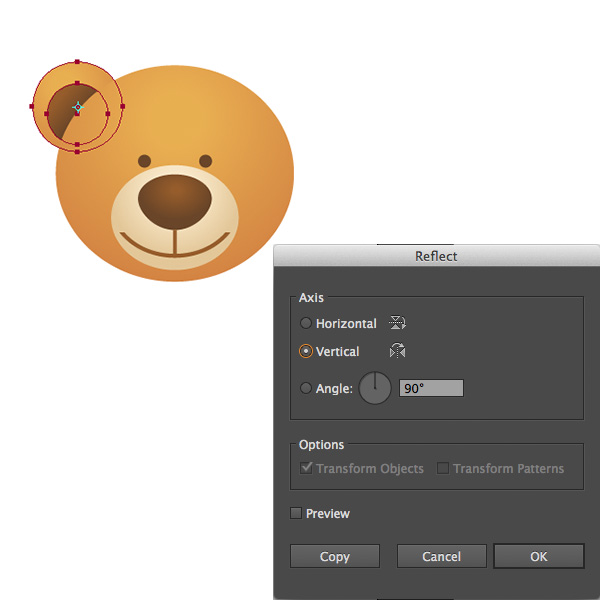
Select both ear shapes and double-click on Reflect Tool (O) to access the Reflect Tool Options. Select flipping over the Vertical Axis and hit Copy button.
Step 4
Move the ear’s copy to the proper place on the Bear’s head.
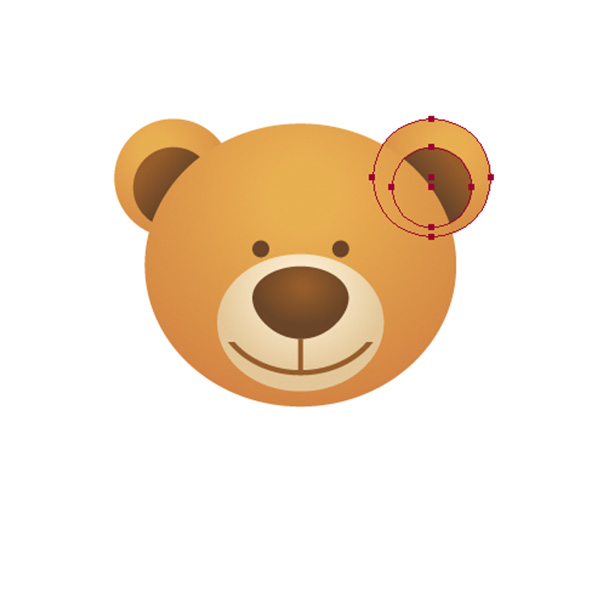
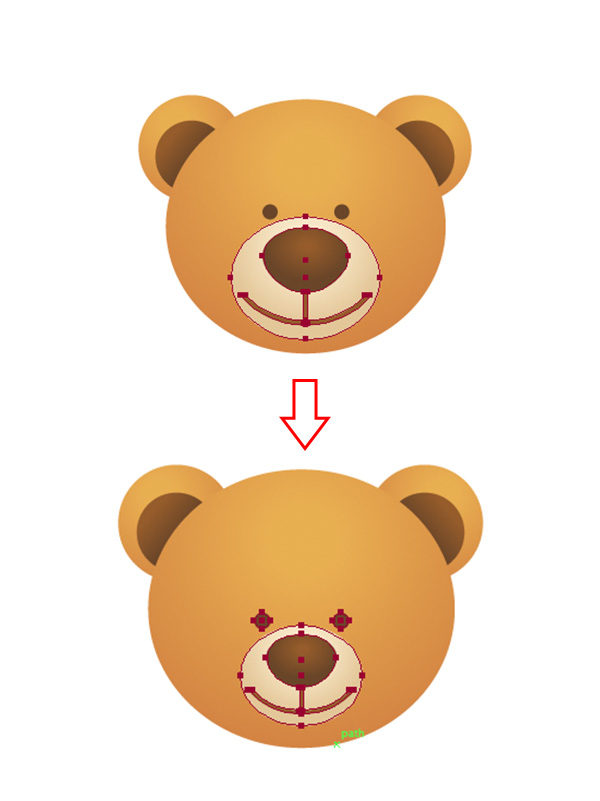
Here I decided to resize the muzzle area and make it smaller. I also change the position of eyes to make a Bear’s face more cute.
3. Make Up a Body Using Simple Shapes
Step 1
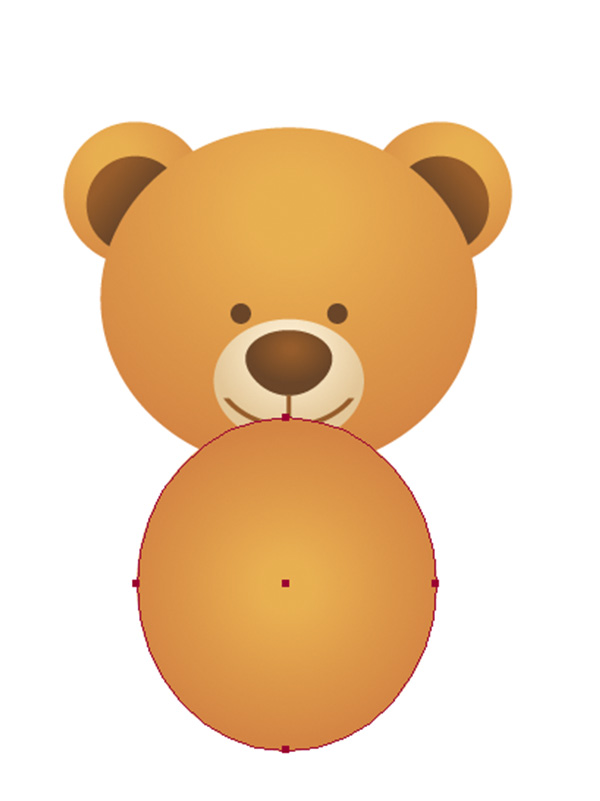
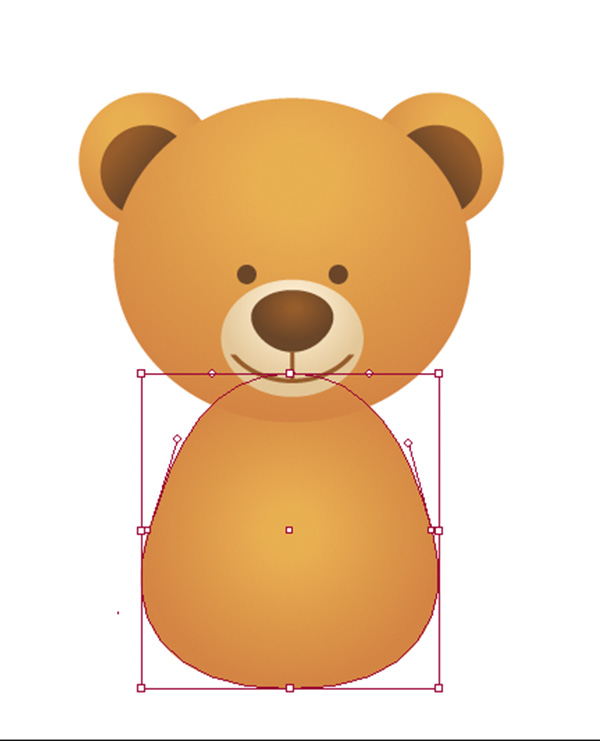
Let’s create a body. Draw an ellipse and fill it with the same gradient as we have on Bear’s head, using the Eyedropper Tool (I).
Step 2
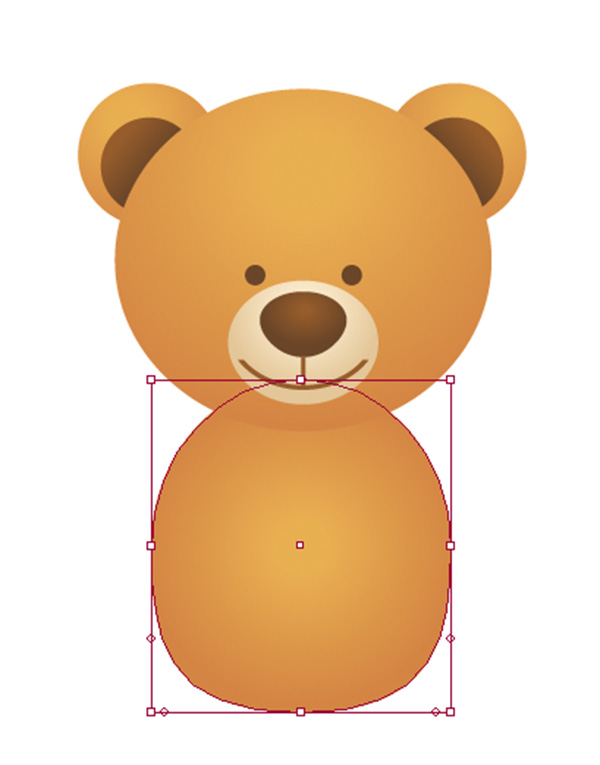
Send it to back (Control + Shift + [ ) and use the Direct Selection Tool (A) to pull the side anchor points down a bit.
Step 3
Change the angle of the upper anchor handles by turning them inwards to give the body an egg-like shape.
4. Add Paws and Arms Using the Ellipse Tool
Step 1
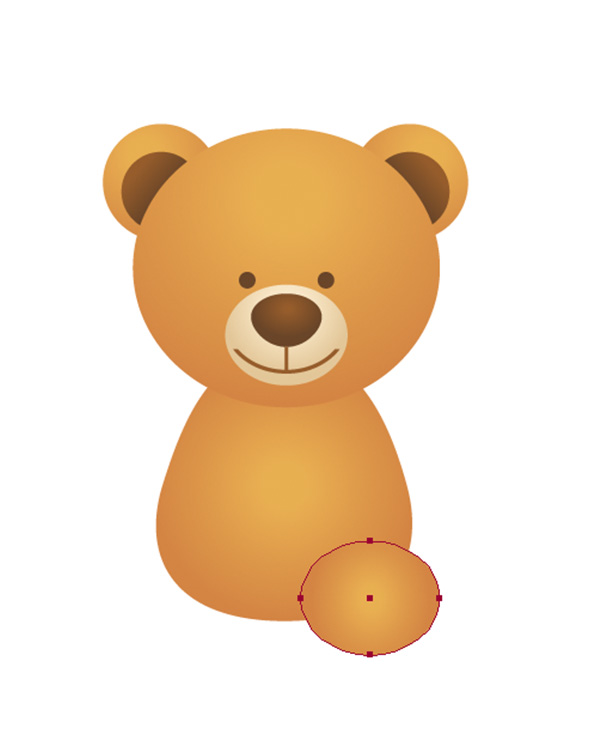
Let’s add some cute and simple paws. Create an ellipse with the Ellipse Tool (L) and fill it with the same body gradient color.
Step 2
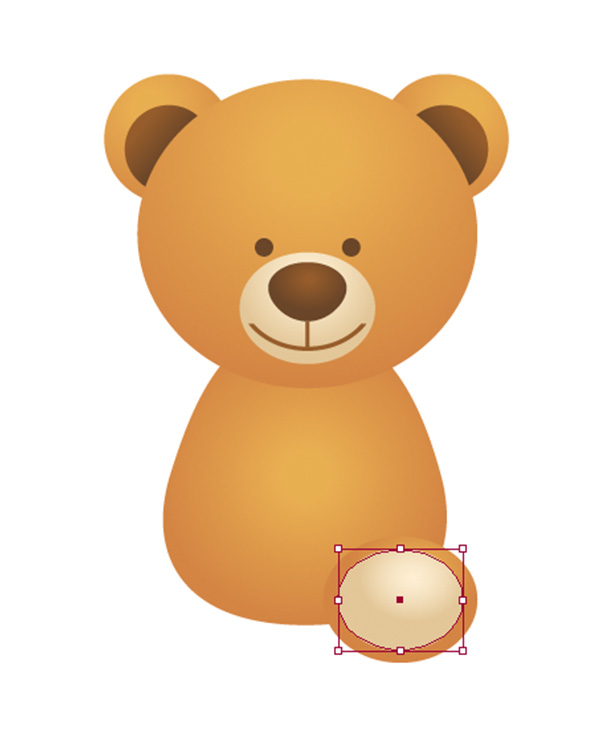
Put another ellipse above and use an Eyedropper Tool (I) to take the beige gradient color from Bear’s muzzle.
Step 3
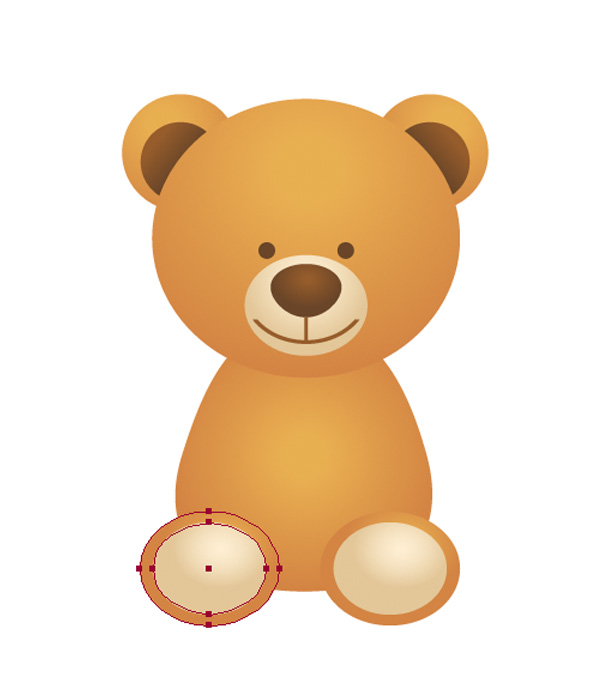
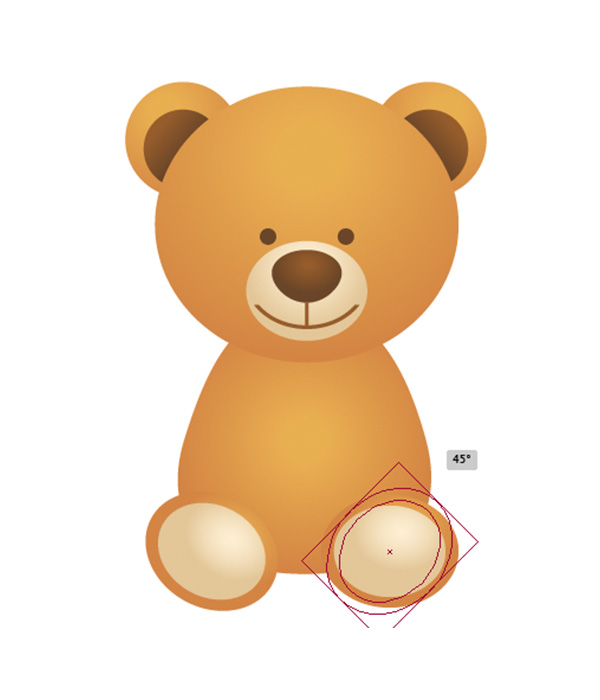
Duplicate the paw and move it to the other side of the Bear’s body.
Step 4
Rotate the paws about 45 degrees angle (holding down Shift button is very handy here).
Step 5
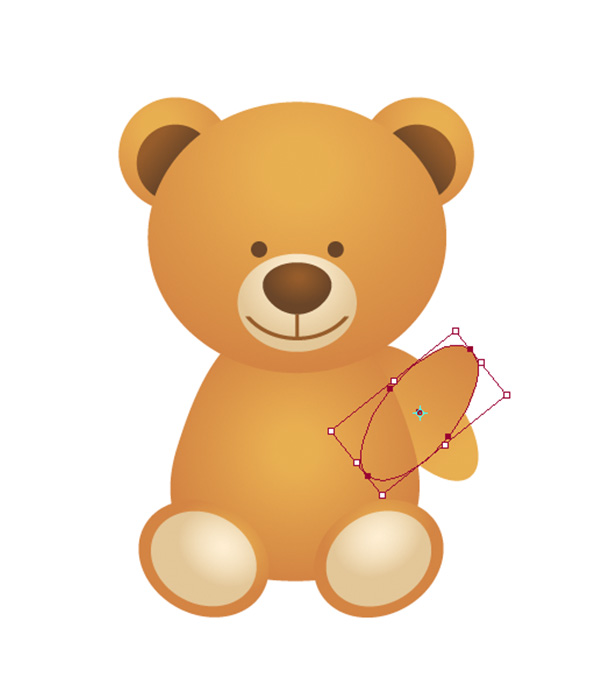
Now we’re gonna add him a pair of arms. Draw an extruded ellipse and fill it with linear gradient from light brown (R=247, G=190, B=96) on the tip of the arm to darker brown (R=212, G=132, B=67).
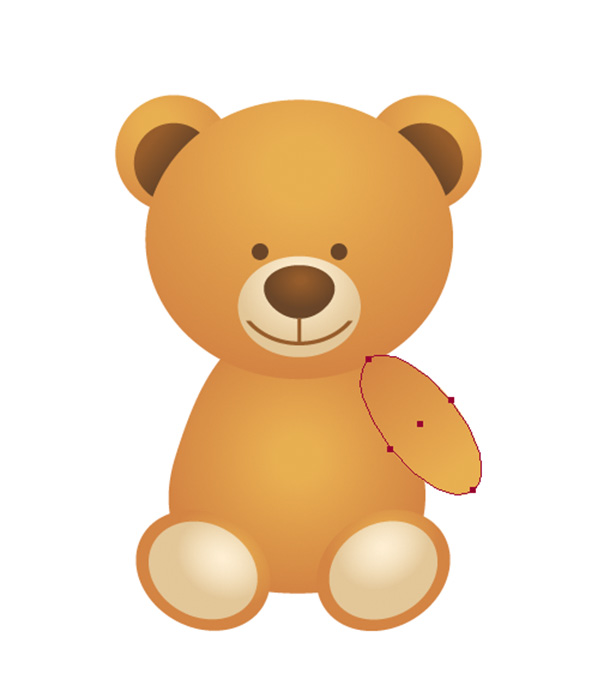
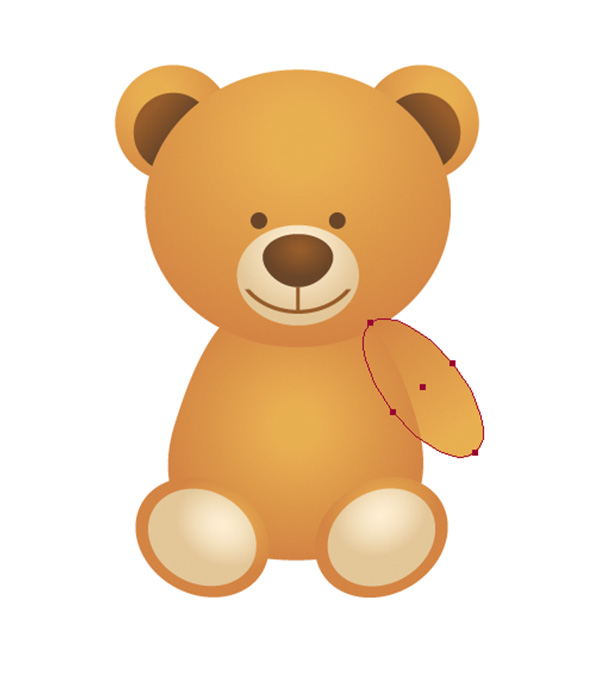
Send it to back (Control + Shift + [ ) behind the Bear’s body.
Step 6
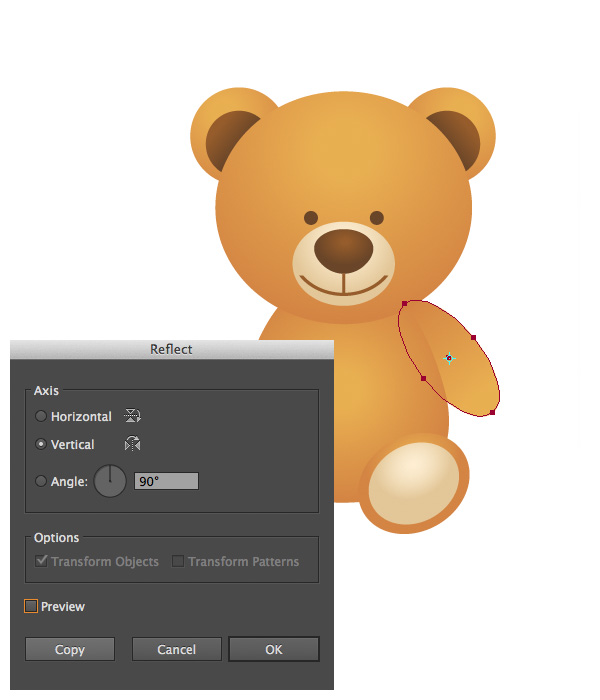
Use the Reflect Tool (O) to make a mirrored copy and move it to the other side of the body.
5. Draw Out the Bear’s Tummy
Step 1
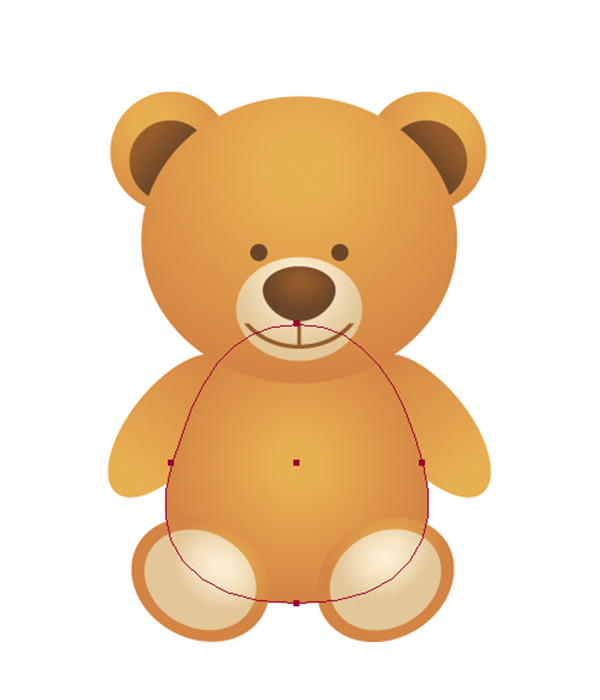
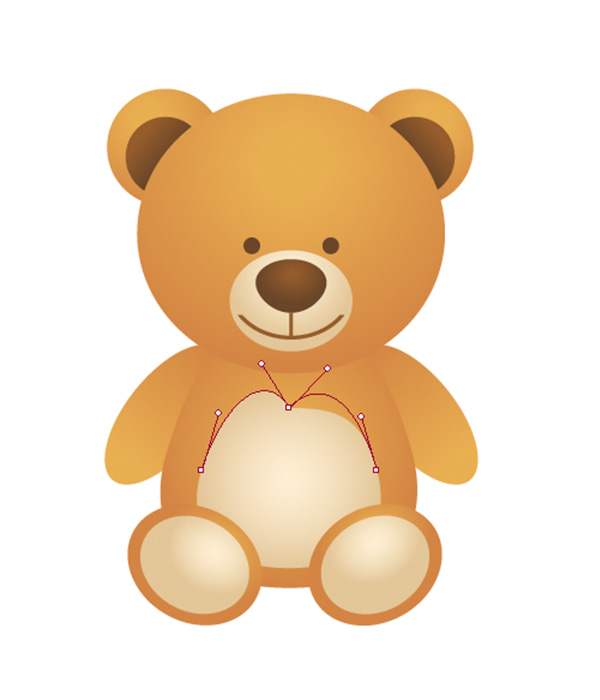
Let’s add a cute tummy-spot to our Teddy Bear. Select the body shape and Copy and Paste in Front (Control + C > Control + F).
Step 2
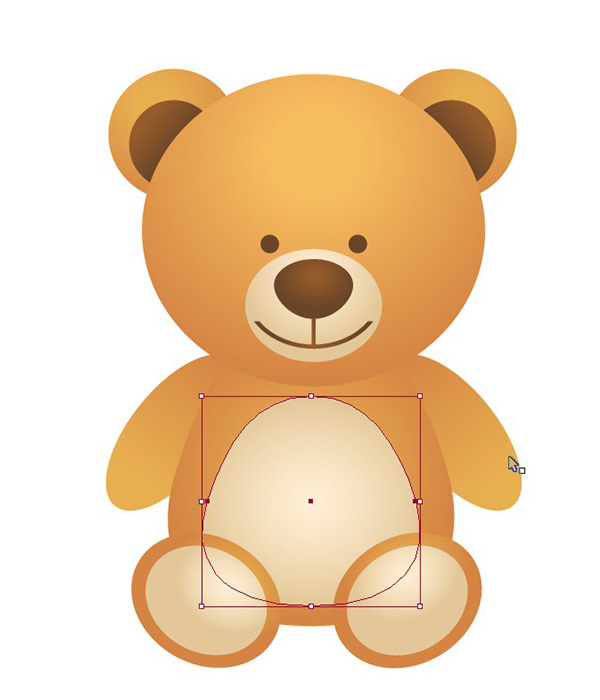
Fill it with the same beige radial gradient as we have on Bear’s muzzle and paws, make it smaller and squash it a bit.
Step 3
Select the upper anchor point with Direct Selection Tool (A) to see the handles and use the Convert Anchor Point Tool (Shift + C) in order to move the handles separately from each other. Pull the left handle up a bit.
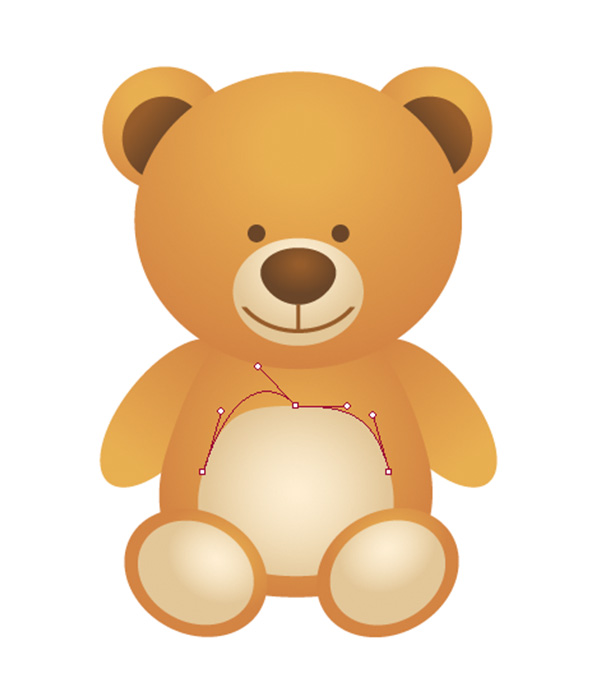
Repeat the same move for the right handle.
6. Add Minor Details To The Nose
Step 1
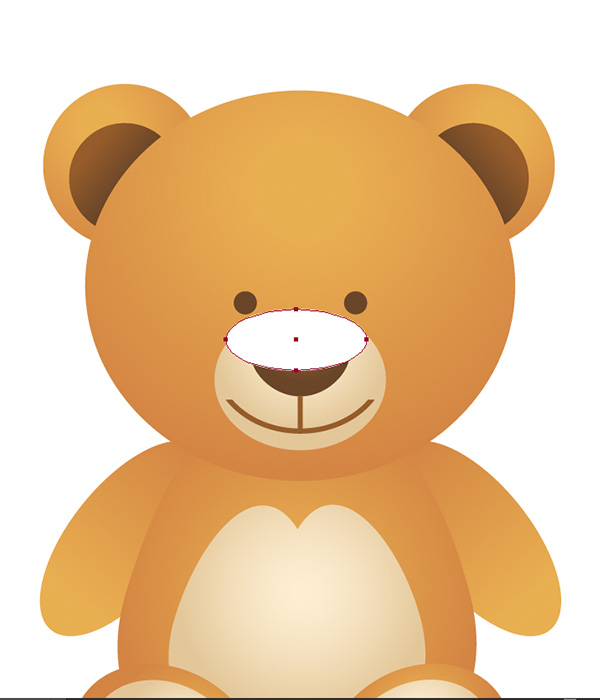
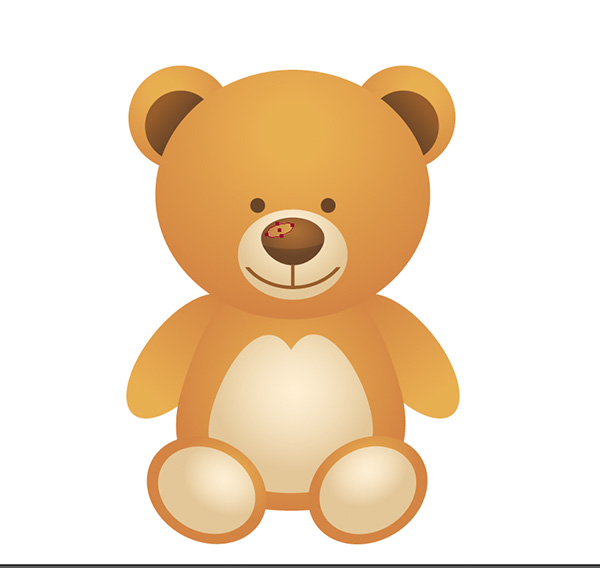
From this step we’ll continue adding details all over our bear and we’ll start from his nose. Make a white ellipse over the upper middle part of the Bear’s nose.
Step 2
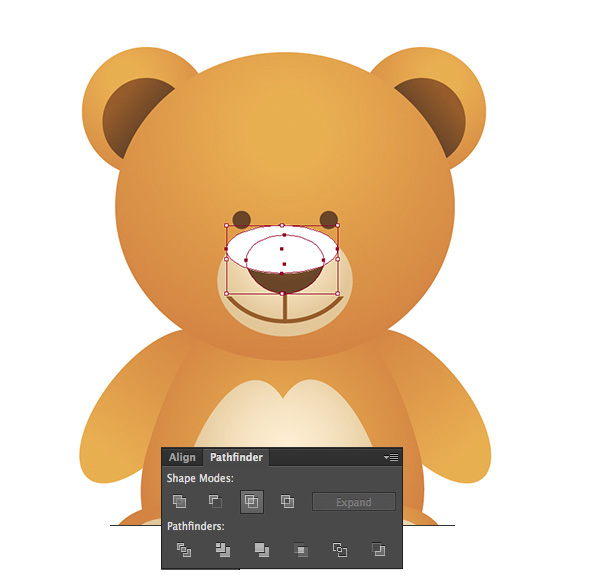
Copy and Paste in Front the brown nose shape, select both the nose copy and the white ellipse and hit Intersect in the Pathfinder panel.
Step 3
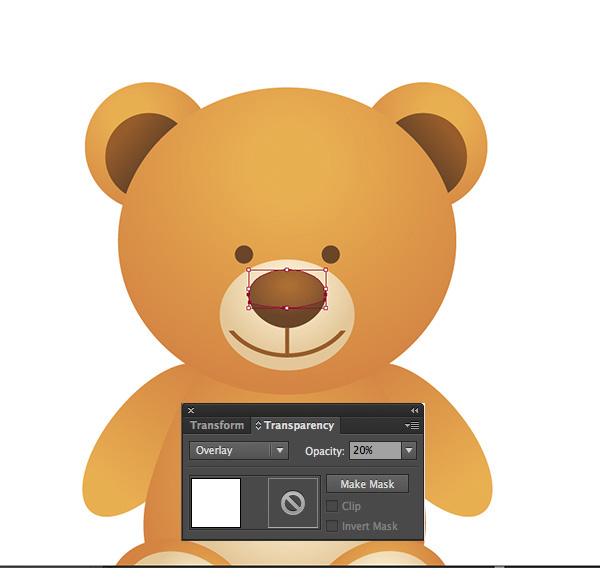
Set the Blending Mode of the white shape to Overlay and lower the Opacity down to 20% in Transparency panel (Window > Transparency).
Step 4
Add a small white ellipse above the nose to make a highlight. Set its Blending Mode to Overlay and the Opacity to 50%.
Step 5
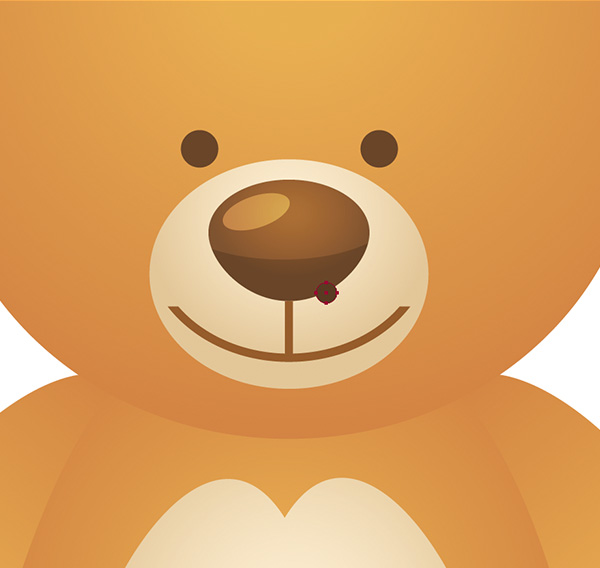
Now we need to add some nostrils. Make a small circle of a dark brown color (R=106, G=69, B=40).
Step 6
Cut off the unnecessary part using Pathfinder as we did with the nose highlight.
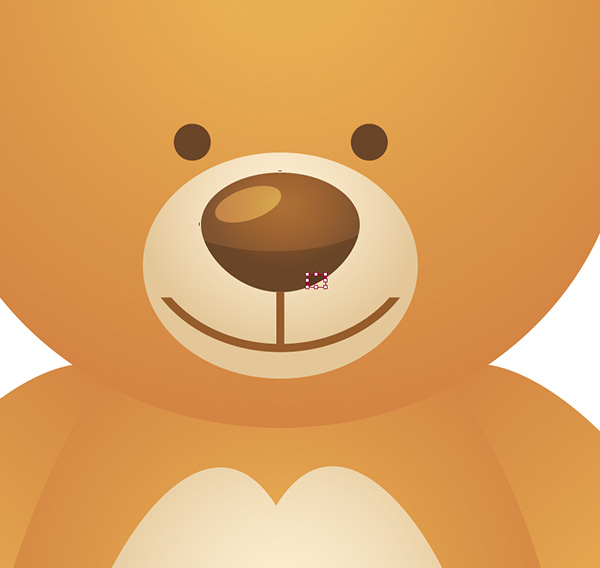
Add the second nostril.
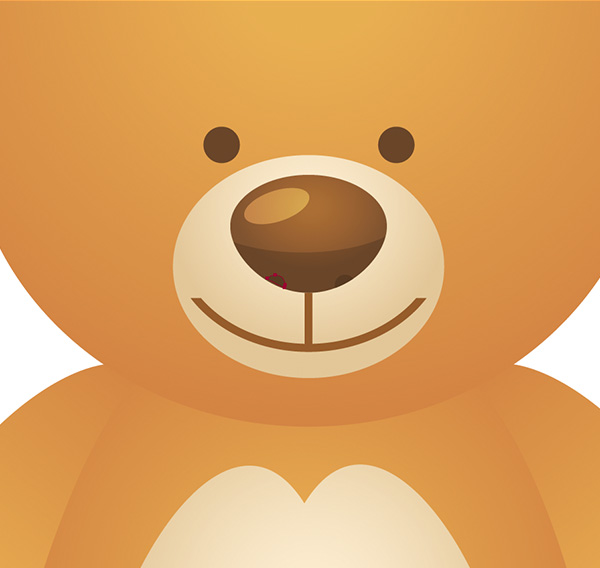
7. Make The Eyes Stand Out
Step 1
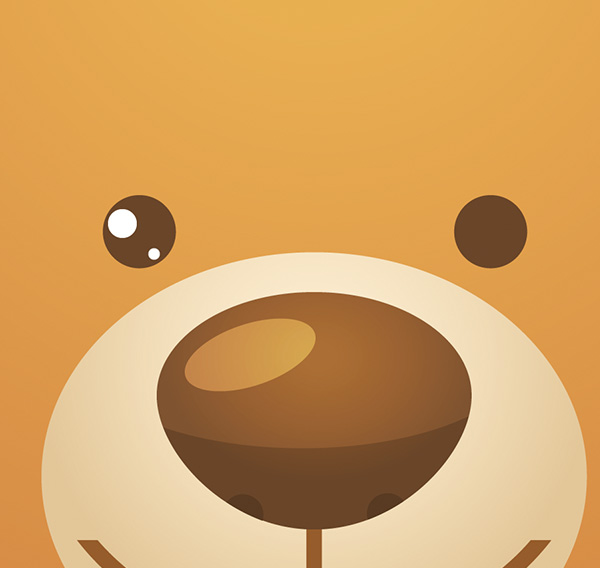
Let’s make the eyes more shiny by adding some details and reflections. Add a couple of tiny white round spots using the Ellipse Tool (L).
Step 2
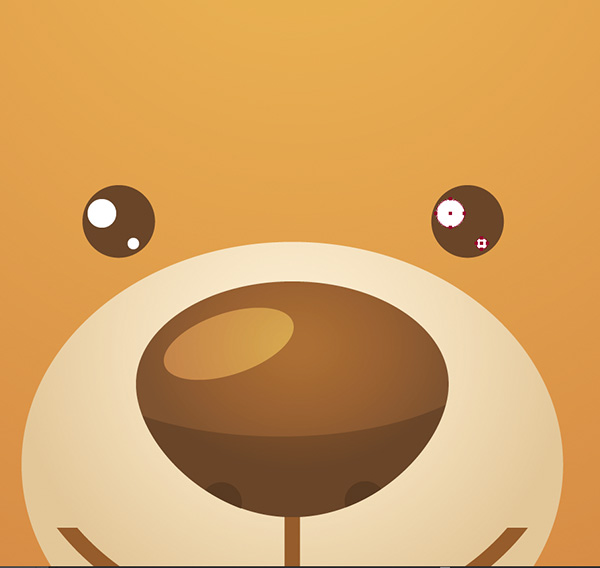
Duplicate the spots and place them on the second eye.
Step 3
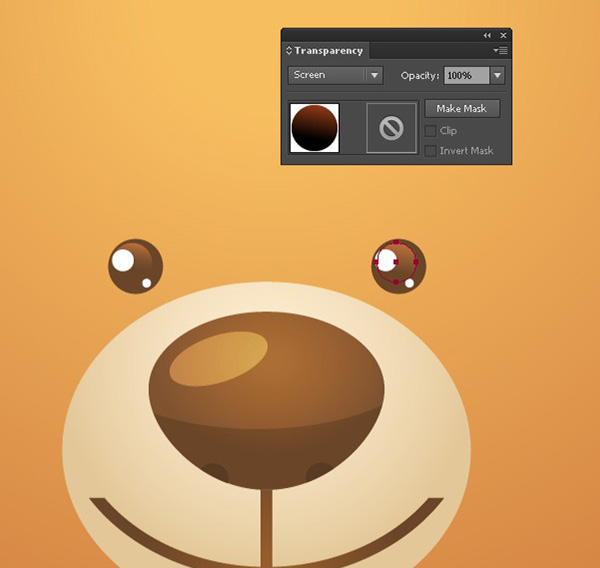
Add some reflections to the eyes by creating a circle (a bit smaller than the eye). Fill it with linear gradient from maroon (R=143, G=58, B=24) to black and set the Blending Mode to Screen to make the eyes more vivid and glass-like. As you may notice, in Screen mode the black color becomes transparent.
8. Render The Shadows Using Linear Gradients
Step 1
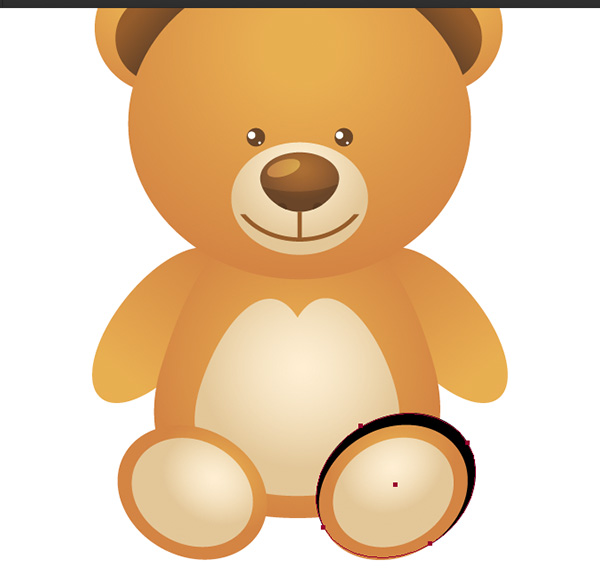
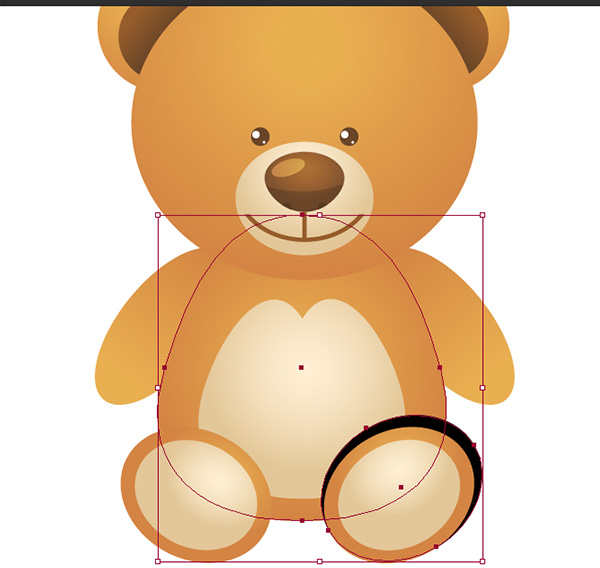
We need to add some shadows here! Let’s start from the paws. Copy and Paste in Back (Control + C > Control + B) the brown paw shape, make it a bit larger and fill with black.
Step 2
Duplicate the brown body shape. Select both, the body and the black ellipse and use Intersect in Pathfinder.
Step 3
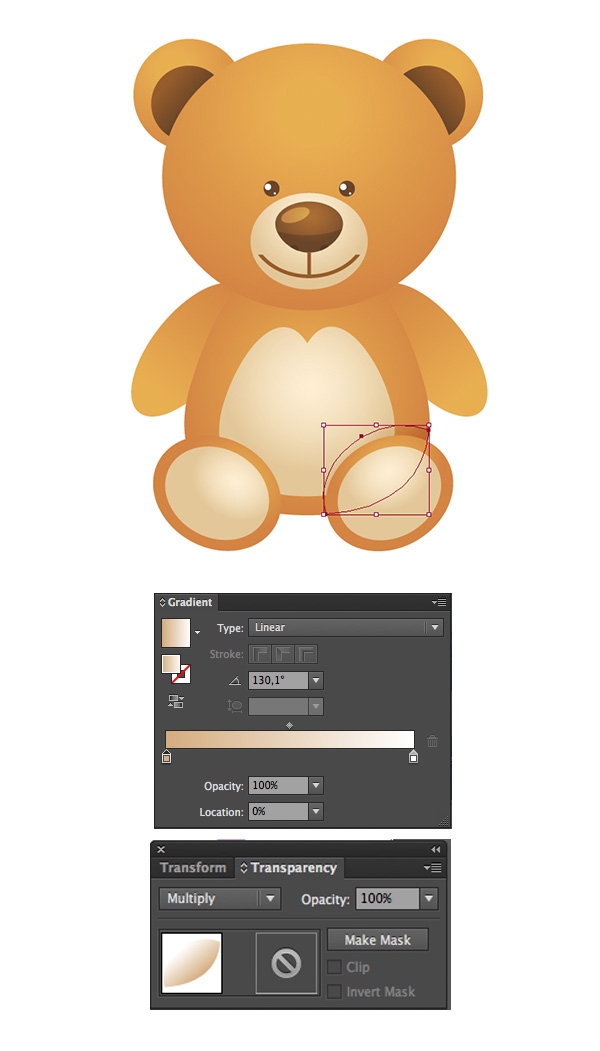
Fill the shape with linear gradient from beige (R=214, G=172, B=124) to white and set the Blending Mode to Multiply. In this mode white color becomes transparent.
Step 4
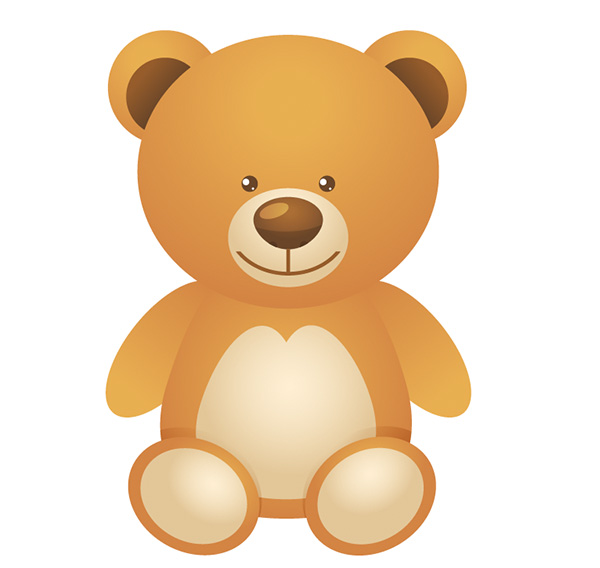
Use the same technique to make a shadow on the second paw or just copy and reflect the existing shape.
Step 5
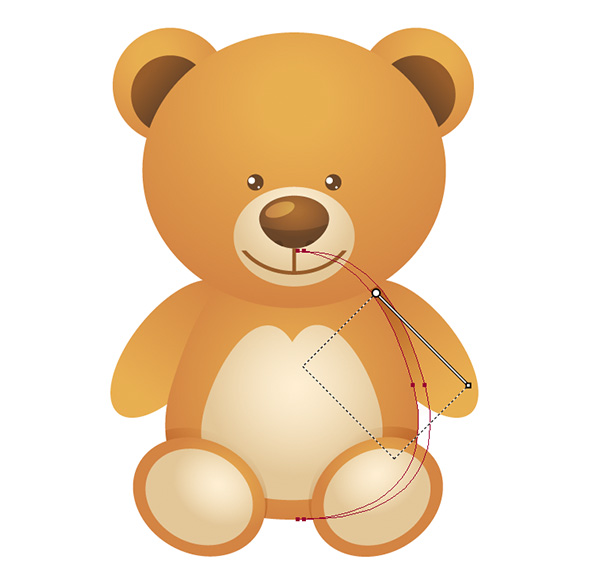
Let’s add some shadows on the arms. Copy and Paste in Back (Control + C > Control + B) the main body shape. Move it rightwards a little, by holding Shift and dragging.
Step 6
Use the Eyedropper Tool (I) to pick the color and appearance options from the shadow which we’ve created behind the Bear’s paw.
Step 7
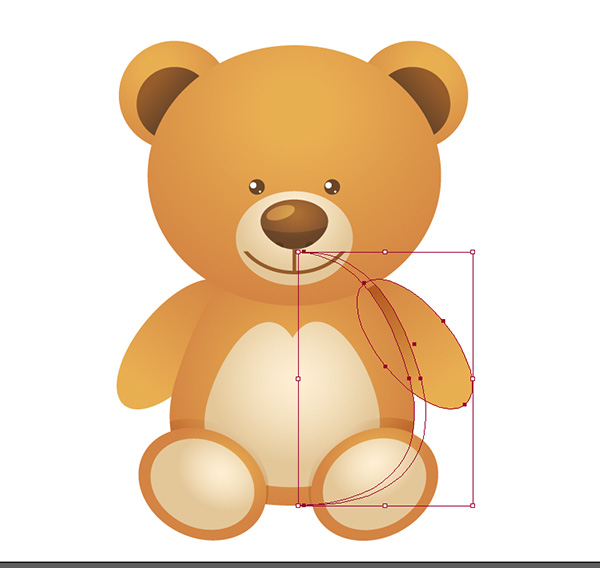
Copy and Paste in Front the arm. Select both the arm and the shadow-shape and use Intersect in Pathfinder.
Step 8
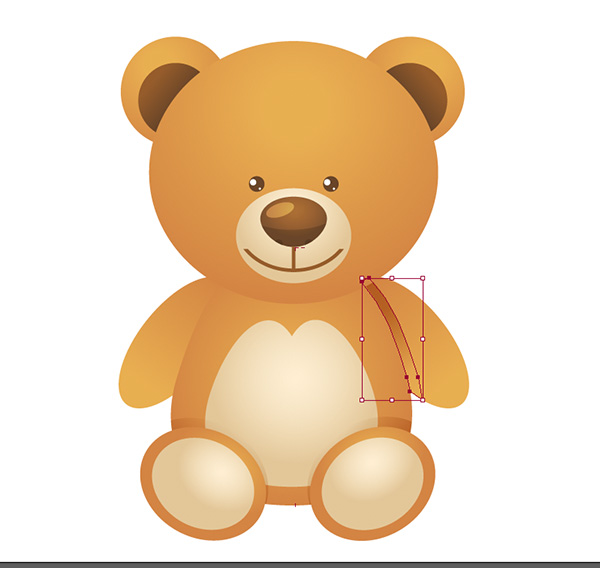
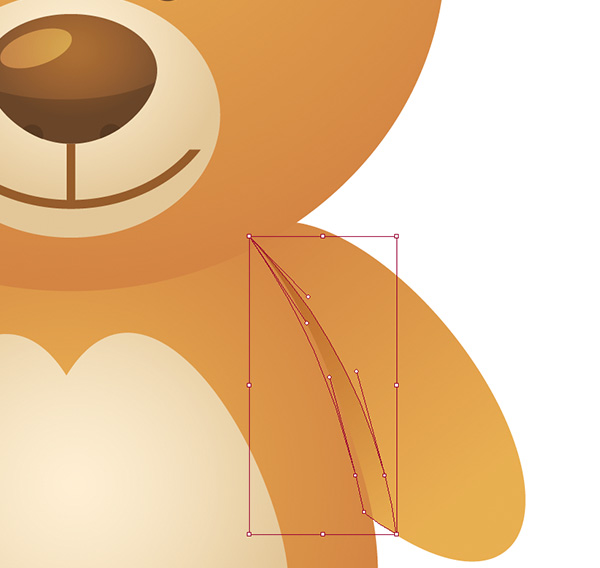
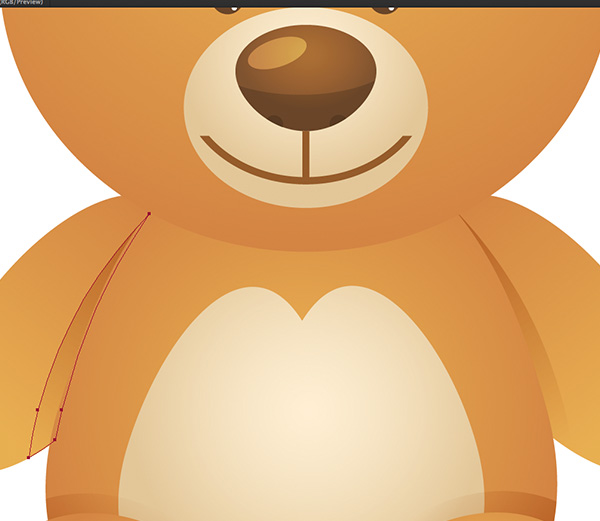
Edit the shadow shape so that it fits the arm. Use the Direct Selection Tool (A) to move the anchor points.
Step 9
Add the same shape to the second arm using the Reflect Tool (O).
Step 10
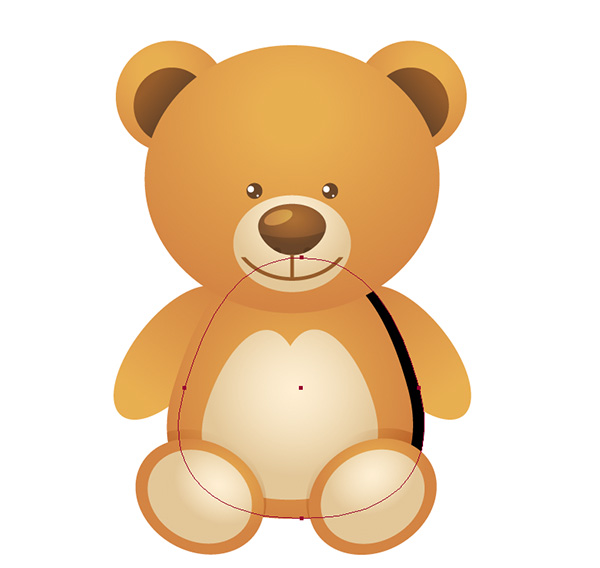
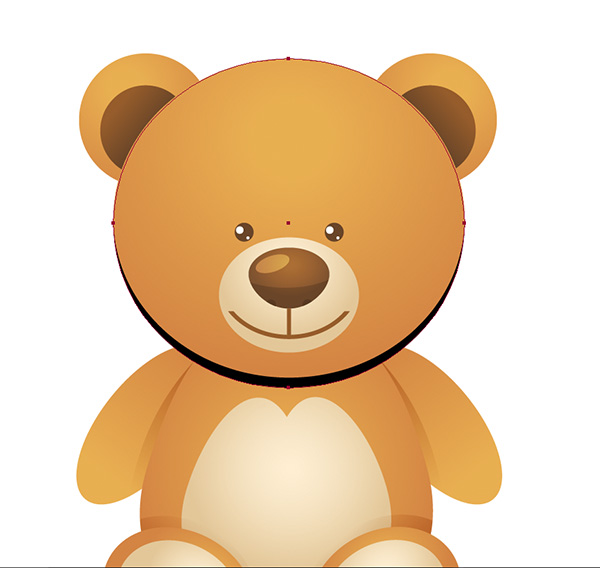
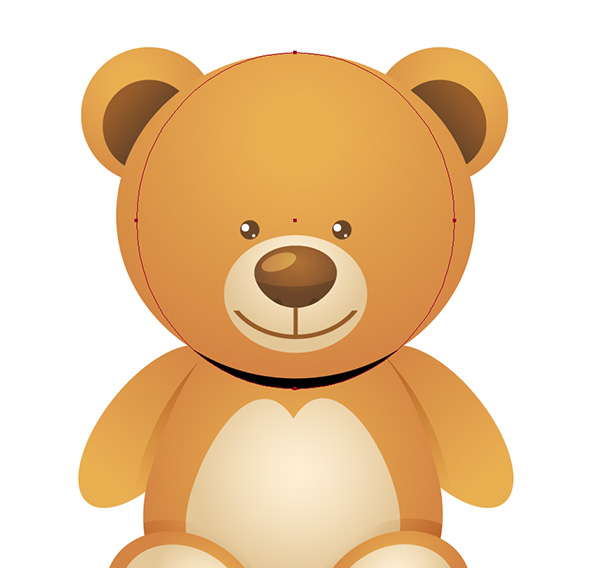
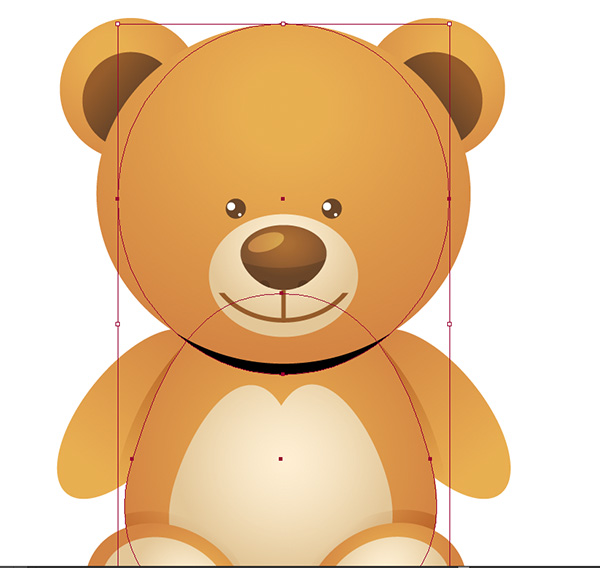
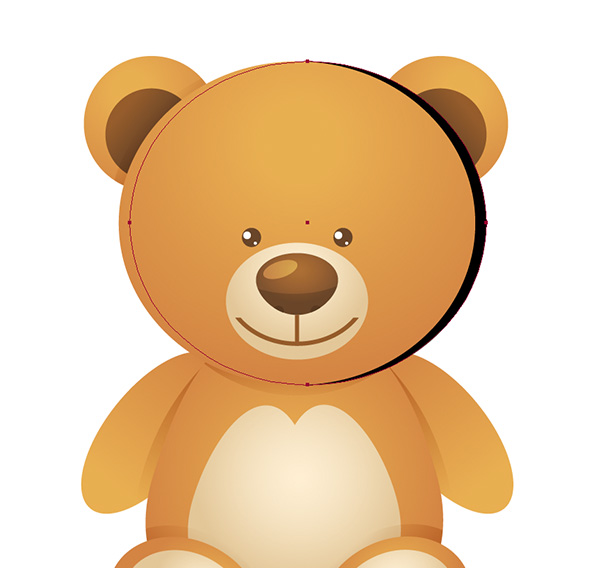
We also need to add a shadow from the head on the Bear’s body. Copy and Paste in Back the main head shape and pull the lower part down a bit by using the Selection Tool (V) and dragging down the lower part of the bounding box.
Let’s switch into the outline mode by pressing Control + Y buttons.
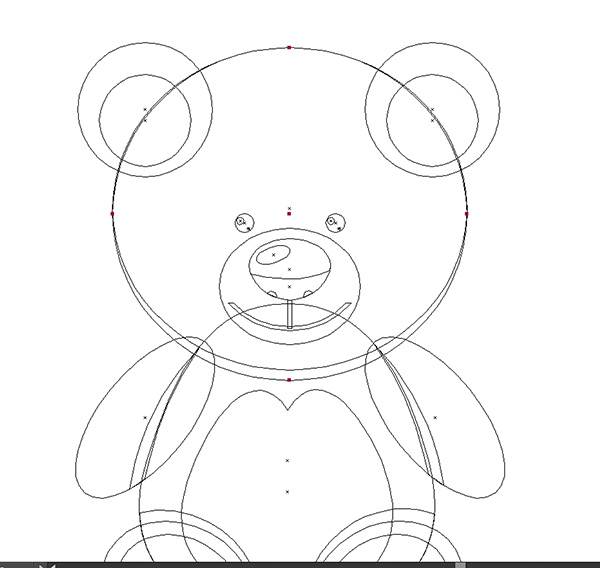
Reshape the created circle slightly to give its lower part a moon shape. For this purpose, just squash the circle a bit from right and left sides to the middle.
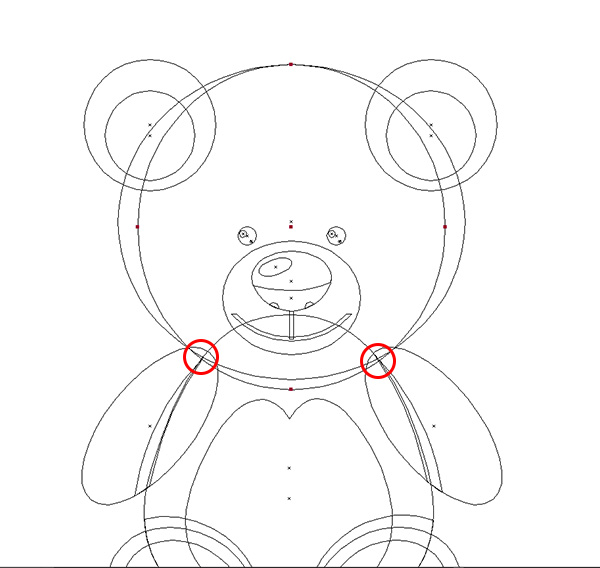
Here is what you should get as a result:
Step 11
Duplicate the main body shape and use Pathfinder to delete the unnecessary part, as we did it before.
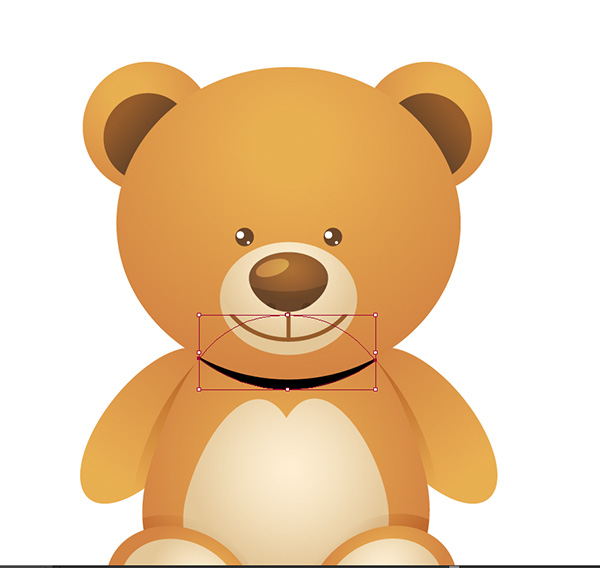
Fill it with the same color as the other shadows.
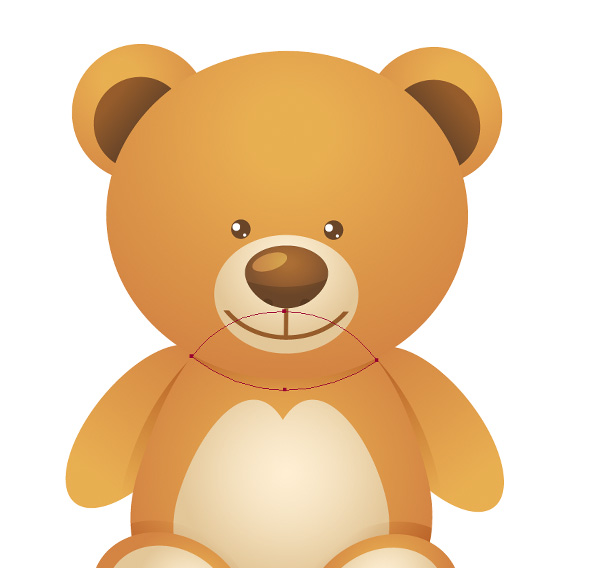
Step 12
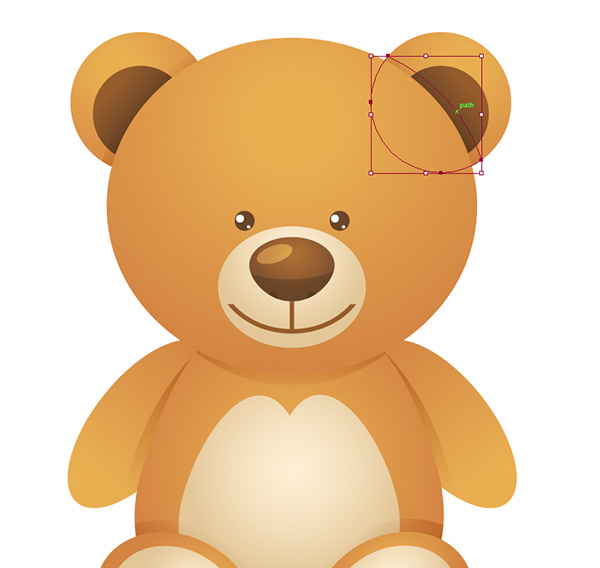
Use the same technique to add a few more shadows for Bear’s ears.
9. Add More Facial Details
Step 1
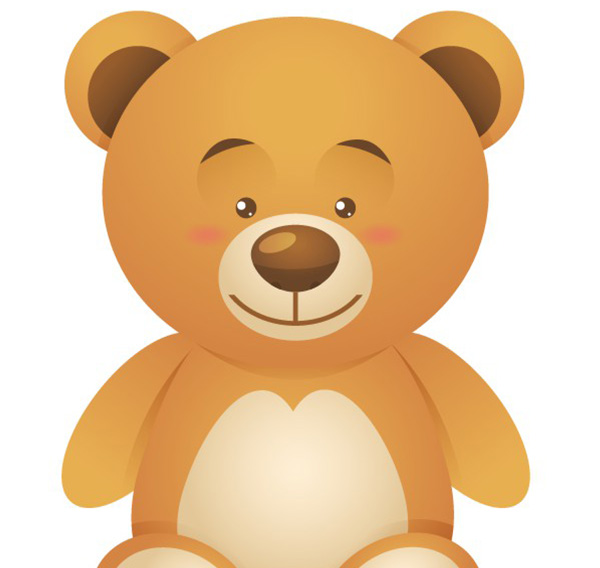
Let’s add some facial details to our toy bear. Create an ellipse, fill it with radial gradient, one side of which is rose-pink (R=232, G=121, B=93) and the second is caramel-brown (R=219, G=147, B=72). Set the Opacity on the brown side to 0% in Gradient panel.
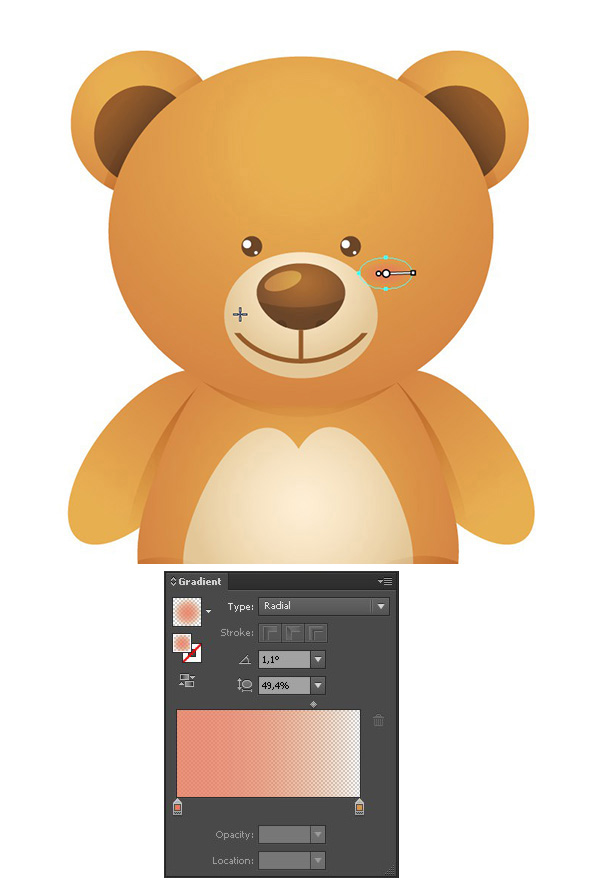
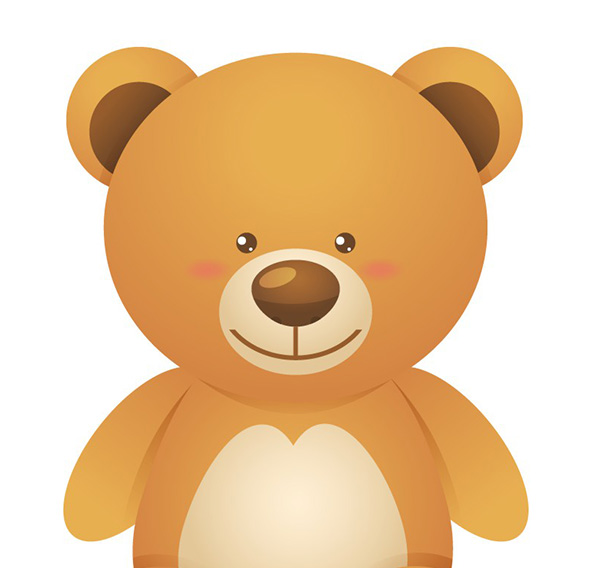
Make the second ellipse. Now our bear has a cute blush on his cheeks!
Step 2
Keep going and create some brows. Make a dark brown ellipse (same color as we had for the nostrils).
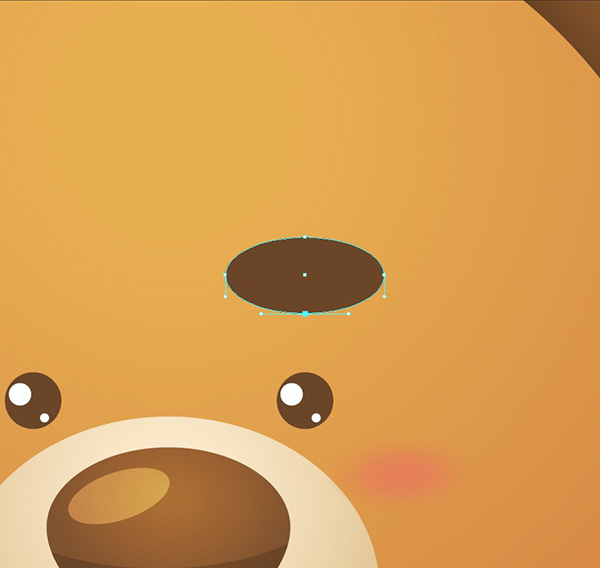
Select the lower anchor point with the Direct Selection Tool (A) and drag it up a bit.
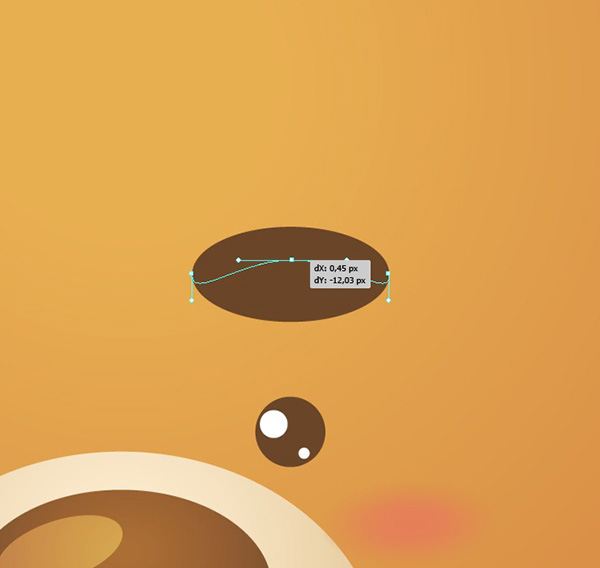
Select both side anchor points and click Convert selected anchor points to corner button in the Convert control panel above. Now we have a pretty brow.

Duplicate the brow and put it to the proper place.
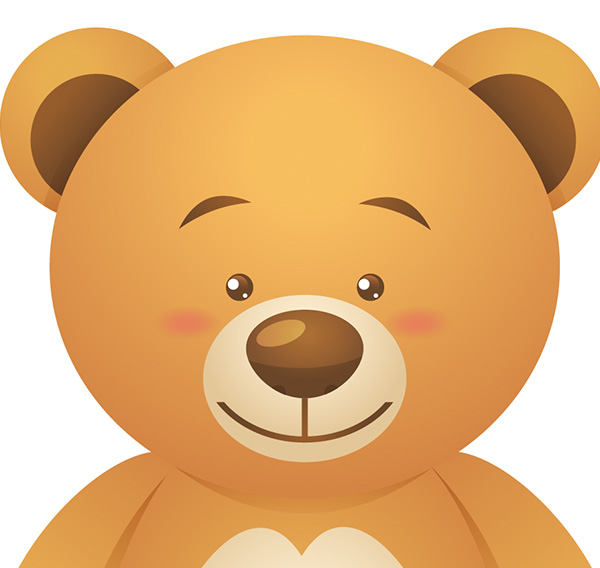
Step 3
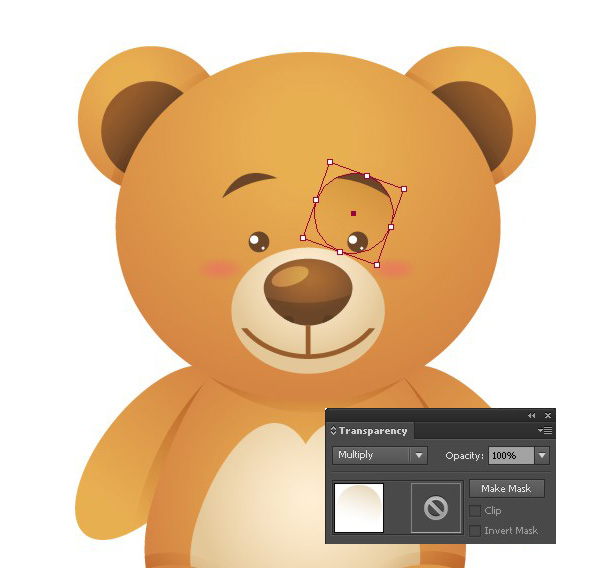
Add an ellipse and place it under the brow (Control + [ ).
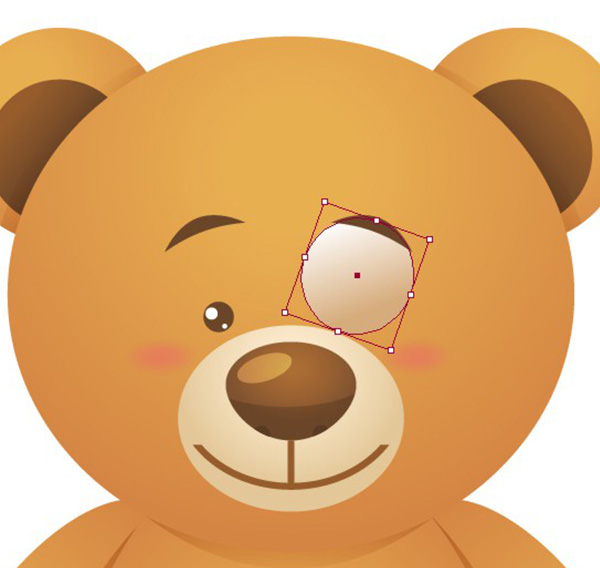
Rotate it a bit so that it fits the brow. Use the Eyedropper Tool (I) to pick the color from the shadows, which we’ve created before (for example, on the ears).
10. Add the Highlights
Step 1
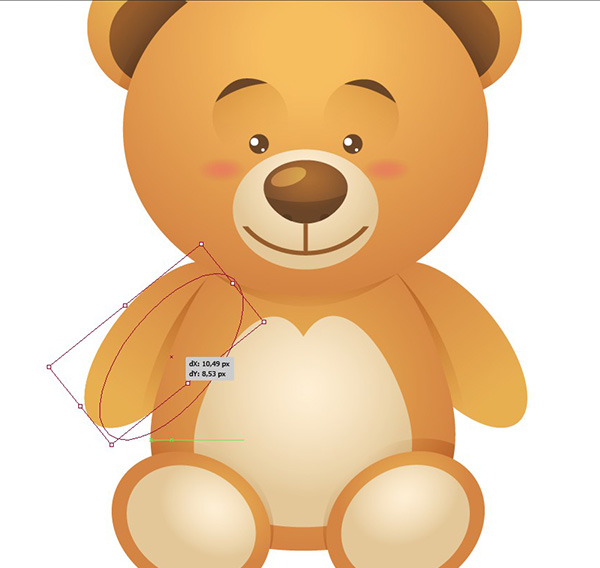
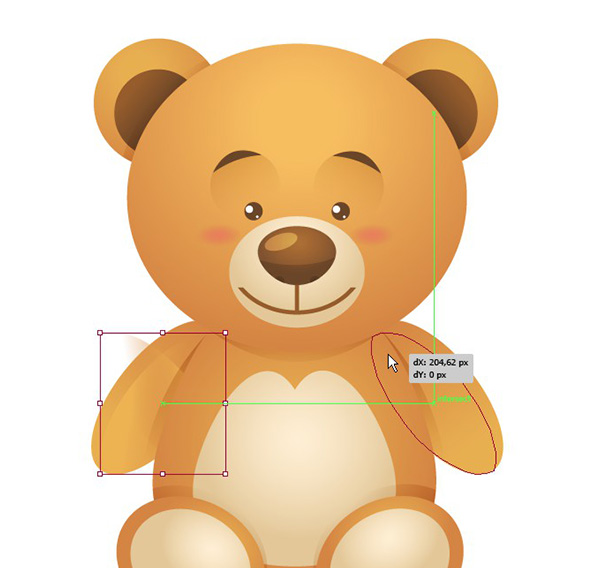
Now we need to add some lines, which emphasize the areas on the toy’s textile, where the parts of the Teddy Bear are sewed together. For this purpose, we are going to light up some parts. Duplicate the arm twice and move one of the copies down a bit.
Step 2
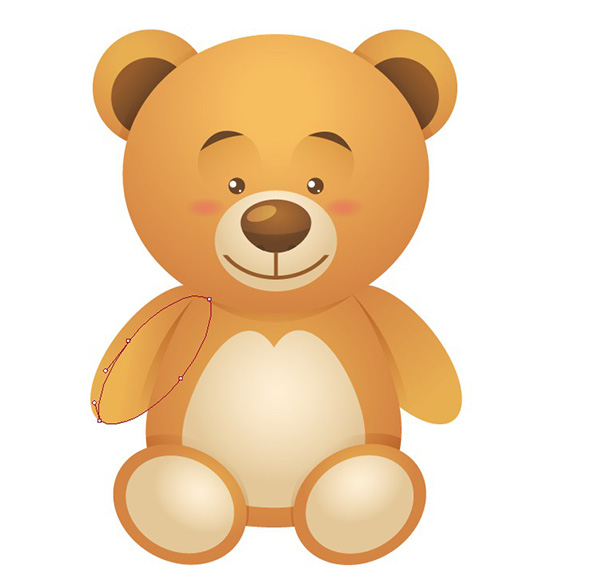
Use Intersect in Pathfinder to delete that part of the shape, which is outside the arm. Fill it with linear gradient of the same color as we have on the Bear’s arms, making the lighter part longer than the dark one.
Step 3
Flip the created shape horizontally and place it on the second arm.
Step 4
Go on and modify the Bear’s head. Copy and Paste in Front the main head shape.
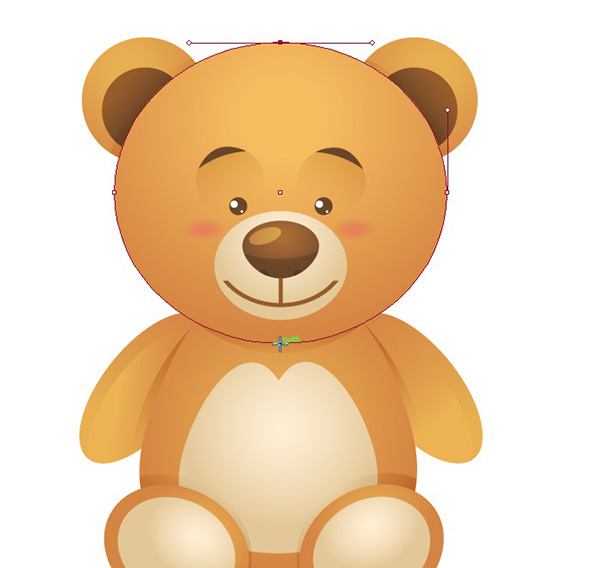
Step 5
Take the Scissors Tool (S), click on the upper anchor point of the head circle, then on the lower one. As a result, you’ll get two separate halves. Delete the left half.
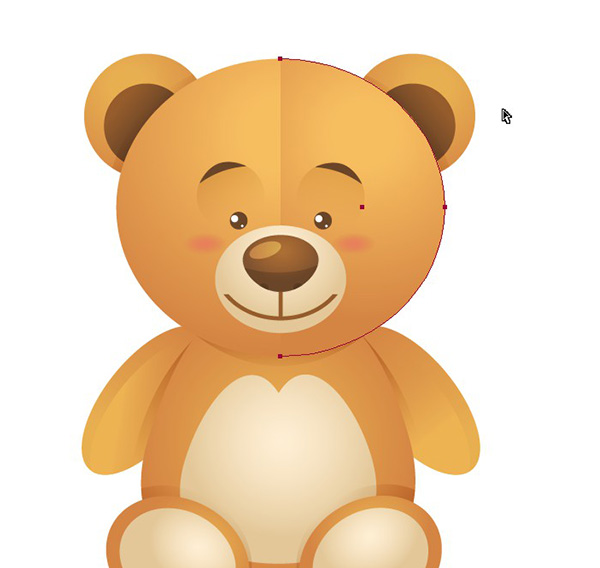
Step 6
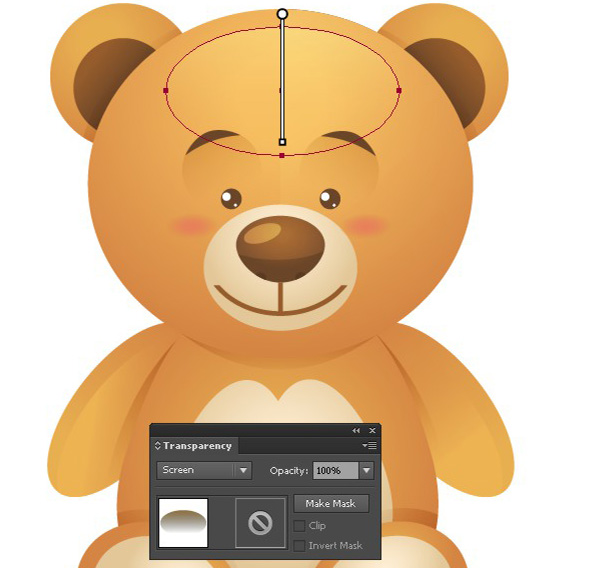
Fill the half-shape with linear gradient from dark brown (R=71, G=52, B=20) to black. Set the Opacity of the black side to 0%. Change the Blending Mode to Screen. Now we have a seam between two parts of the toy’s fabric.
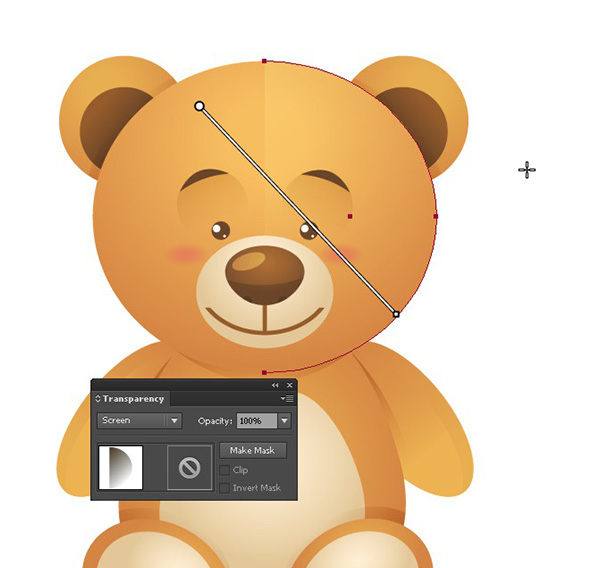
Step 7
Add another ellipse above Bear’s forehead and fill it with same linear gradient with Screen mode as we did for the half-shape.
11. Draw Stitches to Give Your Toy an Old Look
Step 1
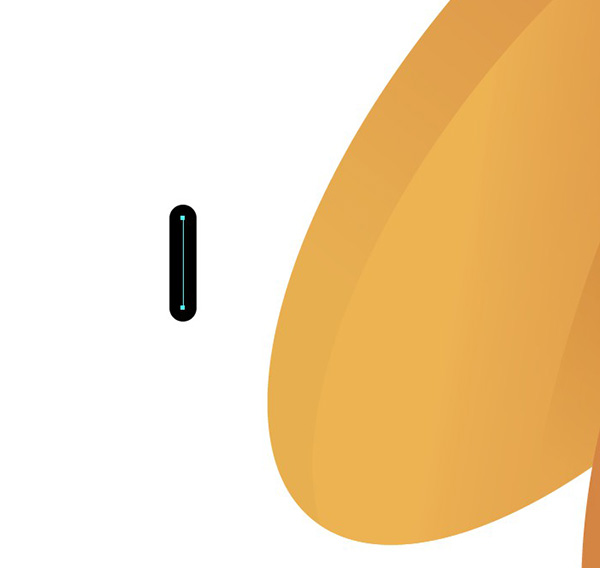
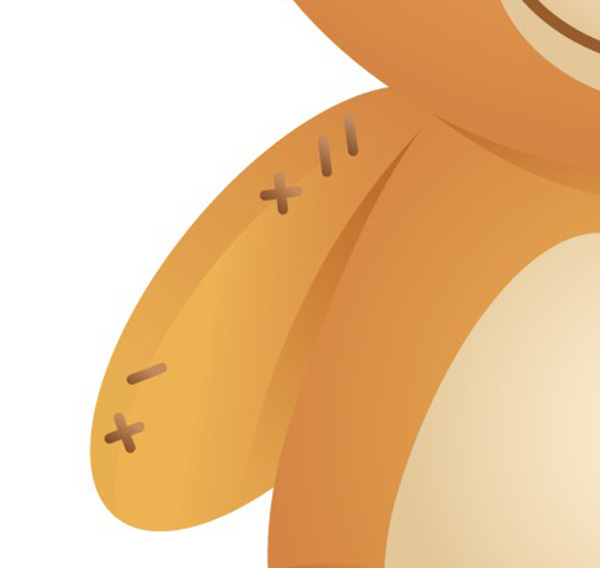
Time for stitches! Take a Line Segment Tool (\) and draw a small vertical line by holding down Shift button. Set the Stroke Weight to 4pt.
Step 2
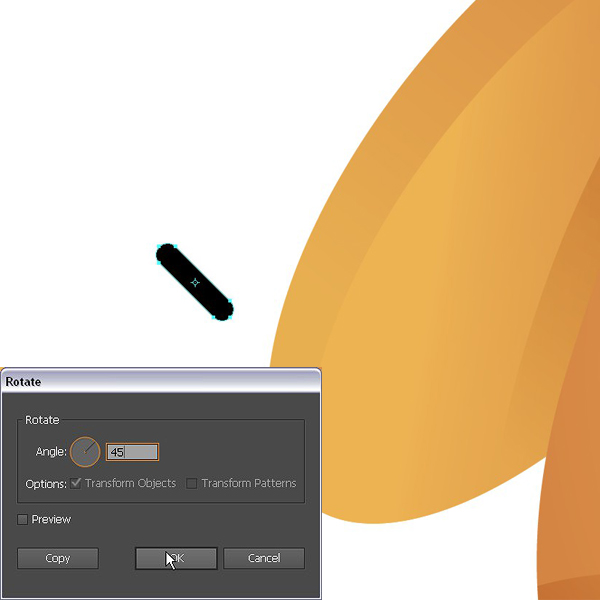
Go to Object > Expand and click OK in the pop-up window to turn the line segment into object. Use the Rotate Tool (O) of just hold the Shift button to rotate the line to 45 degrees.
Step 3
Duplicate the line and flip it to make a cross-stitch. Fill the stitch with the same dark brown linear gradient as we have on the Bear’s nose and ears.
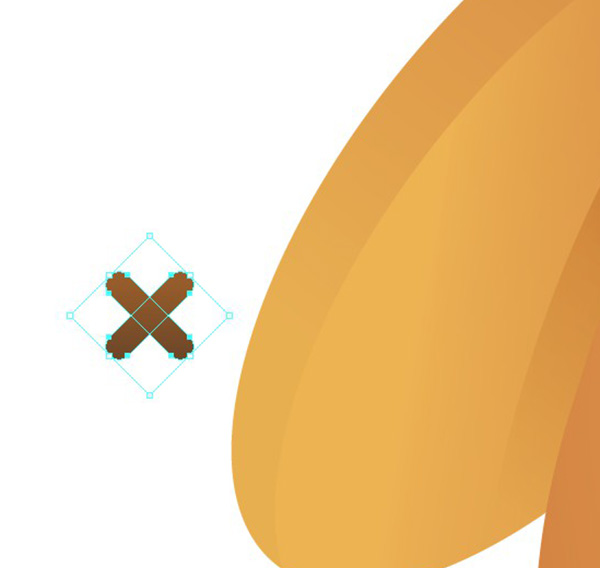
Place the stitch on the middle of the Bear’s arm and make a couple of copies. Some of them will consist only of one part.
Step 4
Let’s add some shadow under the stitches. Copy and Paste in Back one part of the stitch and move it down a bit. Pick the color from the other shadows that we’ve created.
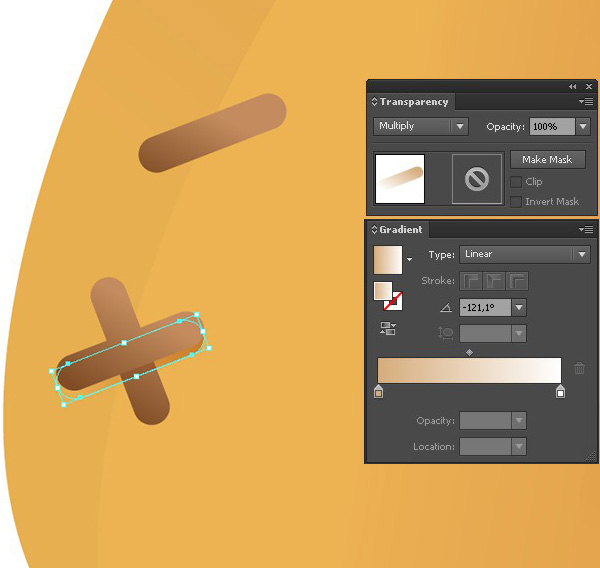
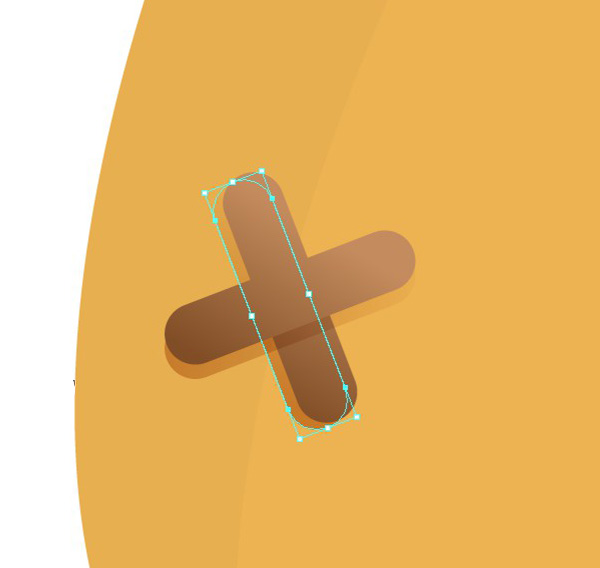
Step 5
Let’s also add some highlights to give the stitches more dimension. Copy and Paste in Front one part of the stitch. Make it narrower by squashing it from the sides with Selection Tool (V).
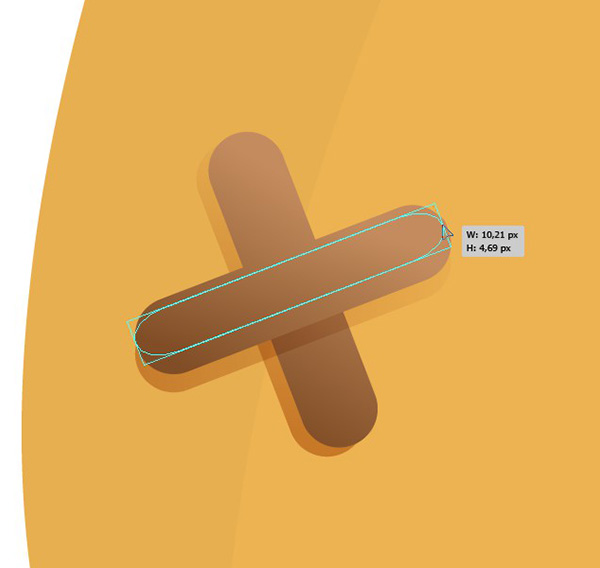
Pick the color from the highlight on the Bear’s forehead.
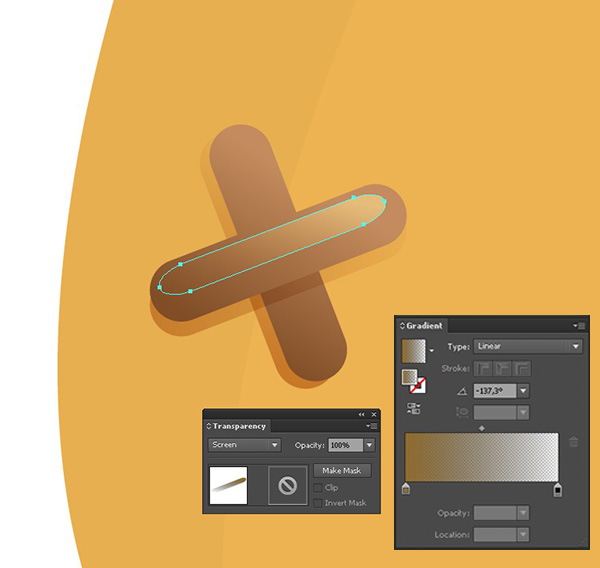
Step 6
Add a few more details to the stitch.
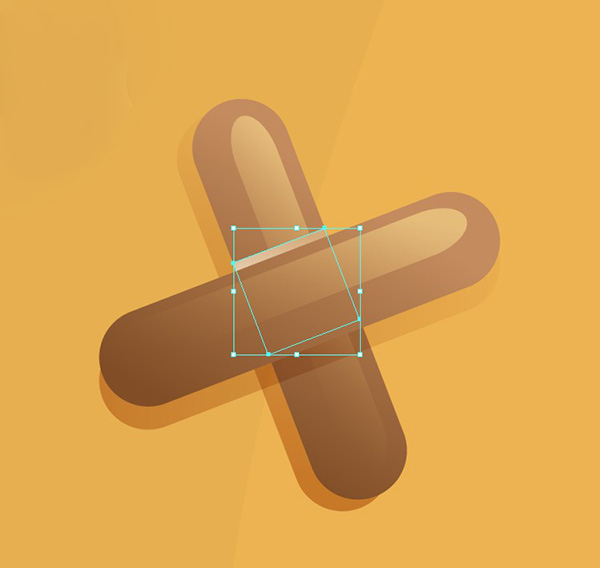
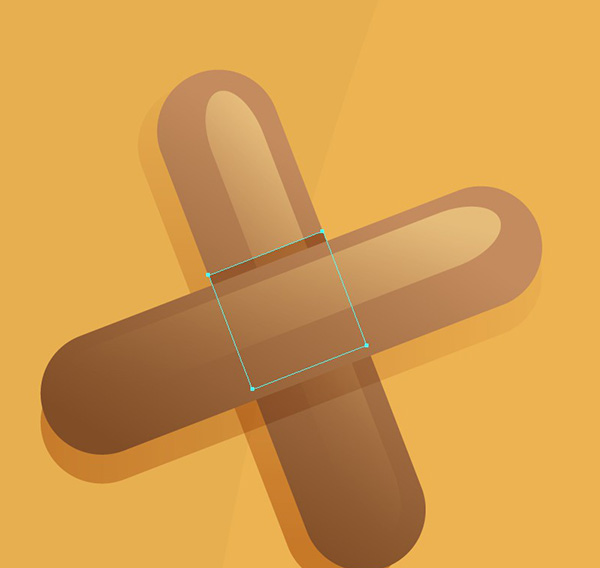
Great, our stitch became more realistic. Looks like you can almost touch it!
Step 7
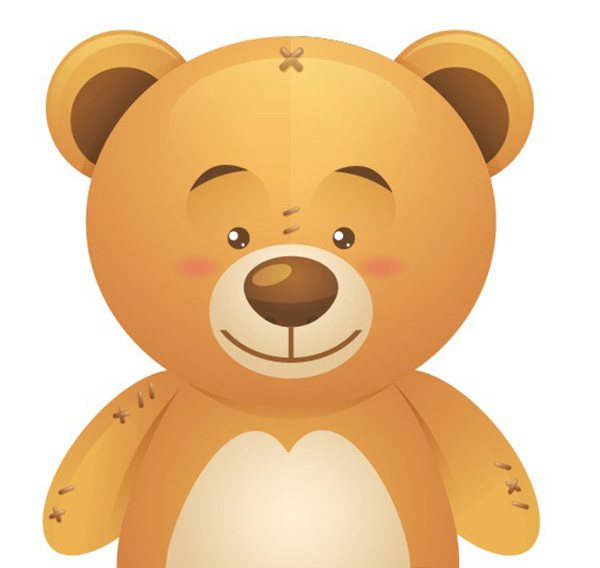
Duplicate the stitches and add a few of them to the Bear’s forehead and face to give him a view of an good old toy from your childhood.
12. Draw a Simple Background
Step 1
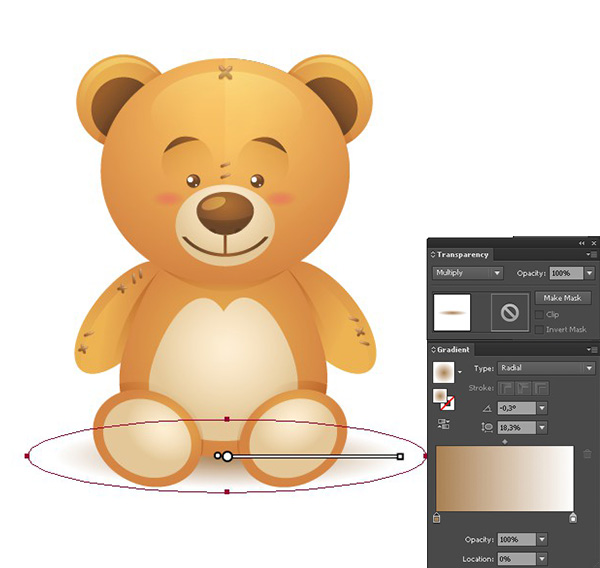
Let’s make a shadow which will be visible on a background of any color! Add a flat ellipse using the Ellipse Tool (L) under the bear and fill it with linear gradient from brown (R=168, G=127, B=82) to white. Switch the Blending Mode to Multiply.
Step 2
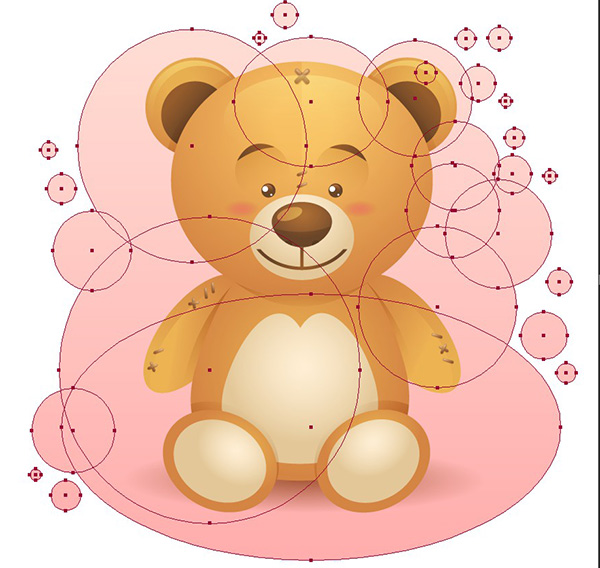
Create New Layer below all other layers. Add some circles of random sizes for the background, group them and apply a linear gradient from pale rose (R=255, G=221, B=212) to pink (R=255, G=174, B=173).
13. Create Some Simple School Books
Step 1
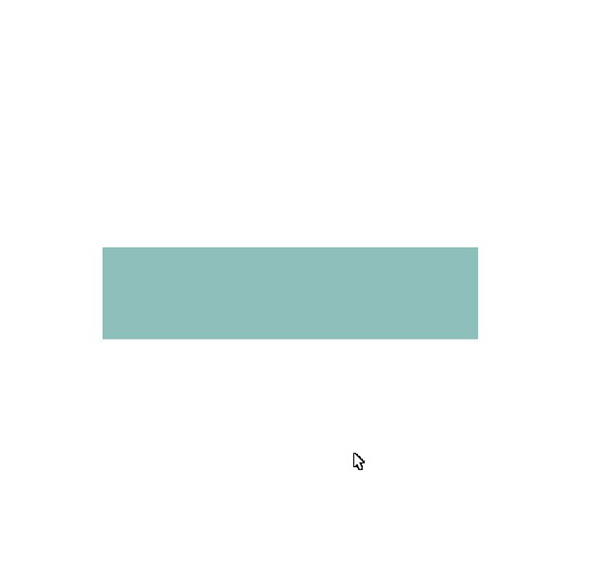
As far as we are keeping in mind a school theme, let’s add some school related items to our picture. Start from making a book. Draw a rectangle using the Rectangle Tool (M) and fill it with greyish blue (R=142, G=191, B=187).
Step 2
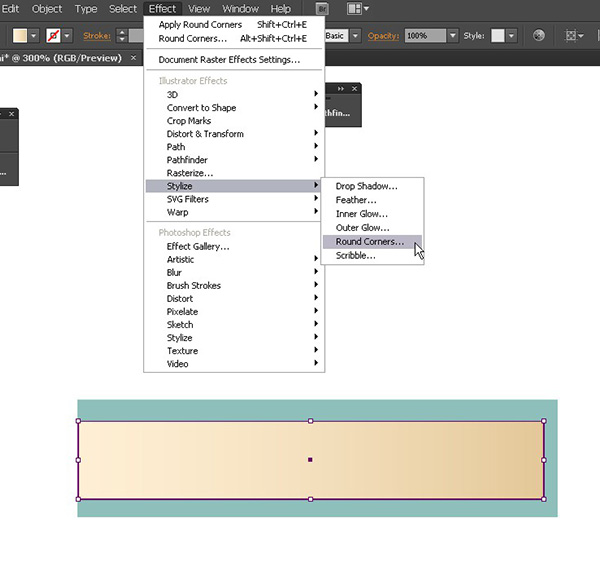
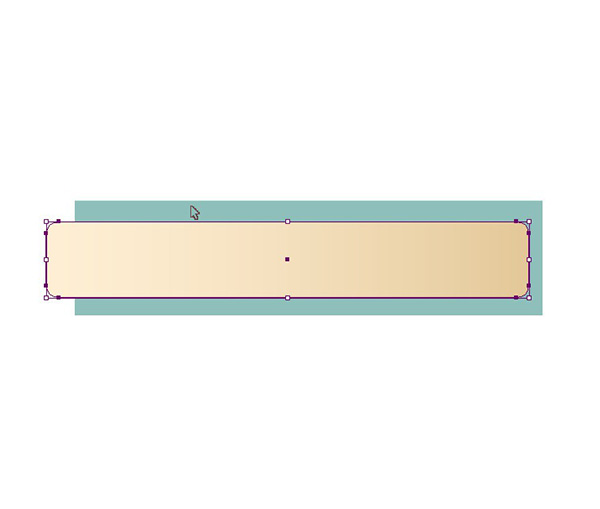
Add a second one above, making it a bit narrower. Fill the new shape with linear gradient from light beige (R=254, G=238, B=231) to the darker beige (R=227, G=199, B=152). Go to Effect > Stylize > Round Corners and set 0px radius in the pop-up window.
Step 3
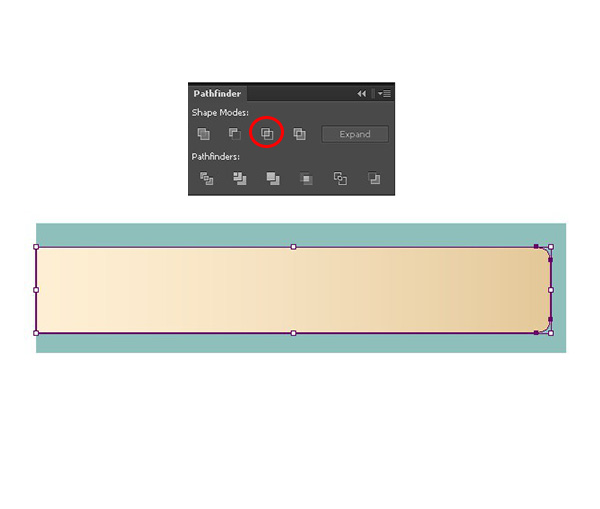
Duplicate the blue shape and cut off the unnecessary part of the beige rectangle using Pathfinder.
Step 4
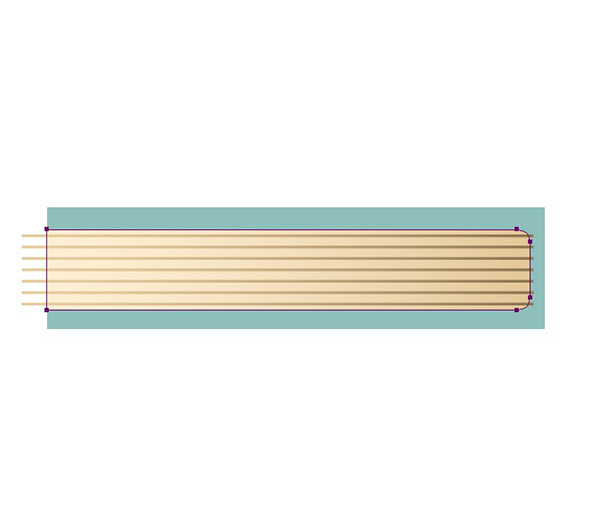
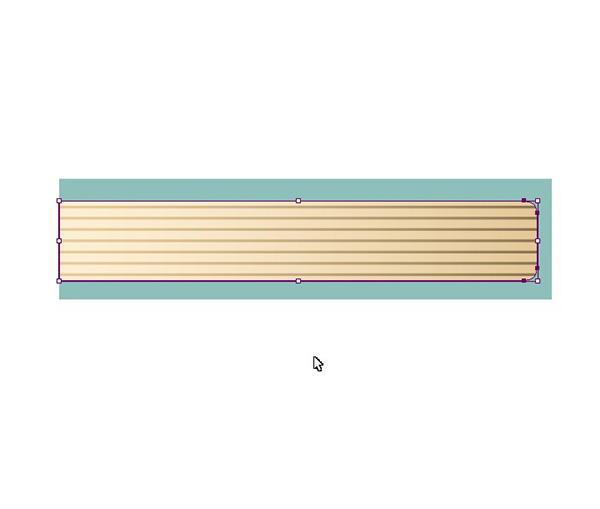
Let’s add some lines to the beige rectangle to make them look like pages of a closed book. You can use either a Line Segment Tool (\) or a Rectangle Tool (M). I prefer the second one and make very thin rectangles, which in fact look like lines.
Step 5
Make a duplicate of a beige shape, place it on top of other objects and switch off the Fill and Stroke colors. Select the newly created shape and the lines, click right-click and Make Clipping Mask.
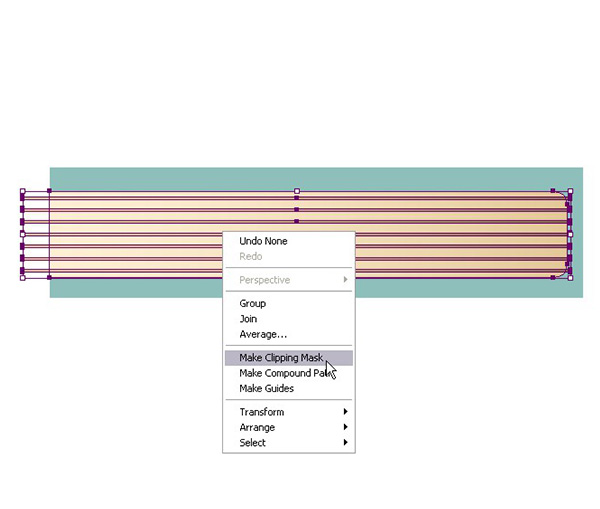
Ready! Now the lines fit the book perfectly.
Step 6
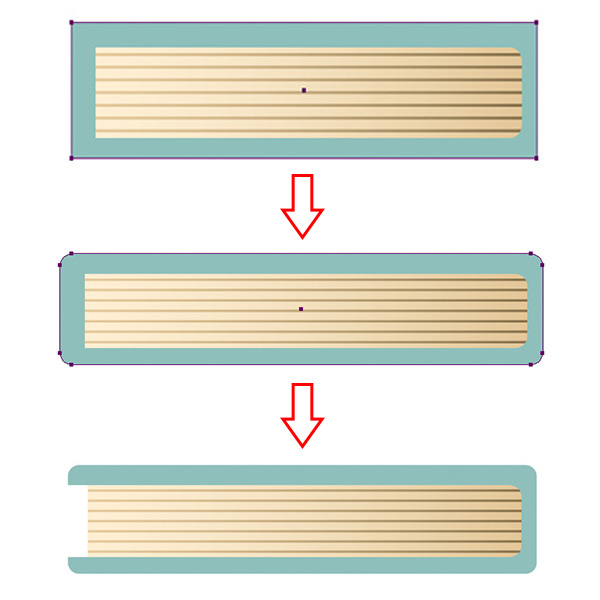
Use the Round Corners effect again to smoothen the book cover and form the outer corners of the book using Pathfinder.
Step 7
Let’s add more simple books of different shapes and sizes to make our picture more detailed!
Create a thinner rectangle on top of the first book and fill it with cranberry-red color (R=187, G=57, B=57). Draw a small shape with Rounded Rectangle Tool across the book and make a few copies of it.
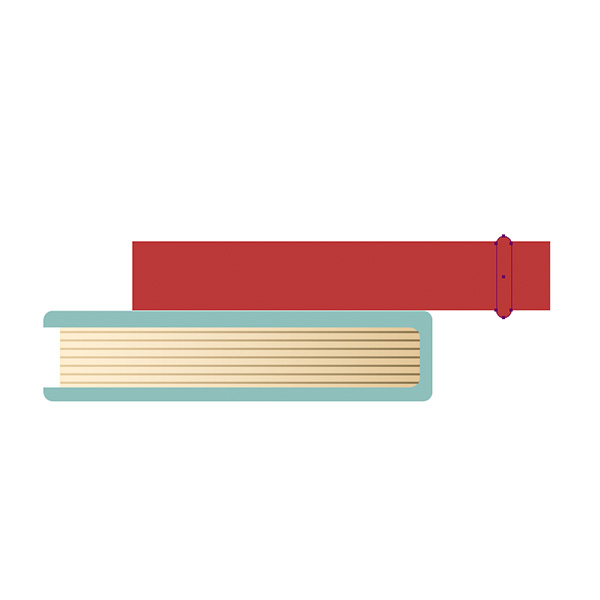
Continue adding more books by duplicating and flipping the existing ones. Change their sizes, details and positions. As you may notice, I’ve added a few more rounded rectangles to the red book and applied gradients in order to make the books more realistic. I’ve also added some golden stripes to the upper book with darker brown color on its ends (R=186, G=157, B=108) and lighter yellowish color in the middle (R=254, G=238, B=211).

14. Draw a Graduation Hat
Step 1
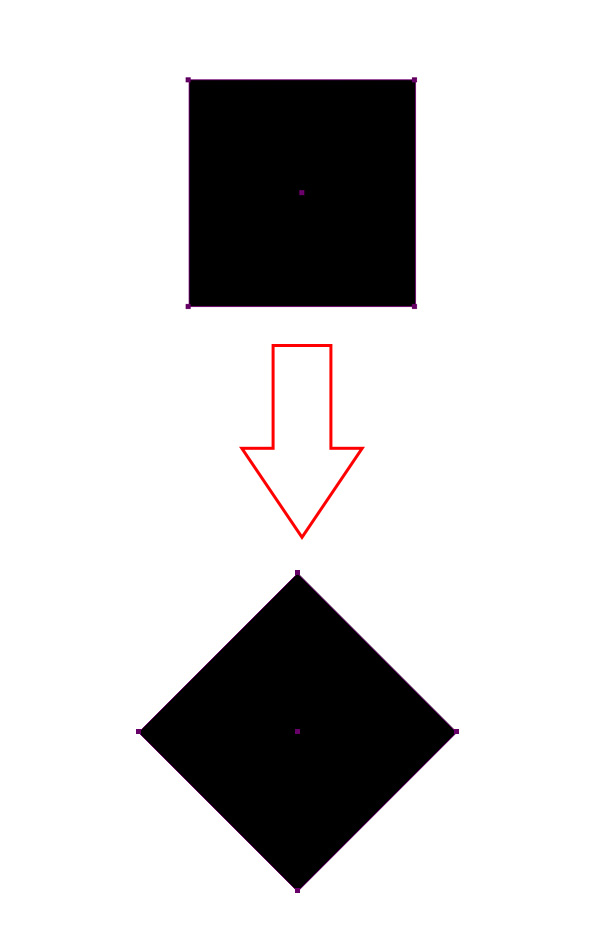
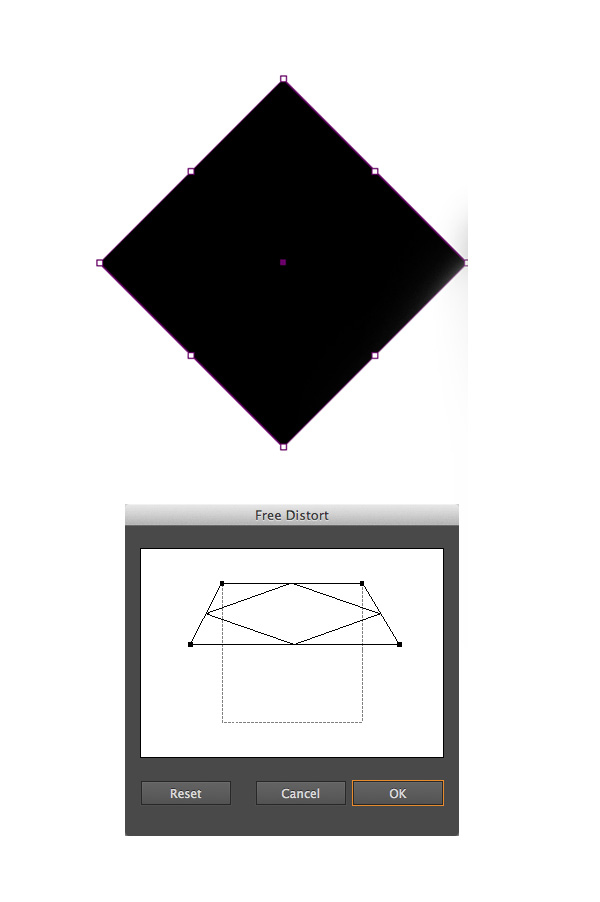
Let’s move on and draw a simple graduation hat. Start from drawing a black square using the Rectangle Tool (M) and holding down Shift button. Using Shift again, turn your square to 45 degrees angle.
Step 2
Go to Effect > Distort & Transform > Free Distort and move the lower corner points up in order to squash your shape and to change its perspective.
Step 3
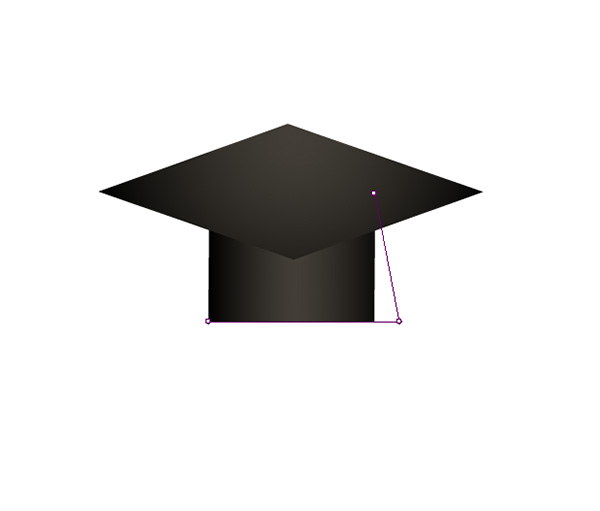
Object > Expand your shape and fill it with radial gradient from dark-grey (R=66, G=62, B=55) to black. Add a smaller square to form a scull-cap. Place it under the top part and use the Direct Selection Tool (A) to drag the lower corner points to the sides in order to make the bottom of the scull-cap wider.
Step 4
Copy and Paste in Back the top part and move it a few pixels down. Fill it with grey color in order to separate the parts of the hat from each other. Add a point in the middle of the bottom and drag it down a bit to form a forehead-part.

Step 5
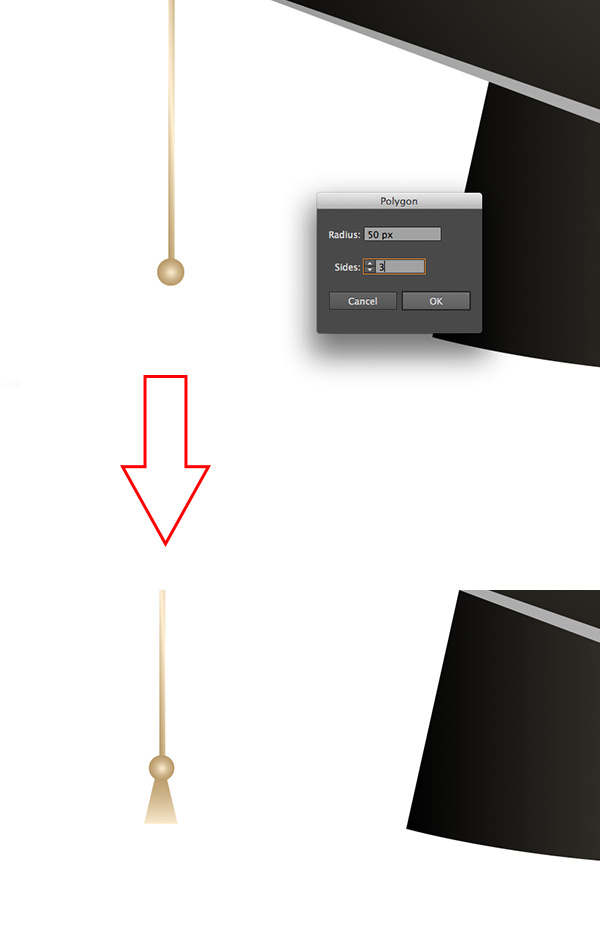
We also need to add a tassel on a ribbon. Here I use the Rectangle Tool (M) to make thin lines of a golden ribbon (the same color as the stripes on the upper book) and a tassel itself, which consists of a circle and a triangle made with Polygon Tool.

15. Render a Ripe Apple for Your Teacher
Step 1
The last but not the least attribute of happy school life is a nice red apple for a teacher!
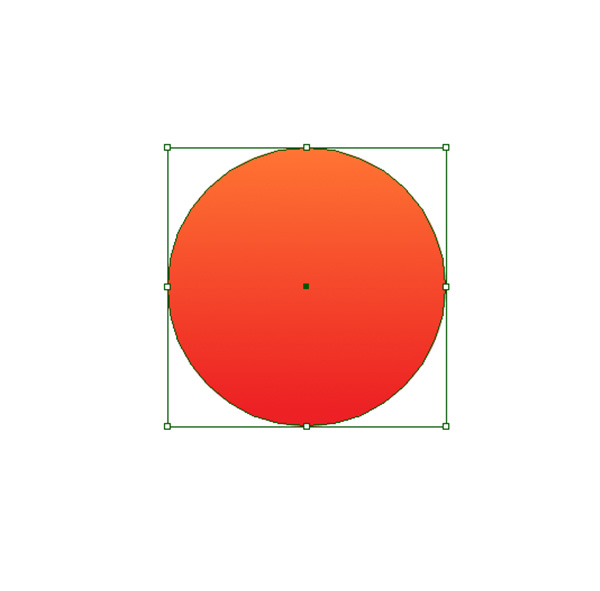
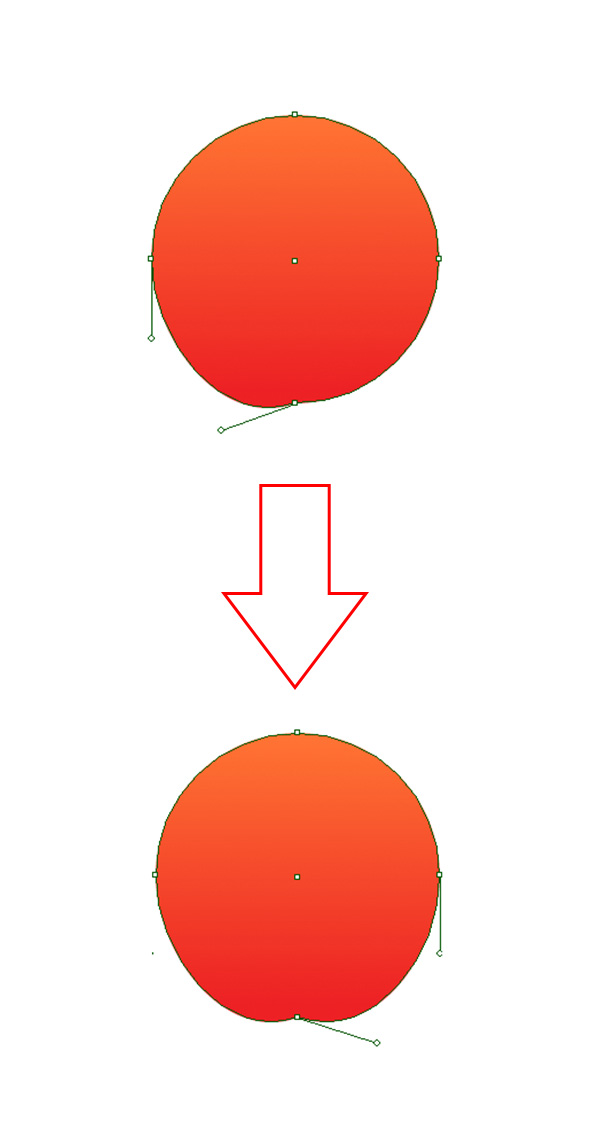
Start from creating a simple circle shape and fill it with linear gradient from dark orange (R=255, G=166, B=51) on top to red (R=237, G=33, B=36) in the bottom.
Step 2
Select the lower anchor point and move the anchor handles using the Convert Anchor Point Tool (Shift + C) as shown on the screenshot.
Step 3
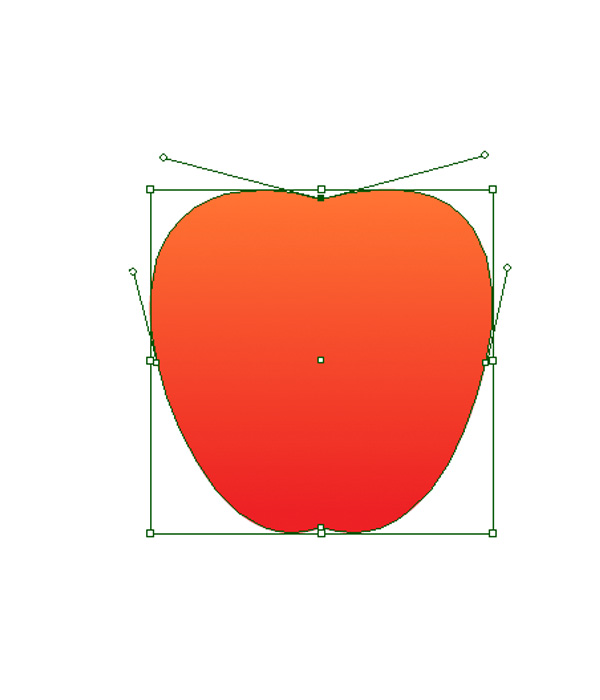
Repeat the same moves for the upper anchor point’s handles. Rotate the handles of the side nodes outwards to make the upper apple part wider than its bottom.
Step 4
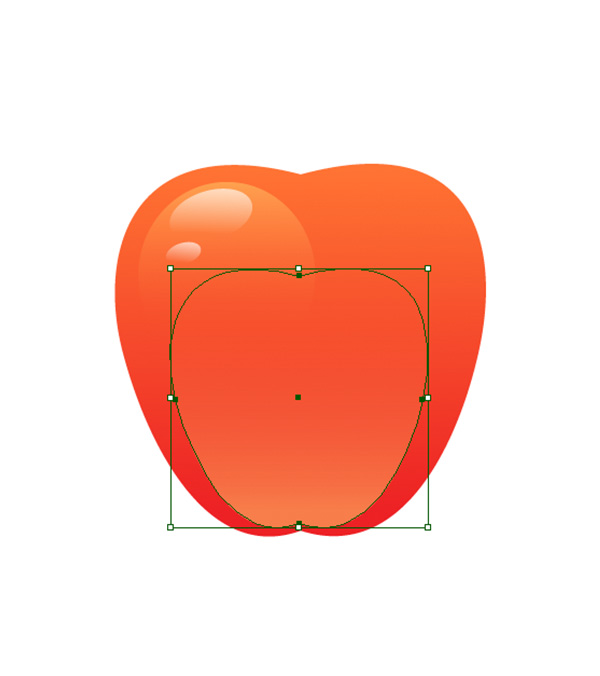
Duplicate the shape and make the copy slightly smaller. Move the copy closer to the bottom and turn it into a highlight by piking up the color and appearance from a highlight spot on a Bear’s forehead. Your shape will become filled with a linear gradient and the Blending Mode will change to Screen. Add a few more highlights and reflections by making ellipses and filling them with the same color as the previous highlight.
Step 5
Finishing touches – we need to add a place, out of which a stem grows. In order to speed up our work flow, just duplicate the Bear’s brow and fill it with the same red color, as the apple’s bottom.
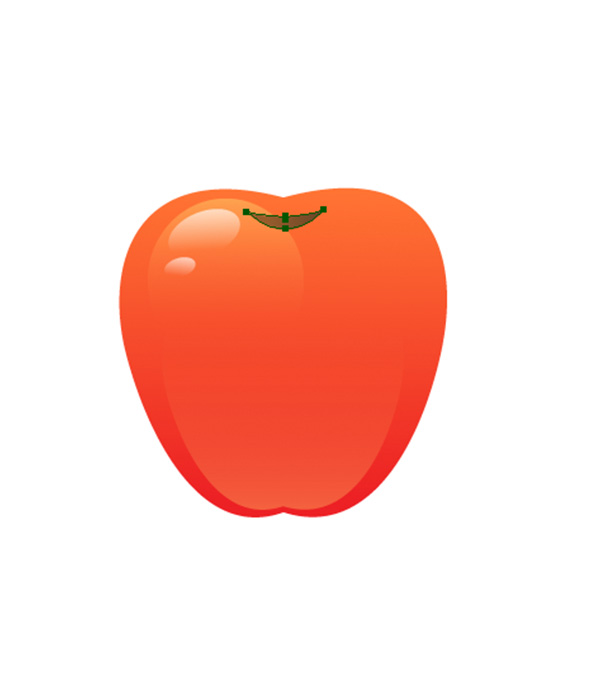
Make a stem and a small leaf out of the same brow-shape.

16. Add a Few Finishing Touches to Refine Your Drawing
Step 1
Finally, group the books and place then behind the bear using Control + [ to rearrange the position. Put the graduation hat on top of the Teddy “ear’s head.

Step 2
Let’s add a simple shadow in order to separate the bear from the books.
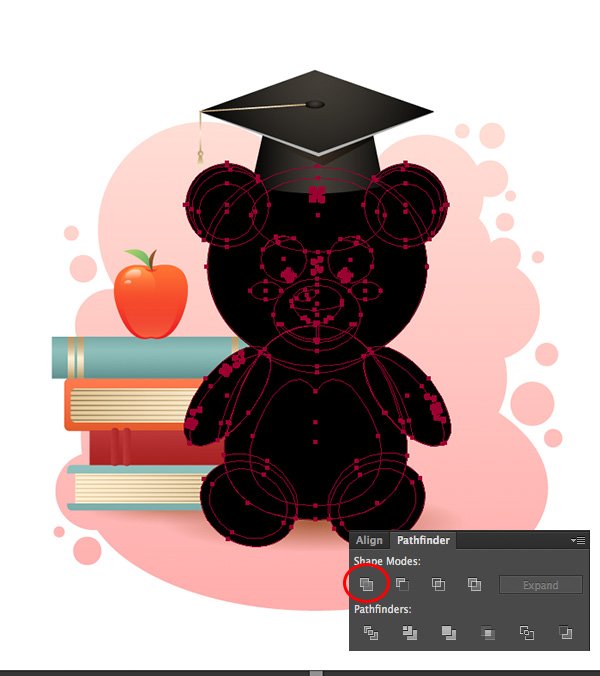
Select all the bear parts, duplicate and put on top (Shift + Control +] ). Fill the selected shapes with black color and Unite them in Pathfinder.
Step 3
Put the black shape under the bear, but above the books (Control + [ ) and move it to the left side a bit.

Step 4
Pick the color and appearance from some shadow which we’ve created earlier on the bear.

Step 5
Now cut off the unnecessary part of shadow. Make a rectangle covering the books and put it under the shadow. Select both shapes and hit Intersect in Pathfinder.
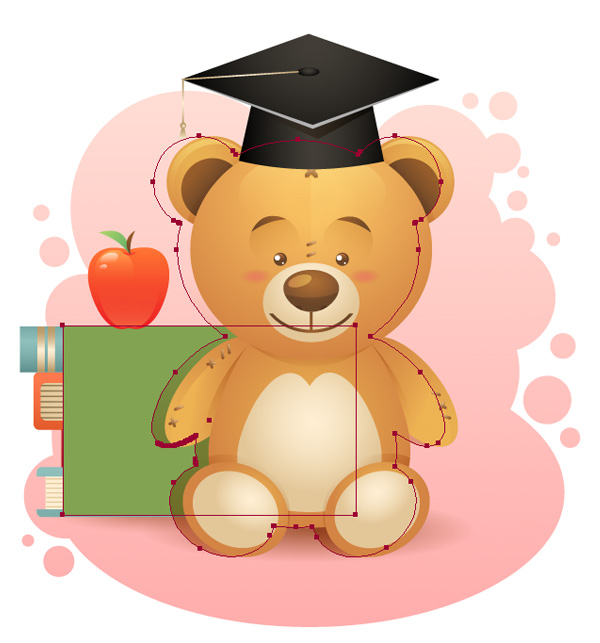
Here you go! The shadow is ready.
Congratulations! You’ve Completed the Lesson!
Great job! Looks like out Teddy Bear is ready to get back to school! I hope you’ve discovered some useful things in this tutorial and now you are ready to create other fancy characters. Enjoy!
