5. Create the Knob
Step 1
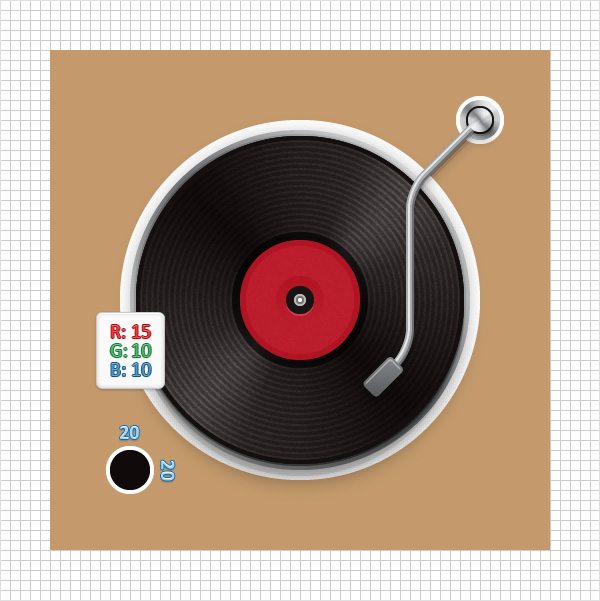
Using the Ellipse Tool (L), create a 20px circle, set the fill color at R=15 G=10 B=10 and place it as shown in the following image.
Step 2
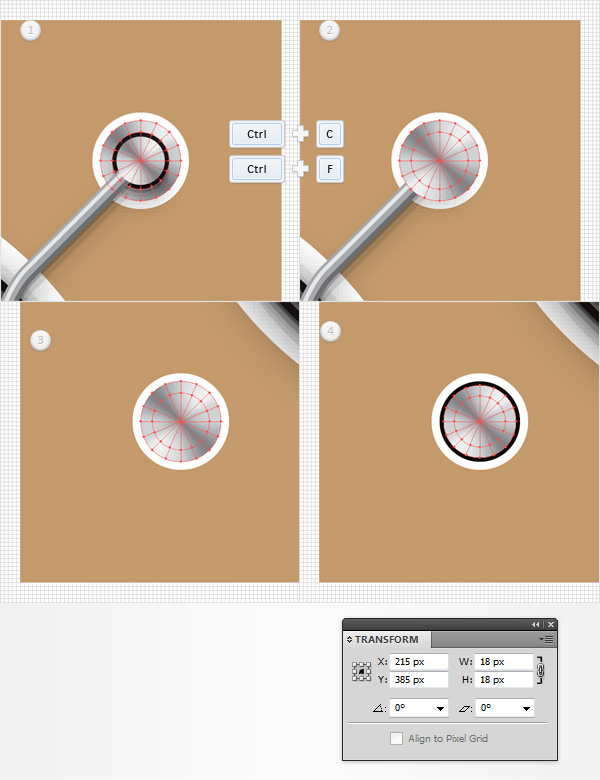
Switch to “gridline every 1px“, so go to Edit > Preferences > Guides & Grid and enter 1 in the Gridline every box. Focus on the Layers panel, open your “arm” group, select the “armBase” mesh and make a copy in front (Control -C > Control-F). Select this copy, drag it outside the group and place it in the top of the Layers panel. Double-click on this new mesh and name it “knob“. Move to your artboard and place the “knob” mesh as shown in the third image. Make sure that it stays selected, go to the Transform panel and simply enter 18 in the width (or height) box. In the end things should look like in the fourth image.
Step 3
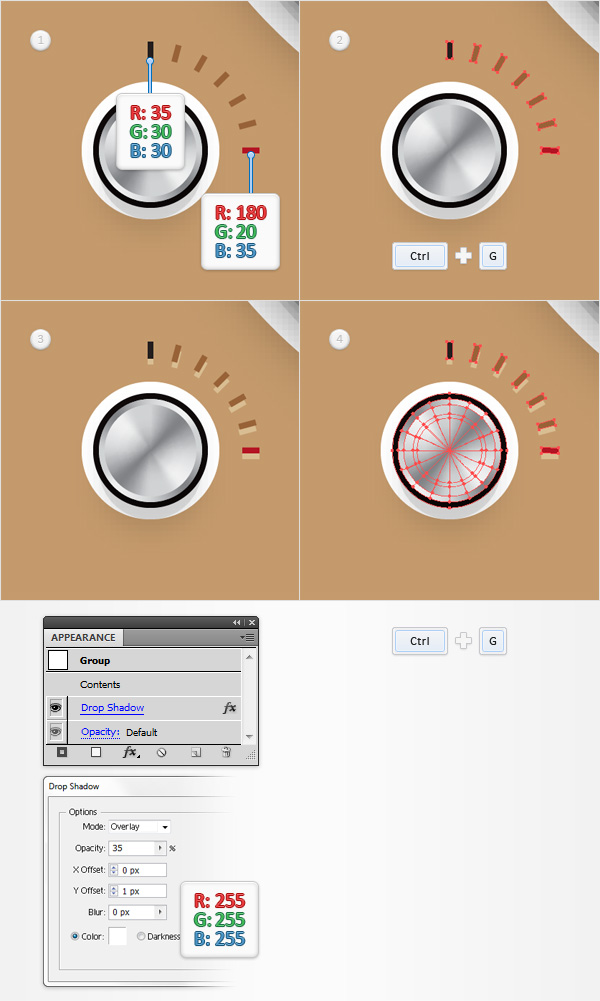
Make sure that your “knob” mesh is still selected and make a copy in front (Control-C > Control-F). Select it, go to the Transform panel, enter 16 in the width (or height) box then go to Object > Transform > Rotate. Enter a -90 degrees angle and click OK.

Step 4
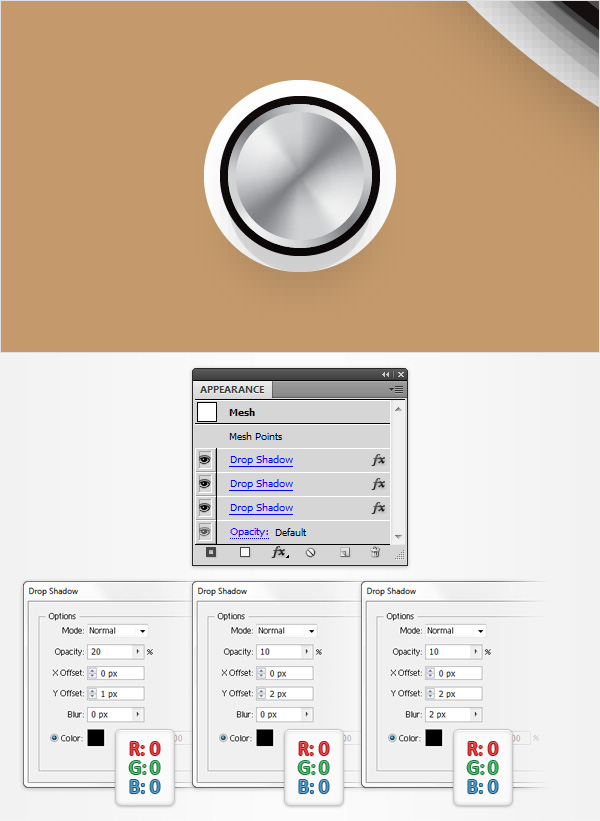
Reselect your “knob” mesh and simply add the three Drop Shadow effects (Effect > Stylize > Drop Shadow) shown in the following image.
Step 5
Using the Pen Tool (P), create a 3px, vertical path and place it as shown in the first image. Add a 1pt stroke for this path and set its color at R=255 G=222 B2=23. Duplicate this thin path, select the copy, drag it down and place it as shown in the second image. Reselect both paths made in this step and Group them (Control-G). Make sure that this new group is selected and go to Effect > Distort & Transform > Transform. Enter the properties shown in the following image, click OK then go to Object > Expand Appearance and Object > Path > Outline Stroke.

Step 6
Make sure that your group of yellow shapes is selected and hit Shift-Control-G twice to Ungroup it. Select the seventeen yellow paths highlighted in the second image and simply delete them. Next, select the five yellow shapes highlighted in the third image and hit Control-8 (or go to Object > Compound Path > Make) to turn them into a Compound Path. Make sure that this new compound path is selected and replace the yellow used for the fill with R=152 G=98 B=55.
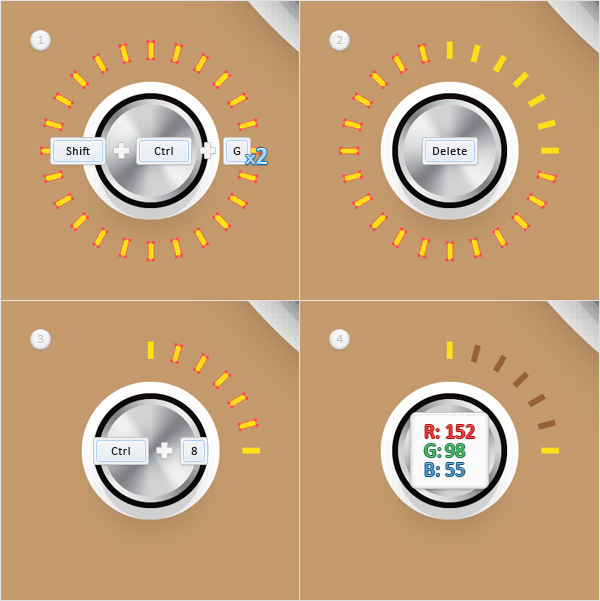
Step 7
Select the top, yellow shape and replace the yellow with R=35 G=30 B=30 then select the remaining yellow shape and replace the yellow with R=180 G=20 B=35. Reselect both shapes edited in this step along with the brown compound path and Group them (Control-G). Make sure that this group is selected and go to Effect > Stylize > Drop Shadow. Enter the properties shown in the following image and click OK. Reselect this group along with the shape and the meshes that make up your knob and Group them (Control-G). Move to the Layers panel and simply name this new group “knob“.
6. Add Shading, Depth and a Subtle Texture
Step 1
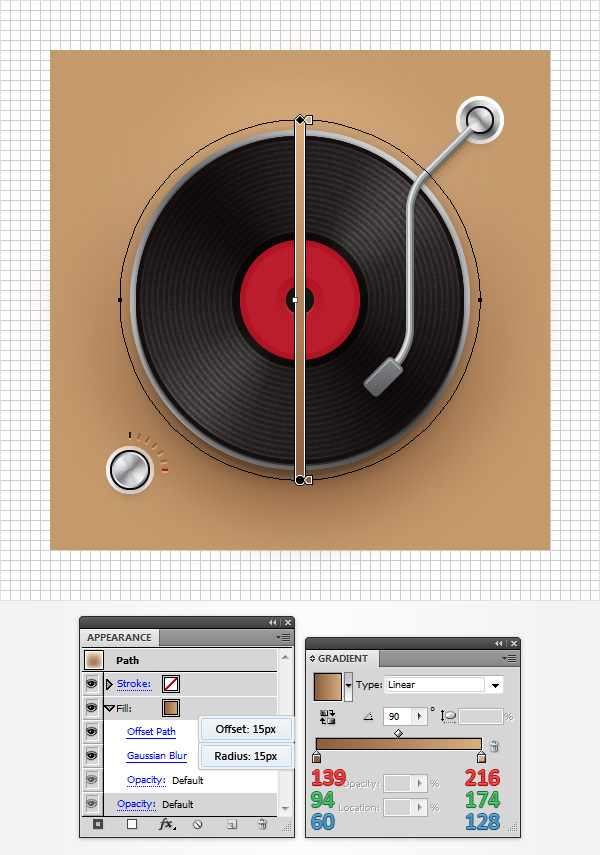
Return to “gridline every 5px“, so simply go to Edit > Preferences > Guides & Grid and enter 5 in the Gridline every box. Focus on the Layers panel and unlock your “vinylShadow” shape. Select this white circle and focus on the Appearance panel.
First, replace the white with the linear gradient shown in the following image. Next, select the existing fill and go to Effect > Path > Offset Path. Enter a 15px Offset, click OK and go to Effect > Blur > Gaussian Blur. Enter a 15 Radius and click OK.
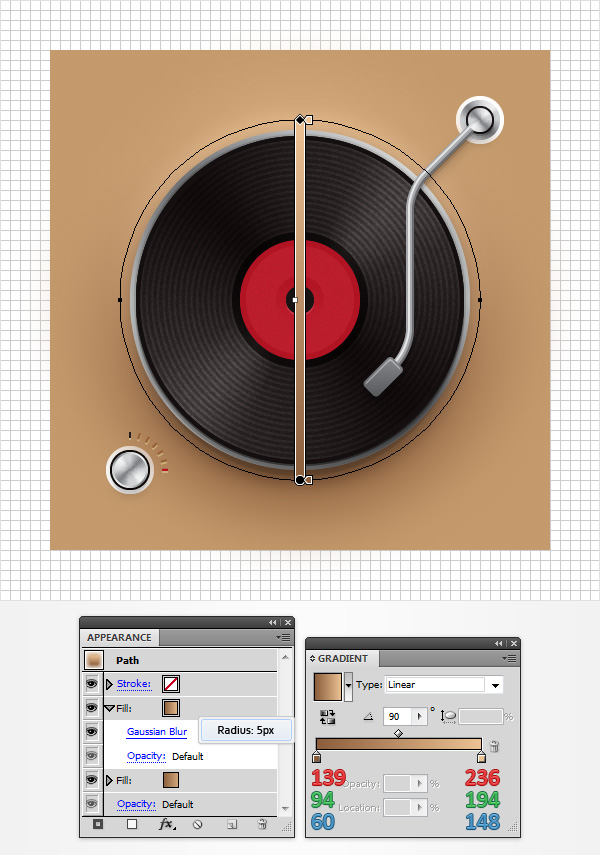
Step 2
Make sure that your “vinylShadow” shape is still selected, focus on the Appearance panel and add a second fill. Select it, add the linear gradient shown in the following image and go to Effect > Blur > Gaussian Blur. Enter a 5 Radius and click OK.
Step 3
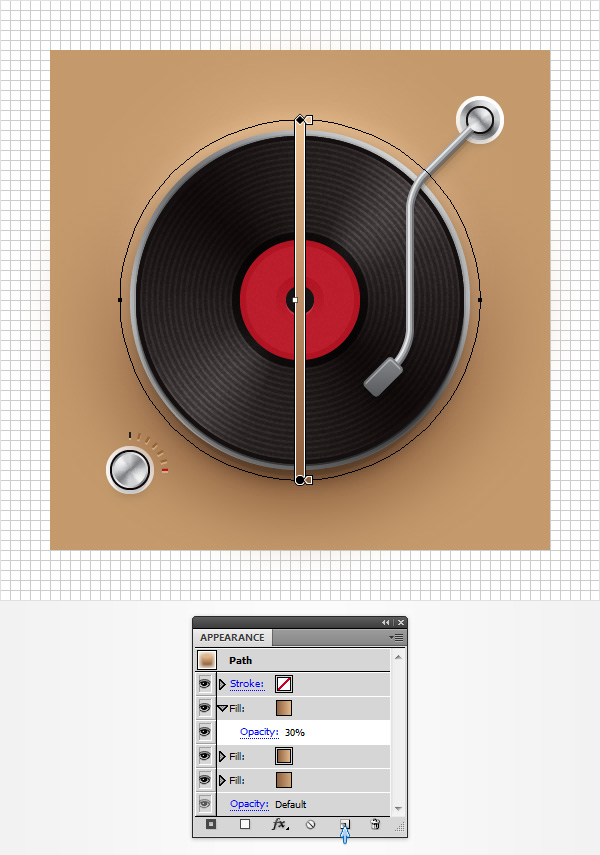
Make sure that your “vinylShadow” shape is still selected and focus on the Appearance panel. Select the top fill and duplicate it using the Duplicate Selected Item button (pointed by the little, blue arrow in the following image). Focus on this newly added fill, remove the existing Gaussian Blur effect then lower its Opacity to 30%.
Step 4
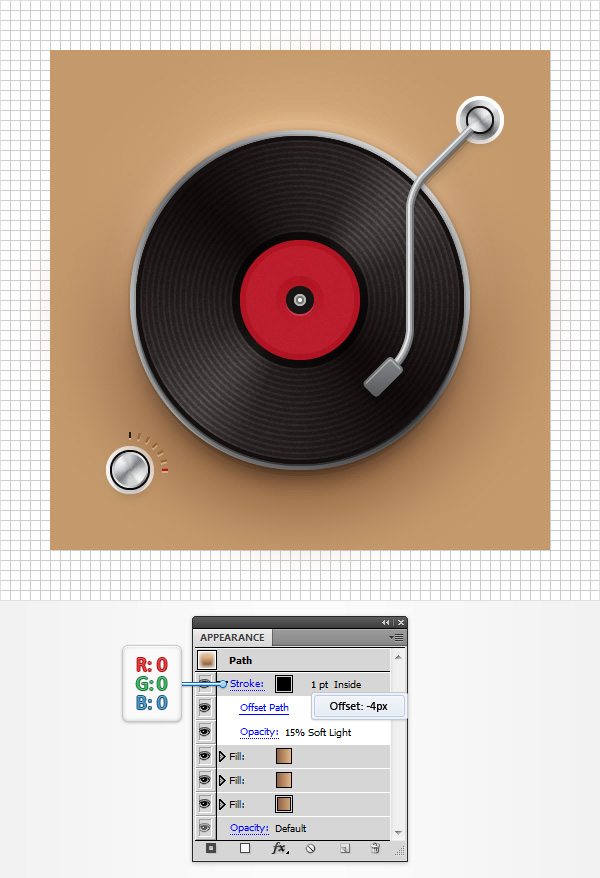
Make sure that your “vinylShadow” shape is still selected, focus on the Appearance panel and add a 1pt, black stroke. Align it to inside, change the Blending Mode to Soft Light, lower its Opacity to 15% and go to Effect > Path > Offset Path. Enter a -4px Offset and click OK.
Step 5
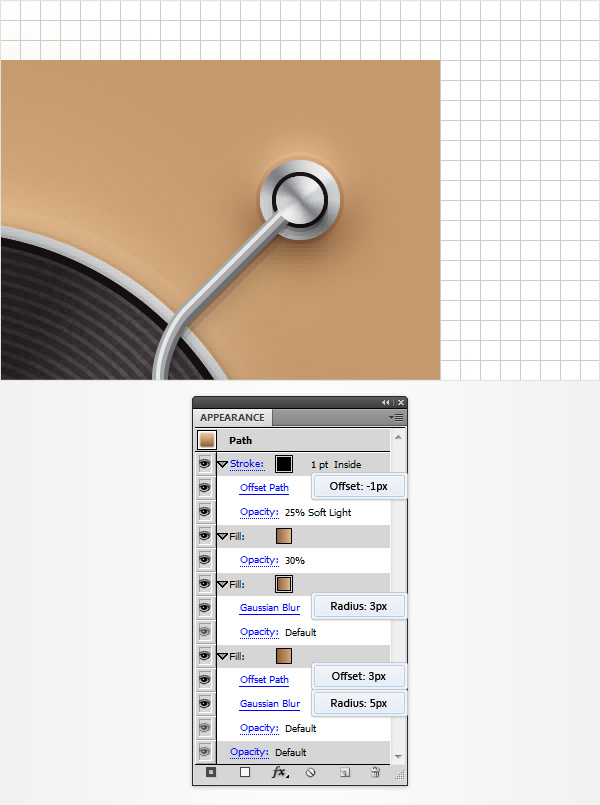
Focus on the Layers panel and unlock your “armShadow” shape. Next, you need to copy the properties used for the “vinylShadow” circle and paste them onto this “armShadow” circle. Here is how you can easily do it. Go to the Layers panel, focus on the right side and you’ll notice that every shape comes with a little grey circle. It’s called a target icon. Alt-click on the target icon that stands for the “vinylShadow” shape and drag onto the target icon that stands for your “armShadow” shape. Make sure that your “armShadow” shape stays selected and focus on the Appearance panel. Open the Gaussian Blur effect used for the bottom fill and set the radius at 5px then open the Offset Path effect used for the same fill and set the offset at 3px. Move up to the the next fill, open the existing Gaussian Blur effect and set the radius at 3px. Finally, open the Offset Path used for the stroke and set its offset at -1px.
Step 6
Focus on the Layers panel and unlock your “knobShadow” shape. Again, use the target icon to copy the Appearance attributes from your “armShadow” circle onto the “knobShadow” circle.
Step 7
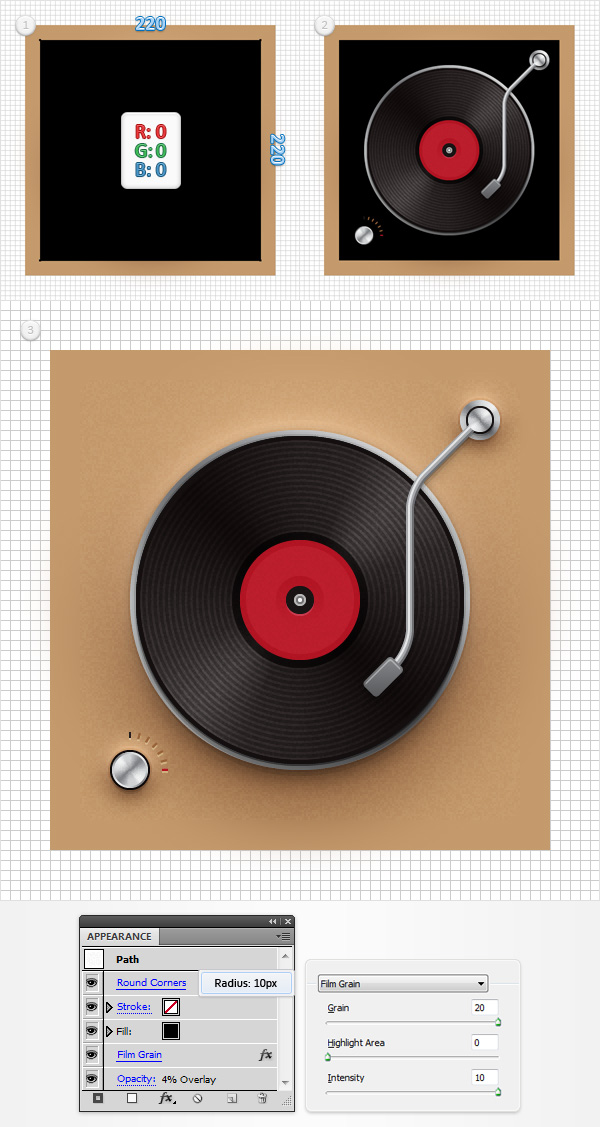
Using the Rectangle Tool (M), create a 220px square, set the fill color at black and place it as shown in the first image. Move to the Layers panel and drag this new rectangle below your “vinyl“, “arm” and “knob” groups. Make sure that this black shape stays selected, lower its Opacity to 40%, change the Blending Mode to Overlay and go to Effect > Stylize > Rounded Corners. Enter a 10px Radius, click OK and go to Effect > Artistic > Film Grain. Enter the properties shown in the following image and click OK.
7. Create the Wooden Board
Step 1
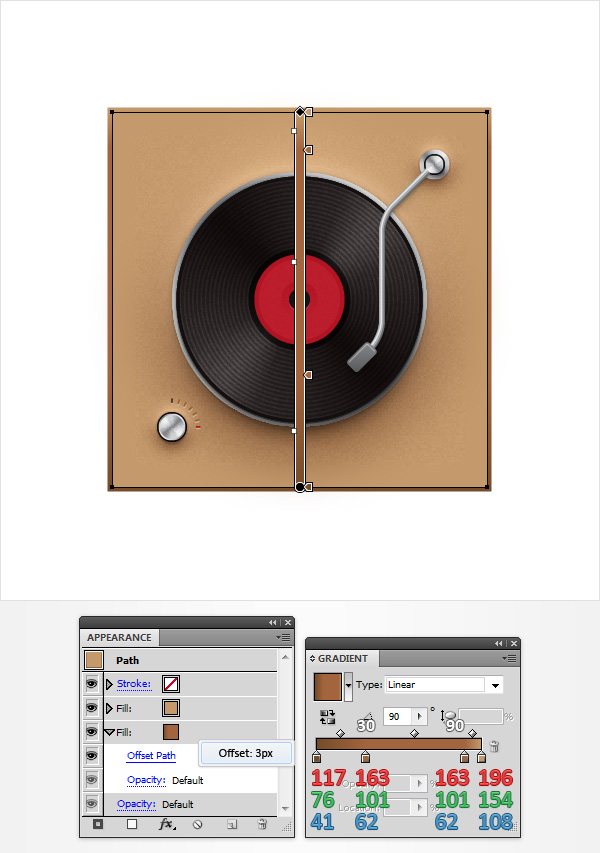
Focus on the Layers panel and unlock your “main” shape. Select this brown square, focus on the Appearance panel, add a second fill and drag it below the existing fill. Make sure that your new fill is selected, add the linear gradient shown in the following image and go to Effect > Path > Offset Path. Enter a 3px Offset and click OK.
Step 2
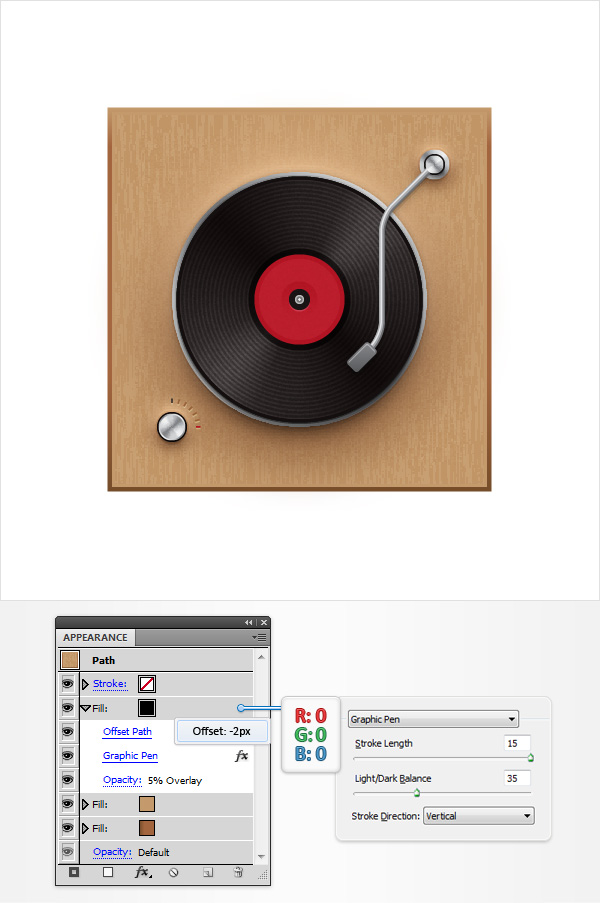
Make sure that your “main” shape is still selected, focus on the Appearance panel and add a third fill. Select it, set the color at black, lower its Opacity to 5%, change the Blending Mode to Overlay and go to Effect > Path > Offset Path. Enter a -2px Offset, click OK and go to Effect > Sketch > Graphic Pen. Enter the properties shown in the following image and click OK.
Step 3
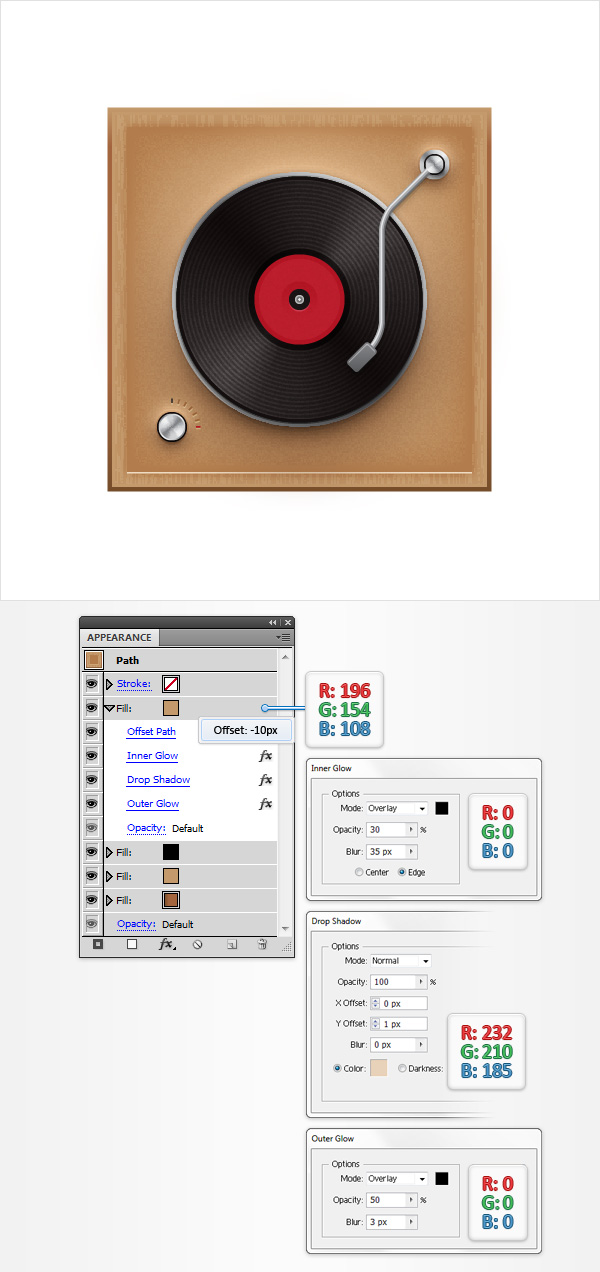
Make sure that your “main” shape is still selected, focus on the Appearance panel and add a fourth fill. Select it, set the color at R=196 G=154 B=108 and go to Effect > Path > Offset Path. Enter a -10px Offset, click OK and go to Effect > Stylize > Inner Glow. Enter the properties shown in the following image, click OK and go to Effect > Stylize > Drop Shadow. Enter the attributes shown below, click OK and go to Effect > Stylize > Outer Glow. Enter the properties shown in the following image and click OK.
Step 4
Make sure that your “main” shape is still selected and focus on the Appearance panel. Add a 2pt stroke, set the color at R=232 G=210 B=185 and align it to inside. Keep focusing on the Appearance panel and add a second stroke for your “main” shape. Make it 1pt wide, set the color at R=169 G=124 B=80 and align it to inside.
