Step 9
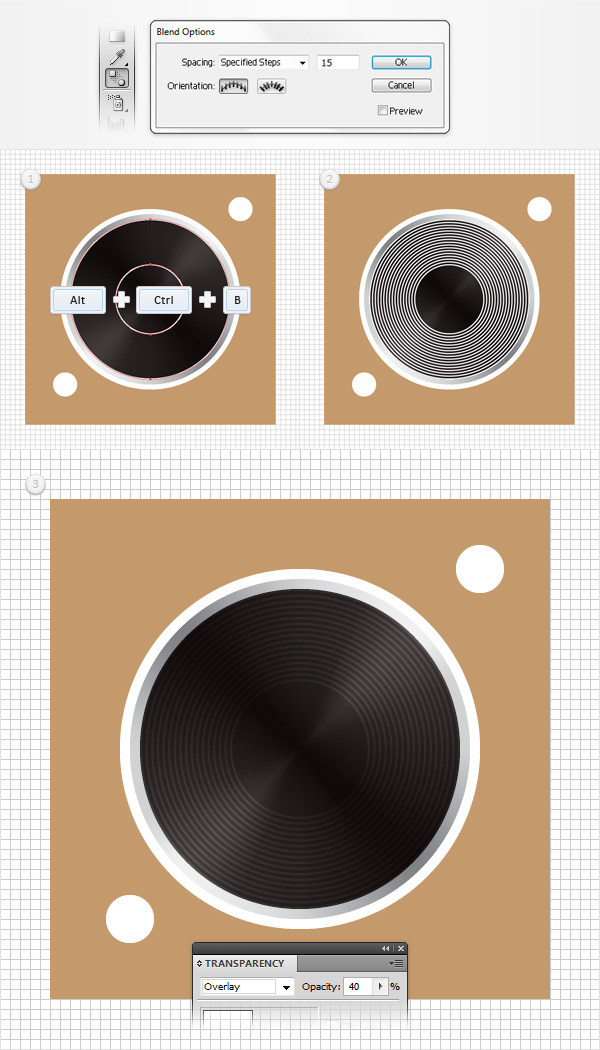
Double-click on the Blend Tool (or go to Object > Blend > Blend Options). Select Specified Steps from the Spacing drop-down menu and enter “15” in that white box.
Move to the Layers panel, select both circles with the white stroke (made in the previous step) and hit Alt-Control-B (or go to Object > Blend > Make) to create a simple blend. Things should look like in the second image. Make sure that your blend is selected, lower its Opacity to 40% and change the Blending Mode to Overlay.
Step 10
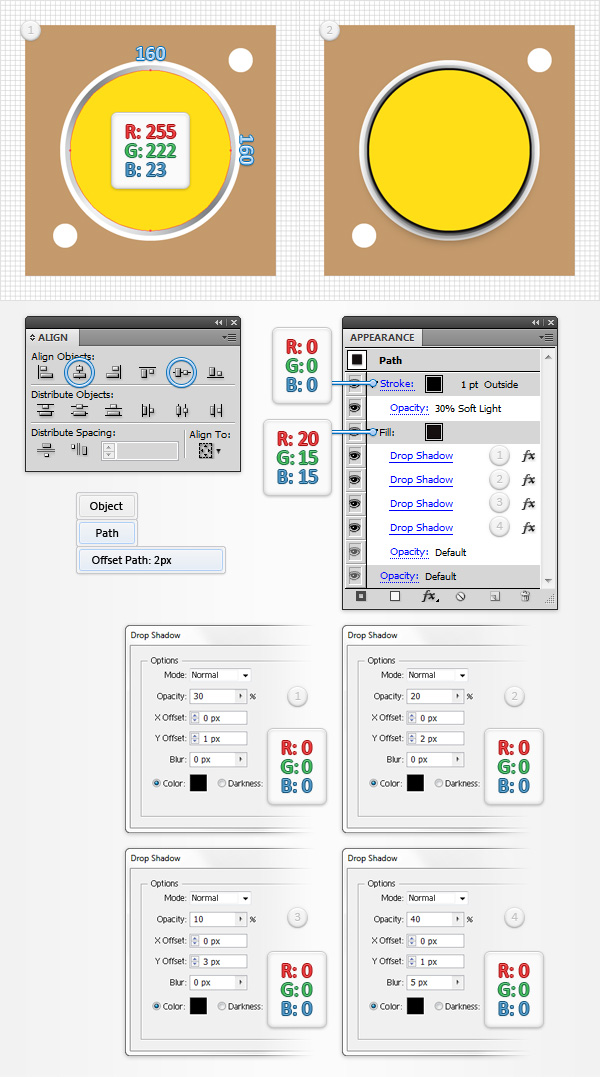
Using the Ellipse Tool (L), create a 160px circle, set the fill color at R=255 G=222 B=23 and center it using the Horizontal Align Center and Vertical Align Center buttons from the Align panel. Make sure that this yellow circle is selected and go to Object > Path > Offset Path. Enter a 2px Offset, click OK and move to the Layers panel.
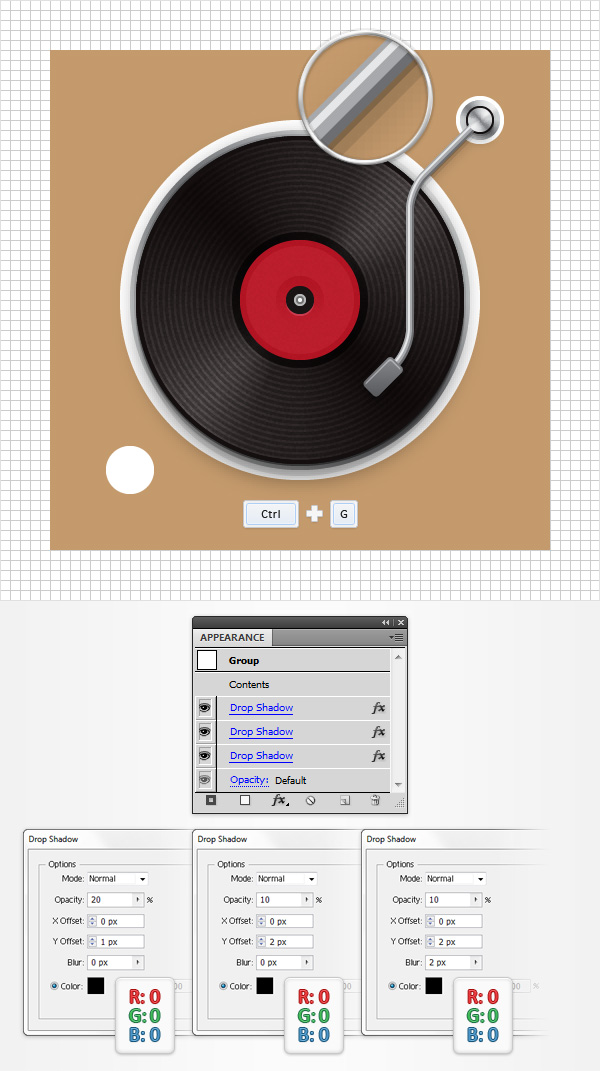
Select the resulting shape and simply drag it below your “vinyl” mesh. Make sure that this larger yellow circle stays selected and focus on the Appearance panel. First, select the fill, replace the yellow with R=20 G=15 B=15 and add the four Drop Shadow effects (Effect > Stylize > Drop Shadow) shown in the following image. Next, add a 1pt, black stroke, align it to outside, lower the Opacity to 30% and change the Blending Mode to Soft Light.
Step 11
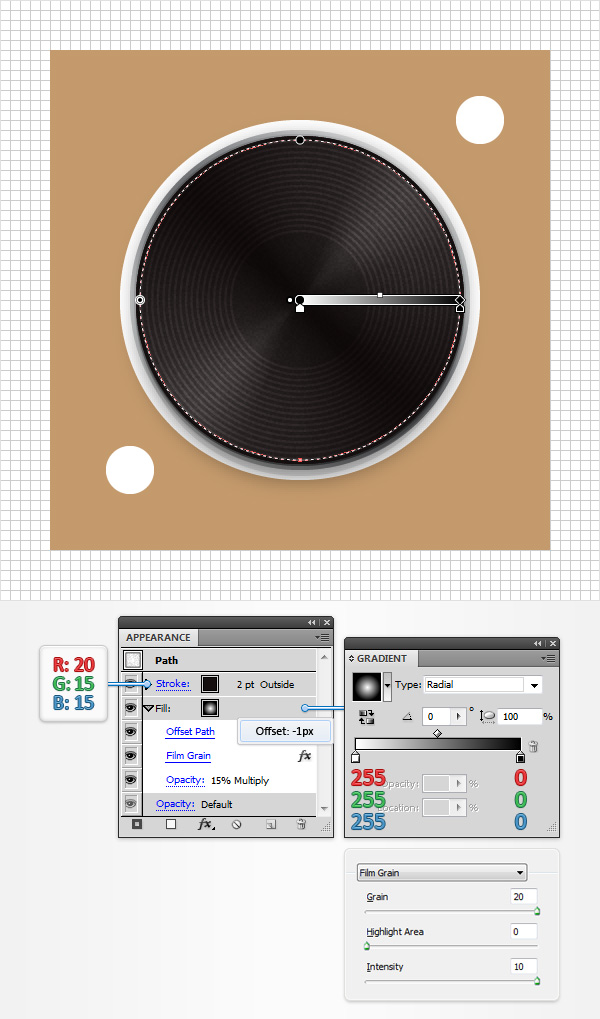
Select the remaining yellow circle and focus on the Appearance panel. Select the fill, replace the existing color with the radial gradient shown below, lower its Opacity to 15%, change the Blending Mode to Multiply and go to Effect > Path > Offset Path. Enter a -1px Offset, click OK and go to Effect > Artistic > Film Grain. Enter the properties shown in the following image and click OK.
Return to the Appearance panel, add a 2pt stroke for this circle, align it to outside and set the color at R=20 G=15 B=15.
Step 12
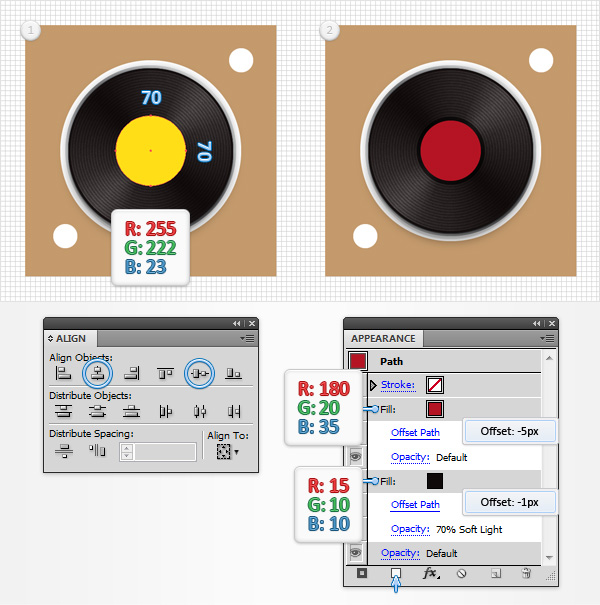
Using the Ellipse Tool (L), create a 70px circle, set the fill color at R=255 G=222 B=23 and center it using the Horizontal Align Center and Vertical Align Center buttons from the Align panel. Make sure that this yellow shape stays selected and focus on the Appearance panel. Select the existing fill, replace the yellow with R=15 G=10 B=10, lower its Opacity to 70%, change the Blending Mode to Soft Light and go to Effect > Path > Offset Path. Enter a -1px Offset and click OK.
Return to the Appearance panel and add a second fill for your shape using the Add New Fill button (pointed by the little, blue arrow in the following image). Select this new fill, set the color at R=180 G=20 B=35 and go to Effect > Path > Offset Path. Enter a -5px Offset and click OK.
Step 13
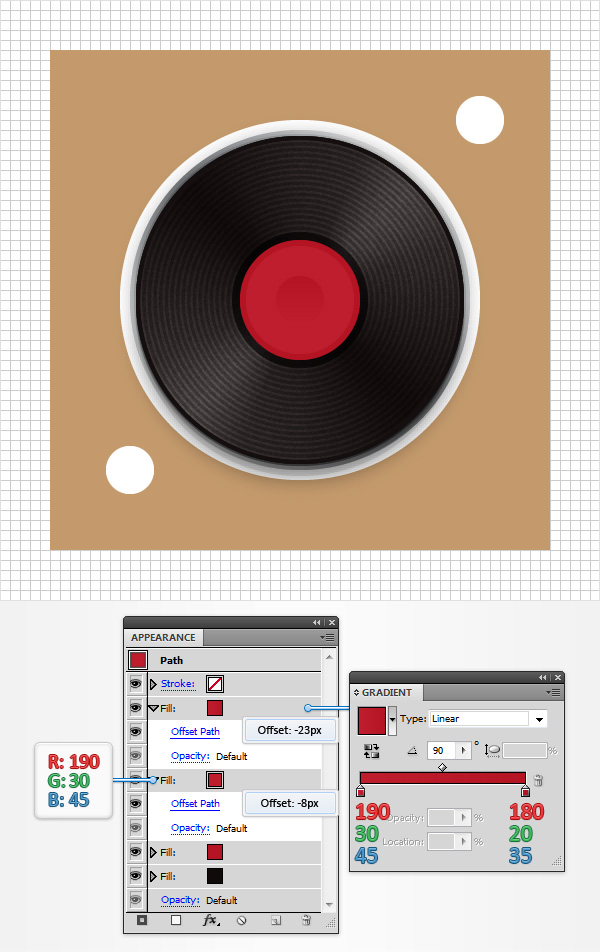
Make sure that your red circle stays selected, focus on the Appearance panel and add a third fill using that same Add New Fill button. Select this new fill, set the color at R=190 G=30 B=45 and go to Effect > Path > Offset Path. Enter a -8px Offset and click OK.
Return to the Appearance panel and add a fourth fill for your shape. Select it, add the linear gradient shown below and go to Effect > Path > Offset Path. Enter a -23px Offset and click OK.
Step 14
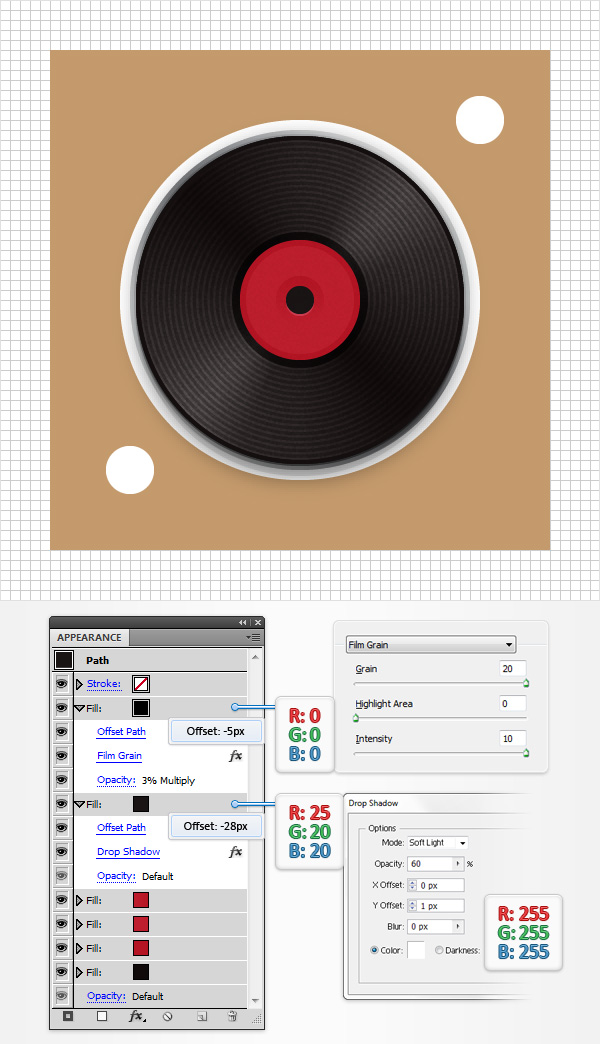
Make sure that your red circle is still selected, focus on the Appearance panel and add a fifth fill. Select it, set the color at R=25 G=20 B=20 and go to Effect > Path > Offset Path. Enter a -28px Offset, click OK and go to Effect > Stylize > Drop Shadow. Enter the properties shown below, click OK and return to the Appearance panel. Add a sixth fill for your shape, select it, set the color at black, lower its Opacity to 3%, change the Blending Mode to Multiply and go to Effect > Path > Offset Path. Enter a -5px Offset, click OK and go to Effect > Artistic > Film Grain. Enter the properties shown in the following image and click OK.
Step 15
Make sure that your red circle is still selected, focus on the Appearance panel and add a seventh fill. Select it, set the color at R=185 G=185 B=185 and go to Effect > Path > Offset Path. Enter a -32px Offset, click OK and return to the Appearance panel. Add the eighth fill, select it, set the color at R=115 G=115 B=115 and go to Effect > Path > Offset Path. Enter a -33px Offset, click OK and get back to the Appearance panel. Add one final final, select it, set the color at white and go to Effect > Path > Offset Path. Enter a -34px Offset and click OK.

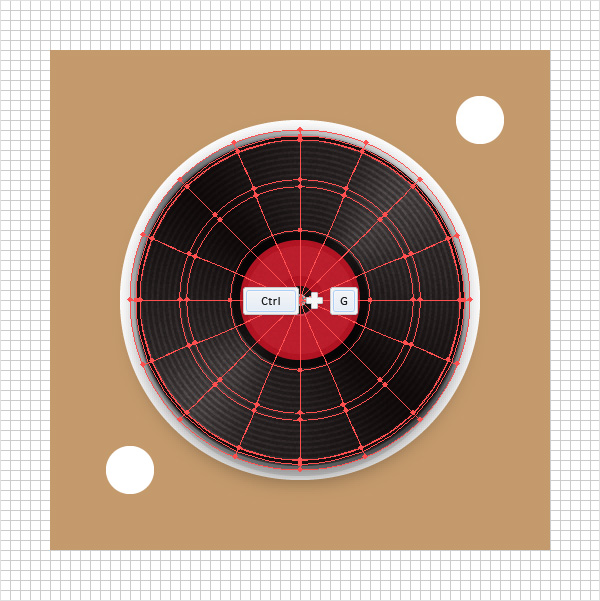
Step 16
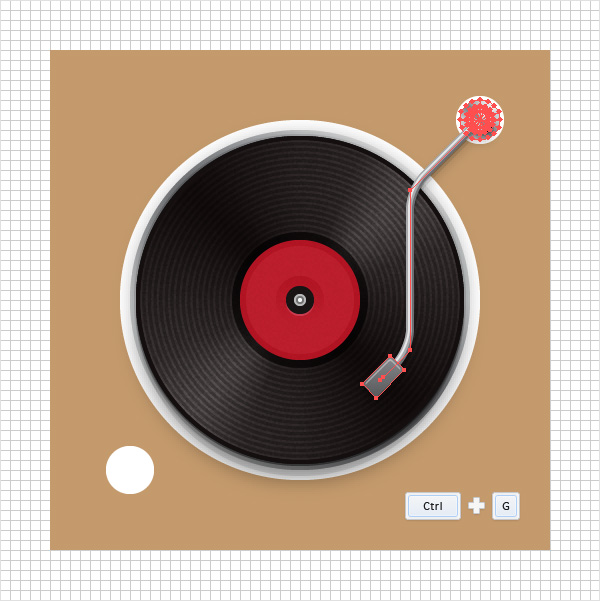
Focus on the Layers panel and unlock your “vinyl” mesh. Select it along with the “vinylSupport” and the rest of the shapes that make up your vinyl and Group them (Control-G). Keep focusing on the Layers panel, double-click on this new group and simply name it “vinyl“.
4. Create the Arm
Step 1
Focus on the Layers panel, open your “vinyl” group, select the “vinylSupport” mesh and make a copy in front (Control -C > Control-F). Select this copy, drag it outside the group and place it in the top of the Layers panel. Double-click on this new mesh and rename it “armBase“. Make sure that it stays selected, go to the Transform panel and simply enter 20 in the width (or height) box. In the end things should look like in the third image. Reselect your “armBase” mesh, drag it up and place it as shown in the fourth image.

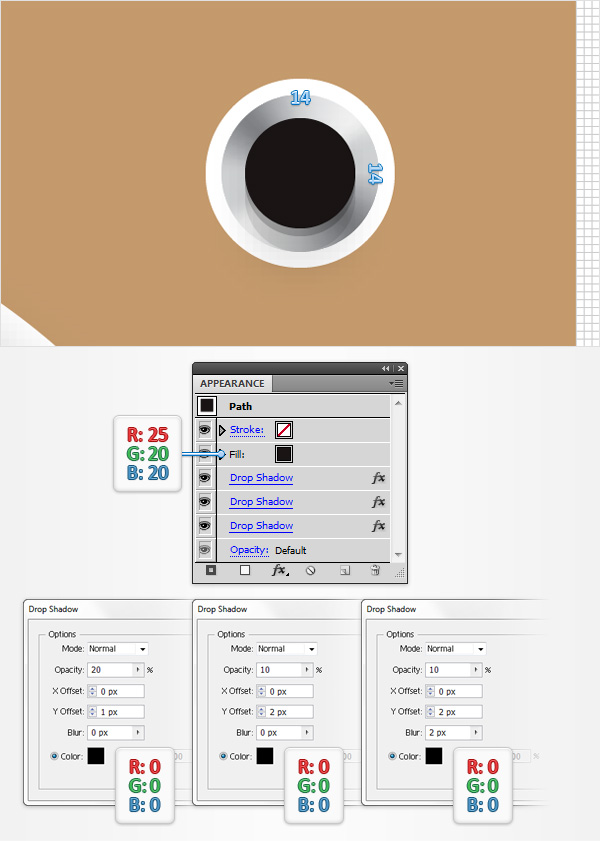
Step 2
Switch to “gridline every 1px“, so go to Edit > Preferences > Guides & Grid and enter 1 in the Gridline every box. Focus on your “armBase” mesh. Using the Ellipse Tool (L), create a 14px circle, set the fill color at R=25 G=20 B=20 and place it as shown in the following image. Make sure that this new shape stays selected and add the three Drop Shadow effects (Effect > Stylize > Drop Shadow) shown in the following image.
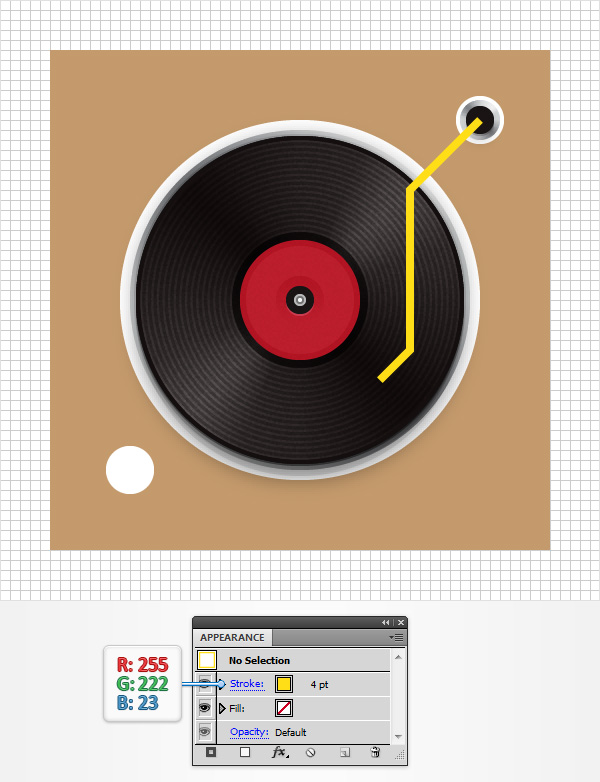
Step 3
Return to “gridline every 5px “, so simply go to Edit > Preferences > Guides & Grid and enter 5 in the Gridline every box. Using the Pen Tool (P), create a simple path as shown in the following image. Make sure that it has no color set for the fill, but add a 4pt stroke and set its color at R=255 G=222 B=23.
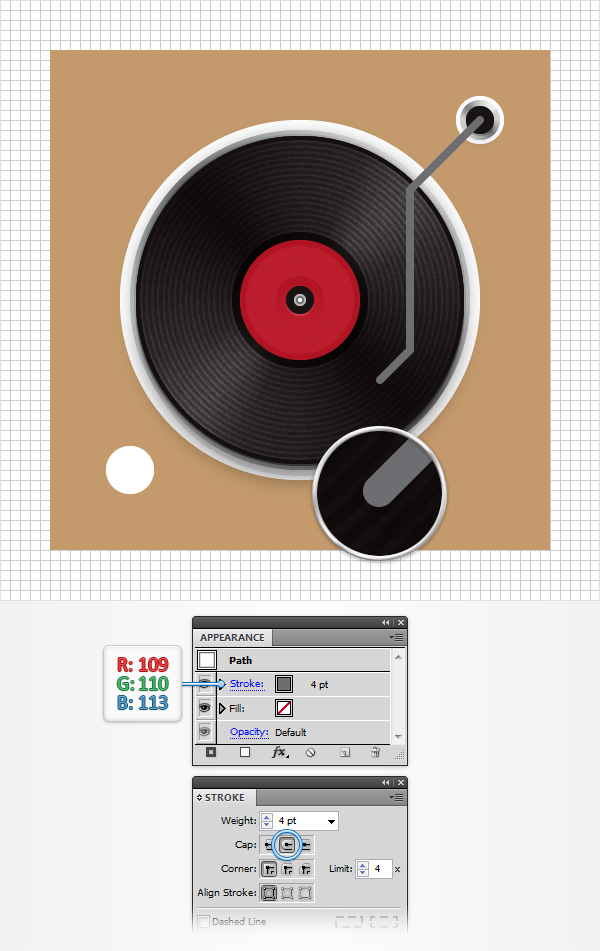
Step 4
Make sure that the yellow path is still selected and focus on the Appearance panel. Select the existing stroke, replace the yellow with R=109 G=110 B=113 then go to the Stroke panel (Window > Stroke) and simply check the Round Cap button.
Step 5
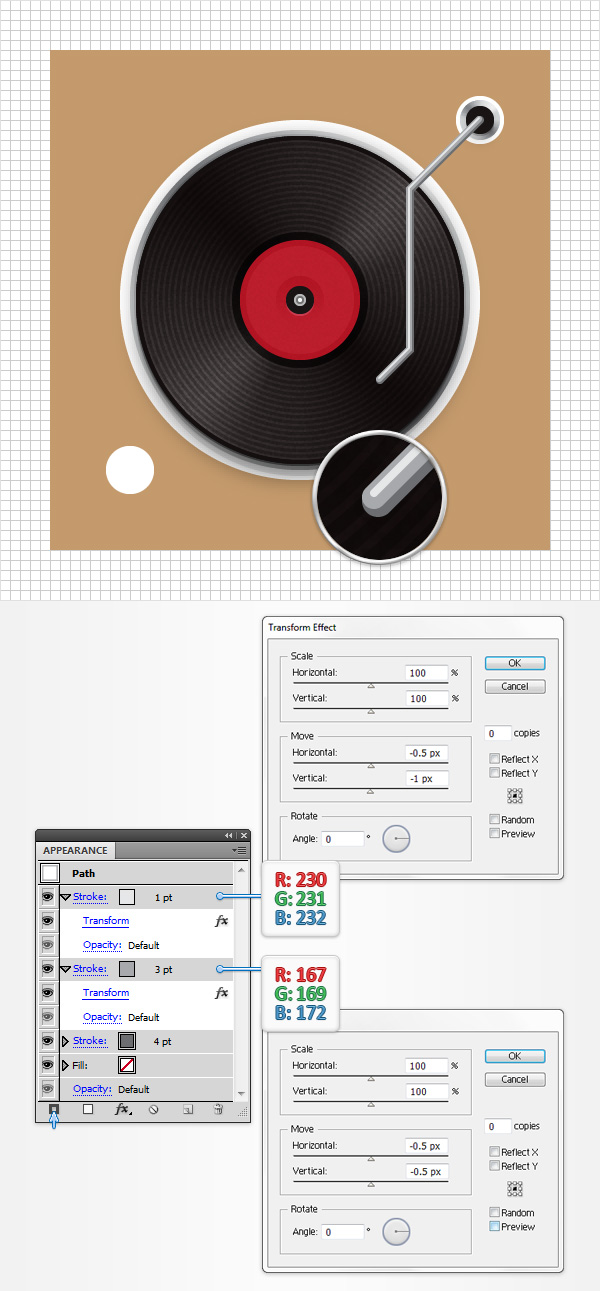
Make sure that the path with the grey stroke is still selected, focus on the Appearance panel and add a second stroke using the Add New Stroke button (pointed by the little, blue arrow in the following image). Select this new stroke, make it 3pt wide, set the color at R=167 G=169 B=172 and go to Effect > Distort & Transform > Transform. Enter the properties shown in the following image, click OK and return to the Appearance panel. Add a third stroke and select it. Set the color at R=230 G=231 B=232, make it 1pt wide and go to Effect > Distort & Transform > Transform. Enter the properties shown in the following image and click OK.
Step 6
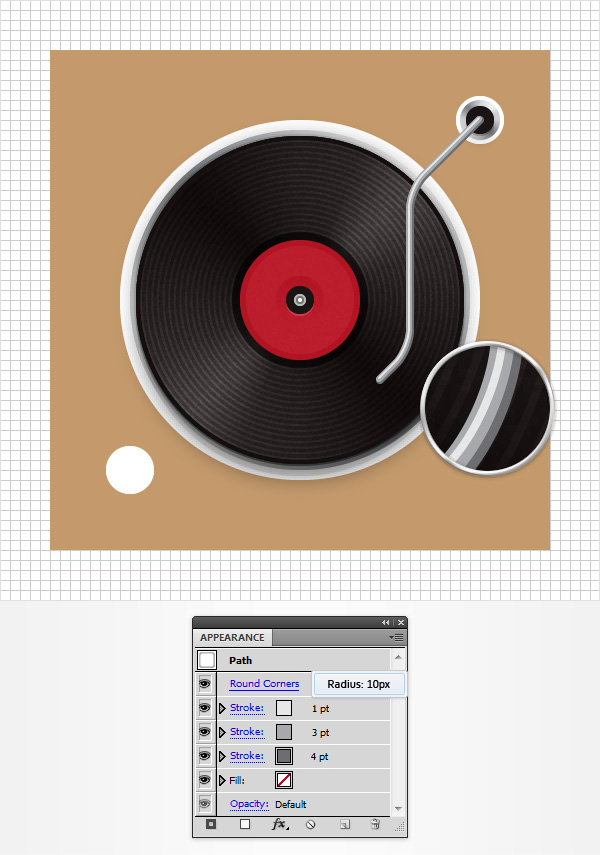
Make sure that the path with multiple strokes is still selected and go to Effect > Stylize > Rounded Corners. Enter a 10px Radius and click OK.
Step 7
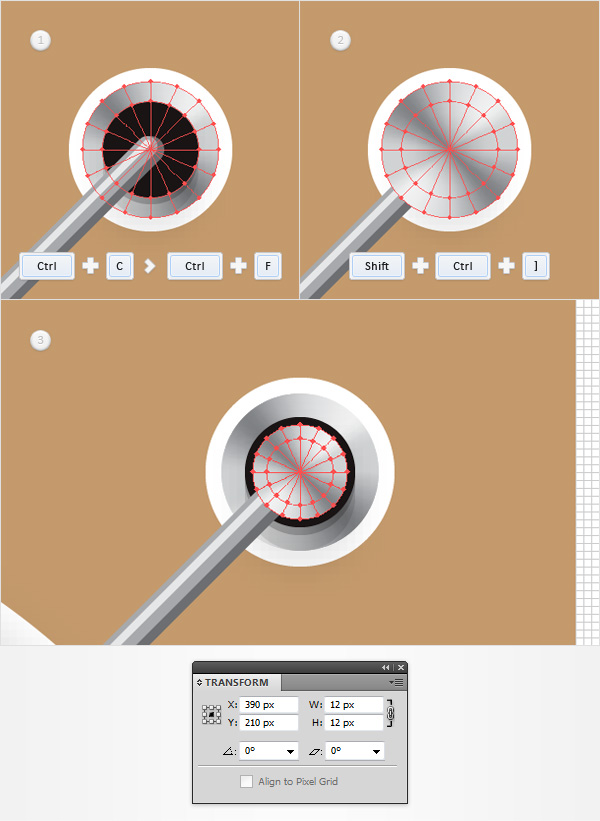
Reselect your “armBase” mesh, make a copy in front (Control-C > Control-F) and bring it to front (Shift-Control-[ ). Select this copy, go to the Transform panel and simply enter 15 in the width (or height) box. Focus on the Layers panel and simply rename this new mesh “armBaseFront“.
Step 8
Switch to “gridline every 1px“, so go to Edit > Preferences > Guides & Grid and enter 1 in the Gridline every box. Pick the Rectangle Tool (M), create a 10 x 20px shape, fill it with a random color and place it as shown in the first image. Make sure that this new rectangle stays selected and go to Object > Transform > Rotate. Enter a -45 degrees angle and click OK. Keep focusing on this shape and simply replace the flat color used for the fill with the linear gradient shown in the following image.

Step 9
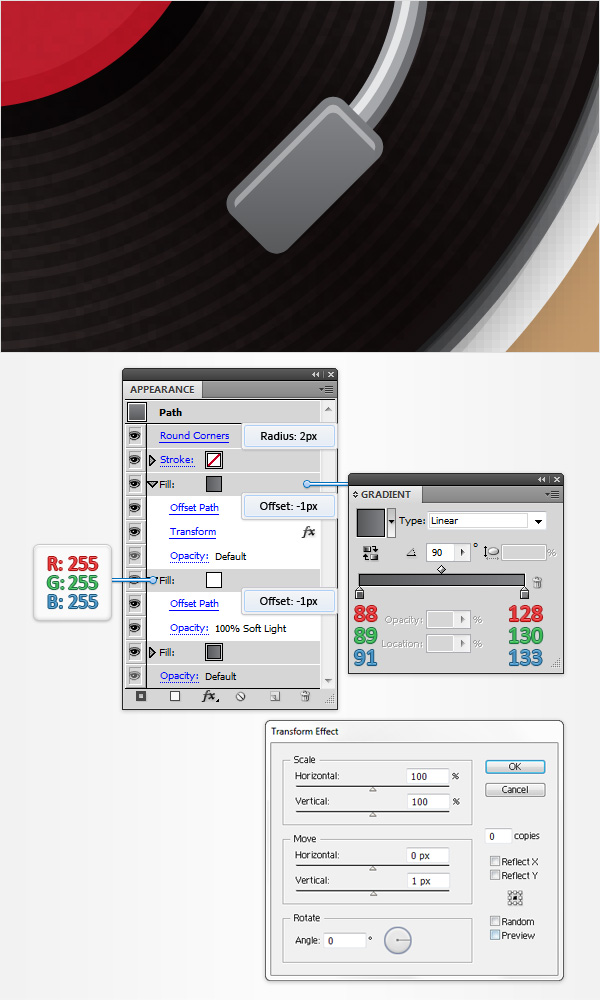
Make sure that your rotated rectangle stays selected, focus on the Appearance panel and add a second fill. Select it, set the color at white, change its Blending Mode to Soft Light and go to Effect > Path > Offset Path. Enter a -1px Offset and click OK. Return to the Appearance panel and add a third fill for your shape. Select it, add the linear gradient shown in the following image and go to Effect > Path > Offset Path. Enter a -1px Offset, click OK and go to Effect > Distort & Transform > Transform. Enter the properties shown in the following image and click OK.
Get back to the Appearance panel, select the entire path (simply click on the Path piece of text from the top of the Appearance panel) and go to Effect > Stylize > Rounded Corners. Enter a 2px Radius and click OK.
Step 10
Return to “gridline every 5px“, so simply go to Edit > Preferences > Guides & Grid and enter 5 in the Gridline every box. Reselect your path with multiple strokes along with the rotated rectangle and the “armBaseFront” mesh and Group them (Control-G). Make sure that this new group stays selected and simply add the three Drop Shadow effects (Effect > Stylize > Drop Shadow) shown in the following image.
Step 11
Reselect all the shapes and meshes that make up the arm and simply Group them (Control-G). Move to the Layers panel, double-click on this new group and name it “arm“.