Step 1: Purchase a Domain Name and Hosting Plan
If you want to build a website with WordPress, you have two options:
1. A site hosted on WordPress.com
With this model, you add your site to the existing network at WordPress.com and choose the plan that’s right for you. You can get a free site, but features will be very limited.
2. A self-hosted site via WordPress.org
This is a site you install on hosting space you buy from a hosting provider. WordPress.org software is free, so you only have to pay for web hosting. You’ll find you get much more flexibility with this model, and the site is yours; it doesn’t belong to the people at WordPress.com.
In this tutorial, we’re going to demonstrate how to create a website using the self-hosted WordPress option. So we’re going to need a hosting plan and domain name to get started.
Discount for Managed Hosting With SiteGround
SiteGround is one of the most popular WordPress hosting options. Here are some of the reasons why millions of WordPress users choose SiteGround:
- Fast and reliable hosting
- One-click WordPress installer
- Free expert support
- Auto-updates
- Free daily backups
- Free SSL certificate
We’re happy to be able to offer a huge discount of up to 75% off managed WordPress hosting, thanks to our partnership with SiteGround.
You can search for and buy a domain name when you complete your hosting purchase. SiteGround simplifies the entire process.
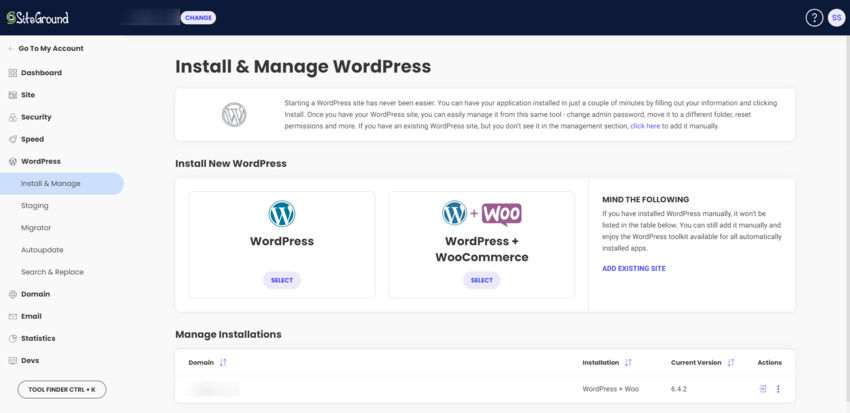
Step 2: Install WordPress
You can install WordPress in one of two ways:
- Use an auto-installer your hosting provider gives you (which is the easier way)
- Install WordPress manually on your server (which is slightly more reliable)
If you’re new to creating websites, use your host’s one-click WordPress installer. (Or WordPress + WooCommerce for ecommerce sites.)
We’ve created a guide to installing WordPress. It will walk you through both WordPress setup options:
Step 3: Get Acquainted with the WordPress Admin Screens
After you’ve installed WordPress and logged in, you’ll see the WordPress admin screens. This will always be your home base.


The menu links on the left lead you to the main areas of WordPress you’ll use to create and manage your designs, content, plugins, users, settings, and more:
Dashboard
This is the main dashboard, which acts as a shortcut to the rest of your site. Using the Screen Options tab in the top-right corner, you can customize what sort of information or shortcuts appear on this screen.
You can also update themes and plugins from the Updates page in this section.
Media
This is the library where all of your media uploads live. It includes:
- Logos
- Images
- Videos
- Audio files
- File attachments
If you import any theme demos or pre-built sites, the content will appear here as well.
Pages
You’ll add and customize the main pages of your website in this section.
Specialized pages like blog posts, ecommerce product pages, and others will not appear here. They’ll have their own dedicated sections in the WordPress menu.
Appearance
There are various tools in this section that will allow you to configure the way your site looks.
- Themes contains all your active and inactive themes.
- Widgets can be helpful for creating sidebar and footer content.
- Menus is where you create the website navigation.
Customizer allows you to do things like upload your logo and favicon, set global colors and fonts, set default page structures, and more. Your theme may come with its own customization panel as well, so you’ll need to use both.
Plugins
When you need to add extra features or functionality to your website, plugins provide a fast and convenient way to build them out. With just a couple clicks, you can set up things like Google Analytics, a live chat widget, and a security monitor.
Users
You might want to add more users to WordPress — to manage the site, write blog posts, troubleshoot, and so on. Use this area to add new users and assign them access privileges depending on what they need WordPress for.
Settings
These are the basic settings for WordPress. Review them to do things like set the home page, restrict comments, manage media sizes, and more.
Posts and Comments
If you start a blog, you’ll use these sections often. Posts is where you’ll create each new entry for your blog. It looks similar to Pages, except there are additional settings for Categories, Tags, and so on.
Comments is where you’ll manage any comments your content receives.
Other Menu Links
When you install plugins, you’ll find that some of them add extra items to the admin menus. Premium themes tend to do this as well. Some add more items to the existing menus and some (increasingly, these days) add a new main-level menu item.
Take some time to explore these admin screens and see what they do. You’ll find they make more sense once you start adding content and installing plugins and themes, which we’ll come to shortly.
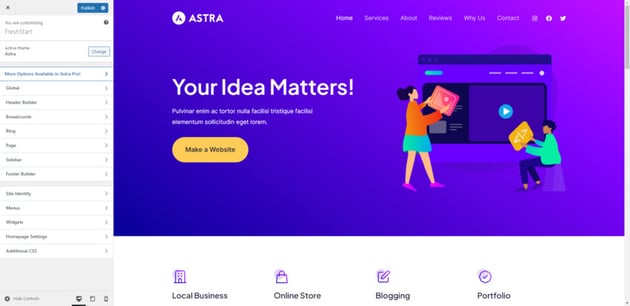
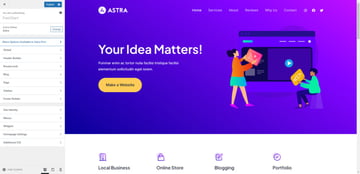
Step 4: Set Up a Theme
Every WordPress site needs a theme. This is the code that determines how your site looks and how it displays your content.
When you first enter WordPress, the default theme will be installed and activated for you. WordPress names these themes according to the year, so it’ll be called something like Twenty Twenty-Four.
Sticking with the default theme will make your site look just like millions of others, so it’s worth changing it.
There are thousands of great themes out there, and you’ll find some free ones in the WordPress.org theme repository. You’ll find these same themes in your WordPress installation.
There are two ways to find and install a free theme from WordPress. Go to Appearance > Themes. Install and activate any theme you want from this screen.
Another way to do it is via Appearance > Customize. If you use the Customizer, you can preview what your theme will look like before you activate it.


You can install as many themes as you like and try them out. But you can only have one activated.
If you want a theme with more flexibility and features, consider buying a premium theme from a provider like Envato Market. Premium themes tend to have more design demos and templates, widget areas, options for navigation and layout, niche features, and more customization options.
Once you’ve settled on a theme, spend some time configuring its settings.
Start by going to Appearance > Customize once more. Upload your logo, set your global colors, choose your fonts, and configure other settings as needed.

If your theme has added a separate section to the menu links on the left, go through the settings there one at a time as well. The more you do here, the less customizing you’ll have to do on a page-by-page basis.
The Best WordPress Themes on ThemeForest
While you can do a lot with free themes, there are limits to what you can accomplish with them. If you are creating professional WordPress sites, eventually you will want to explore paid themes.
You’ll find thousands of the best WordPress themes ever created on ThemeForest. These high-quality WordPress themes will improve the website experience for both you and your visitors.
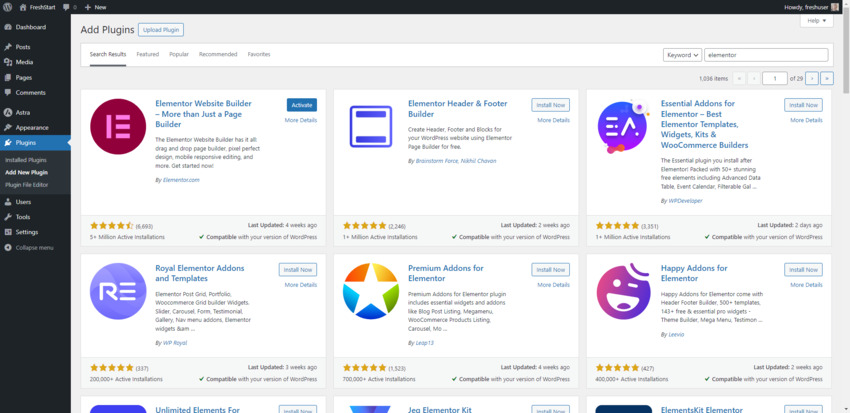
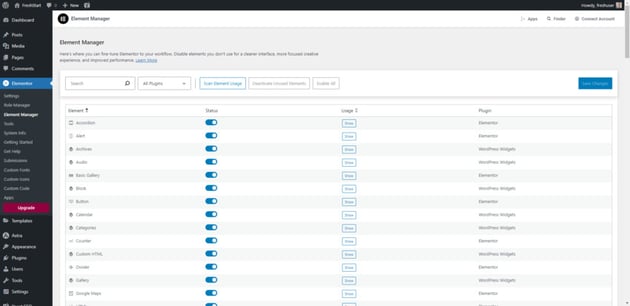
Step 5: Install WordPress Plugins
Plugins are code that you add to your site for extra features and functionality. But don’t worry: you don’t actually work with the code. You’ll make decisions about how you want each plugin to work using a variety of settings.
To install a plugin, go to Plugins > Add New. From here, you can choose from popular plugins or search for plugins with specific features. Click the Install button to install a plugin and then the Activate button to activate it.

Learn more about installing plugins in our guide.
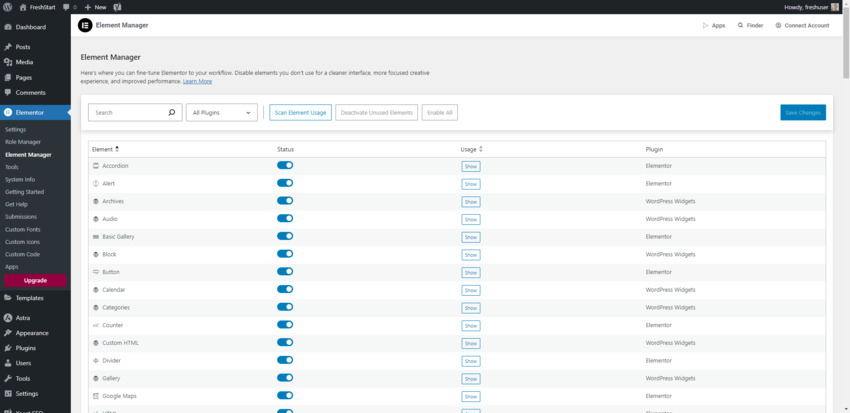
Once activated, you can manage your plugins from the Plugins screen. Here you can update plugins, deactivate and activate them, and delete them if you no longer need them. It’s wise to keep your plugins up to date so they stay fast and secure enough to use.
Also check the menu on the left. You’ll find your new plugin has settings to configure there as well. Some plugins may appear under menu links like Settings or Tools while others have their own freestanding menu area.
There are a few plugins I always install on a new WordPress site:
- Page builder plugin
- Contact form plugin
- Backup plugin
- Security plugin
- Caching plugin
- SEO plugin
Discover the best WordPress plugins to use in each of these categories by watching our free course:
Installing plugins like these will make sure your site is secure and fast, and that people can find it.
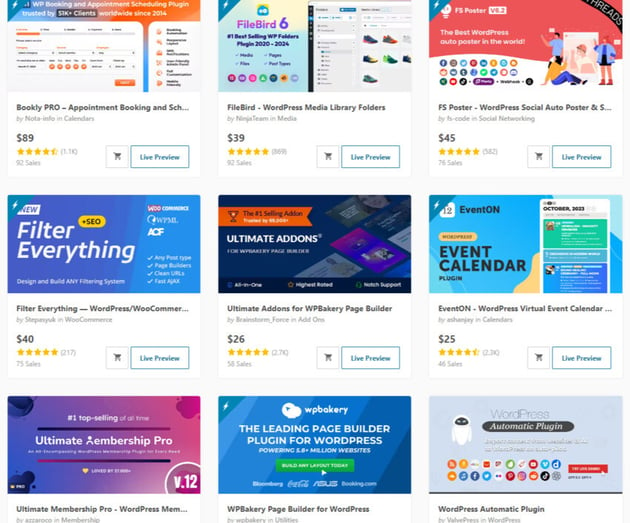
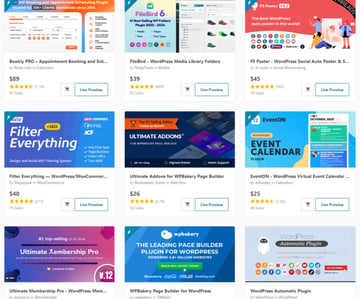
The Best WordPress Plugins on CodeCanyon
The WordPress free plugin repository has tens of thousands to choose from.
You can also find top-quality professional WordPress plugins on CodeCanyon. These plugins come with free support and lifetime upgrades and can help take your site to the next level.

Here are some recommendations to help you get started with WordPress plugins:
Step 6: Add Pages
You’re probably itching to start creating some content. Before you start, make sure you have all the pages you need.
When you install a free, generic WordPress theme, the auto-generated design usually includes essential pages like Home, About, and Contact.
Premium WordPress themes tend to come with much bigger website demos and templates. Depending on the website type, there may be pages like:
- Services
- Portfolio
- Projects
- Testimonials
- FAQs
- Staff
- Resources
They may also come with a pre-built shop or blog. Unlike the page examples above, though, these custom post types are managed in different areas in WordPress.
For now, let’s focus on pages since they house the majority of your website’s content.
To add a new page, click Pages > Add New. This takes you to the editing screen.

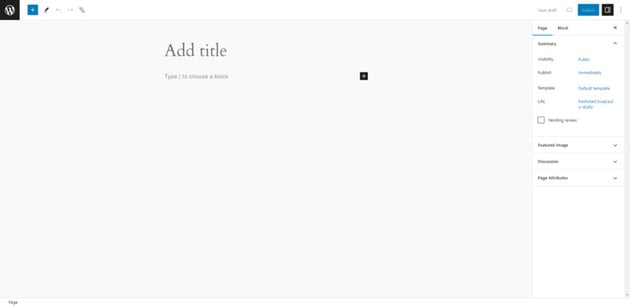

Give the page a title and click Save draft in the top-right corner. Repeat this process until you have all the pages set up that you need to start with.
You can always add more down the road as your business and website needs change.
Want a more detailed look at how to create new pages or blog posts on your website? This tutorial will get you started:
Step 7: Create Your Content
Your theme is going to be a huge time saver. Rather than build your website’s pages and layouts from-scratch, a lot of that work will be done for you already.
That said, the existing content in the template needs to be replaced with your own.
This step is the longest one in this process to complete, but it’s worth taking your time with it. You want your website to look great, be easy to use and read, and help visitors quickly accomplish their goals. It can take some time to piece this together.
Take this process page by page. For pages created by your theme, work on editing the pre-populated content. For new pages you’ve created, add new content using blocks.


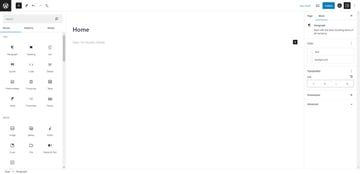
Types of blocks include:
- Paragraphs
- Headings
- Lists
- Images
- Videos
- Tables
- Buttons
You can also add formatting with blocks, like spaces, separators, and columns.
As you install plugins, you may find your list of blocks has expanded as well. For example, a contact form plugin usually adds a form block so you can easily embed it on the page (as opposed to using a shortcode).
Publishing and Editing
Once you’re happy with each page, use the Preview button to see what it looks like on the frontend of your website. When it’s good to go, use the Publish button to make it live.
By the way, you can edit your pages and custom post types at any time, even after they’ve been published. Just click on Posts or Pages and then select the post or page you want to edit. Make the changes and click the Update button.
Step 8: Edit Your Site’s Settings
So now you’ve got some content. It’s time to tweak the general settings for your site. You’ll do this via the Settings menu.
Settings you can edit include:
General: Add the basics about your website like the site title, URL, admin’s email (if it’s not you) as well as default settings related to where you’re located.
Writing: You only need to edit these settings if your website will have a blog. In that case, you can set defaults and enable emailing-in posts (which I wouldn’t recommend).
Reading: Designate a page for your home page. It can be one of the pages you just created or your blog feed. In addition, make sure the “Discourage search engines” checkbox is unchecked so that your site can be indexed and ranked in search results.
Discussion: If you have a blog, use these settings to determine who can comment and what the rules for commenting are.
Media: Set the default image sizes. This isn’t necessary, but it can be helpful if you have multiple people contributing to your site or blog.
Permalinks: Enable pretty permalinks here, which will make your URLs look nicer and improve your SEO.
Privacy: Set up your privacy policy page. WordPress can help you set one up or you can select a custom one you’ve made on your own (or with a plugin).
Step 9: Set Up the Navigation
The navigation menu is essential. Without it, people won’t be able to get around your site.
You can create as many navigation menus as you want by going to Appearance > Menus. However, most websites have just one that appears in the header of their website — either as a horizontal string of links or under a vertical hamburger (dropdown) menu.
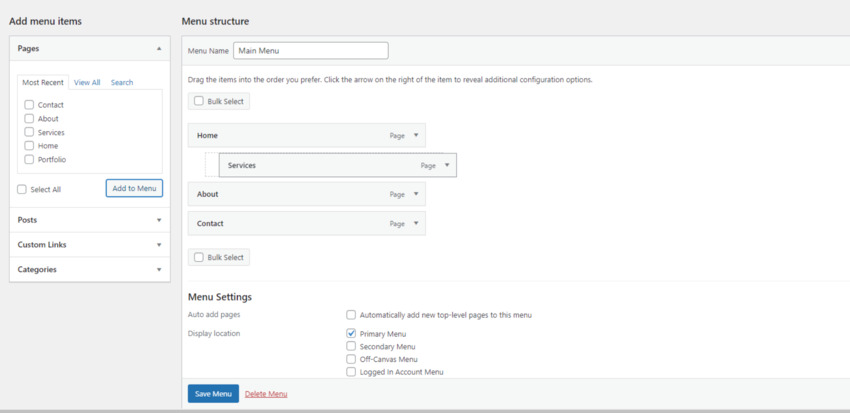
To start, create one for the header. Give it a name like Main Menu and set the Display location to Primary Menu. Click the Create menu button to generate it.
To build it out, use the panel on the left to add pages, posts, custom links, and categories to the navigation.
Check the ones you want to include and click Add to Menu. You can then drag-and-drop the various pages so that they appear in the order you want them to. You can also move them inward so that they drop down from a top-level menu link.
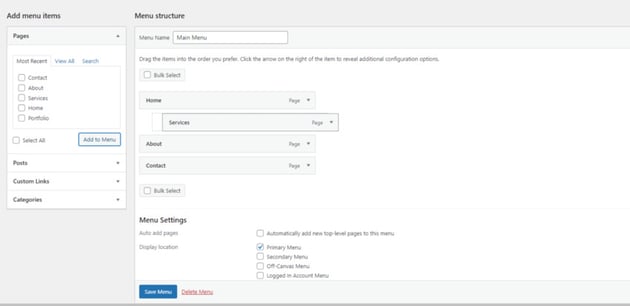
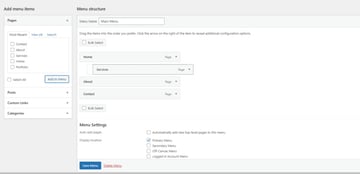
Save your changes.
If you open up your website now, you should see all of these pages — in this order and hierarchy — at the top of your site.
Step 10: Manage Your Site
Once you’ve created your site and added content to it, your job isn’t done. You’ll need to manage it on an ongoing basis.
This includes:
- Keeping the software up to date — both WordPress itself and your themes and plugins. You’ll see alerts on the Dashboard > Updates screen when new updates are available.
- Adding new content on a regular basis.
- Dealing with any security and performance issues.
- Working on your SEO to get more visitors.
- Sharing your content via social media and other channels (which you can automate with a range of plugins).
Keep on top of your website, and it will work harder for you. A stagnant site will drop through the search engine rankings and end up costing you more than it’s worth.
But if you manage it regularly, it will remain a valuable asset for you and your business.
Summary
If your goal is to build a great website, WordPress is the way to go.
Working with WordPress isn’t as difficult as some people may tell you. Once you’ve installed the software and gotten acquainted with the admin screens, that’s when the fun begins.
While you could easily throw something together in a couple hours, spend some time with your site. Find a beautiful WordPress theme for it, add cool features and functionality, and create content that captures the attention of visitors and makes them want to take action.
Over time, you’ll see your content expand and your visitor numbers grow. Enjoy!