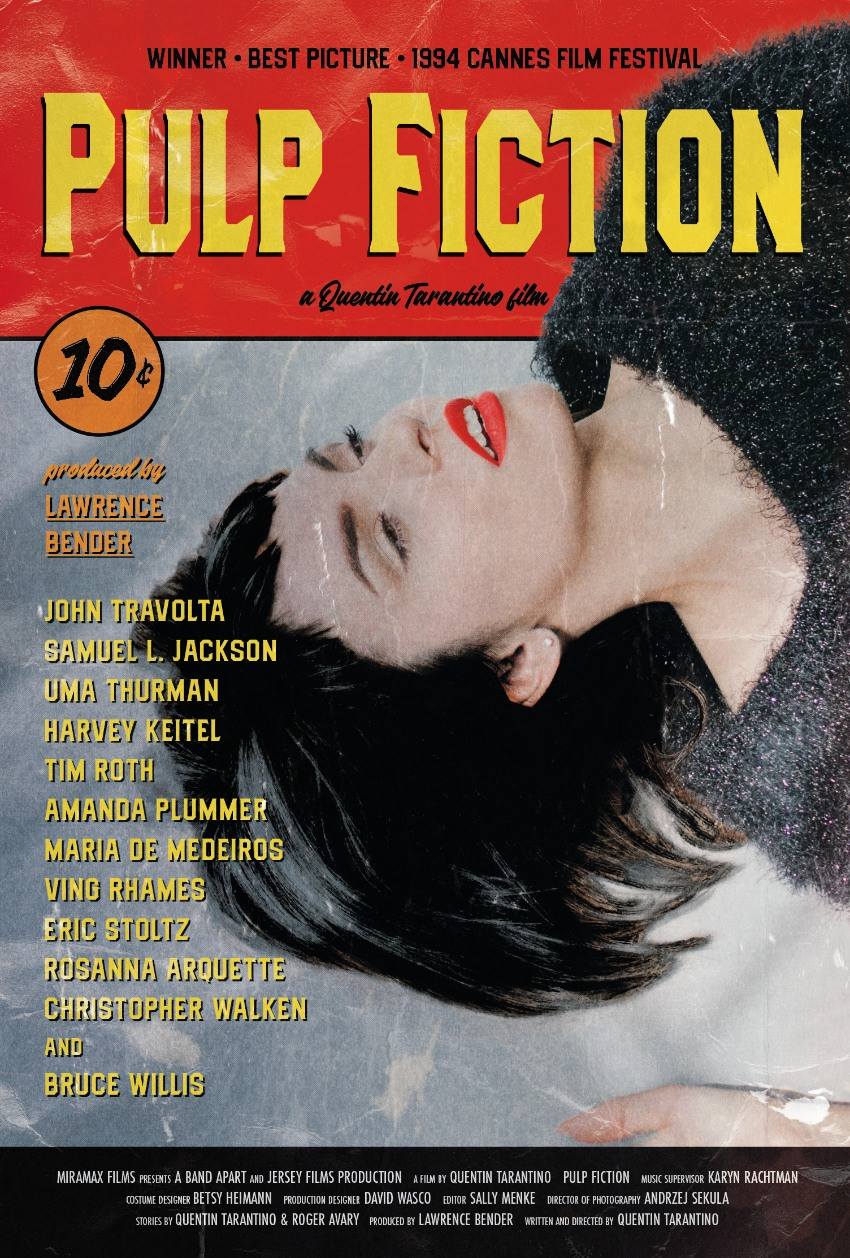
Who Designed the Pulp Fiction Poster?
Directed and written by Quentin Tarantino, Pulp Fiction is a cult movie that tells the interwoven—and frequently violent—stories of criminals and mobsters in the seedy underworld of Los Angeles.
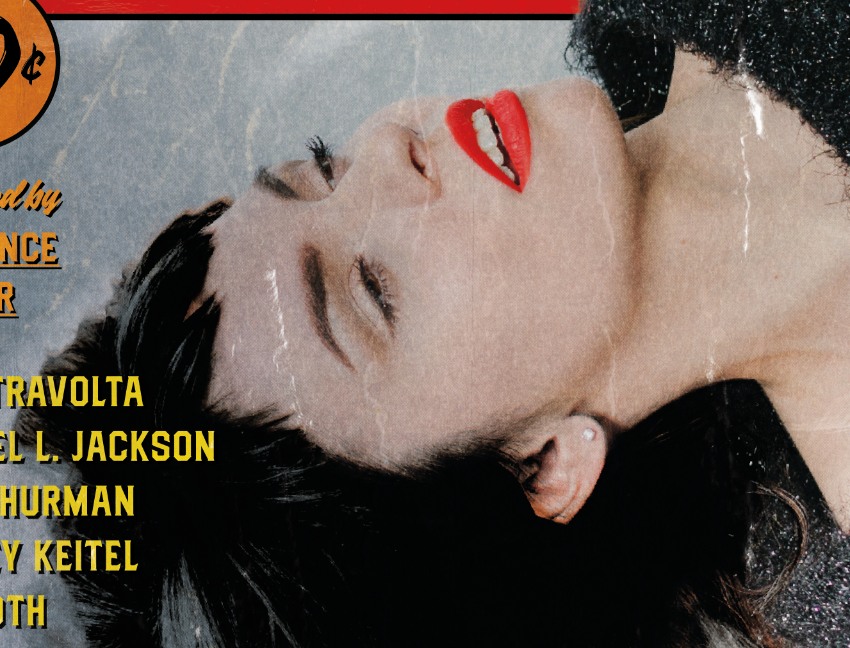
The Pulp Fiction movie poster was released by studio Miramax to mark the film’s release in 1994, but the credit for the Pulp Fiction artwork is somewhat disputed. While the artwork for the poster, including the typography and layout, was created by poster designer James Verdesoto (who also created movie posters for The English Patient and Ocean’s Eleven), the iconic photograph of Uma Thurman as femme fatale Mia is still the subject of an ownership dispute.
In a 2021 lawsuit, LA-based photographer Firooz Zahedi argues he should have a greater copyright claim to the image, which he claims to have staged, art directed, and shot. After he received a fee of $10,000, Zahedi argued that the poster went on to be used by Miramax across thousands of consumer products without his copyright consent. While the claim to the iconic photograph is still unclear, the image of mobster wife Mia lounging across a motel bed surrounded by seedy props is undoubtedly one of the most iconic photos in contemporary cinema.
In this tutorial we’ll create a spin on the original Pulp Fiction movie poster, taking inspiration from the Pulp Fiction artwork to create a vintage-inspired, film noir poster design. Read on to find out how to create your very own Pulp Fiction movie poster.
How to Make the Pulp Fiction Poster
The original Pulp Fiction movie poster uses design elements that recreate the look and feel of a well-worn pulp fiction book. What font is used on the Pulp Fiction poster? The Pulp Fiction typography is heavily inspired by vintage pulp fiction and comic book styling, with chunky display fonts in a Western signage style.
To create the Pulp Fiction poster, you’ll need to download the following fonts, textures, and images.
Fonts
Textures
Photo
We’ll be using Adobe InDesign to set up the poster layout and Adobe Photoshop to edit the photography, to give Mia her distinctive black bob and red lipstick.
1. How to Set Up Your Pulp Fiction Movie Poster in InDesign
Step 1
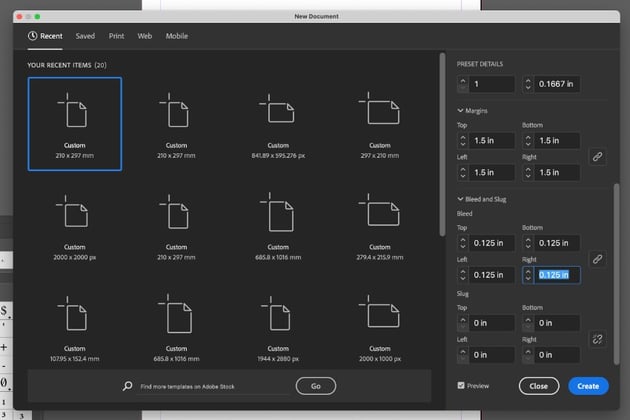
Open InDesign and go to File > New > Document. Set the Width of the document to 27 in and Height to 40 in, to create a standard movie poster size.
Set the Margins to 1.5 in and add a Bleed of 0.125 in, before clicking Create.


Step 2
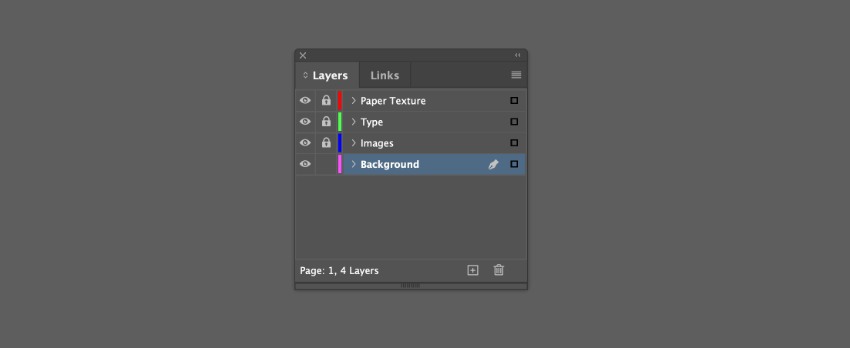
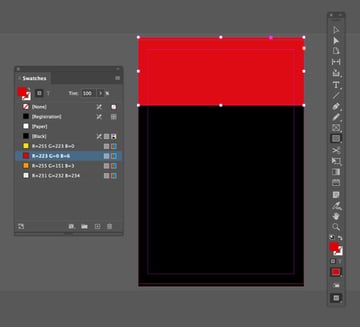
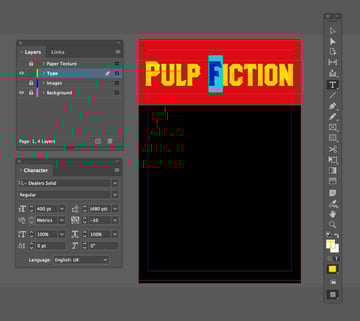
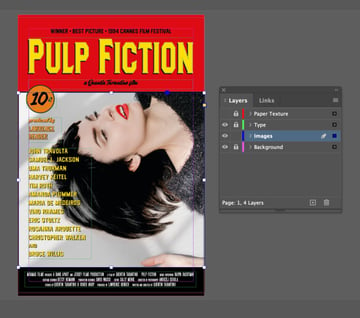
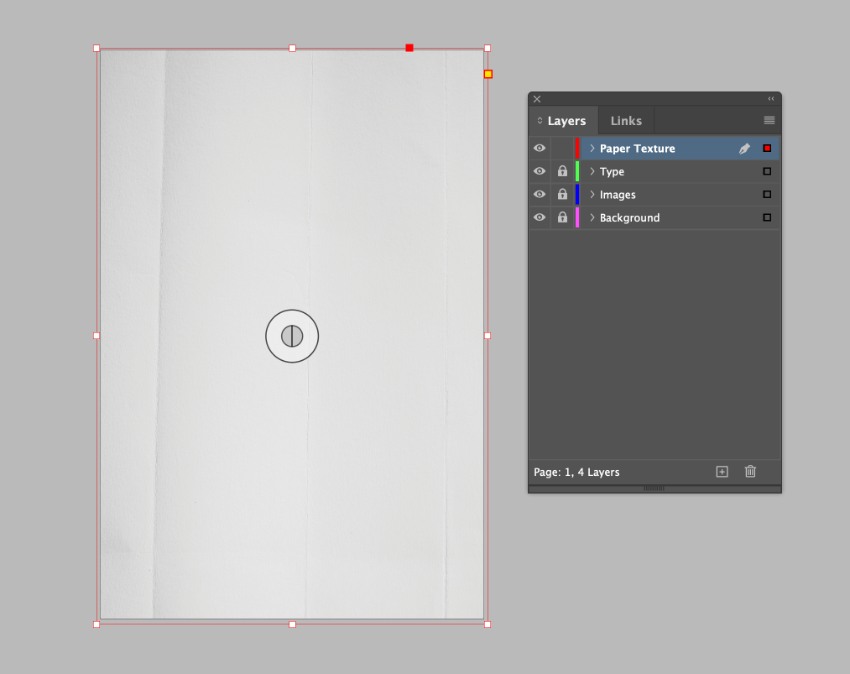
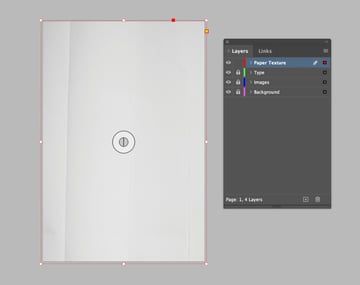
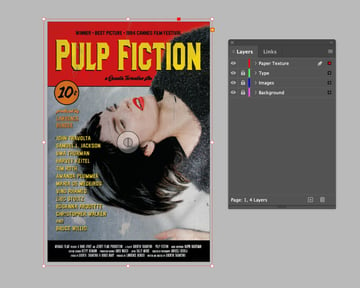
Go to the Layers panel (Window > Layers) and create four new layers, in the order: Background, Images, Type, and Paper Texture at the top.
Lock all of the layers except Background, which we’ll work on first.

Step 3
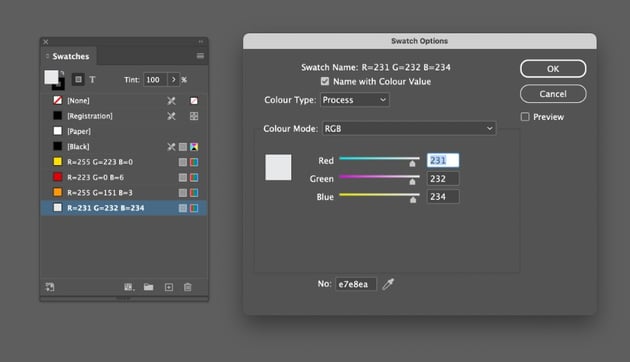
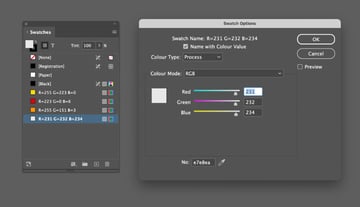
Next, we’ll create some color swatches to use on our Pulp Fiction poster. Go to Window > Color > Swatches, and choose New Color Swatch from the panel’s menu.
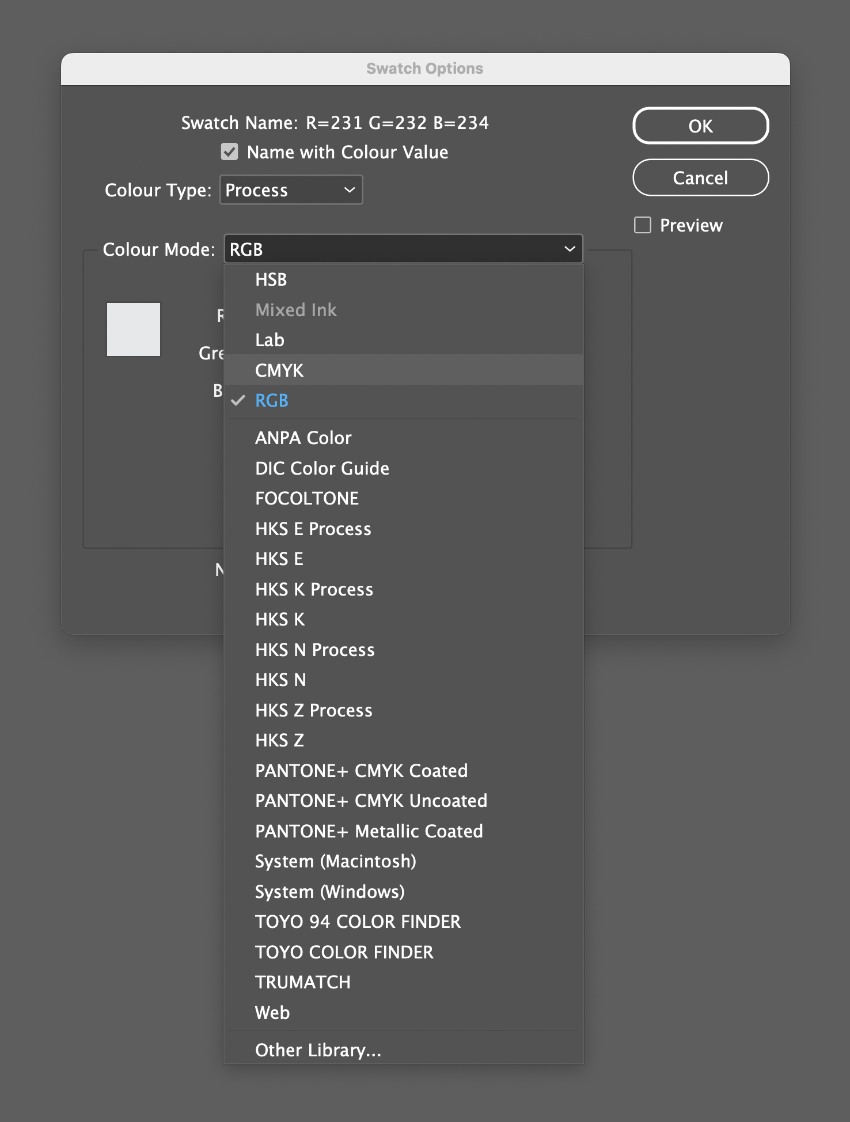
I’m going to create a digital poster for sharing online, so I will create RGB versions of the swatches. If you want to create a poster for printing, simply enter the RGB values below, and then convert the Color Mode of your swatches to CMYK from the Swatch Options window.


The first swatch is a yellow, R=255 G=223 B=0. Create three additional swatches: R=223 G=0 B=6 (red), R=255 G=151 B=3 (orange), and R=231 G=232 B=234 (off-white).

Step 4
Working on the Background layer, use the Rectangle Tool (M) to create a shape across the whole page, setting the Fill to [Black].
Create a second rectangle, smaller than the last and at the top of the poster. Set the Fill of this to red.


2. How to Add Comic Book Typography to Your Pulp Fiction Poster Design
Step 1
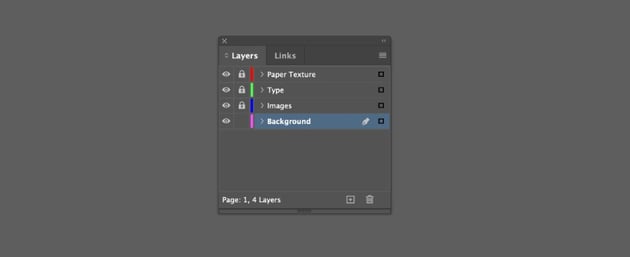
Lock the Background layer and unlock the Type layer.
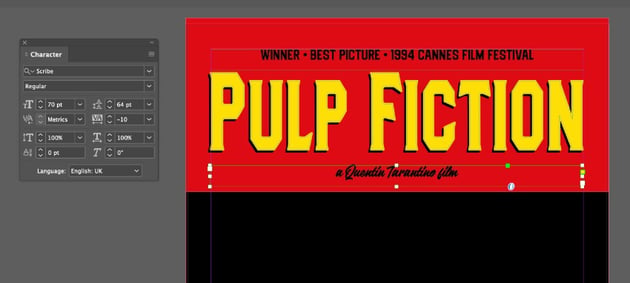
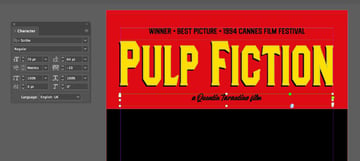
Use the Type Tool (T) to create a large text frame across the top of the red section of the poster, typing in the movie title and setting the Font to Dealers Solid, with the first two letters of each word set to 400 pt. Set the other letters to around 360 pt. Set the Font Color of the title to yellow.

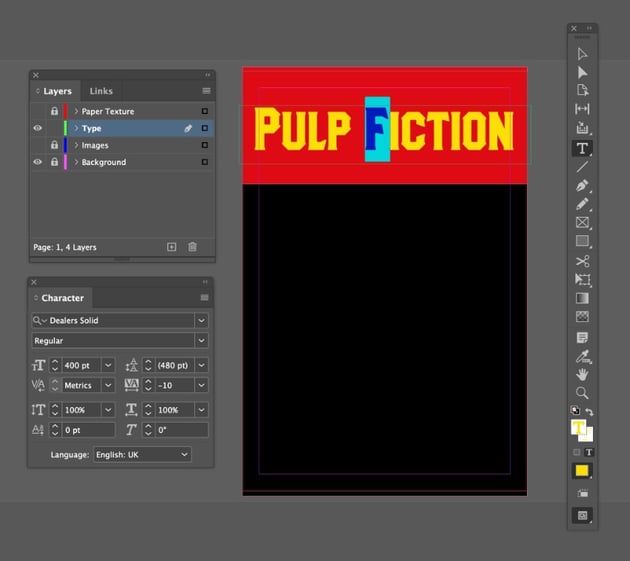
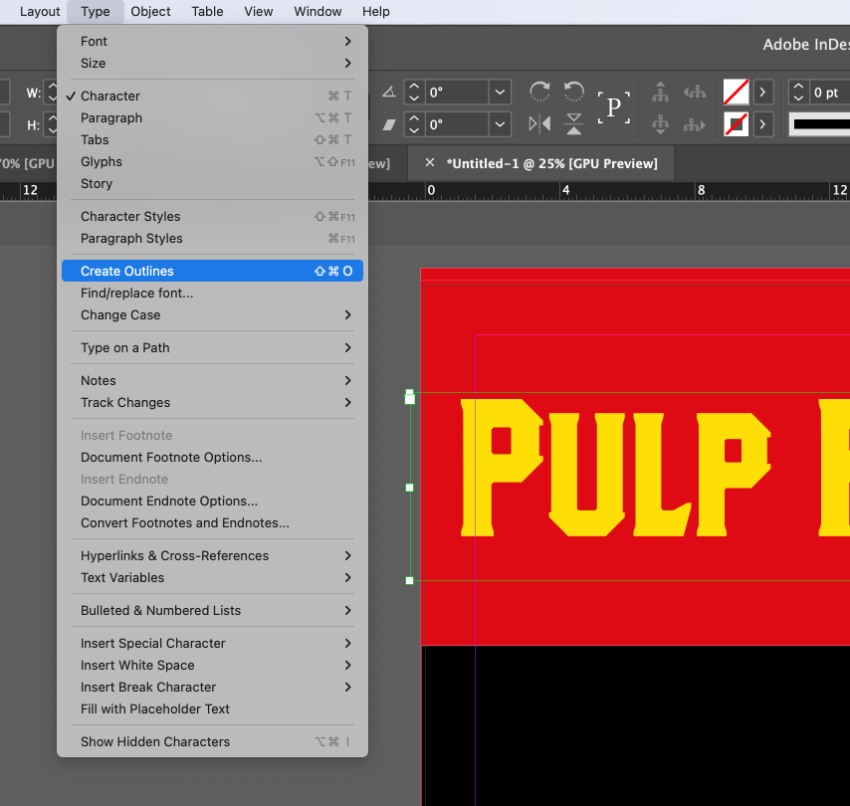
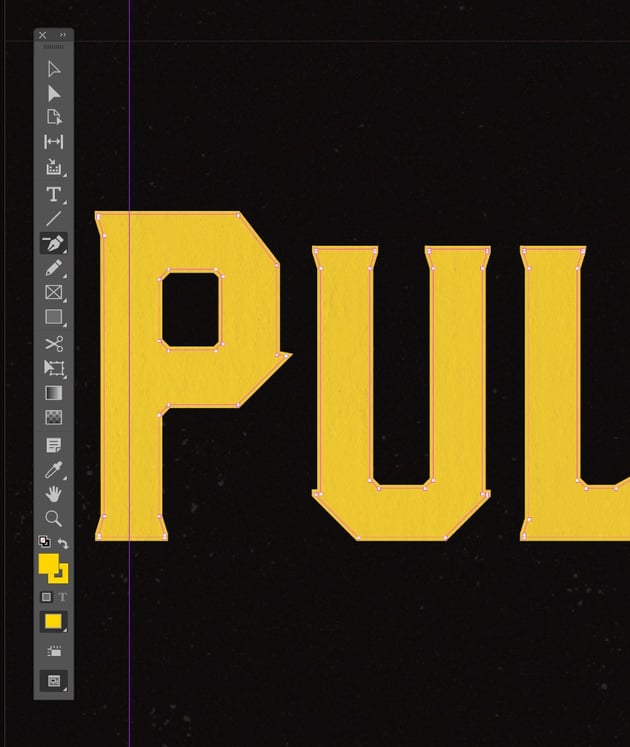
Go to Type > Create Outlines to vectorize the text. Pull the text upwards to create a more condensed effect.


Select the Delete Anchor Point Tool (-) and zoom into the vector text. Use the tool to select and delete any of the serif details on the type, to create a cleaner effect.


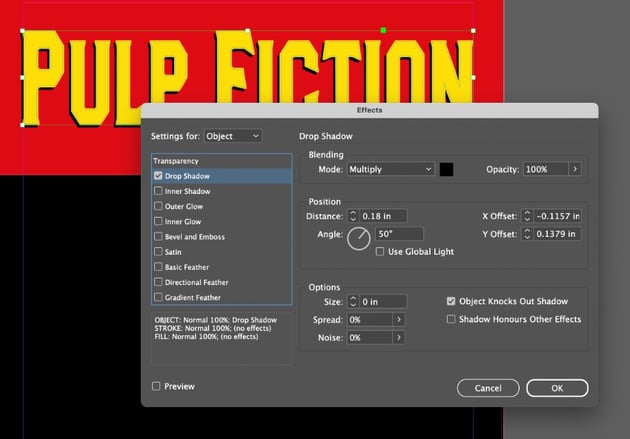
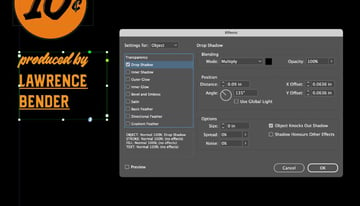
Then with the whole title selected, go to Object > Effects > Drop Shadow. With the shadow color set to [Black] and Opacity to 100%, set the Distance to 0.18 in, Angle to 50, and Size, Spread, and Noise to 0. Click OK.


Step 2
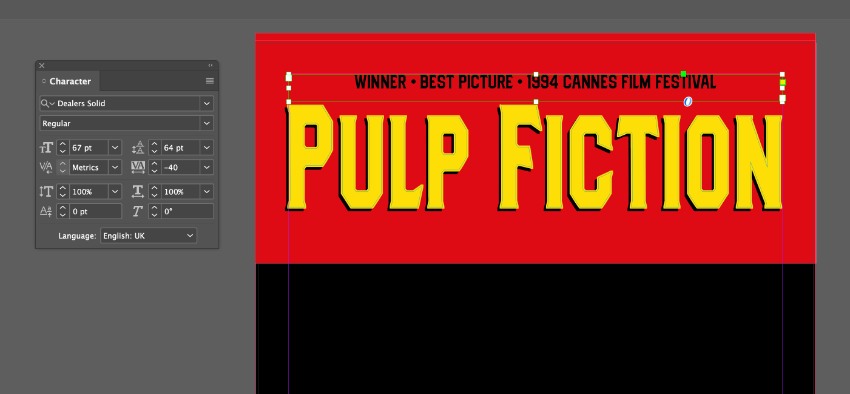
Create a text frame above the title, for listing the award credit, and set this in Dealers Solid, Size 67 pt, and a [Black] Font Color.


Create a second text frame below the Pulp Fiction movie font, listing the director’s name, and setting this in Scribe, 70 pt.

Step 3
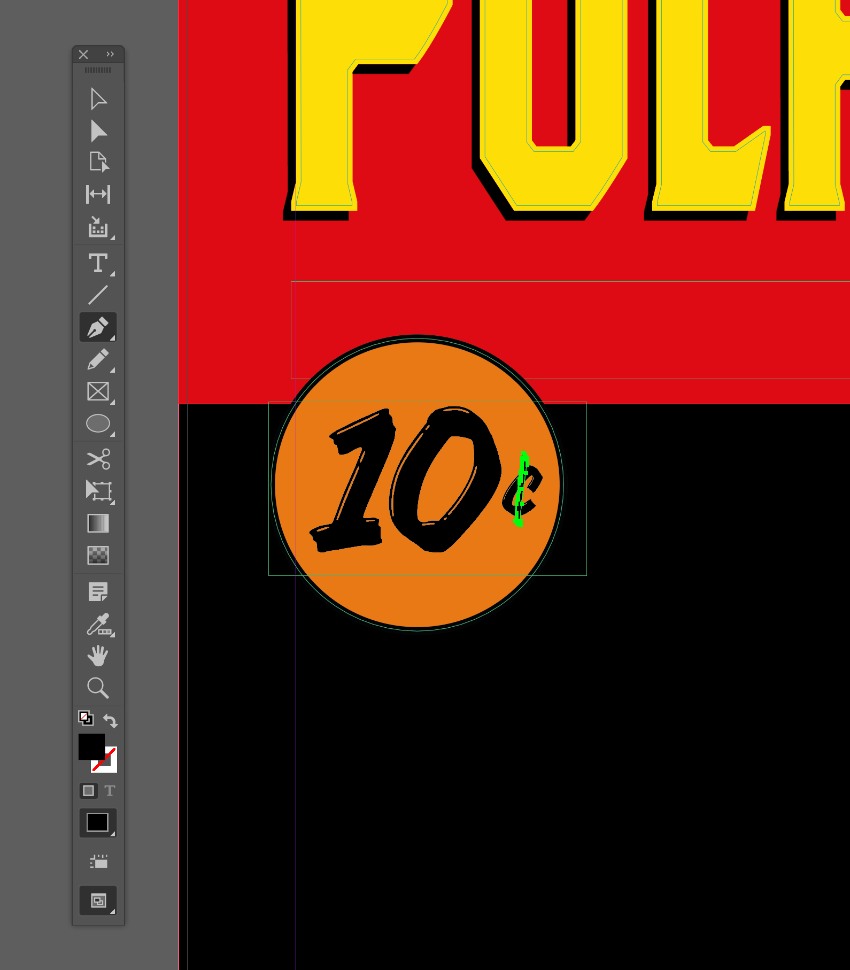
Use the Ellipse Tool (L) to create a circle to the left of the poster, overlapping the red and black boundary. Set the Fill to orange and Stroke Color to [Black], with a Stroke Weight of around 7.5 pt.
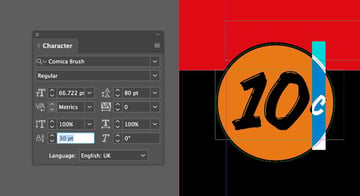
Create a text frame over the top of this, typing in ‘10c’ and setting the Font to Comica Brush, Size 200 pt. Make the ‘c’ much smaller, and increase the Baseline Shift to around 30, to shift it higher.
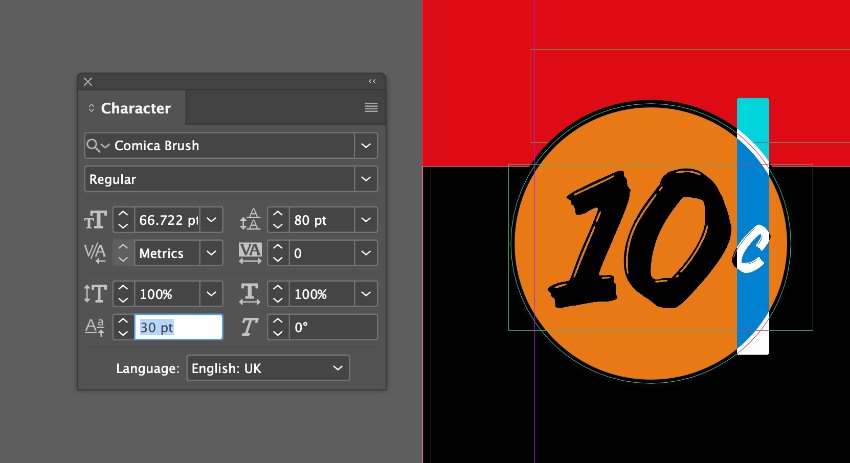

To create the cent icon, use the Pen Tool (P) to draw a rough line over the top of the ‘c’.

Step 4
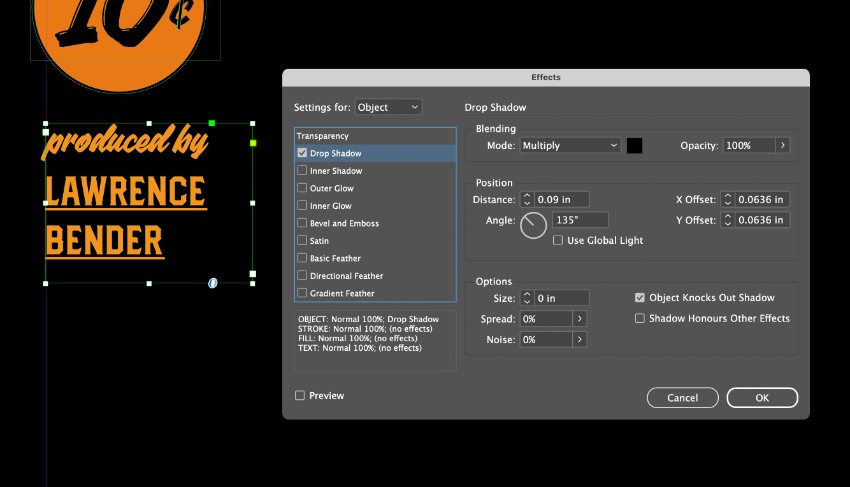
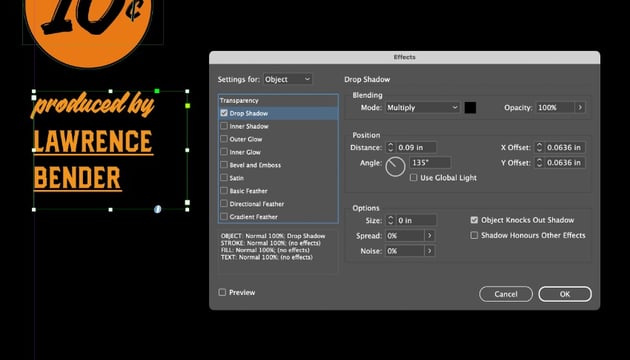
Add the producer name below, setting the font to Dealers Solid, an orange Font Color and adding an Underline.
As we did with the movie title, add a clean drop shadow to the text frame (Object > Effects > Drop Shadow). You won’t be able to see this yet, but once the photo is added to the Pulp Fiction poster it will help the text to stand out.
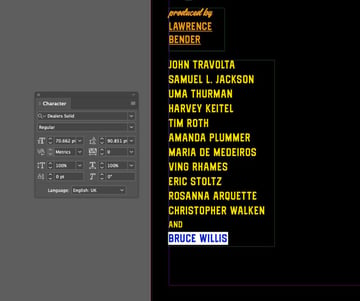
Set the cast names in a text frame below, flushed left to the margin line. Set the Font to Dealers Solid, a yellow Font Color and, as before, add a crisp drop shadow to the whole text frame.
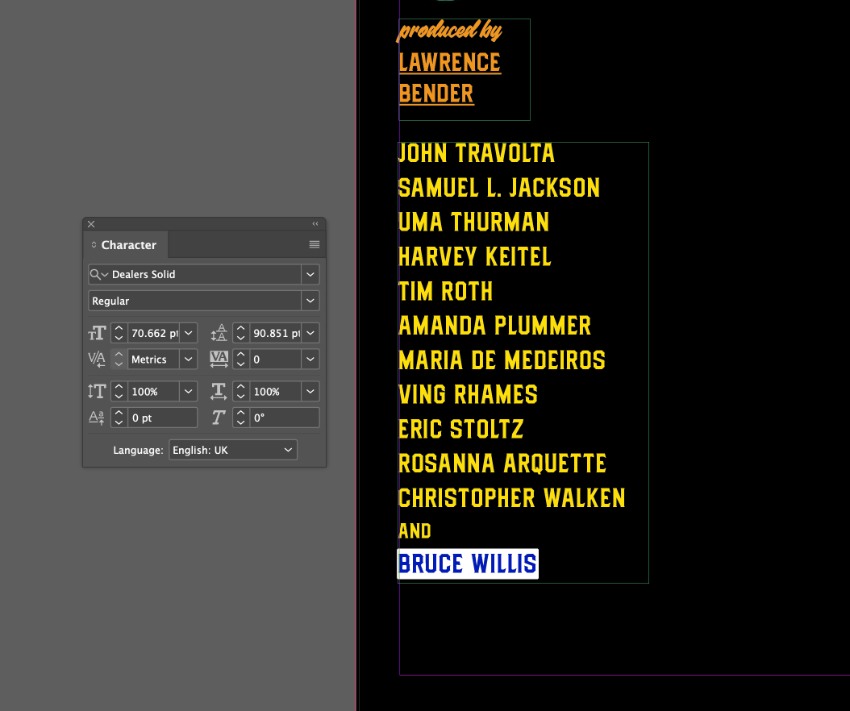

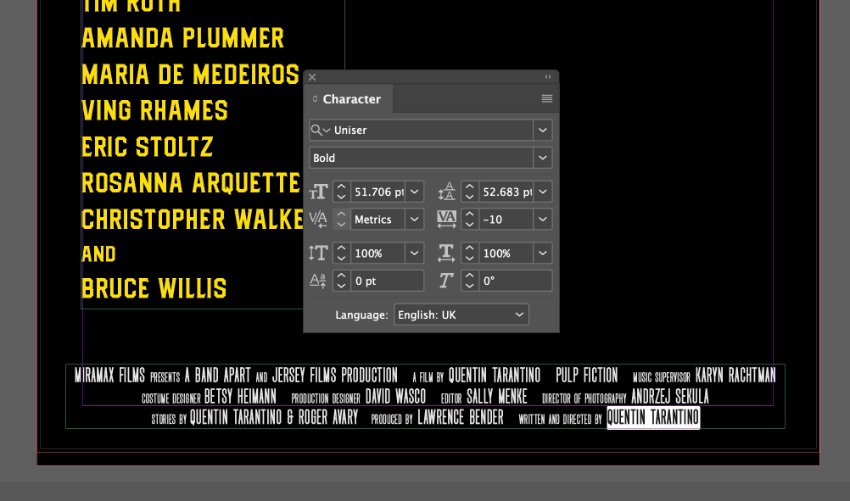
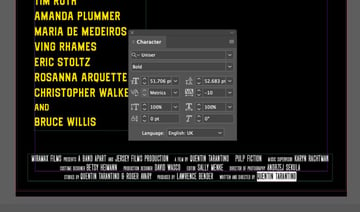
Add a text frame of movie credits to the bottom of the poster layout, setting the Font to Uniser Bold, All Caps and an off-white Font Color. Increase the size of the names to create contrast throughout.

3. How to Edit Photography for Your Pulp Fiction Poster
Step 1
We have an image of Mia to hand, but we can give her that distinctive black bob and red lipstick in Photoshop before we use it on the poster design. For now, File > Save your InDesign document and minimize the window.
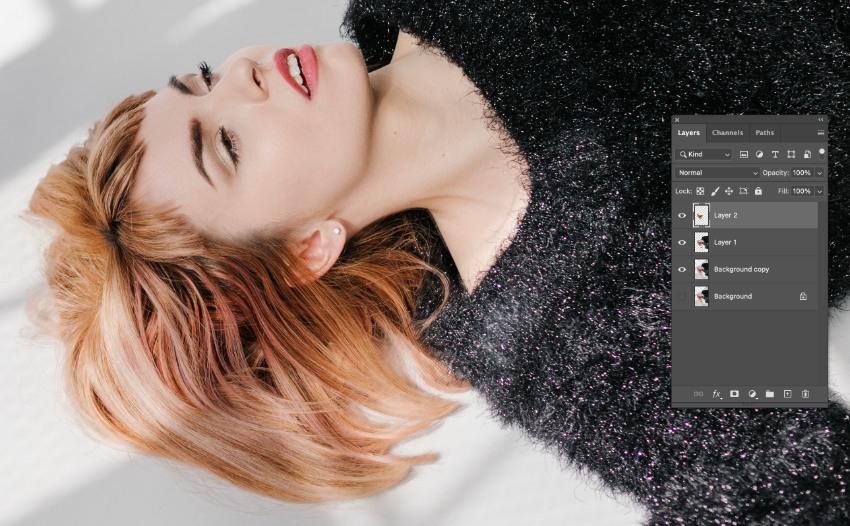
Open the image in Photoshop, and from the Layers panel duplicate the Background layer. Lock the Background layer, and switch off its visibility.
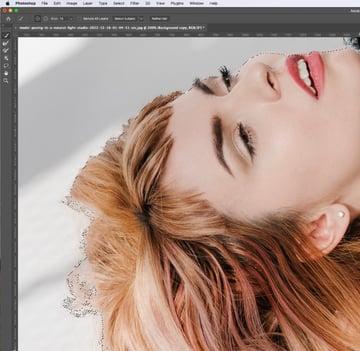
Select the Object Selection Tool (W) and then click Select Subject from the top Controls panel. When you hover over the subject in your image Photoshop will automatically select it.
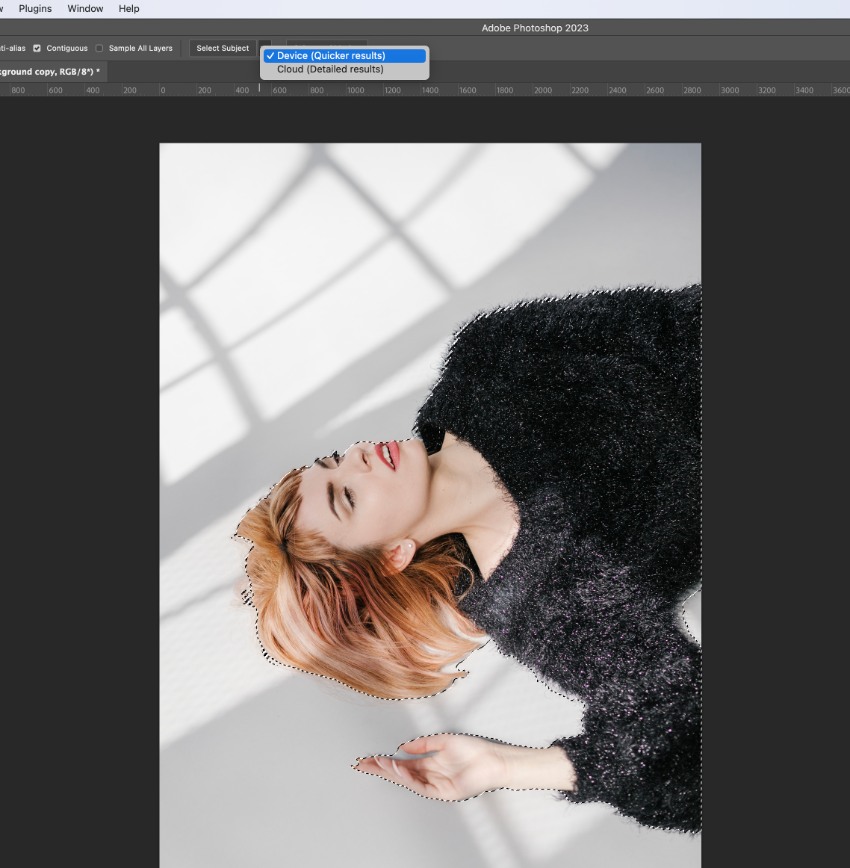
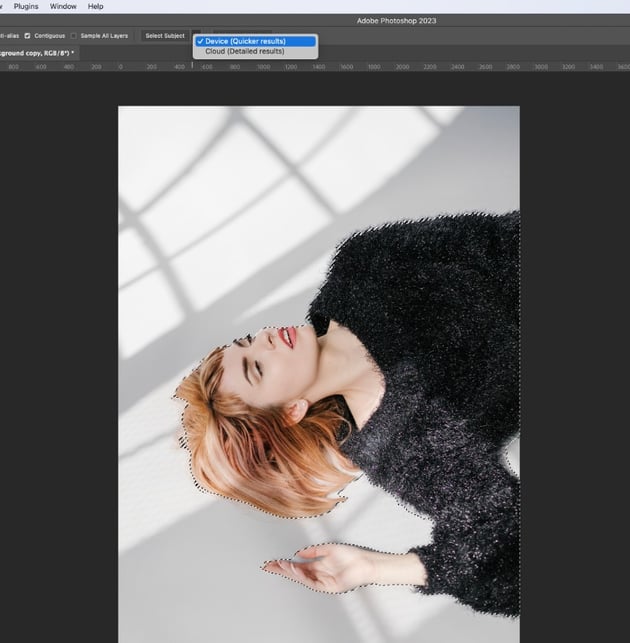

To refine the selection click on Select and Mask in the top Controls panel. In the Properties window that opens, check Smart Radius and shift the Radius and Shift Edge sliders until you are happy with the result. Focus particularly on creating an accurate line around the edge of the subject’s jumper and hair. Click OK to exit.

Copy and Paste the selected subject onto a new layer.


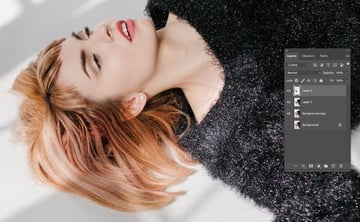
Step 2
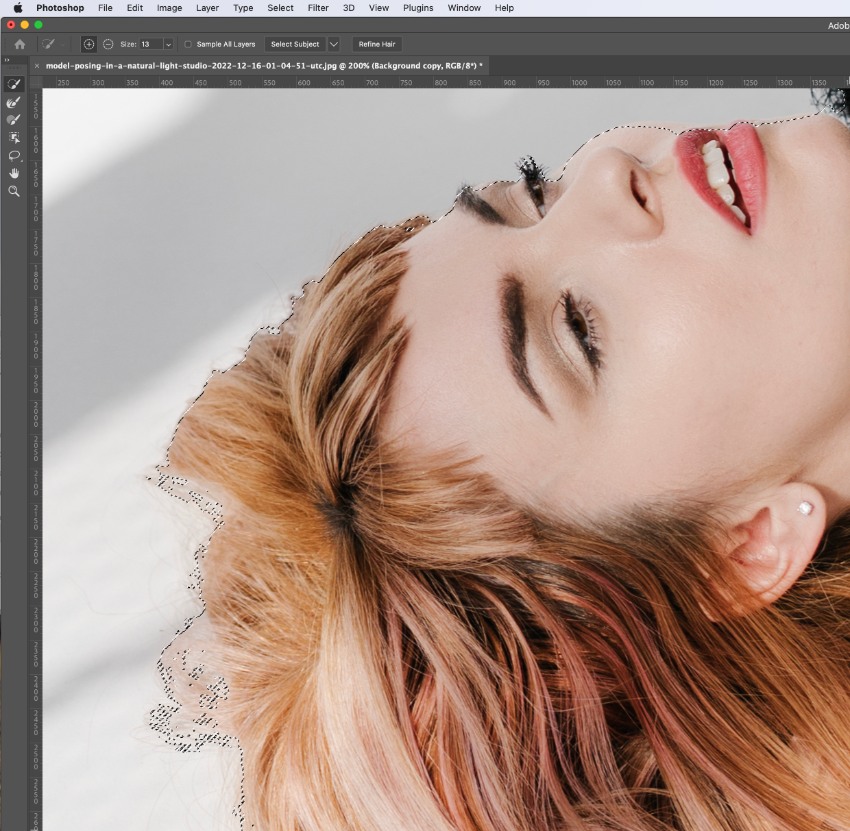
Now we have isolated the subject, we can work on changing the color of her hair. Select the hair on the original image using the Lasso Tool (L), and click on Refine Hair in the top Controls panel to get the selection really tight.
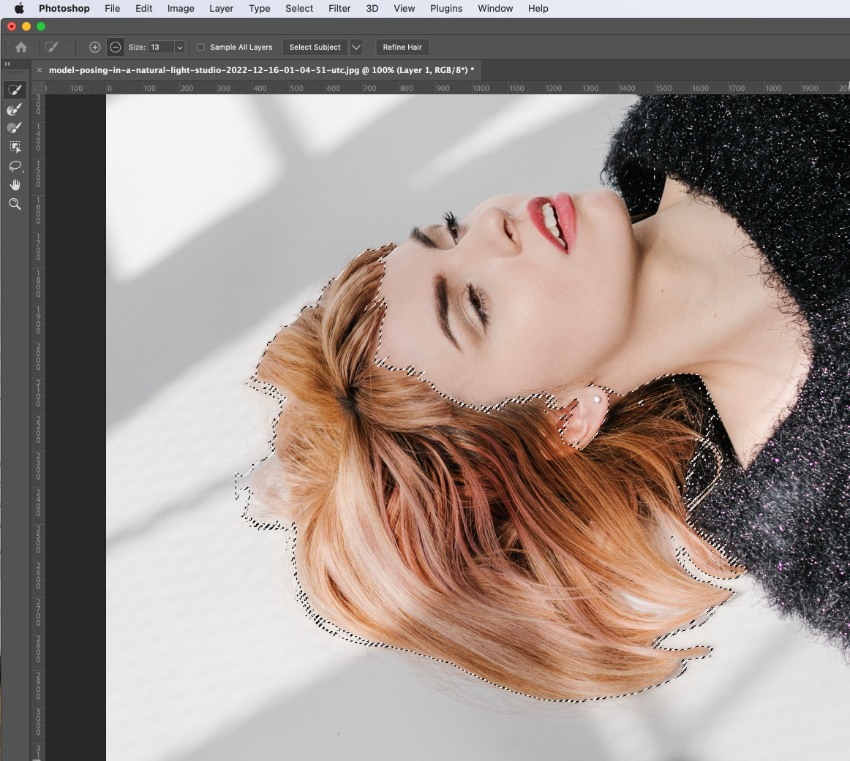

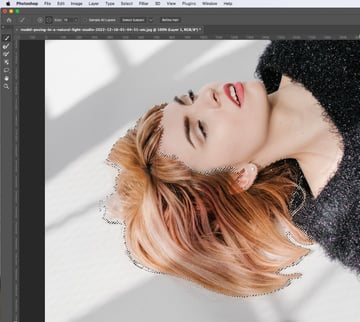
Copy and Paste the selection onto a new layer.

Now from the Adjustment layer menu at the bottom of the Layers panel, choose Black & White, to switch the hair to a gray color. Use the Option key to attach the adjustment layer to the hair layer below.
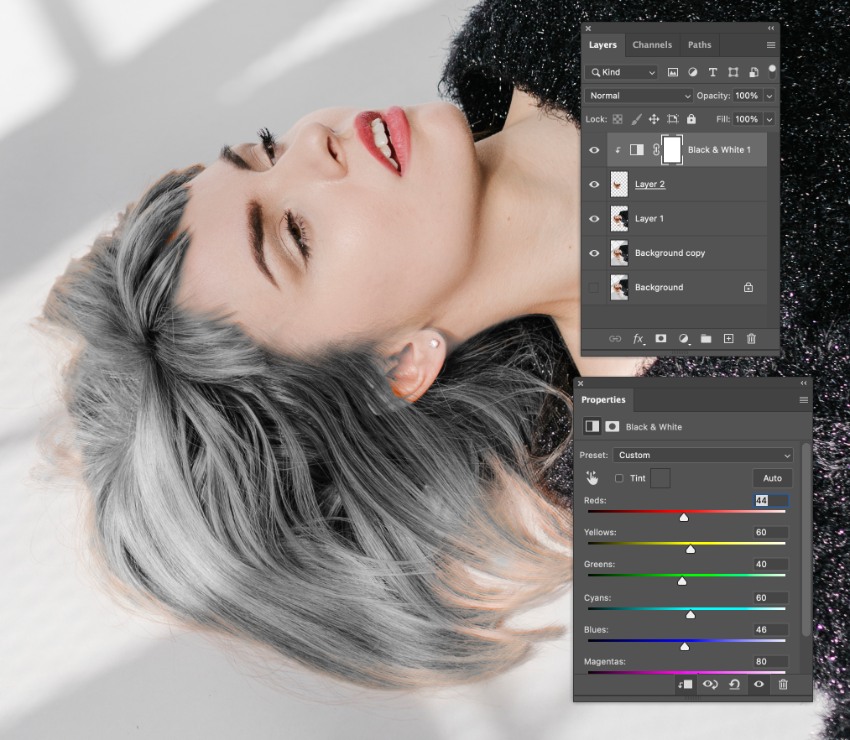
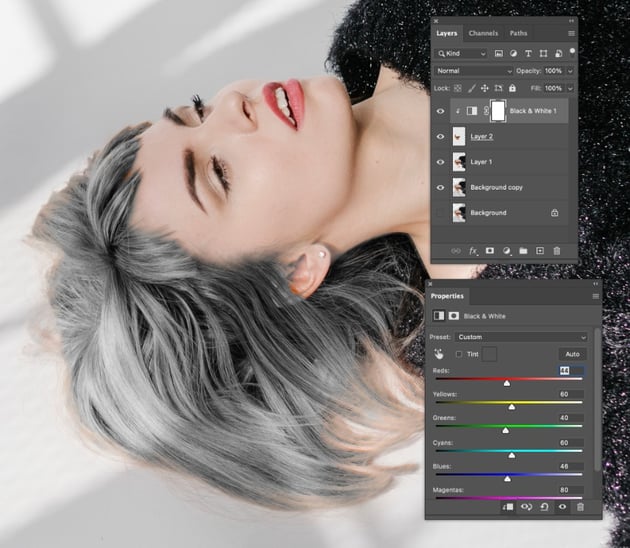
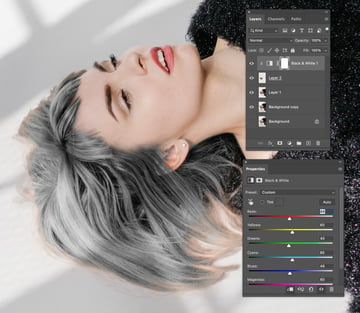
Check the Tint box and switch the Tint Color to black. On the Custom Preset, move the color sliders down to saturate the hair with the black hue.


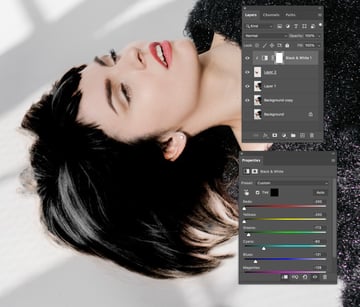
To increase the black effect further, you can duplicate both the hair and Black & White layers to create a copy above, deepening the inky color.

Step 3
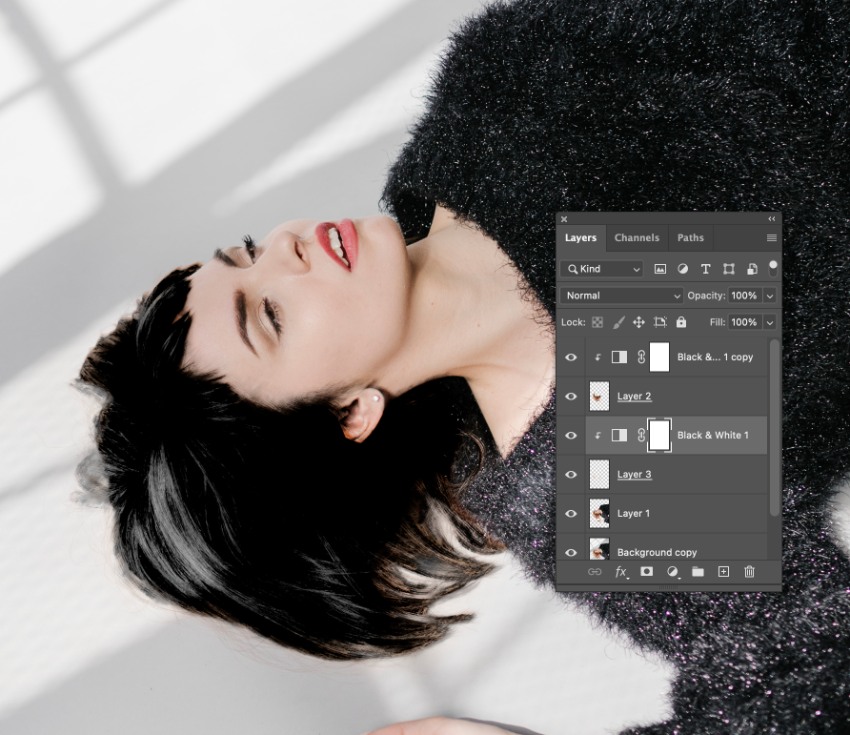
Return to the layer which has the image of Mia without the background. Use the Lasso Tool (L) to select her lips.
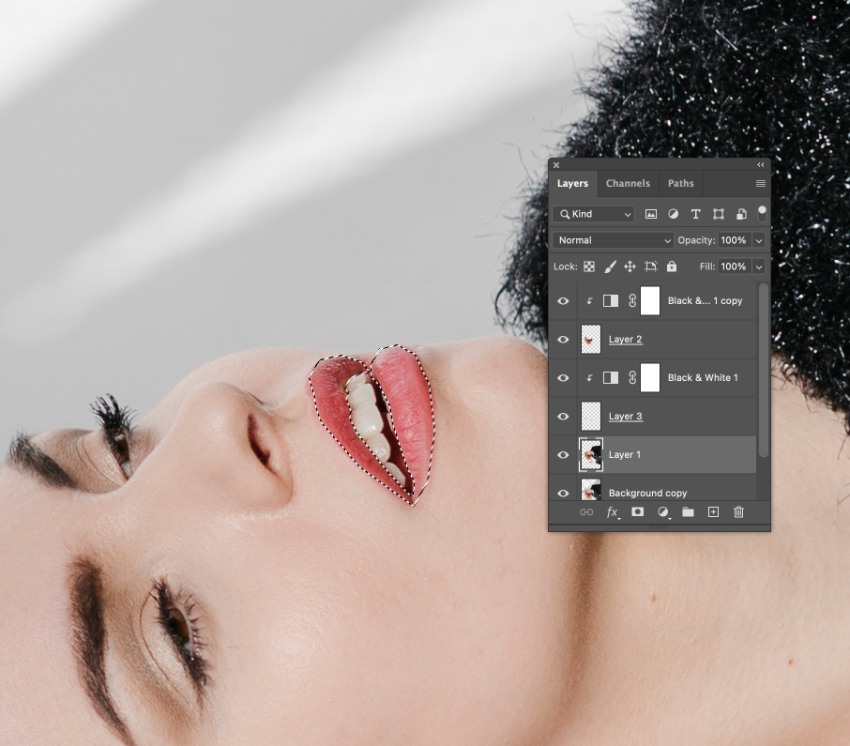


Create a Color Balance adjustment layer attached to the lips selection. Increase the amount of Red in the Midtones to +100. Increase the level of Red to +54 in the Shadows Tone, and shift the color sliders on the Highlights Tone to really push the vibrancy of the lips.


Step 4
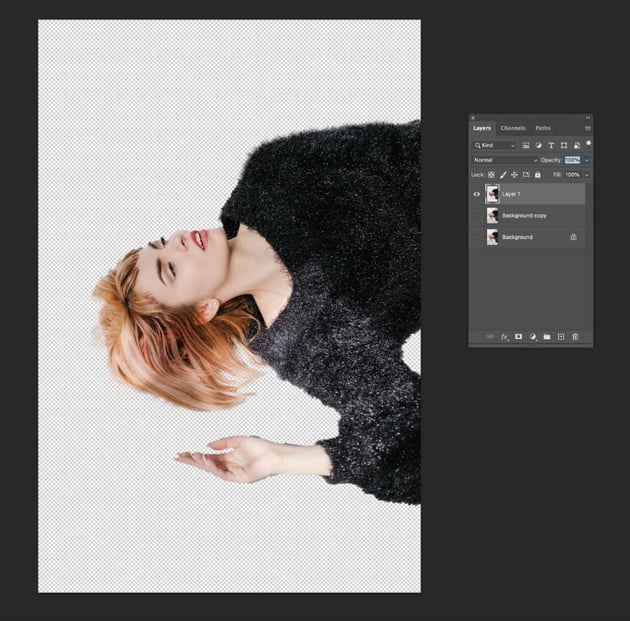
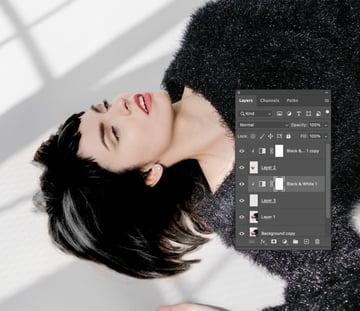
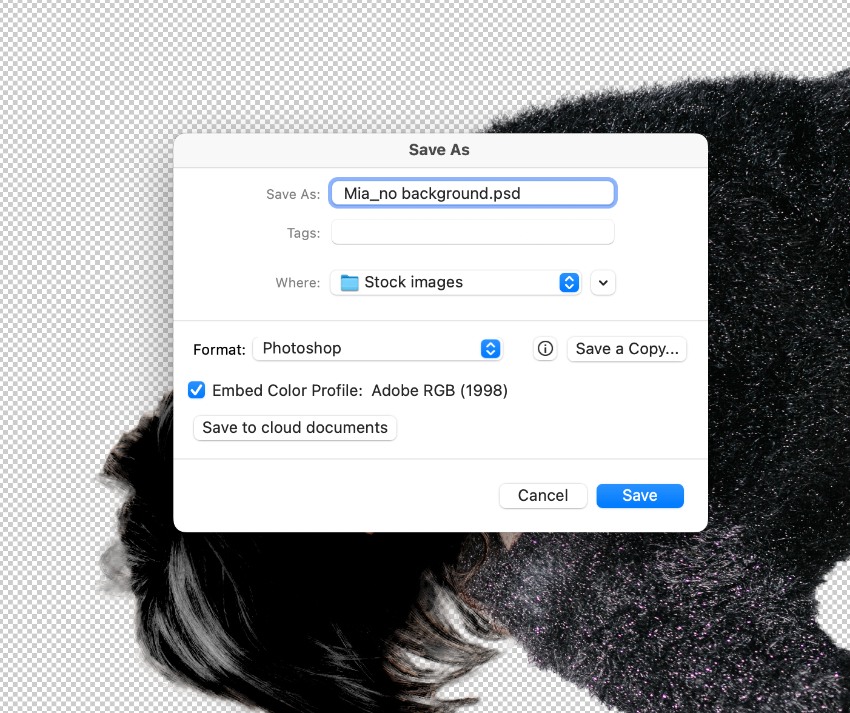
With your image edited, we can now export two versions of Mia—one without a background and one with the background intact.
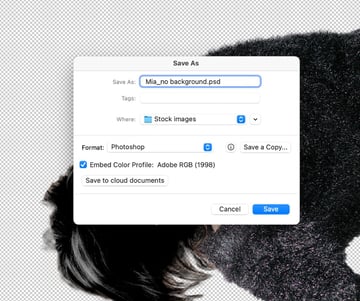
Select the layer of Mia without the background, and switch off the layers below. Go to File > Save As, and save this as a PSD file called ‘Mia_no background’.

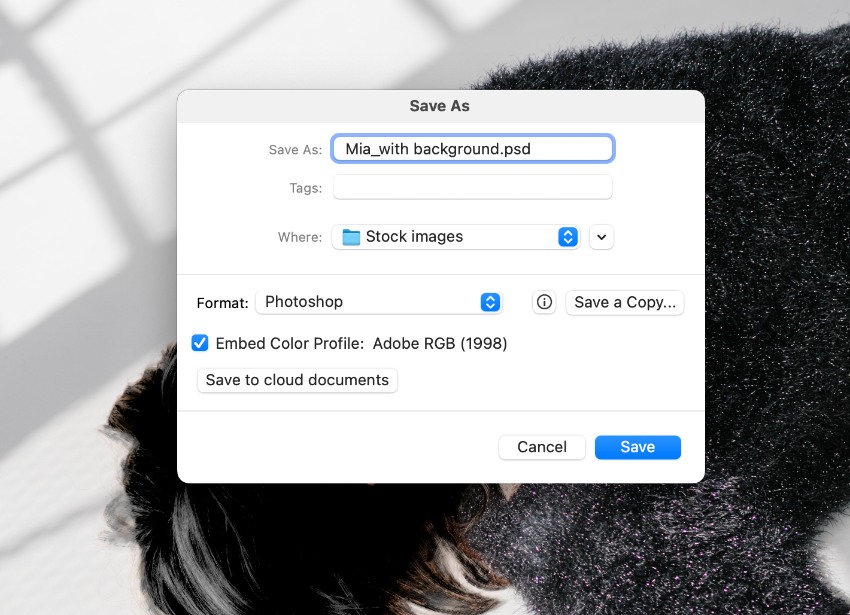
Back in Photoshop, switch on the layers below and Save As, naming it ‘Mia_with background’.


4. How to Place Mia on Your Pulp Fiction Artwork
Step 1
Return to your InDesign poster, and unlock the Images layer.
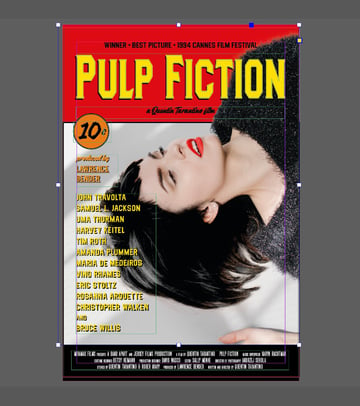
Use the Rectangle Frame Tool (F) to create an image frame across the center section of the poster, below the red movie title section, allowing for a black section to remain at the bottom of the poster. File > Place the version of Mia with her background intact.


When you’re happy with the placement of Mia, and with the image frame selected, Edit > Copy and Edit > Paste in Place.
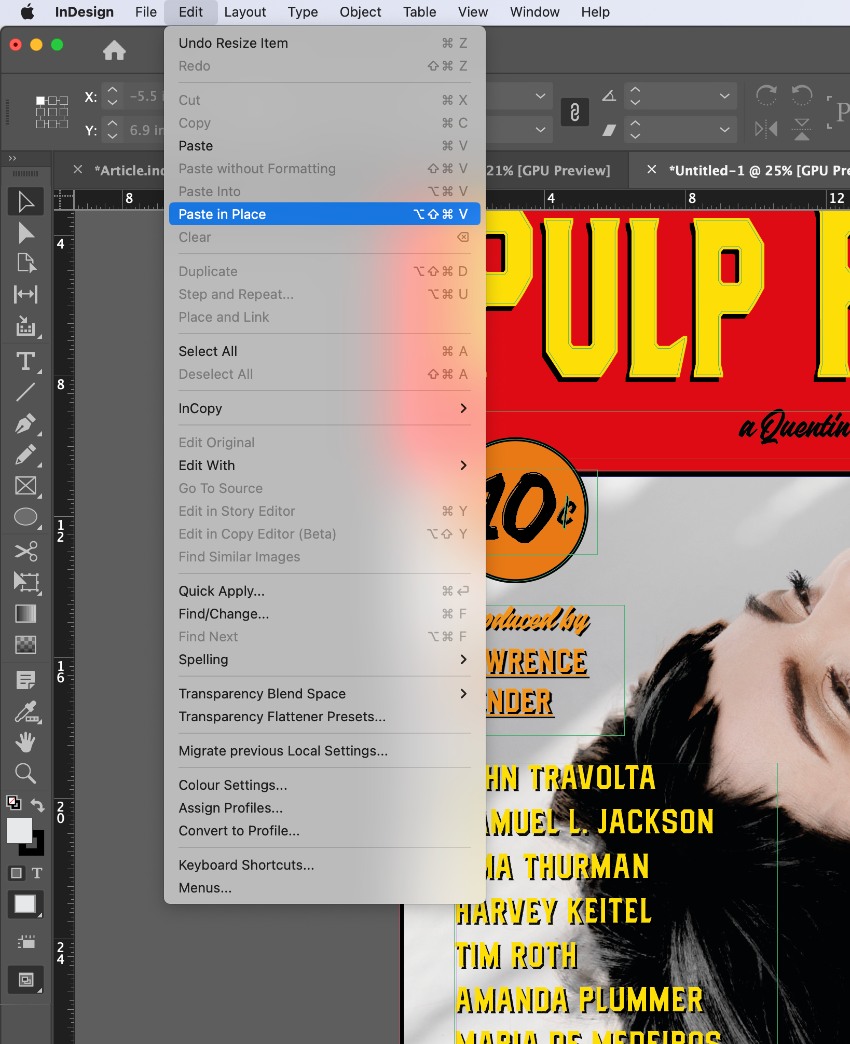

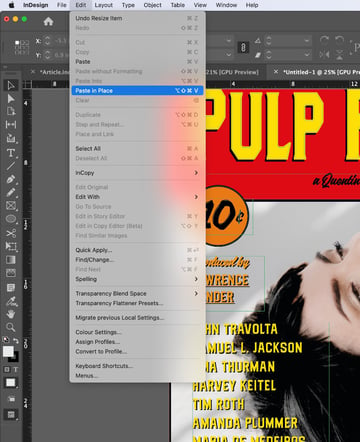
With the second version of the image frame selected, go to File > Place and replace the image with ‘Mia_no background’.


Step 2
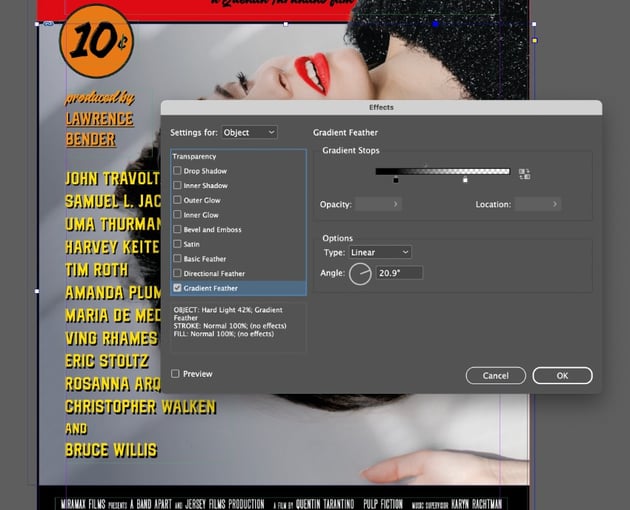
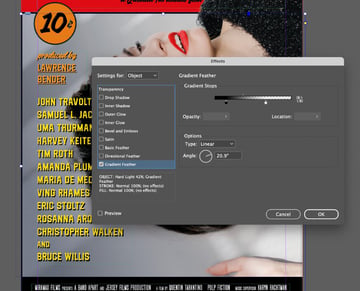
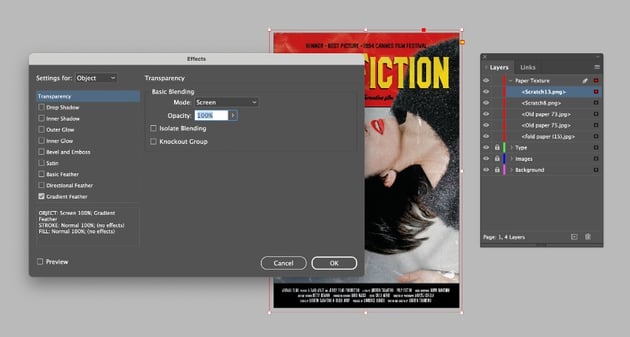
Create a rectangle shape over the main part of the image, set in [Black], and then go to Object > Effects > Transparency.
Set the Mode to Hard Light and Opacity to around 42%.

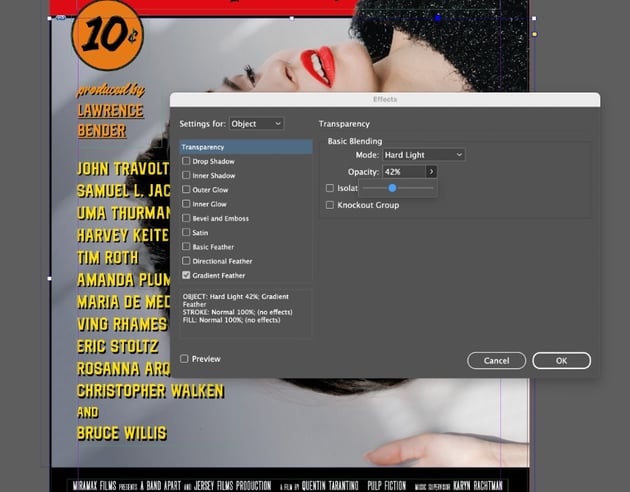

Then click on Gradient Feather in the left-hand menu, and create a soft dark gradient from the bottom-left corner, setting the Angle to around 20.

5. How to Bring Gritty Texture Into Your Pulp Fiction Movie Poster
Step 1
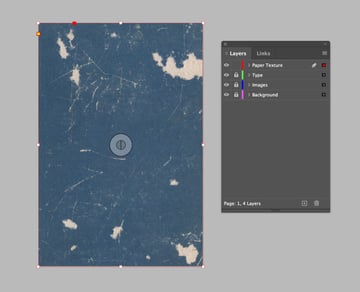
Building up multiple layers of texture is the key to achieving the original Pulp Fiction poster style.
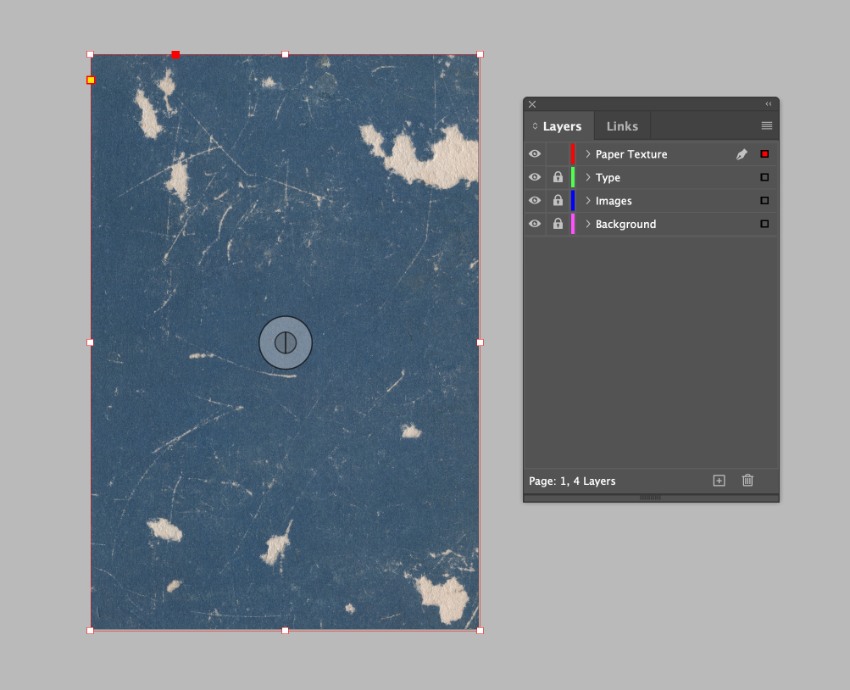
Lock the Images layer and unlock the top layer, Paper Texture.
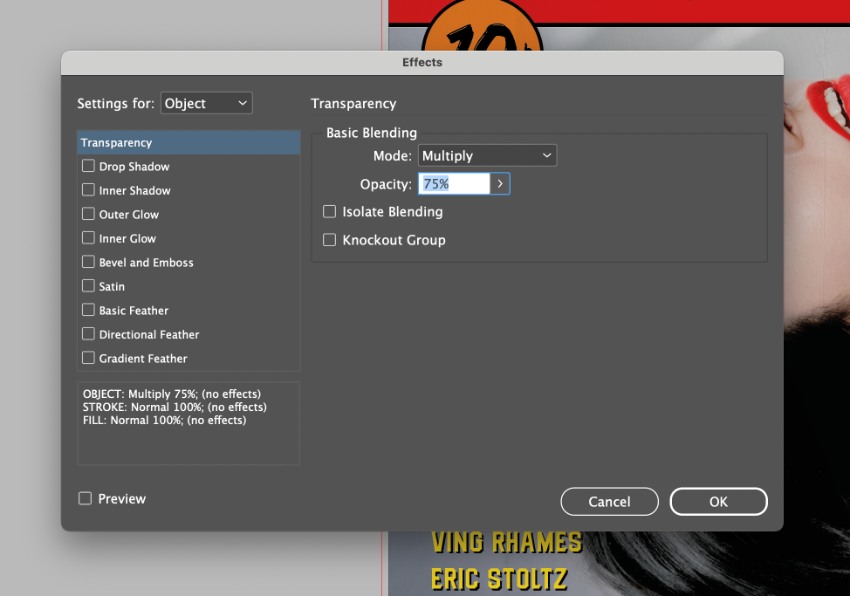
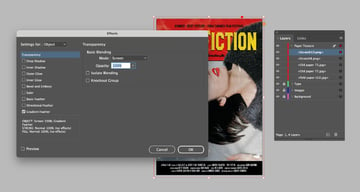
Use the Rectangle Frame Tool (F) to create an image frame across the page and File > Place one of the textures from the Folded paper texture bundle. Allow the texture to fill the whole page.

With the frame selected go to Object > Effects > Transparency. Set the Mode to Multiply and Opacity to 75%, before clicking OK.


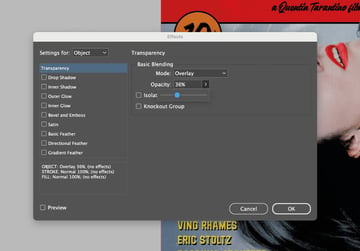
Step 2
Let’s layer up a second texture by creating a second image frame. File > Place, choosing one of the textures from the Old grunge paper textures bundle.
Go to Object > Effects > Transparency. Set the Mode to Overlay and Opacity to around 36%, before clicking OK.


Step 3
Finally, let’s place one of the scratched textures from the Scratched and torn paper texture bundle, applying a Screen transparency.


Create another layer of a different scratched and torn texture, also applying a Screen overlay effect.
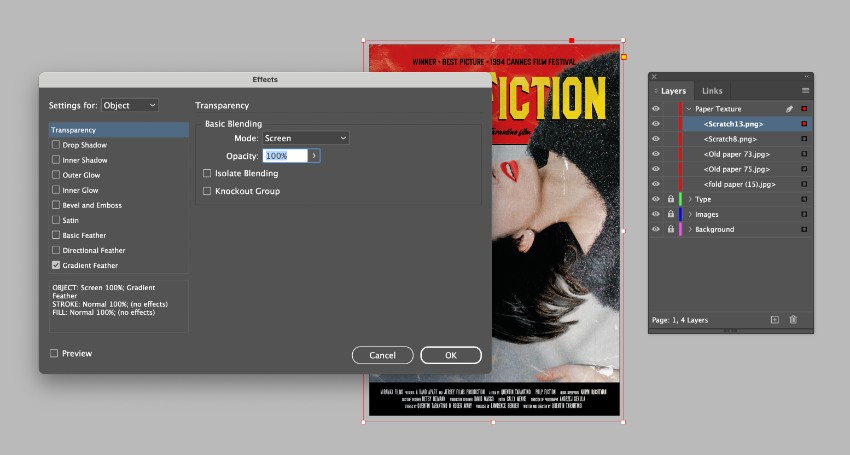
Layering up these textures will bring in so much depth and gritty texture to the poster design. The result is really worth the time spent layering these up.
Your poster design is now finished! Read on to find out how to export your design, ready for sharing online or printing.
6. How to Export Your Pulp Fiction Poster as a Shareable PDF
Once you’ve finished working on your poster(s), you can export the design as an image ready for printing or sharing online.
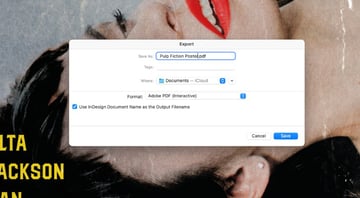
For a printable poster, go to File > Export and choose Adobe PDF (Print) from the Format options. Make sure to include the Bleed on your exported PDF for professional printing.
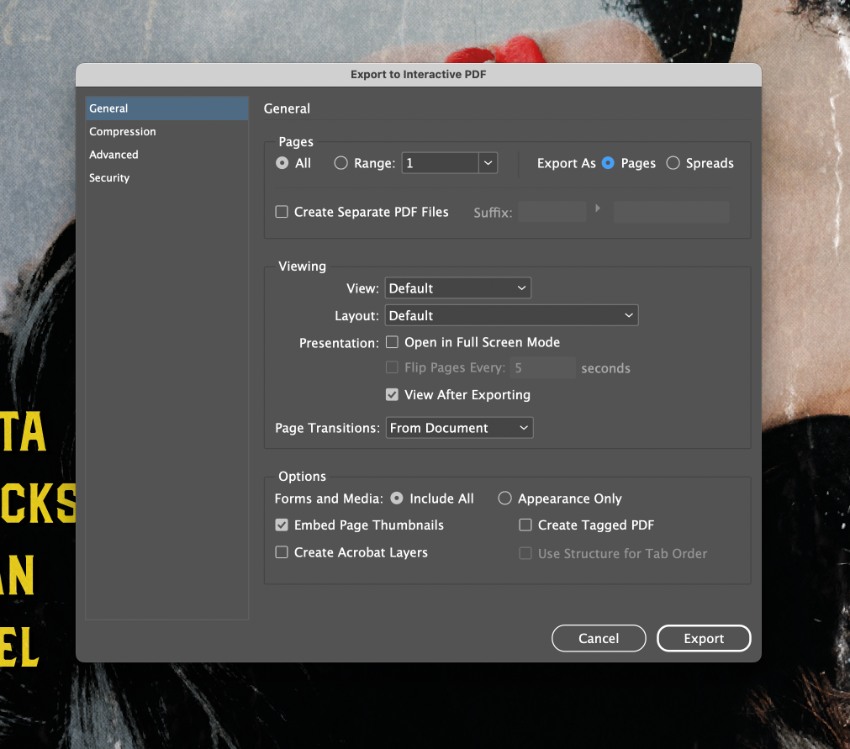
To create a digital poster for sharing online, we can also export the design as an Interactive PDF. Go to File > Export and choose Adobe PDF (Interactive).


In the window that opens, you can compress image size from the Compression section if you wish, before clicking Export.


Your Pulp Fiction poster is exported and ready to share. Great job!
You Finished Your Pulp Fiction Poster
In this tutorial, you’ve created a suitably seedy and gritty tribute to the original Pulp Fiction movie poster. Complete with Pulp Fiction font styles, film noir photography, and grungy paper textures, this is one super cool poster design.

Discover Great Fonts From Envato Elements
Featuring distinctive vintage-inspired typography, the original Pulp Fiction poster pays tribute to the seedy, gritty styling of American pulp fiction. Below, discover more comic book fonts and Western font styles from Envato Elements to recreate the Quentin Tarantino style.
1. Mutone (OTF, TTF, WOFF)
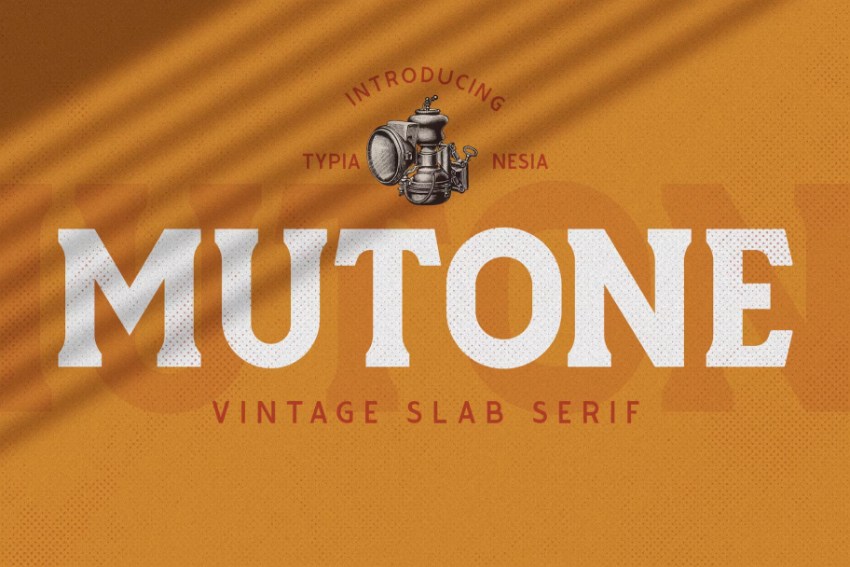

Perfect for recreating the vintage look of Tarantino-directed movies like Once Upon a Time in Hollywood, Mutone is a slab serif with chunky letterforms.
2. Quentin (OTF, TTF, WOFF)
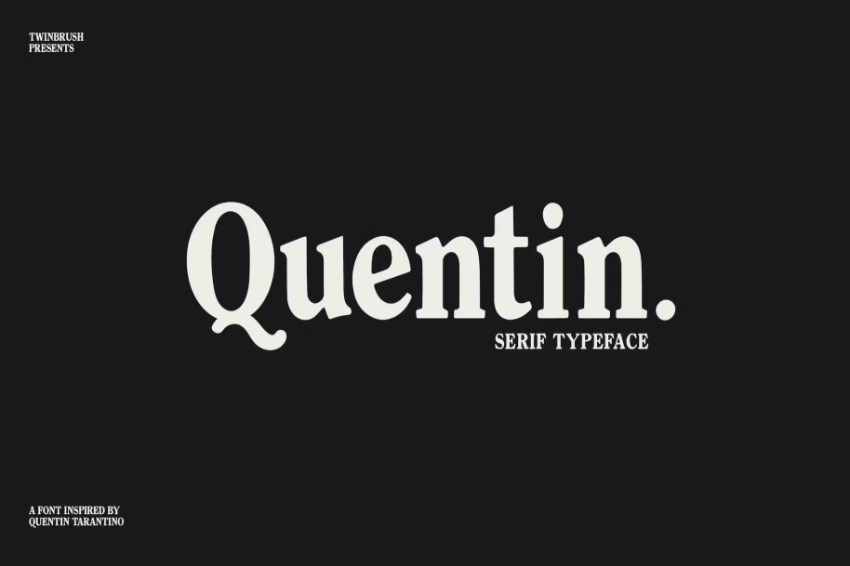
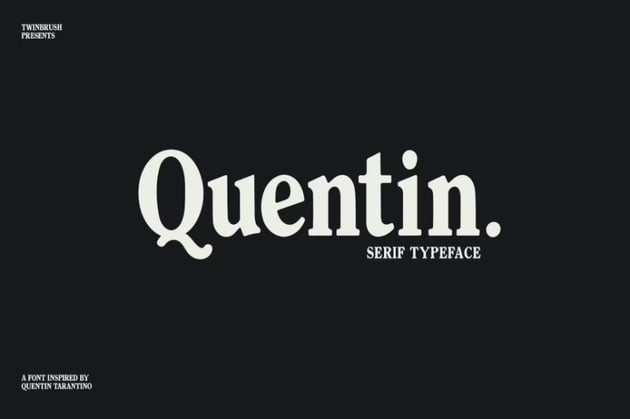
Directly inspired by Quentin Tarantino, Quentin is a condensed, retro-style serif font with a distinctive character.
3. Silvano Western (OTF, TTF, WOFF)
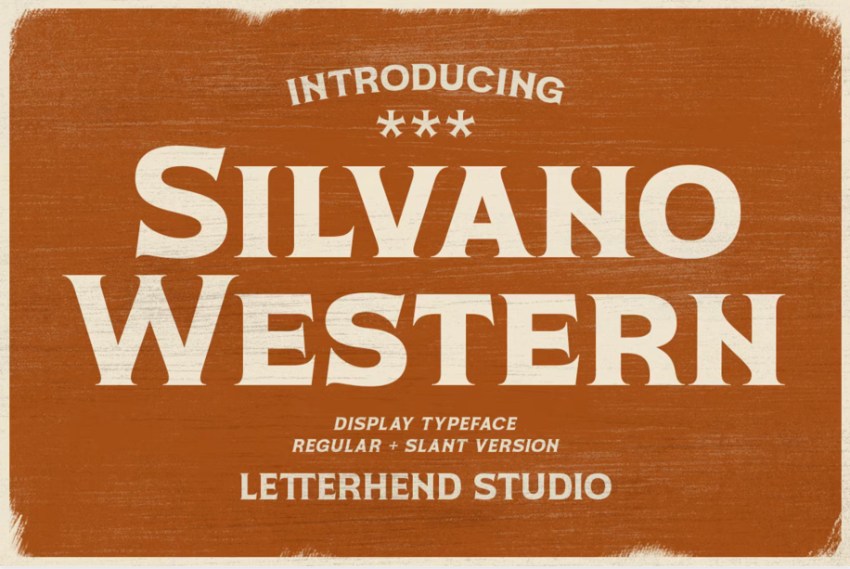

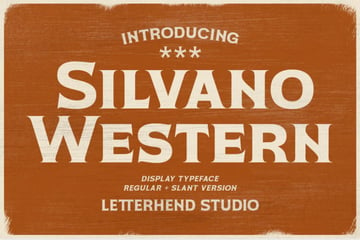
Get on your high horse with this pioneering font with Wild West spirit. Silvano Western can be used to bring a cowboy-esque impact to movie poster designs.
4. Okie Doko Western Slab (OTF, TTF)
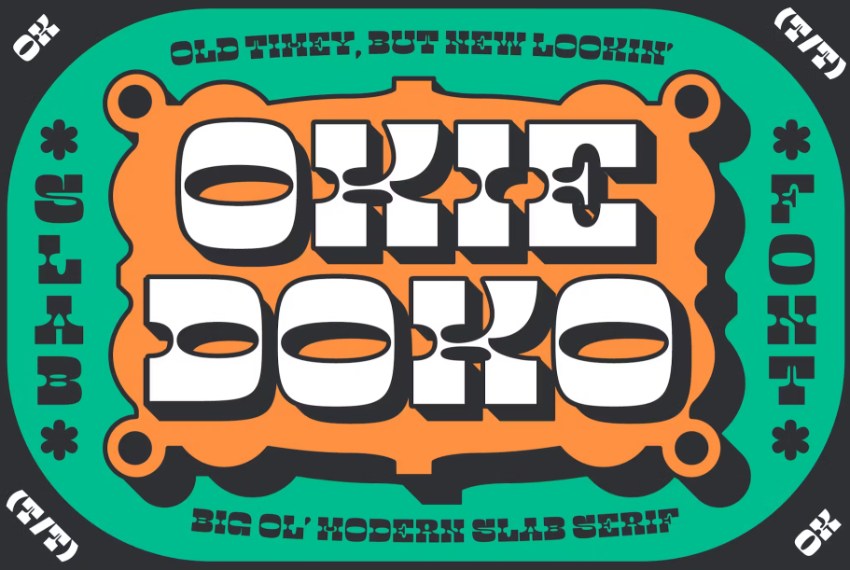


A retro type style that is perfect for eye-catching movie titles, Okie Doko is a modern slab serif with wide, 70s style letterforms.
5. West Django (OTF, TTF, WOFF)
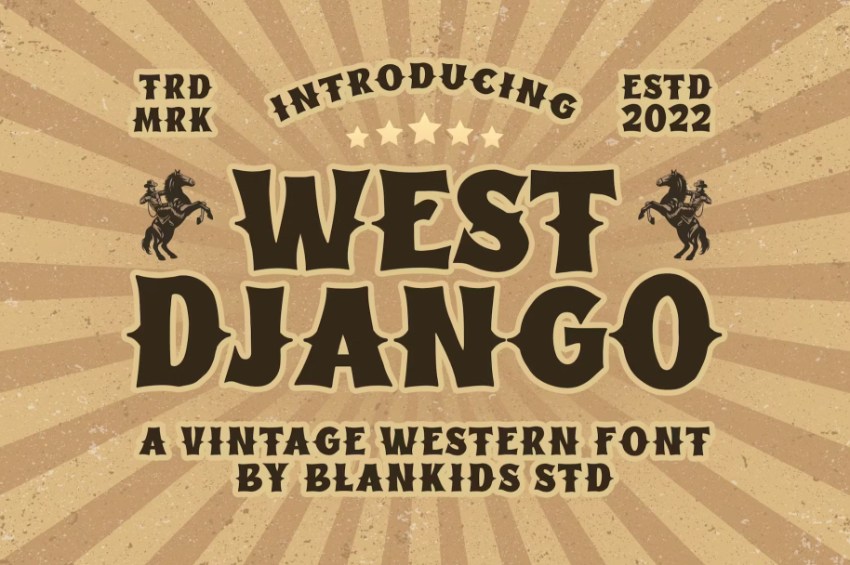
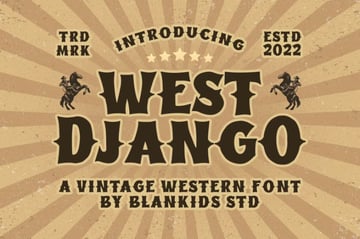
Making a nod to the comic book Western fonts used in the 1960s and 1970s, West Django is jaunty and characterful.
Explore More Poster Tutorials and Resources
If you’d like to recreate more iconic posters or learn more about this amazing graphic design area, check out our resources: