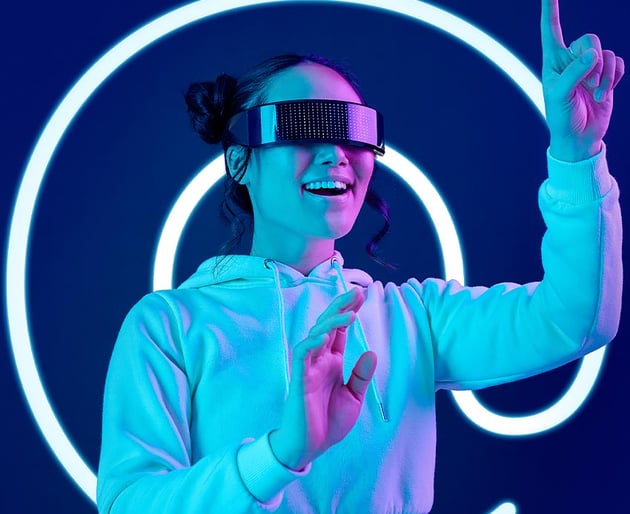
1. How to Add a Lens Flare Overlay in Photoshop
Step 1
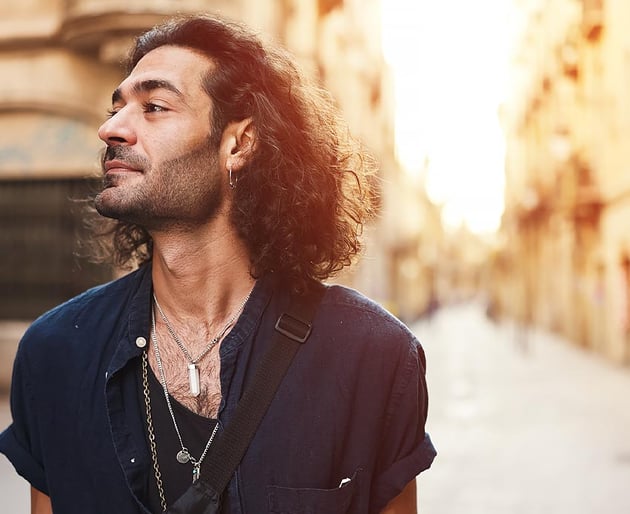
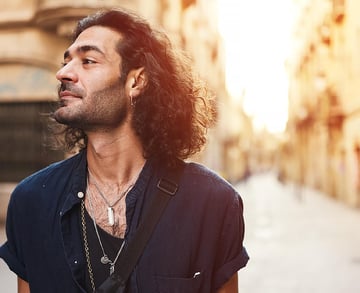
Let’s start with a classic light leak overlay. The go-to light leak overlay is a blob of color on an empty layer set to Screen. It’s fast but flat.
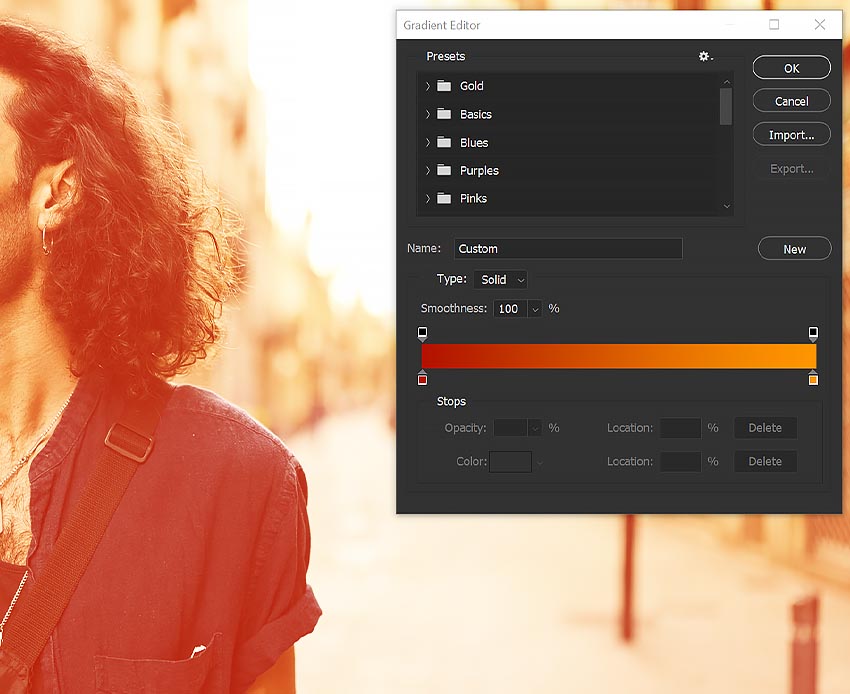
Instead, try using a Gradient Map adjustment layer set to Screen.
For a golden-hour glow, go for reds #b31000 in the darks and oranges #ff9600 in the lights.

Step 2
Then all we need to do is Invert the Gradient Map’s Layer Mask using Control/Command-I and mask with white where we want our light leak.
You’ll have a much more dynamic color in the light source. We can also use the Gradient Map Toggles to refine how that color is distributed. You can add more than two colors and even save some presets using the New button in the Gradient Editor to make this just as quickly as adding a big blob of boring color.

2. How to Make a Duotone in Photoshop
Step 1
A classic duotone-inspired effect is already typically done using Gradient Maps, but this time we’ll ditch the map and use Solid Color Fill layers instead.
Create two Solid Color Fill layers. The top color should be a brighter value, and the bottom color a darker value.
Contrasting color combinations like red and blue will work best. I’m going to go with a darker deep blue #000e57 for the bottom layer and hot pink #ff4b97 for the top layer.
Step 2
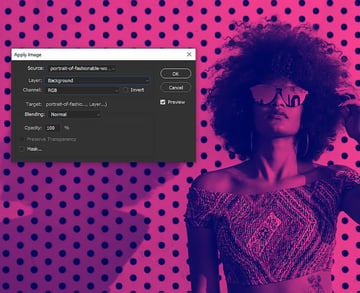
Now, let’s go to the upper options bar and choose Image> Apply Image.
We want to set the Layer to our subject or image layer. In my case, it’s the default “Background” layer. If you’ve renamed it or imported it differently, you’ll choose whatever it’s named.
Next, we can play with the different Channel options. This will change from image to image. For this image, I like both the Green and RBG channel; I’ll go with RGB and press OK.


Step 3
We can further edit the duotone effect by editing the mask. Hitting it with some Image > Adjustments > Brightness/Contrast is a great option.
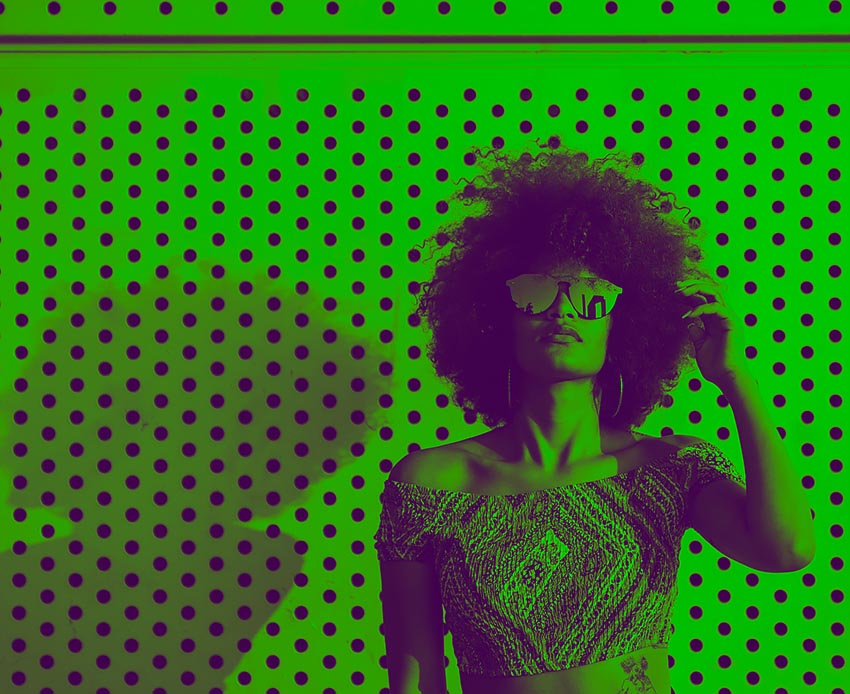
Because these are Color Fill layers, we can easily click and change the color. We can save some of our favorite color combinations using the Save Swatches button. I changed my colors to a dark purple #370050 and a lime green #a2ff35 color.
And, my favorite, we can use Layer Modes and Opacity controls to further refine the effect. Pin Light, Linear Light, and Hard Light are great options. Below, I’ve changed the Layer Mode to Linear Light and the Opacity to 85%.
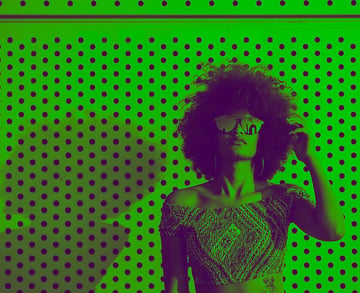
This is also a great effect to pair with the upcoming glitch effect in Photoshop.

3. How to Create a Y2K Effect in Photoshop
Step 1
Let’s move on and see how to create a glitching effect or a Y2K effect in Photoshop, specifically known as chromatic aberration. Let’s start with the typical process of getting the base chromatic aberration effect, and then I want to look at how we can play with it.
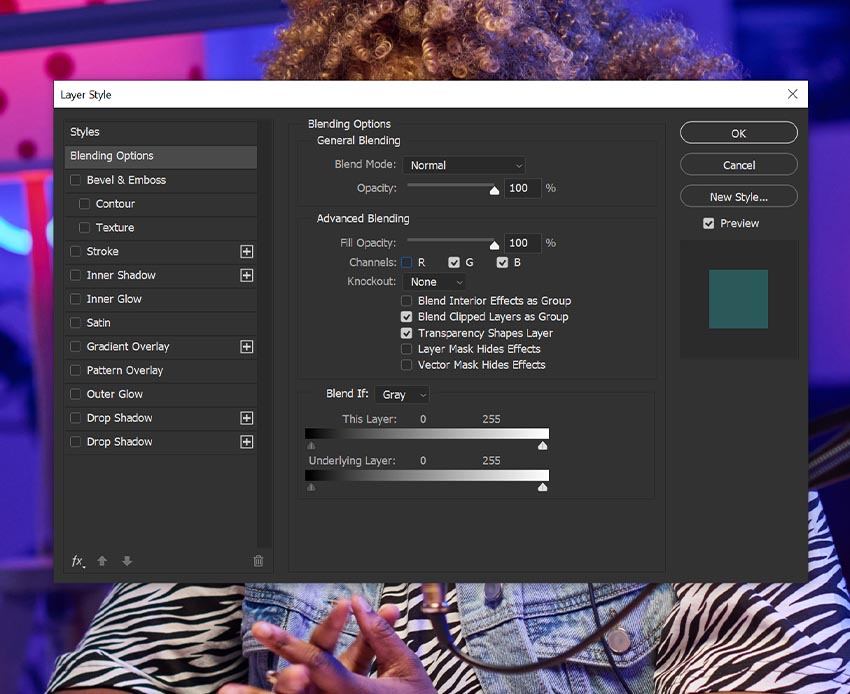
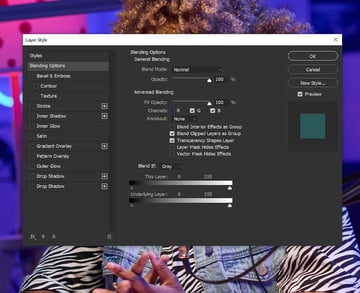
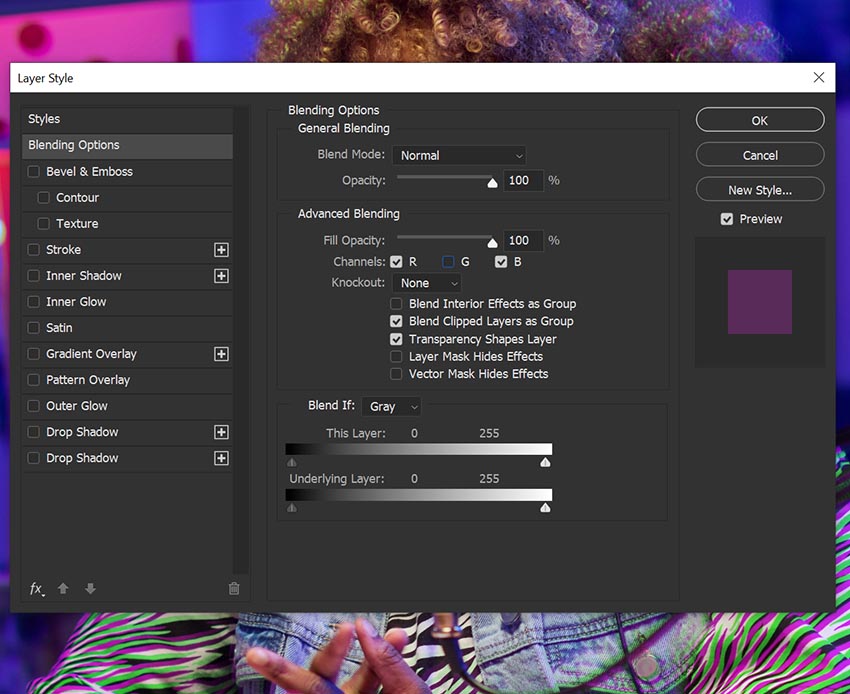
First, Duplicate the image using Control/Command-J and then double-click the copy to open the Layer Styles panel.
Here, we want to look at Advanced Blending, where we’ll find the Channels. Let’s Uncheck the R Channel for now.

Step 2
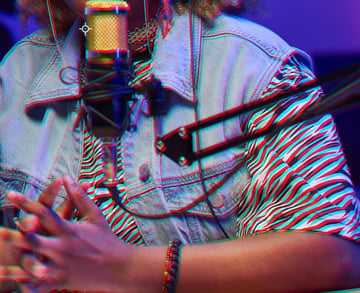
Now, with the Move tool active, let’s nudge the duplicate layer across and up by 5 to 10px. The direction doesn’t matter; the more we move the layer, the stronger the chromatic aberration effect.


Step 3
I always suggest adding a Layer Mask to the chromatic aberration layer and masking out the face of any subjects. Use a soft round Brush so the edges are nice and soft. This will help keep the face sharp and in focus.
We don’t have to stop here, though. There are a million ways we can edit this.


Step 4
First, we don’t have to be stuck with the classic red and cyan color combination.
Double-click the chromatic aberration layer and mix and match the different Channel Boxes. I love a lime green and purple combination, which we get when the Green Channel is Off, with both Red and Blue Channels On.


Step 5
Second, our chromatic aberration layer is just a layer, so we can add filters, warp, and transform it like any other layer.
Let’s add a Filter > Distort > Wave and play with the Wavelength, setting the Max to around 830. This will give a subtle distortion.


Step 6
We can push that distortion even further by Unlinking the layer mask from the chromatic aberration layer and using Warp Transform to push and pull on the edges of the image.
You can push this as far as you want, even layering multiple effects on top of each other.
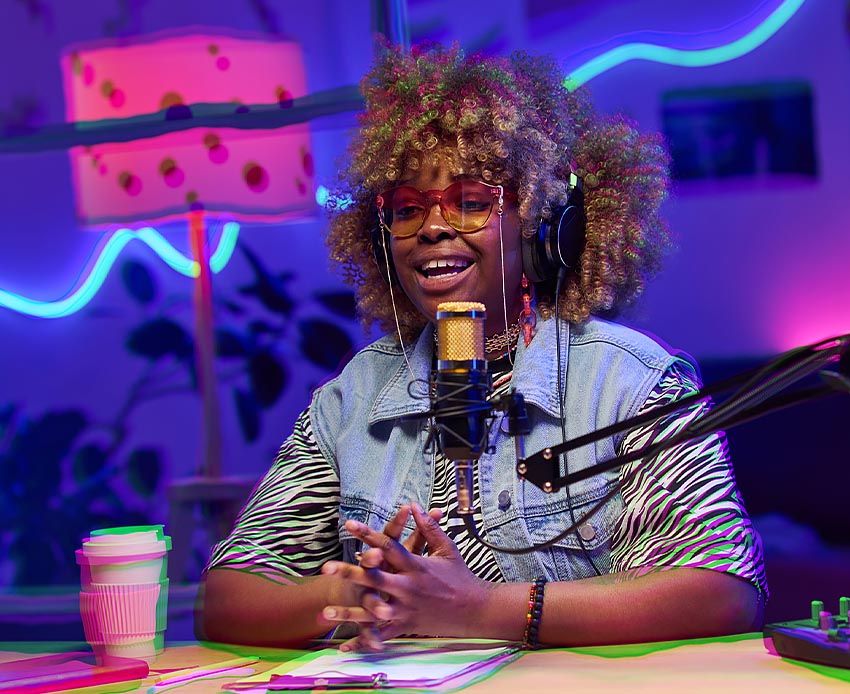


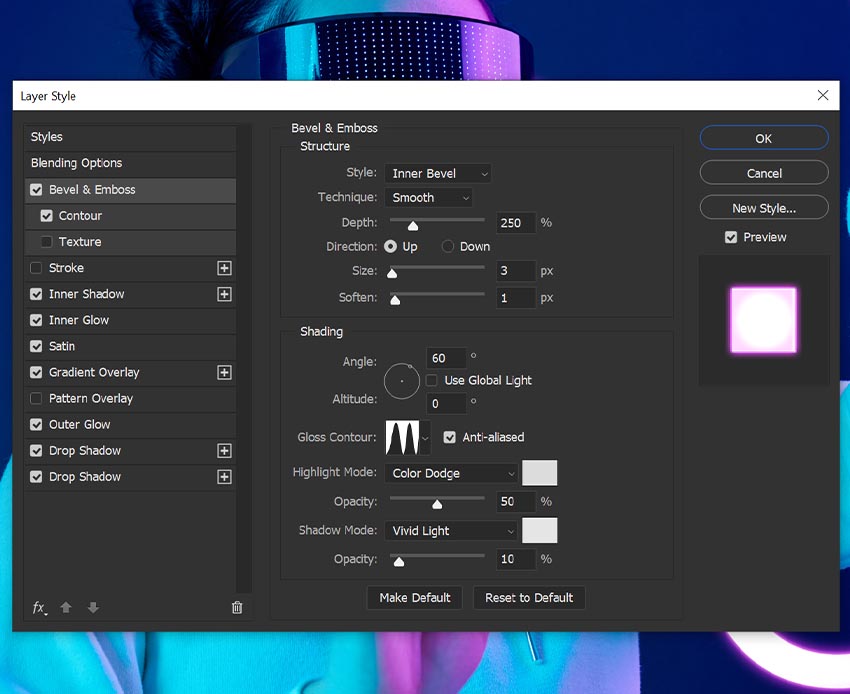
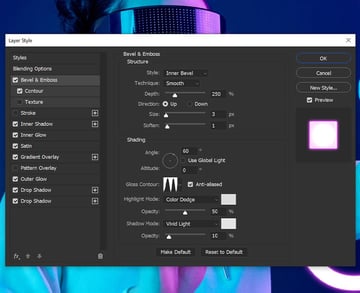
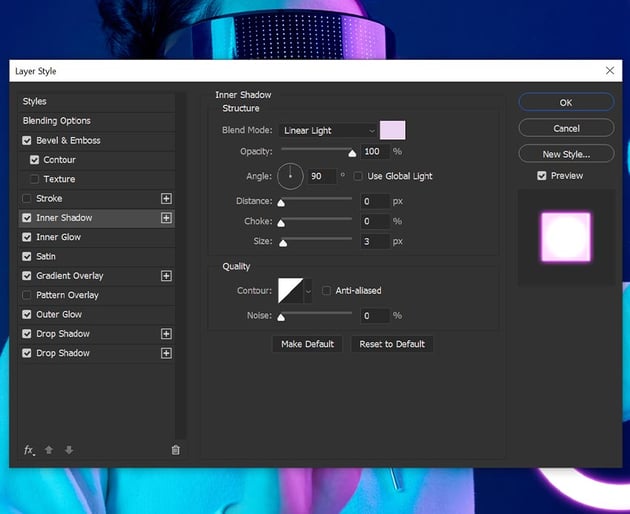
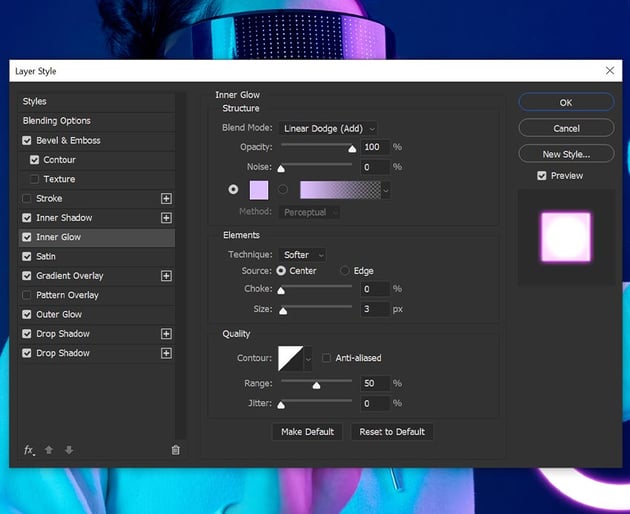
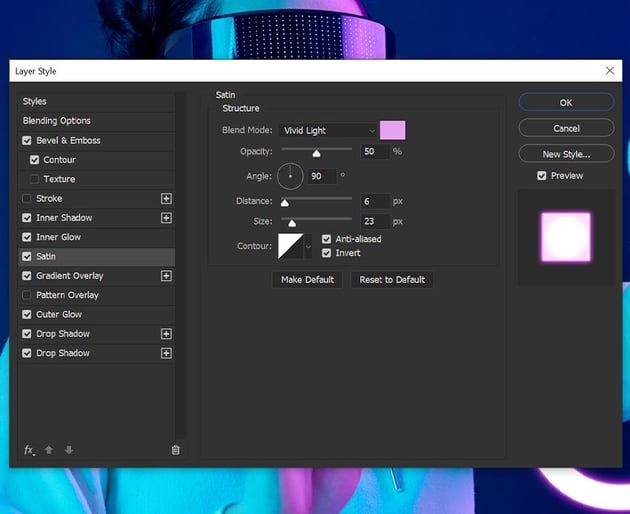
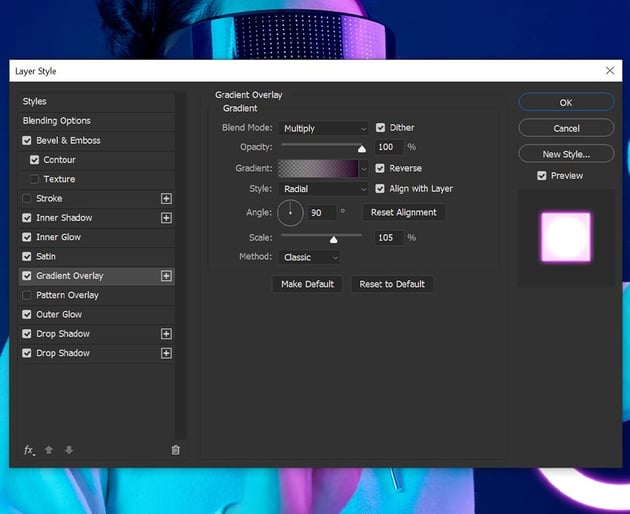
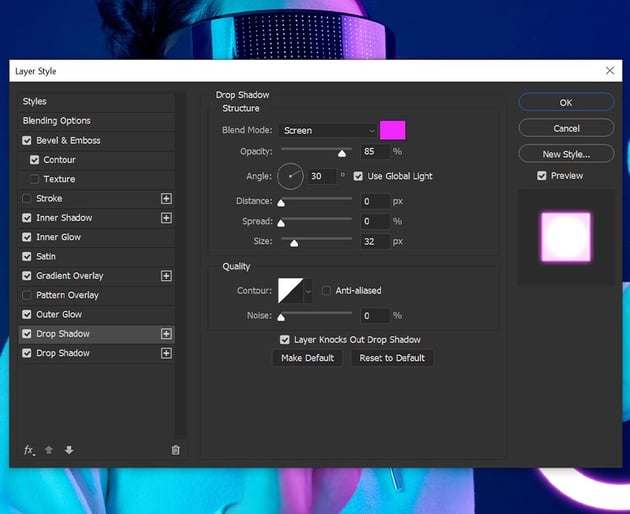
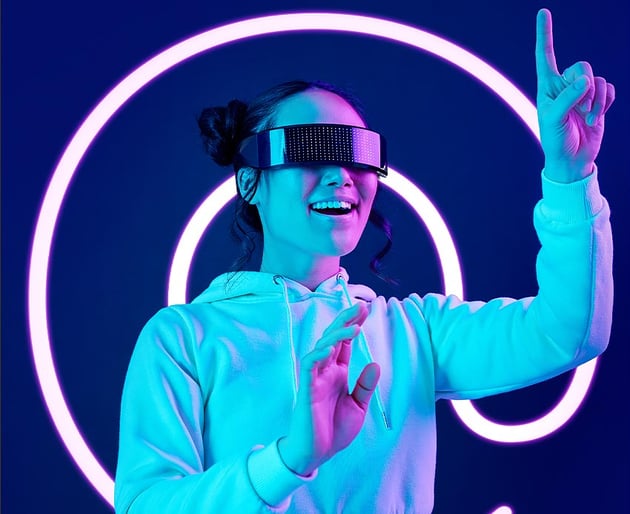
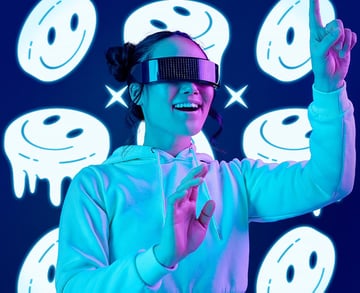
4. How to Create a Neon Effect in Photoshop
Step 1
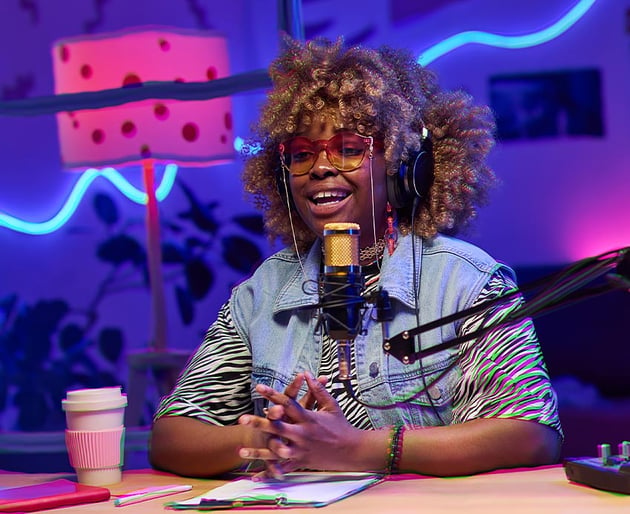
The main issue with neon shapes and designs is how flat they are. It’s a white shape with some Inner and Outer Glow applied and then called done. Here is my go-to Layer Effect recipe for a more dynamic-feeling glow.
The main goal here is to create slight variations in the light, while making sure everything stays vivid and bright.
The color can be easily changed in one of two ways at two different points. First, you can change it here by switching every pink shade you see to your desired color.


Step 2
Before we move on to the second way to change the color, let’s save this as New Style. You do not want to have to recreate this over and over. Now, whenever you have a new shape, text, or standard pixel layer that you want to turn neon, you just have to go to Styles and choose your “Neon” preset.
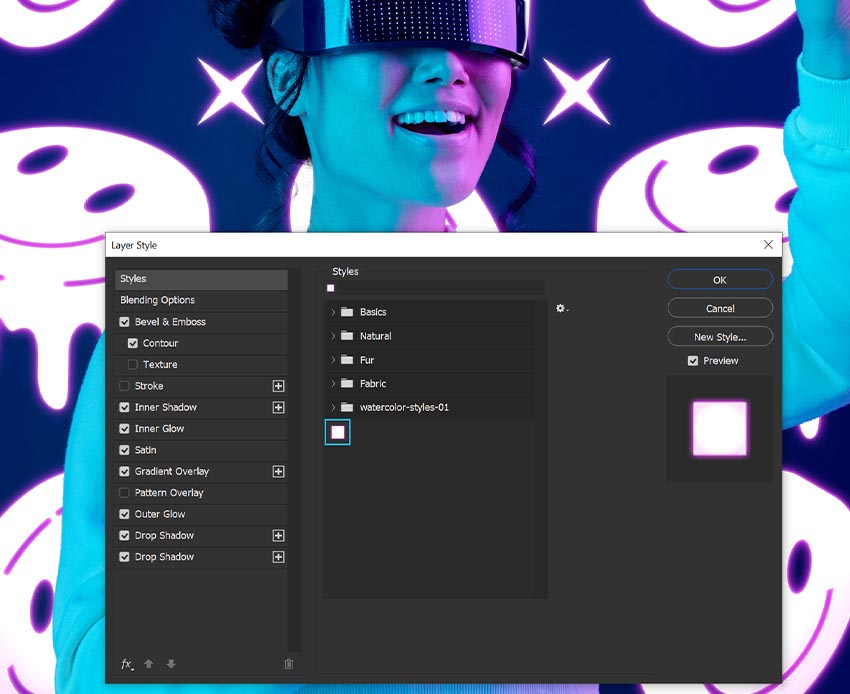


Step 3
Finally, to change the color very quickly, without messing with the Layer Styles, just Group your neon layers together and Clip any color-changing adjustment layer into the group. A Hue/Saturation adjustment layer will work best.
Even if you only have one neon design, you’ll still want to put it in a Group, as Layer Styles override Adjustment layers if clipped directly in the layer.


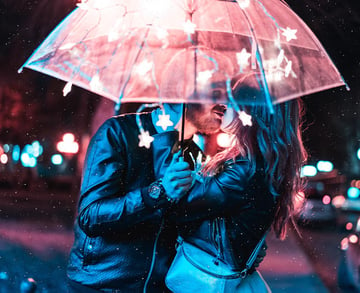
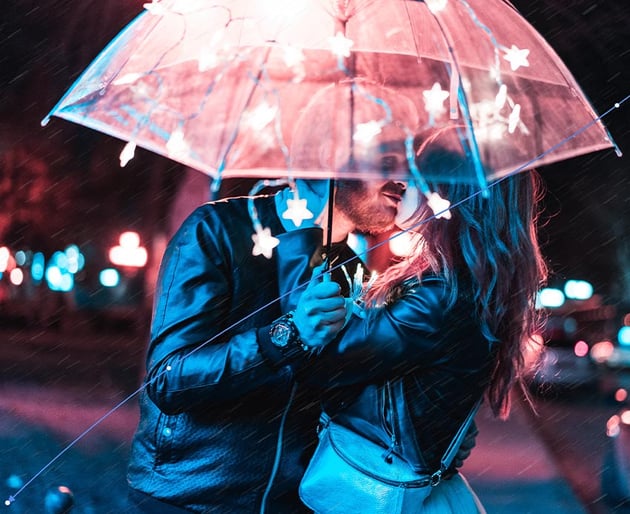
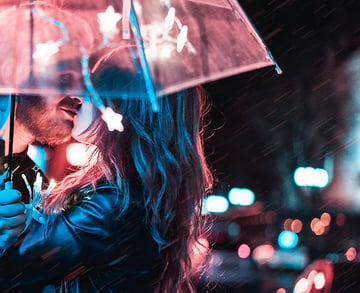
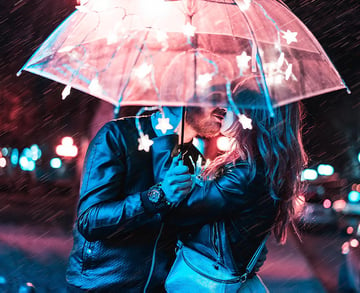
5. How to Create a Rain Effect
Step 1
And let’s finish off with some rain. The old-school way includes using noise, layer modes, and motion blur. My preferred method involves none of those.
Create a New Layer and fill it with black using the Paint Bucket tool.
Next, go to Filter > Pixelate > Mezzotint, setting the Type to Coarse Dots.


Step 2
Zoom in close, and go to Select > Color Range. Click on a white dot and adjust the Fuzziness to 200. We want all the white dots to be selected.
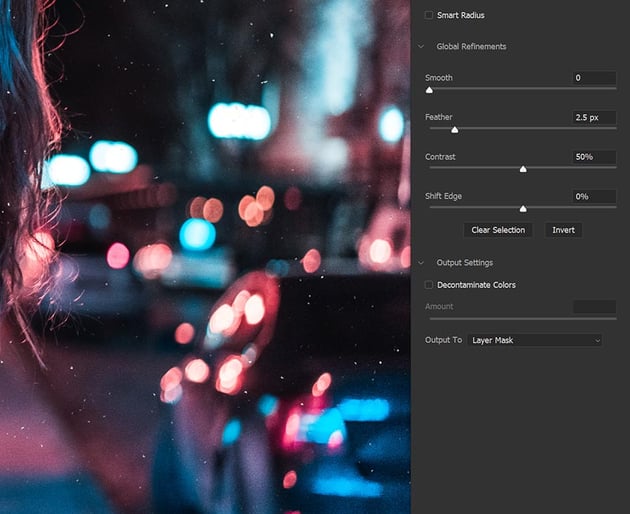
Add a Layer Mask, and enter Select and Mask from the Properties panel or the selection tools in the upper option bar.
In Global Refinements, set the Feather to 2.5 px and Contrast to 50%. This will thin out the dots. The more dots, the heavier the rain, so feel free to play with those two settings; this is just a good starting point. Press OK once you’re happy with the dots.


Step 3
Now, we’re going to Duplicate this layer twice using Control/Command-J, for a total of three dot layers.
Select all of these dot layers and Right-click > Merge Layers. This will make the dots brighter/stronger looking.


Step 4
Next, we’re going to Duplicate the new dot layer twice more, leaving us with three layers. Hide two of these layers. We’re going to edit each layer separately.
Select the first dot layer, and let’s go to Filter > Blur Gallery > Path Blur and stretch the rain using the blue path you can see in the image below. This will give the initial motion blur effect.


Step 5
Why use Path Blur and not Motion Blur? Because by placing Points on the path and pulling, we can create movement in the rain.
You always want your rain to be going in more than one direction. It’s up to you how strong the movement is; you can create a really intense rainstorm or a more subtle effect like this one.
You can also play with the Movement Speed, though 50 works fine here.


Step 6
Now, Unhide the second dot layer, grab the Move Tool, and Right-click > Flip Horizontally.
We also want to Transform it to be around 20% larger.


Step 7
And again, Filter > Blur Gallery > Path Blur. I recommend making the path curve in the opposite direction from the first. The rain should fall in the same general direction, but we want slight variation in movement.


Step 8
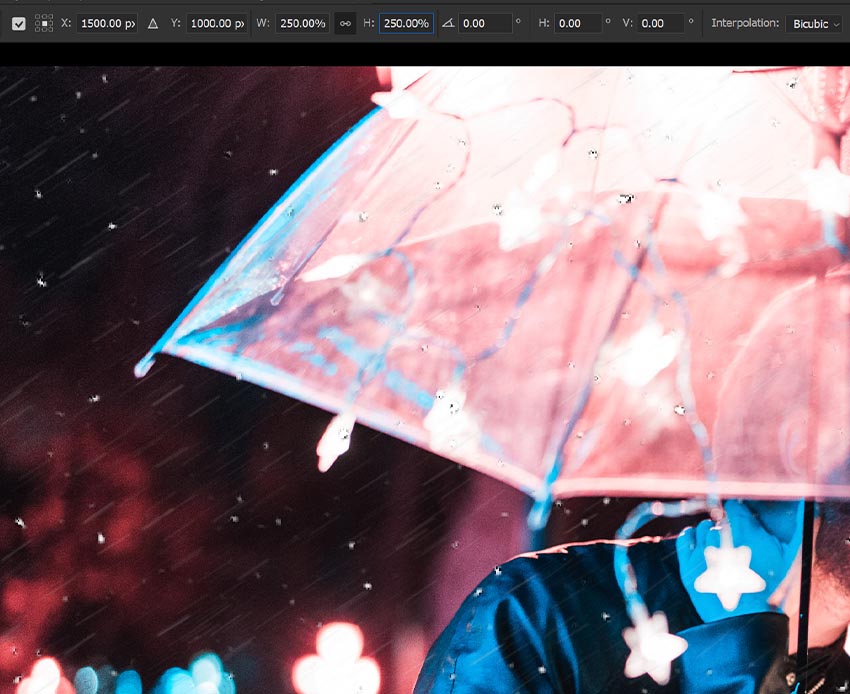
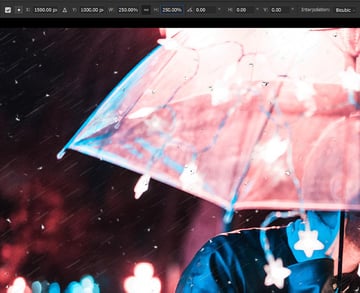
For our last dots, we want to increase the layer’s size by 250% using the Transform upper option bar.

Step 9
And one more round of Filter > Blur Gallery > Path Blur.
I increased the Movement Speed to 70 for this last layer.


Step 10
Finally, Select all of the rain layers and Right-click > Merge Layers.
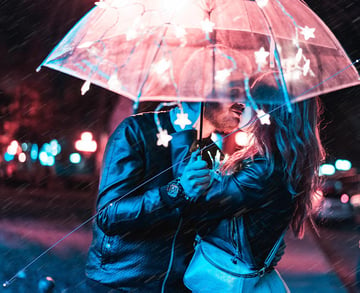
Go to Image > Adjustments> Hue/Saturation, Check Colorize, and add a tint of color to the rain. Rain is clear and will reflect the light in its environment, in this case, a vivid red.


Step 11
Bonus step, you can Duplicate the rain layer to make it appear stronger and mask out areas you want to be less intense.
You can also play with layer modes like Screen.


That’s It!
That’s five effects you can start using today! Streamline your workflow and experiment with different variations to make them truly unique. We kept it simple today, but I’m a “go big or go home” type of gal. Happy designing!
Work Even Faster With Envato Elements
If you want to create even more cool photo effects, you need to check out Envato Elements. For a flat monthly fee, you get unlimited downloads of the best digital creative assets. You can download premium fonts, Photoshop add-ons, graphic templates, and more.
Here are just a few you can download right away:
50 Professional Lens Flare Photo Overlays (ATN)

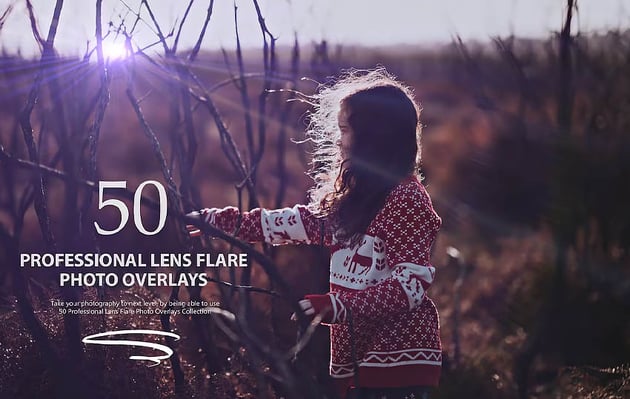
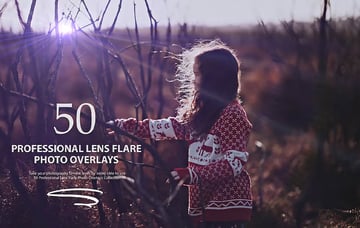
Wondering how to add lens flare in Photoshop quick and easy? This pack is the answer. With 50 lens flare overlays to choose from, you’ll always have a fresh effect to use. If you run out, this is only volume one of many!
Faded Duotone Photoshop Actions (ATN)

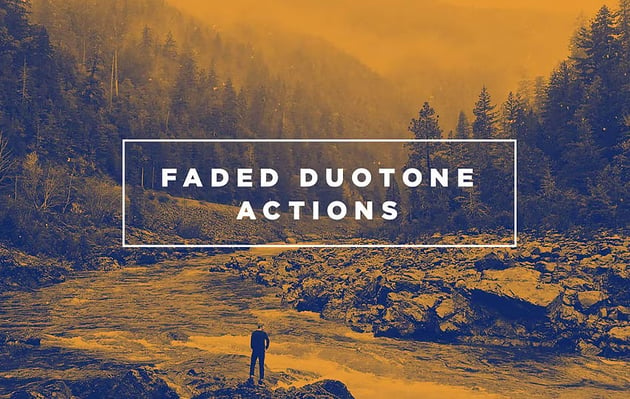

Create a duotone Photoshop effect in the blink of an eye with this classic faded duotone action. With multiple colors and being completely customizable, this is a staple action for all Photoshop users.
RGB / Glitch Photo FX (PSD)
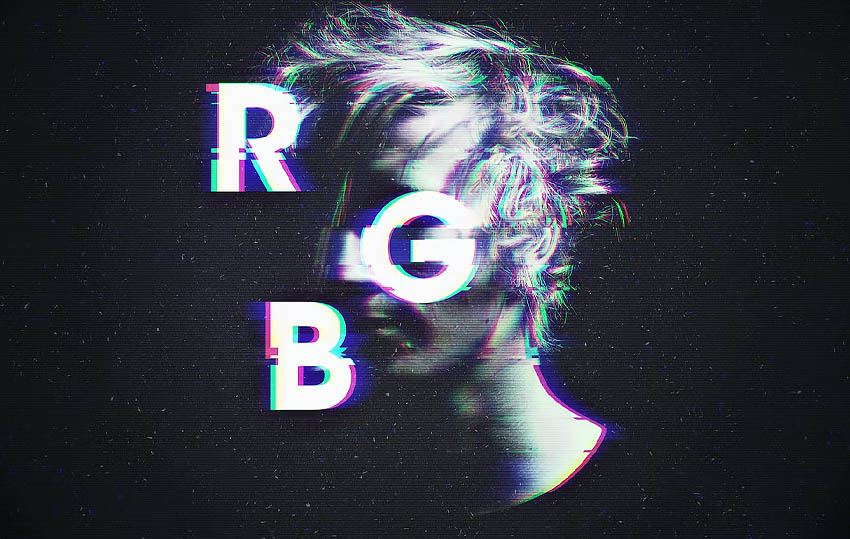

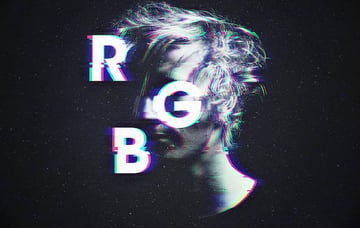
I love a good glitching effect, and this one is a favorite! I’ve used it personally dozens of times and recommend it to anyone wondering how to make a glitch effect in Photoshop.
Neon Sign Effect (PSD)


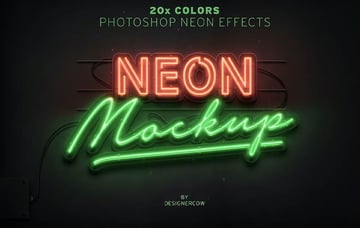
Neon effects in Photoshop are always a win in my book. Whether it’s a classic, classy neon sign or an edgy cyberpunk design, neon is a trend I don’t see losing steam anytime soon. This neon sign effect comes with 20 colors and premade backgrounds.
Rain Photoshop Action (ATN)
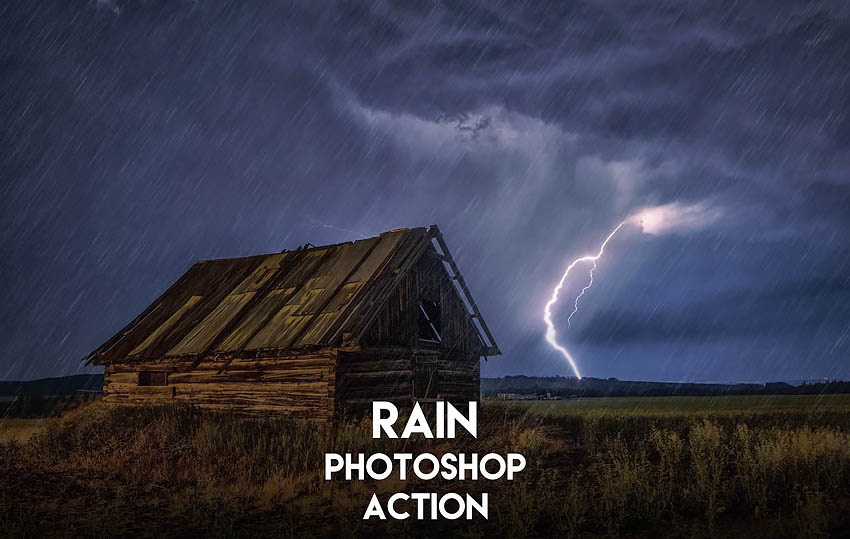


Create a rain storm in seconds with this rain Photoshop action. All the layers are easy to edit and adjust, and every time you run the action, you get a unique result. It’s great for both raging storms and gentle summer showers.
Want to Create More Photoshop Effects?
Looking for even more resources? Hungry to learn more Photoshop skills? Envato Tuts+ has your back: