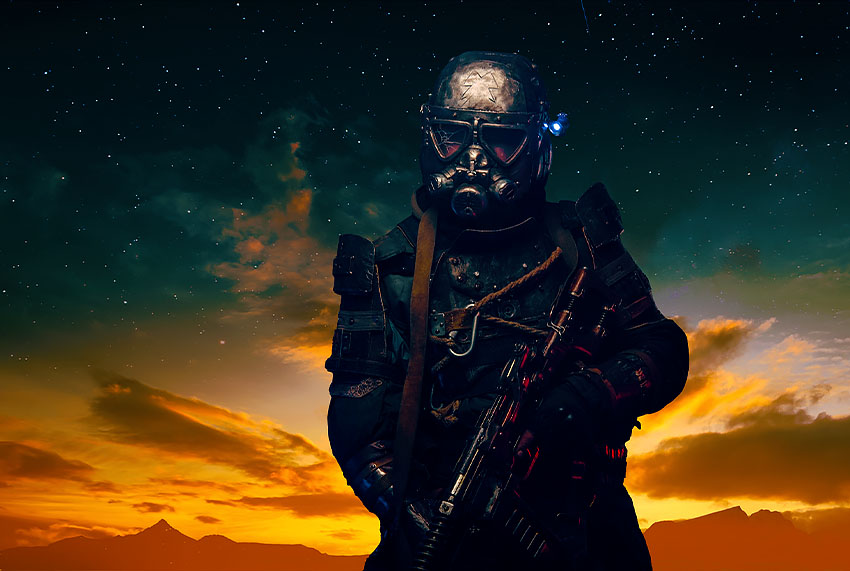
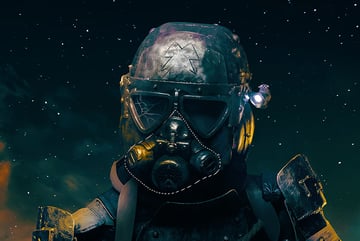
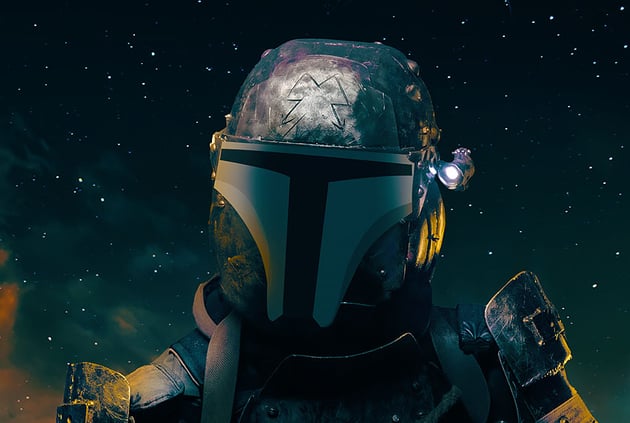
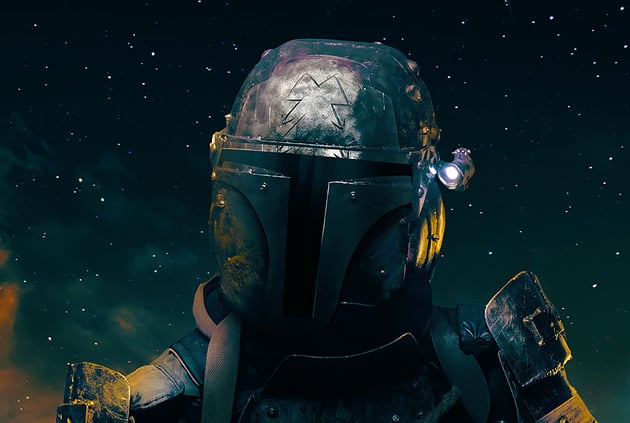
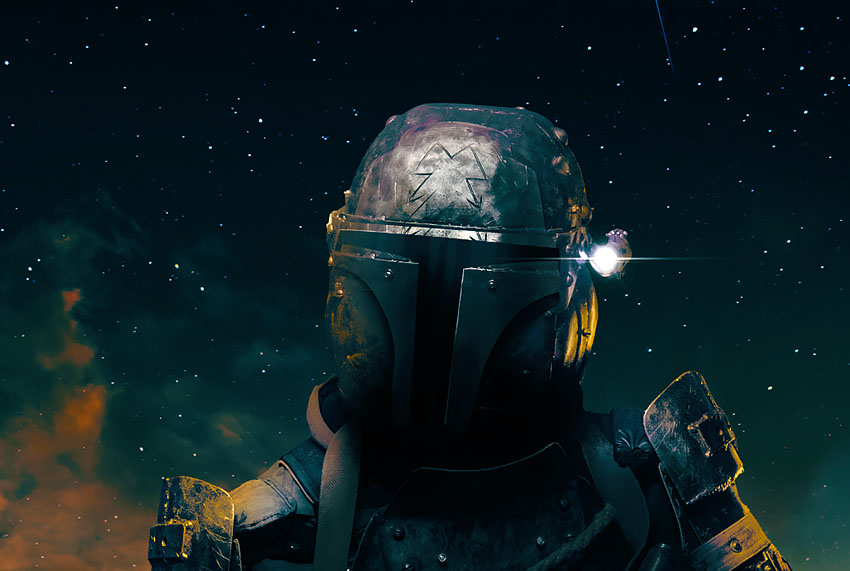
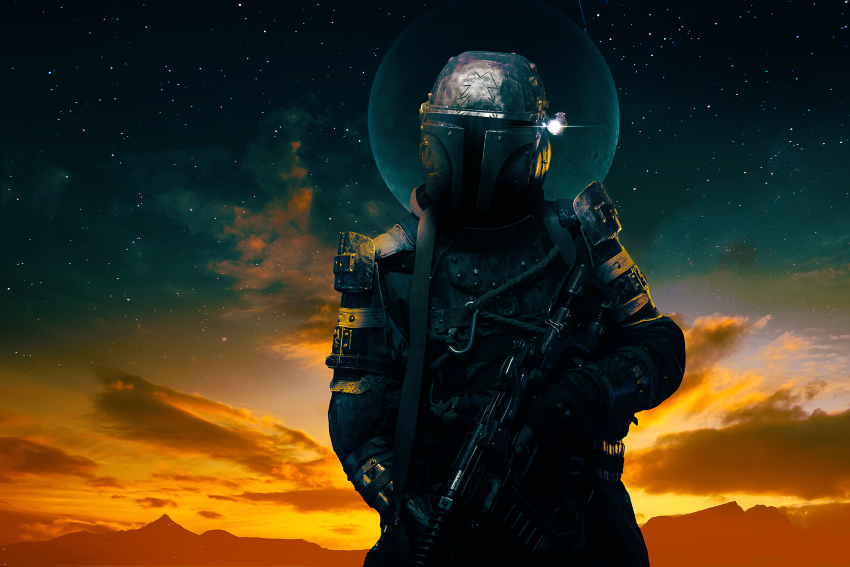
If you’re a fan of the Star Wars universe, you cannot miss this tutorial! We’ll transform a generic helmet into a Mandalorian-inspired helmet. We’ll also create a dramatic sky-to-space effect using just one setting and create a sci-fi cinematic teal-orange color grade.
Prefer to watch a video? Then don’t miss this new video from the Envato Tuts+ YouTube channel! Learn how to recreate the iconic Mandalorian helmet here:
What You’ll Learn in This Mandalorian Photoshop Tutorial
- How to create a dramatic sky effect in Photoshop
- How to create shadows in Photoshop
- How to use Content Aware Fill in Photoshop
- How to create a blue and orange color grade
- How to create a Mandalorian photo effect
What You’ll Need
To complete this Mandalorian project, you will need the following resources:
Find more resources on Envato Elements!
1. How to Create a Dramatic Sky in Photoshop
Step 1
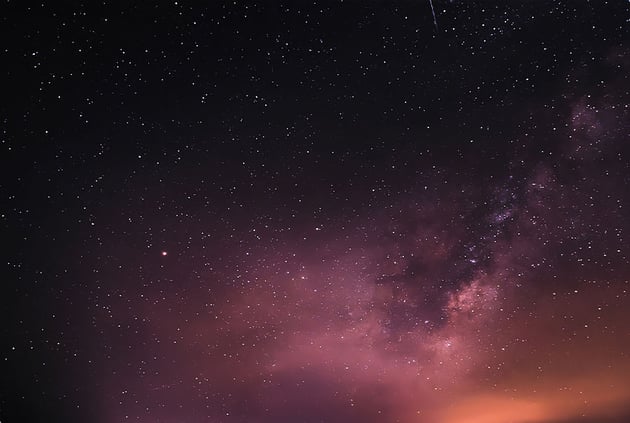
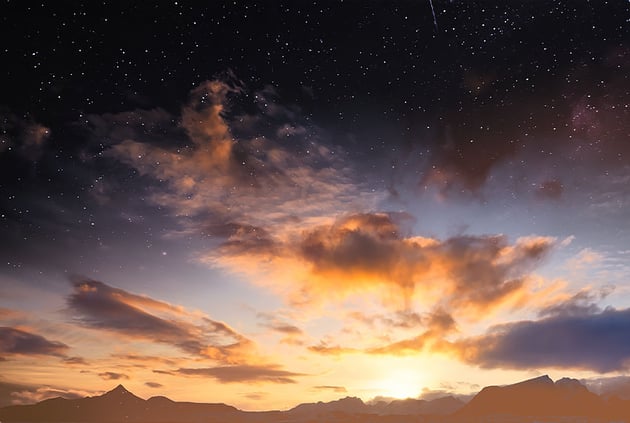
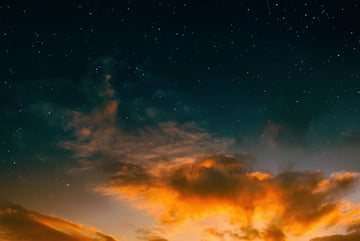
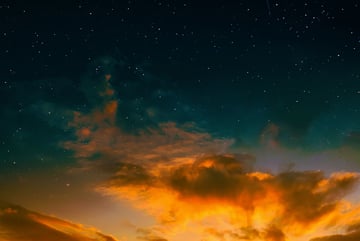
We’re going to start by putting together our sky, focusing on creating a nice blend of sundown and a starry night sky. I’ll be using this photo for the base.

Step 2
Next, let’s create a New Layer set to Screen and paint a bloom of orange #f1792e light on the bottom half of the canvas. To make it less uniform, I’m going to paint it at an angle.


Step 3
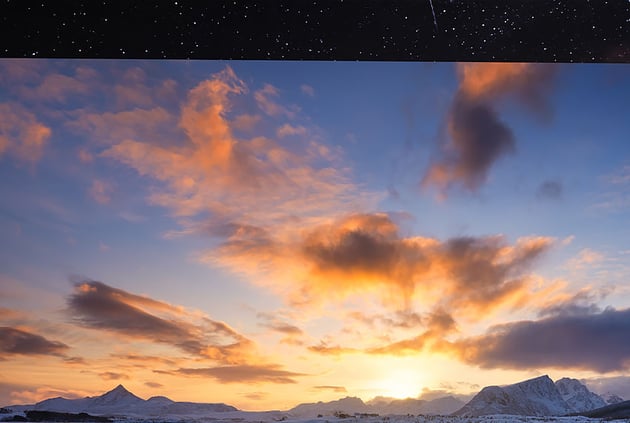
Now for my favorite part, the clouds! We’re going to need an image of scattered clouds on a dark blue background—something with a heavy perspective.


Step 4
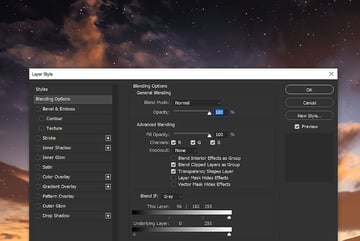
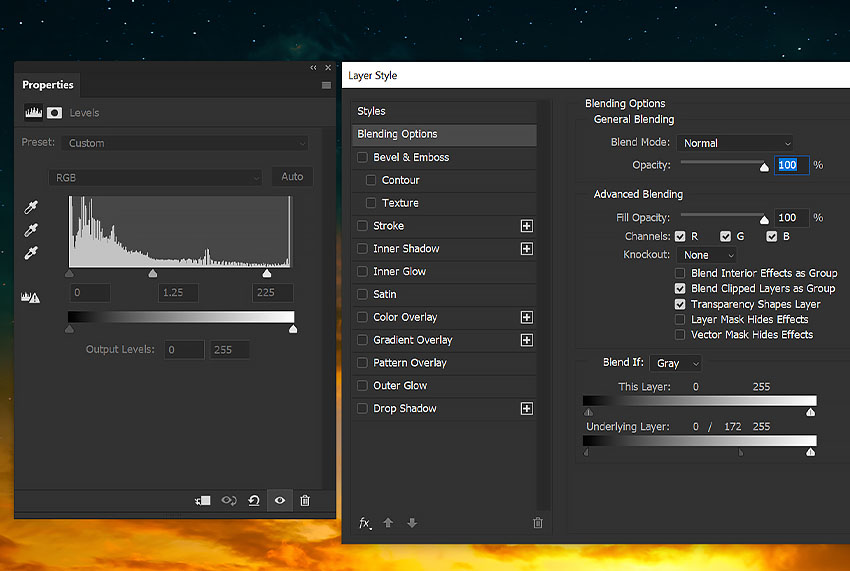
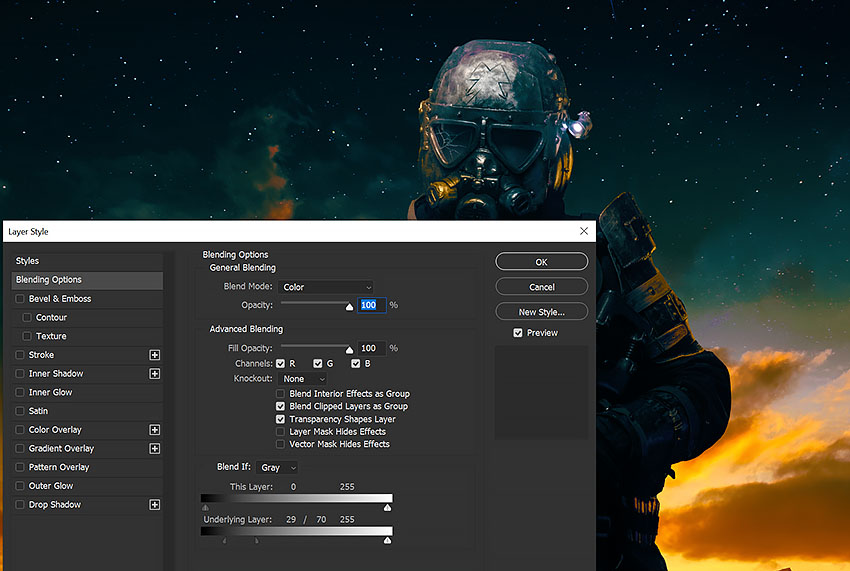
Now, let’s double-click the sky layer and look at the Blend If section, focusing on this layer. We’re going to use these toggles to remove the darker values of the image, which will blend away the upper sky but leave the clouds and the lighter sky. Hold Shift to split the toggles up, and keep pulling them toward the right until you achieve that blended sky effect.
Clean up any harsh edges with a Layer Mask.


Step 5
You may end up with some stars in the dark clouds. Let’s duplicate our sky layer, right-click > Clear Layer Style, and bring that layer below the original sky.
And then, we can add a Layer Mask, Invert the mask with Control/Command-I, and mask in clouds wherever we don’t want stars to peek through.


Step 6
Let’s layer on even more light with a New Layer set to Screen. We want to paint orange #f9863f on the bottom and a blue-teal 1badd3 color at the top. We’ll be really leaning into the orange-blue color scheme.
Bring this layer down to 25% Opacity or so.


Step 7
In fact, let’s further push that blue and orange with a Gradient Fill layer going from Orange to Teal, setting the Blend Mode to Overlay.
This is optional, but I’m going to darken the upper portion of my sky with an Overlay layer and a brush set to black. We want a bright orange sunset and a dark blue starry sky.


Step 8
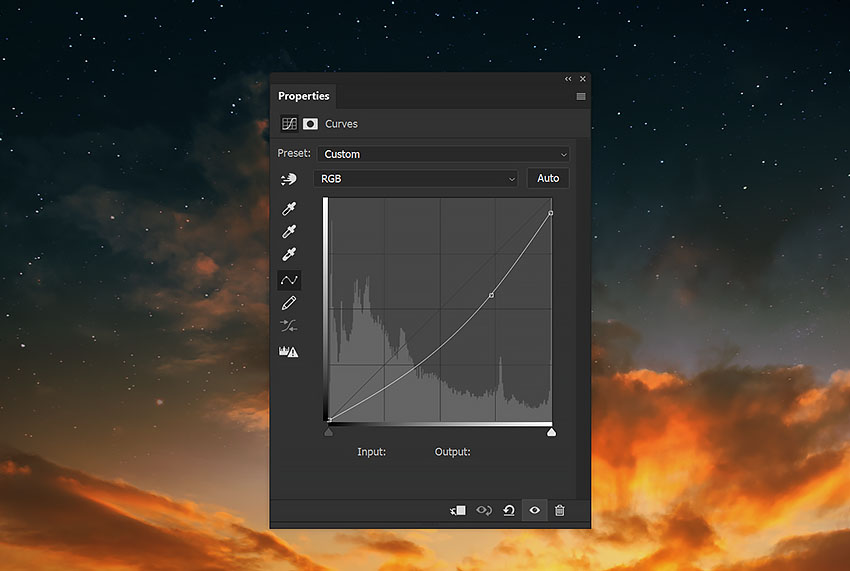
Finally, let’s darken the whole sky with a Curves adjustment layer, bringing down the midtones and highlights.
2. How to Create an Orange and Blue Color Grade
Step 1
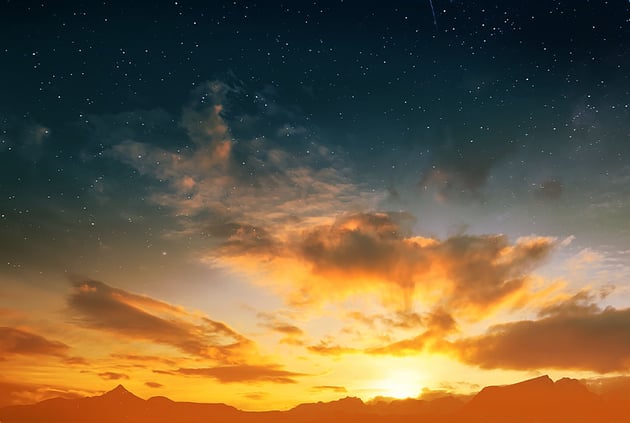
I usually save this step for last, but let’s add our color grade. That’ll give us the final teal and orange colors.
Let’s start with a Color Lookup adjustment layer set to Teal Orange Plus Contrast, with the Blend Mode Pin Light at 75% Opacity.


Step 2
Second, add a Vibrance layer set to 100 Vibrance. If this looks too harsh, then bring it down to around 50.


Step 3
Third, add a Levels layer, pulling the midtones to the left to brighten the image.
We also want to use Blend If to slightly remove the levels from the shadows. Remember to hold Shift to split up these toggles.


Step 4
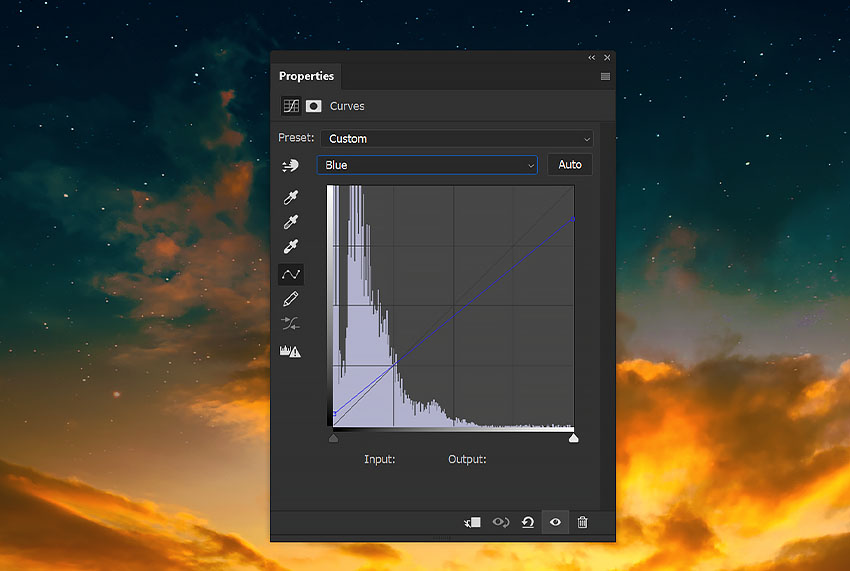
Finally, add a Curves layer where we’ll go into the Blue channel, bring up the shadows, and lower the highlights. This will add blue in the dark and yellow in the highlights.


3. How to Create Dramatic Shadows in Photoshop
Step 1
Now, onto our subject! Place and extract the subject onto the middle of the canvas. We’ll do some speedy color adjusting using Filter > Camera Raw and selecting Auto. This will just add some fast contrast.
We’ll then add even more contrast using a Curves layer inside our subject. Bring down the shadows slightly, and use the Opacity settings to further dial in the contrast. We want to use clipped Adjustment layers so we can edit them later on. We’ll also be placing layers underneath this layer in future steps.


Step 2
We’re going to put our subject in a group named “Subject.” We have to clip some color adjustment layers into this group. Start with a Hue/Saturation layer, removing -70 Saturation from the Blues.
Next, add a Curves layer to bring up the shadows. This will look really intense, but once we add back our shadows, it’ll all even out.
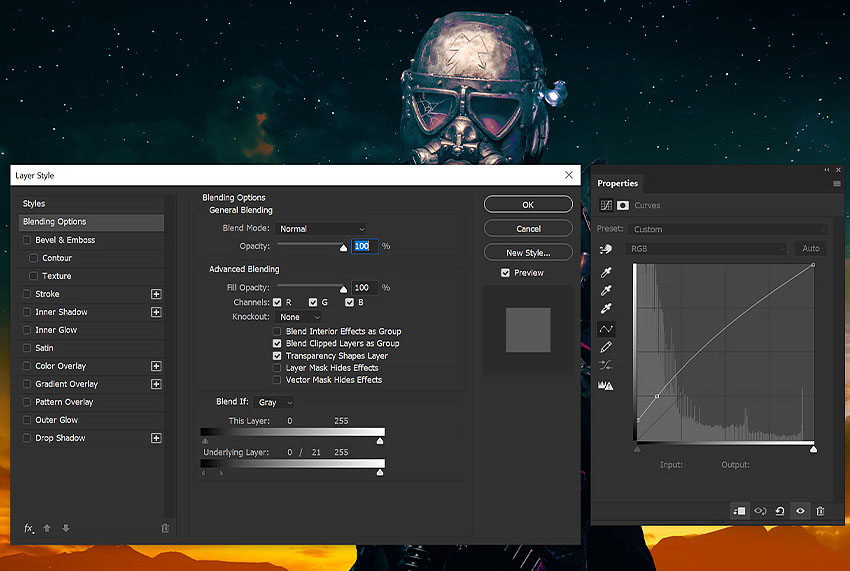


Step 3
To create the base of our shadows, let’s make a Color Fill layer set to a dark blue #002644 and clip it above the last Curves layer in the “Subject” group. Set the layer to Multiply, and bring the Opacity down to 70%.

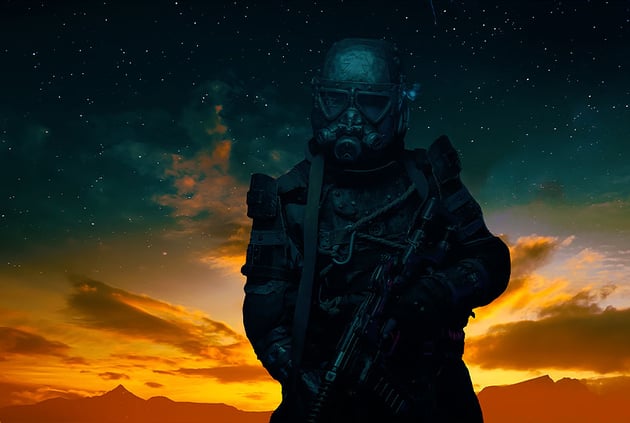

Step 4
Next, adjust the Blend If settings, blending the layer away from the subject’s highlights.


Step 5
Now, we want to remove the shadows from the edge of the subject. My favorite way to do this is to delete the current layer mask on the Color Fill layer.
Hold Control/Command and then click the Subject layer. This will create a selection around the subject.
Next, let’s go to Select > Modify > Contract, and contract by 150 px. The amount will depend on the size of your photo. Feel free to play with the amount.
Now, let’s add a New Layer Mask to the Color Fill layer, increasing the Feather by 50 px or so.


Step 6
We can Duplicate that shadow layer and set it to Hue to bring even more blue into the other shadows.
Step 7
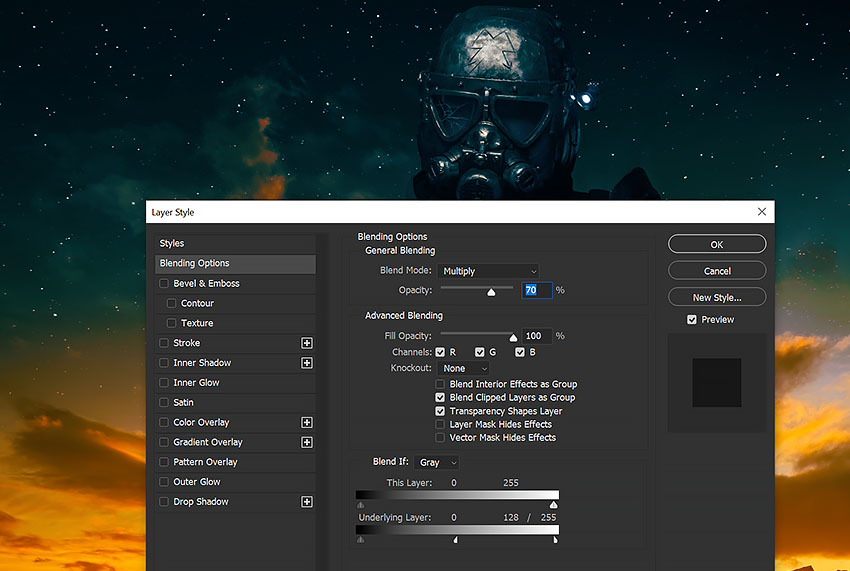
Shadows like this are always paired with a rim light, and we can use our existing layers to create one. Let’s duplicate the Shadow Color Fill layer and bring it to the top of the clipped layer stack.
Set the color to an orange #b3782c color, the Blend Mode to Color, and the Opacity to 100%.
Now, Invert the layer mask. The Mask will go from only appearing in the middle of the subject to appearing everywhere but the center.
Finally, we need to switch the Blend If settings. We want this layer to be blended away from the shadows, not the highlights.

Step 8
If the edges need a bit more light, add some using a clipped Curves layer, also removing the layer from the shadow using Blend If.


4. How to Create a Helmet in Photoshop
Step 1
Finally, let’s get to the Mandalorian portion of this Mandalorian tutorial. The main goal is to turn a generic sci-fi costume into something more Mandalorian-inspired… without just copying and pasting helmets from low-res files. This means we first need a blank slate, and this is where Content Aware fills come in!
Let’s Duplicate the subject and clip the duplicate into the original under the Curves layer we created earlier. We also want to Right-click > Rasterize so that it’s not a Smart Object.
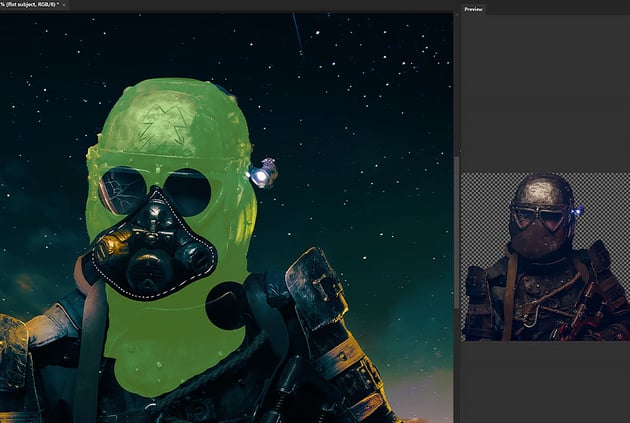
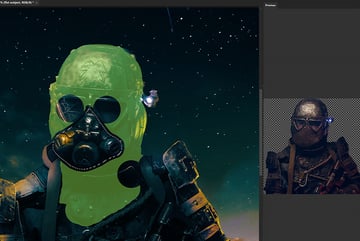
Let’s grab the Lasso tool and set the Feather to 10px. We want to select the mouth and nose portion of the helmet.


Step 2
Now, let’s go to Edit > Content Aware Fill. The default settings should work fine; we just want to remove the green from any areas we don’t want Photoshop to sample from. So we don’t want any of the ropes or cloth. We really just want the helmet and the upper part of the chest.
It won’t look great; we just want a smoother base. By default, it’ll paste as a New Layer. Re-clip your layers back into the subject if you need to.

Step 3
Next, hold Shift and select the flat subject and the content fill layer. Hold Alt/Option, drag the layers to Duplicate, and Right-click > Merge them. On this new merged layer, we want to do Step 2 again; only focus on the eyes this time.
Once the eyes are removed, Duplicate and Merge the layers as we did before.

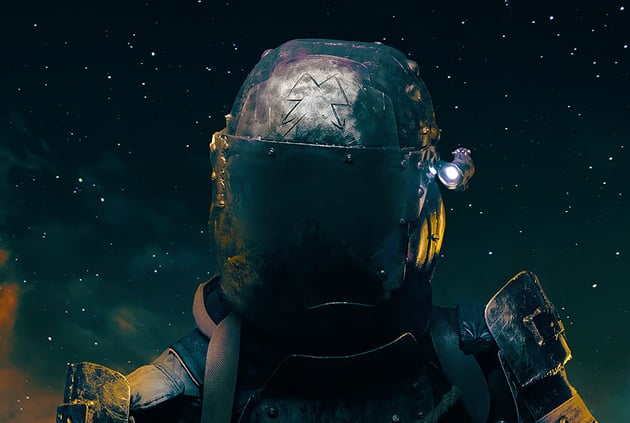

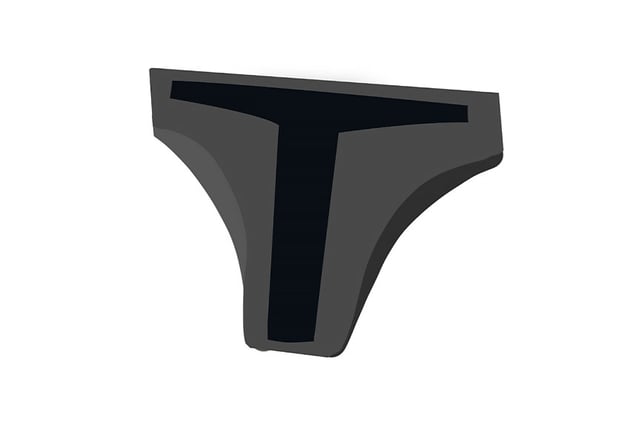
Step 4
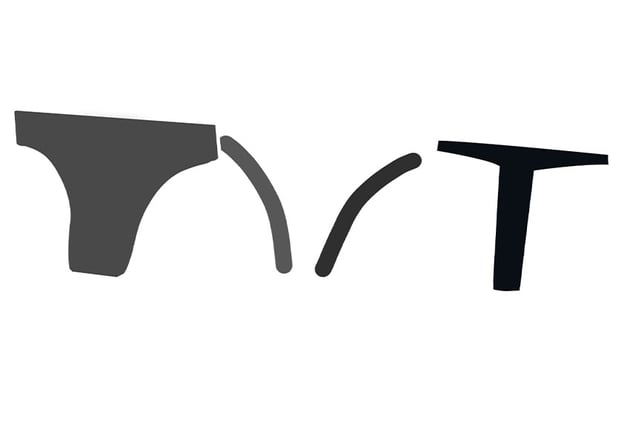
For this next step, consider bringing up a reference to the Mandalorian helmet. We’re going to recreate a very simplified version of the primary eye visor on three New Layers.
You want to make the eye part soft black and the base medium gray, and then add a light and dark area on each side of the base to create the metal curve shape.
Here are my three layers, isolated, and then what it looks like in the PSD. Keep in mind that this might look really bad. Think of this as a rough draft.


Step 5
With the basic shapes done, we can add some texture using the Lasso Tool to select and copy the helmet’s surface.
Now, paste and clip it into each gray shape. Set each layer to Hard Light. You’ll likely have to adjust the angle and size of the texture to make it fit with the helmet best. You can also try different Blend Modes and Opacity levels.


Step 6
Now, all we have to do is paint some shadows and highlights onto all three layers. I used layers set to Overlay and Screen and a soft round Brush set to Black and White. I used a harder brush for the harder highlights on the visor and edge of the helmet.
Use as many layers as you need, clipping each layer into whatever shape you are lighting and shading.

Step 7
You can also group all the shapes together and use a clipped Overlay layer to create global lighting to help the three shapes appear as one object. Also create some shadow layers below the shape if you need some shadows.


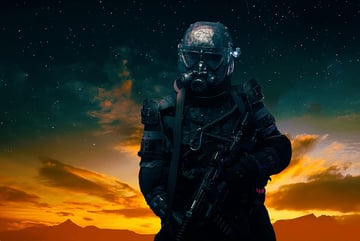
5. How to Add Sci-Fi Elements to a Photo
Step 1
We’ll finish everything with a simple white light flare on the flashlight. I used this premade flare, set it to Screen, and changed it to a pale orange color.


Step 2
Finally, we really need something that frames our want-to-be Mandalorian. I’m thinking a planet! Place and extract a planet onto your canvas, above the starry Milky Way layer but below all other sky layers.
Also, we do want to make sure this planet is a Right-click > Smart Object.


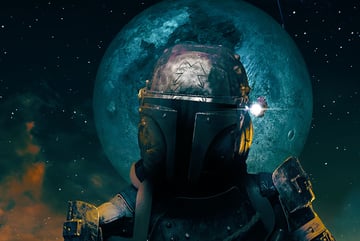
Step 3
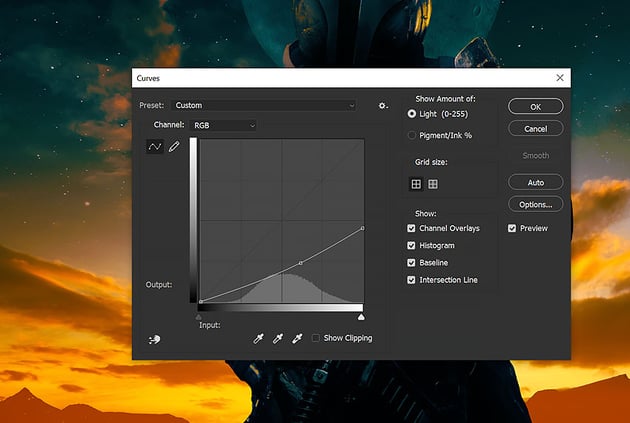
Now, we need to make some lighting adjustments to the moon. Start by going to Image > Adjustments > Curves, bringing down the highlights and making it nice and dark.
Since our layer is a Smart Object, we can use the Smart Mask to remove the edges for the Curves adjustment. We want the middle of the moon to be darker than the outer edges.

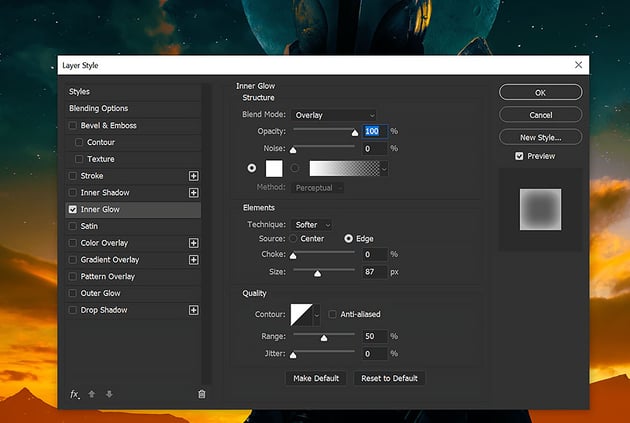
Step 4
We’re going to make that shadow even more intense by adding an Inner Glow effect.


Step 5
Finish off by clipping a New Layer into the moon, setting it to Multiply, and painting a dark blue #b3782c shadow in the middle and upper portion of the moon. We want brighter outer edges and a nice darker center.


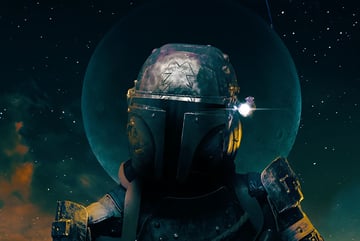
You’re All Done!
That’s how to make a Mandalorian-inspired effect in Photoshop. While we leaned heavily on blue and orange in this tutorial, feel free to experiment with different color combinations. The best thing about sci-fi and space themes is just how colorful and vibrant they can be.
You can also try out different visor and helmet shapes using the same techniques we used for the Mandalorian helmet.

Explore More Cool Resources From Envato Elements
Your love for sci-fi projects doesn’t need to end just yet! If you want to create even more cool designs, you need to check out Envato Elements’ offer. For a flat monthly fee, you get unlimited downloads of the best digital creative assets. You can download premium fonts, Photoshop add-ons, graphic templates, and more.
Here are just a few you can download right away:
Death Star Font (OTF, WOFF)
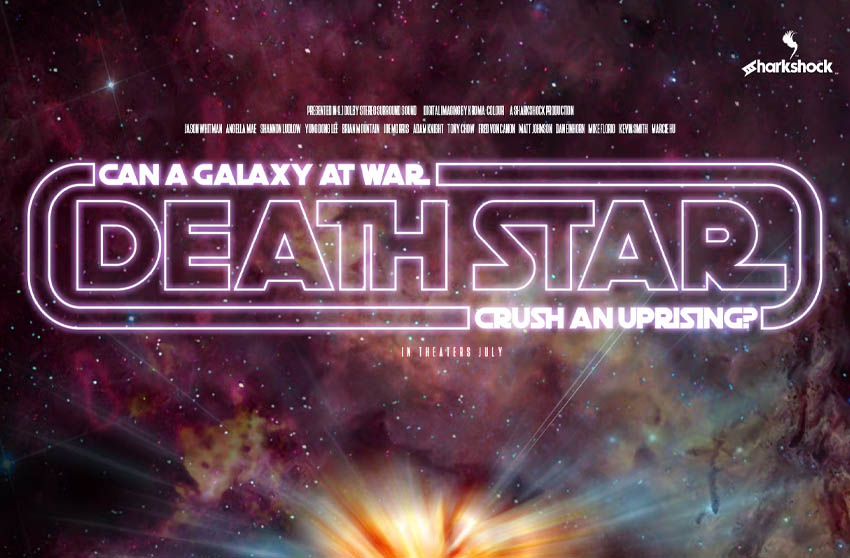

Death Star is a must-have font for any Star Wars fan. This font mimics the iconic font style perfectly, and it works great for both fan art and original projects.
Starfighter Photoshop Action (ATN, PAT, PSD)

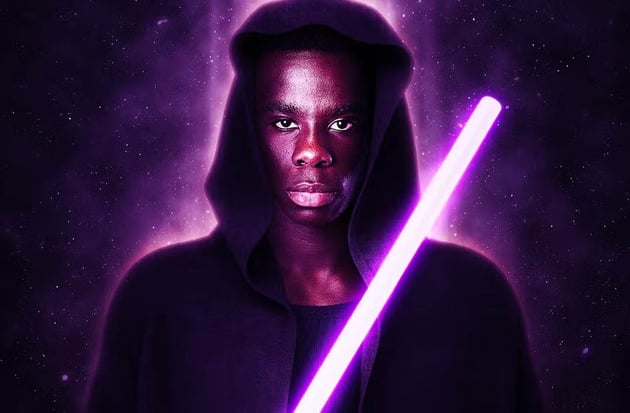
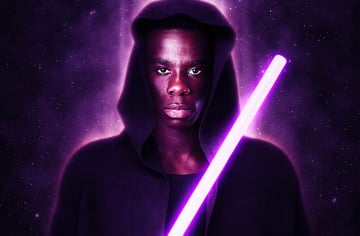
Turn yourself into a Jedi with just a few clicks. This action is fully layered and easy to customize. You can change both the lightsaber and cloke color, and the action includes its own video tutorial.
Space Nebula Photoshop Brushes (ABR, PNG)

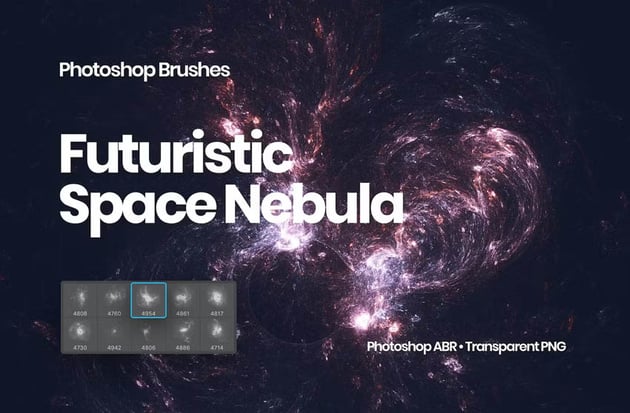
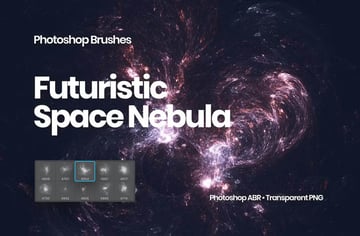
This set of space nebula brushes is both explosive and elegant. It also comes with fully colored PNG files for easy drag-and-drop galaxies.
Hologram Photoshop Action (ATN, PAT)

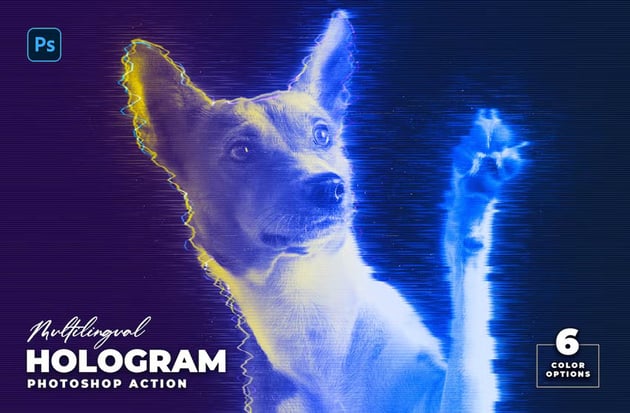

Holograms are a staple in all the best sci-fi movies, and now you can create a hologram photo effect in seconds. Apply it to pets, people, and even objects. Fully customizable, this action is easy to use and integrate into existing images.
The End Movie Poster (PSD)


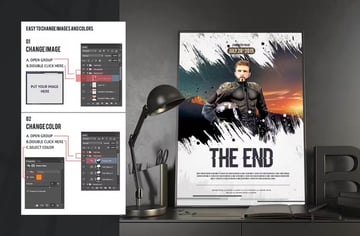
The Mandalorian may be a TV show, but it is as cinematic as a summer blockbuster movie. Swap the images and fonts in this template to create the look you want. Everything in this PSD is named, color-coded, and organized for easy editing.
Discover More Star Wars Creative Projects
If you love Star Wars Day, check out our cool Star Wars tutorials from previous years, and May The Force Be With You:
Want to Create More Photoshop Space Effects?
Looking for even more resources? Hungry to learn more Photoshop skills? Envato Tuts+ has your back: