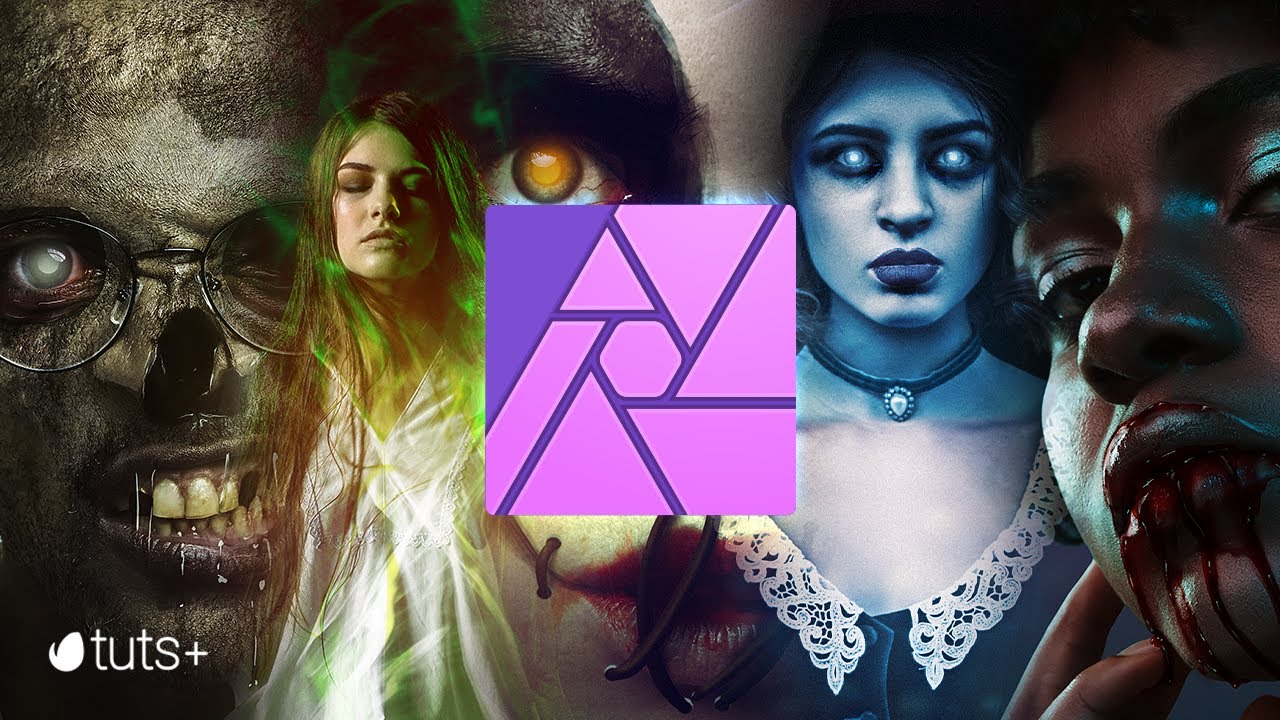
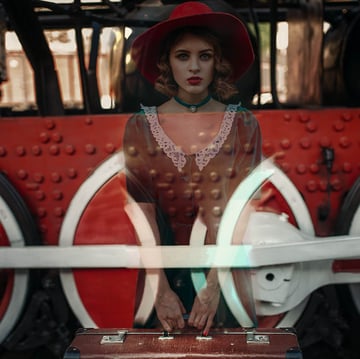
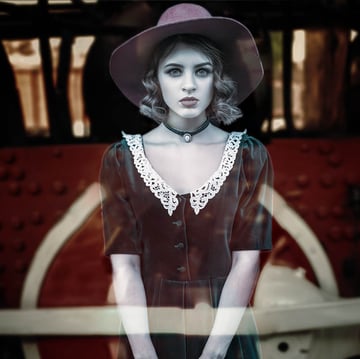
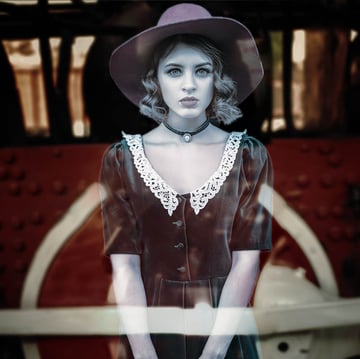
Today, we’ll be using a mixture of blending modes, layer masks, and adjustments layers to add a ghost to photos and create some spooky photo effects in Affinity Photo.
Looking for some Halloween photo editor resources? Look no further than Envato Elements! We have everything you need to do photo manipulation in Affinity Photo.
You can check out my new course over on our Envato Tuts+ YouTube channel. I’ll show you how to add Halloween effects to a photo, including zombies, witches, and more!
What You’ll Learn in This Affinity Photo Tutorial
- How to blend images in Affinity Photo
- How to make a ghost photo in Affinity Photo
- How to create creepy photo effects
- Affinity Photo manipulation techniques
What You’ll Need
To complete this project, you will need the following graphic resources:
Find more resources on Envato Elements!
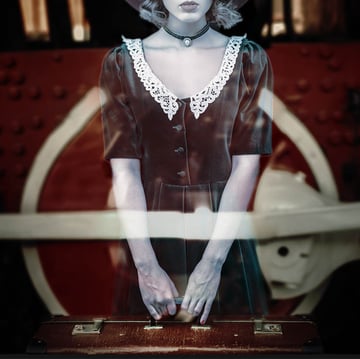
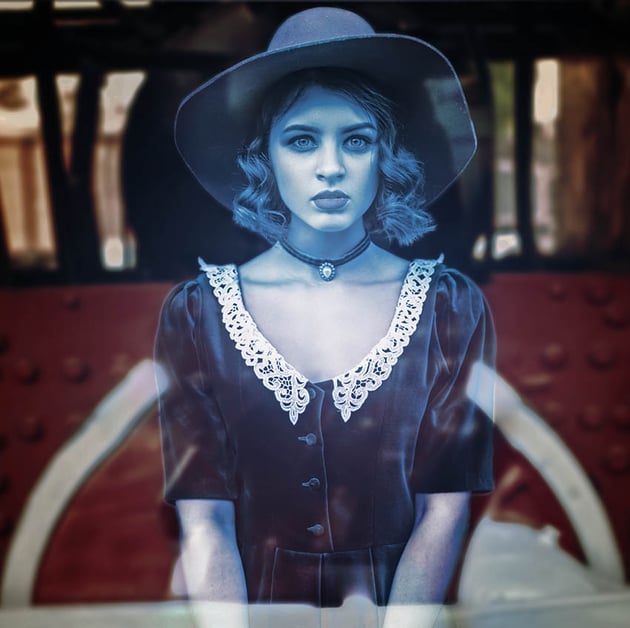
1. How to Make Someone Transparent in Affinity Photo
Step 1
First, we want to Duplicate our subject using Control-J. We always want to make sure we have a backup of our subject, just in case.
Now, we’re going to start by removing the subject from the background using the Patch tool. We want to keep as many original details as possible, using them to fill in the areas where the woman was. It’s best to patch using a few medium selections rather than one giant selection.
This doesn’t have to be perfect; in fact, it will likely look kind of bad! That’s okay, as we’ll return to it a bit later.


Step 2
Next, let’s create two New Layers, setting one to Overlay and the other to Soft Light.
On the Overlay layer, let’s add white to the middle of the canvas using the Brush tool.
We’ll use the Soft Light layer to create a vignette effect—painting black on the edges of the canvas.


Step 3
Then let’s create a Black & White adjustment layer set to 50% Opacity and 0% Red. This will desaturate the bright reds in the image.
Let’s also create a Brightness/Contrast adjustment layer set to -70% Brightness and +10% Contrast.


Step 4
We’re going to finish off the adjustments to the background with a Layer > New Fill Layer.
Let’s set it to a dark blue color #0F2247, a layer mode of Subtract, and an Opacity of 50%.


Step 5
Let’s go back to the original subject layer and Duplicate her using Control-J again.
Bring the duplicate above all your current layers and set it to Screen at 50% Opacity. From now on, I’ll be referring to this layer as the “ghost” layer.


Step 6
All we have to do now is select the subject on the Ghost layer using the Selection Brush tool.
You can use the Refine button in the upper options bar if you need to. Keep in mind that some soft fringe is fine, as it will add a slight glowing outline to our subject.
Once you’re happy with the selection, create and Clip a Mask into the Ghost layer. This will give us a standalone extraction of our subject. Extracting a subject while still keeping them on their original background is a great Affinity Photo manipulation technique!


Step 7
From here, we want to go back to the background layer we patched earlier and continue to refine it using the Patch tool.
It still doesn’t need to be perfect, as most of the background will still be mostly obscured. But if you are having a hard time getting the background not to look choppy, then you can add a Lens Blur Live Filter right above the patched layer. Blur just enough to make things look blended.


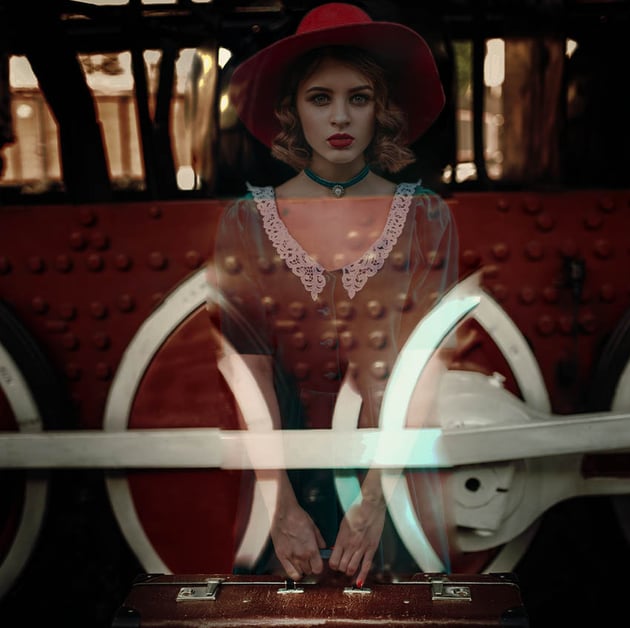
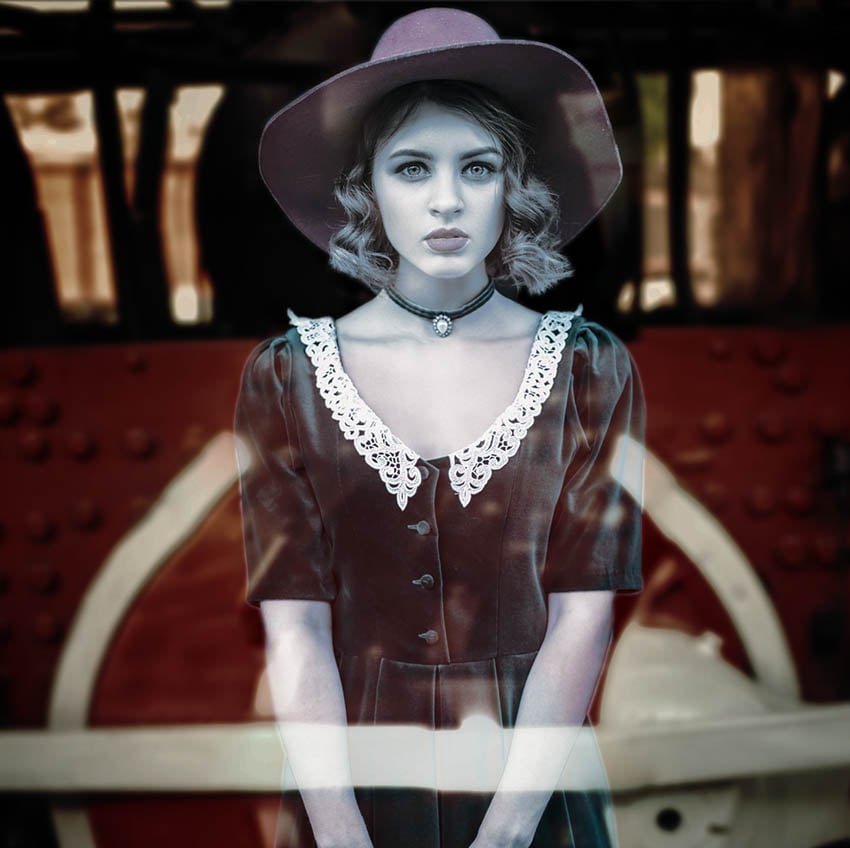
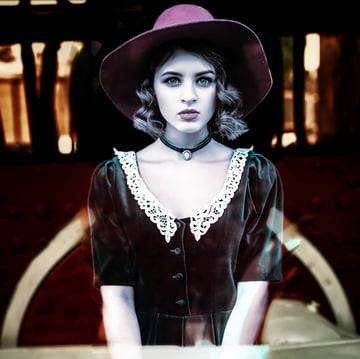
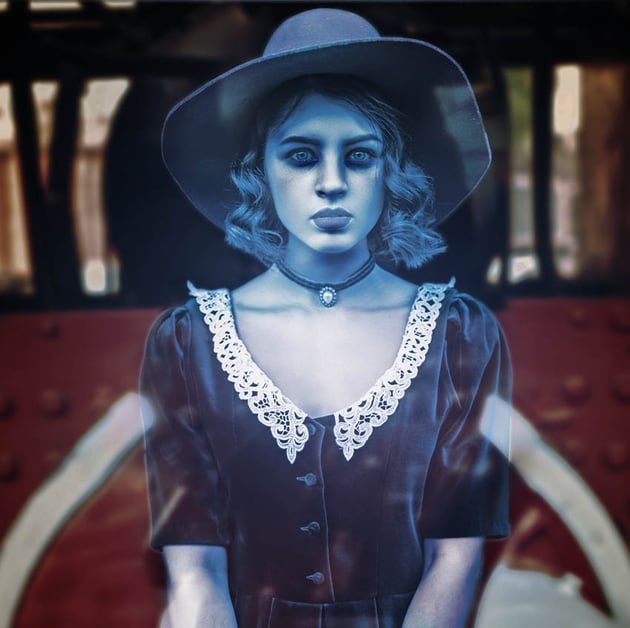
2. How to Make Someone Look Like a Ghost
Step 1
She’s transparent, but if you’re wondering how to make someone look like a ghost, we have a few more steps to go.
Let’s Duplicate the Ghost subject, including the layer mask, and change the layer mode from Screen to Soft Light.
Now, we can Clip an HSL adjustment into the second Ghost layer, setting it to -75% Saturation. Then add a Recolor adjustment set to 200 Hue and 60% Saturation. This combo should give you a ghostly gray tint.


Step 2
Duplicate the original Ghost layer and bring it to the top of the layer stack. Set the layer mode to Screen and the Opacity to 90%.
Let’s create and Clip a Recolor adjustment layer into the new Ghost layer, setting it to 200 Hue and 23% Saturation.

Step 3
Next, we want to focus most of the brightness on the middle of the subject. So let’s create and Clip a Brightness/Contrast layer into the third Ghost layer. Set the Brightness to -61% and the Contrast to 100%.
Then, using a soft round Brush set to black, we want to mask the darkness away from the middle of the subject. When masking adjustment layers, you do not need to create a layer mask. Just paint black or white directly onto the layer.
Step 4
Make a final Duplicate of the original Ghost layer and bring it to the top of the current layer stack. We should have four Ghost layers in total. Set the layer to Lighten.
Create and clip a Recolor layer into the final Ghost layer. Set the Hue to 23.8 and the Saturation to 38%, giving it an orange hue.
Clip an Invert adjustment layer above the Recolor layer. This layer will invert the color to blue and make the shadows brighter.

Step 5
Group your four Ghost layers.
If there are a lot of white edges, you can clean them up by creating a Layer Mask in the group, placed above all four ghost layers. Then, using a soft round Brush, mask out those edges.

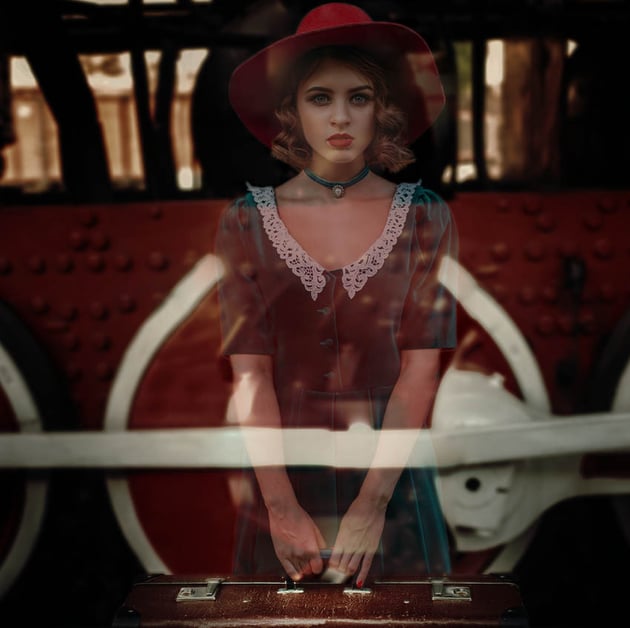
3. How to Create a Glow Effect
Step 1
Now that we have our ghost, she needs some glow. Let’s Group all the layers we have so far and name the group “Main Subject.”
Duplicate that group, and Right Click > Rasterize. Change the copy’s layer mode to Overlay.


Step 2
Create and Clip a Layer Mask into the copy, and then Invert it using Control-I.
Now, we can use a soft white Brush to mask the middle of the image back in. We are focusing on the subject, giving her a glow of contrast.


Step 3
Next, let’s clip a Gaussian Blur Live Filter into the copy. Set the Radius to 28 px.
You can find Live Layers towards the bottom of the Layers panel, next to the Layer Effects.


Step 4
Now, create and Clip an Invert adjustment layer above the Gaussian Blur layer. Then add a Recolor layer above the Invert layer, setting it to 210 Hue, 30% Saturation, and -26 Lightness, turning it blue.

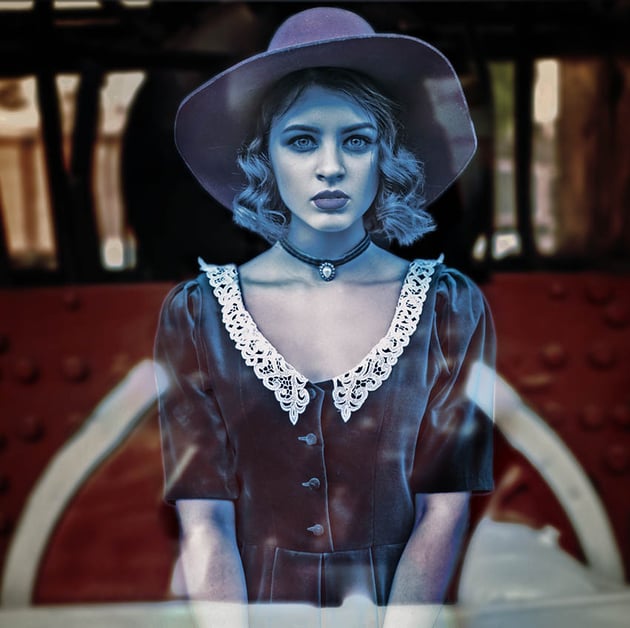

Step 5
Go back into the Main Subject group and Duplicate the original Ghost layer set to Screen. Bring the duplicate to the top of the layer stack, and set it to Soft Light at 85% Opacity.


Step 6
Create and clip a Gaussian Blur Live Layer into the newest Ghost layer, setting the Radius to 54 px.


Step 7
Finally, create a New Layer set to Screen. Using a very large, soft, round brush, paint a bloom of light blue #64C4FF light coming from the center of the subject. Lower the Opacity to 30%.


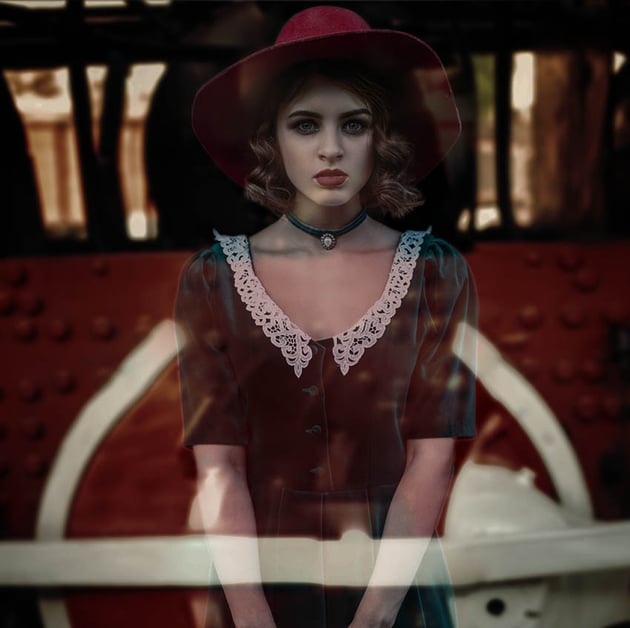
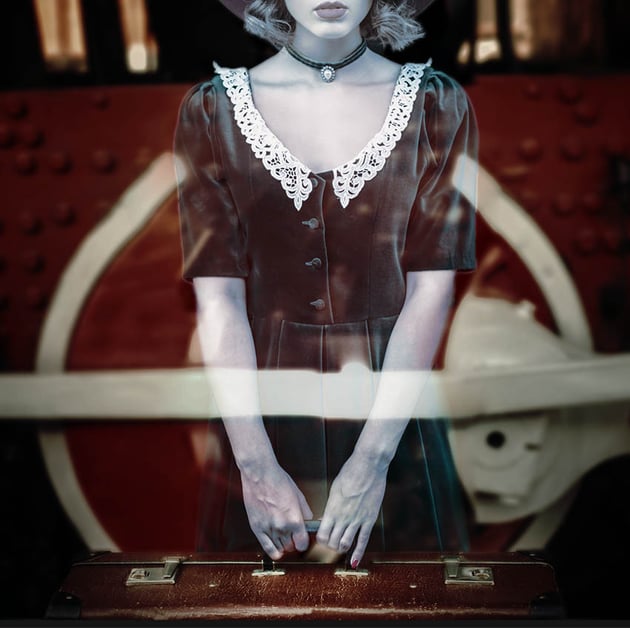
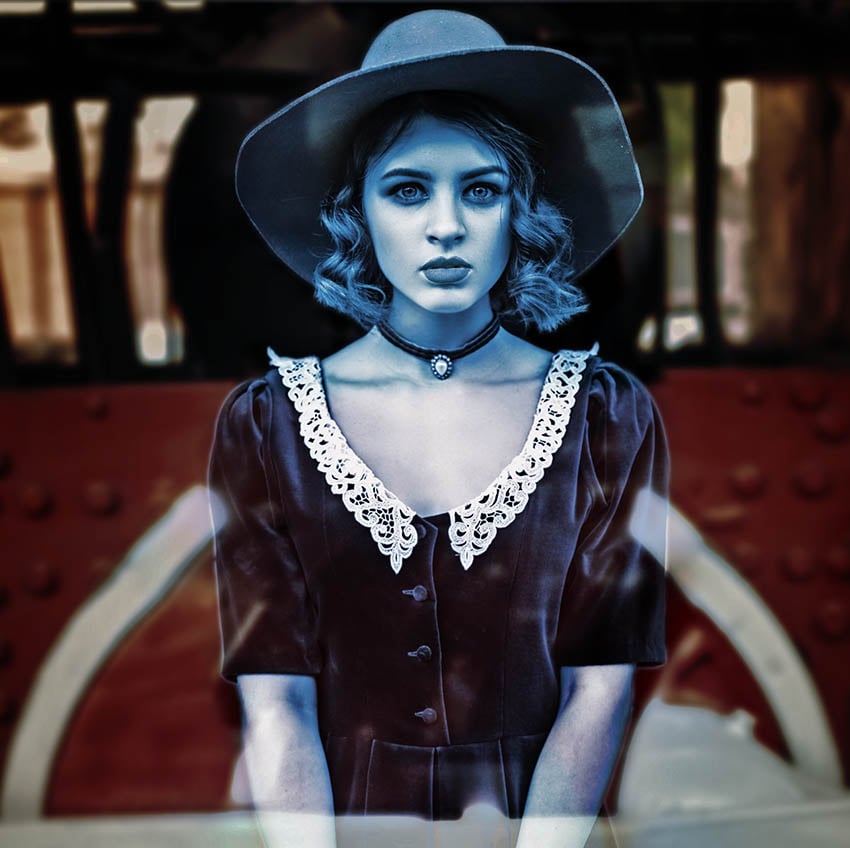
4. How to Create Ghost Eyes in Affinity Photo
Step 1
We have just a few more Affinity Photo editing details to go.
First, create a New Layer set to Overlay. On this layer, use a soft black Brush to enhance the dark circles under the subject’s eyes and her cheeks and nose. Use multiple layers to get an even darker effect.


Step 2
Create a New Layer set to Screen. Use a small, soft, round Brush to paint light blue #92D5FF on the eyes of the subject. You want the brush to be the size of the subject’s iris, and then click once for each eye.
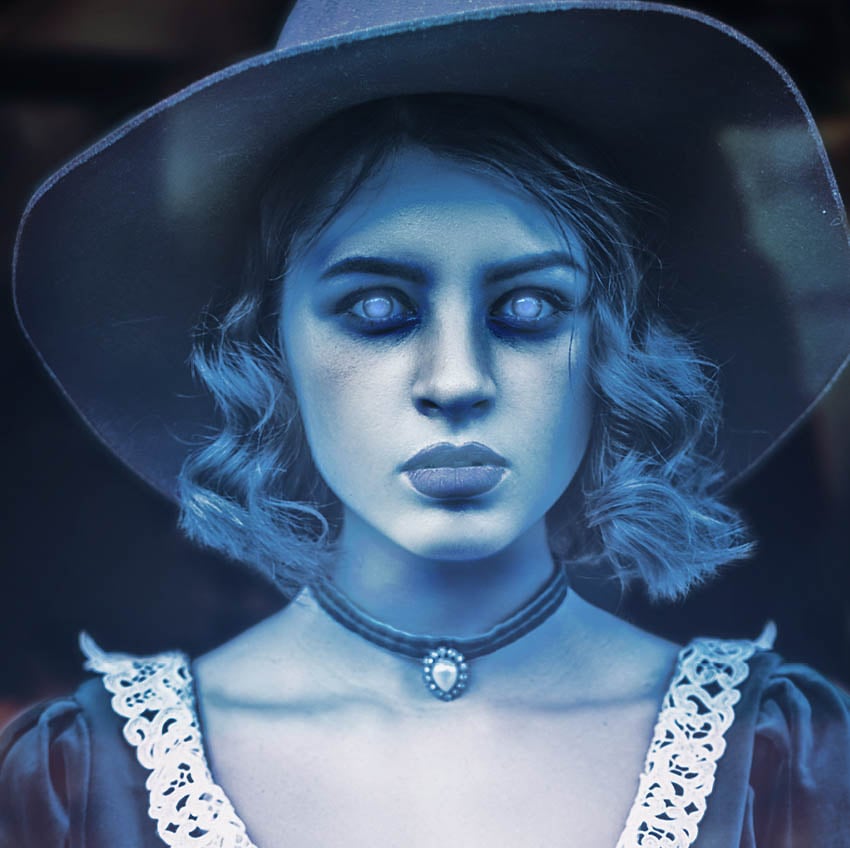


Step 3
Create a New Layer and set it to Color Dodge. Use a 75% Hard round Brush to paint a dot of blue #6A7FB3 on each pupil.
If the pupil is too harsh, you can use a soft Eraser brush to remove some of the opacity of the pupils. If you want the eyes to be extra bright, Duplicate the layer using Control-J.


Step 4
Finish everything up with a Brightness/Contrast layer set to -5 Brightness and 20% Contrast. Then add a Color Balance layer set to -37 Red and 34% Blue. These layers will help tie everything together.


You’re Done!
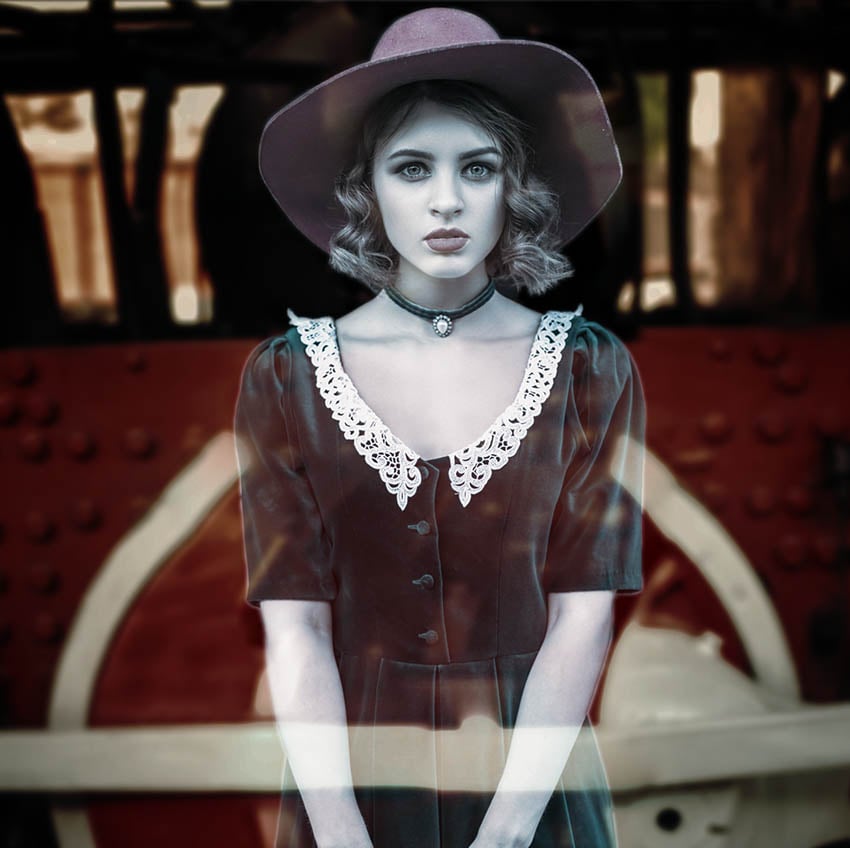
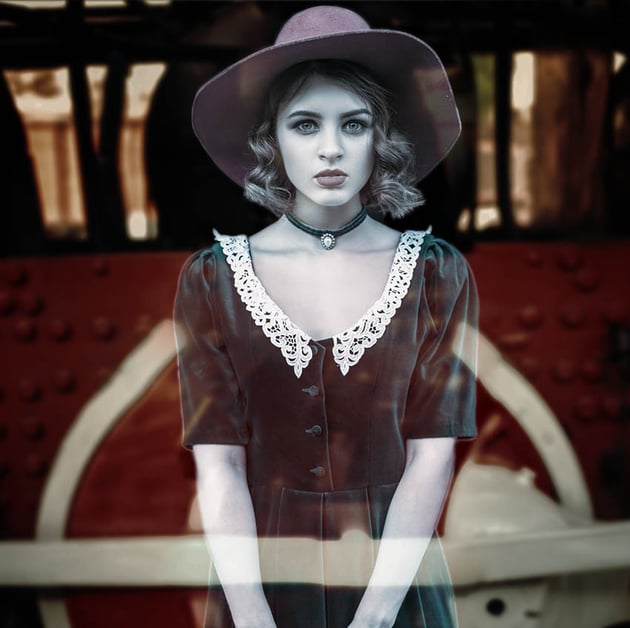
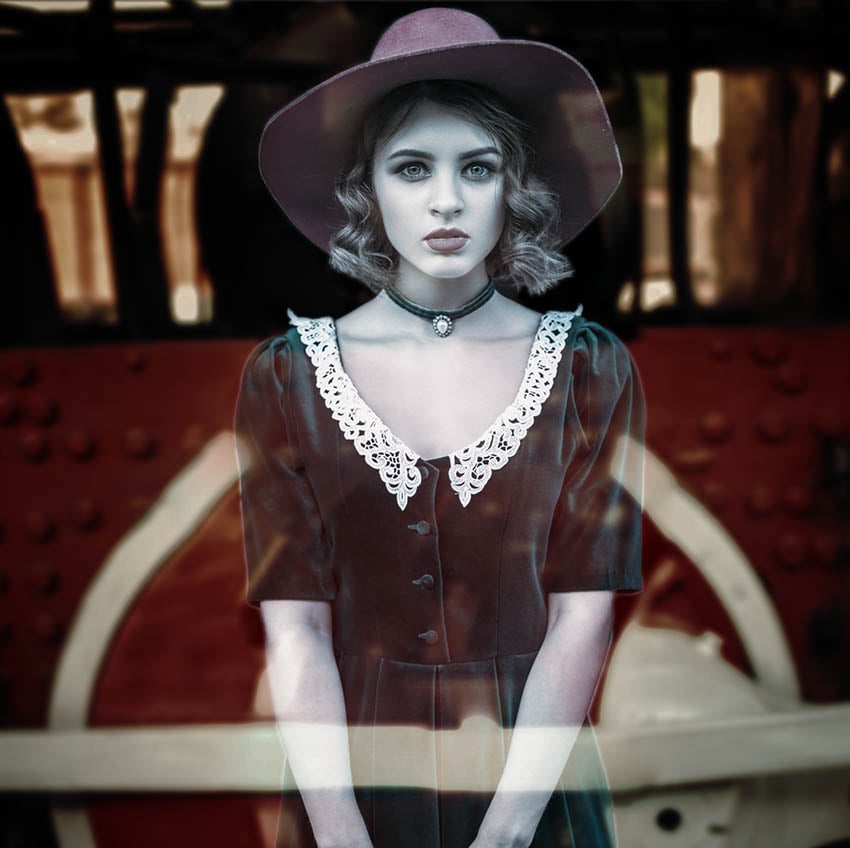
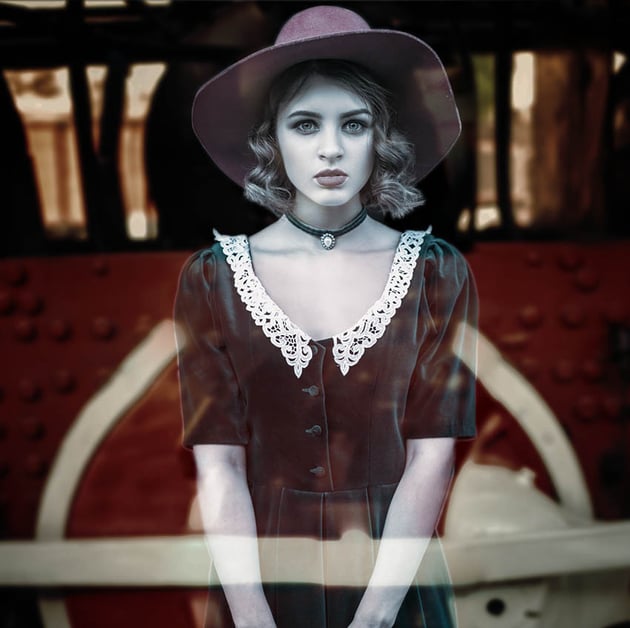
That’s how to make a ghost photo in Affinity Photo! You can even try this same ghost photo effect using different layer modes and colors. It’s a very versatile and customizable technique. We even have more ghost-themed Affinity Photo tutorials that you can pair with it.
Embrace the spooky season and add Halloween effects to photos today! And check out some of the other Affinity Photo editing resources below.
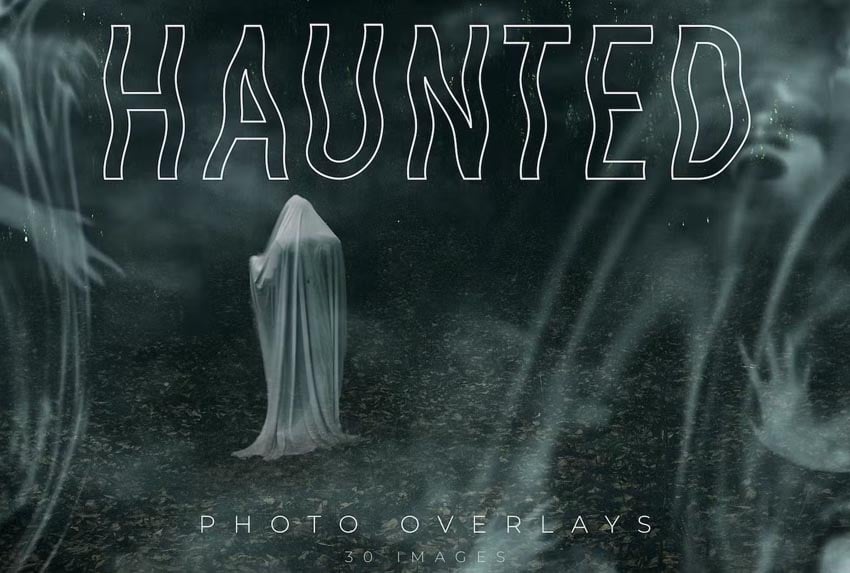
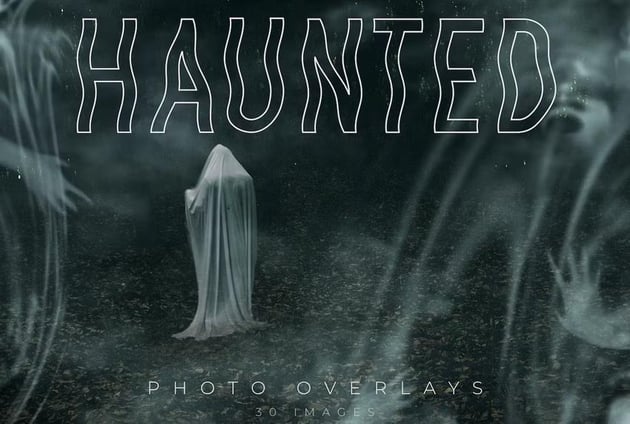
30 Haunted Photo Overlays
This is a must-have for anyone who loves creepy photo effects. Add a ghost to photos instantly by just dragging and dropping these ghost overlays right onto your photo.
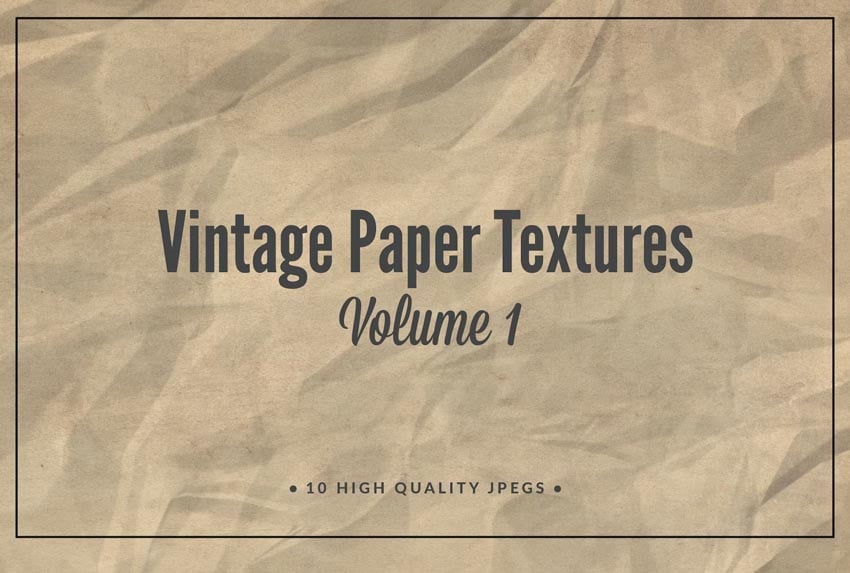
Vintage Paper Textures Volume 1
Halloween photo effects always look better with a nice vintage paper texture added to them. But any photo manipulation in Affinity Photo will benefit from these textures!


Dust Particles Brushes
Spooky photo effects are always full of atmosphere. Add atmosphere instantly using these dust particle brushes! Yes, they are compatible with both Affinity Photo and Photoshop.


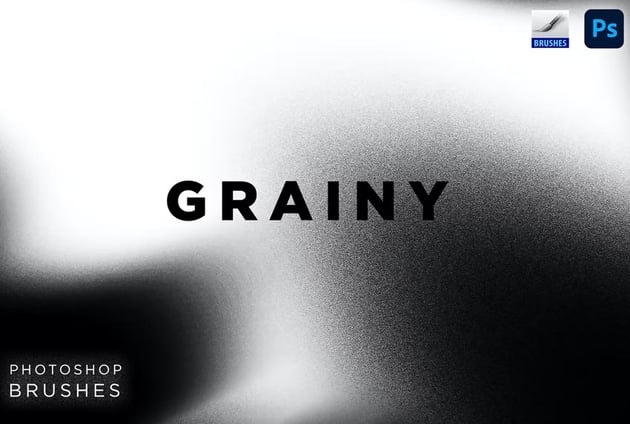
10 Grainy Blob Photoshop Brushes
Heads up, all Halloween photo editors! You’re going to want to add these grainy blob brushes to your tool belt. Cross-compatible with both Photoshop and Affinity Photo, they are a must-have texture brush.

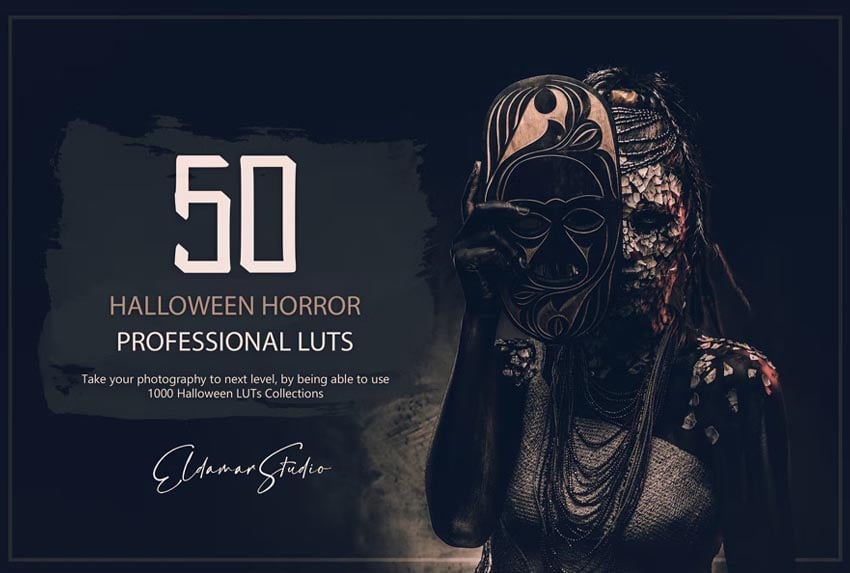
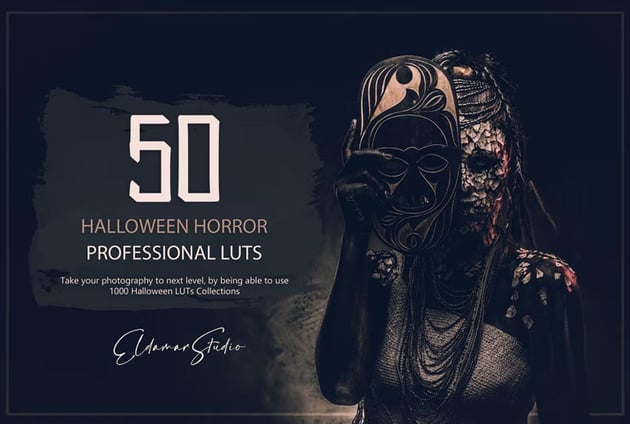
50 Halloween Horror LUTs and Presets Pack
If you’re wondering how to blend images in Affinity Photo, I always say a good library of LUTs is a must! LUTs add instant color grades and filters to a photo. These ones are perfect for any and all ghost photo effects.

Check out more Affinity Photo tutorials and Halloween photo effects below.