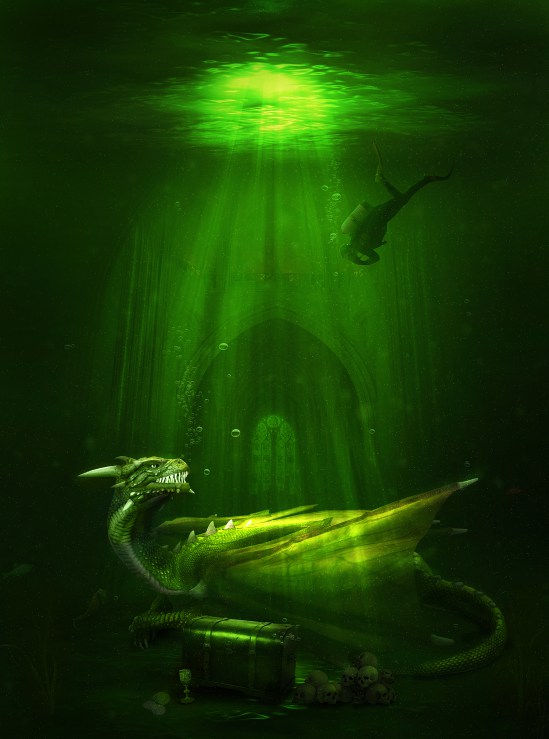
In this tutorial we will create an awesome underwater photo manipulation. I’ll explain some of the more complex techniques I use in the first steps to make it easy for beginners but intermediate and advanced users can also learn a thing or two.
I like doing underwater scenes because there is something mysterious about the depths of the oceans where all kind of strange creatures live but also because I like putting menacing creatures and curious humans together in a scene.
Tutorial Resources
Step 1
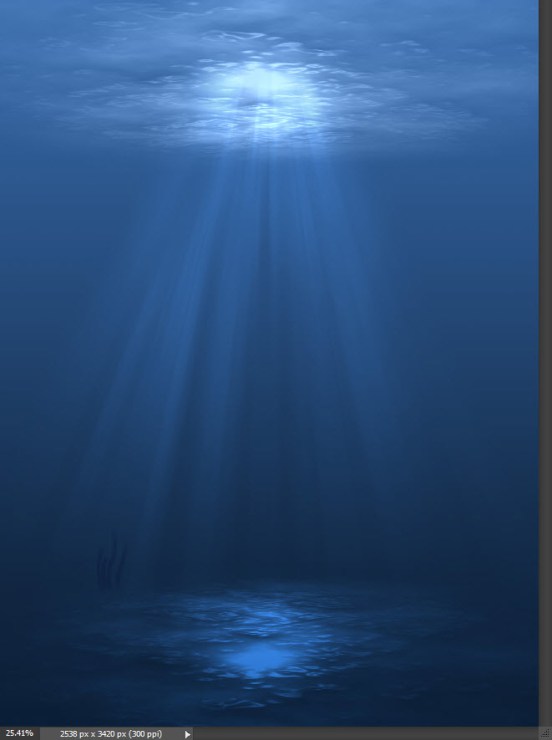
Open the file “Underwater”. This will be the base of our scene.
Step 2
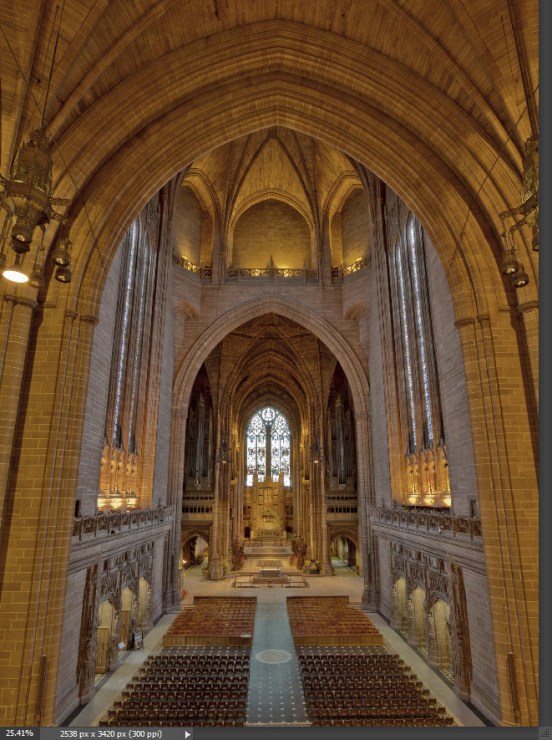
Open the file “Cathedral”. Copy all by pressing Ctrl + A and Ctrl + C. Go back to our scene and paste with Ctrl + V. Transform this layer into a Smart Object by right clicking on it in the layer Palette and choosing Convert To Smart Object from the drop down menu. Press Ctrl + T to enter Free Transform and position the cathedral as shown below. Hold the Shift key while dragging the corners when in Free Transform to resize proportionally.
By converting a layer into Smart Object we can resize the layer without actual loss of pixel information. We can also apply various filters which we can edit at a later time.
Step 3
Don’t forget to properly name your layers – organization is key when working with lots of layers.
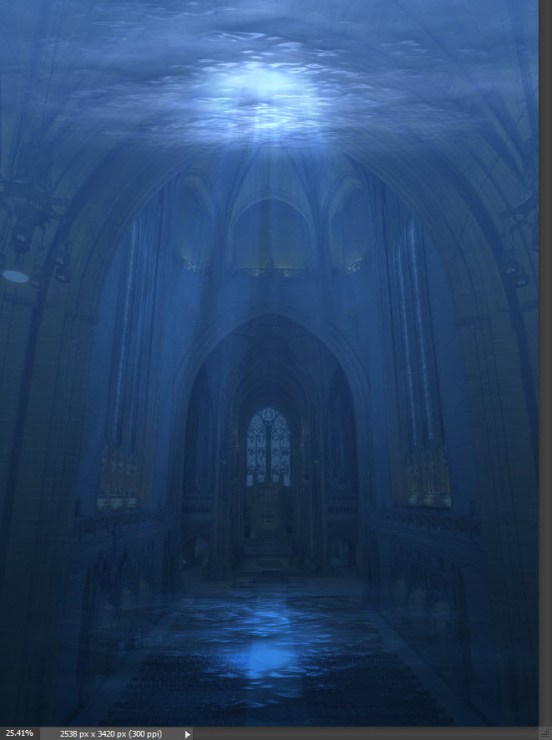
Change the blending mode of the Cathedral layer to Soft Light and lower the opacity to 43%. As you can see this makes the cathedral blend nicely with the scene.
Step 4
We will use layers masks a lot in this tutorial so a short explanation is in order.
First you can create layer masks by going to Layer > New Layer Mask > Reveal All.
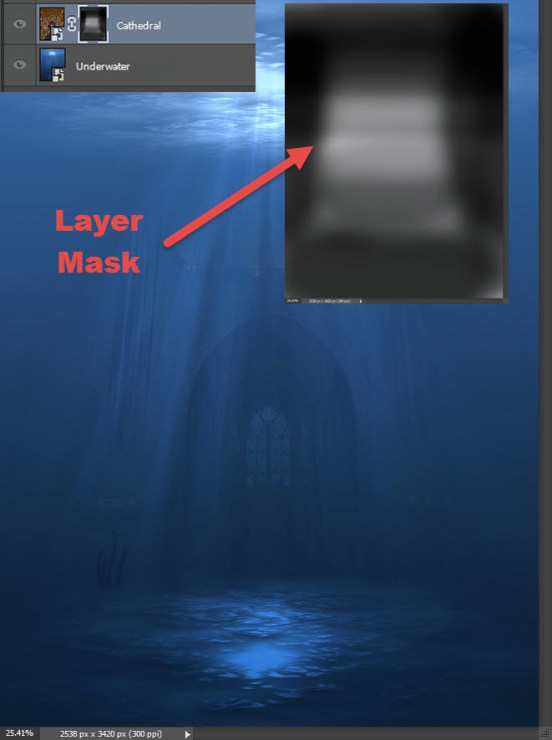
Second – layer masks allow us to partially or completely hide a section of the layer without deleting the actual pixels of that layer – we are merely “masking” the layer. By painting with a black brush in a layer mask we will hide the painted area. If the brush is at various opacities (smaller than 100%) than we will partially hide that section and achieve a transparency effect that is very good for blending various objects in a scene. White color reveals a section of the layer – so for example if we fill the layer mask with black (Shift + F5) we will completely hide the layer. Painting with a white brush at various opacities will partially or completely reveal the painted section.
Third – make sure to click on the layer mask thumbnail (which is to the right of the layer thumbnail in the layer palette) before painting with black or white. Otherwise you’ll end up painting over the actual layer which is not something that you may want.
So in this step create a layer mask (you already know how, right?). Fill it with black and select the Brush Tool (B). Select the standard round soft brush and set the opacity to 50%. Paint in the layer mask over the center section of the cathedral to partially reveal it. As you go further from the center lower the opacity to 20-30% to fade it into the background.
Step 5
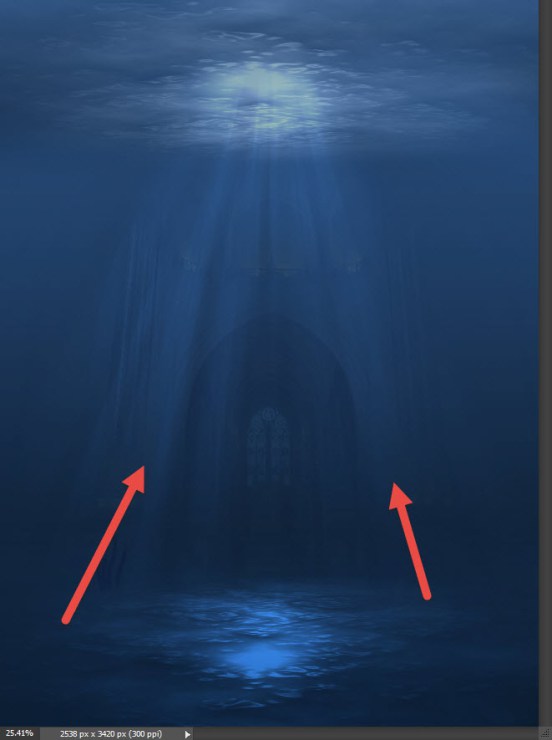
Create a new layer (Ctrl + Shift + Alt + N) and with the standard round soft brush at 5% Opacity and 500px size paint over the upper section of our scene to darken it.
Step 6
We will use Adjustment Layers a lot in this tutorial so let’s get you familiar with them.
They are a non-destructive way of applying various adjustments and effects to a document. By non-destructive I mean that you can edit the effects at any time (this includes deleting the effect, changing the opacity of the effect and the blending mode).
All Adjustment layers can be found under Layer > New Adjustment Layer > …..
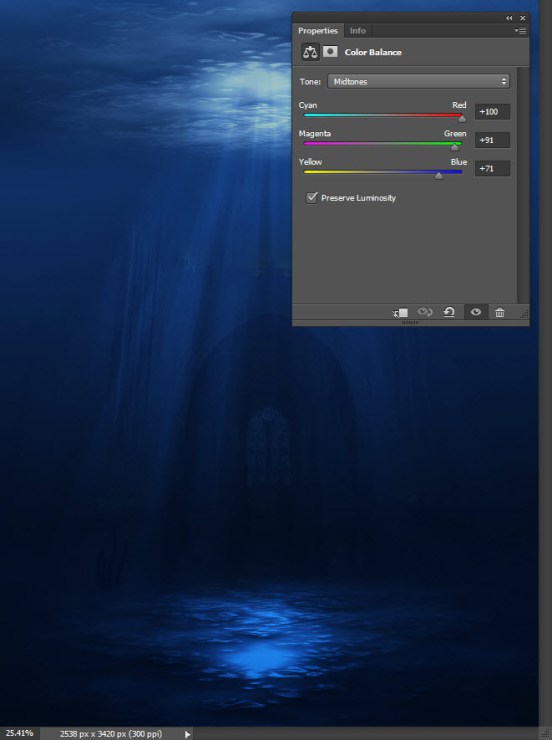
Let’s see one in action. Create a Color Balance Adjustment Layer (Layer > New Adjustment Layer > Color Balance – remember?) and use the settings shown below to boost the colors. Change the blending mode to Soft Light and you’ll see that our scene just got darker and more intense.
Step 7
Now that the background is done let’s start placing some characters that will give life to our scene and tell a story.
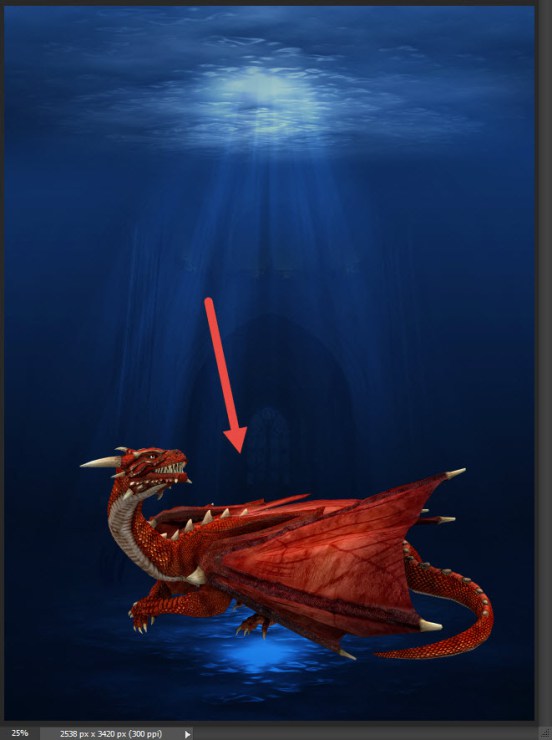
Open the file “Dragon” (thankfully it’s already cut into a transparent png so we don’t have to do any selections) and select all with Ctrl + A. Copy with Ctrl + C and paste it into our scene with Ctrl + V. Don’t forget to convert it into a smart object (step 2 tells you how). Convert all imported layers into smart objects – especially if you’re going to resize them.
Use the Free Transform to position the dragon on the bottom of the cathedral as shown below.
Step 8
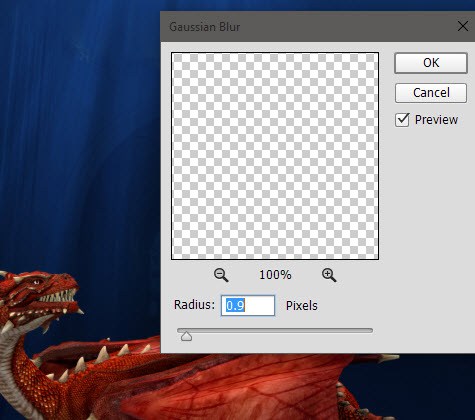
The dragon layer is too sharp (I’m talking overall texture not edges) compared to our scene so let’s blur it a little bit. Apply a 0.9px Gaussian Blur to the dragon layer (Filter > Blur > Gaussian Blur).
Step 9
Next we’ll apply a bunch of effects and brush strokes to the dragon but we want to restrict them only to the dragon layer. In order to do this we will have to “clip” the layers to the dragon layer. But how do we do that?
Well, it’s pretty easy actually. You hold the Alt-key and click between two layers in the layer palette – by doing this you’ll clip the upper layer to the lower layer and thus show the upper layer only through the visible pixels of the lower layer.
But what if you want to clip a second layer to the bottom layer (which already has a clipped layer above)? You just Alt-click again between the layer you want to clip and the already clipped layer above the bottom layer.
It sounds complicated but once you’ll see the things in action you’ll see how easy it is.
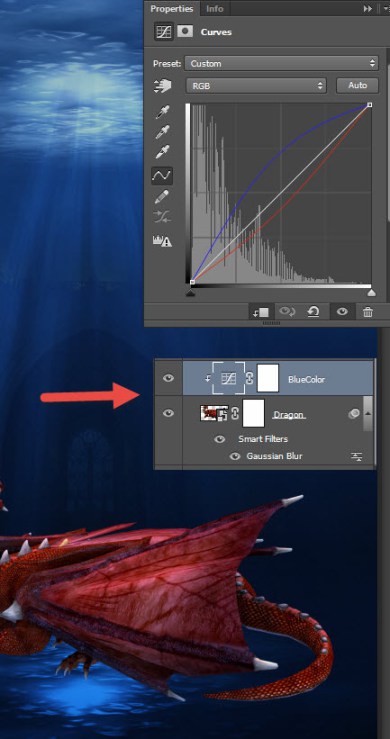
So, let’s create a Curves Adjustment Layer. Use the settings shown below to reduce the intense reds of the dragon and add some blues. The effect is applied to the whole scene. If you Alt-click between the curves and the dragon layer magic happens and suddenly the effect is only applied to the dragon.
Step 10
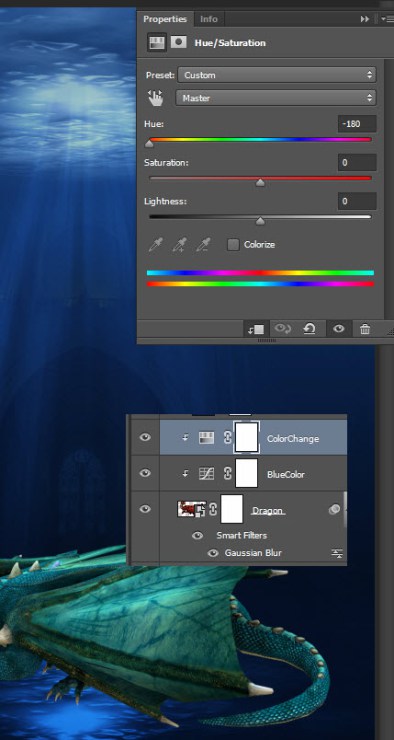
Let’s clip another adjustment layer to the dragon layer. Create a Hue/Saturation Adjustment Layer and drag the Hue slider to -180. Clip this layer to the dragon layer by Alt-clicking between the Hue/Saturation layer and the already clipped Curves Adjustment Layer and voila – multiple clipped layers to the same bottom layer – the dragon.
I won’t explain again how the clipping works so try to do your best and understand – if you’re still in doubt read the steps again and repeat the instructions.
Step 11
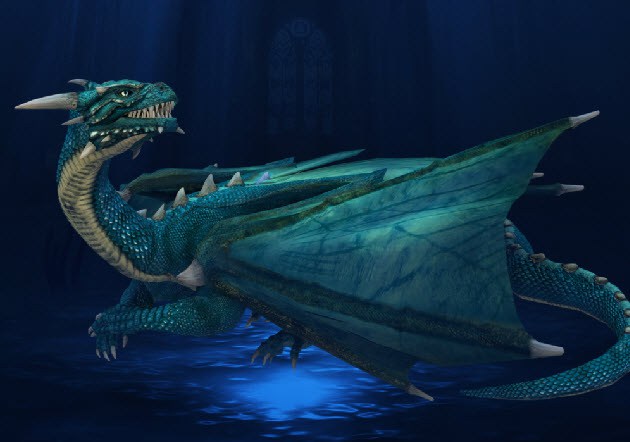
Create a new layer and fill it (Shift + F5) with a deep blue color (#0a234b). Clip this layer to the dragon layer and lower the opacity to 49%. Add a layer mask and with a black round soft brush at 50% Opacity paint over the highlights of the dragon (in the layer mask).
Step 12
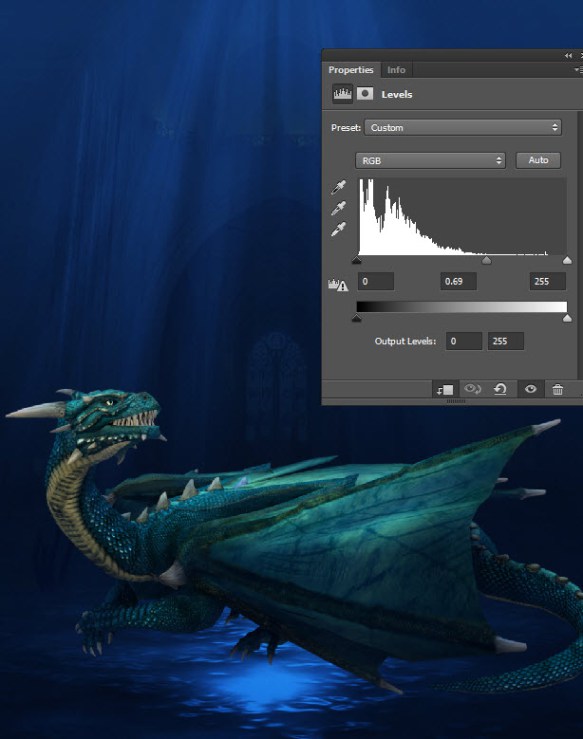
Create a new Levels Adjustment Layer and use the settings shown below to darken. Clip this layer to the dragon layer and fill the layer mask with black. With a white round soft brush at 90% opacity paint in the layer mask over the lower section of the dragon. Clip it to the dragon layer.
We are essentially correcting the lighting of the dragon layer – because the light will come from above we want the lower section more dark and the upper section lighter.
Step 13
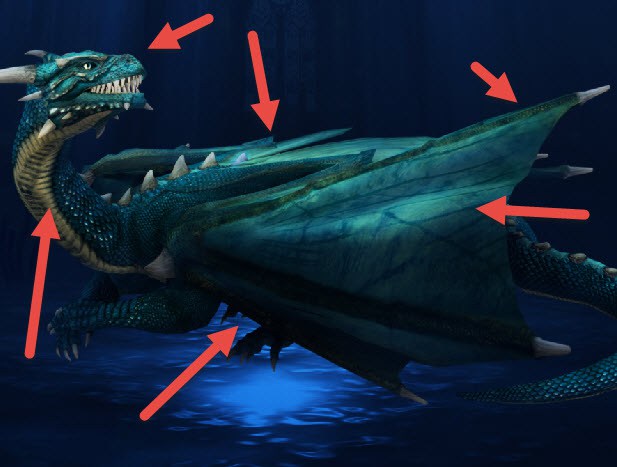
Let’s further improve the dragon’s lighting. Create a new layer and set the blending mode to Overlay. With a round soft brush at 20% opacity paint over the dragon’s highlights. Once you’re done paint with black over the existing shadows. Clip the layer to the dragon layer.
I used 3 layers to achieve the effect below (all of them set to Overlay) because I wanted to be able to delete a layer if something was not to my liking.
Step 14
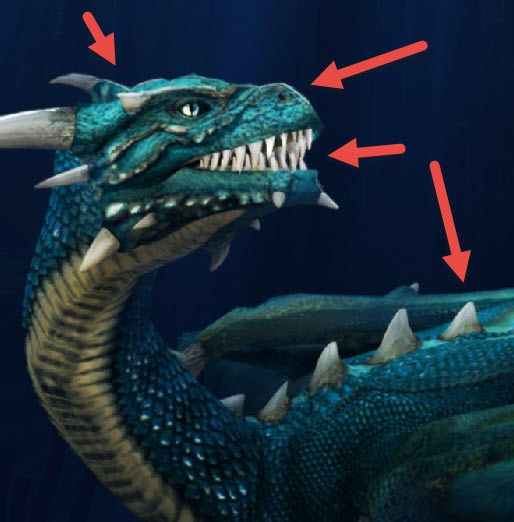
Create a new layer and set the blending mode to Dodge or Overlay. With the round soft brush at 80% opacity and 1px size paint some highlights on the edges of the dragon shape – especially in the upper sections. I also took the liberty to paint some highlights over the dragon’s teeth – he is supposed to be a menacing figure and white sharp teeth are a good way to express it.
Clip this layer to the dragon layer.
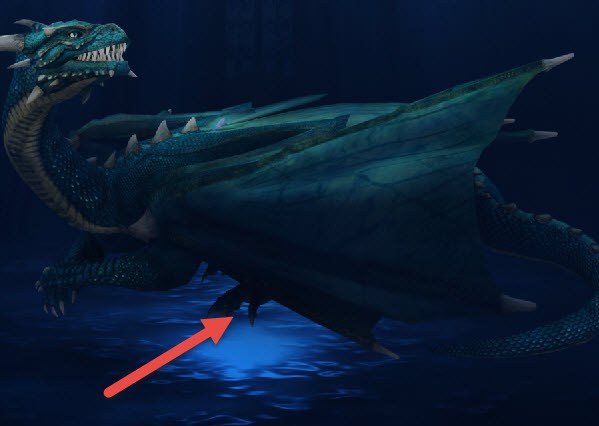
You should also paint some shadows on a new layer below the dragon layer – use a soft round brush at 50% Opacity.
Step 15
Ok, how do we go about blending the dragon with the scene? One obvious answer would be to lower the opacity but this will have the unwanted effect of the background scene showing through the dragon’s body. So we have to do it in another way.
Create a new layer but this time don’t clip it to the dragon layer. Sample a blue color from the background (#092046) and with the round soft brush at 20% opacity stroke repeatedly over the dragon – especially over the lower sections.
Step 16
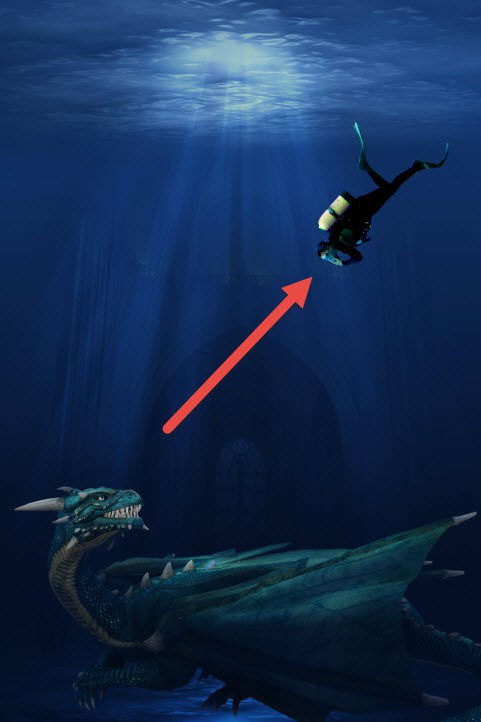
Let’s add the diver. Open the file “Diver” and make a selection of the diver with your favorite selection tool (you can use the Pen Tool to make a path around the diver and then Ctrl + Enter to transform the path into a selection). Copy and paste the diver into our scene and position him as shown below (with Fee Transform).
Step 17
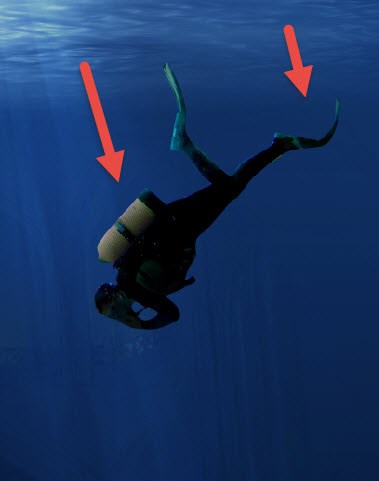
Create a couple of new layers (once you’re satisfied with a result you can continue on another layer just in case you make a mistake) and paint some lighting on the diver until you achieve a result as shown below. You should clip these layers to the diver layer and consider the light direction – which is from above. Thus you should darken the bottom parts of the diver and lighten the upper parts. In order to achieve this you can either use Levels Adjustment layers that darken and use layer masks to restrict the darkening effect or you can simply paint with black and white (at low opacities).
Step 18
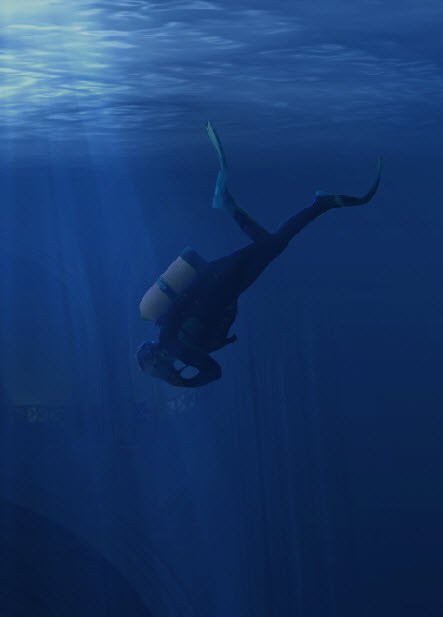
Next we should blend the diver with the scene like we did with the dragon. Create a new layer and with the same blue color as that at step 15 paint (at a low opacity) with a soft brush over the diver.
Step 19
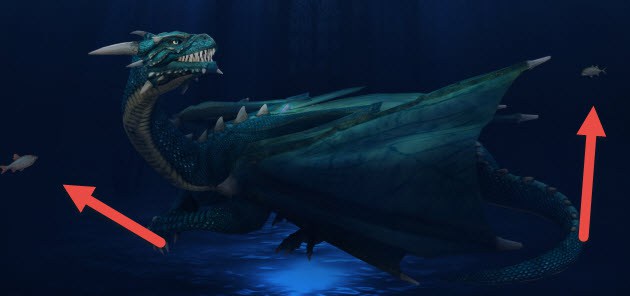
Let’s add some marine life. Open the file “Fish” and place two fish in our scene as shown below.
Step 20
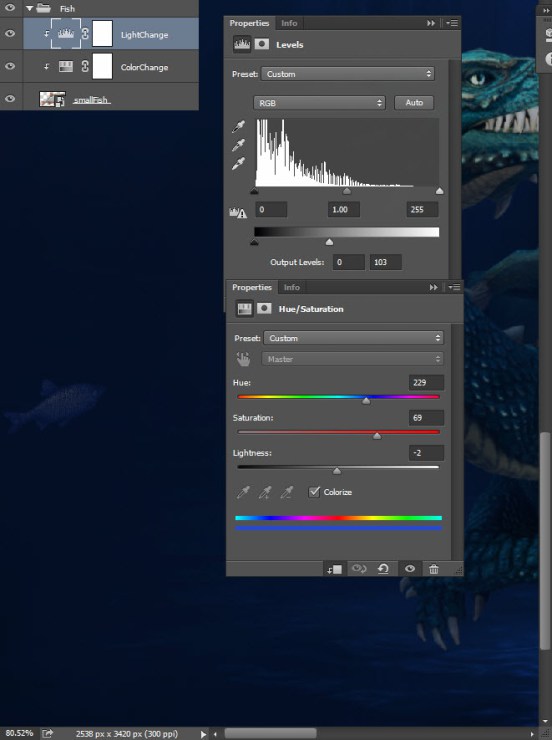
Now create two Adjustment Layers (a Hue/Saturation and a Levels Adjustment Layer) and clip them to one fish. Use the settings shown below to correct the color of the fish (make them more blue) and correct the lighting (make them darker). Repeat these steps for the other fish.
Step 21
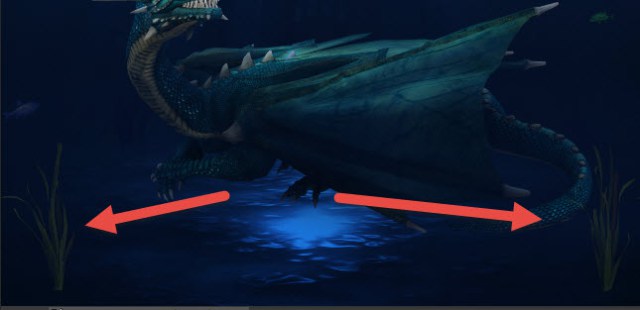
Now let’s add some aquatic plants. Open the file “Aquatic Plants” and copy/paste them in our scene. Duplicate the aquatic plants layer once (Ctrl + J) and place each plant as shown below. Lower the opacity of each layer to 14%.
As you see lowering the opacity blends the plants nicely with the background – you could also use the technique at step 15 but it’s not worth the trouble – the plants are small decorative elements and lowering the opacity looks good enough.
Step 22
Now group the two aquatic plants (Ctrl + Click on each and press Ctrl + G) and add a layer mask to the group. Paint with a round soft brush in the layer mask to hide the bottom hard edges.

Step 23
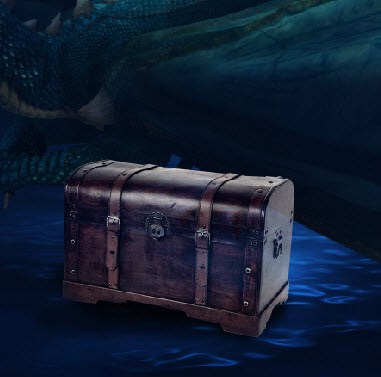
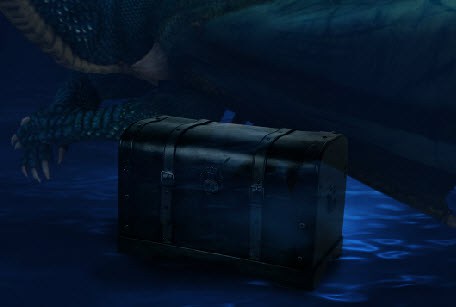
Open the file “Coffer”. Copy and paste the coffer in our scene. Put it as shown below and on a new layer (below the coffer layer in the layer palette) paint some shadows with a soft round brush at 50% Opacity.
Step 24
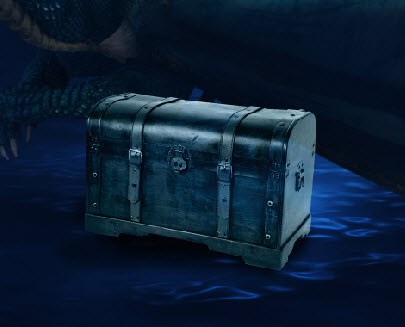
Make a new layer and fill it with a blue color (#174451). Clip this layer to the coffer and change the blending mode to Color.
Step 25
Darken the coffer by painting on a new layer (clipped to the coffer layer) with black. Avoid painting too heavily on the top section because that’s where the light will hit. You can also use a Level Adjustment Layer to darken the coffer.
Step 26
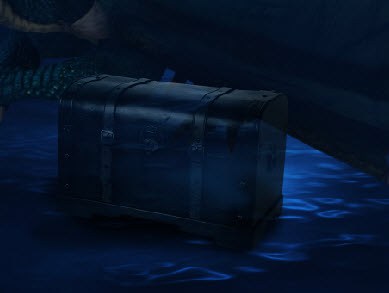
Use the technique described at step 15 to blend the coffer with its environment.
Step 27
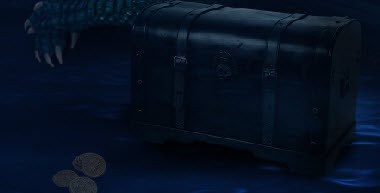
Open the file “Coins”. Copy and paste the coins next to the coffer. Paint a subtle shadow on a new layer below the coins and group both layers. Lower the group opacity to 18%.
Step 28
Open the file “Cup”. Copy and paste the cup next to the coins and lower the opacity to 88%. Paint some shadows below the cup (on a new layer obviously) and blend the cup with the environment as explained at step 15.

Step 29
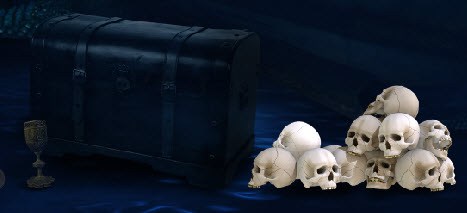
Open the file “Skulls”. Copy/paste the skulls next to the coffer and on a new layer below the skulls paint some shadows.
Step 30
Create a new Levels Adjustment Layer with the settings shown below and clip it to the skulls layer to darken it.
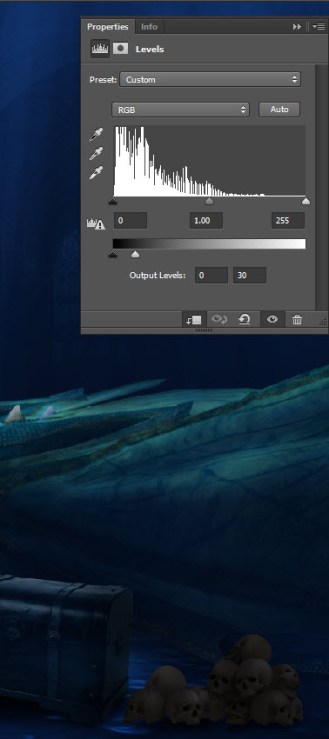
Step 31
Create a new Hue/Saturation Adjustment layer with the settings indicated below and clip it to the skulls layer to make the colors match the overall scene.
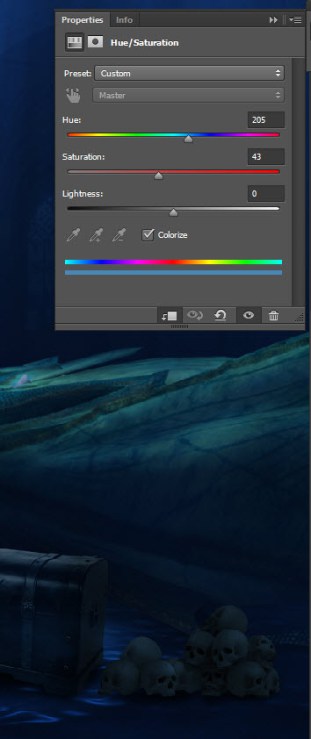
Step 32
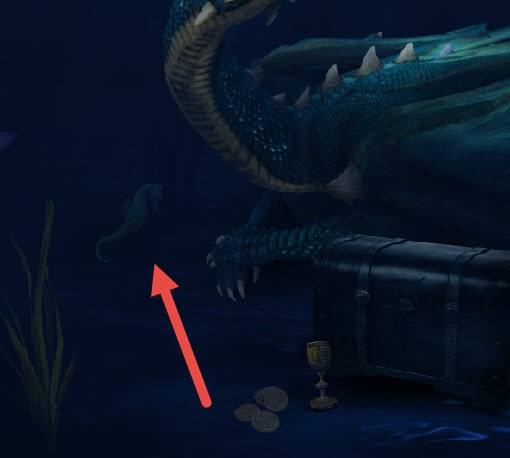
Open the file “Sea Horse”. Copy and paste it next to the dragon as shown below and lower the opacity to 15%. This could represent the dragon’s offspring or another marine creature.
Step 33
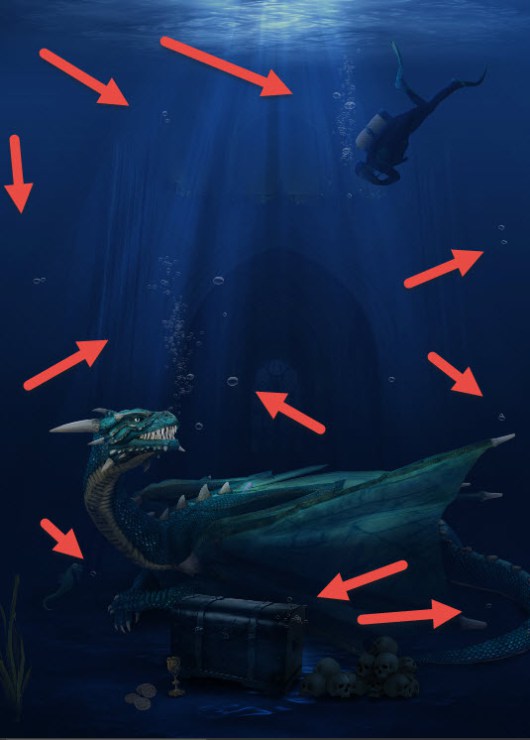
Let’s add some bubbles. Open the file “Bubble Brushes” and import the brushes by double clicking on the .abr file. Use these brushes (on one or more new layers) to add bubbles to the scene – near the dragon, the diver and the coffer.
Step 34
Time for adding the final touches.
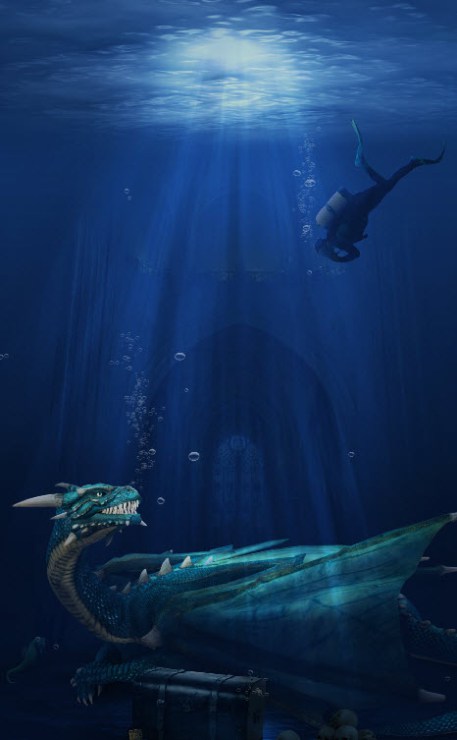
Open the file “Light Brush” and import the brushes. Use a light brush to create some rays coming from above and use a layer mask to hide the hard edges and harsh whites.
Create another new layer and set it to Overlay blending mode. With the round soft brush at 10% opacity paint over the section where you painted the light brush to increase luminosity.
Step 35
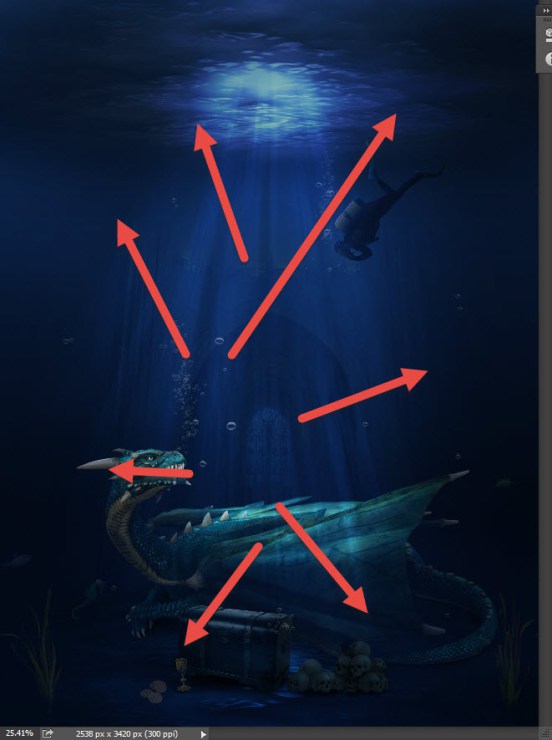
Now let’s paint some darkness around the edges of our scene to better put focus on the center area where our characters reside. Create one or more new layers set to Overlay blending mode and paint with a round soft black brush at 10% opacity over the edges.
Step 36
Let’s add some floating debris to make the underwater scene more believable.
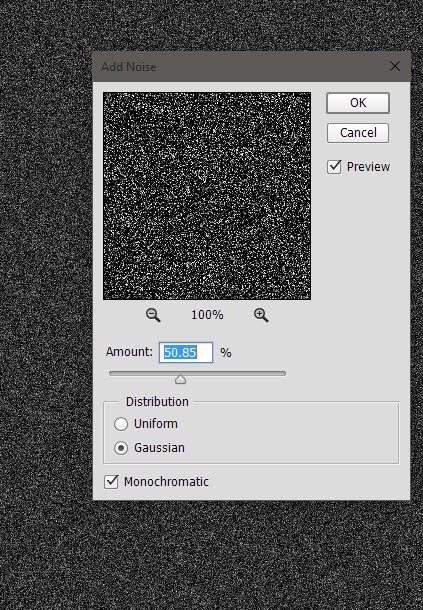
Create a new layer and fill it with black. Add some noise by going to Filter > Noise > Add Noise.
Step 37
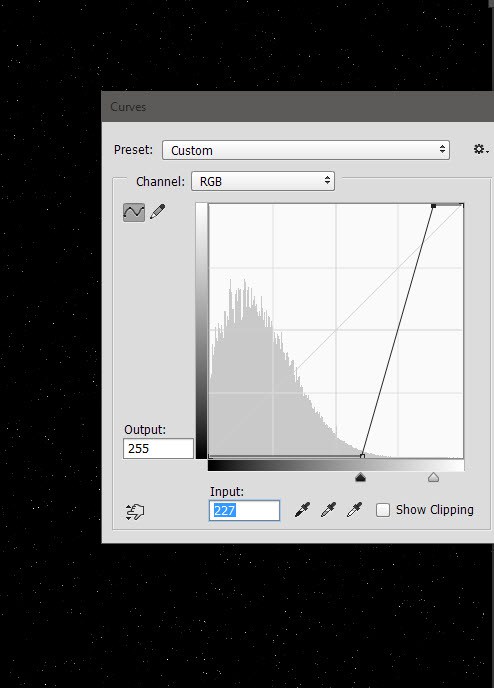
Apply a Curves Adjustment to the noise layer by going to Image > Adjustments > Curves with the settings indicated below. By doing this we will get rid of most of the ugly gray noise and keep just some bright points resembling stars or debris.
Step 38
Change the blending mode of the debris layers to Screen and lower the Fill to 15% – and there you have it – debris!
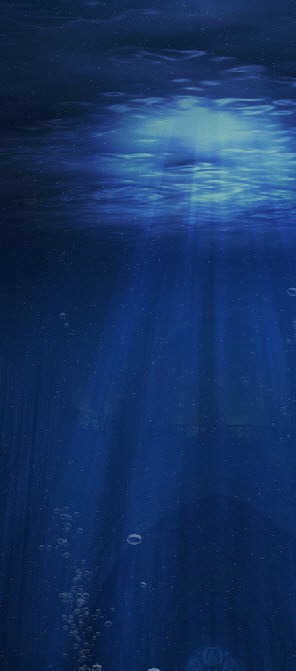
Step 39
Now we need some bigger debris particles. Duplicate the previous debris layer and resize it a lot (at least 500% of the original size) with the Free Transform Tool. Set the Fill to 100% and lower the opacity to 11%. Use a layer mask to hide the debris where the water surface is.

Step 40
And as a finishing touch as far as the debris is concerned let’s add some huge blurred particles. Open the file “Snow Texture” and copy paste it in our scene. Change the blending mode to Screen and lower the opacity to 7%. Apply a Gaussian Blur of 9.2px (Filter > Blur > Gaussian Blur).
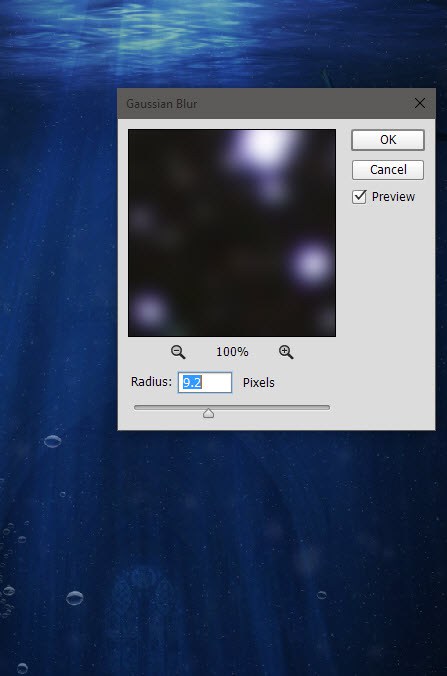
Step 41
All of the scene’s element are in place – now let’s play with boosting the overall look.
Let’s start by creating a new Vibrance Adjustment layer and boosting the vibrance slider all the way to 100.
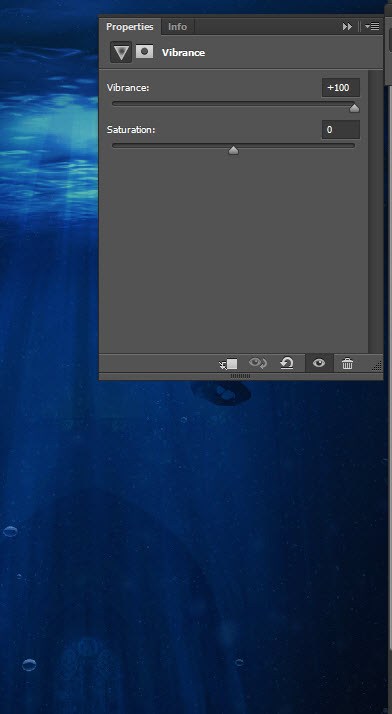
Step 42
Let’s further improve the look of our focus element – the dragon. Create a couple of new layers and set the blending mode of each to Overlay. On the first paint with white over the highlights and on the second paint with black over the shadows.
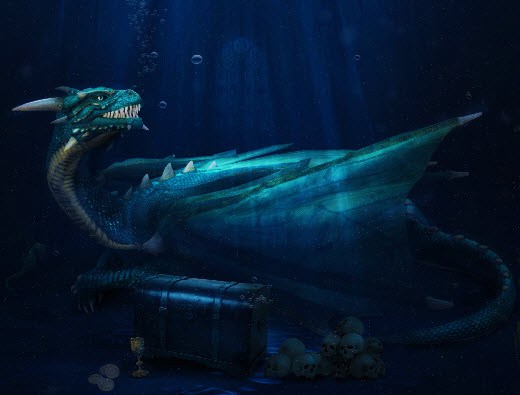
Step 43
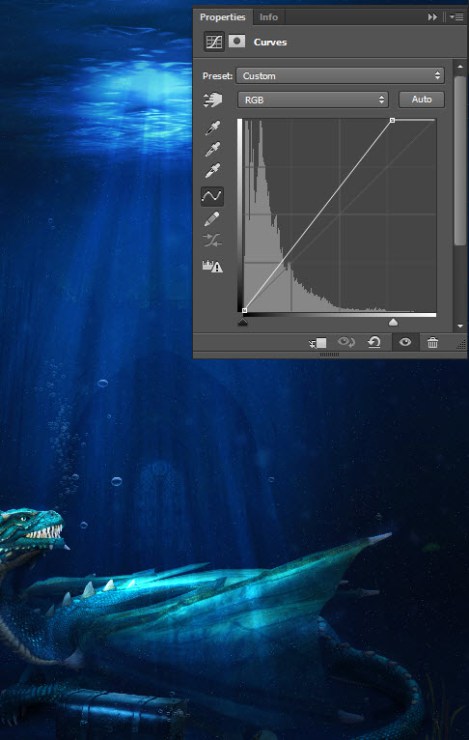
Create a new Curves Adjustment Layer and use the settings shown below to increase the contrast and improve lighting tremendously.
Step 44
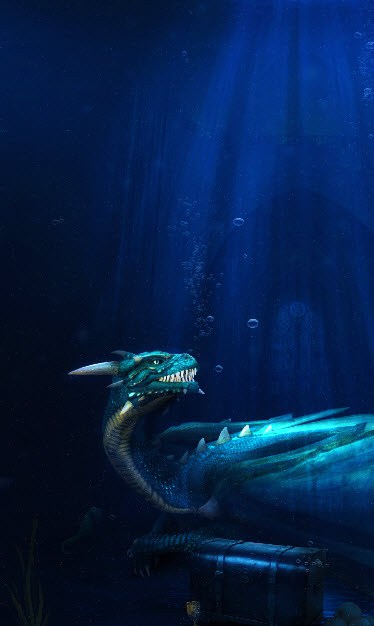
Create a new layer from all the visible layers (Ctrl + Shift + Alt + E) and apply a 200px Gaussian Blur. Change the blending mode to Soft light and lower the fill to 32%. This particular technique will soften and enrich the colors while also increasing contrast.
Step 45
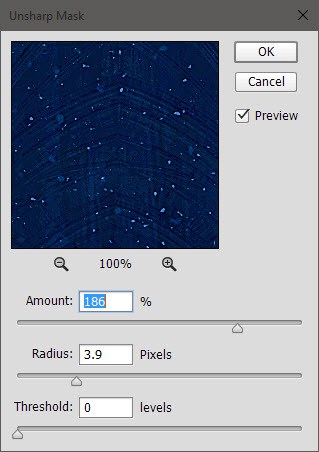
Create a new layer from all the visible layers again but this time apply a sharpen effect by going to Filter > Sharpen > Unsharp mask.
This is a required step for most photo manipulations as it brings a nice crispness to the overall look.
Step 46
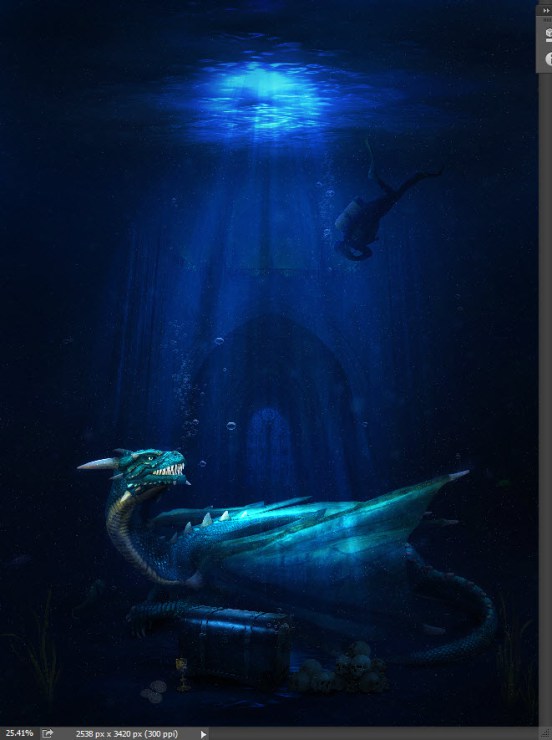
Create a new layer and set the blending mode to Multiply. With a round soft brush at 10% Opacity paint repeatedly over the edges of the scene to create a vignette effect.
Step 47
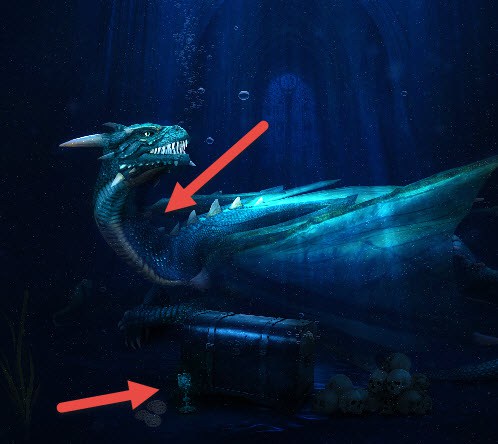
As you can see the neck of the dragon and the cup have a dissonant yellow color. Create a new layer and set the blending mode to Color. Sample from around the scene and paint with a round soft brush at 50% Opacity over the areas indicated below.
Step 48
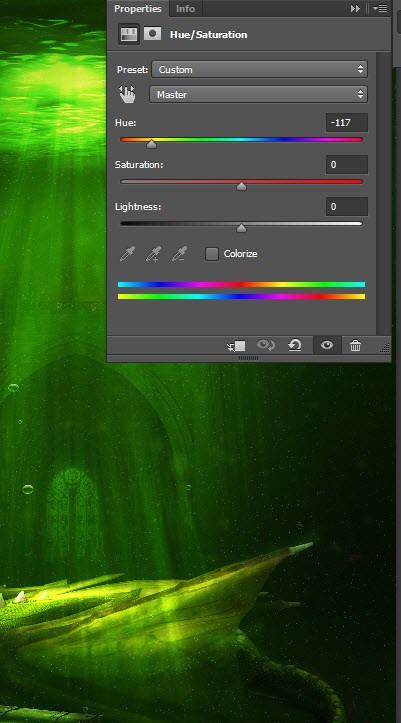
Now let’s dramatically shift the colors from blue to green. While I like the blue version I find that the green one is more appropriate to this particular scene – it brings to mind poison and danger while giving the scene an unusual strong look.
Create a Hue/Saturation Adjustment Layer and use the settings shown below to achieve this effect.
Step 49
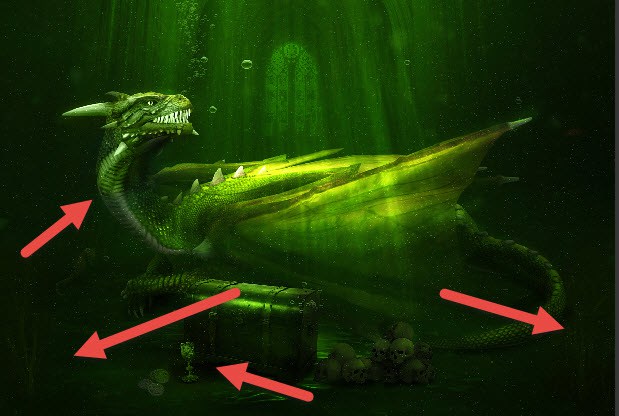
As you can see the previous step had the unfortunate effect of creating some unusual colors on some parts of the scene.
Let’s correct this by creating a new layer and setting the blending mode to Color. With a round soft brush( 60% Opacity) sample from a scene green area and paint over the indicated areas.
Final Results
