Create a Sci-Fi Chamber Photo Manipulation in Photoshop 5.00/5 (100.00%) 1 vote
Learn how to create a sci-fi photo manipulation of a mysterious chamber with amazing light flares and great entrance with Photoshop. In this tutorial, you’ll learn how to contruct your own chamber with textures , place a model in front of the entrance and then complete it by adding realistic shadows and lighting effect Throughout the tutorial, you’ll learn techniques that will help you create better photo manipulations.
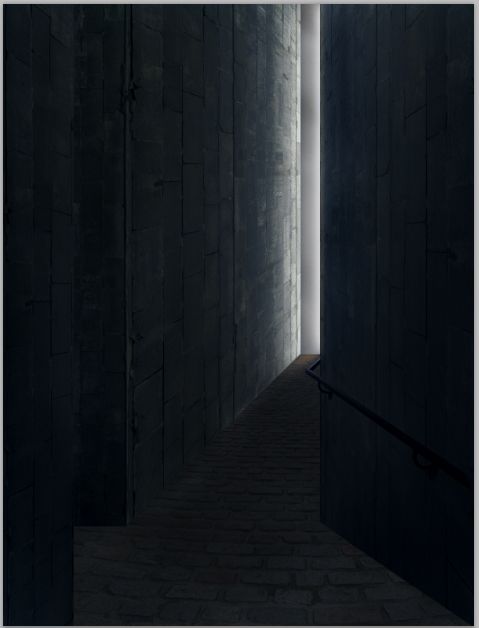
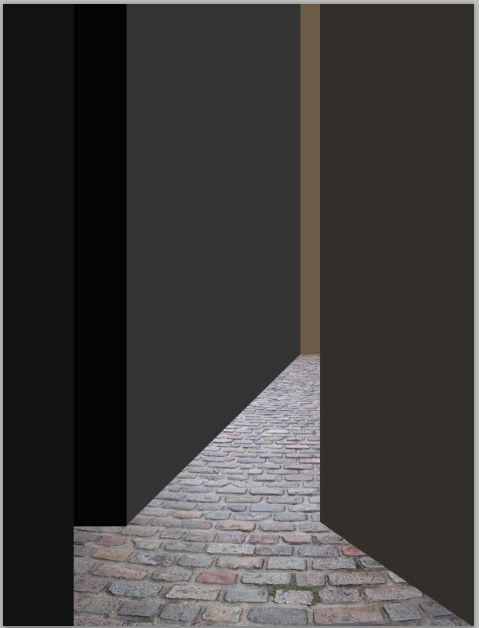
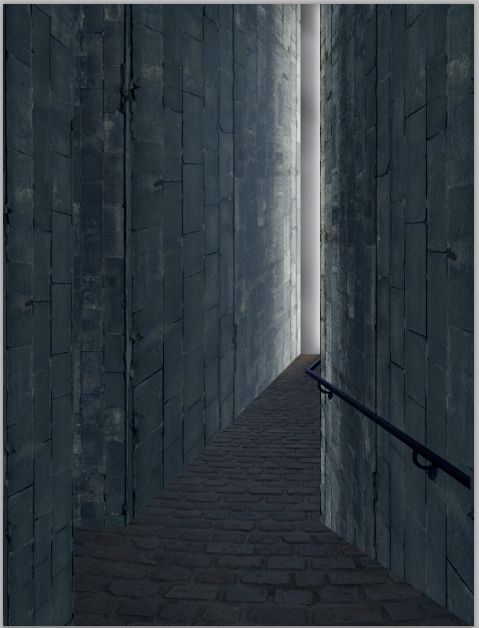
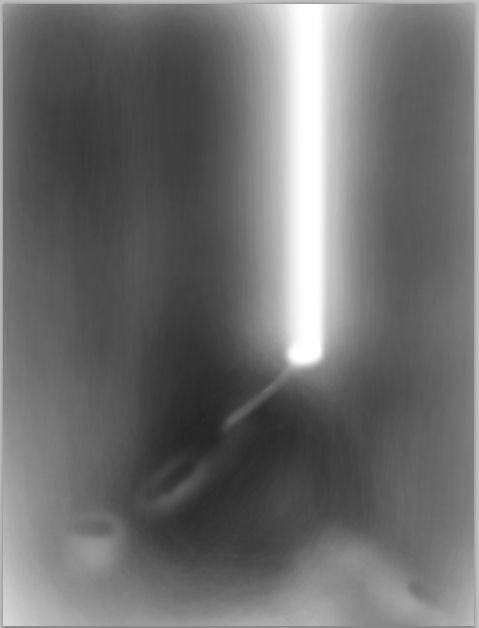
What you’ll be creating
On this tutorial we will create a sci-fi scene of a mysterious chamber with flares and an astonishing great entrance. We will use some essential techniques in doing photo manipulation. We will use masking, brush tool, some filter, color adjustments and textures all through the steps in this tutorial. Use Adobe Photoshop CS3 or higher, don’t forget a glass of coffee and optionally a pack of cigarette for your companion. Ready..?

Tutorial Resources
Step 1
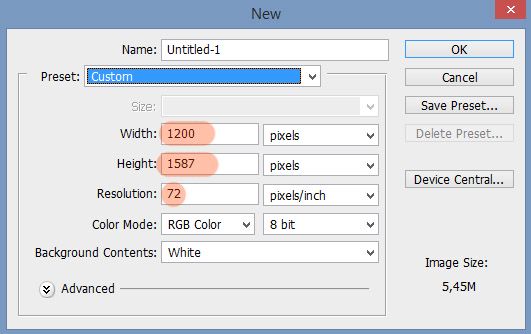
Let’s start by creating a new document (Ctrl+N) in photoshop with size shown in screenshot below:
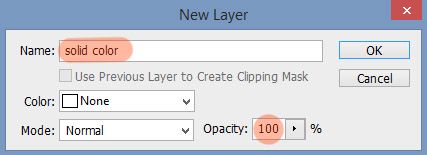
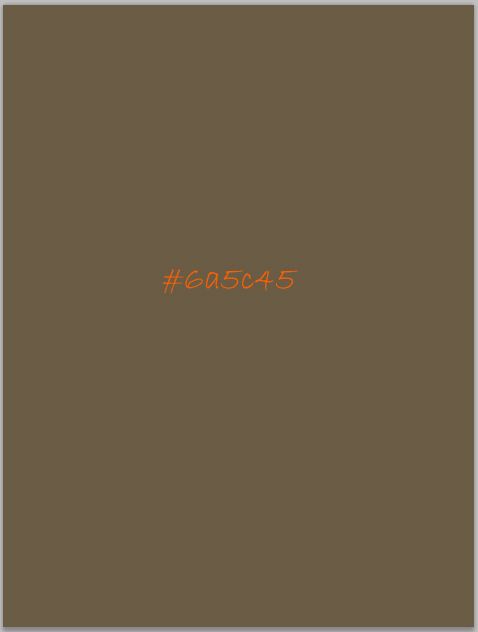
Then, proceed to create the first new layer on the document (Shift+Ctrl+N). On the new layer pop-up window, we give the name for this new layer solid color. While we are being active on the solid color layer, hit Shift+F5 to fill this layer with color. Choose light brown (#6a5c45)
Step 2
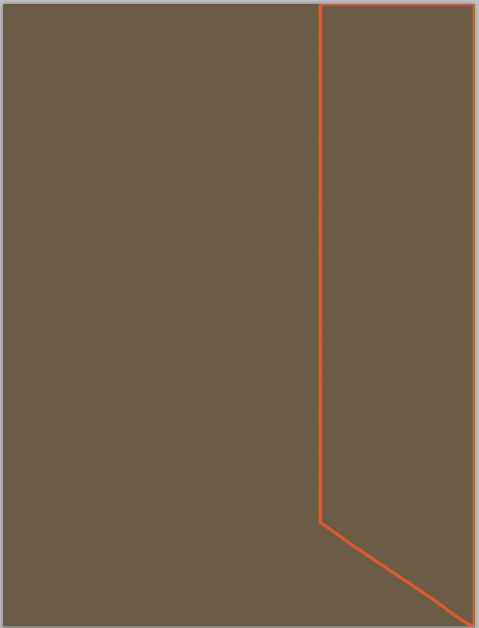
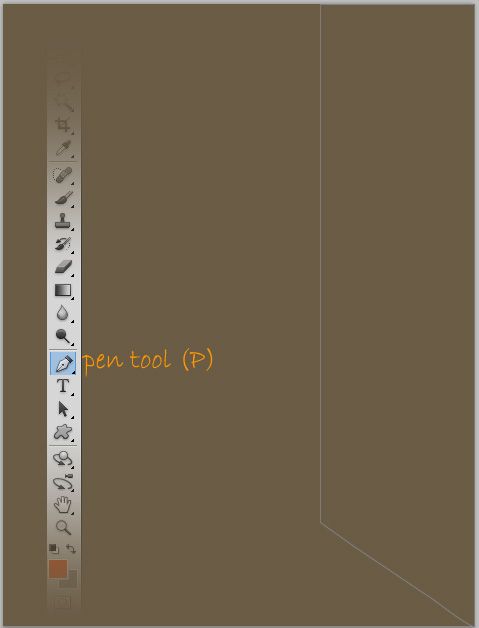
Create a new layer (Shift+Ctrl+N) above the solid color layer. Take pen tool (P). With this tool, create square path as the one highlighted in orange color.
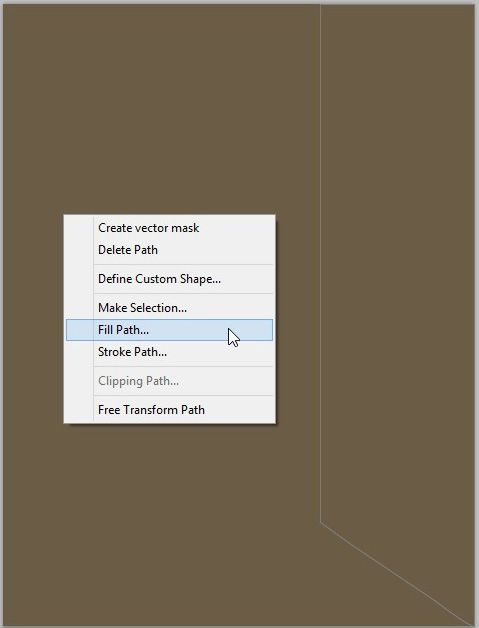
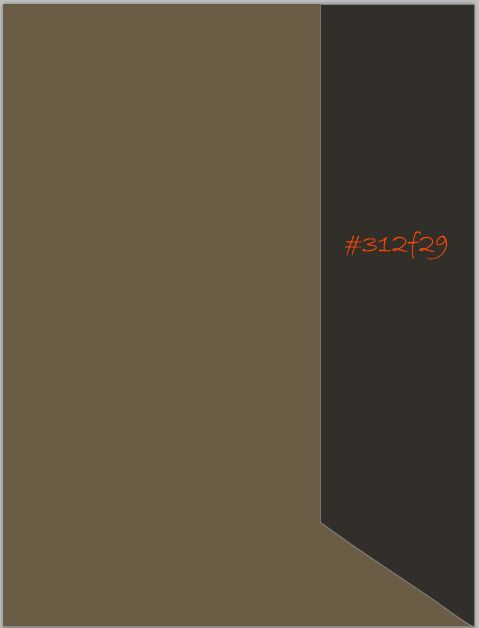
After creating the path, right click on the document to show path option window. Choose Fill Path. Then, fill it with solid color of any color we prefer or we can fill it with given color of #312f29 as shown in the screenshot. Finally, delete the path. Name this new layer right.
Step 3
On another new layer (Shift+Ctrl+N), create another color-filled square path. Take a look the screenshot below for our reference. Name this new layer left.
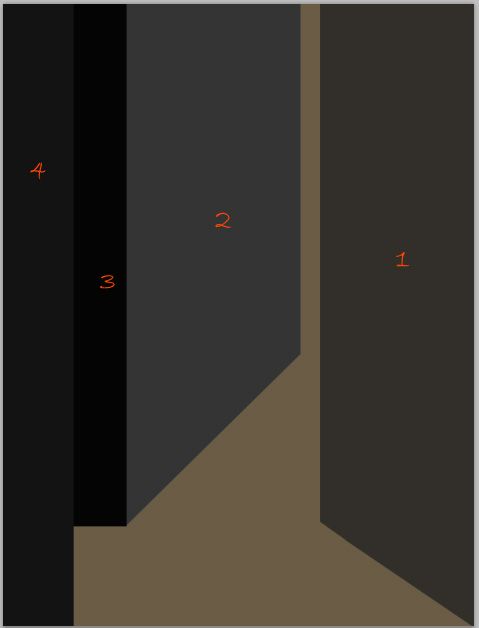
With the same way, create the other two color-filled square paths on two different new layers.
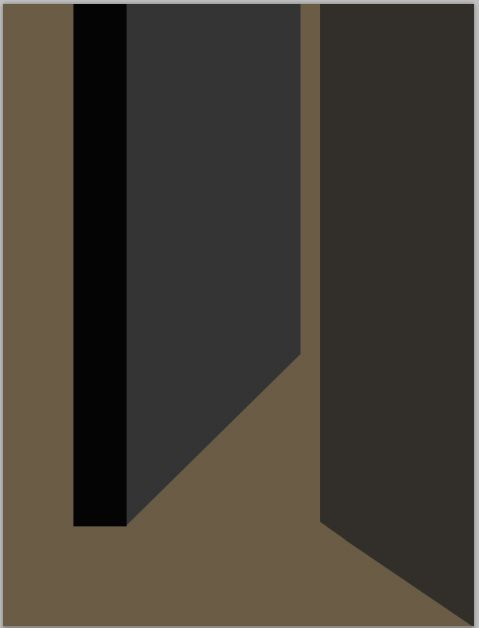
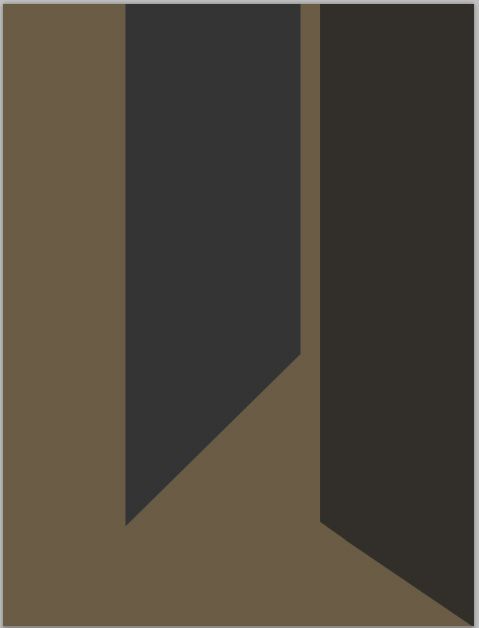
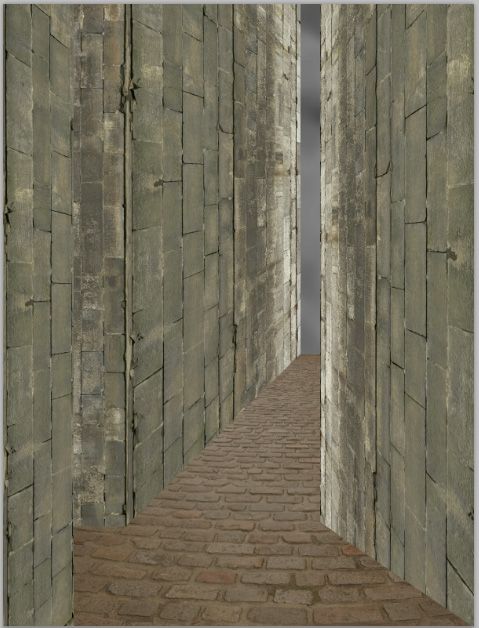
So we have four color-filled squares. The first and the second are right and left. Let’s name the third middle foreground and the fourth left foreground. The four squares are supposed to be walls of a chamber.
Step 4
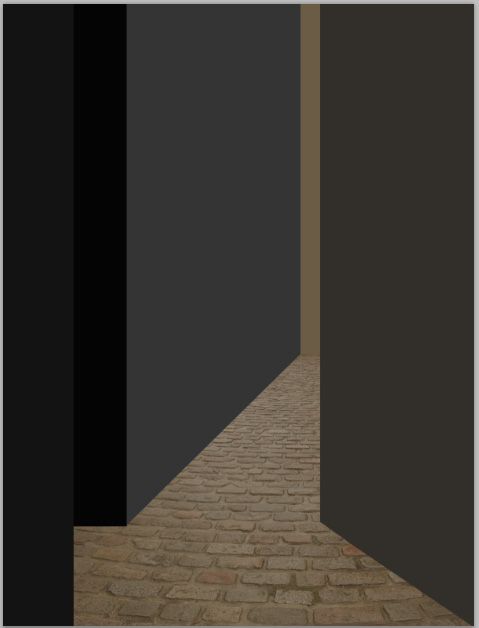
Now we will add floor for the chamber. Open the brick floor image in the document. Make sure to place this floor layer between the four wall layers and solid color layer in the layer panel. Take move tool (V). Move the floor image to the position where needed.
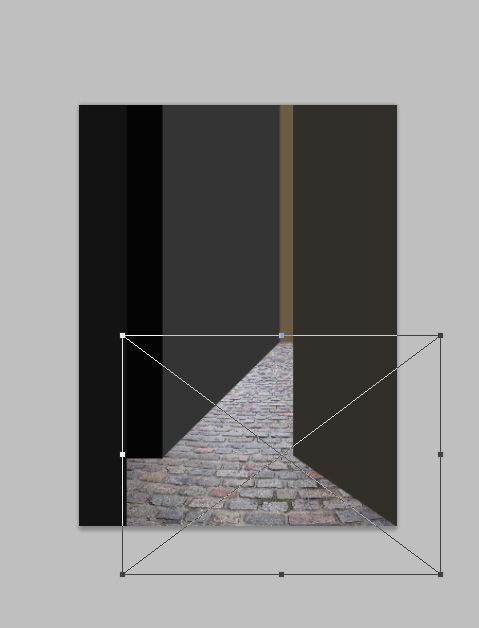
Finally, change this floor layer to soft light blending at 100% opacity.
Step 5
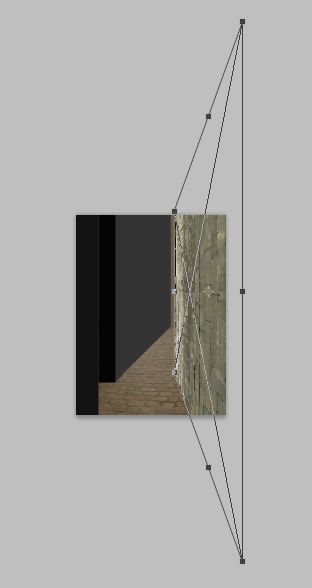
Next, we will give brick texture to the four walls. We do this for the right wall first. Open the brick texture. Position this texture layer above the right layer in the layer panel. Activate the free transform tool (Ctrl+T). We will alter the position and perspective of this texture to fit the right wall. Right click on the document to show transform option. Firstly, rotate the image 90 ccw, then flip it vertically.
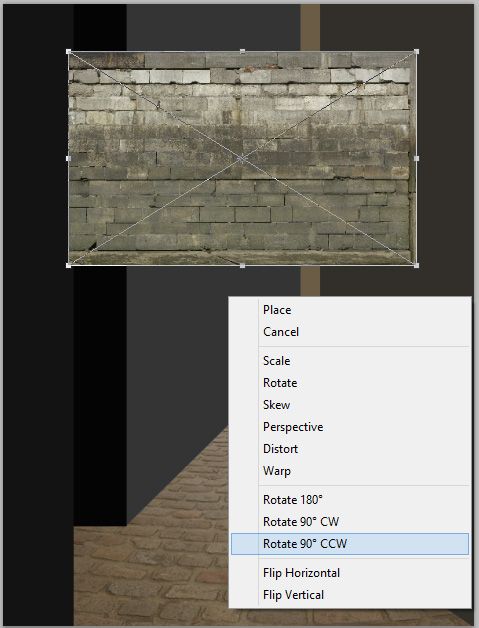
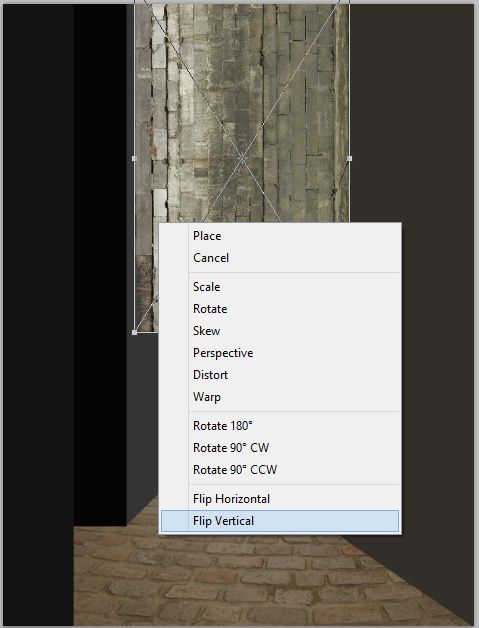
Finally, change the perspective of this image by hold-click and drag downward the right corner transforming point.
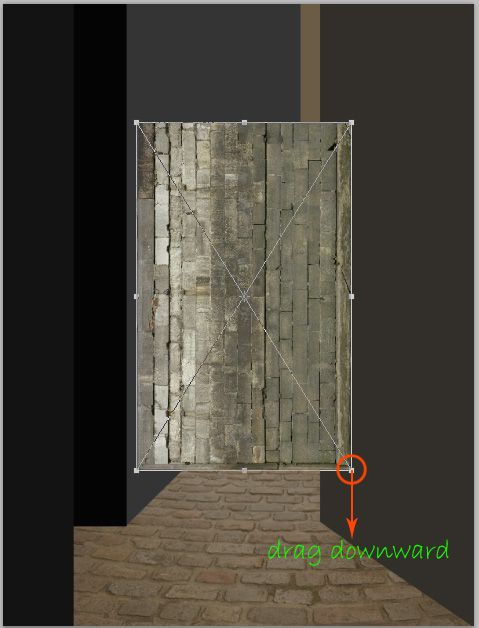
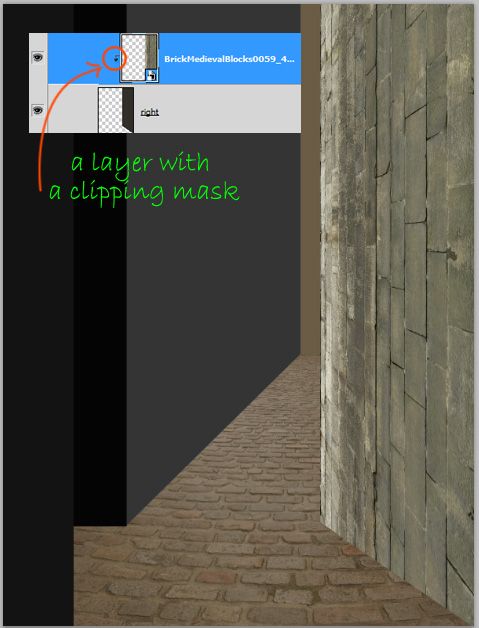
After getting desired position, give this texture layer a clipping mask (Alt+Ctrl+G)
Step 6
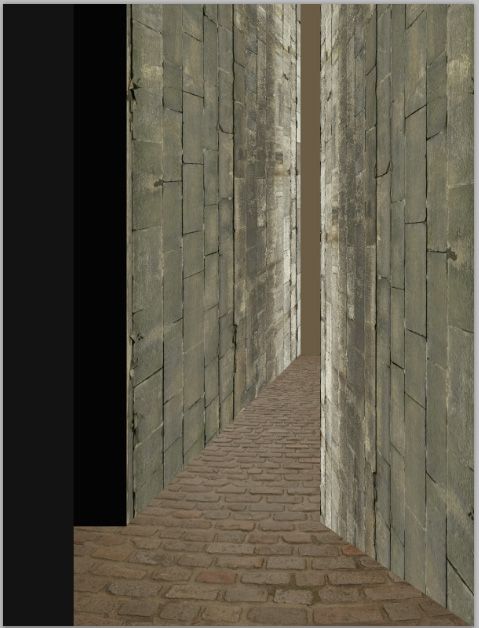
Do the same ways to add textures to the other walls.

Step 7
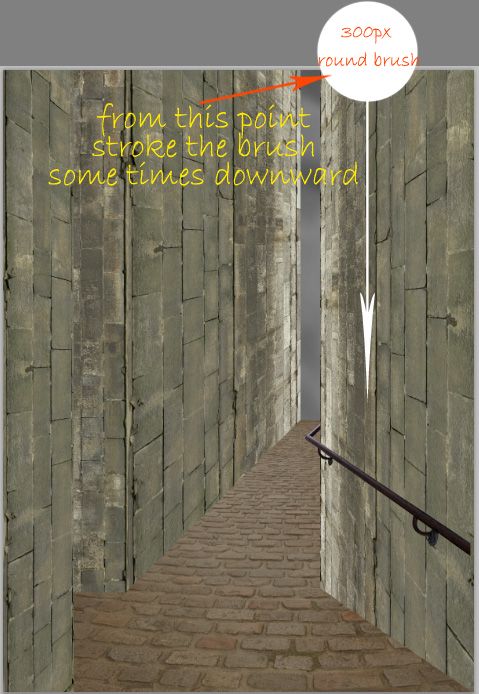
Now we will clean up the solid color behind the edges of the right and left walls To do this purpose, we will give the mentioned part some masking. Go select the solid color layer created in previous step 1 to be active on it. Go to layer > layer mask > reveal all. Take brush tool (B), choose soft round brush. With black color, stroke the brush on mentioned part as indicated in red highlight:
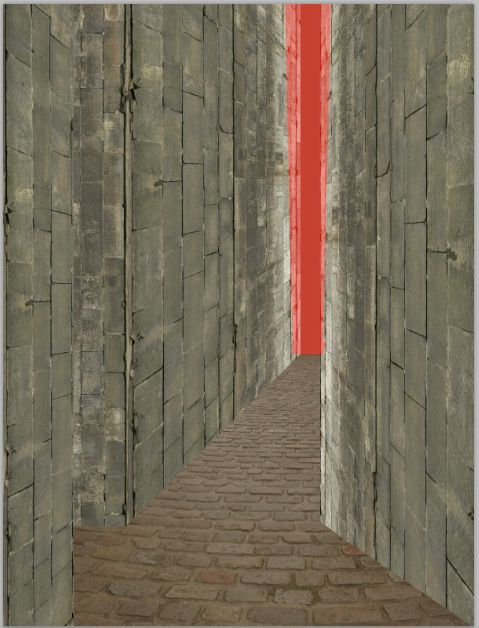
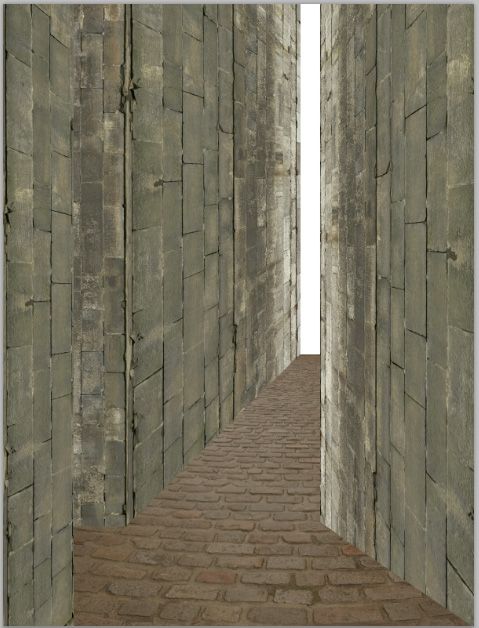
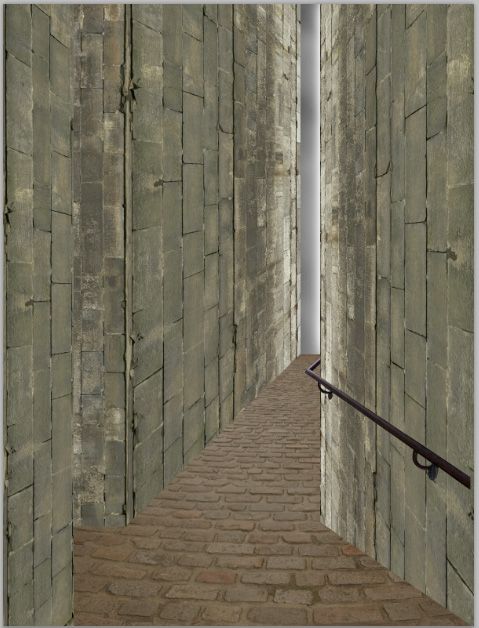
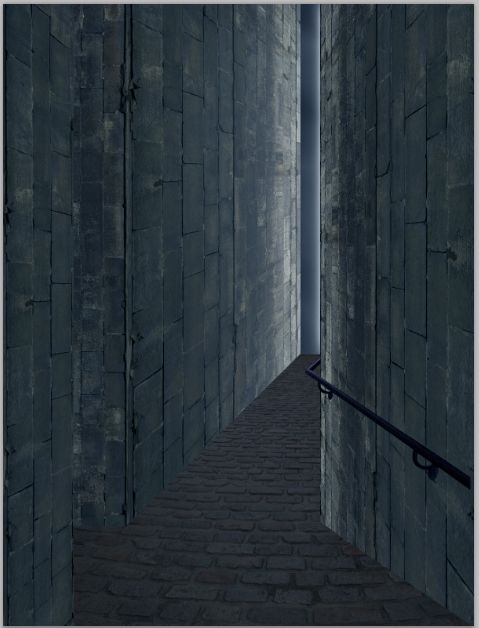
Here is the result after masking. The masked part is supposed to be the entrance of the chamber.
Step 8
Now we will add some cloud texture behind the entrance. Create a new layer again (Shift+Ctrl+N) below the solid color layer. Go to filter > render > cloud to create cloud texture.
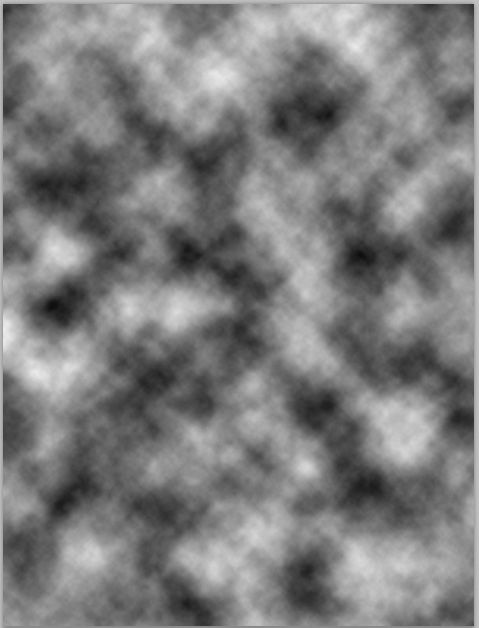
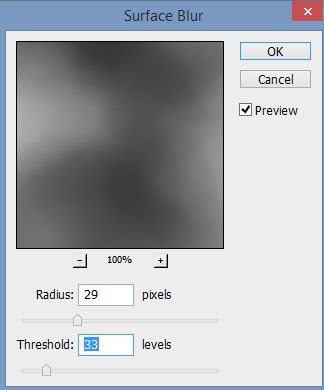
Then give this cloud another filter, surface blur to smooth the texture. Go again to filter > blur > surface blur.

Duplicate (Ctrl+J) this cloud layer on time. Set this duplicate to exclusion blending at 100% opacity.
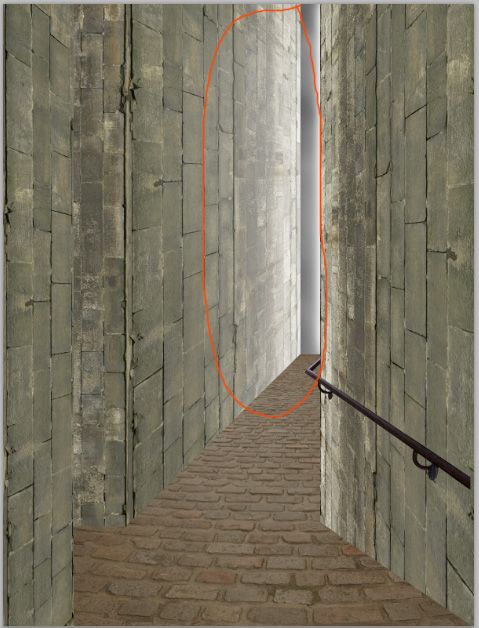
This cloud texture will be not entirely seen because its position is below the solid color layer. It is just visible in the masked part of the solid color.
Step 9
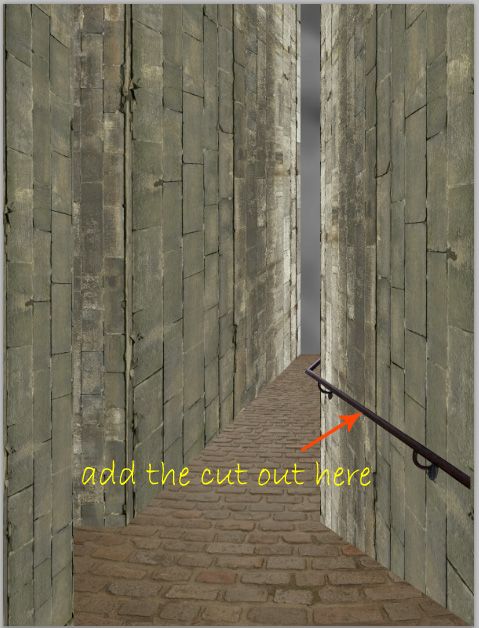
Now we will add another object to the scene. Open the stock image in photoshop. Take pen tool (P) to cut out the iron handle from the image.
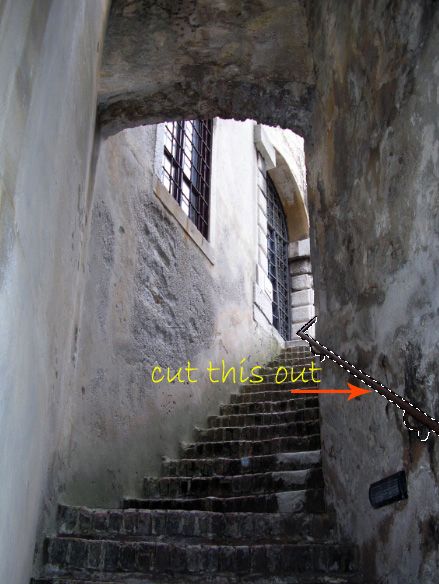
Add the cut out to the main scene.
Step 10
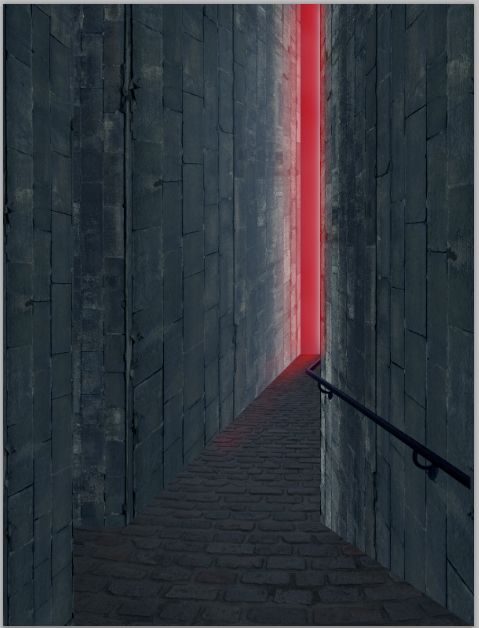
Now we will add light coming from the right side behind the right wall shining through the entrance. To do this, create another new layer (Shift+Ctrl+N) above the two cloud layers. Take brush tool (B) set as the one below.

With white color, stroke the brush repeatedly from top right side of the entrance down to the bottom.
Step 11
Referring to the light source, there should be some light casted on the left wall. So we will give some highlight to it. Go select again the left layer. Create a new layer with a clipping mask above it. Take a very soft round brush (0% hardness) set at very low opacity of about 10-15%. On this layer, paint soft white to add some highlight on the left wall.
Step 12
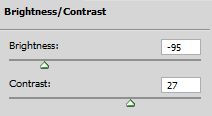
Proceed to give the whole scene color adjustment layer. Firstly, go to layer > new adjustment layers > brightness/contrast. Make sure to position this adjustment layer above the other layers. Set this layer to normal blending at 100% opacity
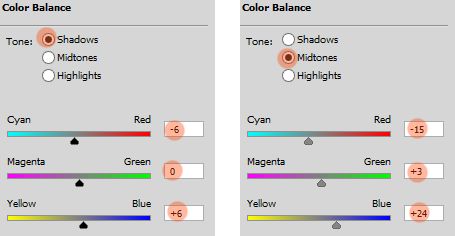
Give the second adjustment layer: color balance. Position this layer above the brightness/contrast layer set to normal at 100% opacity.
Select the two adjustment layers. Hit Ctrl+ G to group them in a folder. Name this folder adjustment. Go to layer > layer mask > reveal all to give this folder a layer mask. Mask areas around the entrance.
Step 13
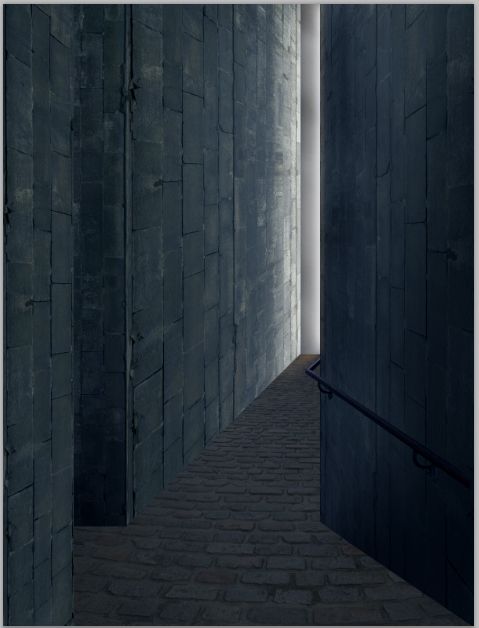
Now we will give some shadow and highlight to the walls. We start to this on the right wall. Select the layer again and create another new layer with a clipping mask above the brick texture. Take a very soft round brush ( 0% hardness) set to about 10% opacity. With combination color of black and white, paint the shadow and highlight where needed.
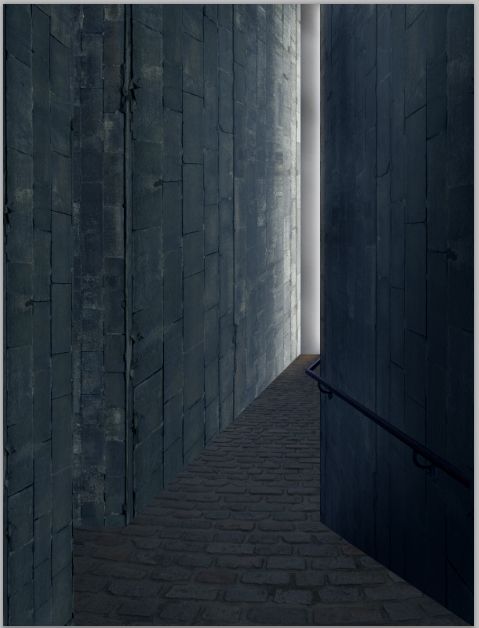
Do the same way to add some shadow and highlight to the other walls.
Step 14
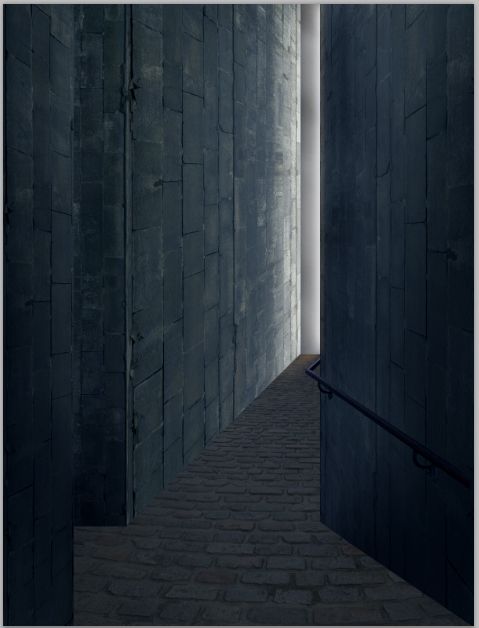
Next, create a new layer again (Shift+Ctrl+N) above the adjustment folder. On this new layer we will add more shade and highlight to overall scene. Take brush tool again (B). Paint soft combination of black and white to areas where needed. Here is the one given for reference set in white background.
Referring to given color, here is the result set to normal at 100% blending.

And this is the result set to normal at about 75% opacity.