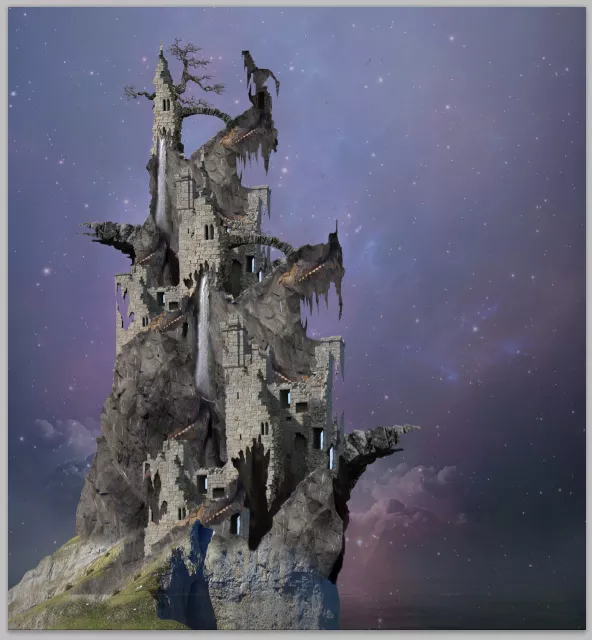
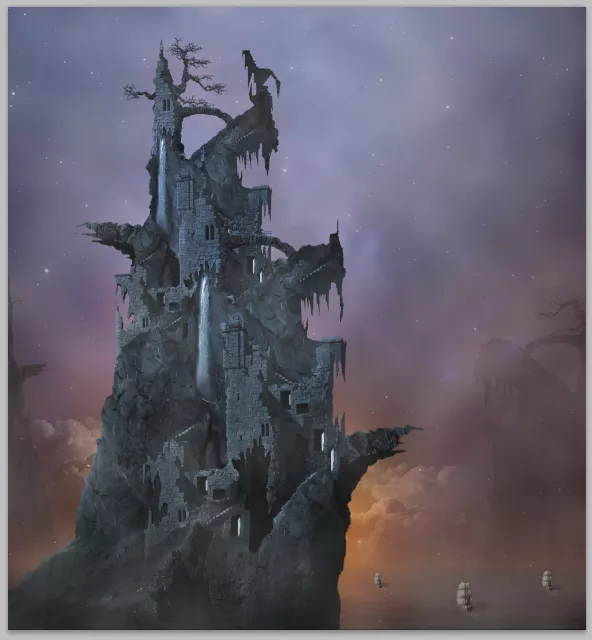
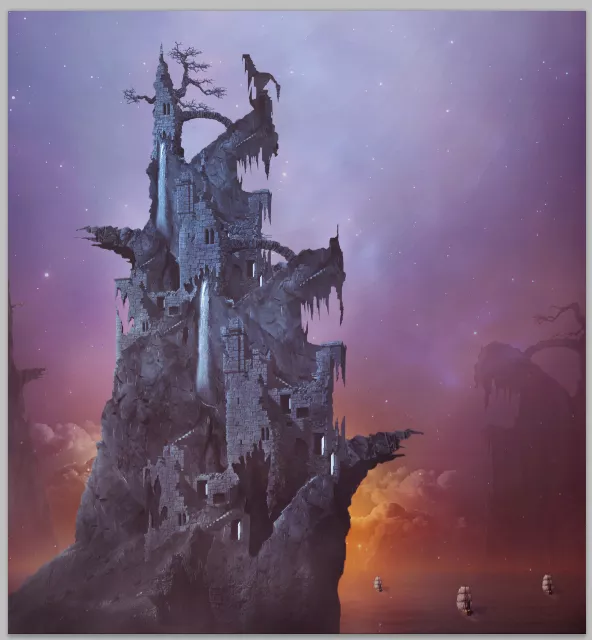
Learn how to create this fantasy photo manipulation of a pirate house scene set in warm scenic dreamscape with Photoshop. In this tutorial, you’ll learn how to create rocky mountain using photos of rock and stones, combine ruin of castle to create dramatic pirate house in the dreamscape with warm vivid lighting. Throughout the tutorial, you’ll learn techniques that are very essential to create better photo manipulations.
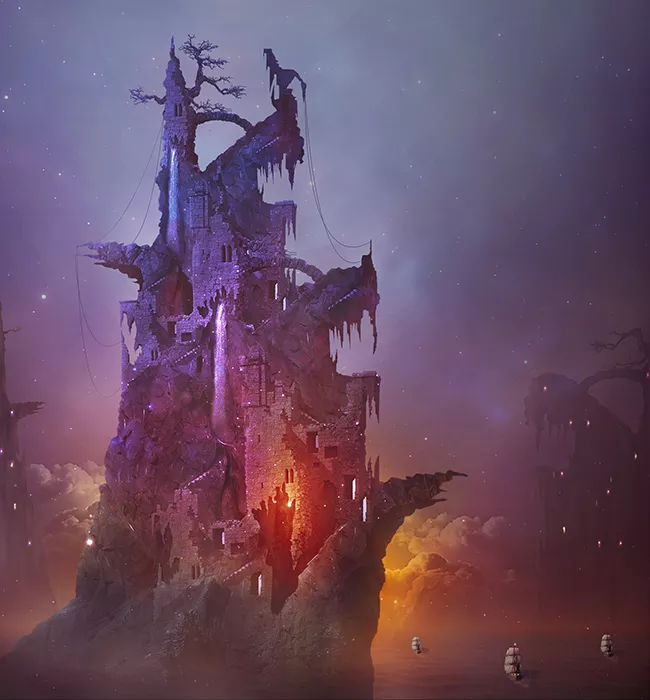
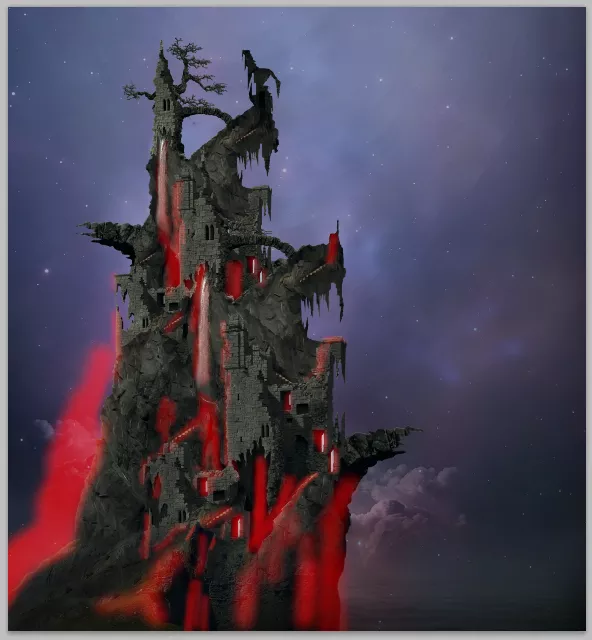
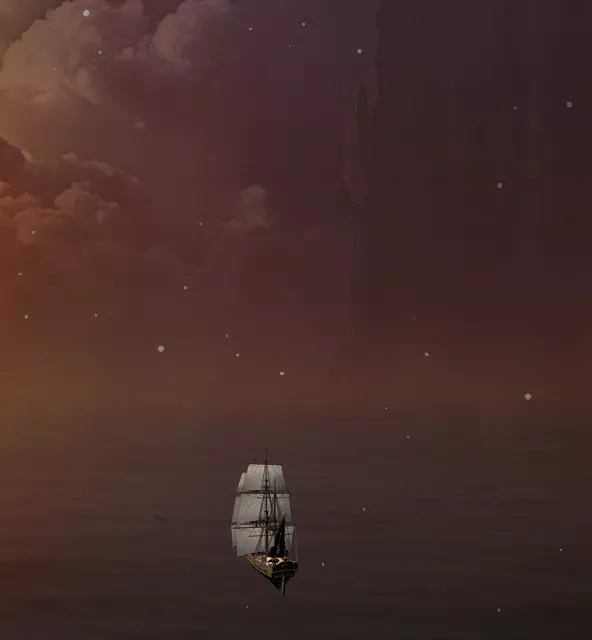
What you’ll be creating
On this tutorial we will create a fantasy scene of a pirate house dreamscape with dramatic warm and vivid lightning. We will use some essential techniques in doing photo manipulation. We will use masking, brush tool, some filter, color adjustments all through the steps in this tutorial. Use Adobe Photoshop CS3 or higher, don’t forget a glass of coffee and optionally a pack of cigarette for your companion. Ready..?

Tutorial Resources
Step 1
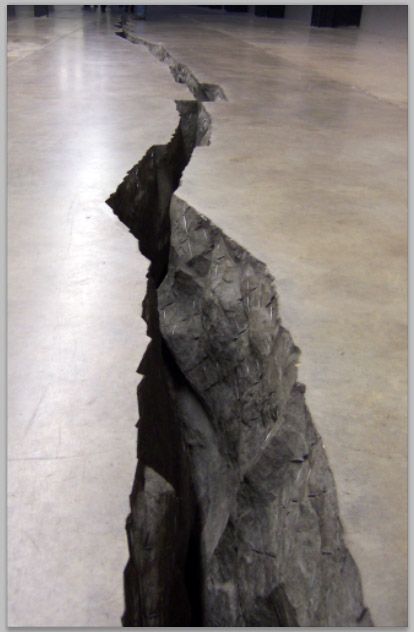
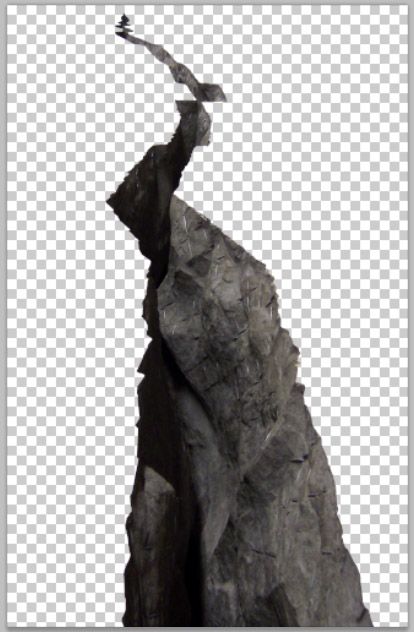
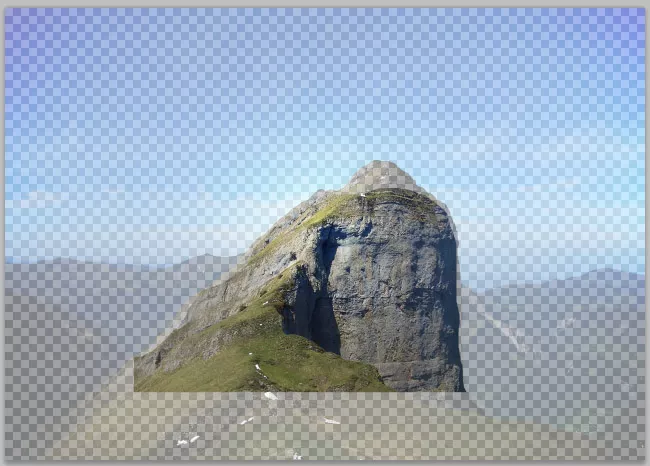
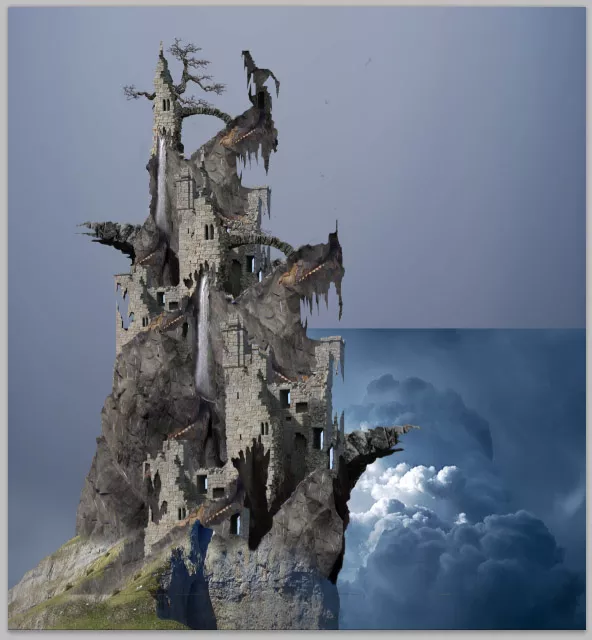
On these early steps we will create some ruined castles standing on a rocky mountain. We need this image to begin with. We will use this image as the rocky mountain.
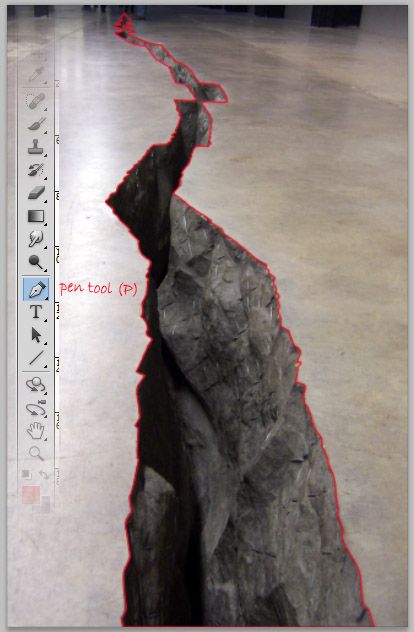
We have to cut out the crack of the image. To do this purpose, take pen tool (P) in the panel tool. With the tool, cut out the crack lined out in red as shown in the screenshot.
For your inspiration, this is the cut out we have now.
Step 2
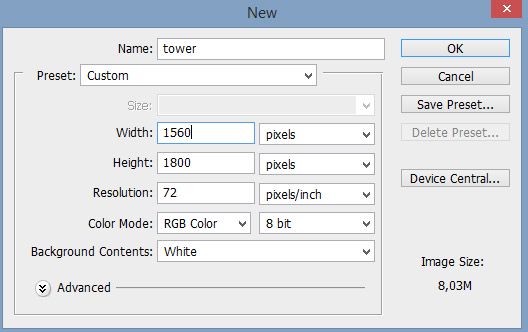
After cutting out the crack, we will start to create a rocky mountain with some ruins standing on it. We do this on a new canvas. Hit Ctrl+N to create a new canvas. Set the size of the canvas as the one sampled in the screenshot.
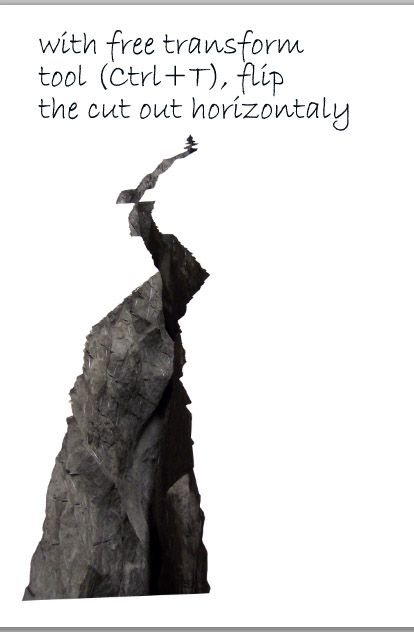
Next, select and copy (Ctrl+C) the cut out and then paste (Ctrl+V) it on the new canvas. We need to flip the cut out horizontally or resize it as needed. To do this, go to edit > transform > flip horizontal/scale.
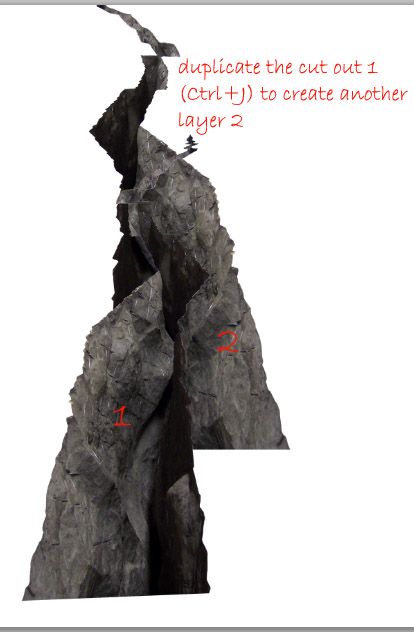
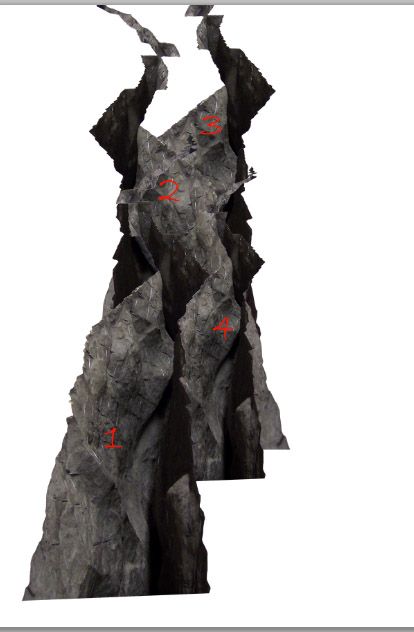
Duplicate (Ctrl+J) the first crack to create the second one. Go again to edit > transform > flip horizontal to flip back the second crack as its original direction. Take move tool (V) and move it to the upper position behind the first one.
Do the similar step to add the third crack behind the second one.
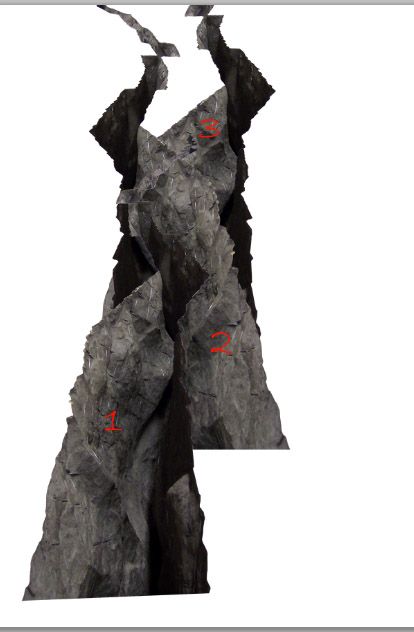
Finally, add the fourth smaller crack and place it between the first and second one.
Step 3
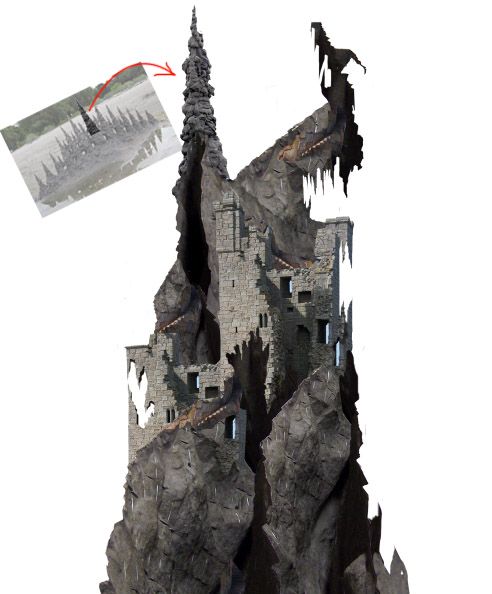
Proceed to add some ruins to the rock. Cut out the ruin.
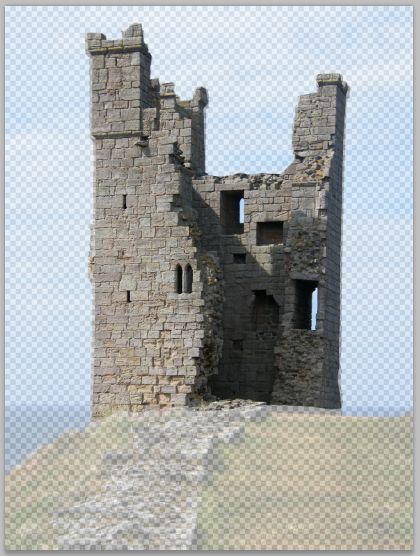
Scale the ruin to the size needed and place it behind the second crack.
Duplicate (Ctrl+J) the first ruin and place the duplicate on the lower left side behind the first crack.
Step 4
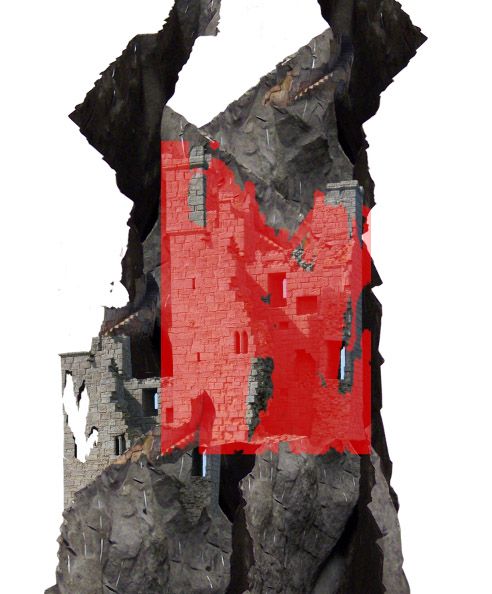
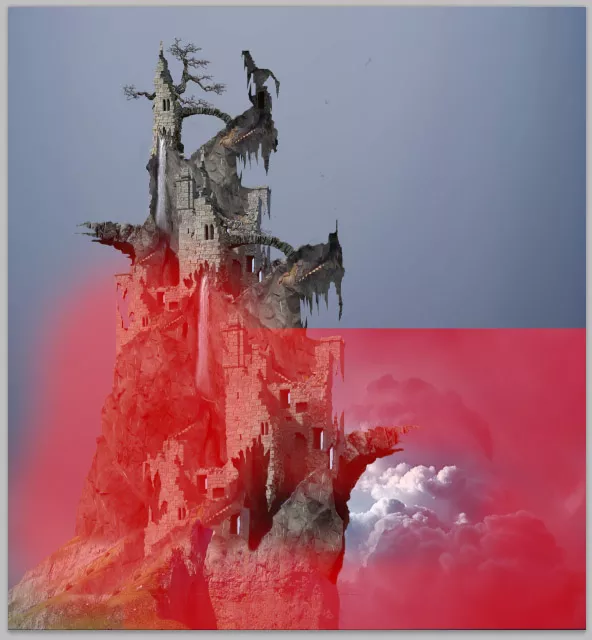
Now select the first ruin and give it a layer mask by going to layer > layer mask > reveal all. Take the brush tool (B) and choose chalk brush 17 pixel in the brush panel (F5). With black color, stroke the brush on areas where needed to mask them. The red highlighted parts show us the masked ones.

Next, we need to hide some part of the fourth crack that overlaps the first ruin. To do this, give the fourth crack a layer mask (Layer > layer mask > reveal all) and mask where needed as shown in the screenshot.
But the problem is we have the uniform looking ruins………………
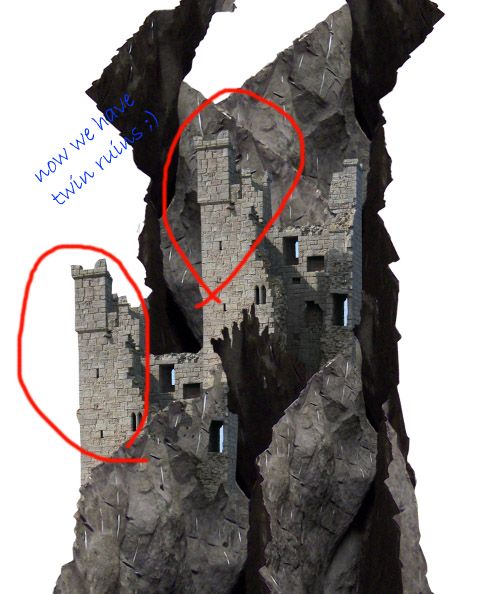
Step 5
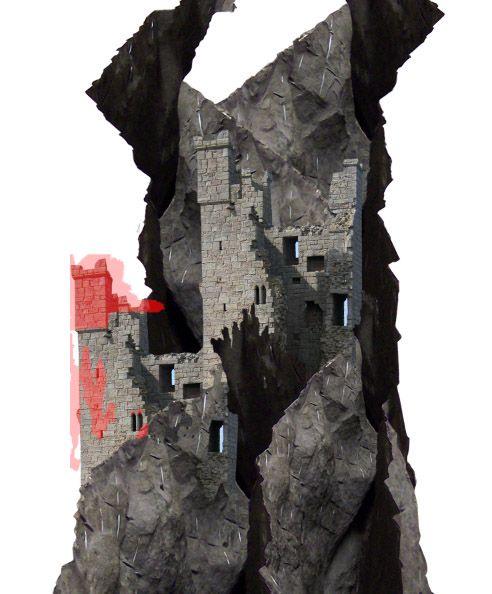
Well, don’t worry, we will fix this “twin” ruin. Give the second ruin a layer mask. Mask some parts of this layer. We do the similar way to do this masking as the one in previous step 4. The red highlighted part is where masking should be done.
Step 6
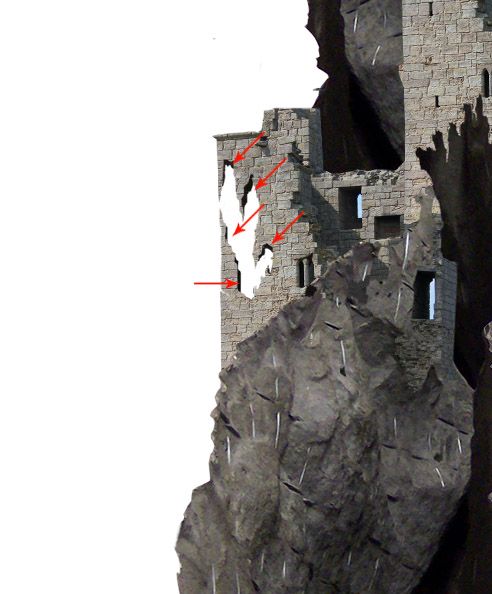
The second ruin looks flat now. We will add some shading behind the ruin. Create a new layer (Shift+Ctrl+N) behind the second ruin layer. On this new layer, paint dark shading behind the ruin as indicated in red arrows in the screenshot.
Step 7
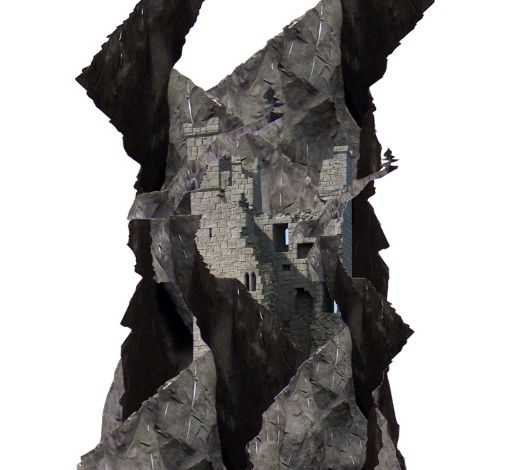
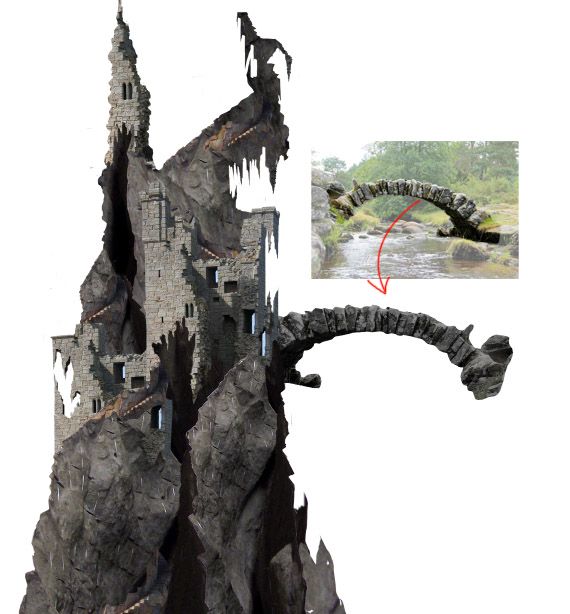
Proceed to add another object to the scene. We will add stairs. Open the tower with stairs image first, the next steps we do are the similar steps as the ones in previous steps. Cut out the tower. Scale and place the tower in front of the first crack.
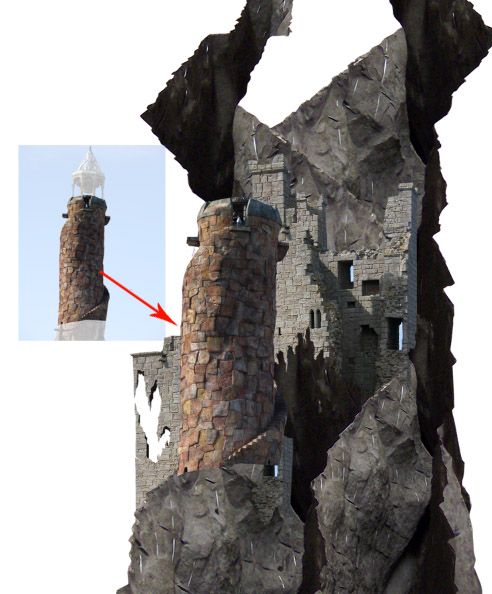
Give this tower layer a layer mask. Mask unneeded part.
Duplicate the tower layer some times. Place the duplicates where needed.
Step 8
On this step, we will alter the shape of the first ruin. To do this, duplicate (Ctrl+J) the first ruin. Scale its size bit bigger than the first one. Place this duplicate layer in front of the first crack layer.
Give this duplicate layer a layer mask. Mask parts where needed as shown in the red highlight.
Step 9
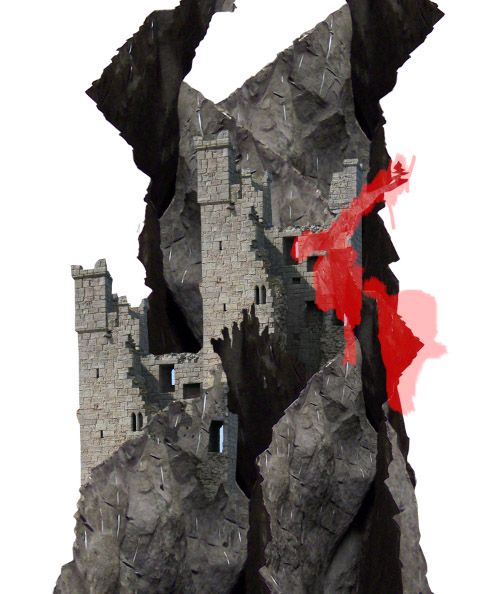
Next we will alter the shape of the third crack. Select the layer, and give it a layer mask. Mask parts as the ones highlighted in red.
Step 10
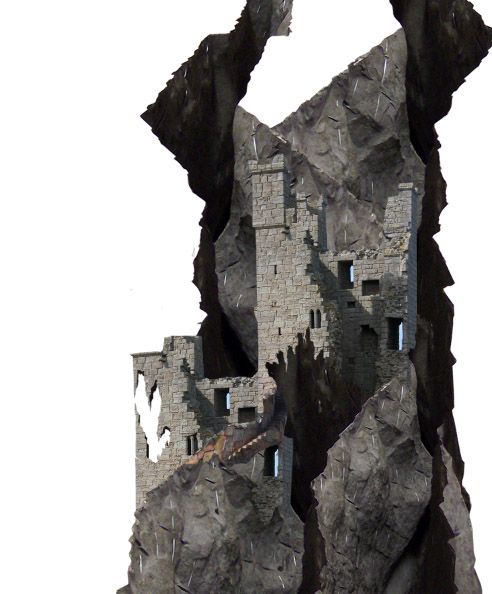
By repeating the previous step, add the other object on left top of the rock.
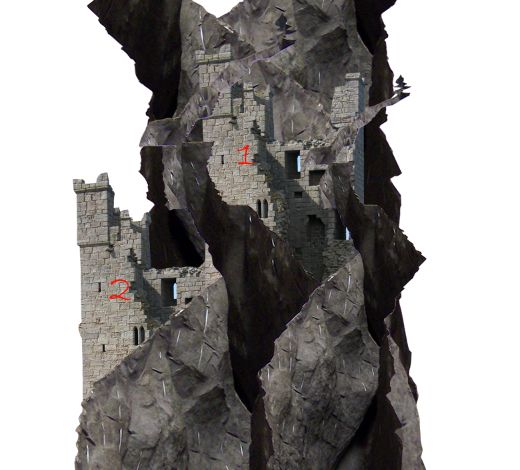
Step 11
More objects
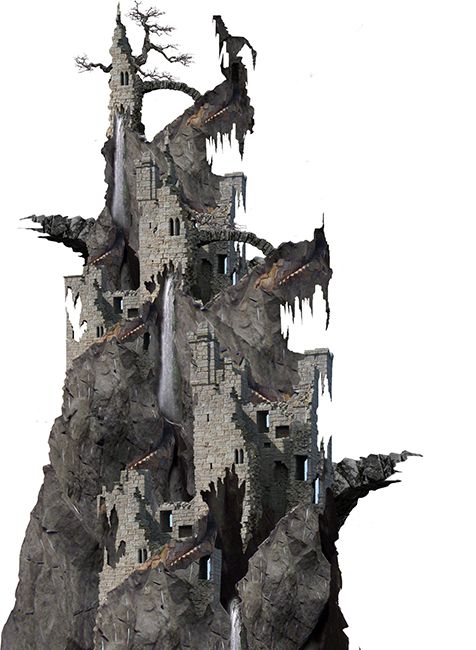
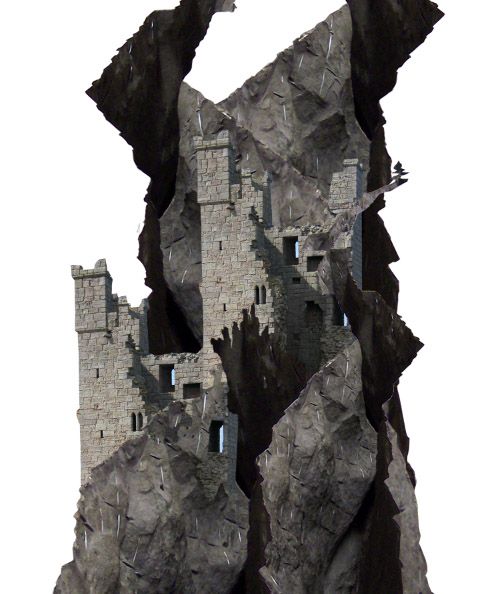
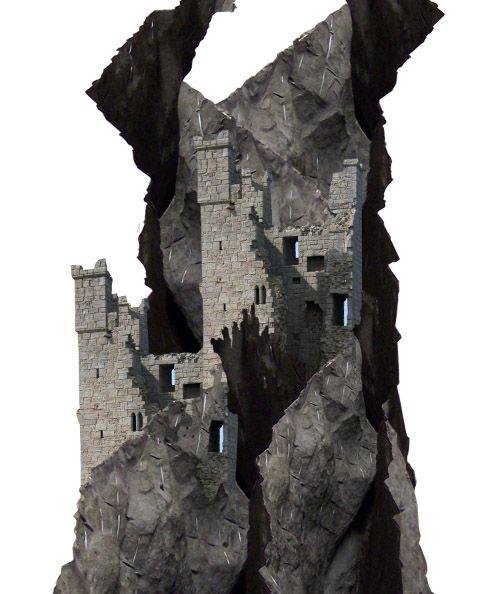
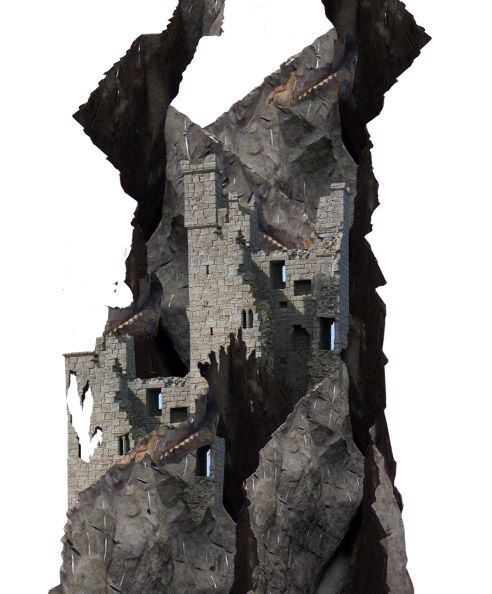
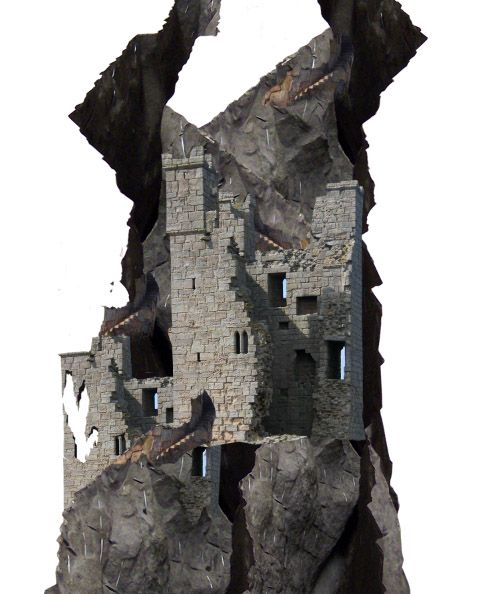
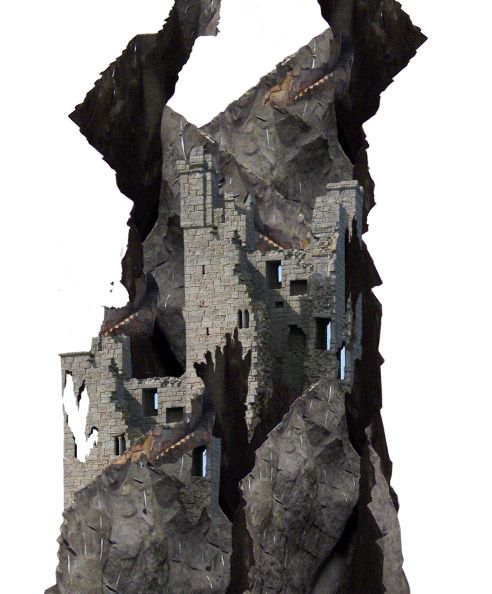
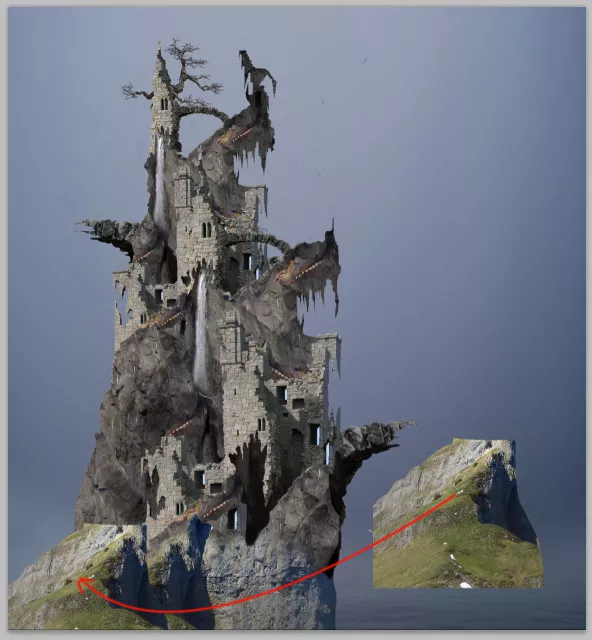
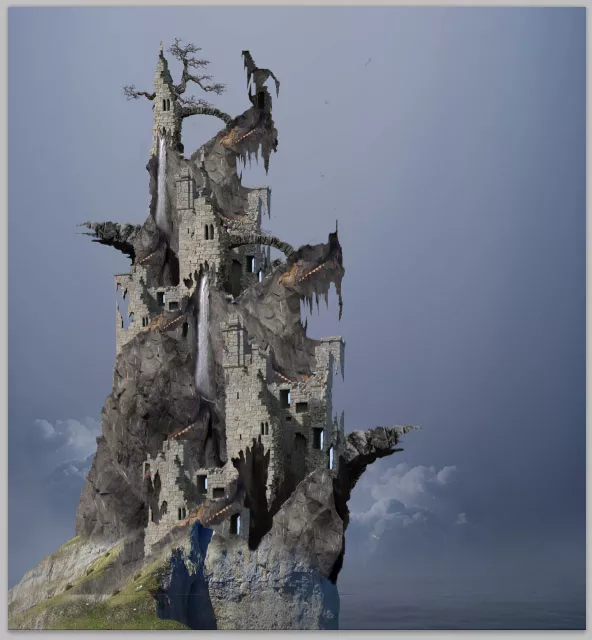
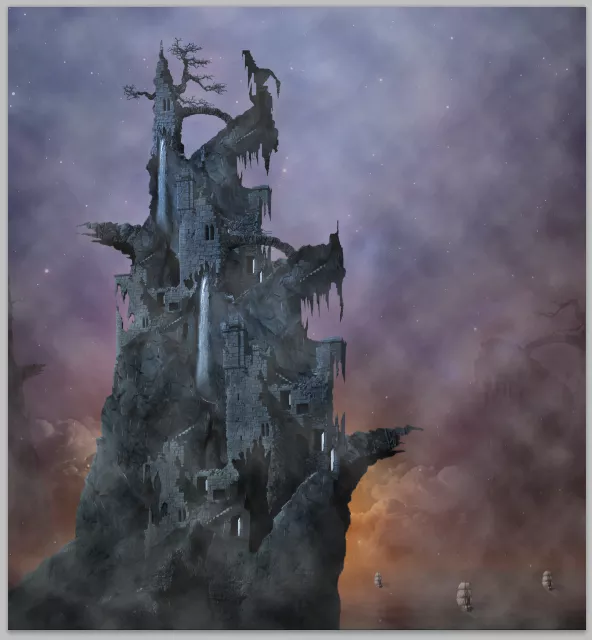
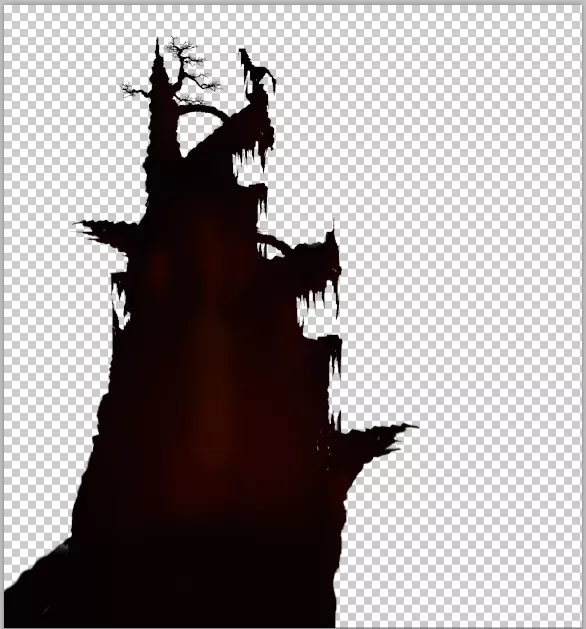
By repeating similar steps with trial and error efforts, this is the result that is finally done for our inspiration. This piece will be used as the main object in the main canvas in the next steps. We still have a long, long way to go….. a cup of coffee, please :)
Step 12
Now we will create the main document. Create a new document/canvas (Ctrl+N).
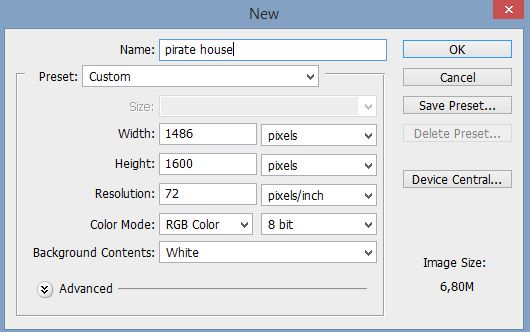
Step 13
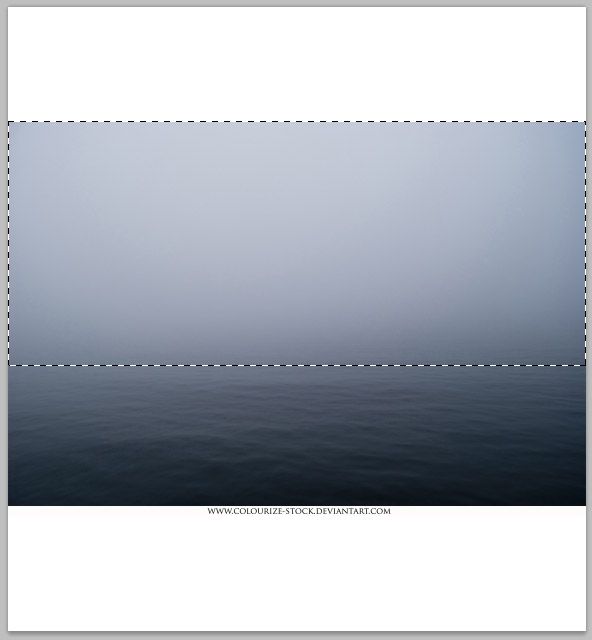
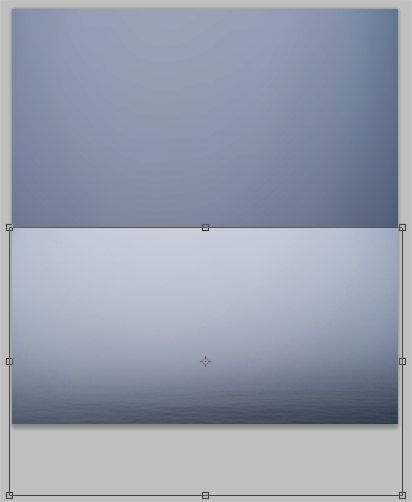
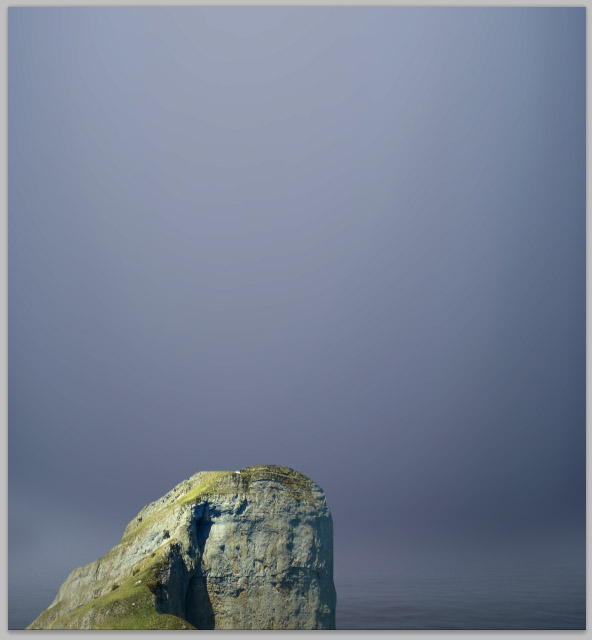
Firstly we will create background for image. To do this, open the misty sea image on the new document. Take rectangular marquee tool (M) in the tool panel. Make selection on the upper part of the image. Duplicate (Ctrl+J) the selection to make it a new single layer in the document.
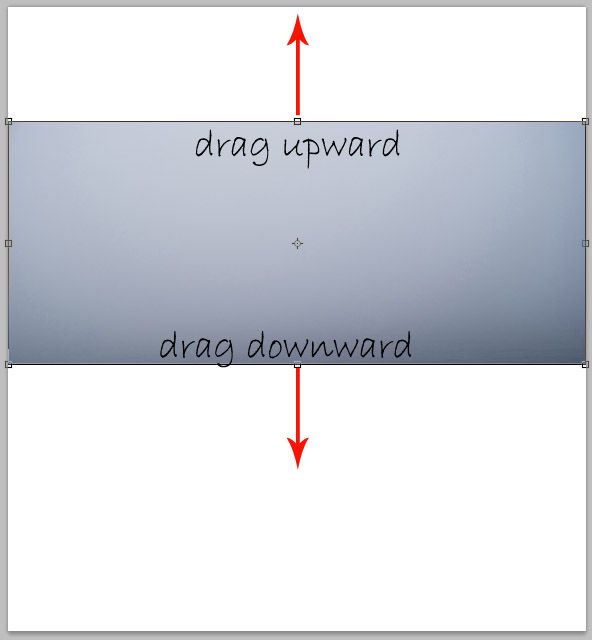
We will use this new layer to create misty texture for the background of the image. Take free transform tool (Ctrl+T). With this tool, click-hold and drag the upper middle transforming point upward and the lower middle one downward to cover the white background.
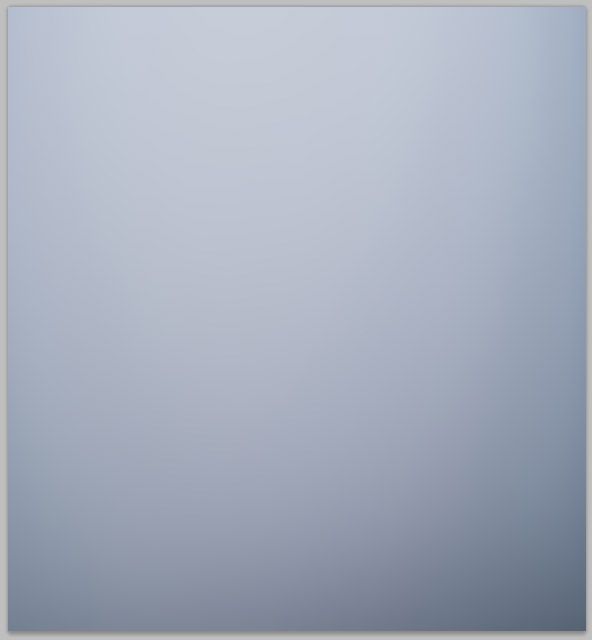
Duplicate the layer and set the duplicate to multiply blending at 100% opacity.
Step 14
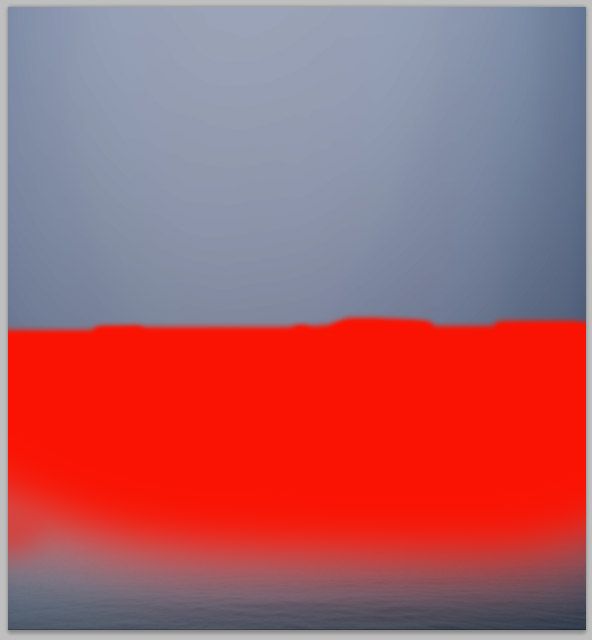
Next, place the original misty sea image above the two misty layers in the layer panel.
Mask the upper part of this layer to hide it. We just use the water texture of the image.
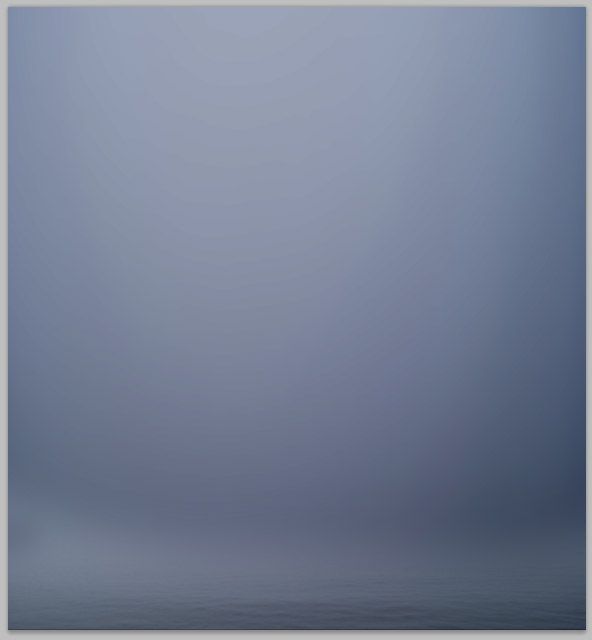
Select all the background layers and hit Ctrl+G to group them in a folder. Name this folder BG
Step 15
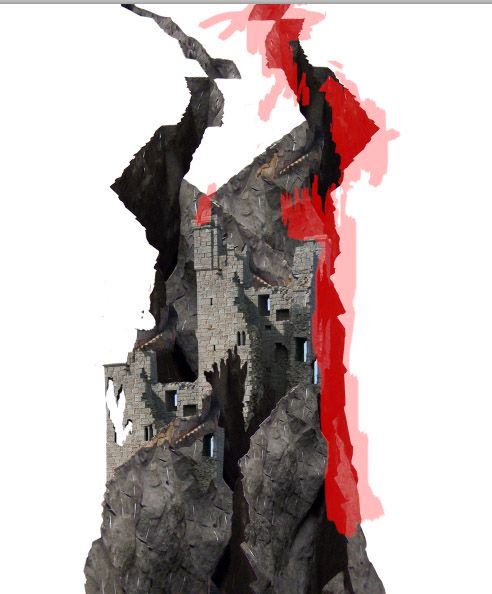
Open the rock image stock. Cut out the rock of the image.
Add the cut out to the main document. We will use this cut out as the base of the rocky mountain with ruins created before.
Cut out again some part of the rock image. Add the cut out to cover the lower left part of the pirate house.
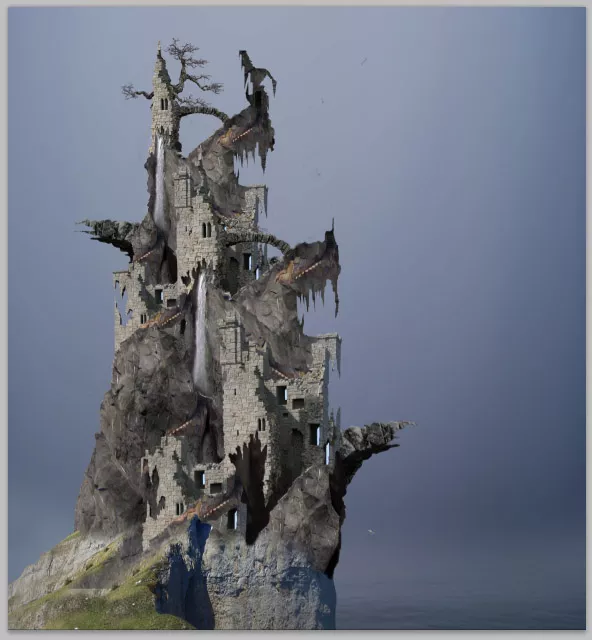
Mask the cut out to make it well blended with the pirate house. Finally select all the pirate house layers and hit Ctrl+G to group them. Name this group, say pirate house.
Step 16
Proceed to add cloud texture to the background. Open the BG folder and add the cloud image within the folder. Scale the size of the image to the size as needed and place in the position where the brightest cloud in behind the lower right side of the pirate house.
Mask unnecessary part of the image. We will use the brightest part of the cloud as the main cloud texture.
Set this cloud layer to normal blending at about 40% opacity.

Duplicate (Ctrl+J) the cloud layer. Flip it horizontally and place the duplicate on the left side behind the building.
Step 17
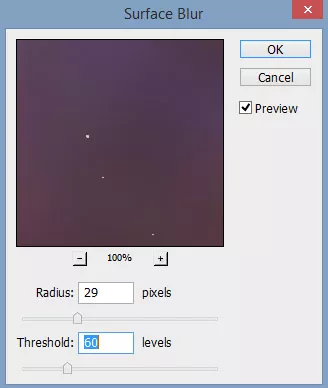
On this step, we will add more texture to the background. We will use the cosmos image for it. Open the image on the document. Place it above the cloud layer within the BG group.
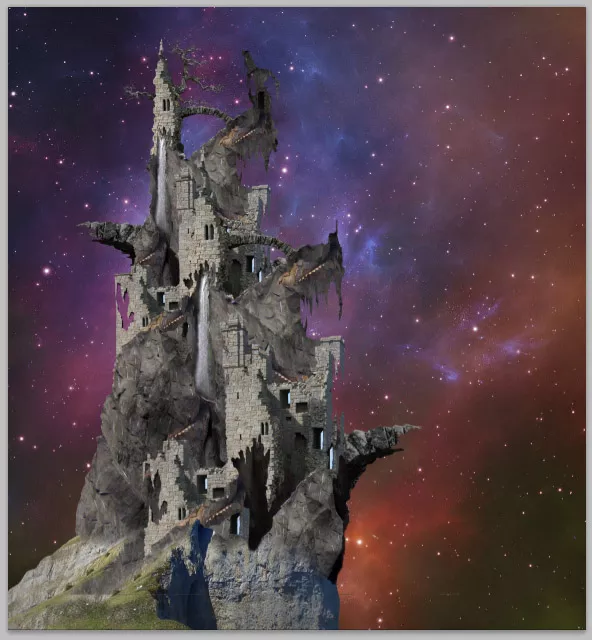
Set this cosmos layer to soft light blending at about 87% opacity.
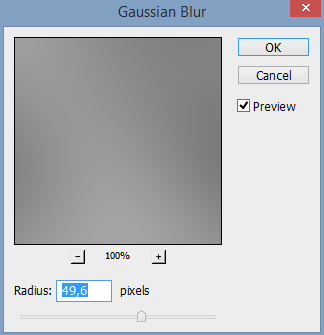
Then, give this layer surface blur filter by going to filter > blur > surface blur.
Type your instructions here.
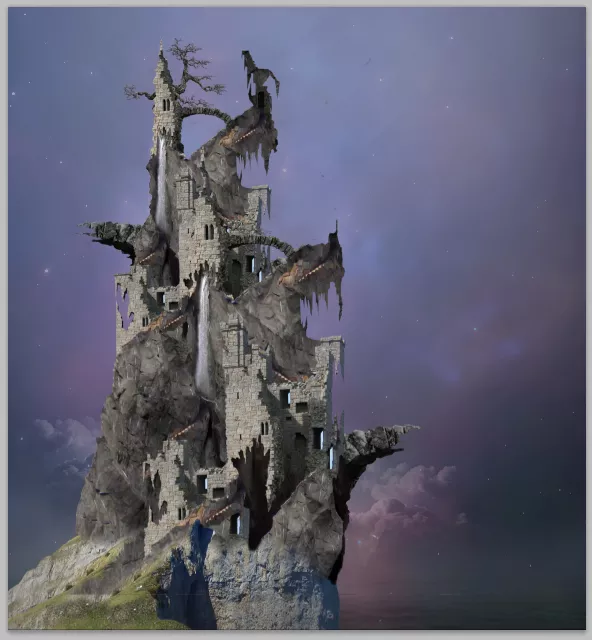
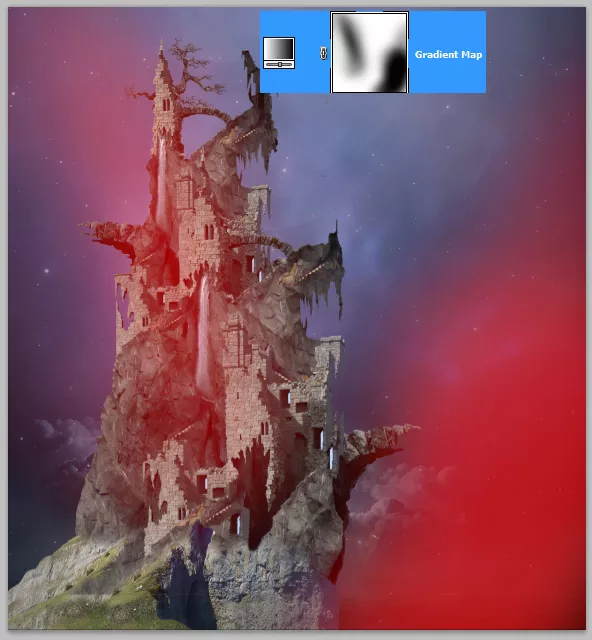
Step 18
Now create two new adjustment layers above the BG folder. Go to layer > new adjustment layers > brightness/contrast and gradient map.
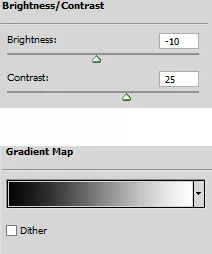
Select gradient map layer and give it a layer mask. With a very soft round brush (0% hardness) set at low opacity at 15%, mask some areas indicated in red highlight.
Step 19
Next, we should do color adjustments to the pirate house layer to match the background color. Open the pirate house group and select the layer. Create a new layer (Shift+Ctrl+N) with a clipping mask above the pirate house layer. On this layer, paint some soft shading with black on areas around the lower part of the building and some others.
Then, give this pirate house layer a new adjustment layer with a clipping mask. Go to layer > new adjustment layers > brightness/contrast.
Mask some parts around the building as indicated in red highlight. If we feel the value of the new adjustment layer is too much, we can lower the opacity of this layer a bit. With this value, set this layer to normal at about 87% opacity to have the result below:

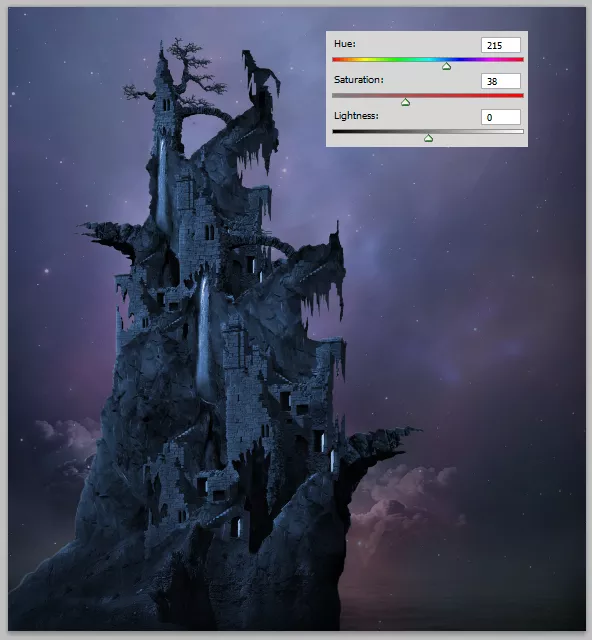
Give more new adjustment layer: hue/saturation. Set this layer to normal at 100% opacity.
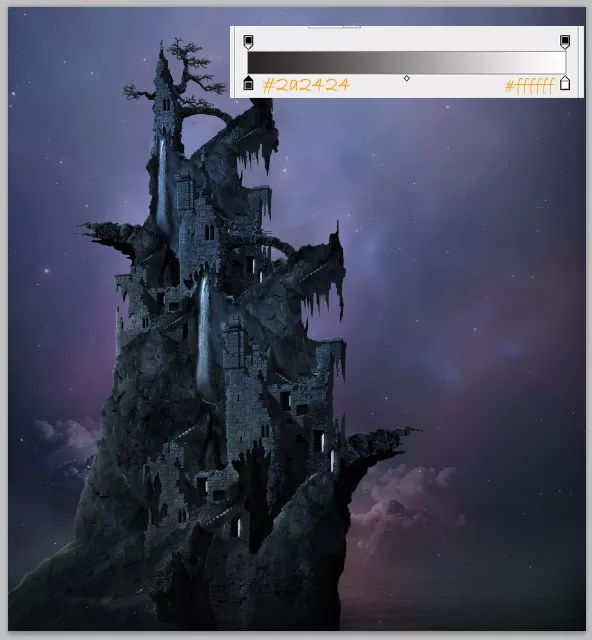
And another adjustment layer with a clipping mask: gradient map. Set this layer to soft light at about 40% opacity
Step 20
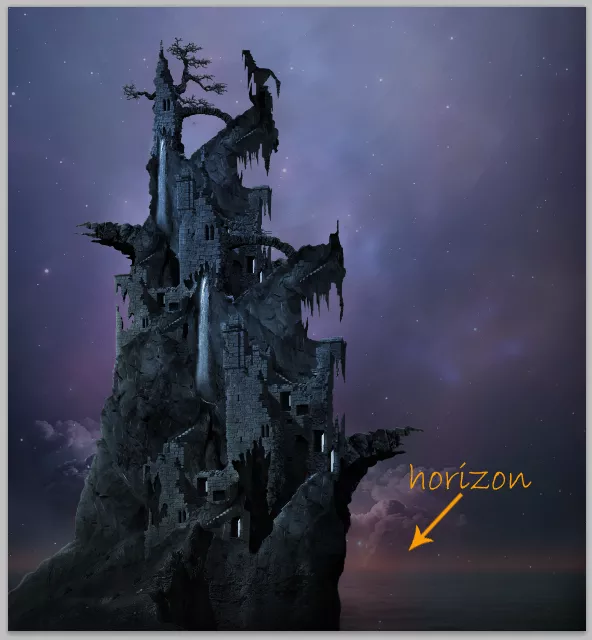
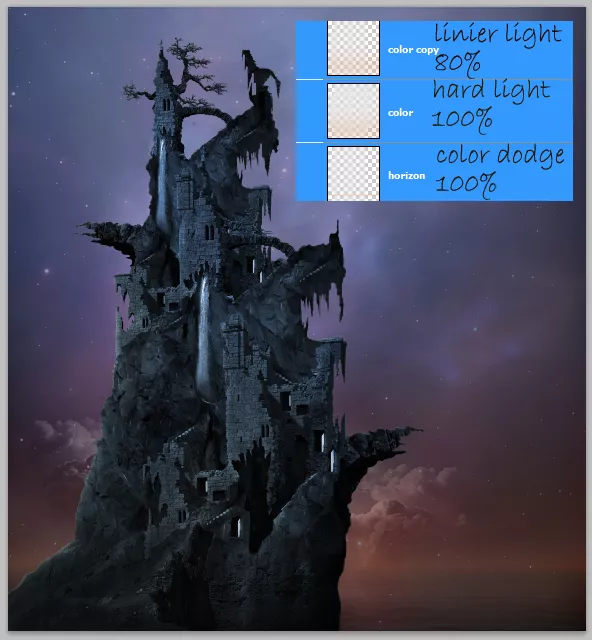
Proceed to create horizon line for the scene. Create again a new layer behind the pirate house folder. Take a very soft round brush with opacity of about 20%. On this new layer, paint orange (#fe9703) horizon. Set this layer to color dodge. To make the line more subtle, we can give it a bit Gaussian blur filter accordingly.
Again create a new layer above the horizon layer, on this layer paint subtle orange color to add more color to the scene. Duplicate the new layer and play around with blending mode to get best result. As illustrated in the screenshot, we use hard light and linier light for the blending mode with set to the values accordingly.

Step 21
Now create again a new layer below the horizon. On this new layer, paint soft yellow on the cloud. Set this layer to overlay at 100% opacity.
Step 22
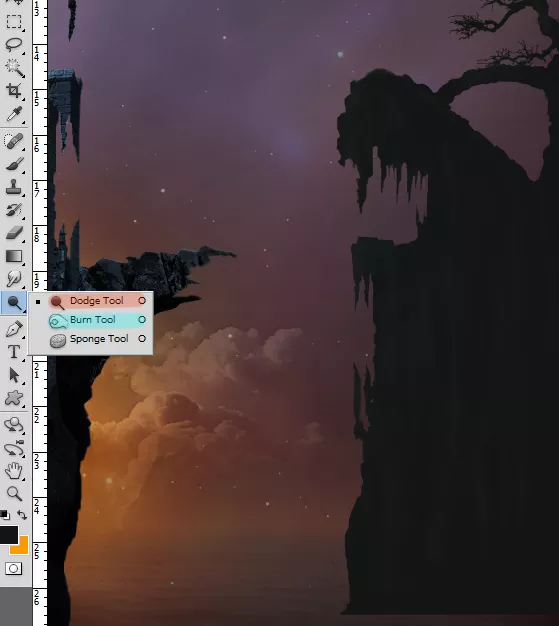
On this step, we will add distant rock to the scene. Create again a new layer (remember press Shift+Ctrl+N). On this new layer paint a dark rock shape as below.
With combination use of dodge and burn tool, paint highlight and shading on the rock to define dimension to the rock so it does not look flat:
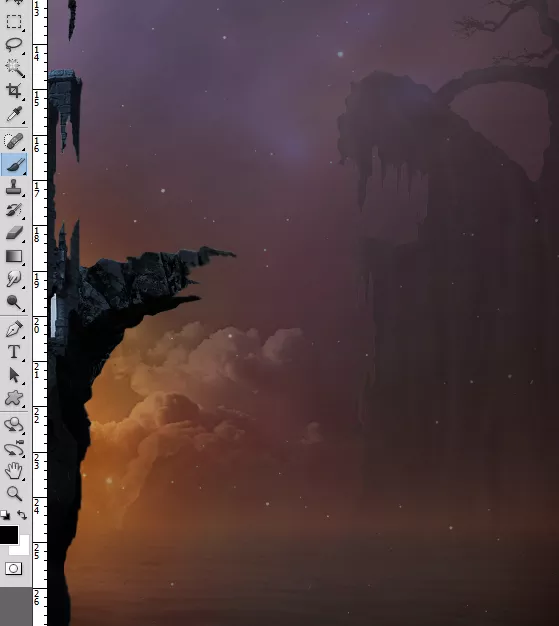
Give this layer a layer mask and mask the lower part of it. Set this layer’s blending to normal at about 40% opacity.
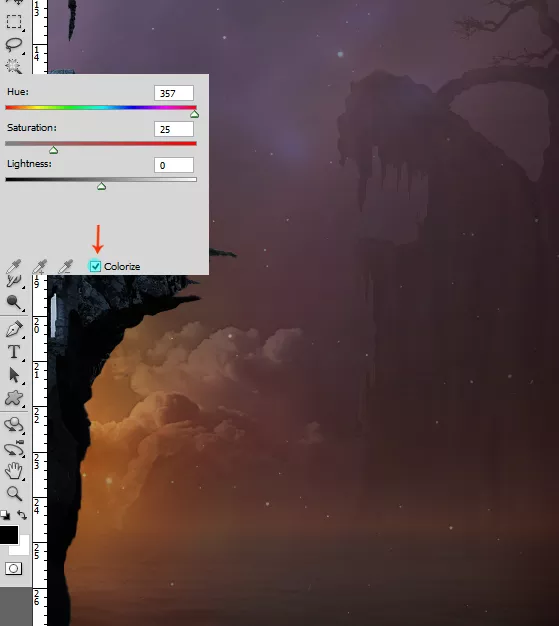
Finally, give this layer color adjustment with a clipping mask. Go again to layer > new adjustment layers > hue/saturation. Check Colorize.
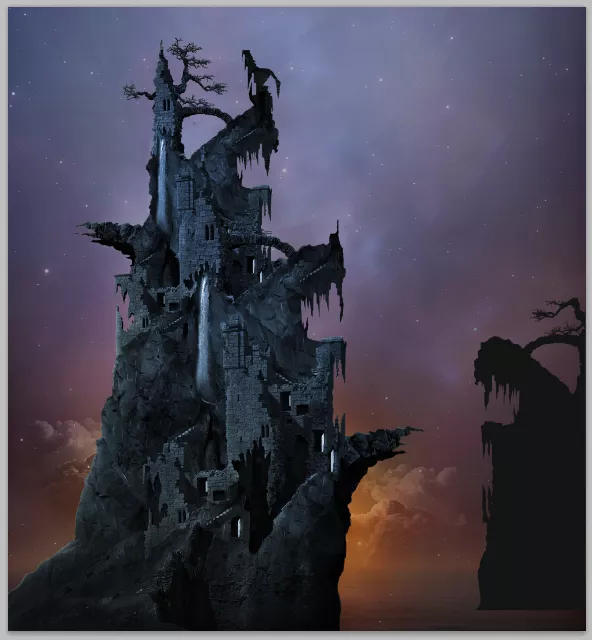
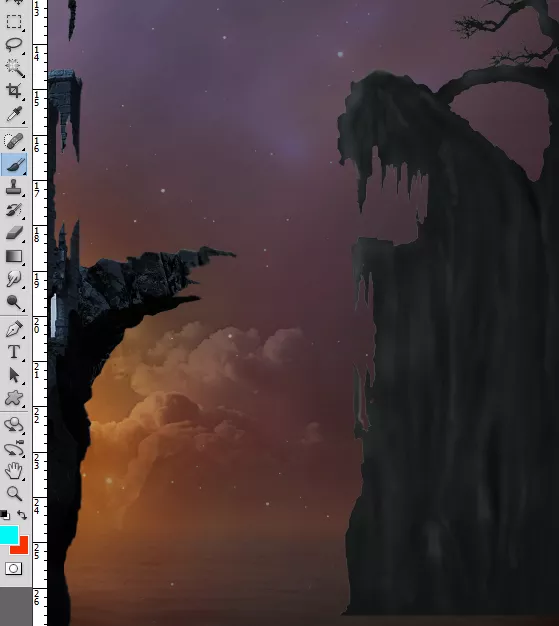
Give the other distant rock on the left part of the scene.
Give another object to the scene. We will add ships. Open the ship image and add it to the document. Take free transform tool (Ctrl+T). Scale the size of the ship accordingly.
Here is the ship after being given water lines below it and shadow.

Duplicate the ship and place the duplicates where needed.

Step 24
On the next last steps, we will do some tweaking for overall mode of the scene like more color adjustments and lightning. First of all, we will add some mist to the scene. Create a new layer above all the other layers. On this layer create cloud filter. Go to filter > render > cloud.
Set this cloud layer to screen blending at about 27% opacity.
Go to filter > blur > Gaussian blur.
Mask the cloud a bit. Let the cloud around the lower part of the building a bit thicker.
Step 25
To add more mist to the scene, we can use the background texture previously created. Duplicate the texture and position the duplicate above the cloud layer.
Set the texture to screen at about 30% opacity.
Step 26
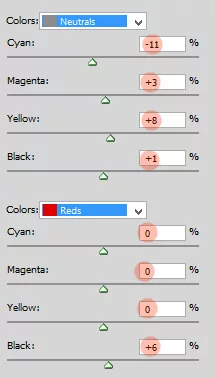
Now we will do some color adjustments. First, we give the scene selective color layer. Place this layer above all the other layers. Set this layer to normal at above 55% opacity.
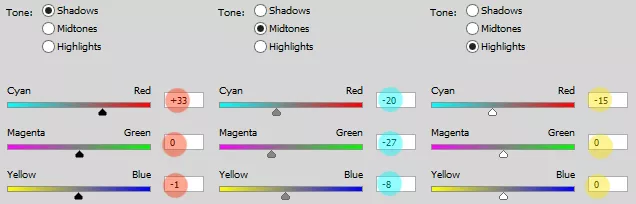
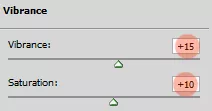
More two other adjustment layers: color balance and vibrance.
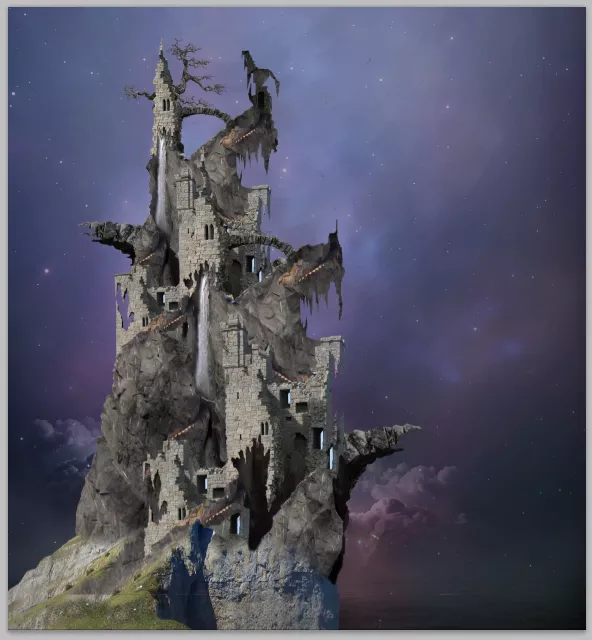
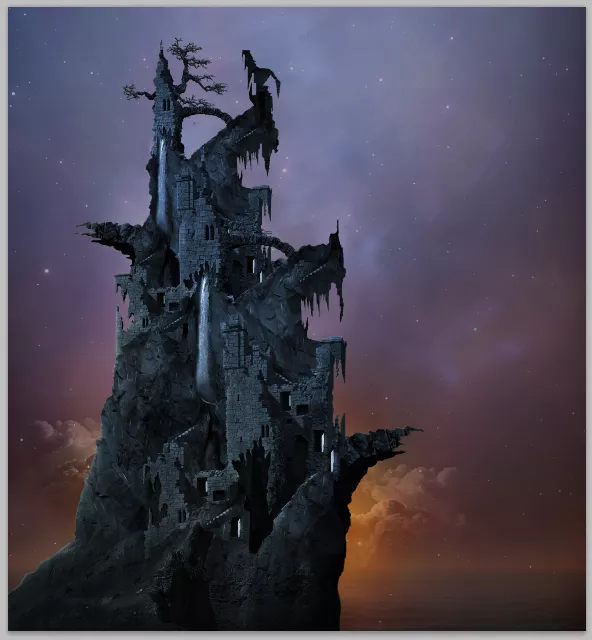
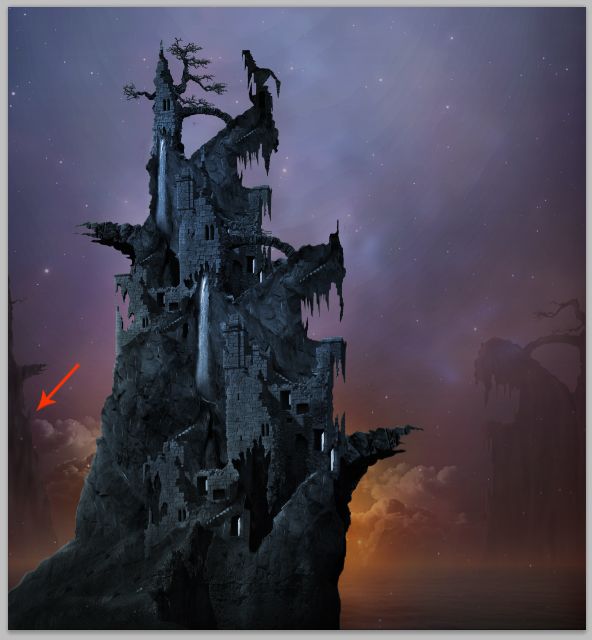
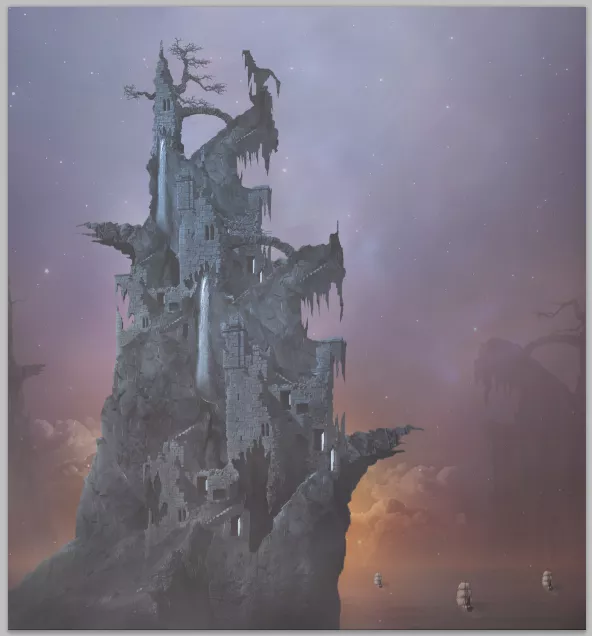
The result should be:
Step 27
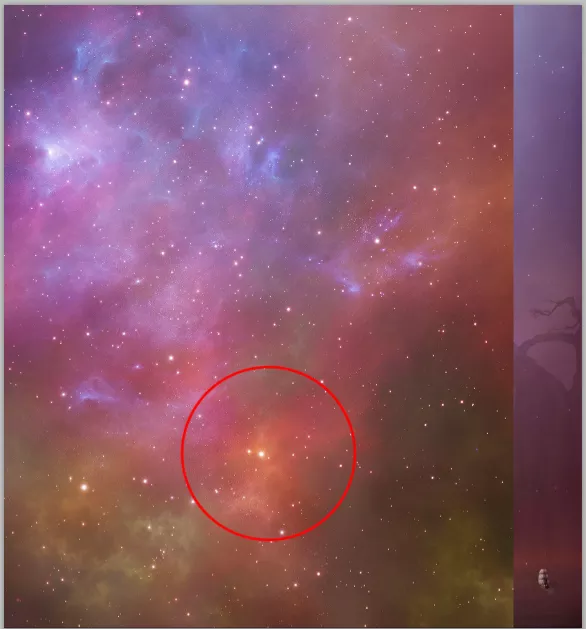
Finally, after doing overall color adjustment, we will do some tweaking on the pirate house layer. We will add some lightning on it. We just make use of the provided cosmos image to achieve this. Duplicate the cosmos layer and place the duplicate above the gradient map layer within the pirate house folder. The part circled in red is the one we will use to create the light on the building. Make sure to give this cosmos layer a clipping mask.
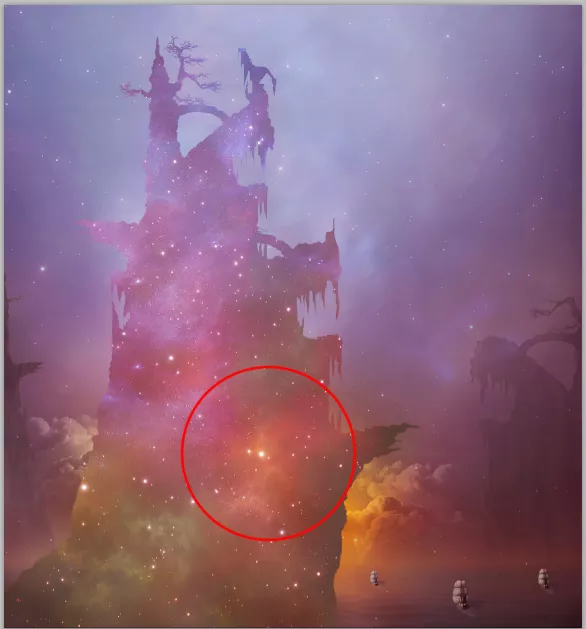
Set the cosmos layer to overlay at 100%

Duplicate the cosmos layer and set the duplicate to color dodge. There it goes, the building got some light now. If we feel the light is very strong around certain parts, we can mask this duplicate layer round the parts.
Step 28
Create a new layer with clipping mask above the cosmos layers within the folder. On this layer, paint reddish orange color as the one below to give red highlight.
Provided this color, we should set this layer to soft light at 100% opacity.

To give more vivid red highlight, we can duplicate this provided color and set this duplicate to color dodge blending. Mask to some areas if we feel the color is overlapping to them.
Step 29
Finally, again, create a new layer with a clipping mask above the reddish layers within the folder. Take a very soft round brush. On this layer, paint subtle combination color of yellow white and a bit blue.

Finally, we have done with the pirate house. Give this folder a layer mask. Mask some areas around the lower part and some edges of the building as indicate in red highlight.
Step 30
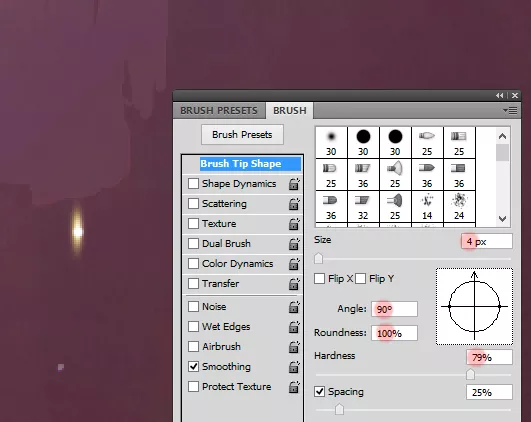
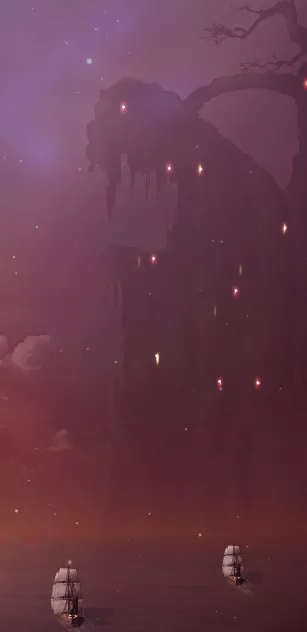
It’s almost done. To complete the scene, we also will add some light spots to the distant rock. To do this, create a new layer above all the other layers. Take brush tool (B). Hit F5 to show the brush preset. Set the shape of the brush. With this shape, click the brush to paint spot. Use soft yellow color for this.
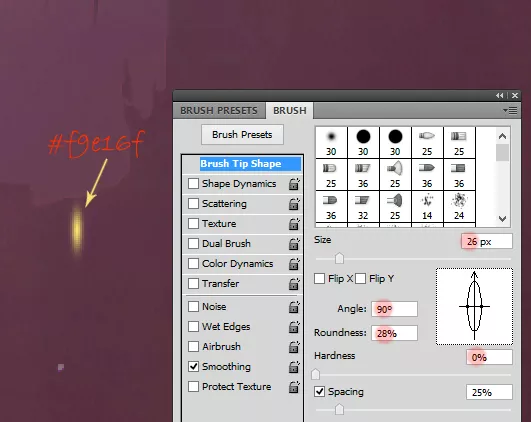
Now on the same layer, click white smaller brush on the middle of yellow spot.

Next set the shape of the brush stroke as below, click white hard dot in the middle of the spot. Set this layer to hard light at 100%.
We can alter the color of the light by giving it color adjustment: hue/saturation by sliding the hue slider accordingly.
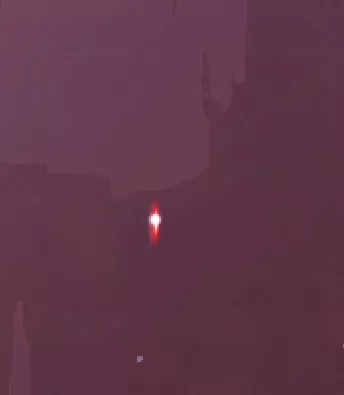
Finally, to give more subtle ray, we can give it a layer style. Go to layer > layer styles > outer glow. Given this light spot, here is the setting of the layer style to and the result:

Step 31
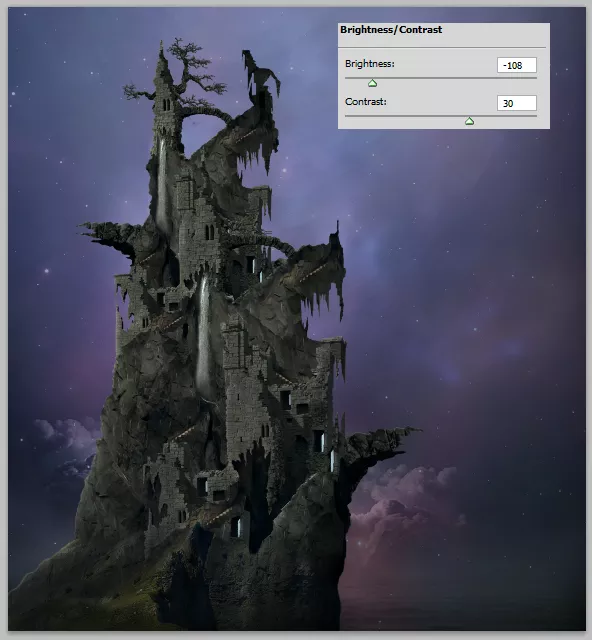
We will give final adjustment layer for overall scene. Go for the last time to layer > new adjustment layers > curve.
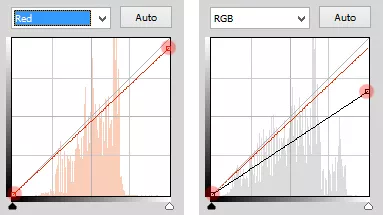
Mask the part indicated in red highlight.
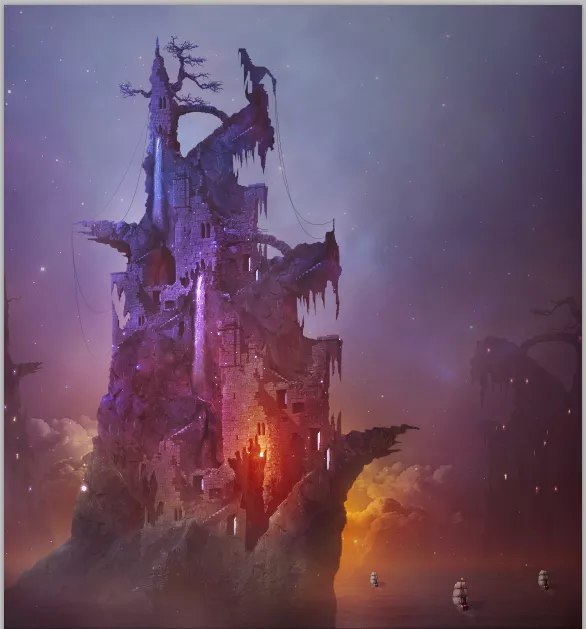
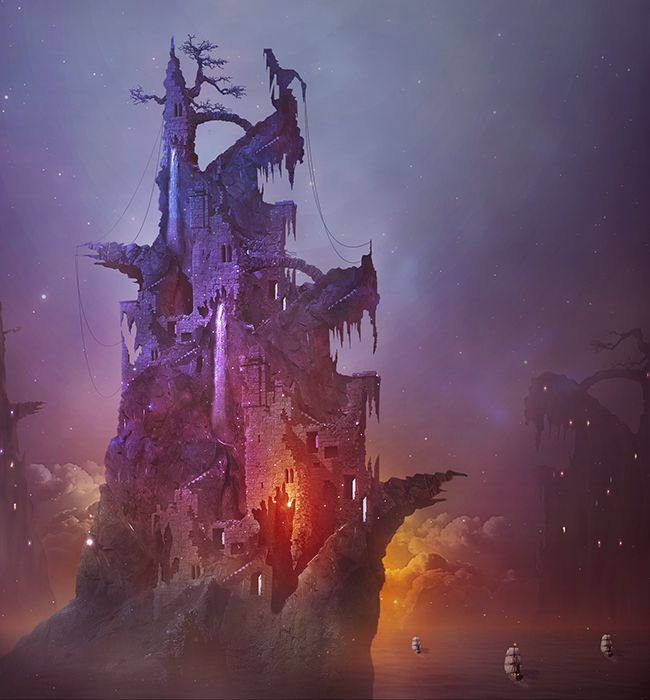
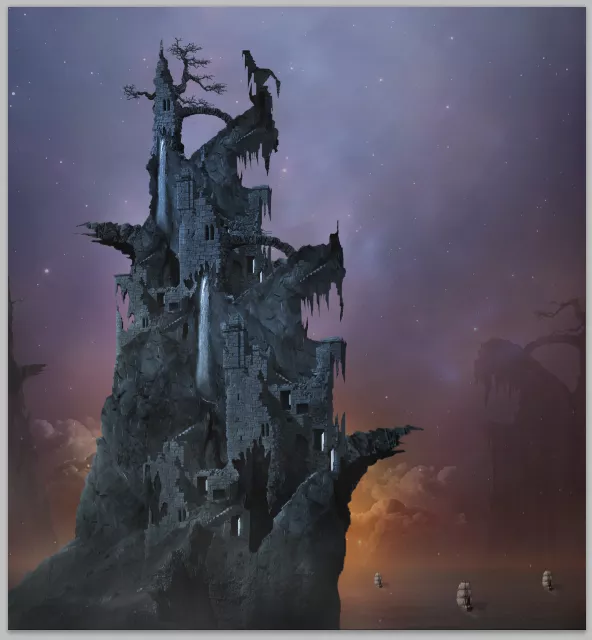
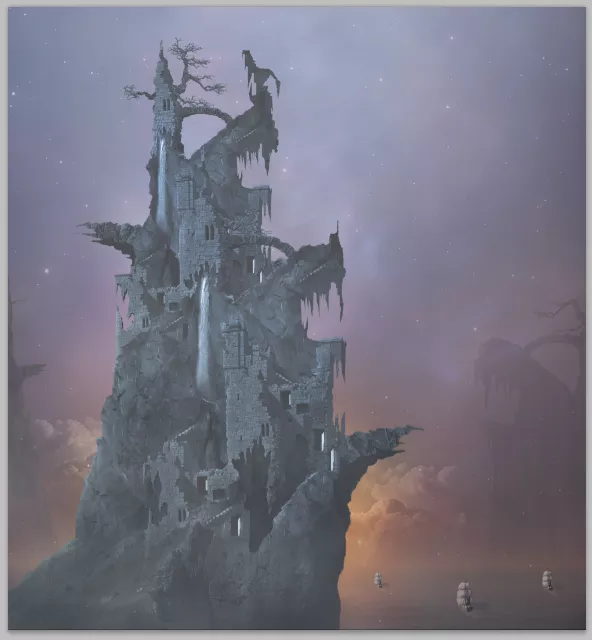
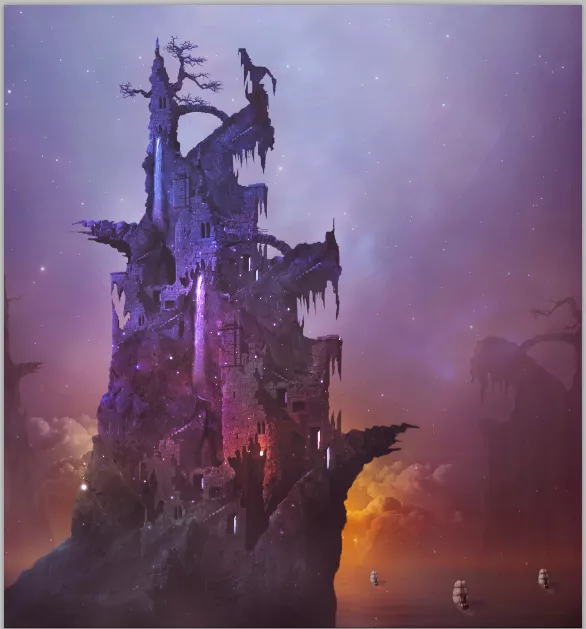
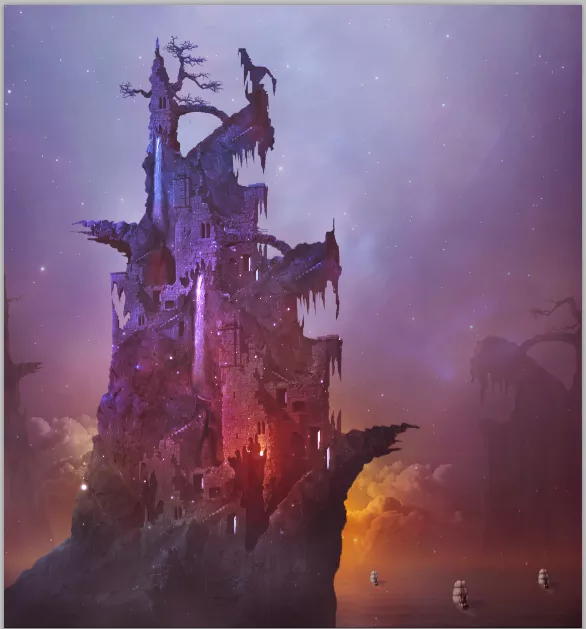
Final Results