
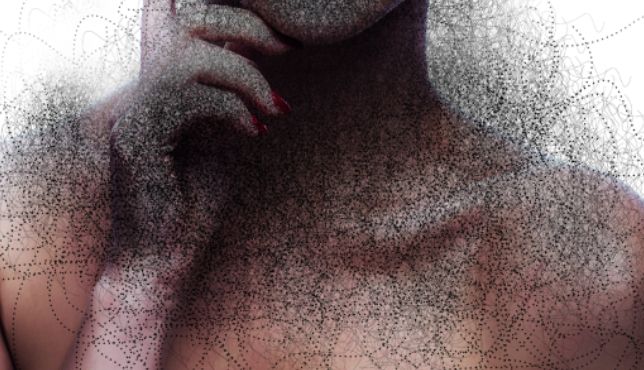
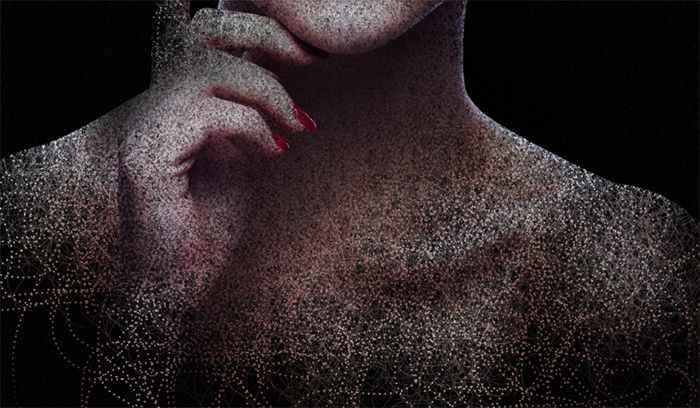
On this tutorial we will create abstract photo artwork of a girl portrait with disintegration effect on it. We will learn to create disintegration effect in a handy and practical technique, adorn the photo with stunning lighning and then complete it with color adjustment. Throughout the tutorial, we will have fun to learn simple and handy tricks to create photo artwork in photoshop.
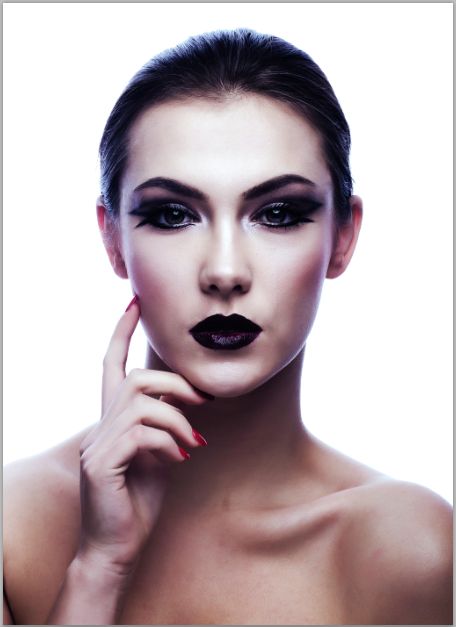
What you’ll be creating
On this tutorial we will create an abstract scene of a girl with disintegration effect on face and body. We will use some essential techniques in doing photo manipulation. We will work with paths, brush tool, some filter, color adjustments and textures all through the steps in this tutorial.This tutorial is done with photoshop CS 3. Don’t forget a glass of coffee and optionally a pack of cigarette for your companion. Ready..?
Tutorial Resources
Step 1
Well, start by opening the girl image in photoshop. Grab magic warn tool (W) located in tool panel on the left side of the photoshop. Set the value of tolerance to 32.
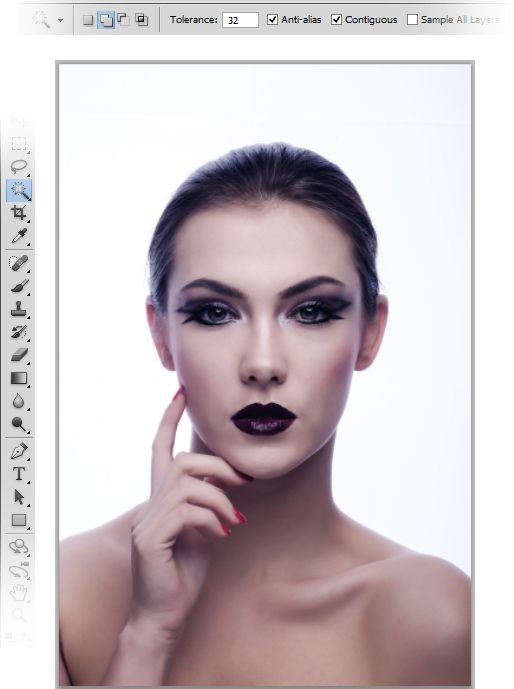
Click the white background of the girl image to make selection on it indicated by blinking small dots around the white background.
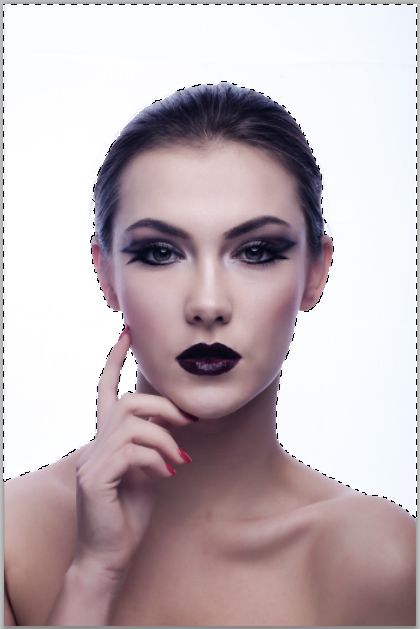
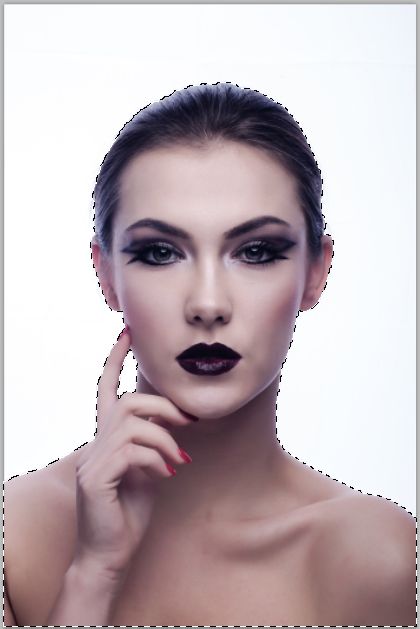
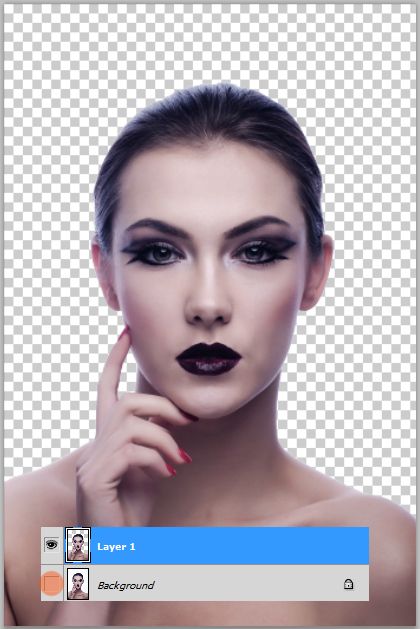
Let’s inverse the selection by hitting Shift+Ctrl+I. Now hit Ctrl+ J to duplicate the girl. Hide the original image by clicking the eye icon beside it.
Step 2
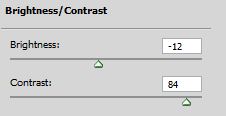
We will alter the tone of the girl’s skin by giving it some new layer adjustments. Firstly, while being active on the layer 1 (the extracted girl image), go to layer > new adjustment layers > brightness/contrast. Set this adjustment layer to these values:
Give more two others adjustment layers: curves and selective color.
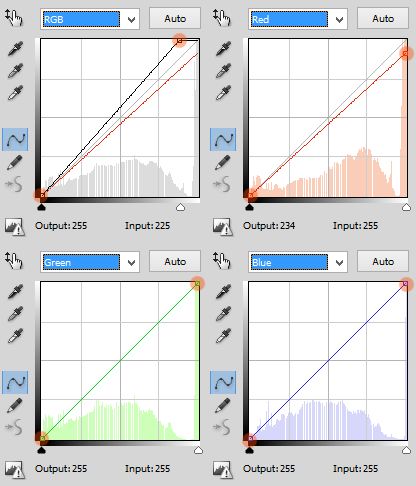
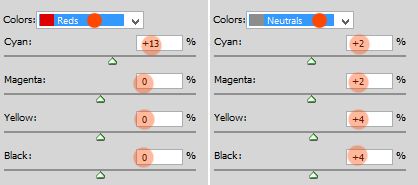
Given the tree adjustment layers, the look of the image should like the one in the screenshot below. Select the layer 1 and the tree adjustment layers, hit Ctrl+E to merge them into a new single layer. Name this layer, say, girl.

Step 3
Now let’s start create the main canvas for the scene we are going to create. Hit Ctrl+N to create it. Set the canvas/document to the size given below:
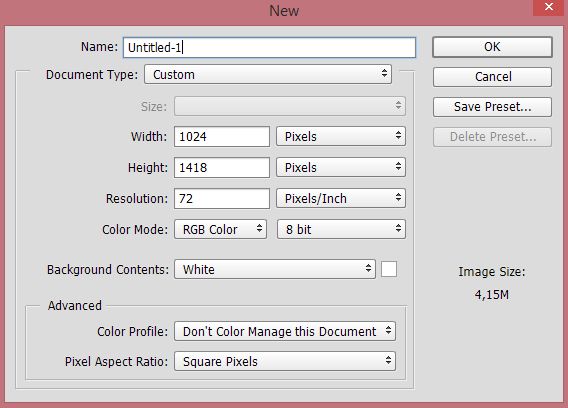
Next, open the girl image to the main document and convert it into smart object layer by going to layer > smart objects > convert into smart object. Take free transform tool (Ctrl+T) and scale down the size of the image to fit the size of the new canvas. Here is the position and size of the girl for your reference:
Step 4
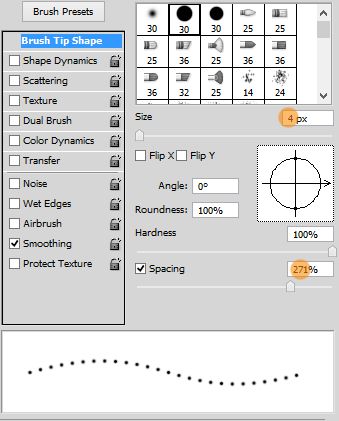
From this step on, we will create texture to which we are going to clip the girl image to make disintegration effect on it. We will just create many dot lines as the texture. To create it, we will use pen tool (P) to make random paths and stroke them with brush (B). Well, start by setting the brush stroke first. Grab the brush tool (B), choose hard round brush. Set the tip of the brush in the brush preset (F5) as below:
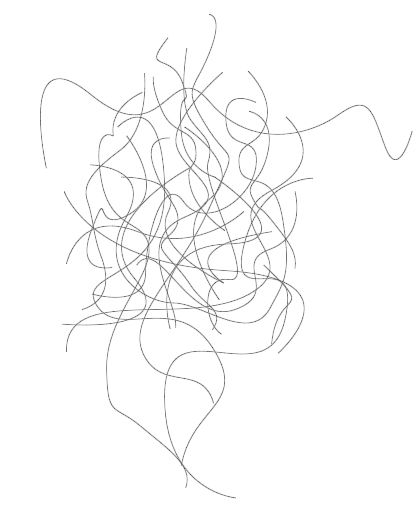
Create a new layer (Shift+Ctrl+N). Take the pen tool (P) and create random path. Below are examples of the path:
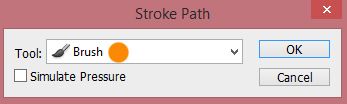
On the new layer, stroke the path and choose the brush as the tool of stroking with black color.

Duplicate the layer as many as needed to create tangled random dot lines. Vary the size of the dot lines to create desired texture. Select all the duplicate layers and merge them (Ctrl+E) into a new single layer. Name this layer, say, texture. Here is sample of the texture we can create:
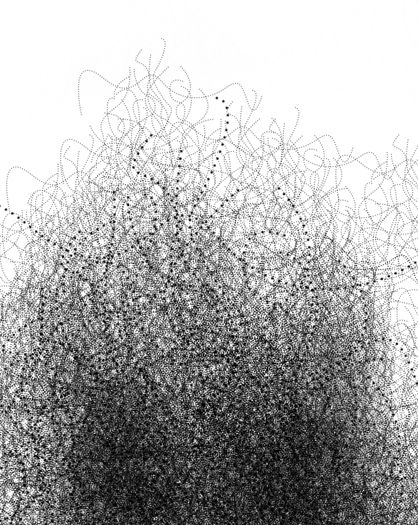
Here is the position of the given texture when placed above the girl layer in the layer panel.
Step 5
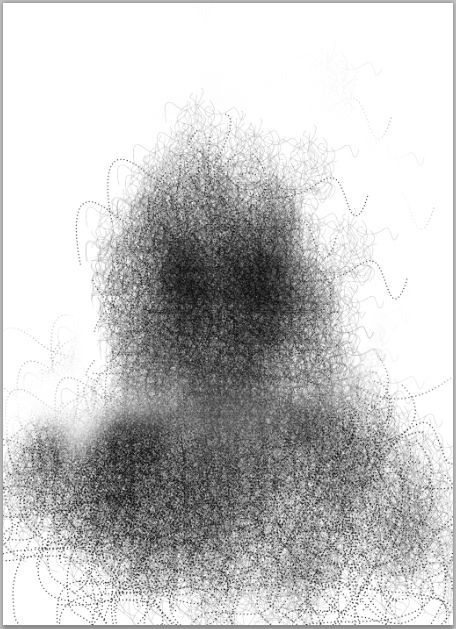
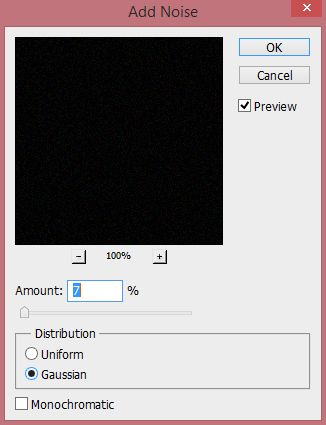
Before creating the disintegration effect, we will create a new layer (Shift+Ctrl+N) below the girl and texture layer. Fill (Shift+F5) this new layer with black color. Name this layer, say, black. Then, go to filter > noise > add noise to give this layer some noise.
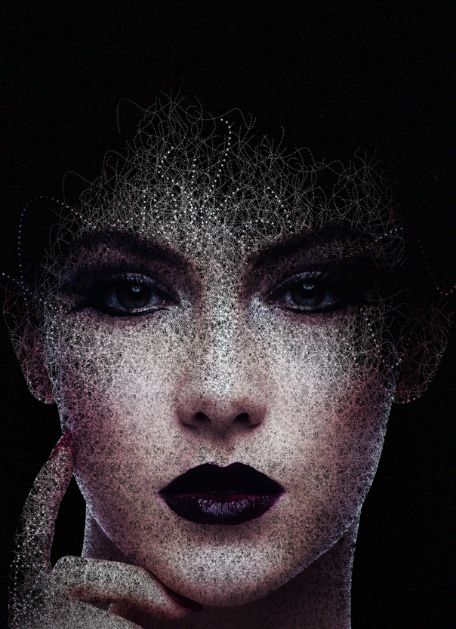
So this is the result so far when the texture layer is positioned above the girl layer.

Step 6
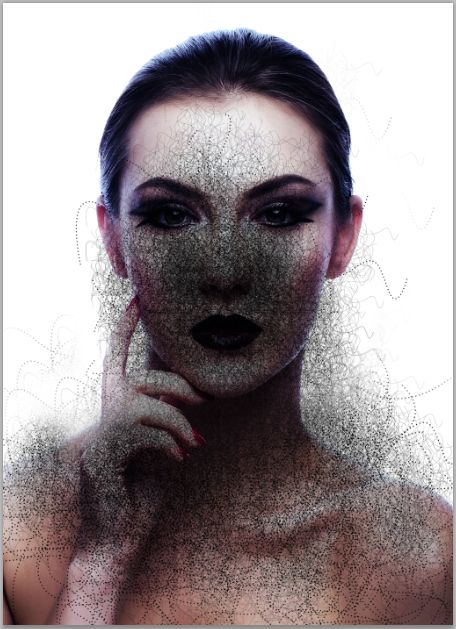
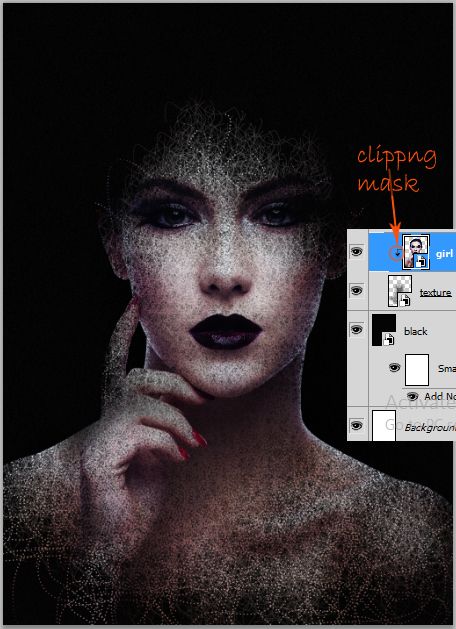
Now we can simply creating the disintegration effect on the girl by positioning the girl layer above the texture layer in the layer panel. When the girl layer is above the texture layer, give it a clipping mask (Ctrl+Alt+G). It is really handy. Given the texture, the result should like this one:
Step 7
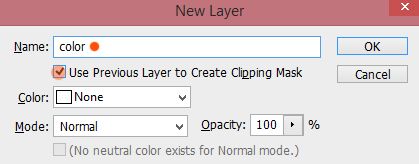
Now we will add some color to the girl. Create new layer (Shift+Ctrl+N) with a clipping mask. Set this layer to color blending.
Take a very soft round brush (B) with 0% hardness and opacity of about 10-15%. On this layer, paint any soft color we prefer around the eyes and neck of the model. The color used below is cyan and the layer is set in normal blending at 100% opacity.
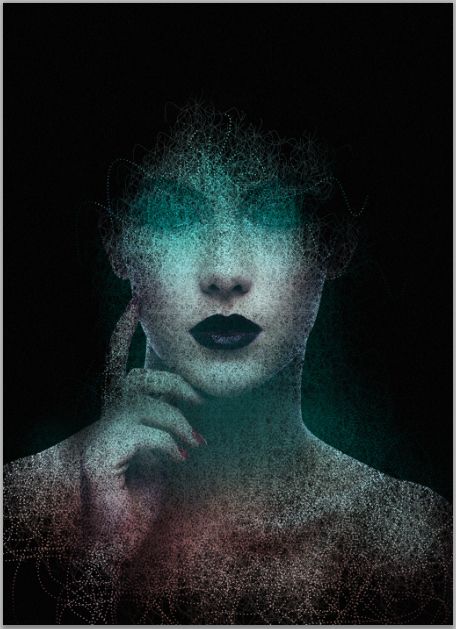
We can duplicate this color layer and play around the opacity to get the desired result. Here is the result.

Step 8
We need to give the lips reddish tone. To do this, create a new layer with a clipping mask above the color layers. Set this new layer to color dodge. Paint soft orange color around the lips.
Step 9
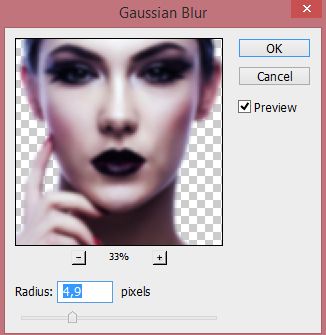
Now we will blur some part around the girl image. Select the girl layer and go to filter > blur > Gaussian blur to give it some blur filter. Set the value below:
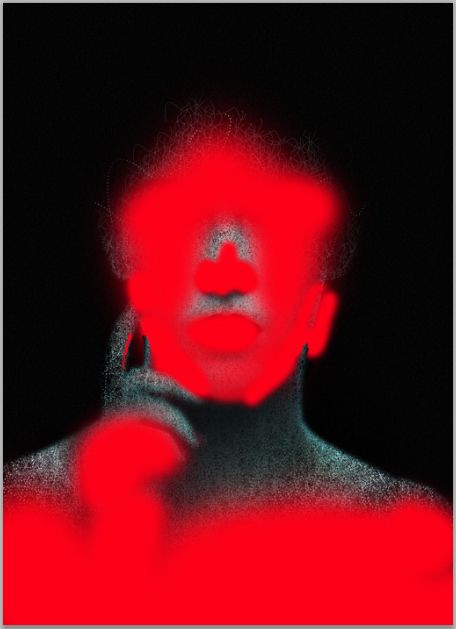
Select the filter mask thumbnail to be active on it and with a very soft round brush, mask the blur effect on areas around the face and body as indicated by red highlight.
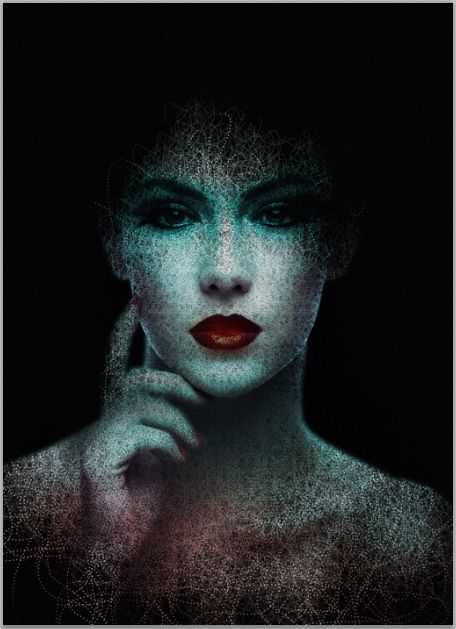
Here is the result. Select all the girl layers and hit Ctrl+G to group them into a folder. Name this folder, say, girl.
Step 10
Create a gain a new layer (Shift+Ctrl+N) below the girl folder. Take the pen tool (P) and create paths as below. Set the brush tip as the ones in the previous step 4.

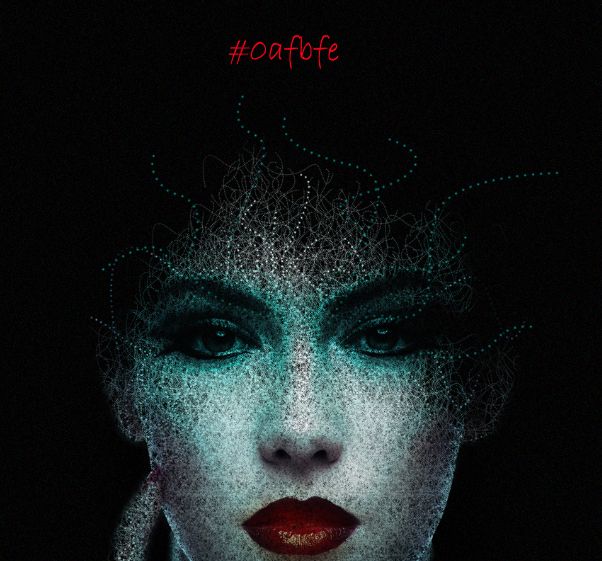
On this new layer, stroke the path. Use color #0afbfe. We can reduce the opacity of this layer if we feel the stroke of the dots is too much.
Step 11
On another new layer, create some new paths like the example below:

Then stroke the paths. To vary the stroke, we can check Simulate Pressure to get narrow pointed dot lines. We may try any different color we prefer to get desired result.
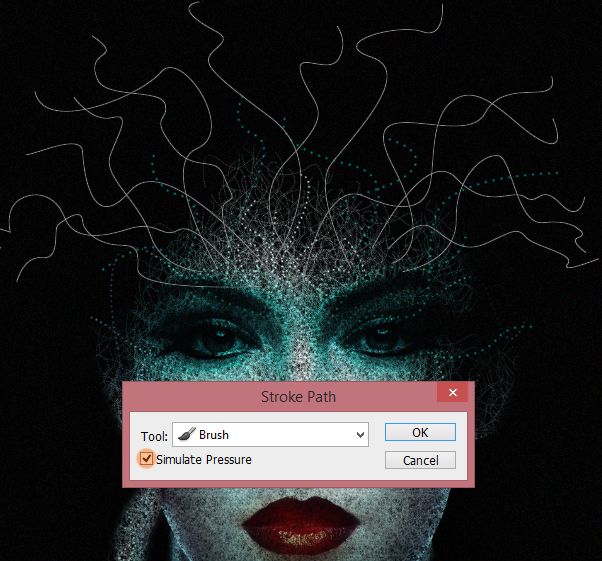
Here is the result with red color.

Step 12
Still with the same ways, we can add more dot lines on areas around the eyes of the model.
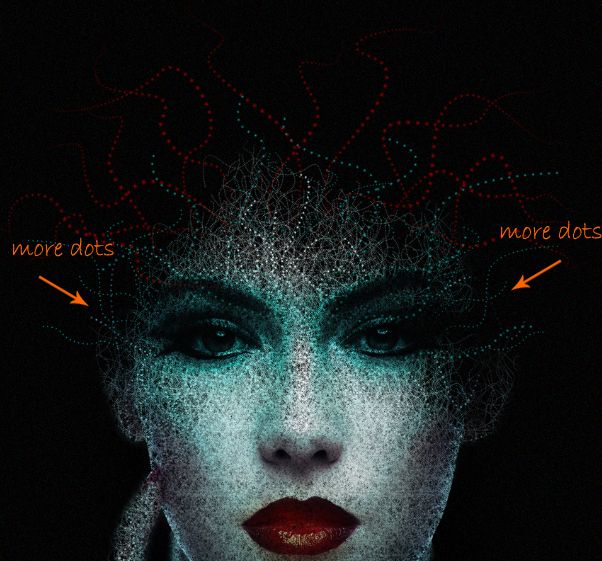
Here is the result so far…..
Step 13
In this step we will add some highlight around the girl. Create a new layer (Shift+Ctrl+N) above all the other layers. Fill (Shif+F5) this layer with black. Set its blending to color dodge and name it, say, highlight. Take a very soft round brush with opacity of about 4-5%. On this layer, paint soft white color around the shoulder, neck and other parts of the girl where needed. Here is the layer in normal blending.
And here is the result in color dodge blending.

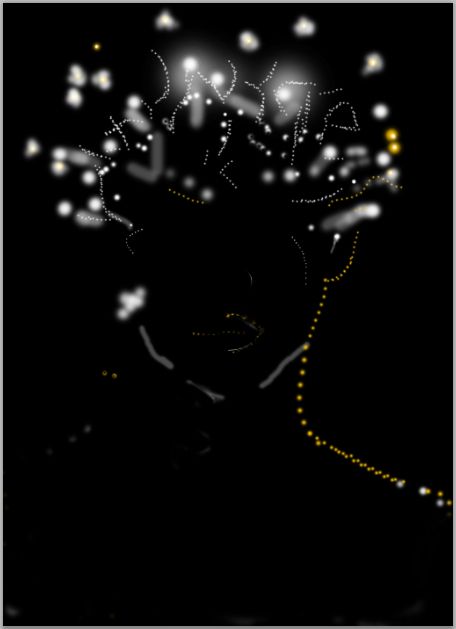
Step 14
To adorn the scene, we may add some blinks around the girl. Create another new layer above the highlight layer. Fill this layer with black and set to color dodge blending. Name this layer, say, light. With the same way as in the previous step 13, paint combination of white and yellow color on areas around the head and the other parts needed.

Step 15
We will do some color adjustment to the scene. Go to layer > new fill layer > solid color.
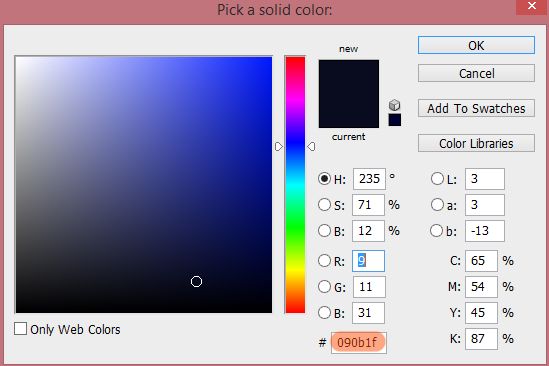
Set this color fill layer to exclusion blending at about 47-50% opacity.
Now go to layer > new adjustment layer > photo filter.
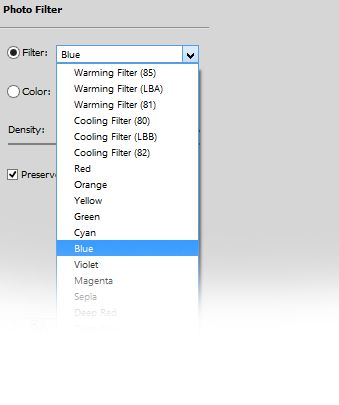
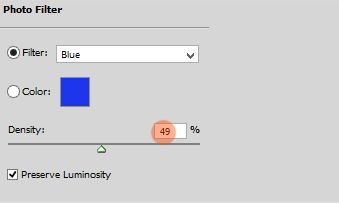
Set this photo filter layer to normal at 60% opacity.
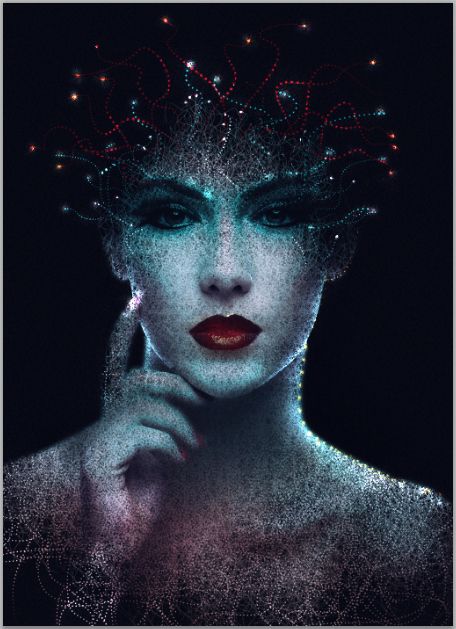
Finally, select all visible layers and hit Shift+Ctrl+Alt+A to merge them into a new single layer. Name this layer, say, final. Go to filter > others > high pass
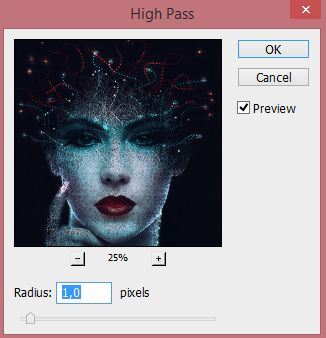
Set this layer blending option to overlay at 100%.
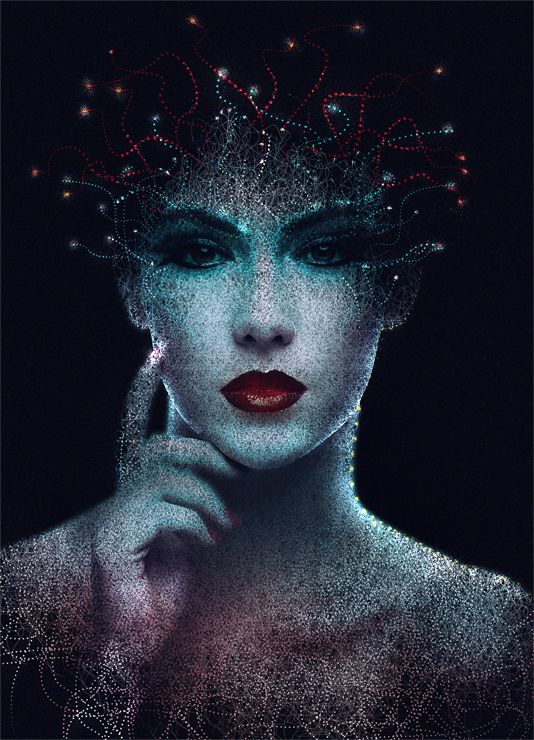
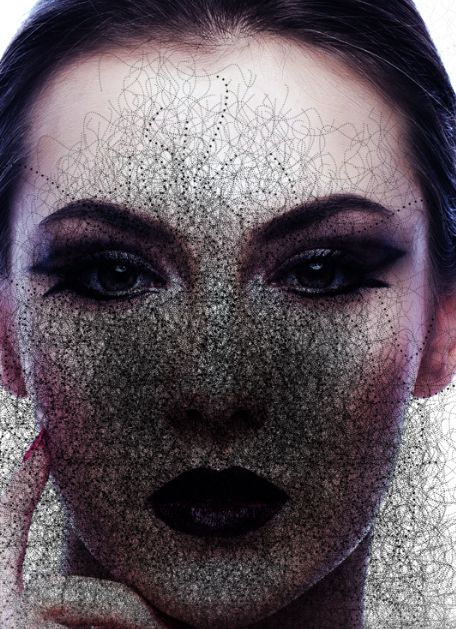
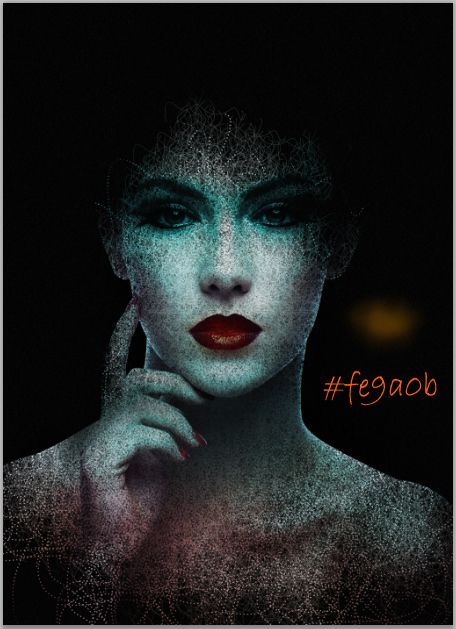
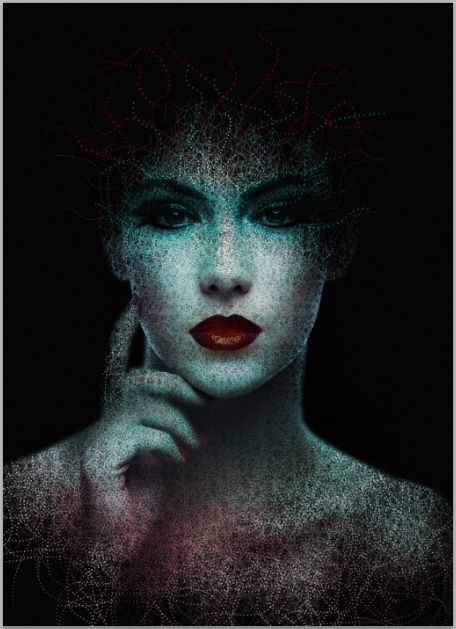
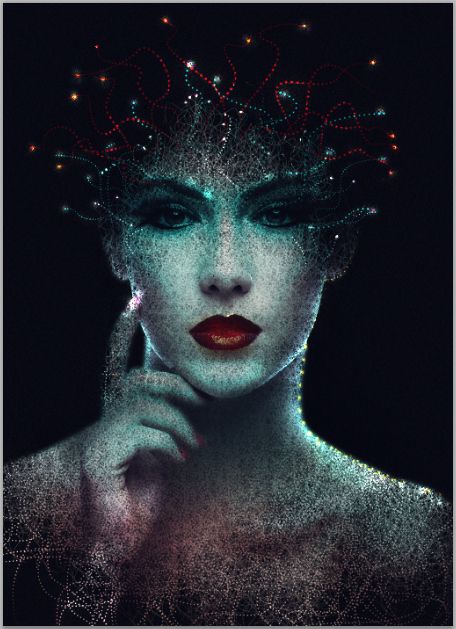
It’s Done !
Final Results