
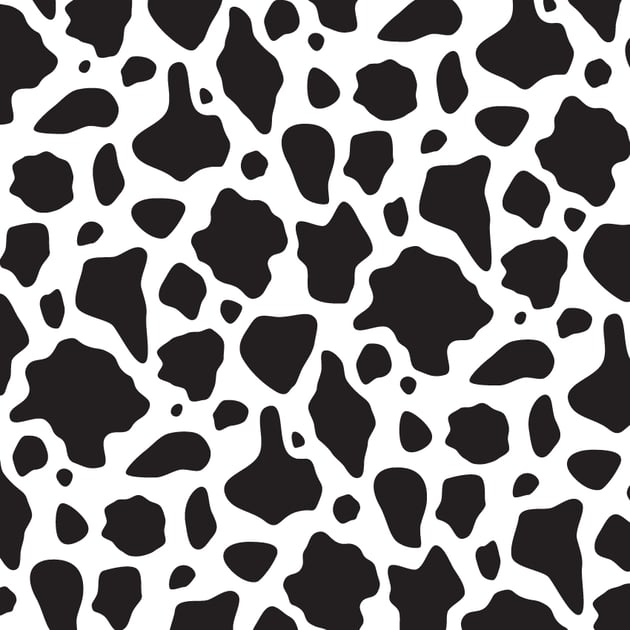

In the following tutorial, you will learn step by step how to make a cow print pattern in Illustrator, and then how to scale, rotate or stylize it.
If you don’t have the time to learn how to draw a cow print, then Envato is the solution. This creative platform offers over 2,000 Illustrator add-ons you can download without restrictions! You can find plenty of vector patterns, including cow patterns.
What you’ll learn in this tutorial
1. How to create a new document and set up a grid
Step 1
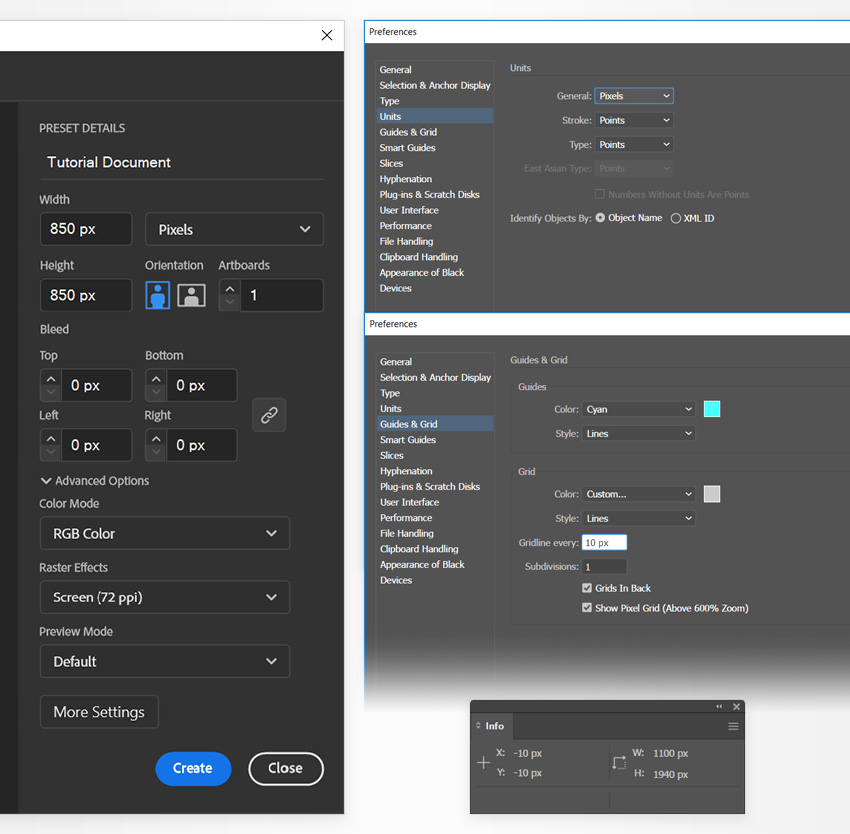
Hit Control-N to create a new document. Select Pixels from the Units drop-down menu, set the Width and the Height to 850 px, and then click that Advanced Options button. Select RGB for the Color Mode and set the Raster Effects to Screen (72 ppi), and then click Create.
Enable the Grid (View > Show Grid or Control-“) and Snap to Grid (View > Snap to Grid or Shift-Control-“). You will need a grid every 10 px, so simply go to Edit > Preferences > Guides & Grid, and enter 10 in the Gridline every box and 1 in the Subdivisions box. Try not to get discouraged by all that grid—it will make your work easier, and keep in mind that you can easily enable or disable it using the Control-“ keyboard shortcut.
You should also open the Info panel (Window > Info) for a live preview of the size and position of your shapes. Don’t forget to set the unit of measurement to pixels from Edit > Preferences > Units. All these options will significantly increase your work speed.
Step 2
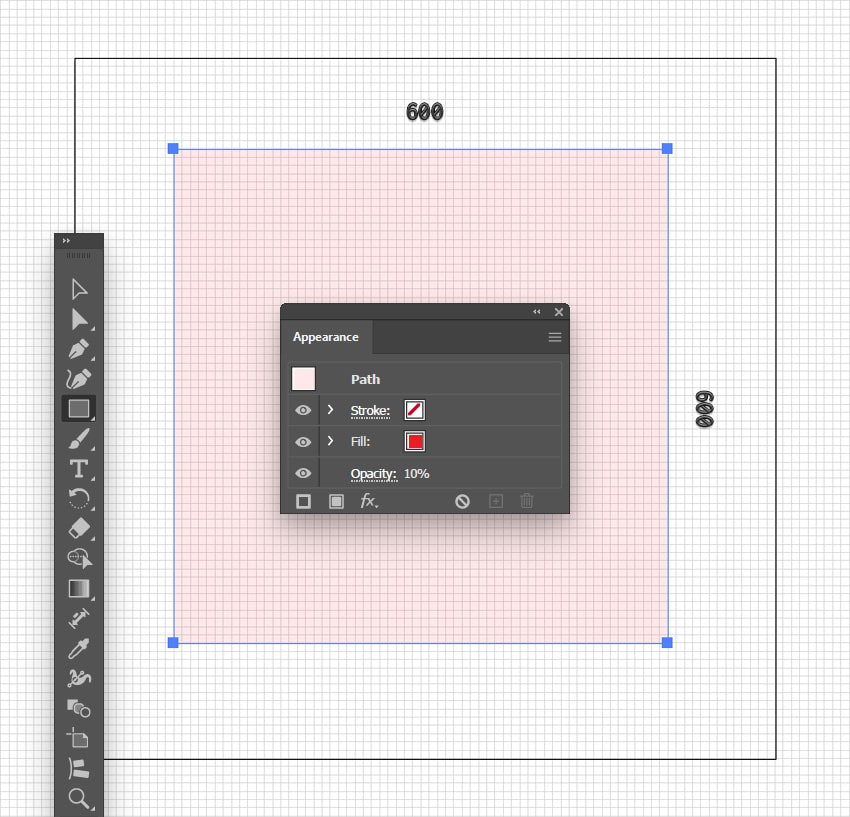
Pick the Rectangle Tool (M) and use it to create a 600 px square. Fill this shape with a random red and lower its Opacity to 10%.
This shape will serve as the frame of your pattern tile. You can open the Layers panel (Window > Layers) and lock this shape to make sure you don’t select or move it by accident as we put together the cow pattern.
2. How to create the vertical edges of the cow pattern tile
Step 1
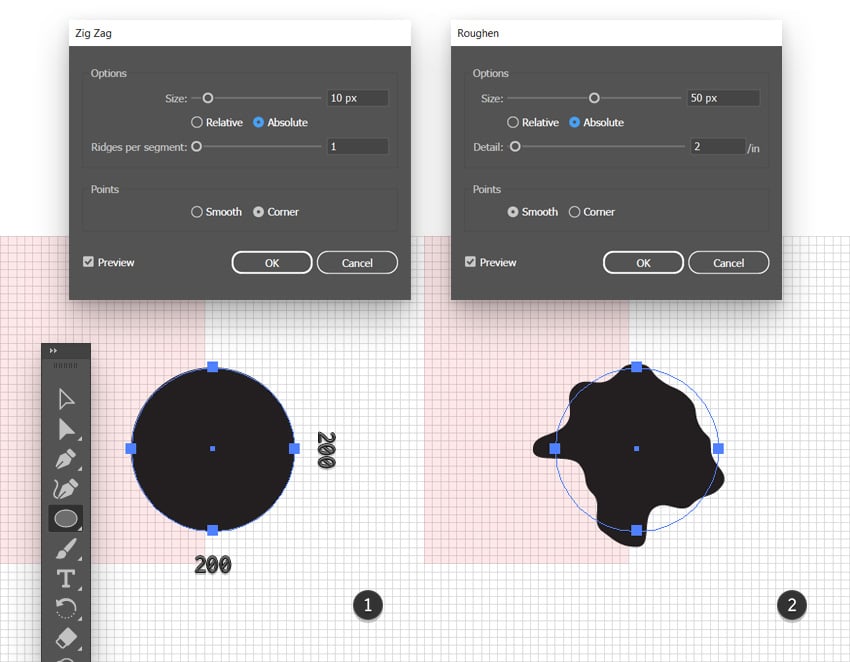
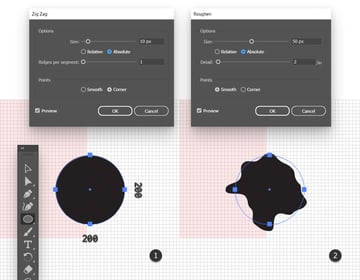
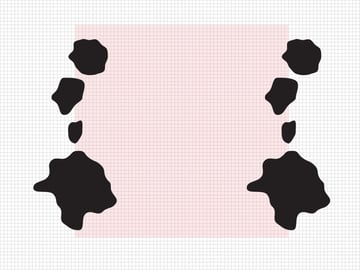
Focus on the bottom-right corner of your red square. Pick the Ellipse Tool (L) and use it to create a 200 px circle. Make it black and place it as shown in the first image (use the grid as a guide).
Keep your circle selected and go to Effect > Distort & Transform > Zig Zag. Enter the settings displayed in the image below, click OK, and then go to Effect > Distort & Transform > Roughen. Enter the attributes shown in the following image, and click OK.
Your end result won’t look exactly like the one below. The key is to get a random distorted shape. If you’re not happy with your result, you can press Control-Z to Undo, and then press Shift-Control-E (or go to Effect > Apply Roughen) to reapply that same Roughen effect. Feel free to repeat this sequence of keyboard shortcuts until you’re happy with your distorted shape.

Step 2
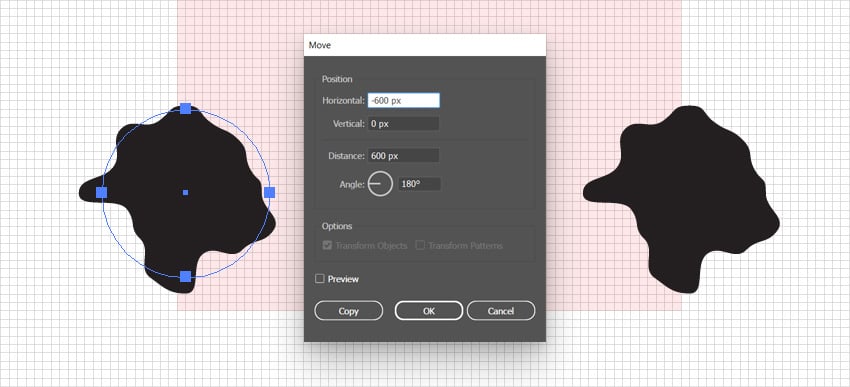
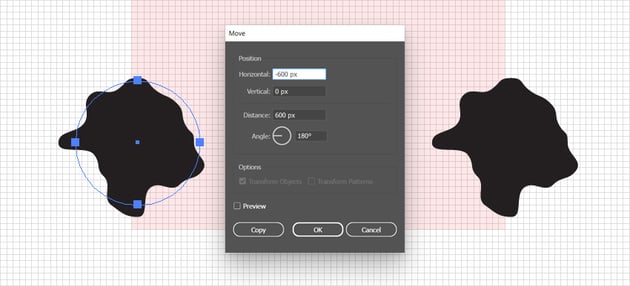
Make sure that your circle is selected, and go to Object > Transform > Move (Shift-Control-M). Set the Horizontal Position to -600 px (the exact size of your pattern tile), and then click the Copy button. This will add a copy of your circle 600 px to the left. In this way, we make sure that the pattern tiles will match perfectly when repeated horizontally.

Step 3
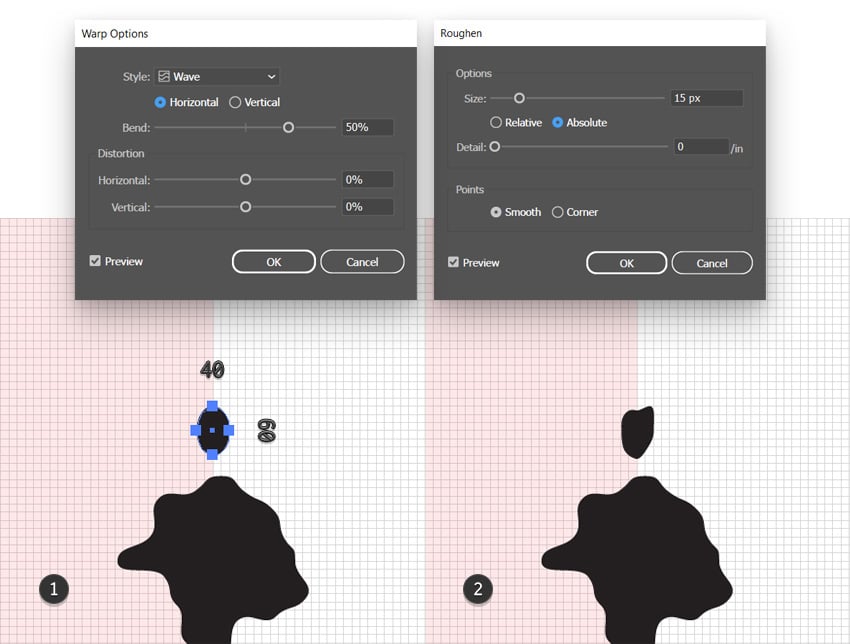
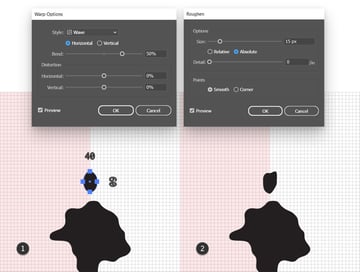
Reselect the Ellipse Tool (L) to create a 40 x 60 px shape, and place it roughly as shown below.
Keep it selected, and go to Effect > Warp > Wave. Enter the settings displayed in the image below, click OK, and then go to Effect > Distort & Transform > Roughen. Enter the attributes indicated in the following image, and click OK.
Remember that you can press Control-Z and then Shift-Control-E to try a different distortion for this shape.

Step 4
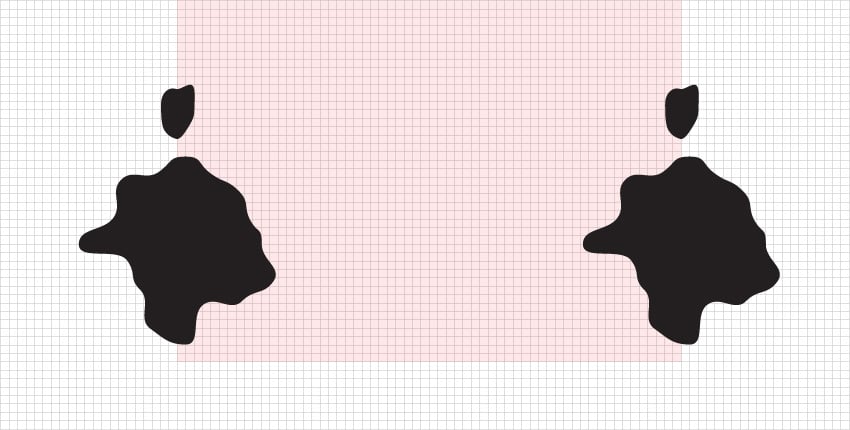
Make sure that your shape is still selected, and press Shift-Control-M to quickly open the Move window. Keep the existing settings and click Copy, just as we did for the first shape.


Step 5
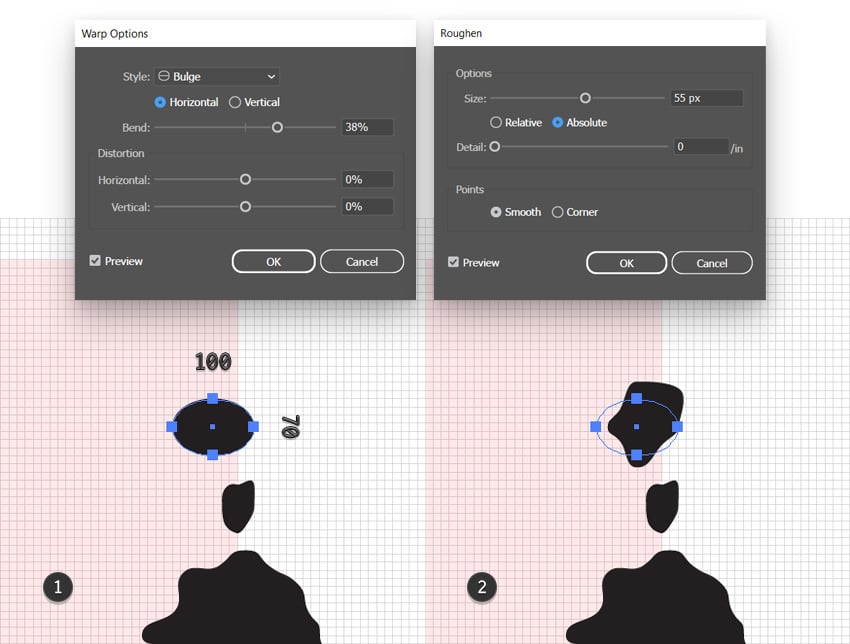
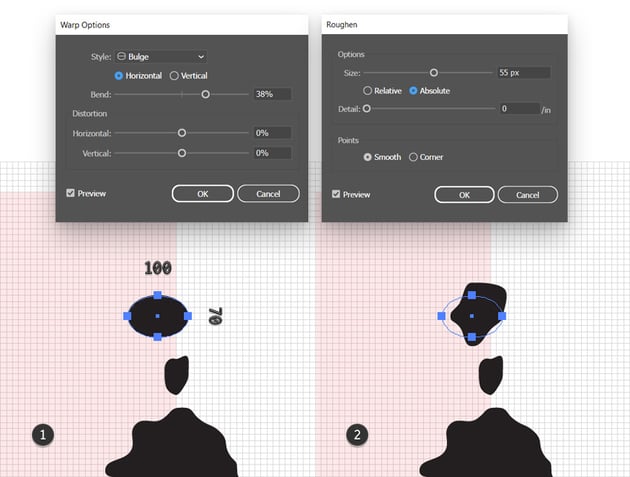
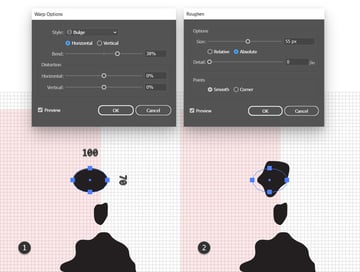
Use the Ellipse Tool (L) to create a 100 x 70 px shape, and place it roughly as shown below.
Keep it selected, and go to Effect > Warp > Bulge. Enter the settings displayed in the image below, click OK, and then go to Effect > Distort & Transform > Roughen. Enter the attributes indicated in the following image, and click OK.
Step 6
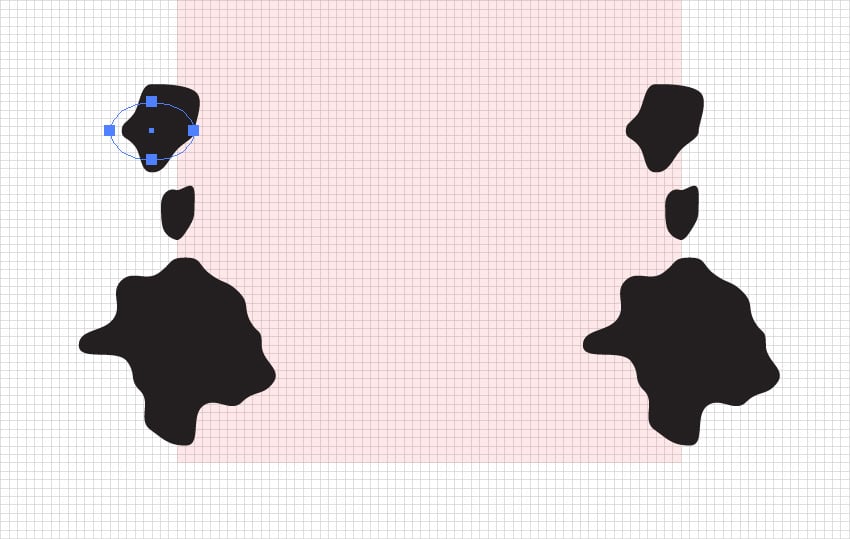
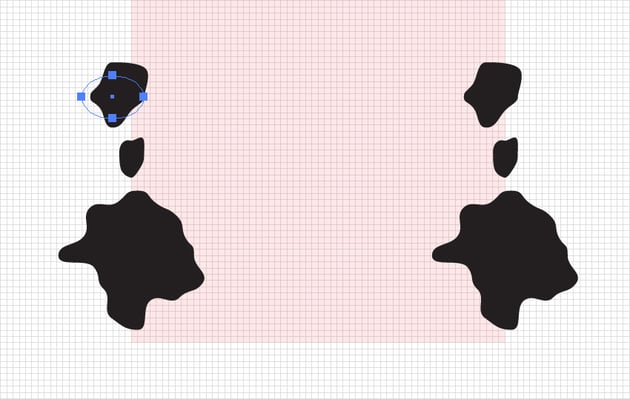
Make sure that your shape is still selected, press Shift-Control-M, and then click that Copy button.

Step 7
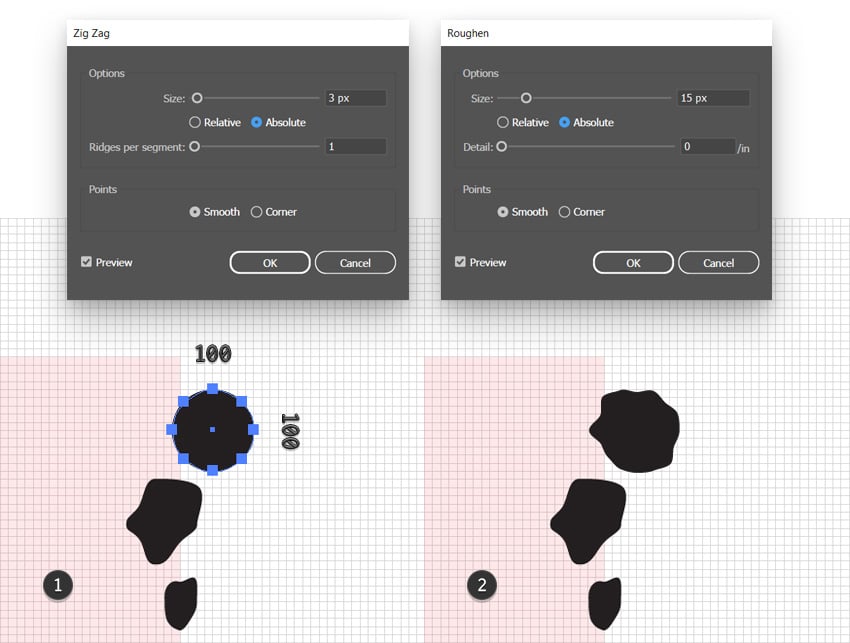
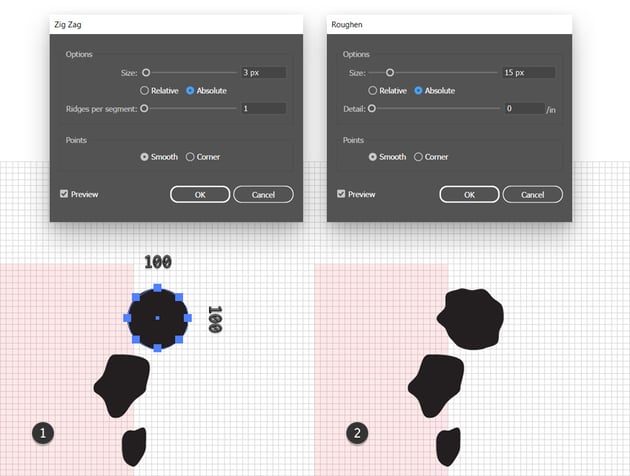
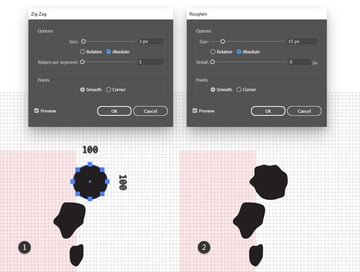
Use the Ellipse Tool (L) to create a 100 px circle, place it roughly as shown below, and then go to Object > Path > Add Anchor Points.
Keep this shape selected, and go to Effect > Distort & Transform > Zig Zag. Enter the settings displayed in the image below, click OK, and then go to Effect > Distort & Transform > Roughen. Enter the attributes indicated in the following image, and click OK.
Step 8
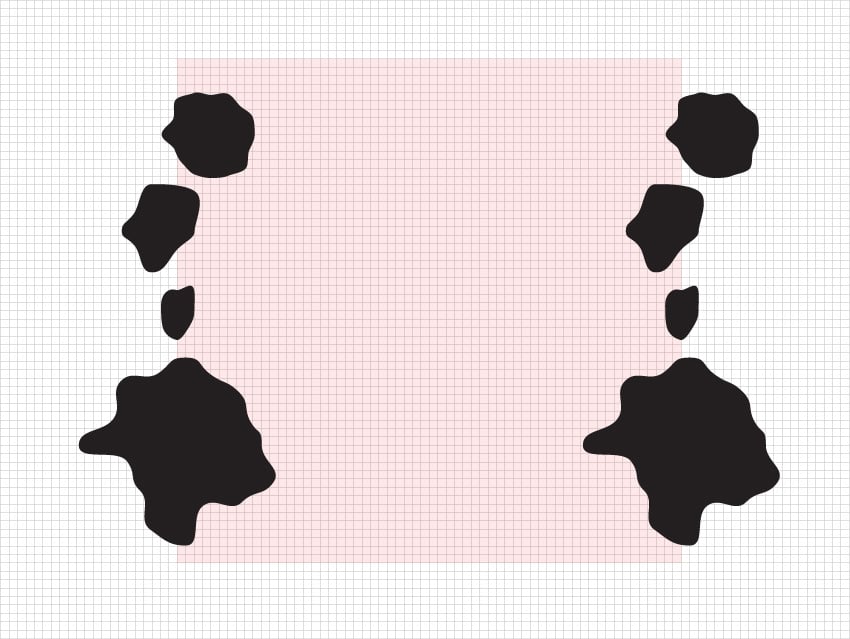
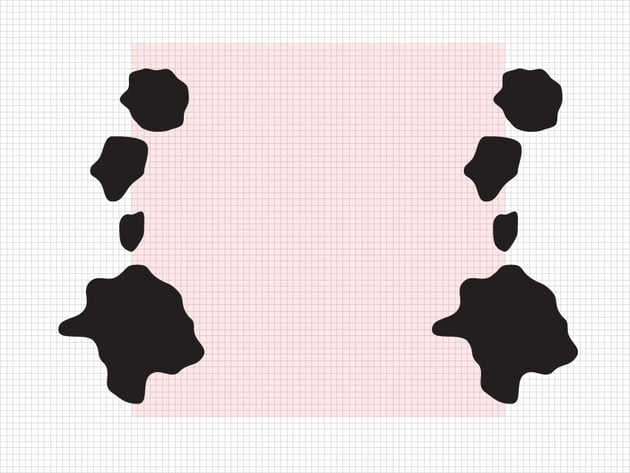
Make sure that your shape is still selected, press Shift-Control-M, and then click that Copy button.
3. How to create the horizontal edges of the cow pattern tile
Step 1
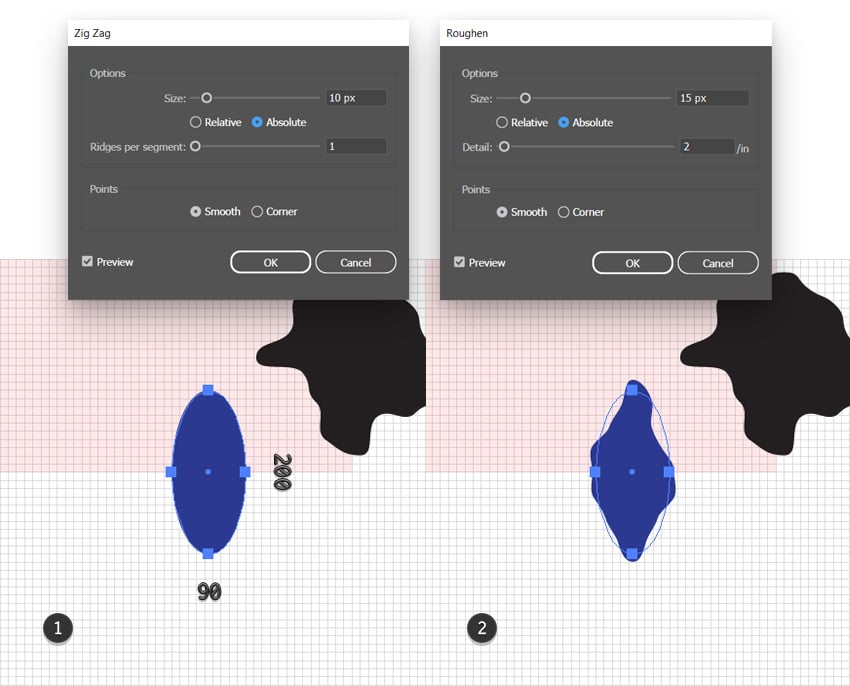
Use the Ellipse Tool (L) to create a 90 x 200 px shape and place it roughly as shown below.
Keep it selected and go to Effect > Distort & Transform > Zig Zag. Enter the settings displayed in the image below, click OK, and then go to Effect > Distort & Transform > Roughen. Enter the attributes indicated in the following image and click OK.
Step 2
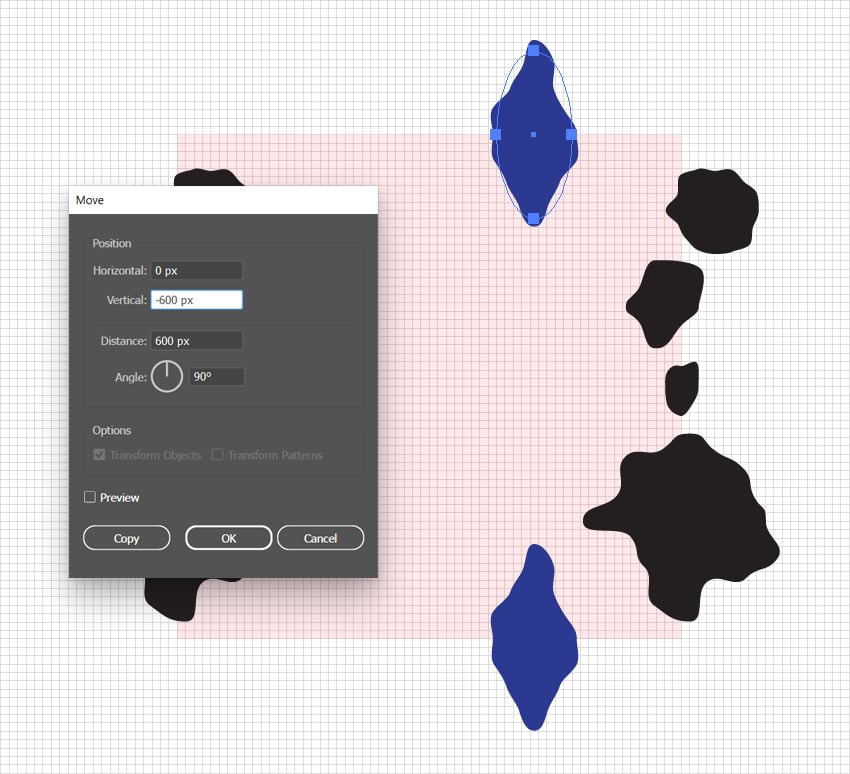
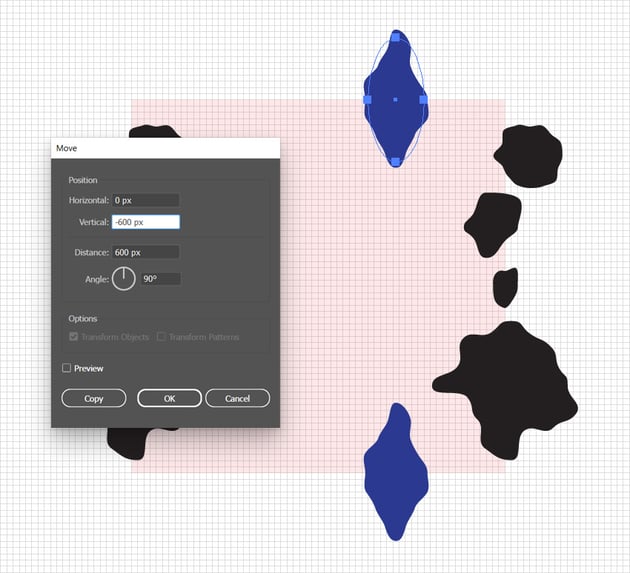
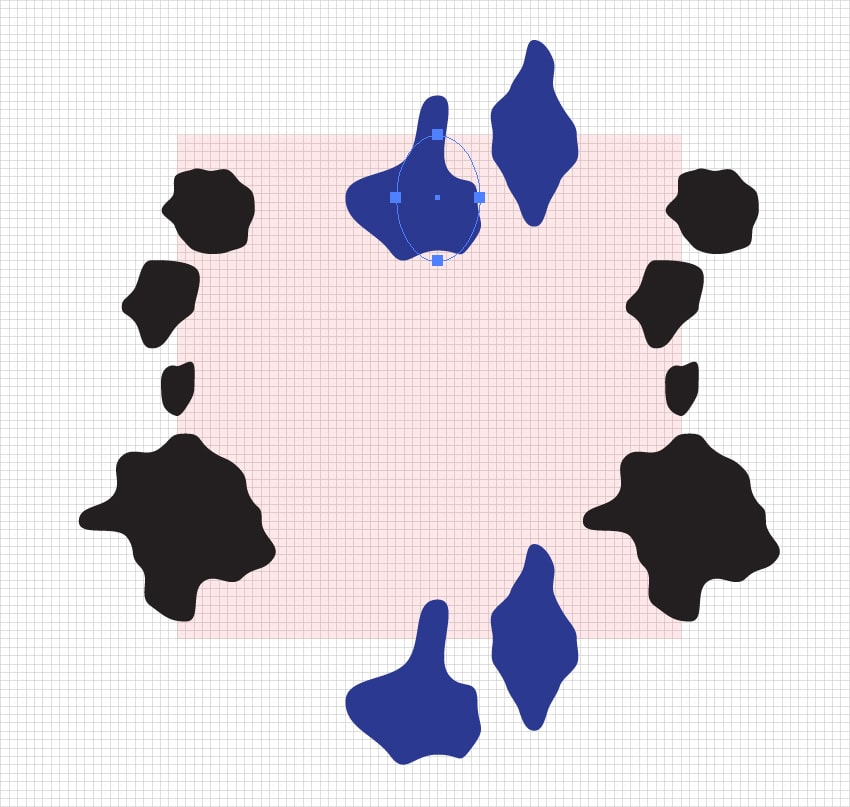
Make sure that your shape is selected and go again to Object > Transform > Move (Shift-Control-M). This time, you need to set the Vertical-Position to -600 px and then click Copy. This will add a copy of your selected shape 600 px above the original one, as shown below.
By moving this copy up by exactly 600 px, we make sure that the pattern tiles will match perfectly when repeated vertically.
Step 3
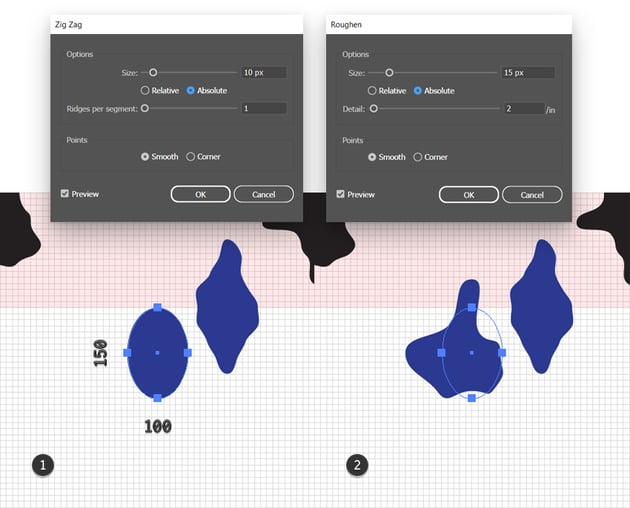
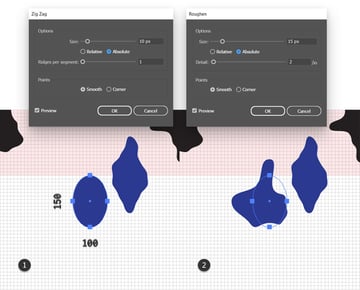
Use the Ellipse Tool (L) to create a 100 x 150 px shape, and place it roughly as shown below.
Keep it selected and go to Effect > Distort & Transform > Zig Zag. Enter the settings displayed in the image below, click OK, and then go to Effect > Distort & Transform > Roughen. Enter the attributes shown in the following image, and click OK.

Step 4
Make sure that your shape is still selected, press Shift-Control-M, and then click that Copy button.


Step 5
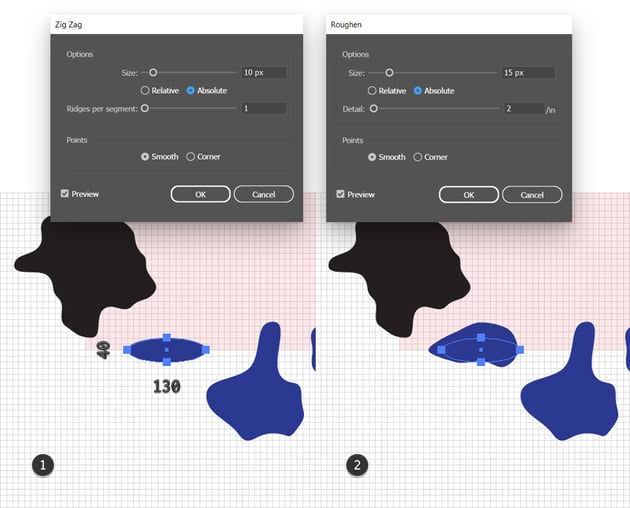
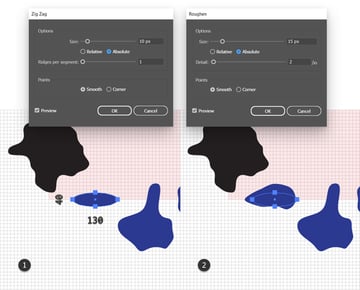
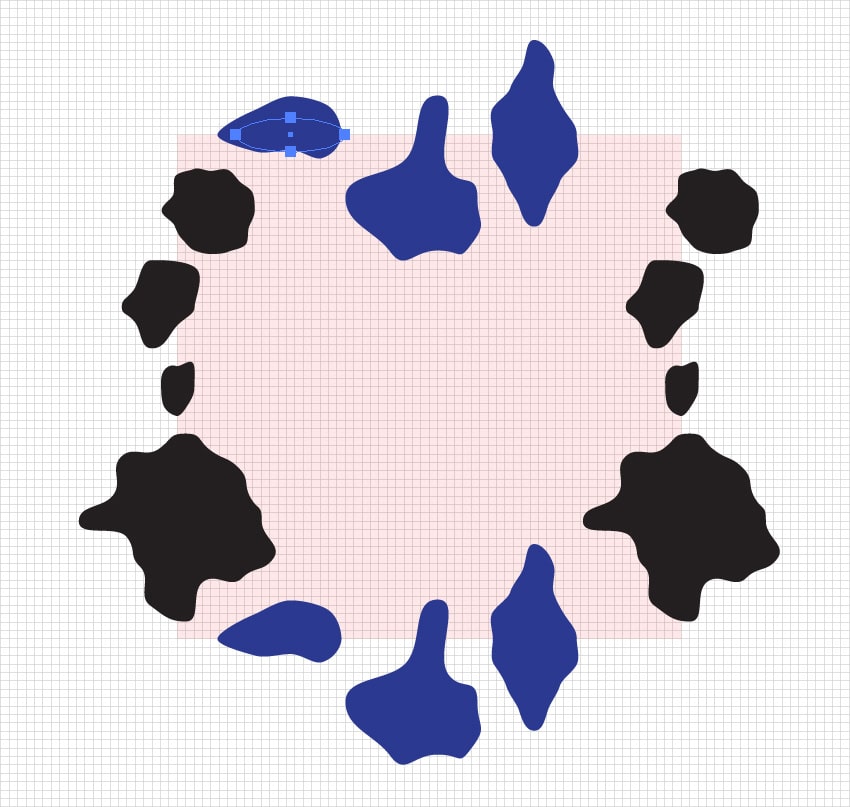
Use the Ellipse Tool (L) to create a 130 x 50 px shape and place it roughly as shown below.
Keep it selected, and go to Effect > Distort & Transform > Zig Zag. Enter the settings displayed in the image below, click OK, and then go to Effect > Distort & Transform > Roughen. Enter the attributes shown in the following image, and click OK.

Step 6
Make sure that your shape is still selected, press Shift-Control-M, and then click that Copy button.
4. How to create the inner parts of the cow pattern
Step 1
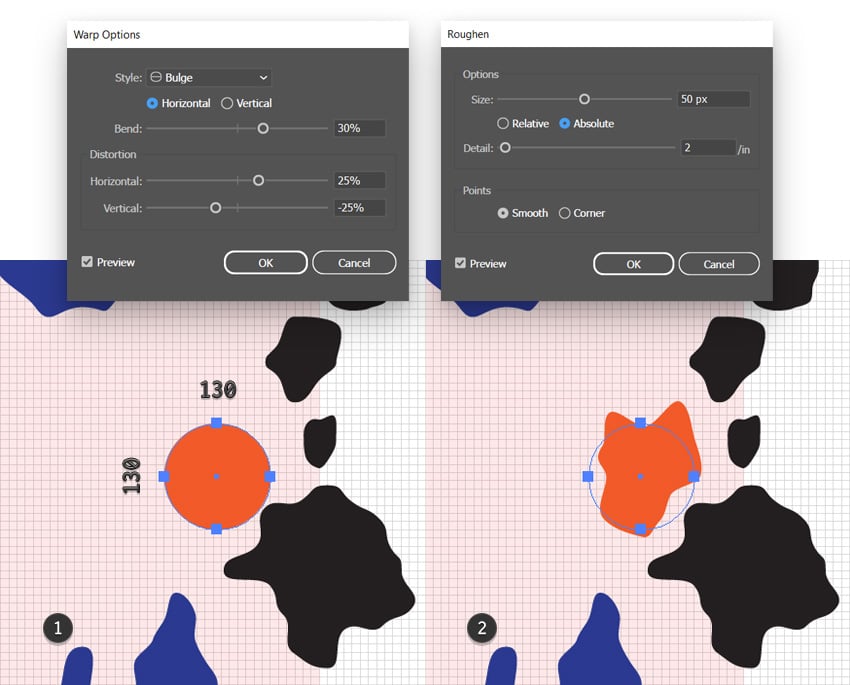
Use the Ellipse Tool (L) to create a 130 px circle and place it roughly as shown below.
Keep it selected and go to Effect > Warp > Bulge. Enter the settings displayed in the image below, click OK, and then go to Effect > Distort & Transform > Roughen. Enter the attributes shown in the following image, and click OK.


Step 2
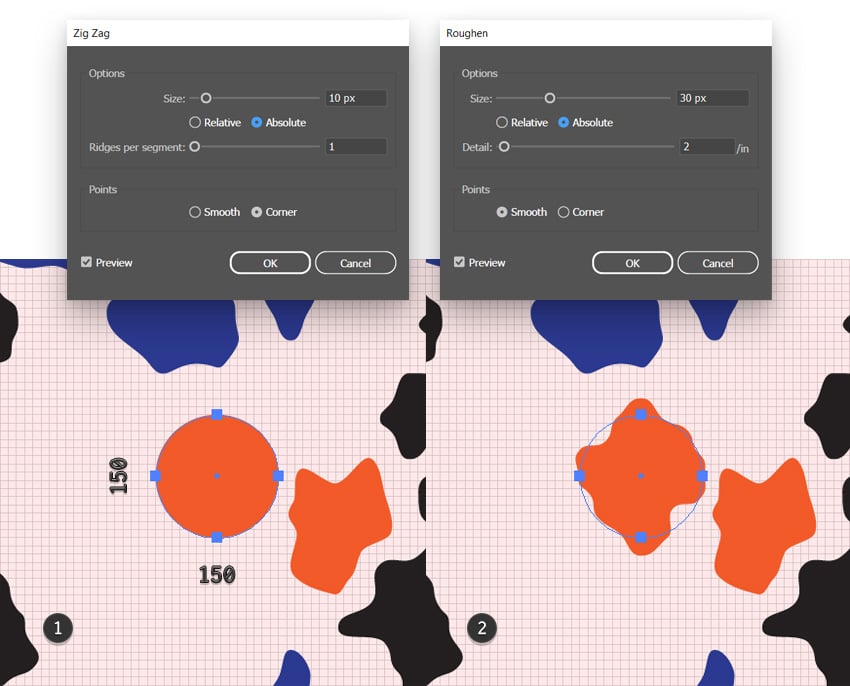
Use the Ellipse Tool (L) to create a 150 px shape, and place it roughly as shown below.
Keep it selected and go to Effect > Distort & Transform > Zig Zag. Enter the settings displayed in the image below, click OK, and then go to Effect > Distort & Transform > Roughen. Enter the attributes shown in the following image, and click OK.

Step 3
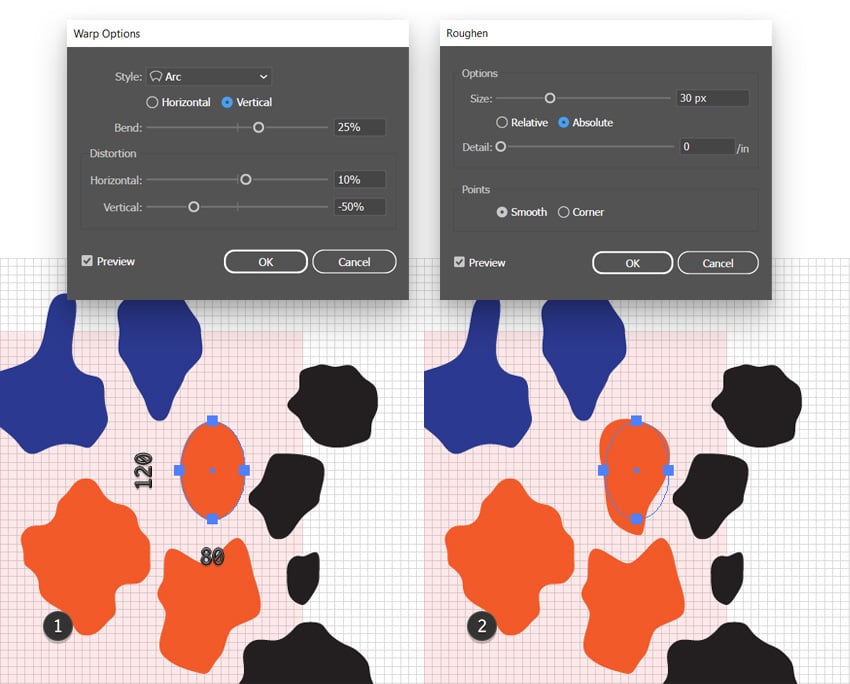
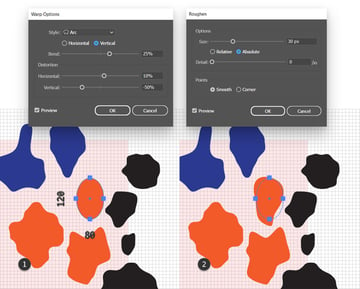
Use the Ellipse Tool (L) to create an 80 x 120 px circle, and place it roughly as shown below.
Keep it selected and go to Effect > Warp > Arc. Enter the settings displayed in the image below, click OK, and then go to Effect > Distort & Transform > Roughen. Enter the attributes shown in the following image, and click OK.
Step 4
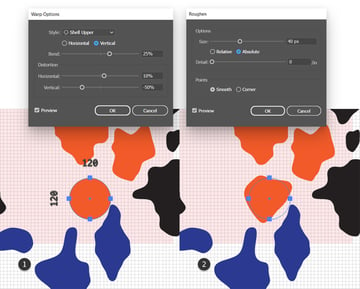
Use the Ellipse Tool (L) to create a 120 px circle, and place it roughly as shown below.
Keep it selected and go to Effect > Warp > Shell Upper. Enter the settings displayed in the image below, click OK, and then go to Effect > Distort & Transform > Roughen. Enter the attributes shown in the following image, and click OK.


Step 5
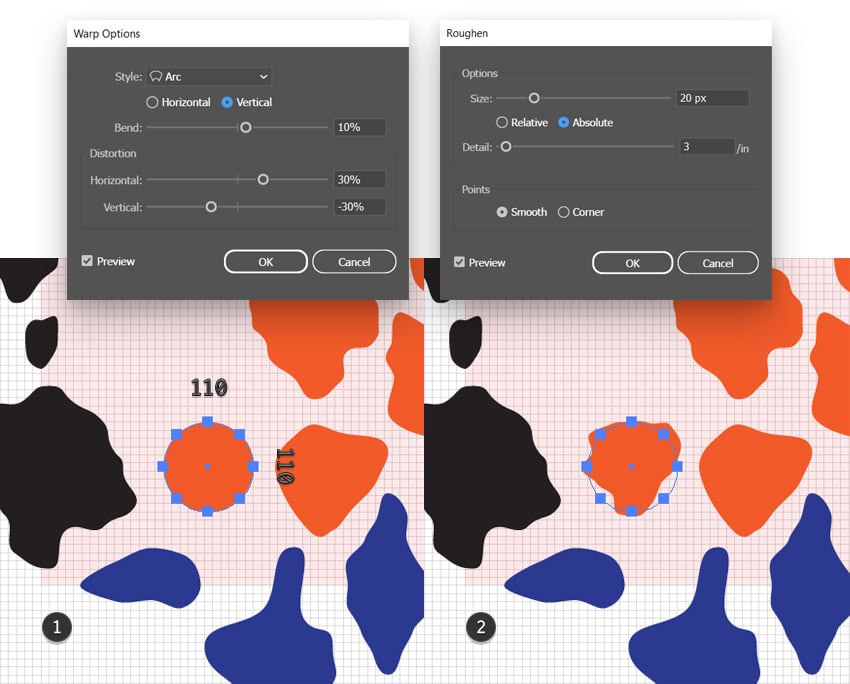
Use the Ellipse Tool (L) to create a 110 px circle, place it roughly as shown below, and then go to Object > Path > Add Anchor Points.
Keep this shape selected and go to Effect > Warp > Arc. Enter the settings displayed in the image below, click OK, and then go to Effect > Distort & Transform > Roughen. Enter the attributes shown in the following image, and click OK.


Step 6
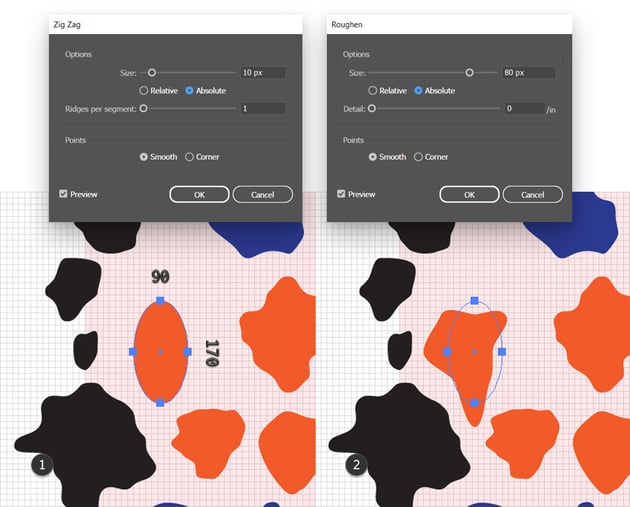
Use the Ellipse Tool (L) to create a 90 x 170 px shape and place it roughly as shown below.
Keep it selected and go to Effect > Distort & Transform > Zig Zag. Enter the settings displayed in the image below, click OK, and then go to Effect > Distort & Transform > Roughen. Enter the attributes shown in the following image, and click OK.


5. How to create the smaller parts of the cow pattern tile
Step 1
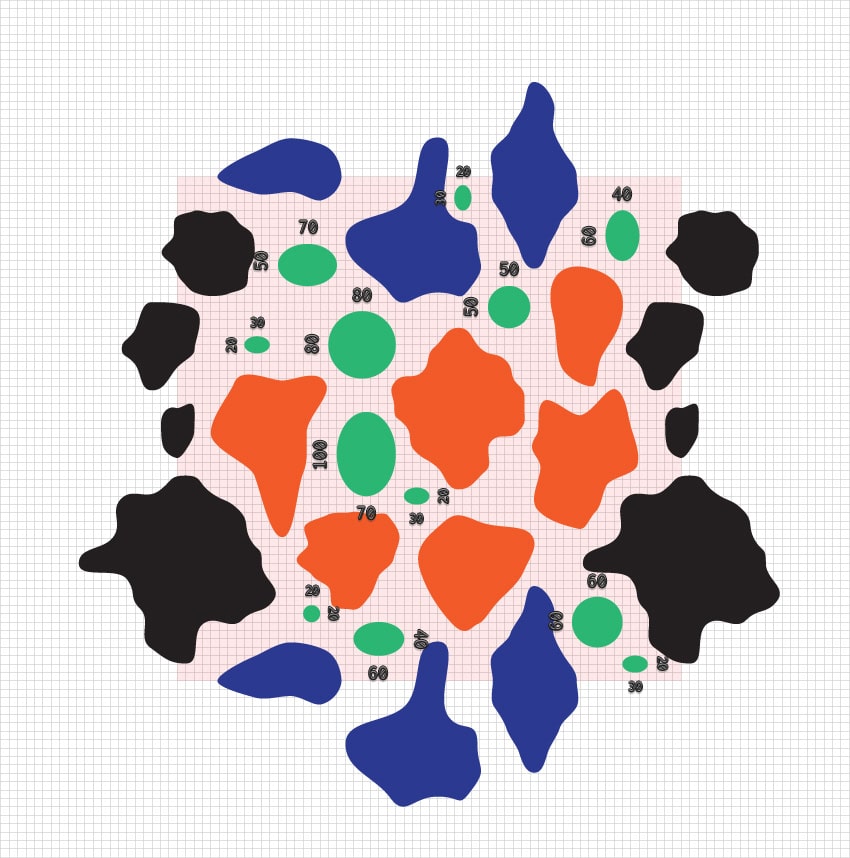
Use the Ellipse Tool (L) to add some smaller circles and ellipses between your existing shapes, roughly as shown in the following image.


Step 2
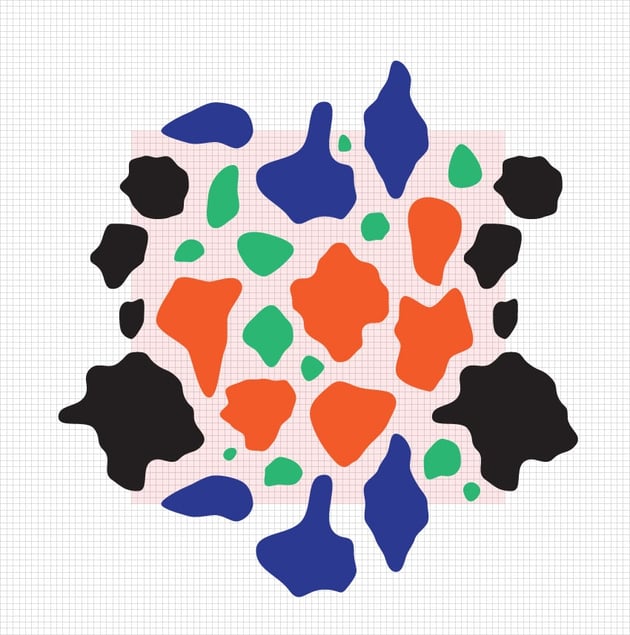
Select these shapes one by one and use different combinations of effects to distort them as you did with the larger ones.


6. How to save a pattern in Illustrator
Step 1
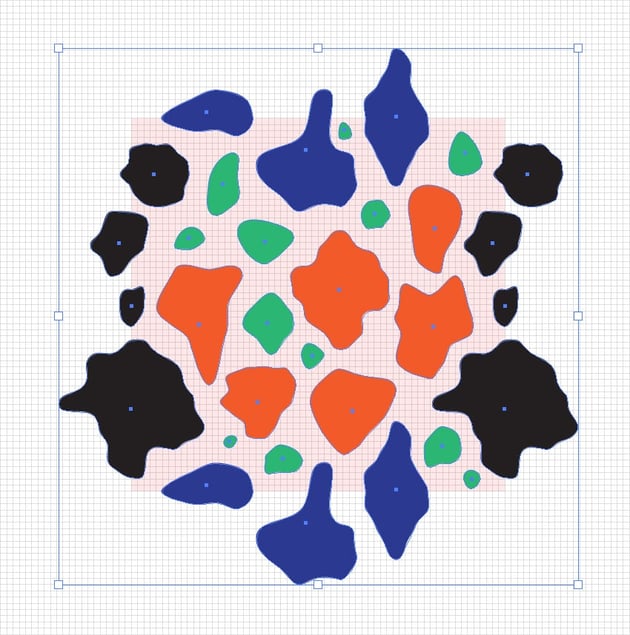
Select all your distorted shapes and expand them by going to Object > Expand Appearance.


Step 2
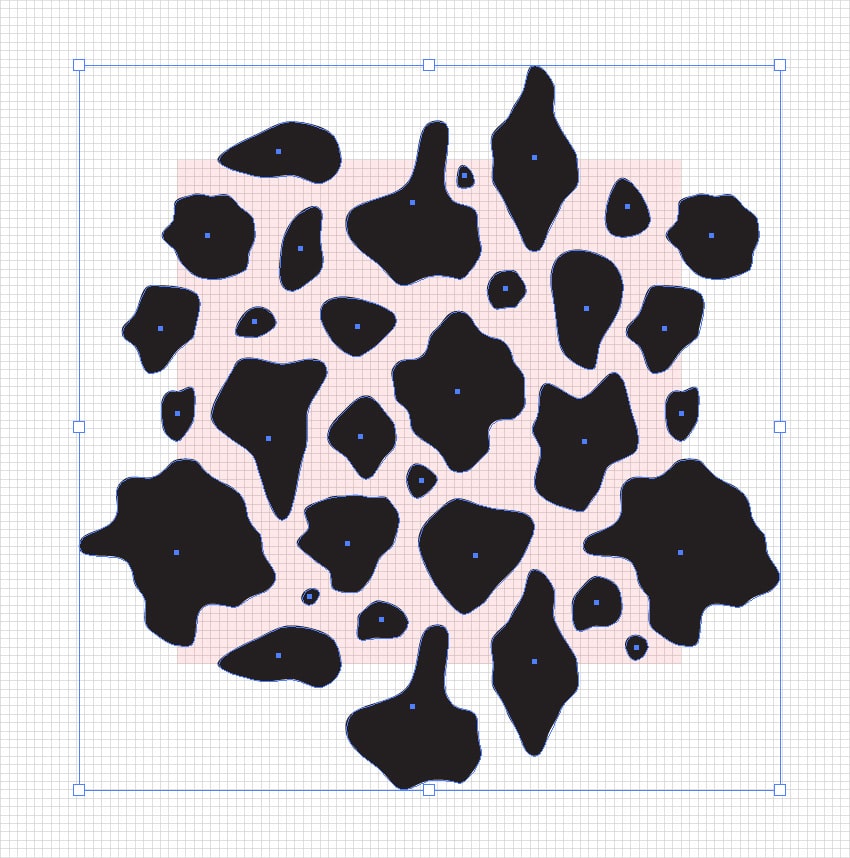
Make all your shapes black, or feel free to use any other color.
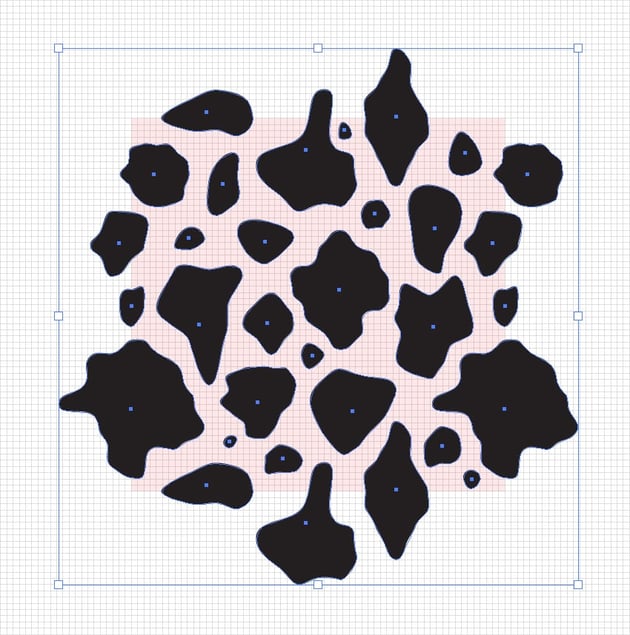
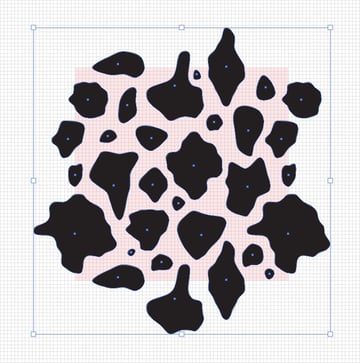
Step 3
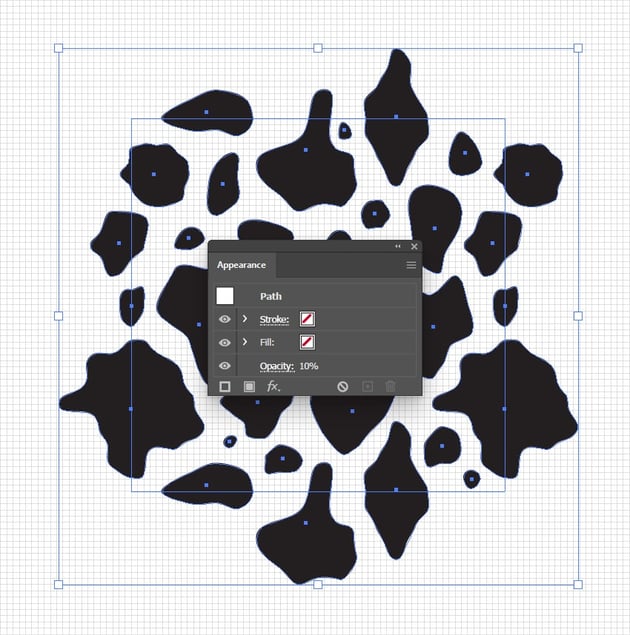
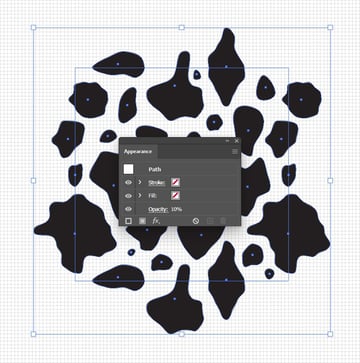
Unlock your red square and select it to remove the Fill color.
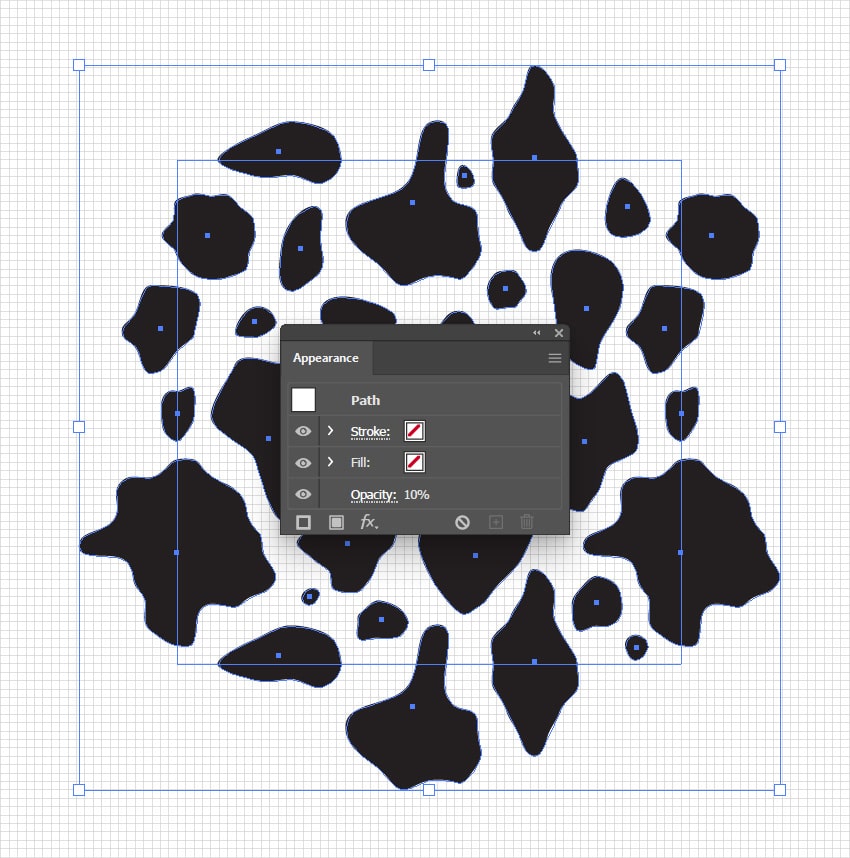
Step 4
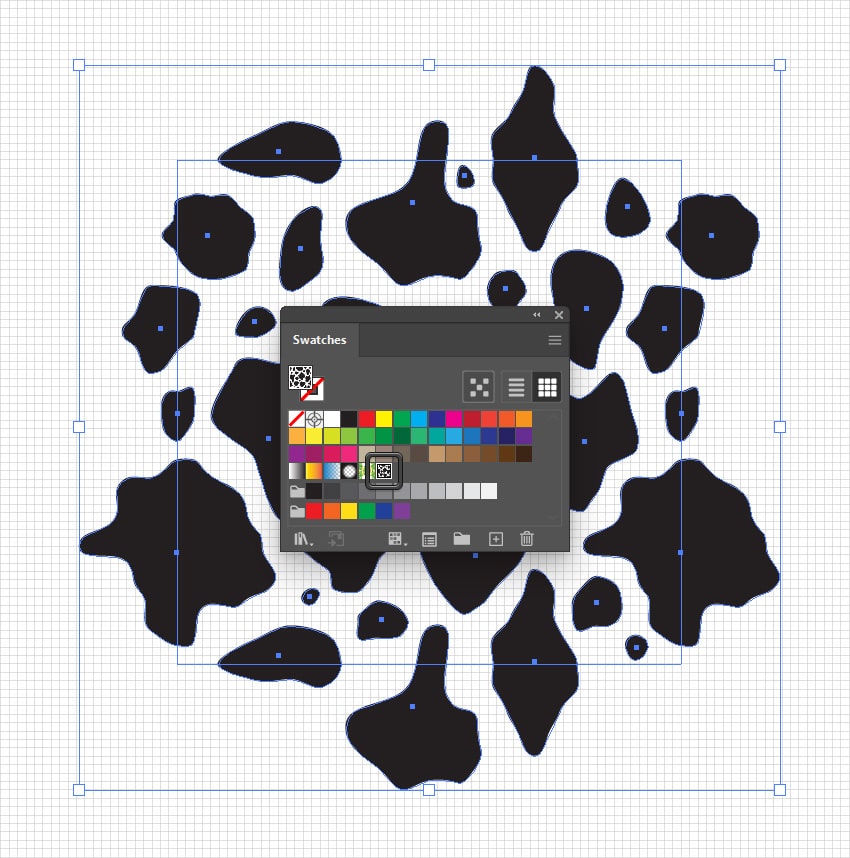
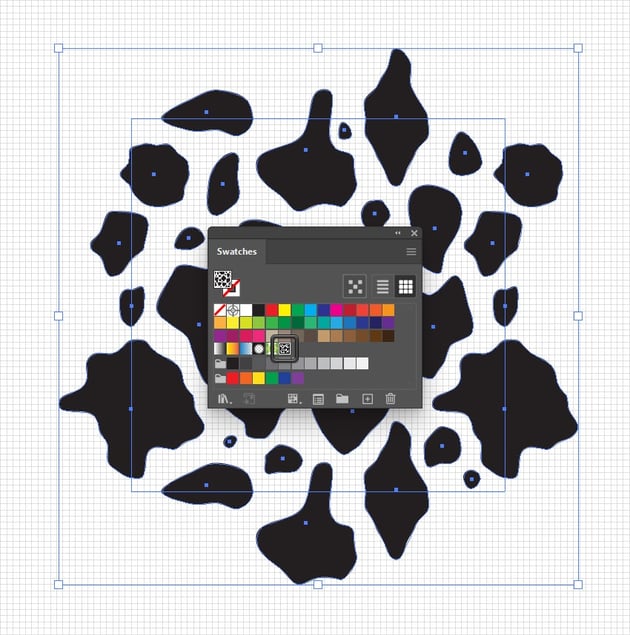
Now, because the color of your square is set to None, this invisible shape will act as the frame of your pattern as you save it. You can press Control-A to quickly select your entire design and simply drag it into the Swatches panel (Window > Swatches) to save it as a pattern.
7. How to apply a pattern in Illustrator
Step 1
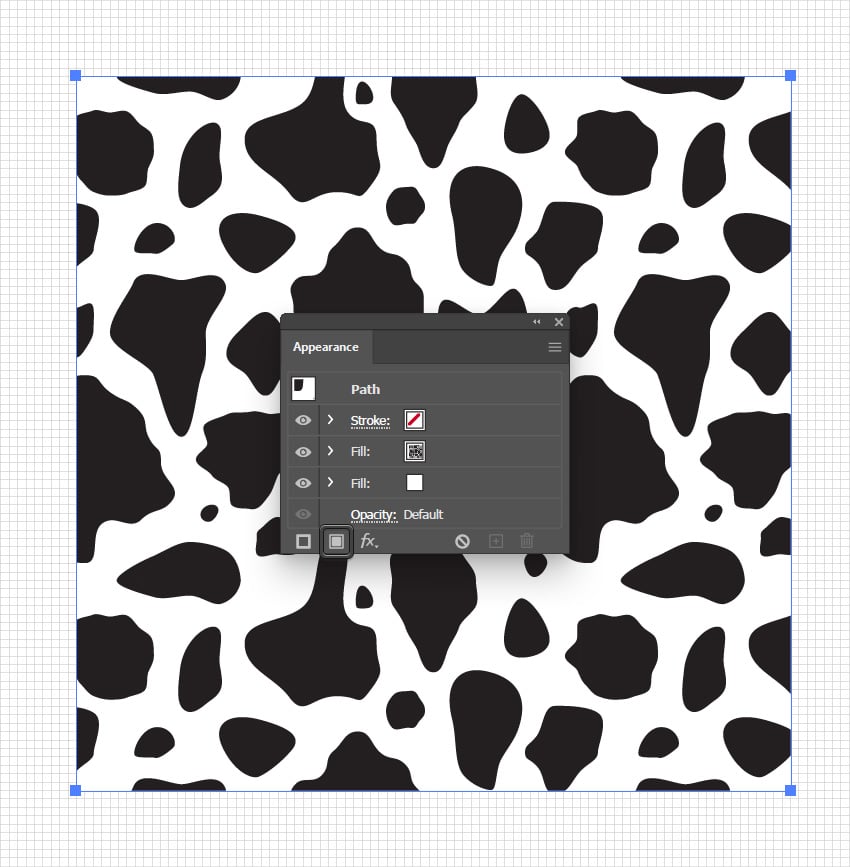
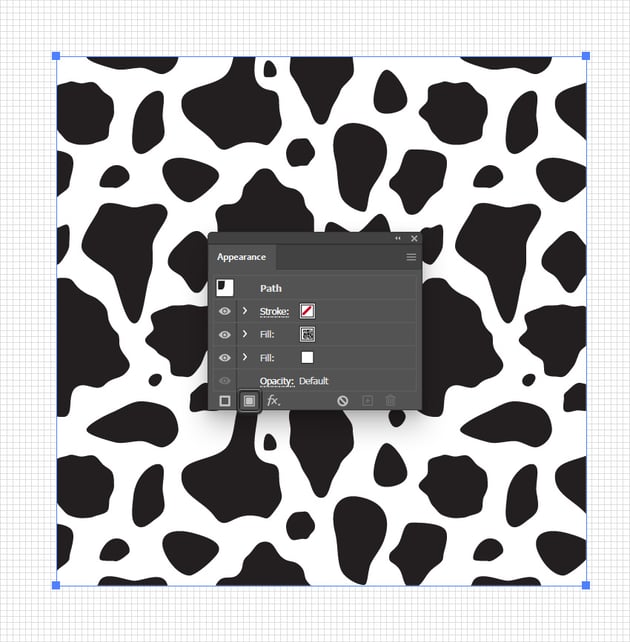
Use the Rectangle Tool (M) to create a shape that covers your entire artboard. Make it white and open the Appearance panel (Window > Appearance). Use the Add New Fill button to add a second fill, select it, and apply your saved cow pattern.
Step 2
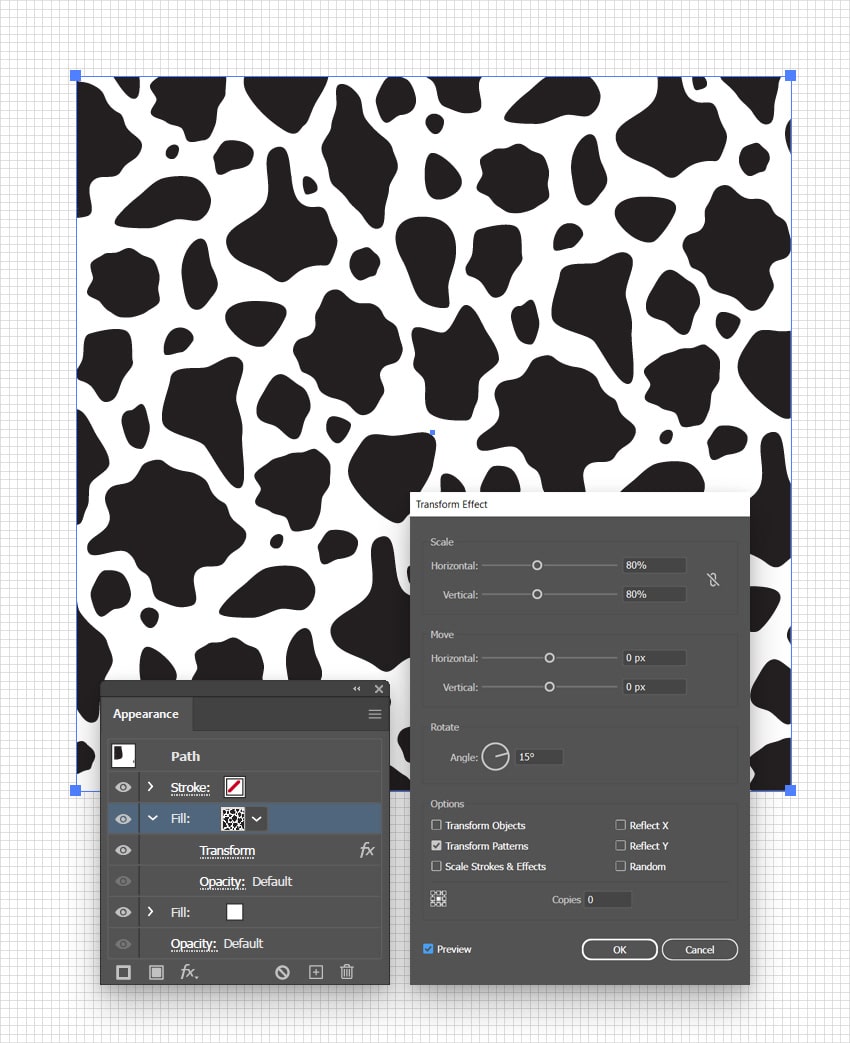
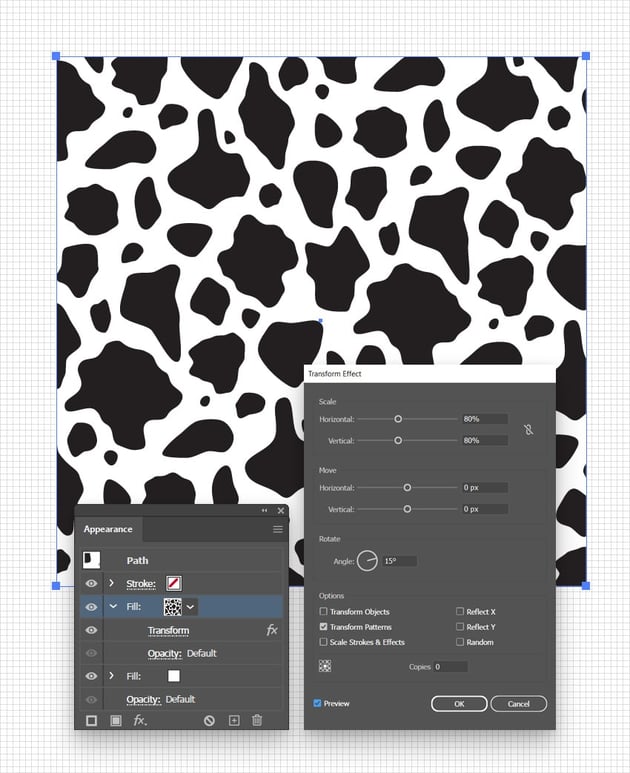
Once the pattern is applied, you can scale or rotate it using a Transform effect. Make sure that the Fill with the pattern (from the Appearance panel) is still selected, and go to Effect > Distort & Transform > Transform.
First of all, uncheck the Transform Objects box and make sure that the Transform Patterns box is checked, and then play with the Scale sliders to scale the pattern or adjust the Angle to rotate it.
Step 3
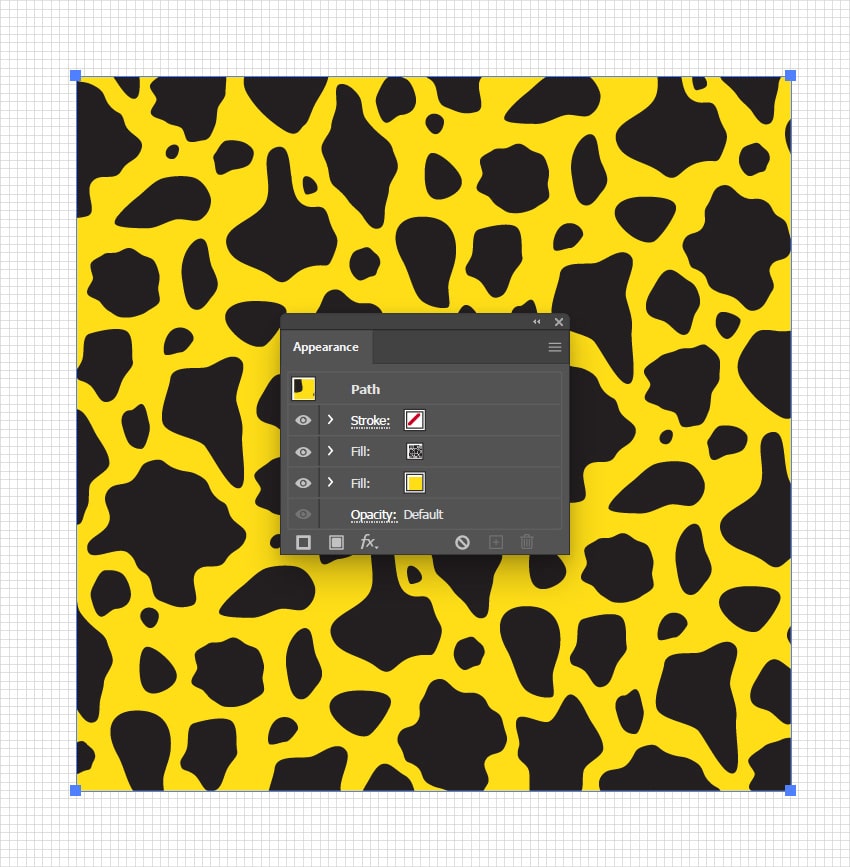
Finally, you can always adjust the color of that bottom fill to create a more vibrant cow pattern.

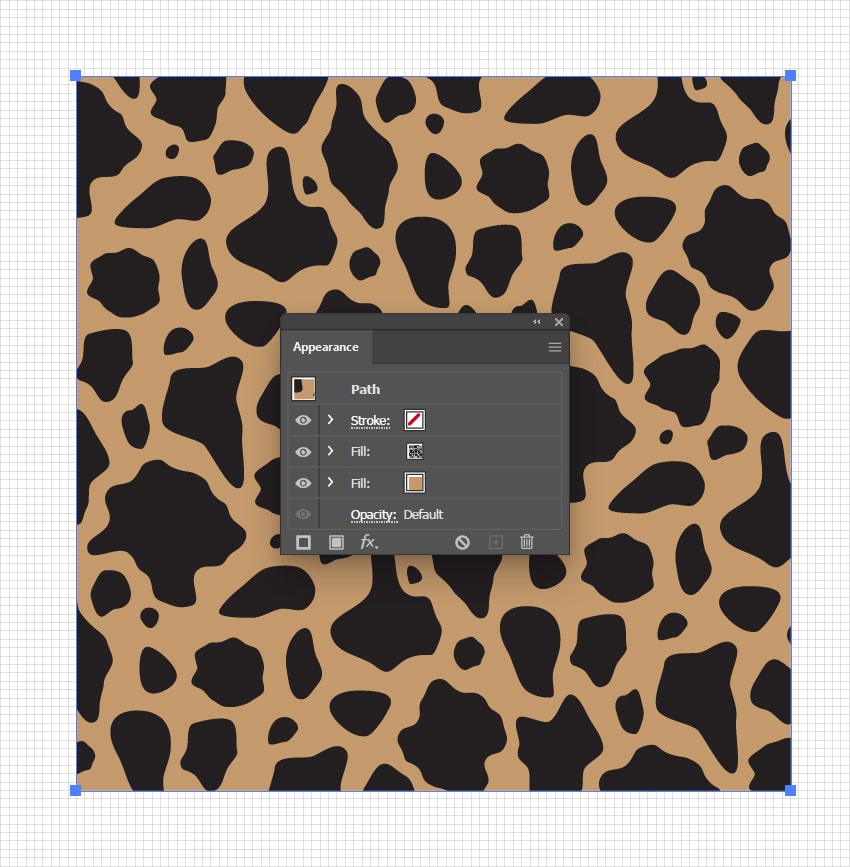

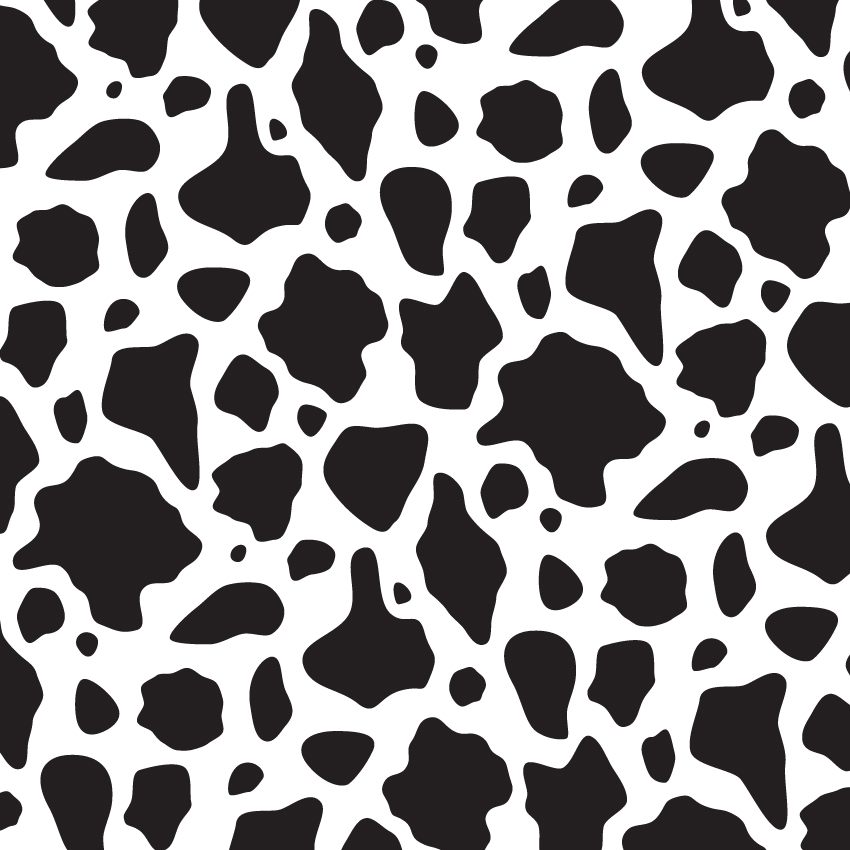
Congratulations! You’re done!
Here is how your cow pattern should look. I hope you’ve enjoyed this tutorial and can apply these techniques in your future vector patterns.
Feel free to adjust the final vector pattern and make it your own. You can find some great pattern drawing ideas at Envato, with interesting solutions to improve your Illustrator patterns.

Popular Illustrator patterns from Envato
Envato is an excellent resource for pattern drawing ideas. Here’s a short list of some of the most popular vector patterns that you can find.
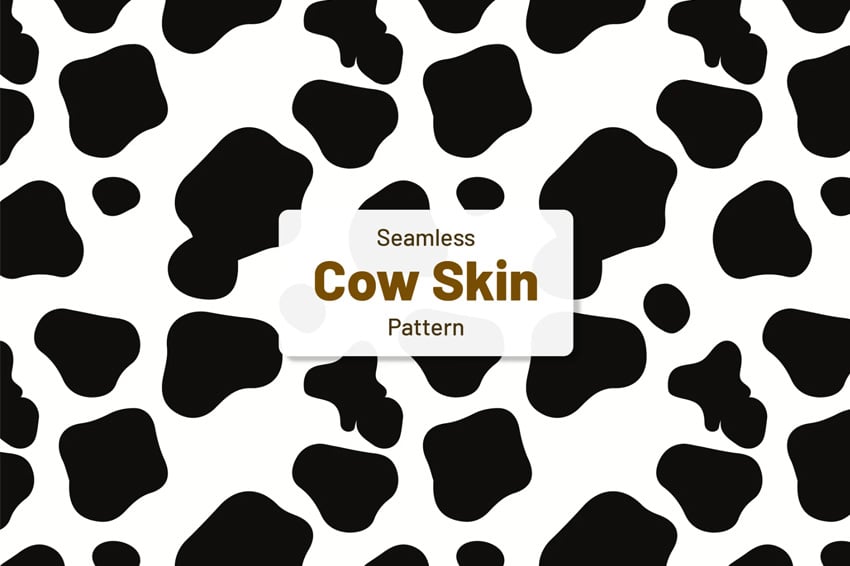
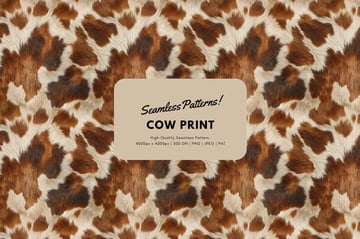
Cow skin seamless pattern (AI, EPS, PSD, SVG, PNG, JPG)
Cut the hassle of learning how to draw cow print in Illustrator and get one from Envato. This seamless cow pattern might be just what you’re looking for.
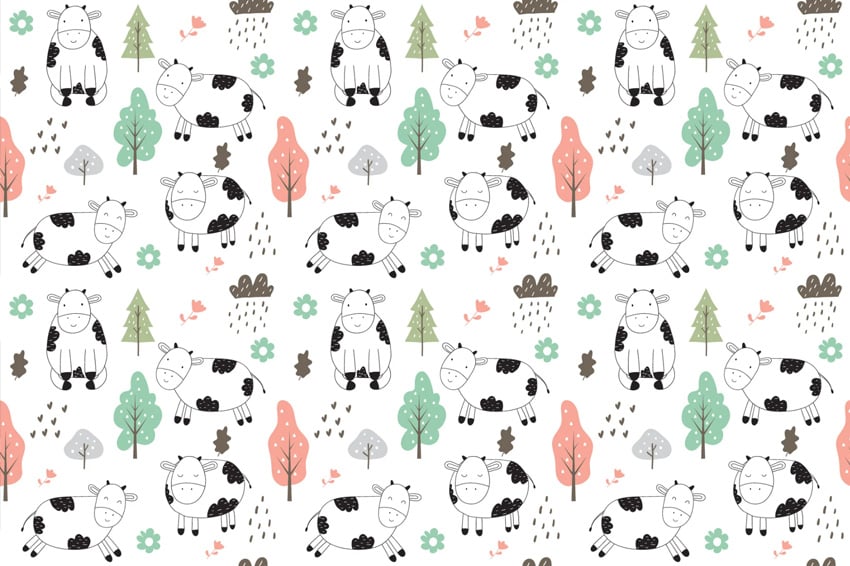
Cute cow pattern (AI, EPS, JPG, PNG)
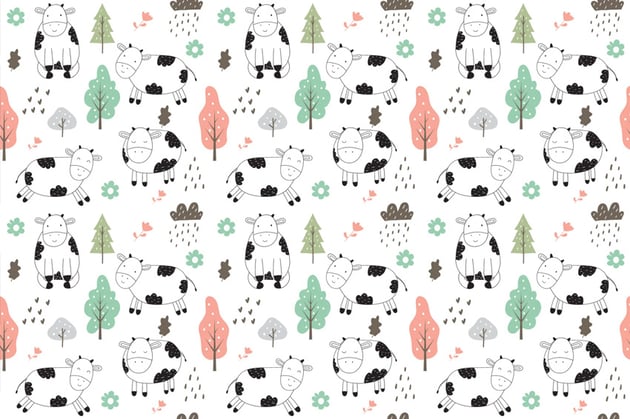
If you’re in a hurry or you simply can’t be bothered to learn how to draw a pattern in Illustrator, this cute cow pattern might be the solution.
Seamless cow pattern (PNG, JPG)
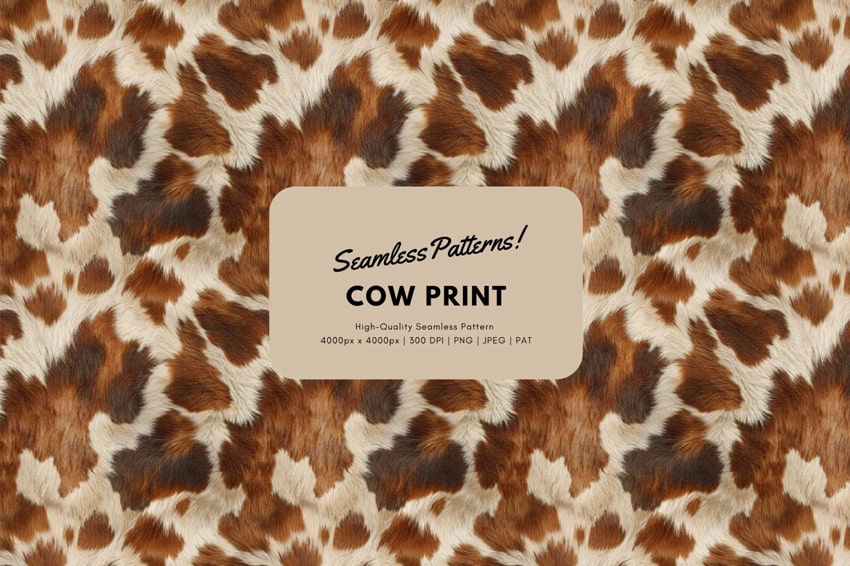
With this seamless cow pattern, you can easily repeat the pattern across any surface, ensuring smooth and consistent results. Bring a touch of boldness and whimsy to your designs in a matter of seconds.
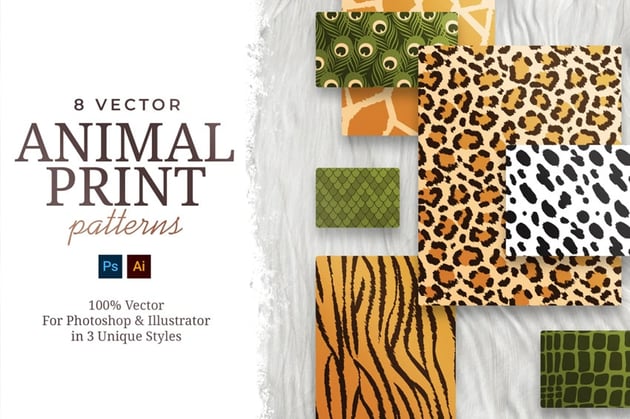
Vector animal print patterns (AI, PSD)
Don’t have the time to learn how to make a pattern in Illustrator? Well, this set of animal vector patterns might come in handy. From classic leopard spots and zebra stripes to unique cow and snake prints, these Illustrator patterns bring a dynamic energy to any project.


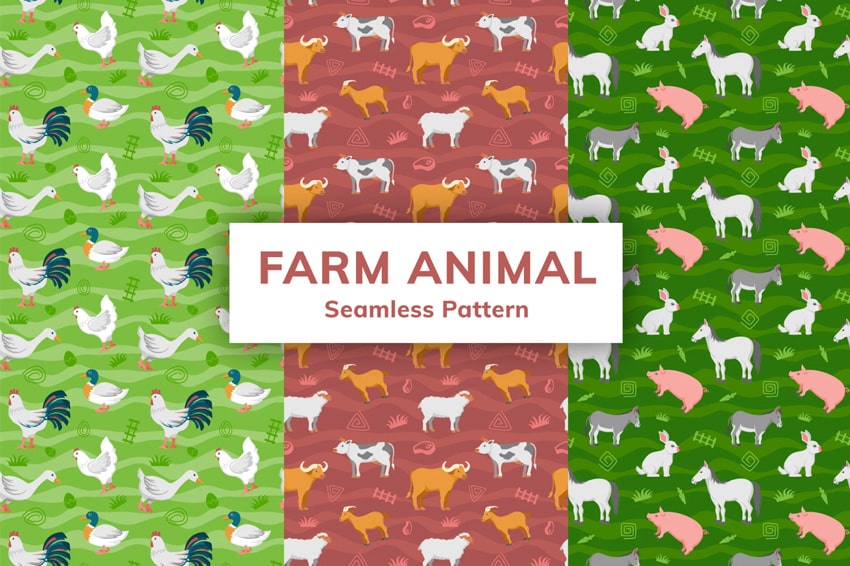
Farm animal seamless patterns (AI, EPS, PNG, PSD)
If you don’t have the time to learn how to draw a pattern, you can always try one of these playful designs. Featuring delightful illustrations of cows, chickens, pigs, and other barnyard favorites, these patterns are perfect for creating rustic designs.


Want to learn more?
We have loads of tutorials on Envato Tuts+, from beginner to intermediate level. Take a look!