


In the following tutorial, you’ll learn how to create a fox logo design from scratch using Adobe Illustrator.
If you don’t have the time to make your own vector fox logo, then Envato Elements is the solution. This subscription-based marketplace has over 2,000 Illustrator add-ons you can download without restrictions! Check it out and you will find lots of fox emblems and cool fox logos.
Want to watch a video tutorial instead? Check out this helpful video, and subscribe to the Envato Tuts+ YouTube channel for more.
What You’ll Learn in This Fox Logo Tutorial
- How to set up a grid in Illustrator
- How to create a pixel-perfect fox logo design
- How to color your fox logo
1. How to Create a New Document and Set Up a Grid
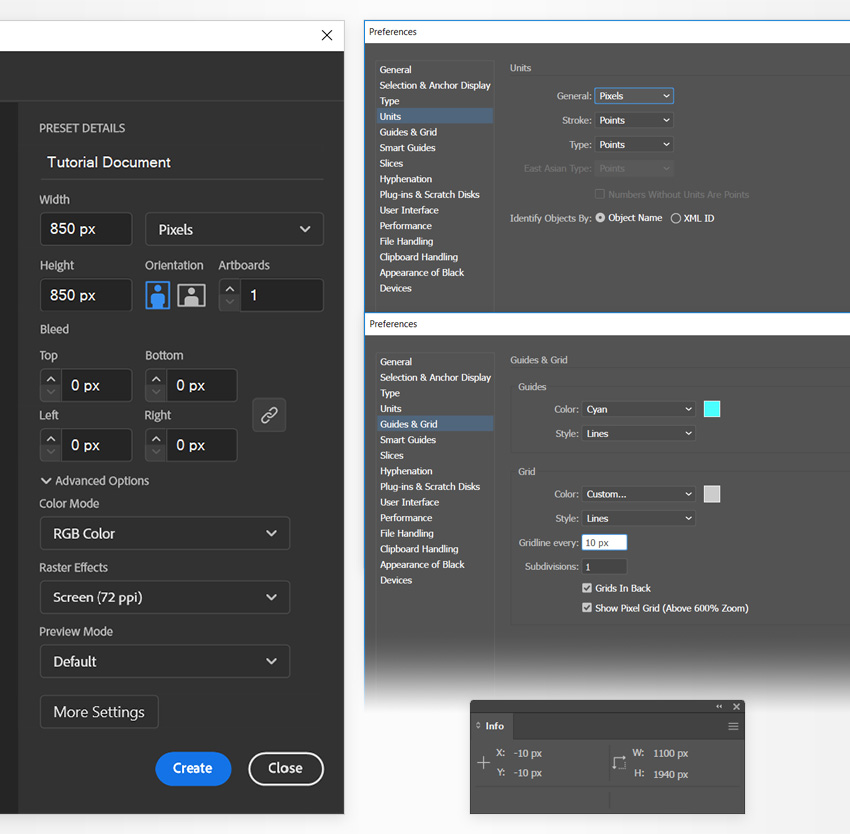
Hit Control-N to create a new document. Select Pixels from the Units drop-down menu, set the Width and the Height to 850 px, and then click that Advanced Options button. Select RGB for the Color Mode and set the Raster Effects to Screen (72 ppi), and then click the Create button.
Enable the Grid (View > Show Grid or Control-“) and Snap to Grid (View > Snap to Grid or Shift-Control-“). You will need a grid every 10 px, so simply go to Edit > Preferences > Guides & Grid, and enter 10 in the Gridline every box and 1 in the Subdivisions box. Try not to get discouraged by all that grid—it will make your work easier, and keep in mind that you can easily enable or disable it using the Control-“ keyboard shortcut.
You should also open the Info panel (Window > Info) for a live preview with the size and position of your shapes. Don’t forget to set the unit of measurement to pixels from Edit > Preferences > Units. All these options will significantly increase your work speed. Now that you’re set, let’s start work on our fox logo design.

2. How to Create a Vector Fox Logo
Step 1
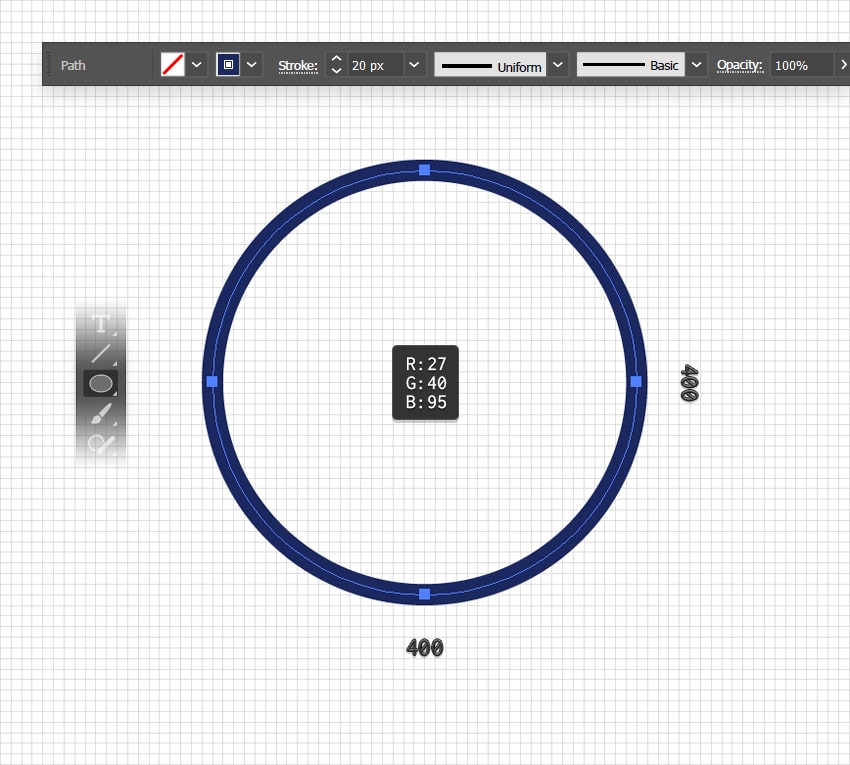
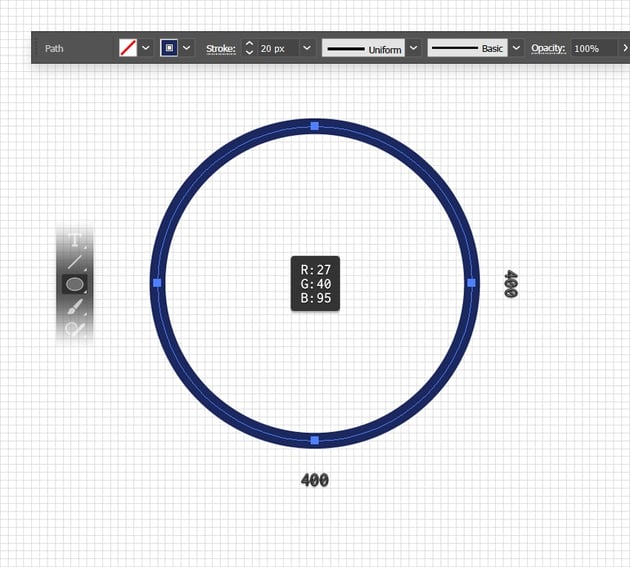
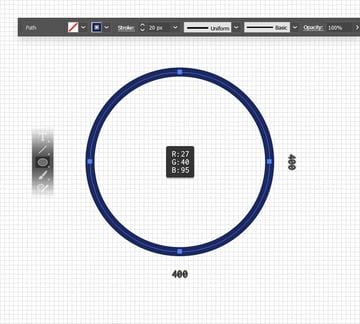
Pick the Ellipse Tool (L) from your Toolbar and then focus on the color settings. Select the fill and remove the color, and then double-click the stroke and replace the existing color with R=27 G=40 B=95.
Move to your artboard and simply create a 400 px circle—the grid and Snap to Grid should make it easier. Keep this shape selected and move to the control panel to increase the stroke Weight to 20 px.
Step 2
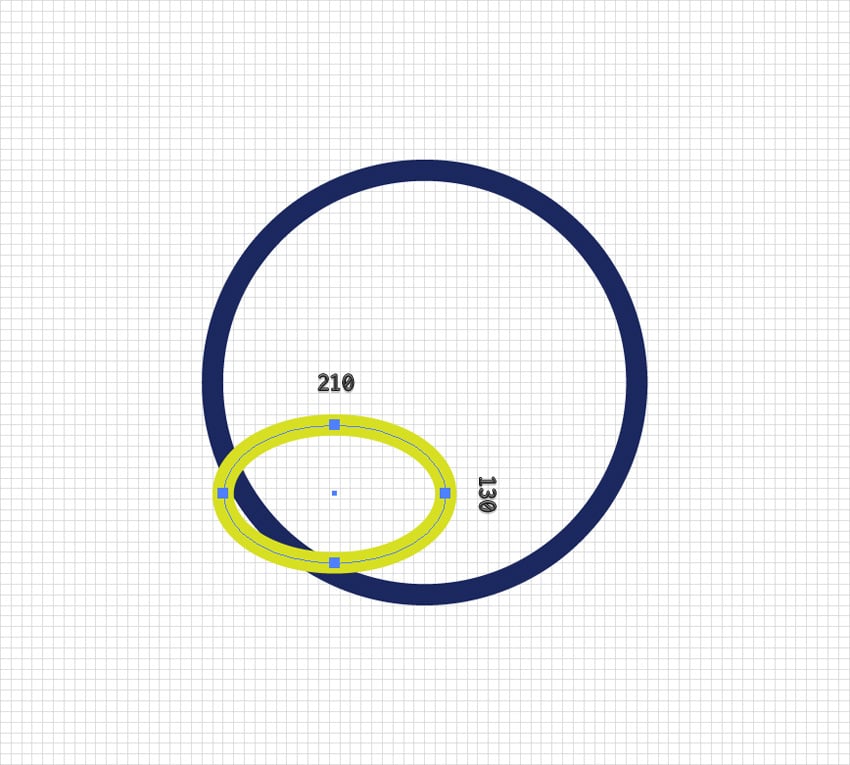
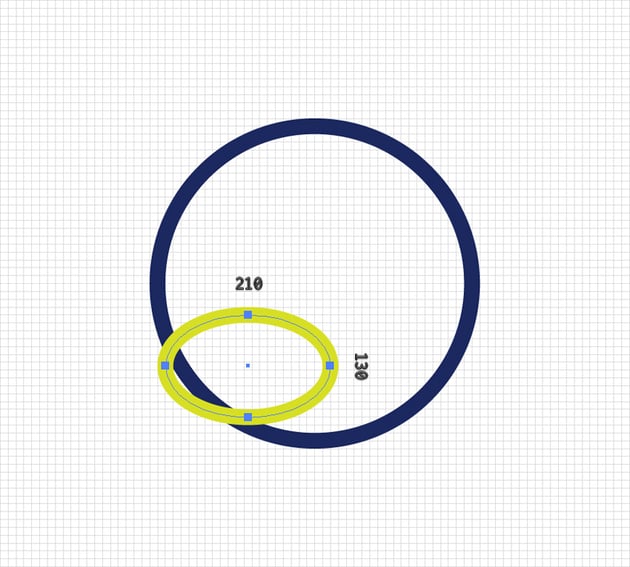
Use the Ellipse Tool (L) to create a 210 x 130 px shape and place it exactly as shown below. Have a close look at the grid, using it as a reference to make sure that you’re placing your shapes in the right location. Set the stroke color to green and keep the Weight set to 20 px.

Step 3
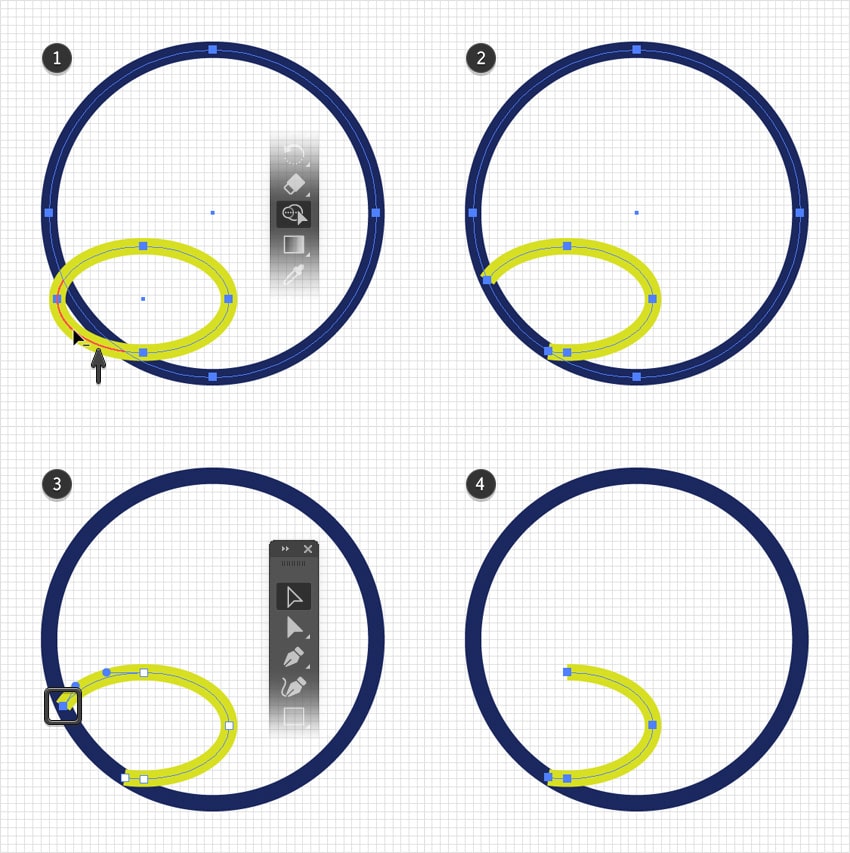
Use the Selection Tool (V) to select both of your shapes and switch to the Shape Builder Tool (Shift-M). Hold down the Alt key and simply click the side of the green oval shape that’s outside your main circle.
Continue with the Direct Selection Tool (A). Use it to select the anchor point highlighted in the third image and press the Delete key to remove it.
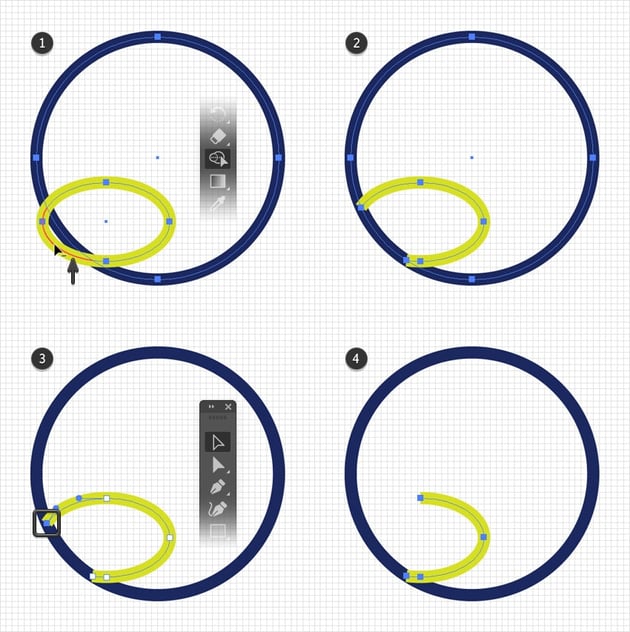

Step 4
Using the Ellipse Tool (L), create a 60 px circle, make it blue, and place it as shown in the first image. Use the Direct Selection Tool (A) to select the two highlighted anchor points and Delete them.


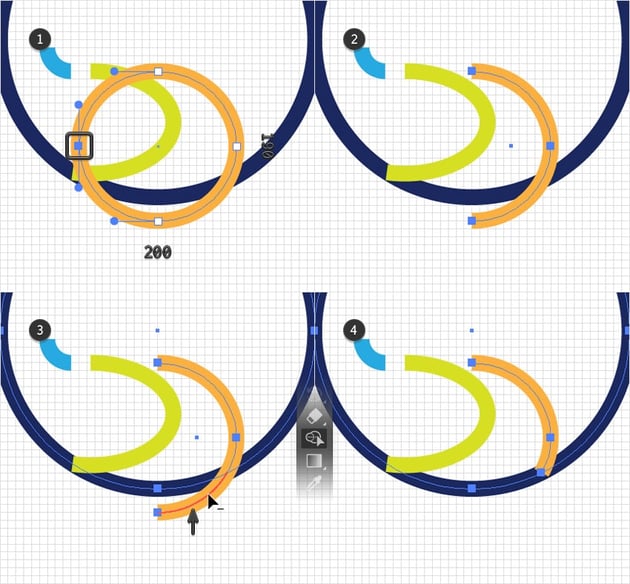
Step 5
Pick the Ellipse Tool (L), create a 200 x 190 px shape, and place it as shown in the first image. Make it orange. Using the Direct Selection Tool (A), select the left anchor point and Delete it.
Select the remaining path along with your main circle, and grab the Shape Builder Tool (Shift-M). Remember to hold down the Alt key, and remove the path that goes outside your main circle.


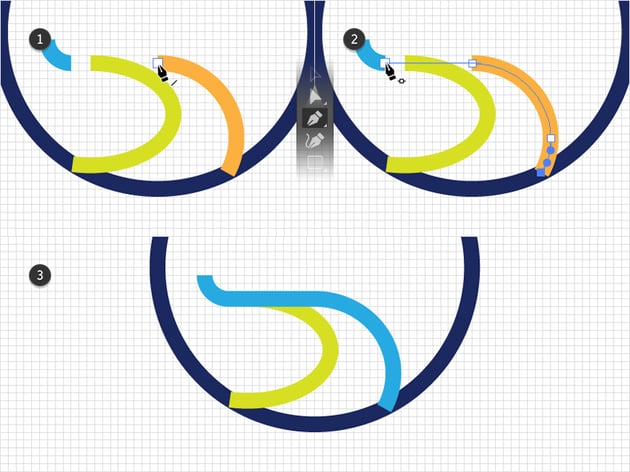
Step 6
Pick the Pen Tool (P) and click the top end of your orange path to connect to it. Move to the right end of your blue path and click to join your two paths, as shown in the third image.


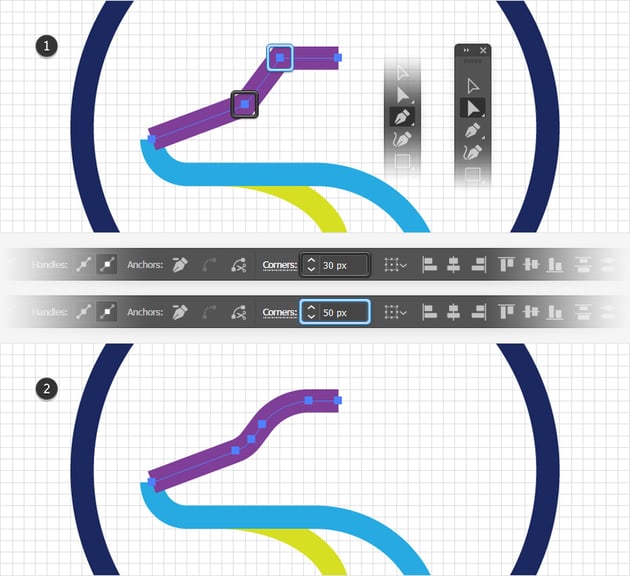
Step 7
Make sure that the Pen Tool (P) is still active and create a simple path, as shown in the first image. Make it purple.
Using the Direct Selection Tool (A), select the anchor point highlighted in black, and focus on the control panel to set the Corner Radius to 30 px. Continue with the anchor point highlighted in blue, and this time set the Corner Radius to 50 px.

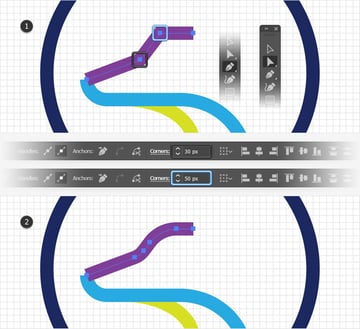
Step 8
Select your blue and purple paths, and press Control-J to join them. Keep the resulting path selected, and open the Stroke fly-out panel to check that Round Join button.


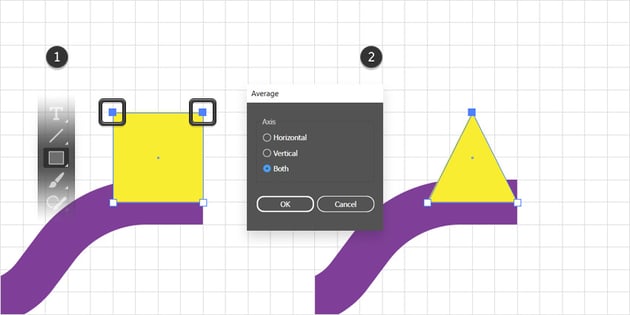
Step 9
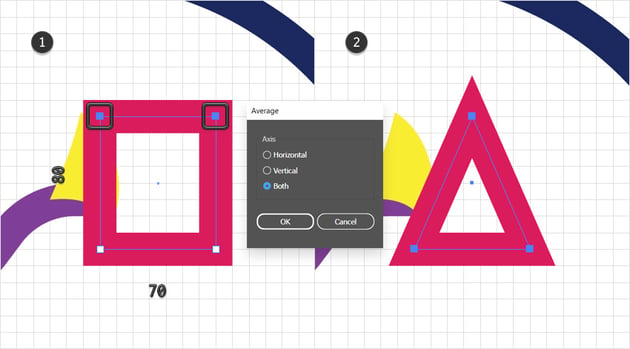
Pick the Rectangle Tool (M) and create a 40 px square, fill it with yellow, remove the stroke color, and then place it as shown in the first image. Using the Direct Selection Tool (A), select the top anchor points of this square and go to Object > Path > Average. Check Both and click OK to easily turn your rectangle into a triangle.


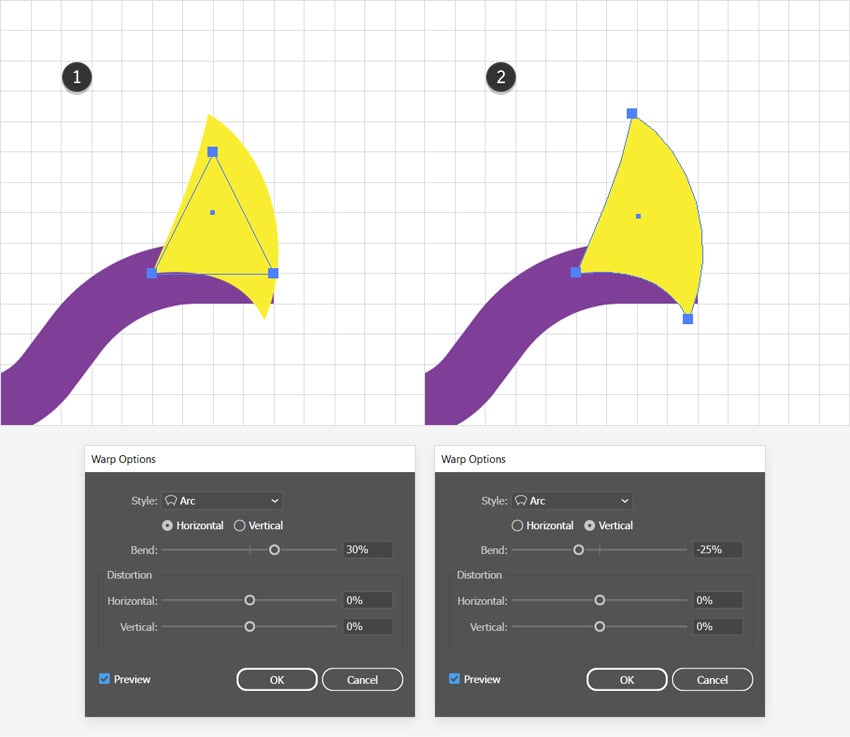
Step 10
Make sure that your yellow triangle is still selected, and go to Effect > Warp > Arc. Check the Horizontal box, set the Bend to 30%, click OK, and then go again to Effect > Warp > Arc. This time, you need to check the Vertical box and set the Bend to -25%. Click OK to apply this second effect, and then expand your shape by going to Object > Expand Appearance.

Step 11
Pick the Rectangle Tool (M) and create a 70 x 80 px shape. Remove the fill color, add a 20 px pink stroke, and then place this rectangle as shown in the first image.
Using the Direct Selection Tool (A), select the top anchor points of this rectangle, and go again to Object > Path > Average. Check Both and click OK.


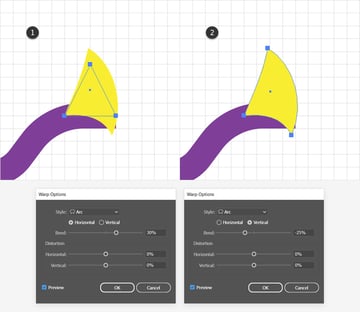
Step 12
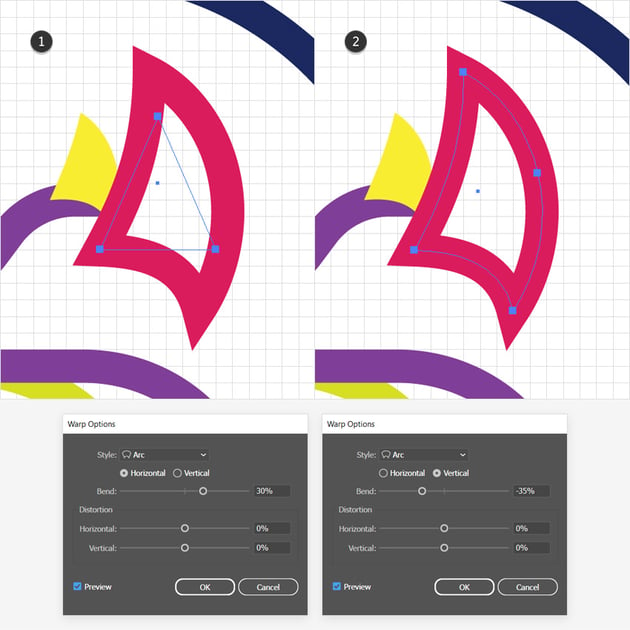
Make sure that your pink triangle is still selected, and go to Effect > Warp > Arc. Check the Horizontal box, set the Bend to 30%, click OK, and then go again to Effect > Warp > Arc. This time, you need to check the Vertical box and set the Bend to -35%. Click OK and expand this shape (Object > Expand Appearance).


Step 13
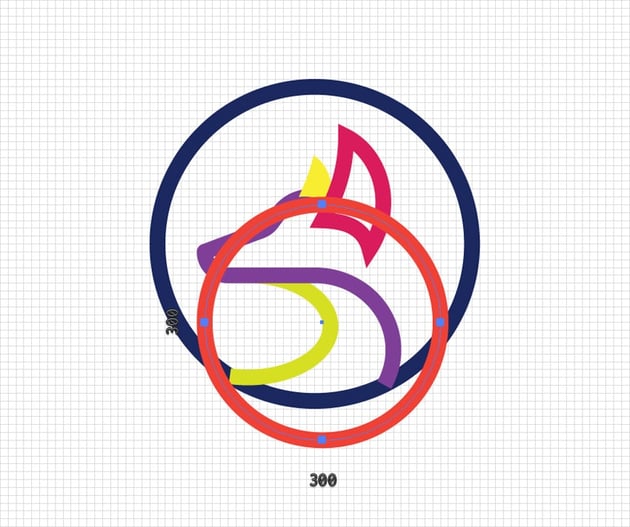
Pick the Ellipse Tool (L), create a 300 px circle, and place it as shown in the first image. Set the stroke color to orange.


Step 14
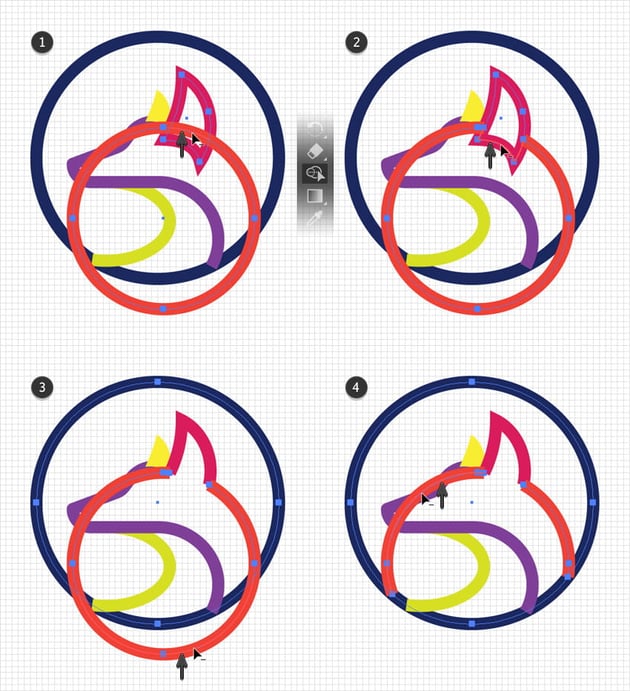
Select your orange circle along with that pink path, and pick the Shape Builder Tool (Shift-M). Remember to hold down the Alt key and remove one by one the four path sections indicated in the following images.


Step 15
Select the remaining orange path along with the pink one, and Join them (Control-J).


Step 16
Using the Pen Tool (P), create a simple sharp path, as shown in the following image.


3. How to Create the Fox Logo Outline
Step 1
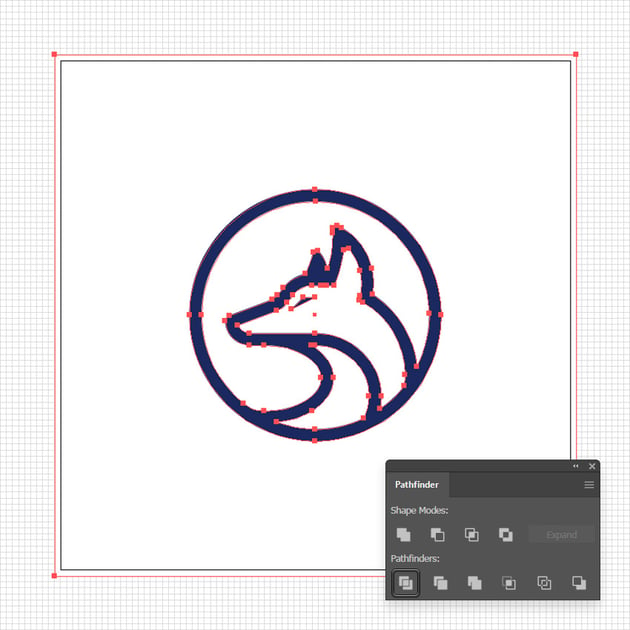
Select all your shapes and go to Object > Path > Outline Stroke to expand the stroke. Merge all these shapes using the Unite button from the Pathfinder panel (Window > Pathfinder). Fill the resulting shape with R=27 G=40 B=95.

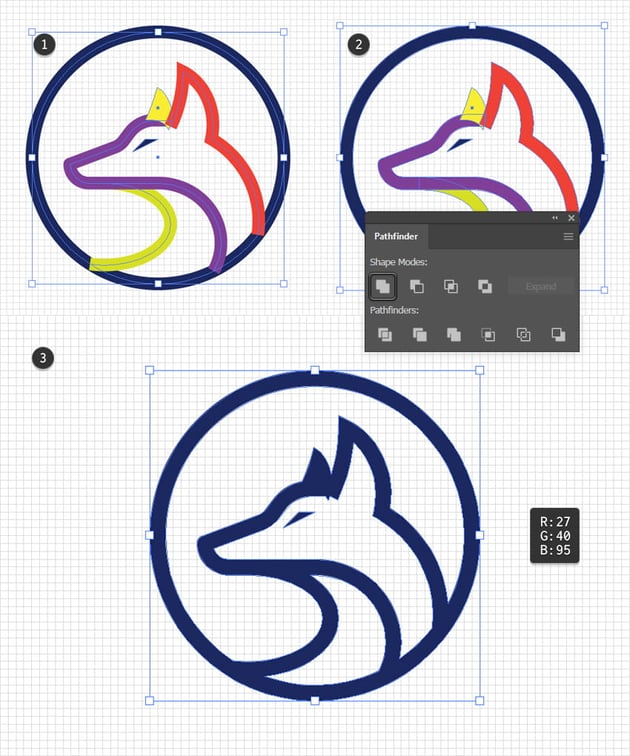

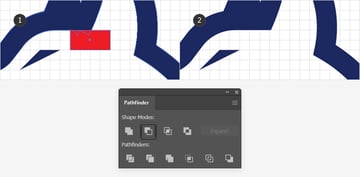
Step 2
Have a closer look at your vector fox logo and use the Rectangle Tool (M) to create a tiny shape that covers those sharp little paths highlighted below. Select this rectangle along with your fox logo, and click the Minus Front button from the Pathfinder panel.


Step 3
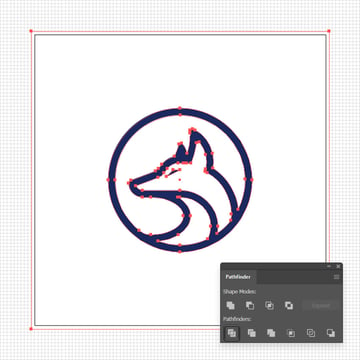
Now focus on the ears and use the Direct Selection Tool (A) to select the three anchor points highlighted in the first image. Move to the control panel and set the Corner Radius to 5 px.
Continue with the anchor point highlighted in the third image, select it, and set the Corner Radius to about 55 px.


4. How to Color Your Vector Fox Logo
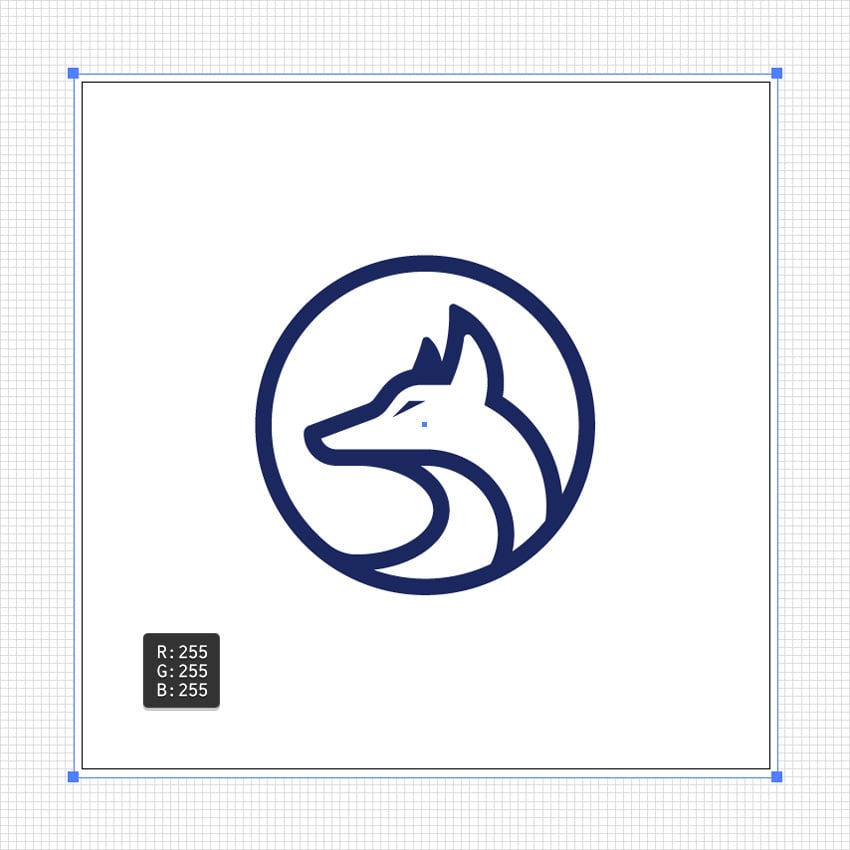
Step 1
Using the Rectangle Tool (M), create a shape that covers your entire artboard, fill it with white, and send it to the back (Shift-Control-[).


Step 2
Select your fox logo along with the white background, and click the Divide button from the Pathfinder panel. Press Shift-Control-G to Ungroup your resulting group of shapes.
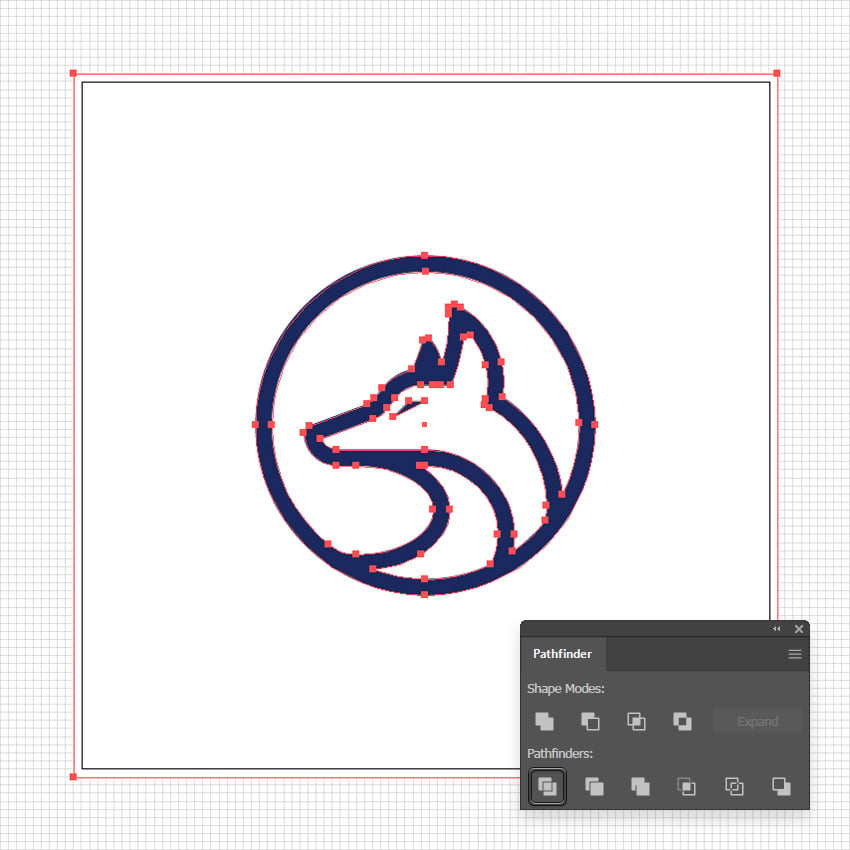
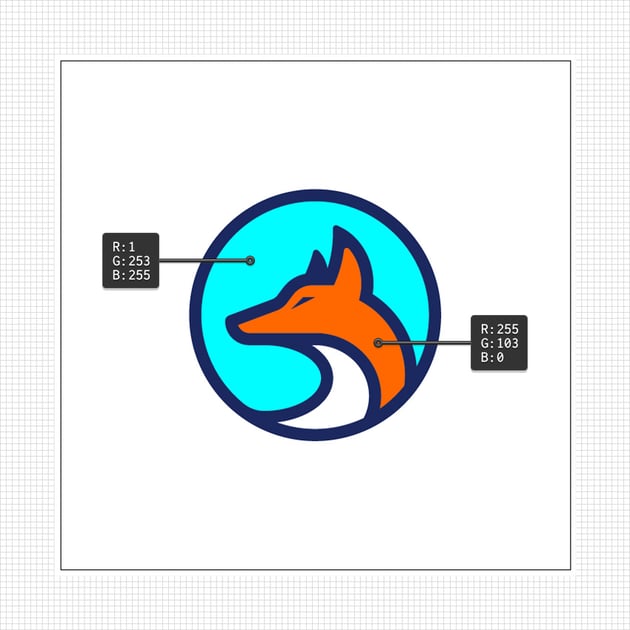
Step 3
Fill the highlighted shapes with the indicated colors, and your fox head logo is complete.

Congratulations! You’re Done!
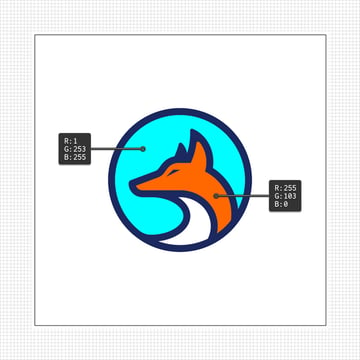
Here is how your fox logo design should look. I hope you’ve enjoyed this tutorial and that you can apply these techniques in your future projects.
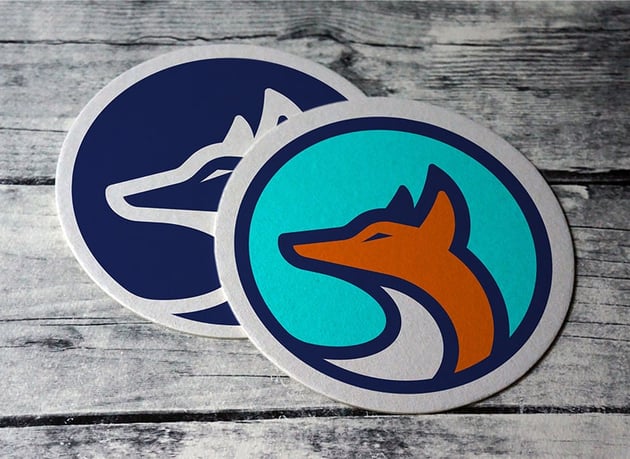
Feel free to adjust this fox head logo and make it your own. You can find some great sources of inspiration at Envato Elements, with interesting solutions to create cool fox logos. You can also use logo mockups to make your design stand out. This Coaster Round Label Mock-up is one of the many examples.


Popular Fox Logos From Envato Elements
Envato Elements is an excellent resource for fox logos. Here’s a short list of some of the most popular fox logos that you can find.
Fox Head Logo (AI, EPS)
Here’s another simple and minimalist approach to a fox head logo. This design could be the perfect solution if you’re looking for a simple yet elegant design.


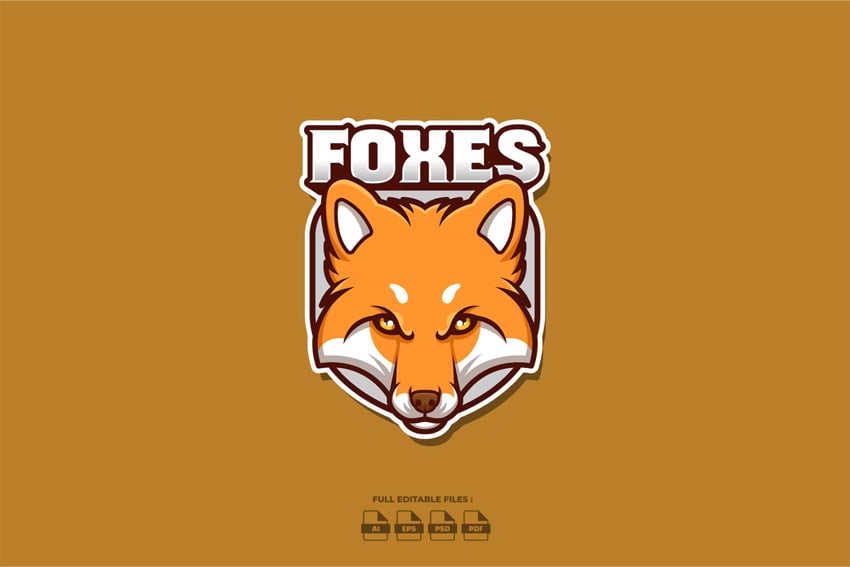
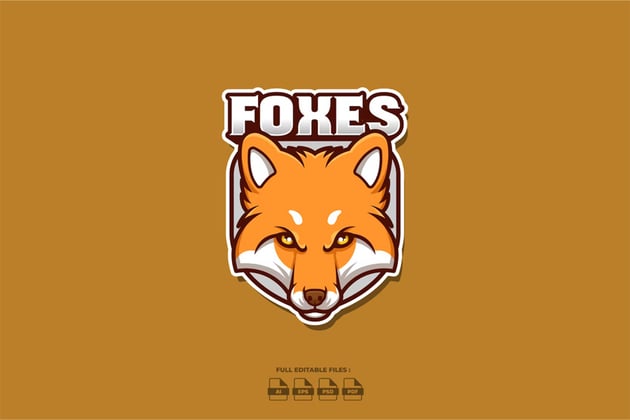
Fox Emblem (AI, EPS)
Looking for something more abstract? Check out this fox emblem. All you have to do is add your text and feel free to adjust the colors as you need.


Fox Logo (AI, EPS, JPG, PDF, PNG, PSD)
If you’re looking for something more complex, then this PNG fox logo might be the perfect choice. The design is 100% vector, so feel free to scale it as you wish.

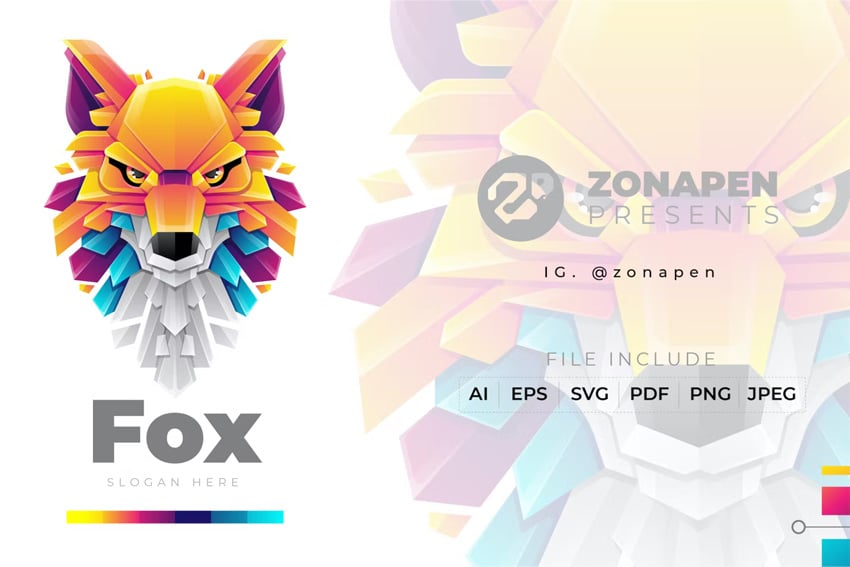
Cool Fox Logo (AI, EPS, SVG, PDF, PNG, JPG)
Take it to the next level with this cool fox logo. The design is 100% vector, so you don’t have to worry if you need to make it larger.

Female Fox Logo (AI, EPS, PNG)
Pump up the cuteness level of your design using this female fox logo. Feel free to recolor it or use different fonts for the text.


Want to Learn More?
We have loads of tutorials on Envato Tuts+, from beginner to intermediate level. Take a look!