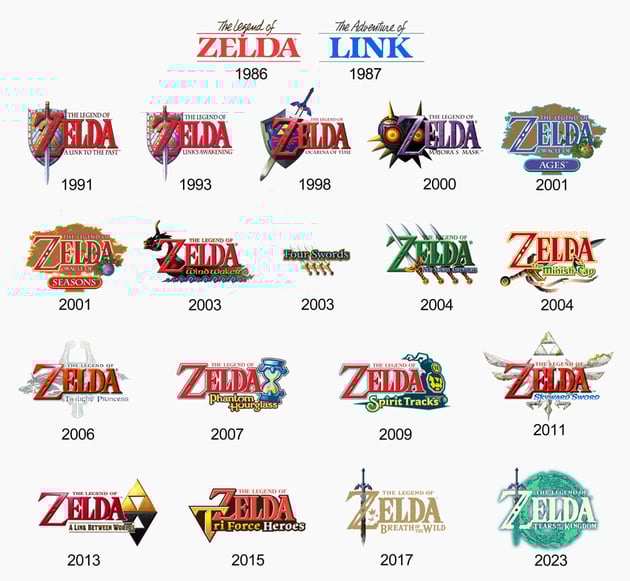
Whether you prefer the Zelda Ocarina of Time logo, the Twilight Princess logo, or the Majora’s Mask logo, which are all unique and beautiful, this tutorial is a great opportunity to learn new techniques whilst creating your own Zelda logo, Triforce! Before jumping in, we’ll briefly learn more about this iconic game series and discuss which is the best Zelda logo.
About Legend of Zelda
The Legend of Zelda is a highly loved and played action-adventure series known for its longevity and significance within the gaming industry. Originally released in Japan, it is one of Nintendo’s most iconic and beloved franchises, with 20 main games along with remakes and spin-offs that fans have enjoyed playing for nearly 40 years. Traveling through the kingdom of Hyrule and engaging in endless battles between good and evil while discovering the secrets of the all-powerful Triforce kept millions of players hooked and devoted.
There is definitely a debate about the best way to play and enjoy all the games in the series: in the chronological order of events or in the order of release.


The Zelda Logos: Which One Is the Best?
This ever-changing logo got a new upgrade in design with every new release to represent the game theme, offering an idea of what kind of game the players are about to play. The only consistent logo design element is the name of the princess Zelda taking center stage in bold letters, with the words “The Legend of” sitting right above it. The name of each specific game always sits below and has got a unique stylized treatment from edition to edition.
The logos divide fans, who have a lot to say about each Legend of Zelda logo, sparking fierce debates. The top picks are definitely the Zelda Ocarina of Time logo, the Majora’s Mask logo, the Breath of the Wild logo, and the much-awaited Tears of the Kingdom logo for their uniqueness. What do you think? Which one is your favorite?
Fictional History of the Triforce: Characteristics
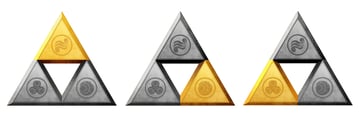
The Triforce is the central fictional artifact of The Legend of Zelda game series, a sacred golden artifact also known as the Golden Power.
It was created by the Golden Goddesses, Din, Nayru, and Farore along with the land of Hyrule and was infused with their qualities, making the Triforce an object of limitless power, capable of granting any wish to anyone who obtains it, regardless of whether the person’s intentions are “good” or “evil”. The stronger the wish, the more the wish comes true, since the Triforce will express it more powerfully. So, of course, many people wanted to get their hands on it. Wars were fought for the Triforce.
These three magical triangles infused with great power are in the possession of the three main characters of the series: Ganondorf, Link, and Zelda, who each have the Power, Courage, and Wisdom virtues. They also define the main plot in each series: an endless battle between Ganon, who wants to create darkness and chaos and use the Triforce for evil purposes, and the hero character Link, who’s destined to stand against Ganon and embarks on a quest to defeat him, find the Triforce, and save the land of Hyrule and the beautiful Princess Zelda.


What You’ll Learn in This Triforce Zelda Logo Tutorial
- How to create the Triforce logo
- How to add texture using 3D Materials in Adobe Illustrator
- How to make the Power, Courage, and Wisdom symbols
- Learn about all your favorite Zelda logos
1. How to Open a New Document in Adobe Illustrator
Launch Illustrator and go to File > New to open the New Document window. There, type the name of the document and set up the dimensions as shown. Keep the Units set to Pixels and the Color Mode to RGB. Once you’re done, hit Create Document.
2. How to Create the Triforce Zelda Logo
Step 1
Let’s start making the Triforce logo by drawing the first triangle. Grab the Polygon Tool, click on your artboard, enter 125 px as the Radius, and choose 3 Sides. Color the resulting triangle with the gold linear gradient shown at an Angle of -90 degrees.
Draw two more triangles of the same size, and arrange them as shown in the image below by aligning the top corner point with the bottom points of the first triangle. Color both triangles with the linear gradient shown, which is a bit darker. Set the Angle to -90 degrees.
Step 2
Select the first triangle and then Copy and Paste in front (Control-F) to make a copy of it. Keep the existing gradient and go to Effect > 3D and Materials > Extrude & Bevel. We are not interested in making a 3D extrusion, so choose the Front Preset and leave the settings as they are. Switch to the Materials tab and find the Comet Pit Surface material among all the materials available. Click on it to apply it to the triangle, and you’re done.
Step 3
Set the Blending Mode of the texture triangle to Soft Light, and then do the same thing to add the texture to the two bottom triangles as well.
Step 4
Copy the three triangles and Paste in front (Control-F), and remove all the existing appearances. Apply a 1 pt Stroke using light brown, and click on Align Stroke to Inside in the Stroke panel.
Add a second stroke at the top by pressing the Add New Stroke icon at the bottom of the Stroke panel. Keep the same brown color, but increase the Weight to 2 pt. Next, go to Effect > Path > Offset Path and apply an Offset of -4 px. Set the Blending Mode to Multiply and reduce the Opacity to 50% for this stroke attribute.
Step 5
Take the Pen Tool (P) and click on the outer corner points of the three triangles to draw a big triangle (1). While the big triangle stays selected, go to Effect > Distort & Transform > Transform and apply the settings shown. As a result, you will get a bigger triangle around the Triforce symbol (2). Follow up with Object > Expand Appearance.
Grab the Pen Tool (P) again and draw a shape between the corner points of the Triforce and the corner points of the blue triangle which act as guides (3). Do this on all three sides to create the appearance of a 3D extrusion. I will name these shapes outer sides (4).
Step 6
Now, do pretty much the same thing on the inside of the Triforce. First, use the Pen Tool (P) to draw a triangle between the inner corner points, and then go to Object > Path > Offset Path and apply a Radius of -15 px to get the smaller triangle in the center.
Use these two triangles as guides and start to draw the pink, green, and orange shapes with the Pen Tool (P). I will name these shapes inner sides.
Step 7
It’s time to color the outer and inner sides of the Triforce. Use the colors and linear gradients shown in the image below.
Step 8
Copy the inner sides and Paste in Front (Control-F), and then go to Effect > 3D and Materials > Extrude & Bevel to apply the Comet Pit Surface material as you did before. Do this for all three inner sides, and then set the Blending Mode to Soft Light.
Step 9
Next, Copy the outer sides and Paste in Front (Ctrl-F), and go to Effect > 3D and Materials > Extrude & Bevel to apply the Comet Pit Surface material again. Use the same settings. Once that’s done, set the left side to Blending Mode Multiply and 35% Opacity. Set the other two sides to Blending Mode Soft Light.
Step 10
To improve the final look of your Triforce Zelda logo, you can add highlights and shading. Copy the right and bottom outer sides and Paste in Front (Control-F), and remove the existing appearances. Color them with the linear gradient shown, and set the Blending Mode to Soft Light.
Let’s add a highlight to the left side. Use the linear gradient shown, and then set the Blending Mode to Color Dodge.
Step 11
Now, focus on the inner sides and add some shading. Select each one, make a copy in front, and color it with the corresponding gradient. Once that’s done, set the Blending Mode to Multiply.
Step 12
The logo is almost done. Let’s create the Power, Courage, and Wisdom symbols and finalize our Zelda logo Triforce design. They are mostly made out of simple shapes.
First, use the Pen Tool (P) to draw a wavy shape as shown below (1). Make a copy of it, move it upwards, and then draw an ellipse on the right side (2). Select the wavy shape along with the ellipse, and press Unite in the Pathfinder panel to merge them. Flip the newly obtained shape horizontally and vertically, and move it downwards. With all three shapes selected, go to Object > Compound Path > Make.
The Courage symbol is made using two circles aligned as shown below (1). With both shapes selected, press Minus Front in the Pathfinder panel to obtain a moon-like shape (2). Make a copy in front of the moon shape, and make it smaller (3). Complete the symbol by adding a circle to the left side (4). With all three shapes selected, go to Object > Compound Path > Make.
Step 13
The Wisdom symbol is similar to what you made previously. Start with two circles (1), obtain the moon shape (2), and then add the circle at the top (3). Group (Control-G) the two shapes, make a copy, and Rotate 225 degrees by going to Object > Transform > Rotate (4). Make another copy and flip it horizontally (5). Once your three groups are arranged as shown, go ahead and press Unite in the Pathfinder panel, followed by Object > Compound Path > Make.
Step 14
Move the symbols on the Triforce, and scale them if necessary. Apply a brown fill and a brown 0.75 pt Stroke (1). Copy each symbol and Paste in Front (Control-F), and then go to Effect > 3D and Materials > Extrude & Bevel and apply the Comet Pit Surface material exactly as you did before. Set the Blending Mode of these texture shapes to Soft Light (2).
Complete the final logo design by adding a circle around each symbol of about 84 x 84 px. Give it a 4 pt Outside Stroke in brown. Reduce the Opacity to about 60% (3).
Congratulations! You’re Done
You have successfully learned how to make your own Triforce logo. Put it over a cool background like the Sun Lights Abstract Backgrounds that I used.
Now that you know how to make it, feel free to apply the same techniques to create other 3D-looking logos and experiment with applying different textures to them. Make sure to check out Envato Elements, where you’ll find many resources like logos, fonts, textures, and graphics that you can use for inspiration or download ready to use.
Want to Learn More Illustrator Skills?
Did you like this tutorial on how to make a Legend of Zelda logo? We have loads of tutorials on Envato Tuts+ that teach many other useful techniques. Here is a list of tutorials specially made for you. Take a look!