Cowboy Carter, also known as Act II, is the second installment of Beyoncé’s three-act project conceived during the last few years. Since all Beyoncé album covers have something to deliver visually, the latest release features an image of a saddle with a sash that says “Cowboy Carter” in a country & western font, and also the Queen B herself wearing the same banner sash while riding. These hints make it very obvious to fans worldwide that they will get a new Beyoncé country album. Yay!
We can definitely get inspired by this event and create various designs. In this tutorial, we will make a ribbon vector design with red and blue ruffles and a similar country font. Let’s begin!
If you don’t have the time, you can always try Envato Elements, where you will find a large selection of country style fonts that are ready to be used for a cowboy text effect, as well as banner designs and ribbons. They will surely improve your work.
What You’ll Learn in This Banner Sash Vector Tutorial
- How to make a ruffle vector brush in Illustrator
- How to make a vector ribbon in Illustrator
- How to add text to the ribbon banner
- How to add texture to the ribbon banner
Tutorial Assets
You’ll need the following resources to complete this project:
1. How to Make a New Document in Adobe Illustrator
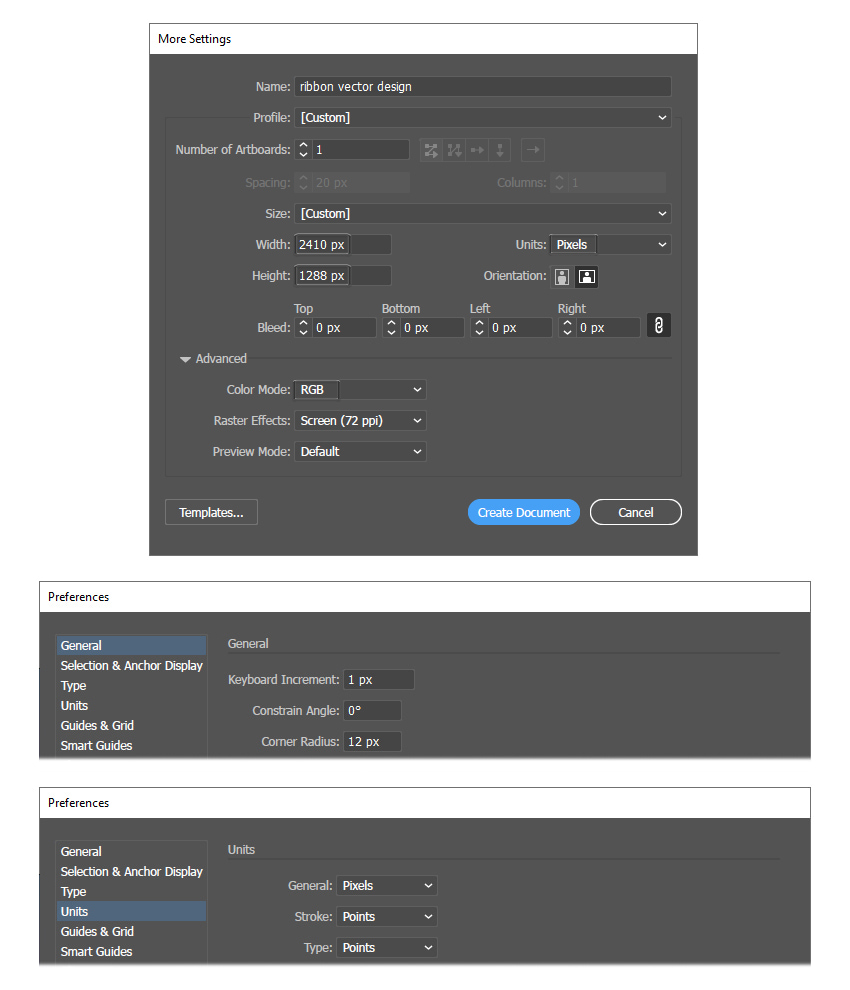
Launch Illustrator and go to File > New to open the New Document window. There, type the name of the document and set up the dimensions as shown. Keep the Units set to Pixels and the Color Mode to RGB. Once you’re done, hit Create Document.
In the image below, you can see the other settings that I prefer to use while working in Illustrator. You can access them by going to Edit > Preferences.

2. How to Make a Ruffle Vector Brush in Illustrator
Step 1
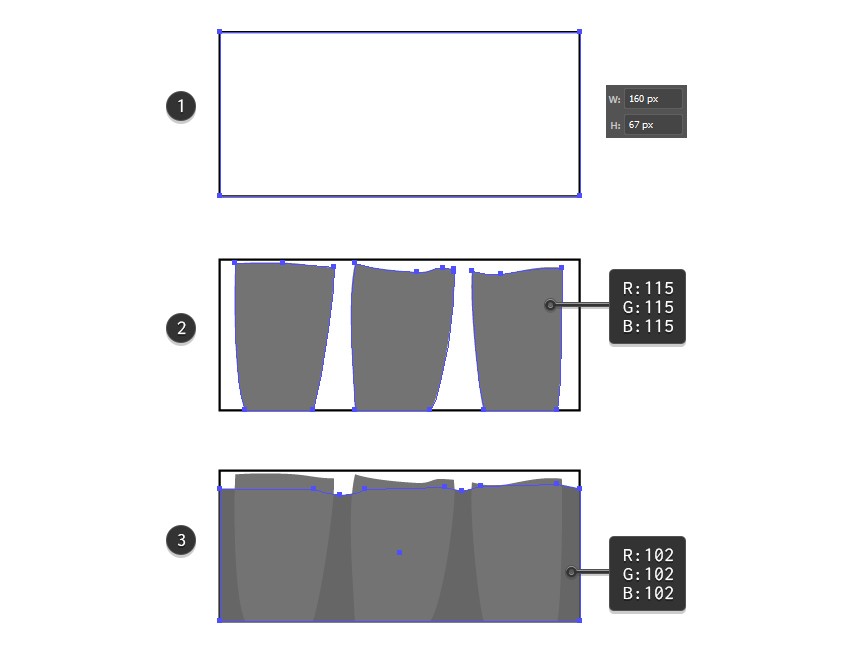
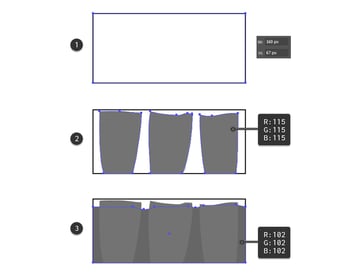
Start by taking the Rectangle Tool (M) and drawing a 160 x 67 px rectangle on your artboard. This will define the size of the ruffle vector brush (1).
Switch to the Pen Tool (P) and draw three petal-like shapes inside the rectangle, as shown in the image below (2). Give them a gray fill color (55% black). Next, Copy the rectangle and Paste in Front (Control-F), and drag the bounding box with the Selection Tool (V) to make it a bit smaller at the top. Distort it by adding a few extra points with the Add Anchor Point Tool (+), and then move these points to create a wavy path with the help of the Direct Selection Tool (A). Color the resulting shape with a slightly darker shade of gray (60% black) (3).
Step 2
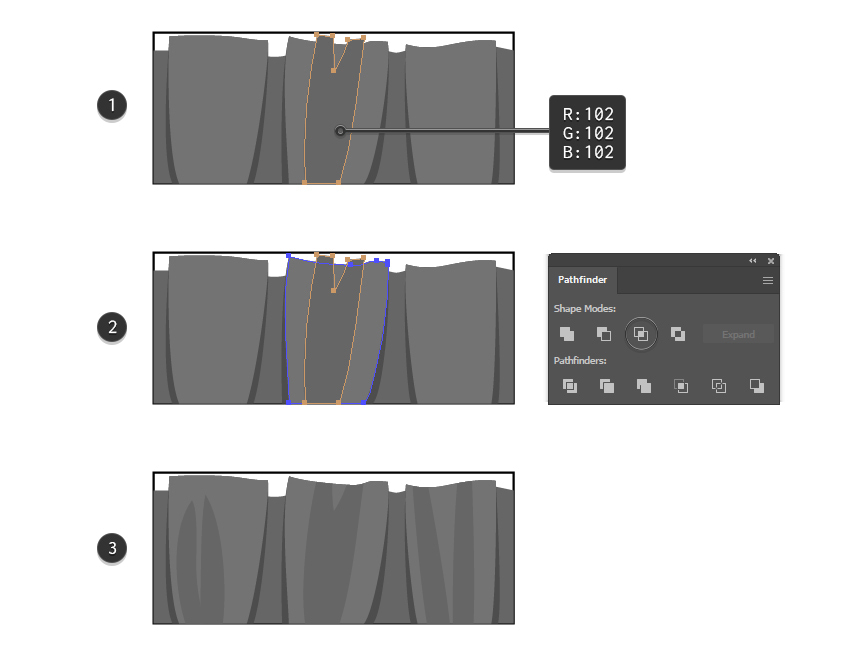
Select one of the ruffle shapes and then Copy and Paste in Back (Control-B) to make a copy of it. Change the fill color to a darker shade of gray (70% black). With the Direct Selection Tool (A), select and move only the bottom points outwards to obtain a shadow. Do the same thing for the other two ruffle shapes.


Step 3
Let’s add more shading by drawing a V-like shape on the ruffle (1). Color it with medium gray (60% black). Don’t worry if you go over the edges because you can crop it.
Select the ruffle shape behind the shading and then Copy and Paste in Front (Control-F) to make a copy of it. Keep this copy selected, along with the shading shape, and press Intersect in the Pathfinder panel (2). Draw more V-like shapes on the ruffles, and repeat the same process (3).

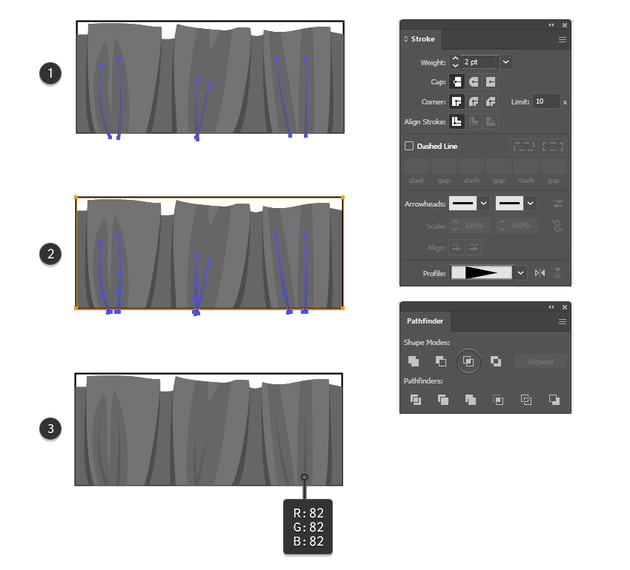
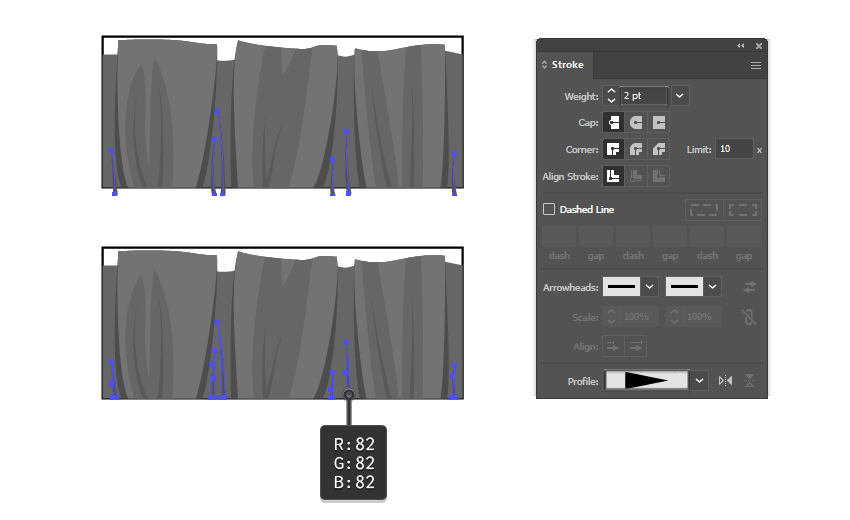
Step 4
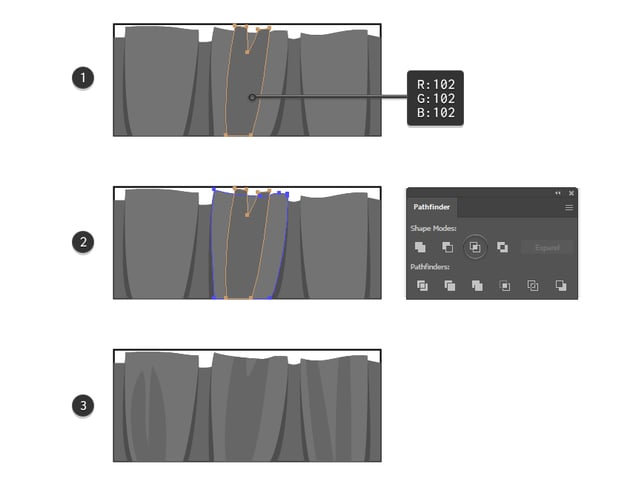
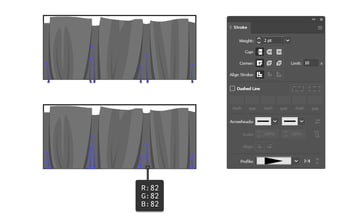
Use the Pen Tool (P) to draw a pair of paths on each ruffle, as shown in the image below. Give them a 2 pt Stroke using Width Profile 4 in the Stroke panel (1). Follow up with Object > Expand Appearance and then Object > Compound Path > Make (Control-8).
Now, select the rectangle and Copy and Paste in Place (Shift-Control-V) to make a copy of it. Keep the rectangle copy selected, along with the newly obtained compound path, and click on Intersect in the Pathfinder panel (2). Fill these detail lines with dark gray (65% black) (3).
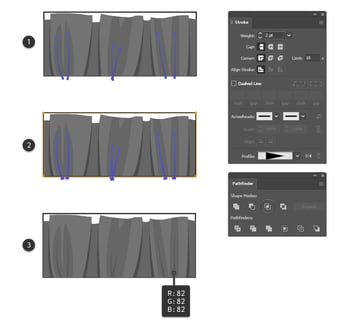
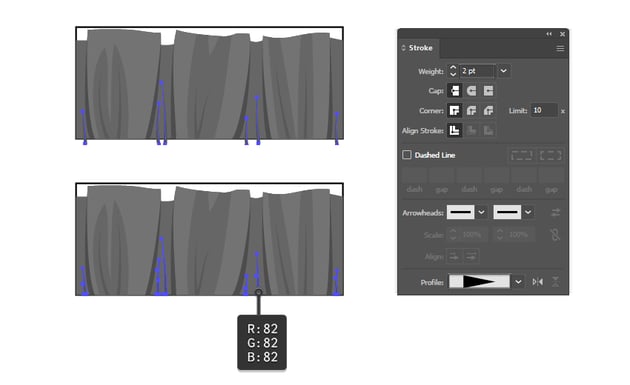
Step 5
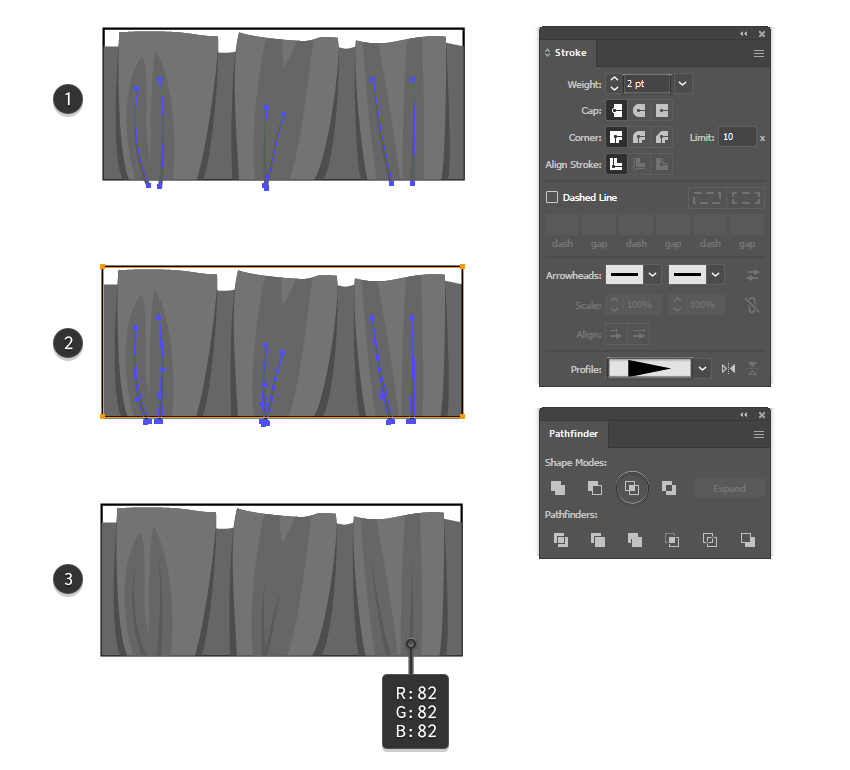
Add more detail lines between the ruffles, as explained in the previous step.
Step 6
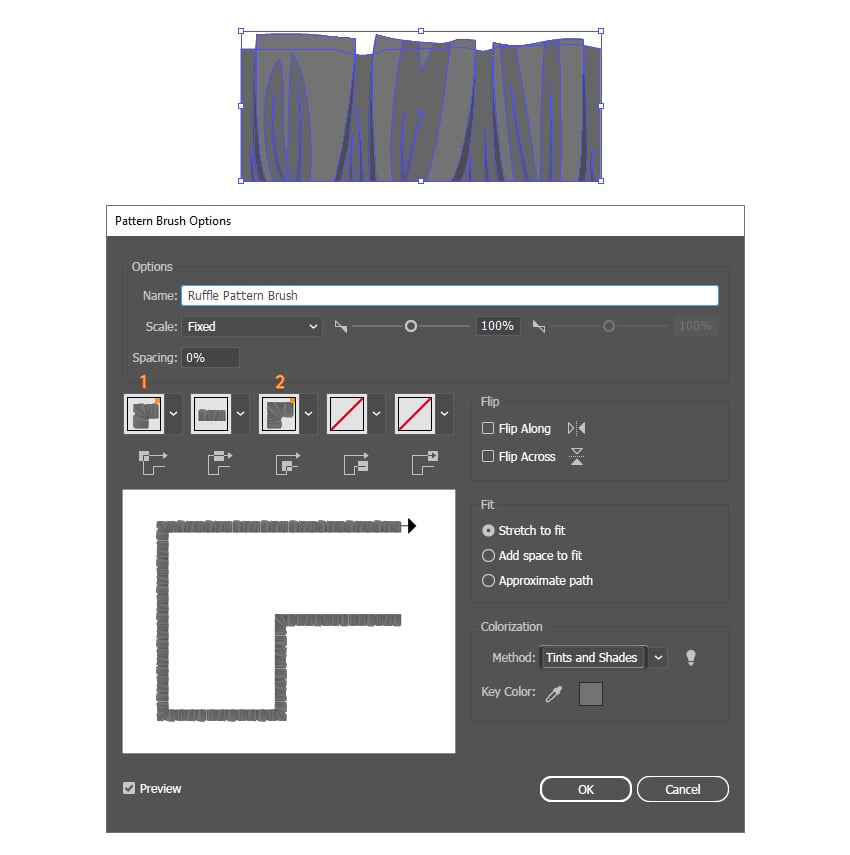
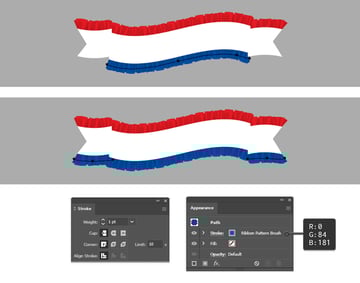
The ruffled ribbon vector brush is done and is ready to be saved. First, select the rectangle and remove the existing stroke. Group (Control-G) all the shapes, drag them into the Brushes panel, and choose New Pattern Brush. Type Ruffle Pattern Brush as the name and set the Colorization Method to Tints and Shades. Also, set the Outer Corner Tile (1) and the Inner Corner Tile (2) to Auto-Centered. Hit OK.

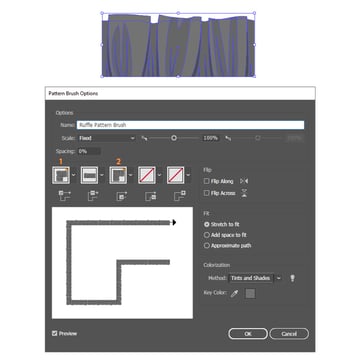
Apply the brush to any path by selecting it from the Brushes panel. You can change the stroke color to any color, and the brush will update itself. Take a look.
3. How to Make a Vector Ribbon in Illustrator
Step 1
In the following steps, you will learn how to create a vector ribbon and how to apply the Ruffle Pattern brush around it.
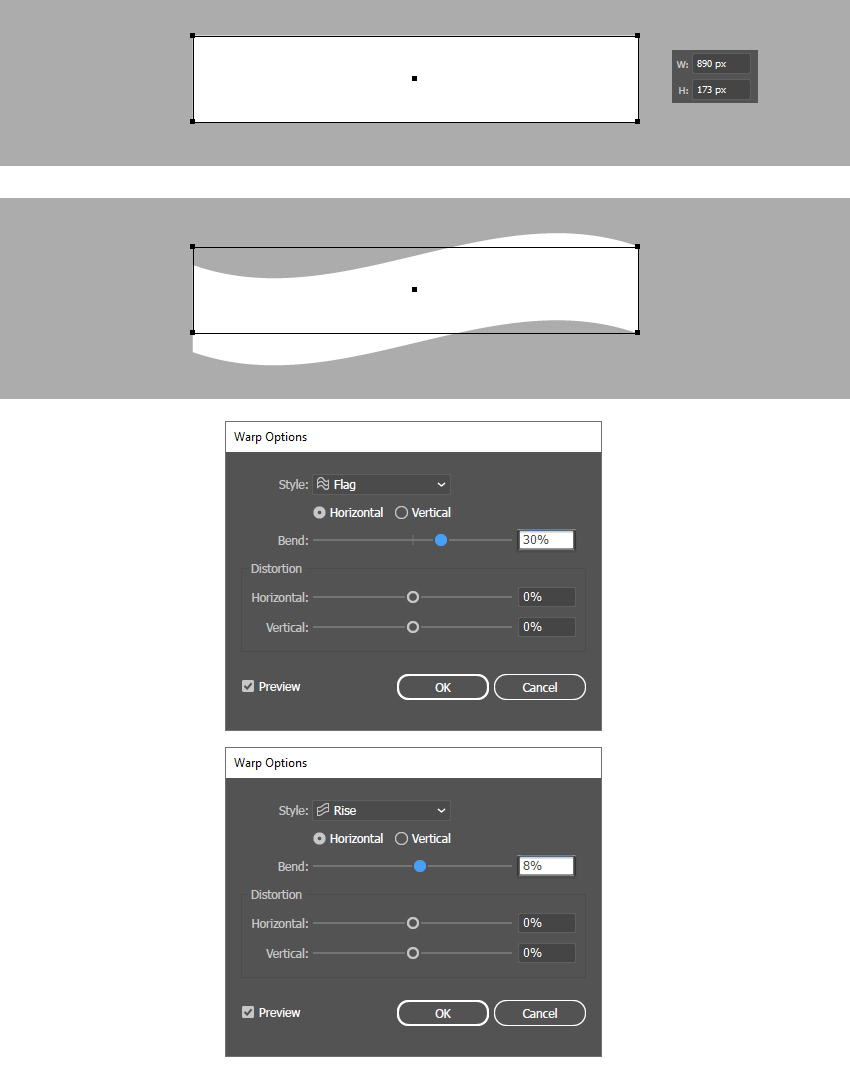
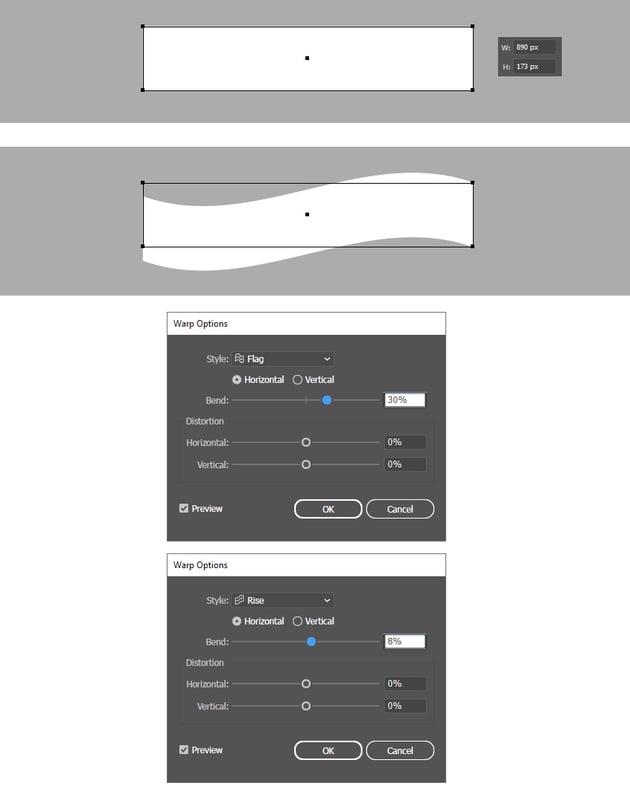
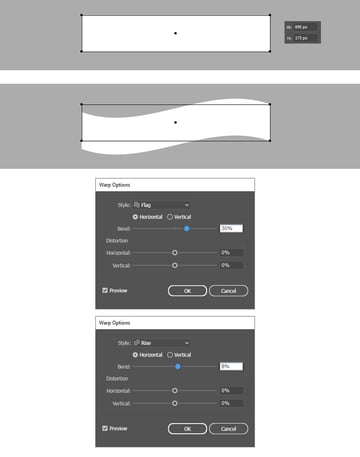
Start by taking the Rectangle Tool (M) and drawing a long rectangle of about 890 x 173 px. Give it a white fill color. With the shape still selected, go to Effect > Warp > Flag and apply a 30% Horizontal Bend. Also, go to Effect > Warp > Rise and apply an 8% Horizontal Bend. Hit OK. Follow up with Object > Expand Appearance, and you will obtain the banner sash vector shape.
Step 2
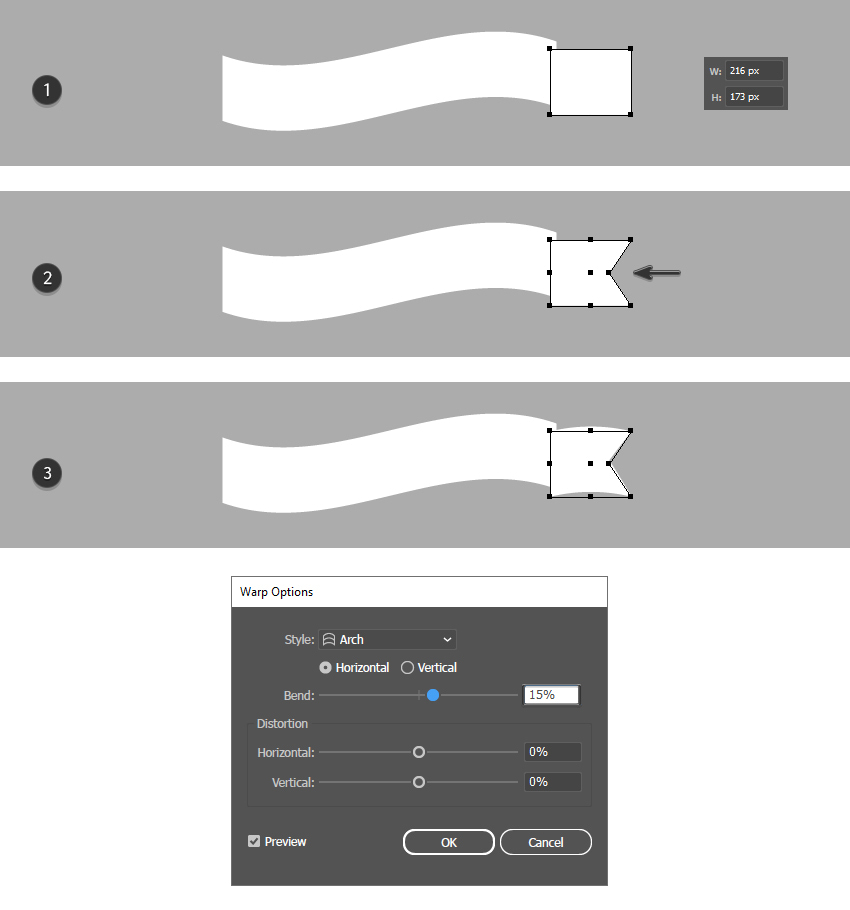
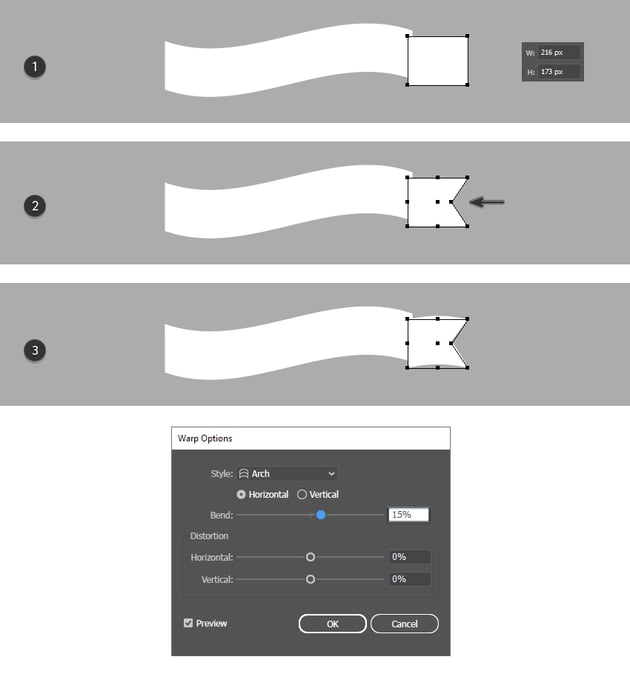
Continue to draw a smaller rectangle of about 216 x 173 px on the right side, and position it a bit lower, underneath the ribbon (1). Go to Object > Path > Add Anchor Points, and then select only the right middle point with the Direct Selection Tool (A) and move it inwards to obtain the forked end (2). Go to Effect > Warp > Arch and apply a 15% Horizontal Bend (3). Hit OK and follow up with Object > Expand Appearance.
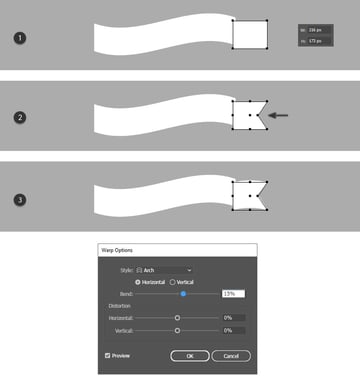
Step 3
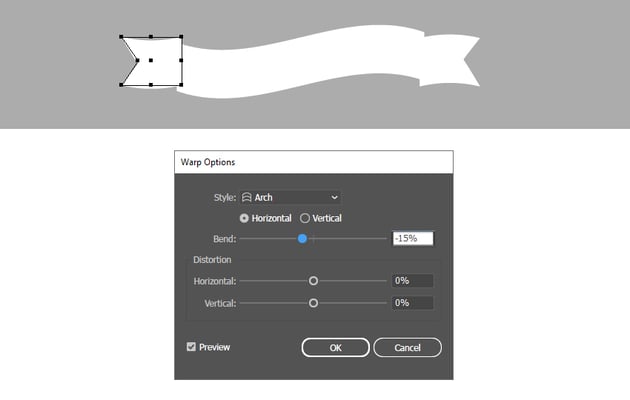
Repeat the same process on the left side of the ribbon to create the other forked end. When applying the Arch effect, choose a -15% Horizontal Bend. Hit OK and follow up with Object > Expand Appearance.


Step 4
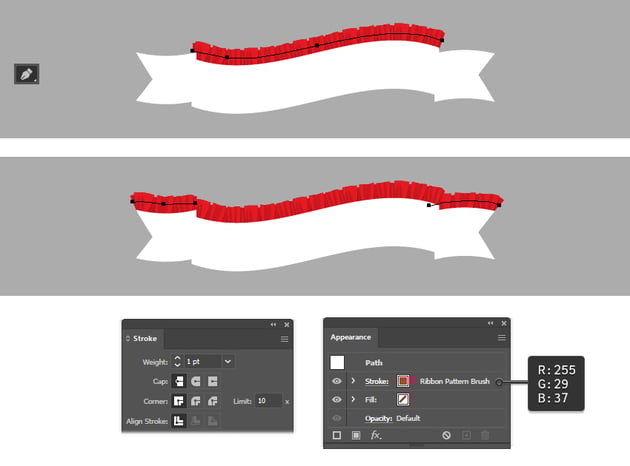
At this point, the ribbon vector banner is done, and you can start adding the ruffles. Grab the Pen Tool (P) and draw a wavy path that follows the shape of your banner at the top. Apply the Ruffle Pattern Brush from the Brushes panel, and set the stroke color to red. How easy, right?
Next, draw a wavy path above the forked ends, using the same brush and settings. Once that’s done, make sure to send these three red ribbon vector paths behind everything by going to Object > Arrange > Send to back (Shift-Control-[).


Step 5
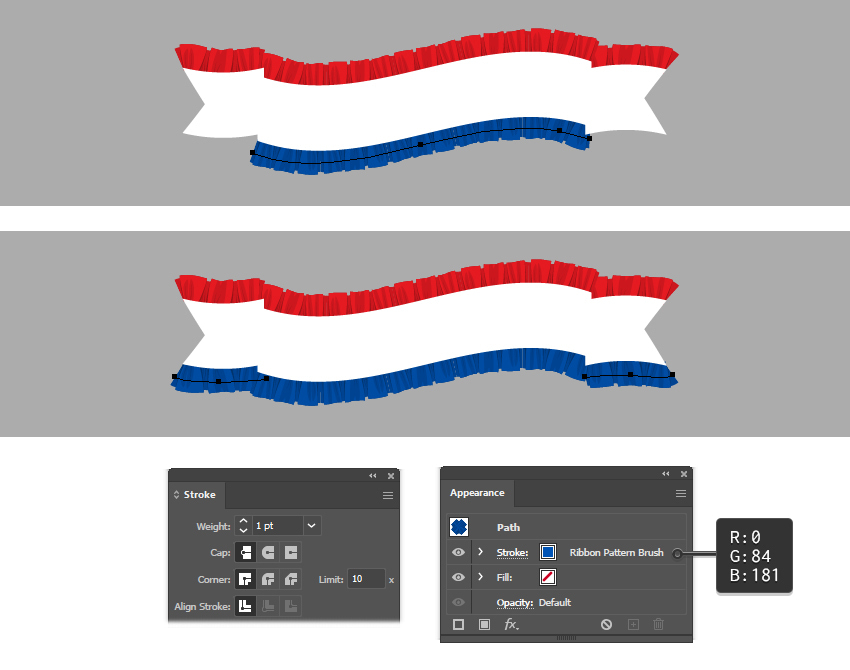
The same thing goes for the bottom side of your banner. Use the Ruffle Pattern Brush again, and set the stroke color to blue. You can make adjustments to the path and adjust the curves and handles with the Direct Selection Tool (A), at any time, to make them fit and look better. Once you’re done, send the three blue ribbon vector paths behind everything by going to Object > Arrange > Send to back (Shift-Control-[).

Step 6
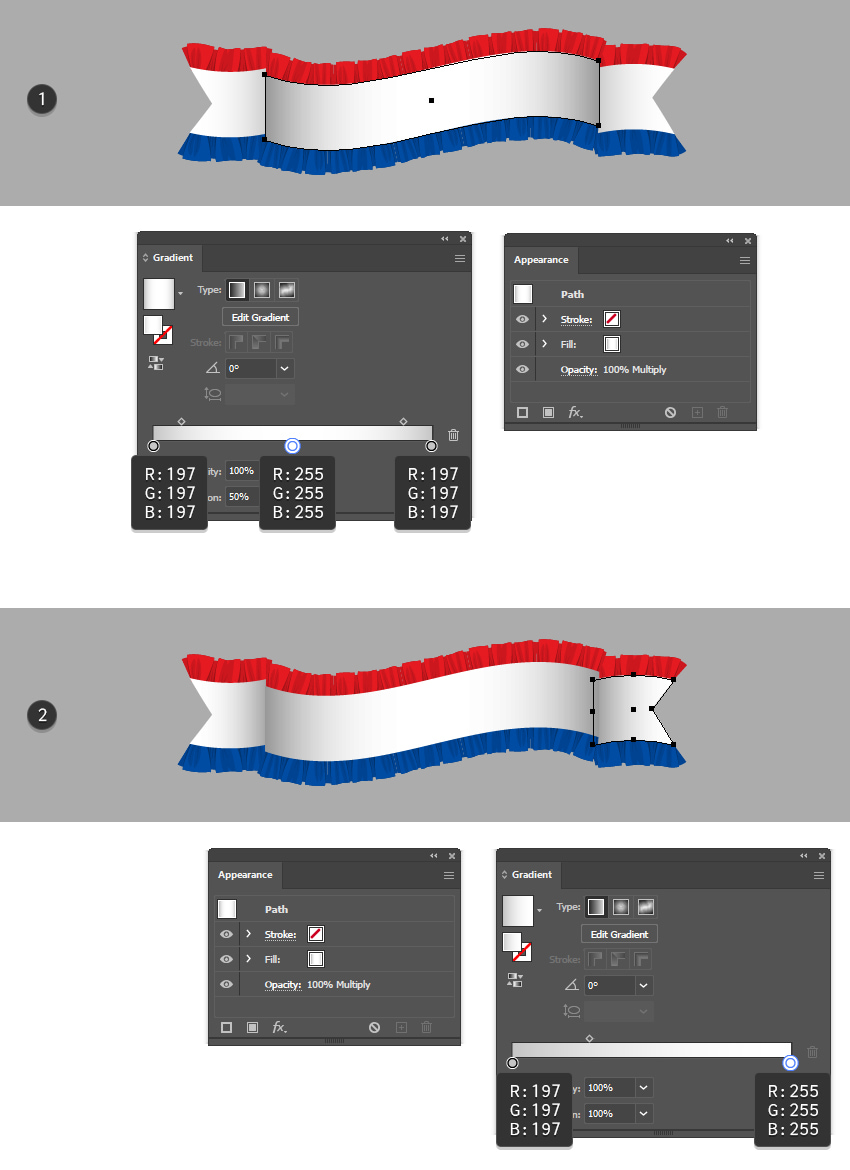
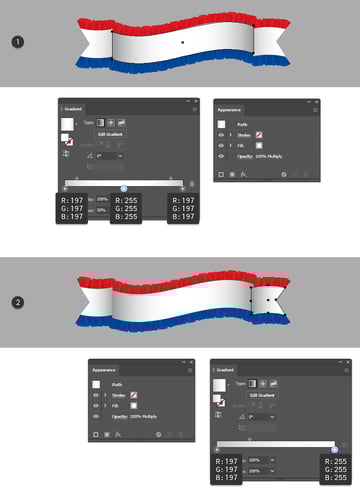
It’s time to add some shading to the ruffled ribbon vector design. Select the middle ribbon shape and Copy and Paste in Place (Shift-Control-V) to make a copy of it. Fill it with the linear gradient shown, and set the Blending mode to Multiply (1).
Now, Copy and Paste in Place (Shift-Control-V) the right forked shape, fill it with a light gray to white linear gradient, and set the Blending Mode to Multiply (2). Repeat the same thing for the left forked shape, but flip the gradient by clicking on the Reverse Gradient icon in the Gradient panel.

Step 7
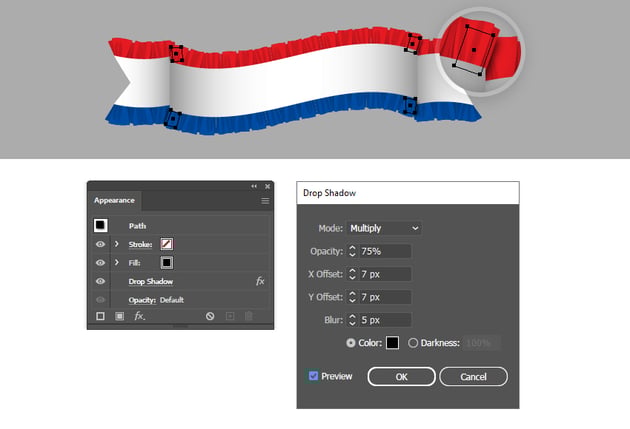
To add shadows under the red and blue ruffles, use the Rectangle Tool (M) or the Pen Tool (P) to draw the four little squares shown below. Color them with black; then go to Effect > Stylize and apply a Drop Shadow. You need to adjust the X Offset and Y Offset values depending on the location of each square. Make sure to send these squares behind the long red and blue ruffles in the Layers panel, but in front of the smaller ruffles from the sides.


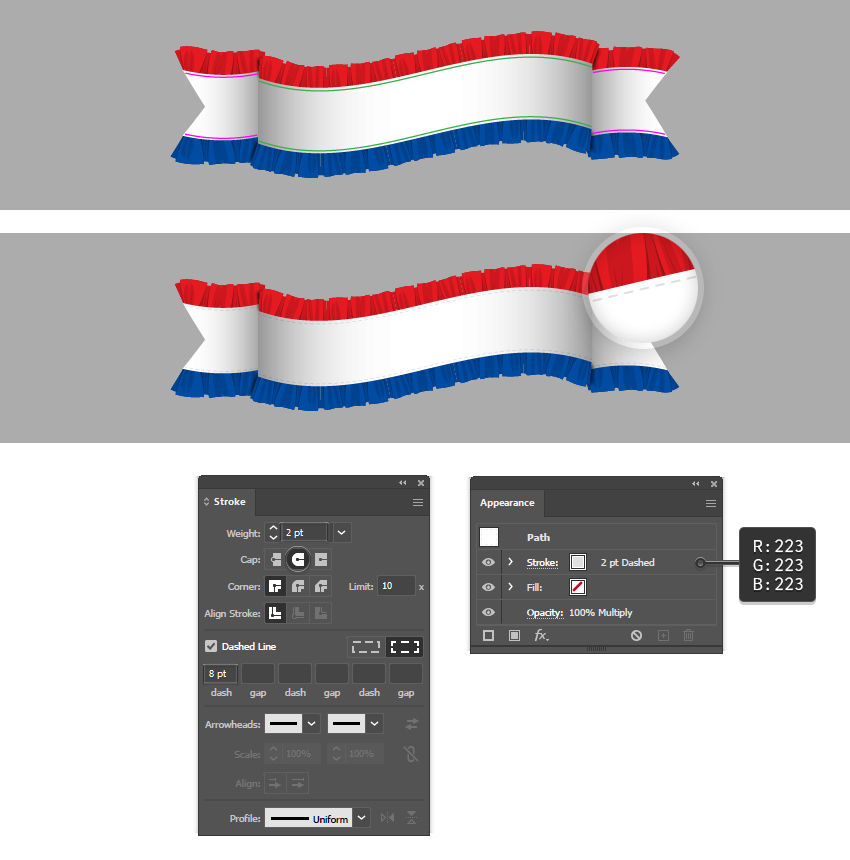
Step 8
Another detail that you can add to your ruffled ribbon vector design is the stitching. Use the Pen Tool (P) to draw green and pink wavy paths following the shape of the ribbon, as shown in the image below. They are very close to the edges. Give them a 2 pt Stroke using light gray. In the Stroke panel, activate Round Cap and also apply an 8 pt Dashed Line.


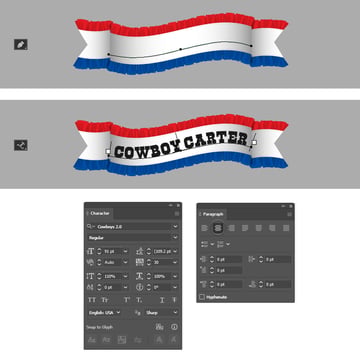
4. How to Add Text to the Ribbon Banner
The vector ribbon is not complete without a country & western font. To add it, first grab the Pen Tool (P) and draw a wavy path on the middle piece of the banner. Switch to the Type on a Path Tool, click on the path, and write “COWBOY CARTER” in capital letters. I am using the Cowboys 2.0 font which works perfectly. Use the following settings in the Character panel:
- Font size: 91 pt
- Set the tracking for the selected characters: 30
- Vertical Scale: 110%
Next, go to the Paragraph panel (Window > Type > Paragraph) and check Align Center. Feel free to make it your own by choosing another country font or typing different text.


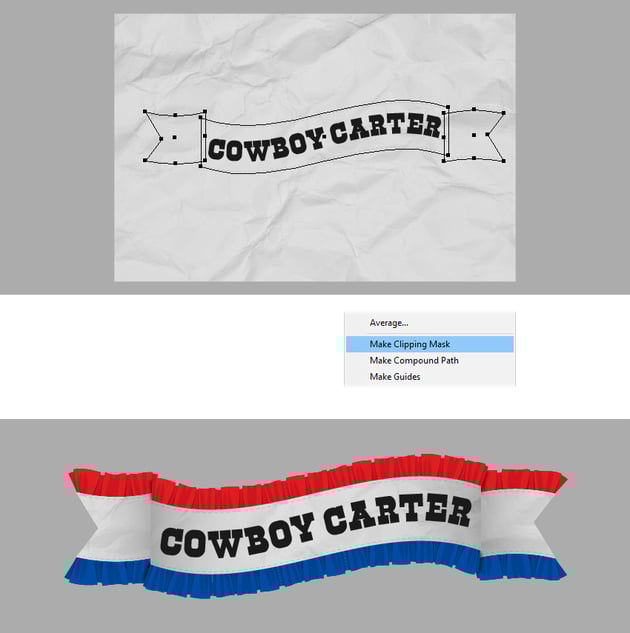
5. How to Add Texture to the Ribbon Banner
This step is optional but will improve your final ribbon design inspired by the new Beyoncé country album.
Go to File > Place and locate the folder containing the texture image on your computer. I am using the BG_02 image from the Crumpled Paper Backgrounds, which will create the appearance of a wrinkled fabric. Once you’ve placed the image inside your document, scale it so that it covers the entire design. Mask the texture using a copy of the middle ribbon shape and copies of the forked ends. Once you’re done, make sure to send the texture behind the shading in the Layers panel.


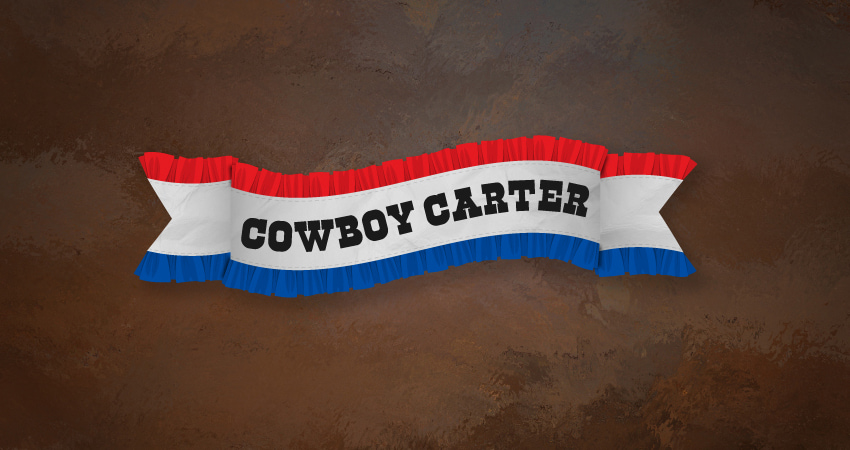
Congratulations! You’re Done
You have successfully learned how to create a vector ribbon inspired by the Beyoncé Act II Cowboy Carter album cover. Put it over a cool background like the Abstract brown background that I’ve used. It’s the perfect addition to improve your final design. You can easily edit the text and the country font to make it fit into your project.
Make sure to check out Envato Elements, where you will find plenty of country style fonts, graphics, and textures, or maybe a cowboy text effect that you can download and use.


Popular Resources From Envato Elements
Envato Elements is an excellent source of fonts, graphics, text effects, and so much more. Here’s a short list of some of the most popular resources that you can find. Grab them and take your designs to the next level.
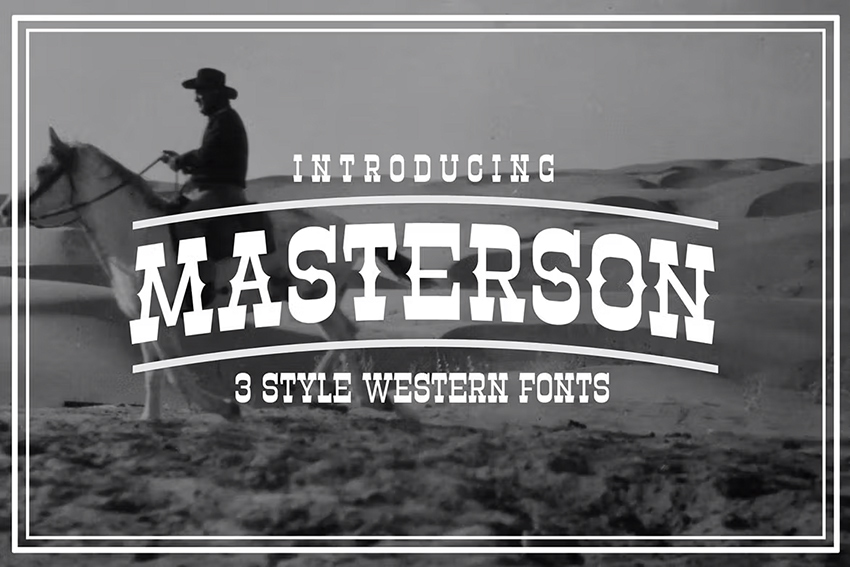
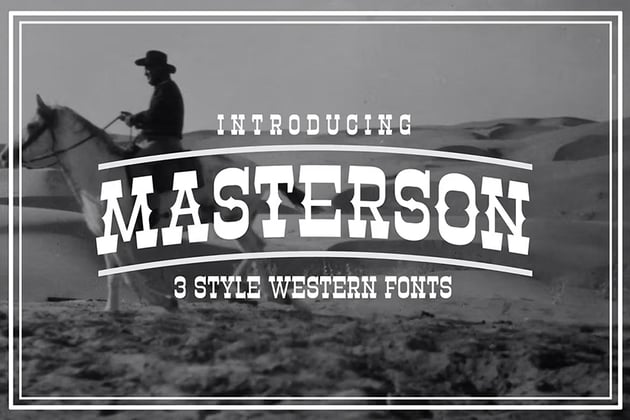
Masterson Font (OTF, TTF)
This country & western font is gorgeous visually and will definitely make a statement in your designs, whether they are banners, posters, titles, or a cowboy text effect. Give it a try!
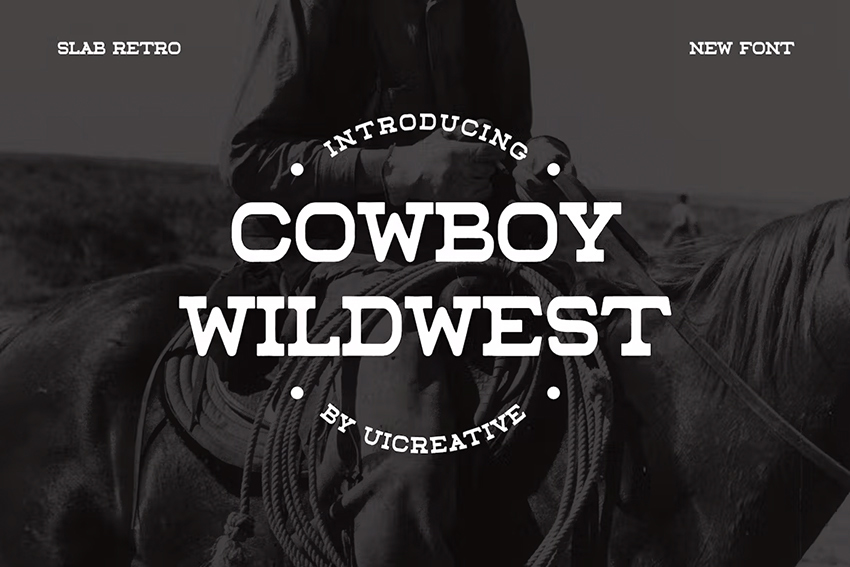
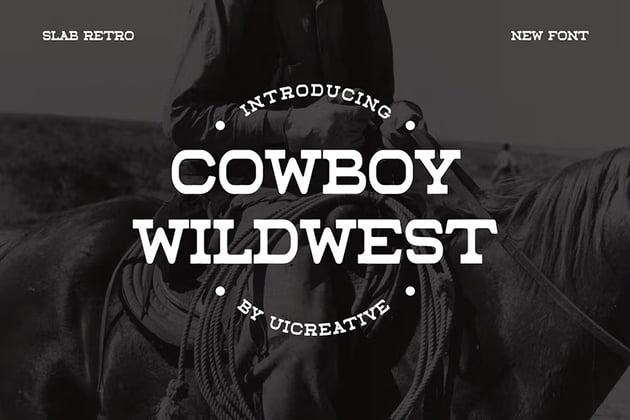
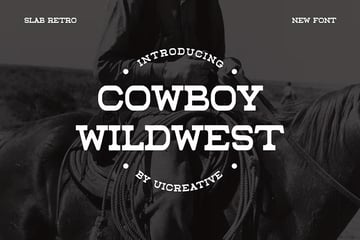
Cowboy Wildwest Slab Serif Font (OTF, TTF, WOFF)
If you’re looking for a font that is both western-looking and modern, then Cowboy Wildwest is the perfect option for you. Grab it and use it in a variety of projects. It’s timeless!
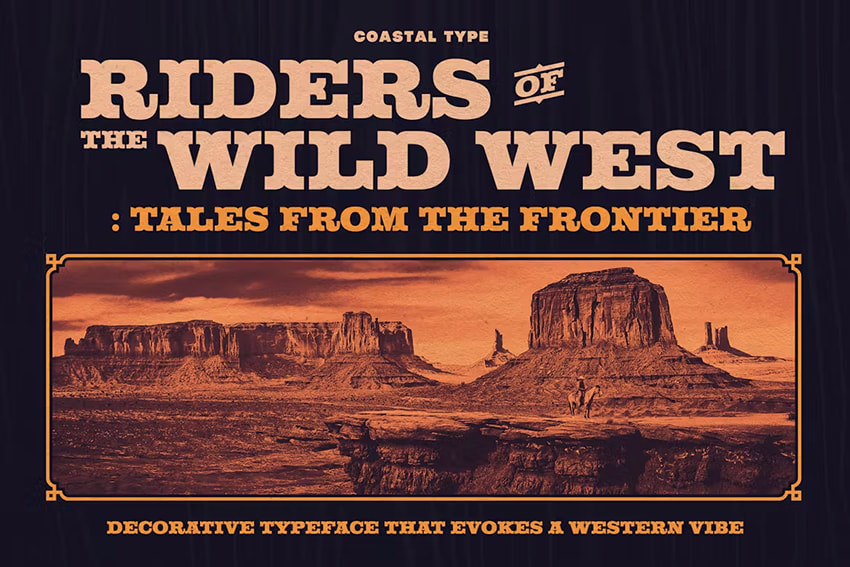
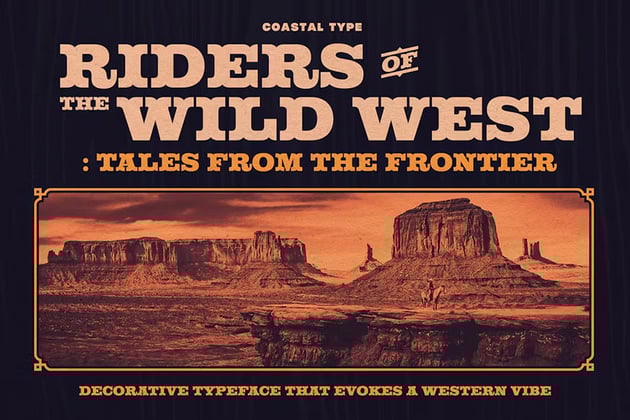
Riders of the Wild West (OTF, TTF, WOFF, WOFF2)
Add a vintage touch to your designs with this bold and eye-catching font. Its unique decorative appearance works great for titles, headlines, posters, covers, logos, or text effects. It will become the main attraction. Give it a go!

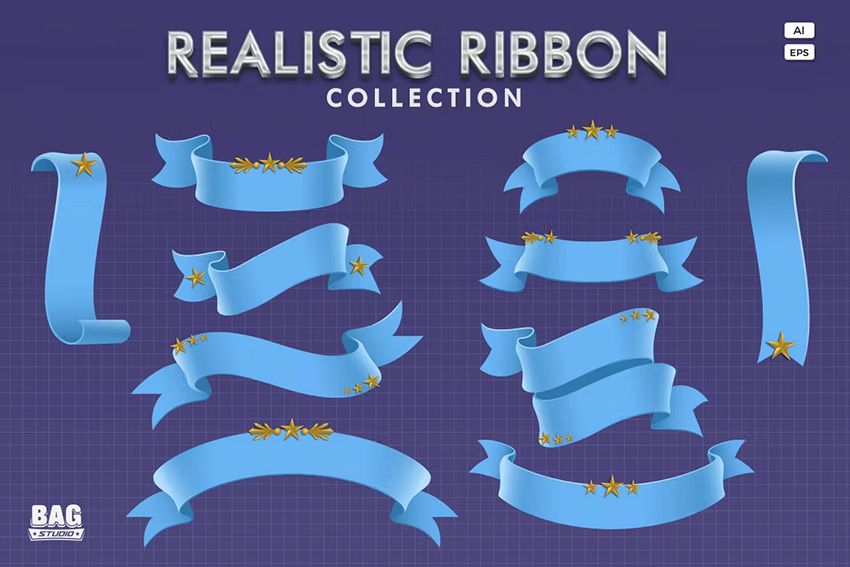
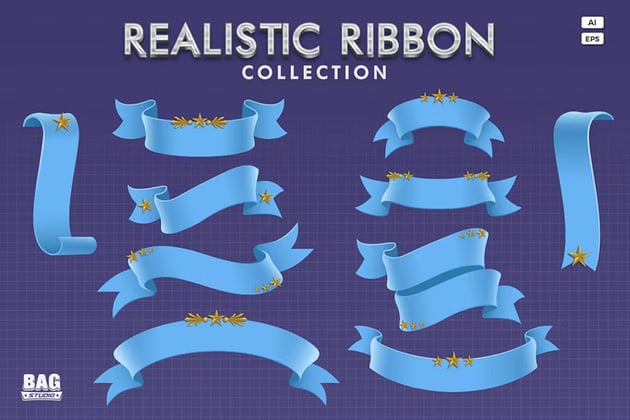
Realistic Ribbon Collection (AI, EPS)
No time to waste? Here’s a collection of realistic ribbon designs that you can use right away to complete your project. They are all vectors, so you can scale them without losing quality, and you can recolor them and then simply add your desired title.
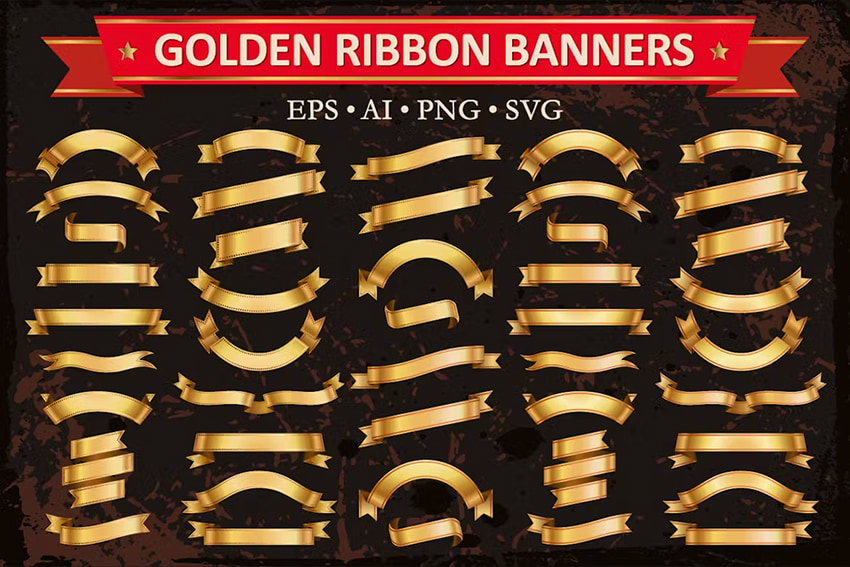
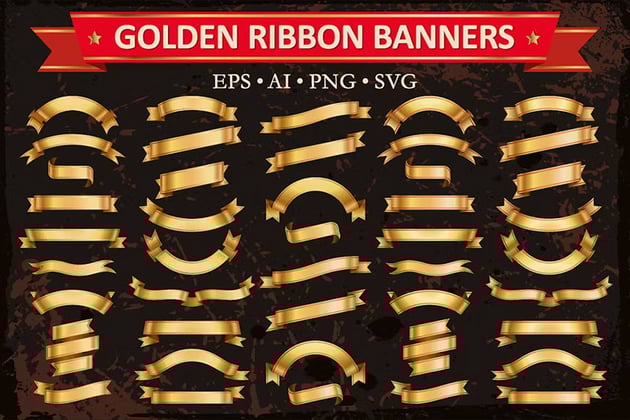
Golden Ribbon Banners Vector Set (AI, EPS, PNG, SVG)
For a more luxurious design, look no further. Here you have a large collection of golden ribbon vector designs in various forms. You will definitely find the perfect fit and add some shine and richness to your design.

Want to Learn More?
Did you like this tutorial on how to create a ribbon vector banner? We have loads of tutorials on Envato Tuts+ that teach many other useful techniques. Here’s a list of tutorials specially made for you. Take a look!