
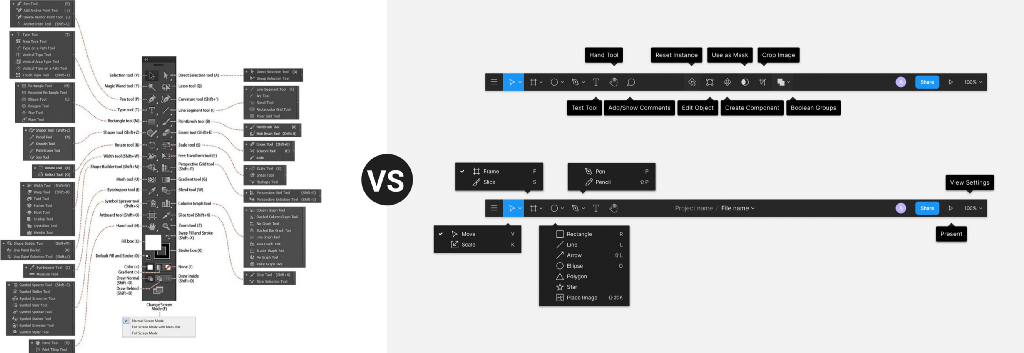
Figma is my tool of choice for designing user interfaces. Extremely simple to use, the learning curve is a fraction of what’s required for any given Adobe Creative Cloud software. But, that simplicity comes at a price: Figma’s primary focus is not illustration or graphic design, and many designers still switch to Adobe Illustrator for those workstreams. For a while now, I’ve tried to avoid doing the same, since the immediate inundation with buttons, icons and collapsable drawers always makes my head spin.
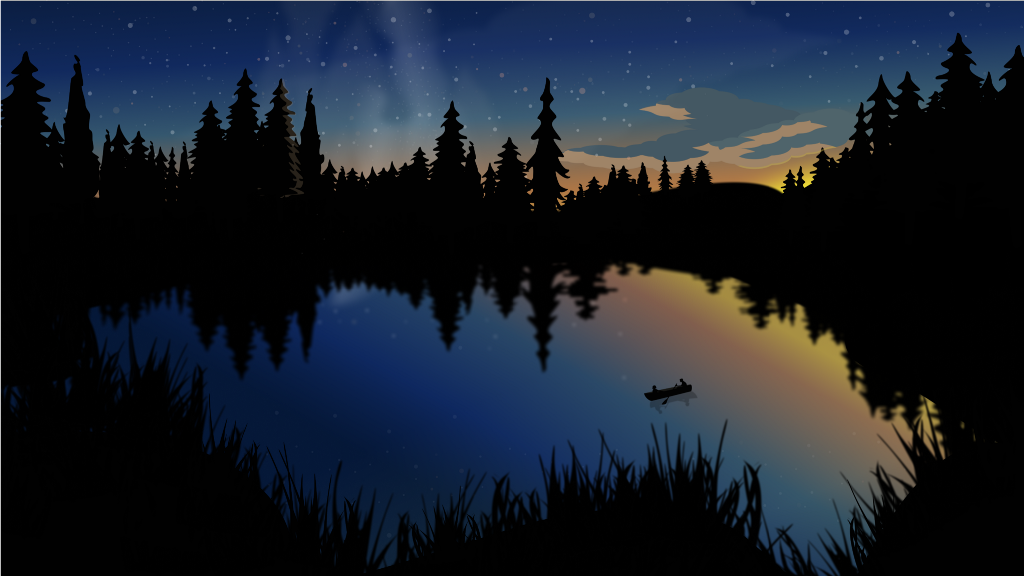
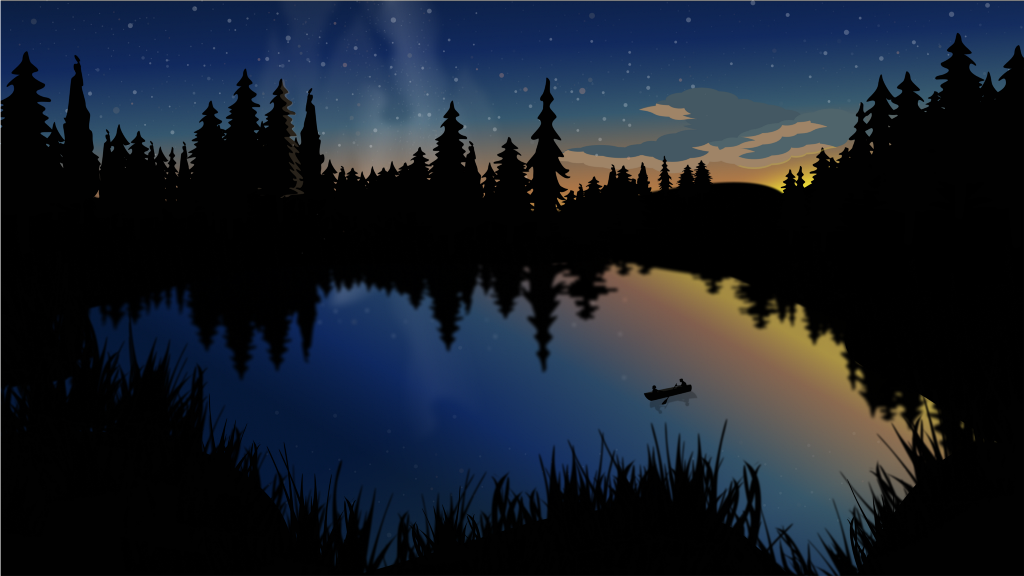
Last year, in furtherance of that effort, I tested Figma’s ability to employ simple tools for rendering complex imagery. My landscape (depicted above) received widespread positive feedback, and many people asked that I share my process.
It took some time to motivate myself to create an actual tutorial, but, after about 12 months, I’ve finally completed it. Here are my 10 shockingly simple steps for drawing this stunning landscape in Figma.
Have questions as you go? Ask me in the comments
Step 1—Draw the Sky and Pond
Create a wide frame (mine is 2728×1535), and add two rectangles to it: one that covers the top 45% (i.e., the sky) and one that covers the bottom 55% (i.e., the pond). Then apply the following gradients to each:
Gradient 1 (overall opacity: 85%)
- rgb(5,11,9,75%)
- rgb(20,43,93,100%)
- rgb(62,97,113,100%)
- rgb(217,135,60,90%)
- rgb(251,196,47,100%)
Gradient 2 (overall opacity: 100%)
- rgb(8,25,45,100%)
- rgb(45,83,112,100%)
- rgb(7,38,104,100%)

Step 2—Draw Rolling Hills
Use the pen tool to draw rolling hills in the foreground and background. Keep them black to resemble a silhouette. They don’t have to be drawn perfectly, since we’ll soon be covering them with grass and trees.
Step 3—Draw the Sun
Draw a wide oval and tilt it about 15°. Set its color to #FFFD32 with a 75px layer blur. Place it behind the background hills so that it aligns with the brightest point. This represents our setting sun.
Step 4—Draw the Forest
Have you ever watched Bob Ross paint? At first, his brush forms basic shapes and simple patterns. But in just a short moment, maybe after a blink, you’ll begin to see trees, or mountains, or clouds. Similarly here, you don’t need to draw every individual tree and blade of grass in the forest. You only need to draw a few representations that can be copied, pasted, resized, rotated, and flipped repeatedly along the hills. Although each individual tree is similar to the next, your eyes will, in fact, see the forest for the trees.
Step 6—Add the Forest’s Reflection
Create a reflection in the pond by duplicating the background trees and flipping them vertically. Drag them on top of the pond and set a 10px layer blur.
Step 7—Draw Clouds
With the pen tool, draw happy little clouds. To create dimension, darken clouds towards the back and lighten clouds towards the front. Then highlight the bottom edges of each cloud to mimic the setting sun’s reflection. From there, just plop it on top of the sky to see it come to life.

Step 8 — Draw Stars
Using the Ellipse Tool, draw a series of white, circles of various sizes. Make some large, some small, and most in between. Try to create a random scattering, then group all of the circles together, set the opacity to 25%, and place them on top of the sky (behind the trees). From here, copy the group, paste it, flip it, resize it and adjust its angle. Do this repeatedly until stars cover the skyline.

Step 9 — Add Smoke & Fog
For the heavy wisps of smoke floating upward, draw a new shape with the pen tool. The exact shape isn’t important so long as it has the general appearance of rising smoke. Use a linear gradient to fadeout the edges, then set its overall opacity to 40%. Its layer blur should also be set to 25px.
For the gentle fog throughout the night sky, duplicate one of the primary cloud layers and enlarge it by roughly 200%. Then set its opacity to 25% and its layer blur to 20px. It should be barely visible. After repeating this process several times and setting each cloud to different sizes, you should get a sense of a hazy summer night.
Step 10 — Draw People in a Canoe
Just one more step! I drew the side of the canoe first and used that to anchor the position of my other characters. I then duplicated the image, flipped it, set its opacity to 25%, and gave it a 2px layer blur. Place it anywhere on the pond that feels right to you.

That’s it—You did it!
Congratulations, you made it! By now you should be looking at this stunning landscape illustration done entirely in Figma:
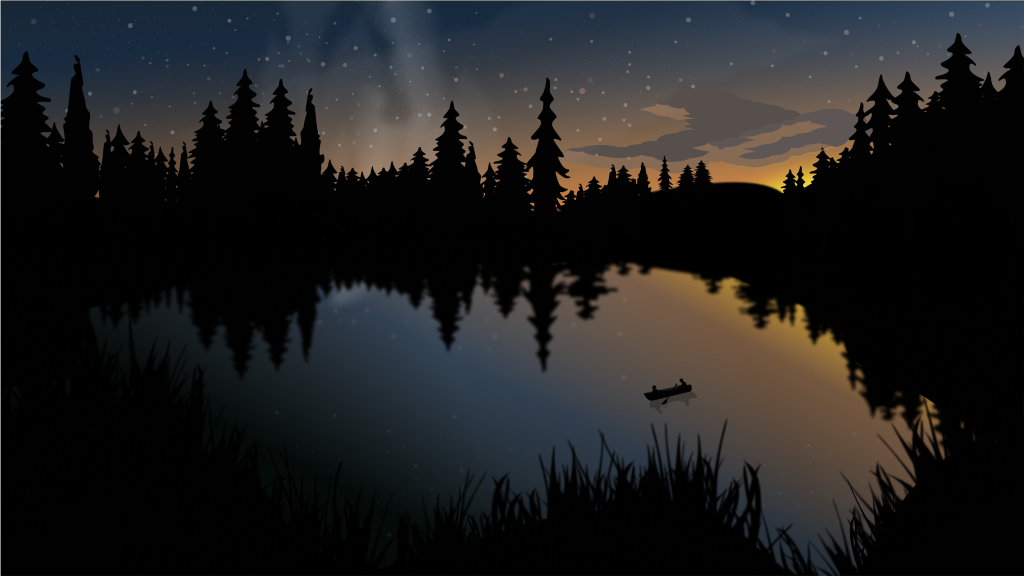
If you’re feeling experimental, play with the gradients to adjust the mood. Just look at this serene alternative I created:
What do you think? Did your illustration turn out like you expected? Do you prefer an alternative color theme? Based on this experience, do you think Figma can compete with graphic design powerhouses like Adobe?
Let me know in the comments!
Jeremy Abrams is a senior full stack designer with a background in human centered design, research, and development. He also has a demonstrated history of managing local and remote cross-functional teams. In a prior life, Jeremy acquired a JD from the Chicago-Kent College of Law and was admitted to the Illinois state bar in 2014.
![]()
Drawing a stunning landscape in Figma was originally published in UX Collective on Medium, where people are continuing the conversation by highlighting and responding to this story.