If you are running a Jamstack architecture, sometimes you will require additional functionality like sending transactional emails to your users. Sending emails requires a server, so you can make a simple serverless service with an endpoint that takes a few fields and sends off an email. It’s an excellent alternative that doesn’t require the maintenance of a server.
This tutorial will build a simple serverless service using AWS Lambda, the Serverless Framework, NodeMailer, and Mailtrap for email testing.
Pre-requisites
- Nodejs
- AWS account with IAM access
- Mailtrap Account
The Serverless Framework
“The Serverless Framework is a free and open-source web framework written using Node.js. Serverless is the first framework developed for building applications on AWS Lambda, a serverless computing platform provided by Amazon as a part of Amazon Web Services.” Wikipedia
AWS IAM User
AWS services such as Lambda require that you provide credentials when you access them. The service uses the credentials to determine if you have the proper access to the resources managed by the service. However, it is not recommended that you access any AWS service using the credentials for your AWS root account user. Instead, use AWS Identity and Access Management (IAM) to create an IAM user and add the user to an IAM group with specific permissions.
Creating an IAM user
If you do not already have an AWS account, visit https://portal.aws.amazon.com/billing/signup and follow the instructions there to create an account. There are 3 ways of creating an IAM user: AWS management console, the AWS CLI, and AWS API. For this post, we will show how to create an IAM user via the management console.
- Sign in to the AWS Management Console and open the IAM console at https://console.aws.amazon.com/iam/.
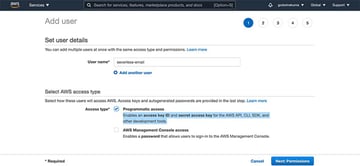
- Click on “Users” in the left sidebar and then click the “Add users” button.
- Input the name of the user. It will be the sign-in username.
- For access type, select the “programmatic access”. It enables an access key ID and secret access key for the AWS API, CLI, SDK, and other development tools, which we need for this post.


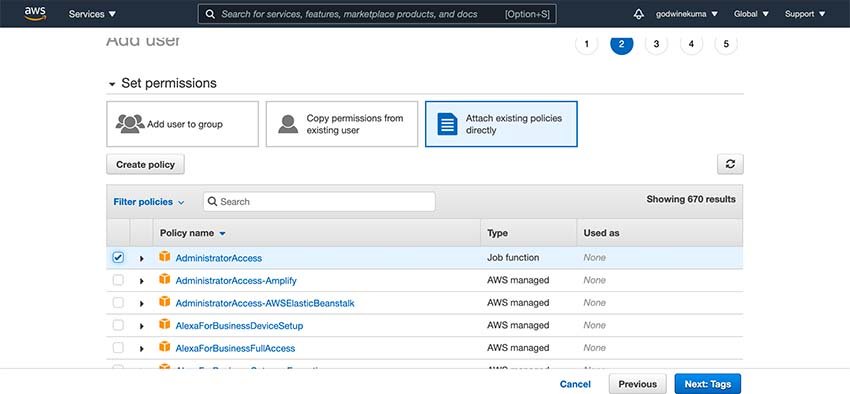
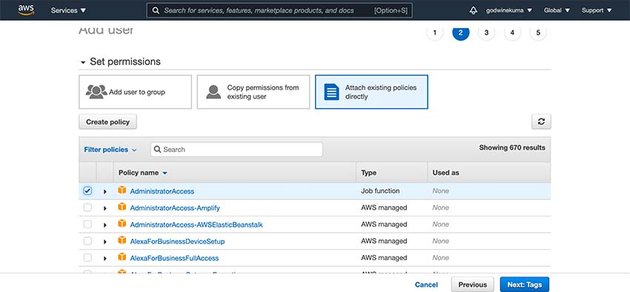
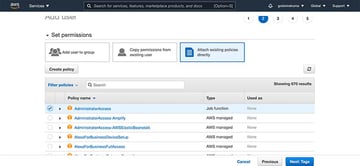
- Click on the “Next: Permissions” button and select “Attach existing policies directly”. In the list of existing policies, check or choose the “AdministratorAccess”. The AdministratorAccess policy is to give the Serverless framework the ability to do whatever it needs to do.
- Click on the “Next: Tags”. The tags are optional, and we do not need them for this post, so we can skip it and click on “Next: Review” to review your selections.


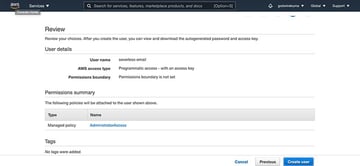
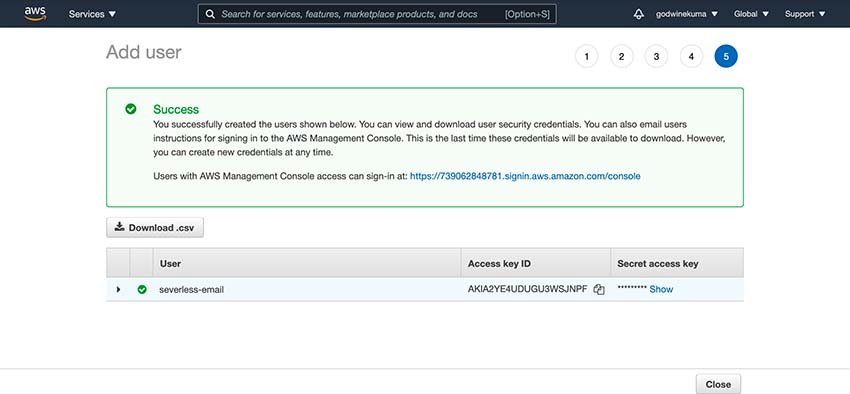
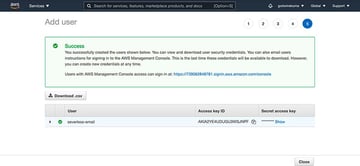
- Next, click on “Create User” and you will see a screen similar to the one below. Take note of the access key ID and secret access key as we will use them in setting up the serverless application.

Setting up Serverless
Now that we have an AWS IAM user, we need to install the Serverless framework and use the credentials we generate above to set it up. Open your terminal and run the command below.
$ npm install -g serverless
Once Serverless installation is completed, set up the credentials to work on the AWS account. To do this, type in the code below in your terminal, replacing the access key ID and Secret access key with the one generated from above. Save the credentials securely in LastPass or other alternatives as lost access may create you more problems in the future.
$ serverless config credentials --provider aws --key [Access key ID] --secret [Secret access key] --profile serverless-email
We have used AWS as a provider, but the Serverless framework supports several other AWS alternatives, feel free to check & compare them too.
Creating a New Serverless Project
This project will be deployed on AWS lambda, using an AWS starter template to bootstrap the project. Create or enter into your desired project directory in your terminal and run the Serverless CLI command below to generate a Serverless project.
serverless create --template aws-nodejs --path severless-email
The --path flag specifies the project folder. The project will be initialized in your current directory if the path flag is not provided.
The command generates two major files, the handler.js, and the serverless.yml files. The handler.js is a starter Lambda events handler, while the serverless.yml holds all the AWS lambda resource configurations. Notice the function “hello” in the list of functions in the serverless.yml file. The handler is set to “handler.hello”, which is the name of the handler file (handler.js) dot the name of the exported function in the file.
While configuring Serverless, we set up a profile and will use that profile to deploy our serverless project. So we need to modify the provider config in serverless.yml to include the profile.
service: severless-email

frameworkVersion: '2'
provider:
  name: aws
  runtime: nodejs12.x
  lambdaHashingVersion: 20201221
  profile: severless-email
functions:
  hello:
    handler: handler.hello
You can now invoke the hello function locally by running the command:
$ sls invoke local -f hello
If everything works well, you should see the output below:
{
    "statusCode": 200,
    "body": "{n  "message": "Go Serverless v1.0! Your function executed successfully!",n  "input": ""n}"
}
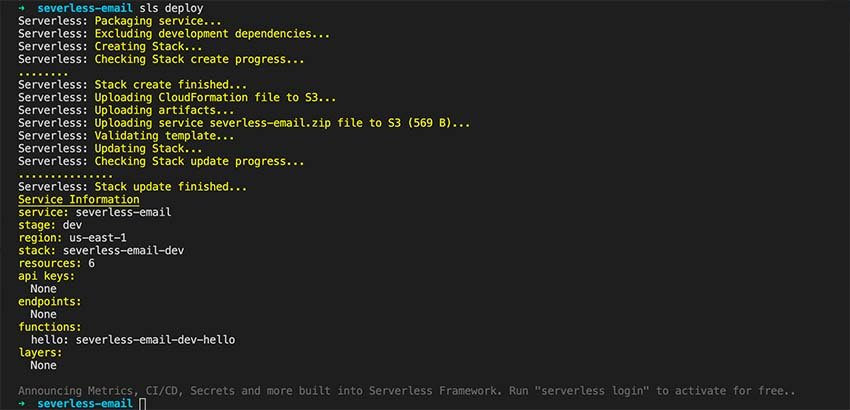
Run the command below to deploy the project to AWS Lambda:
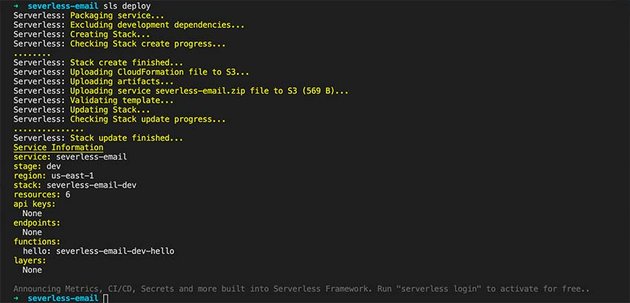
$ sls deploy
The command will create a serverless config file, which will make a cloud formation template, which will build all the resources associated with the project. If everything works fine, you will see an output similar to the one in the image below.

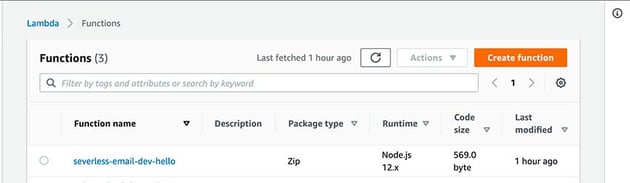
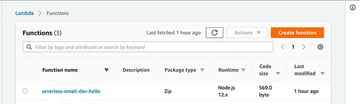
If you head over to the AWS Lambda console, you should see the newly deployed Lambda function.

Sending Emails on Lambda
We will use Nodemailer to send an email. It is an NPM package that supports SMTP and other email tools like AWS SES to stream emails.
“Nodemailer is a module for Node.js applications to allow easy as cake email sending. The project got started back in 2010 when there was no sane option to send email messages, today it is the solution most Node.js users turn to by default.” – Nodemailer Website
To install an external library on the serverless project, we need to initialize an NPM project to generate the package.json file for dependency management. In the terminal, run the command below.
$ npm init --yes
The --yes flag initializes an NPM project without the frequent questions when setting a new project. With the package.json file generated, let’s go ahead and install nodemailer.
$ npm install nodemailer
Create a new file, email.js, and add the code below into the file.
const nodemailer = require("nodemailer");
module.exports.send = async (event) => {
    let testAccount = await nodemailer.createTestAccount();
    let transporter = nodemailer.createTransport({
      host: "smtp.ethereal.email",
      port: 587,
      secure: false,
      auth: {
        user: testAccount.user,
        pass: testAccount.pass,
      },
    });

    let info = await transporter.sendMail({
      from: '"Fred Foo 👻" <[email protected]>',
      to: "[email protected], [email protected]",
      subject: "Hello ✔",
      text: "Hello world?",
      html: "<b>Hello world?</b>",
    });

  return {
    statusCode: 200,
    body: JSON.stringify(
      {
        message: 'Go Serverless v1.0! Your function executed successfully!',
        data: {
            input: event,
            messageId: info.messageId,
            previewURL: nodemailer.getTestMessageUrl(info)
        },
      },
      null,
      2
    ),
  };
};
The code above is a handler for sending Nodemailer emails. Now let’s configure a new function on the serverless.yml file. This function will listen to an AWS HTTP event and then trigger the email handler. Your serverless.yml file should now look like the one below.
service: serverless-email

frameworkVersion: '2'
provider:
  name: aws
  runtime: nodejs12.x
  lambdaHashingVersion: 20201221
  profile: serverless-email
functions:
  hello:
    handler: handler.hello

   email:
    handler: email.sendEmail
    events:
      - https:
          path: send-email
          method: POST
          cors: true
Deploy the code again by running
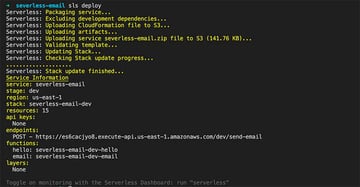
$ sls deploy
If the deployment is successful, you will see an output similar to the one below. Notice the endpoints. Because we added an HTTP even parameter to our function, it generated a new endpoint with the given path.


Copy the endpoint and use it to make a POST request on the postman.
Email Testing With Mailtrap
Email testing is essential because it helps you view and identify errors in your emails before sending them to your customers. Simple things like broken images and browser compatibility could impact the experience of your customers. The only way to ensure that your users don’t get to find out about such issues is by testing the emails before sending them to your customers.
To test emails sent with Nodemailer, we will use Mailtrap, an online email sandbox service that captures SMTP server traffic from staging and dev environments. It allows you to automate your test flows with a flexible API, analyze content for spam score and email deliverability, and validate HTML/CSS. People also explore PHP contact form to manage their business emails via managed servers, so that they don’t have to deal with the server management hassles
Create a free account, go to the SMTP settings tab in your Inbox, copy the Node.js – Nodemailer transporter config, and use it to replace the transporter in email.js.
const nodemailer = require("nodemailer");
module.exports.sendEmail = async (event) => {

    let transporter = nodemailer.createTransport({
      host: "smtp.mailtrap.io",
      port: 2525,
      auth: {
        user: "YOUR Mailtrap User ID",
        pass: "YOUR Mailtrap Password"
      }
    });

    let info = await transporter.sendMail({
      from: '"Fred Foo 👻" <[email protected]>',
      to: "[email protected], [email protected]",
      subject: "Hello ✔",
      text: "Hello world?",
      html: "<b>Hello world?</b>",
    });

  return {
    statusCode: 200,
    body: JSON.stringify(
      {
        message: 'Go Serverless v1.0! Your function executed successfully!',
        data: {
            messageId: info.messageId,
            previewURL: nodemailer.getTestMessageUrl(info)
        },
      },
      null,
      2
    ),
  };
};
Deploy again and call the email API via post, then test again on Postman. If everything goes well, you should get a response like the one in the image below.
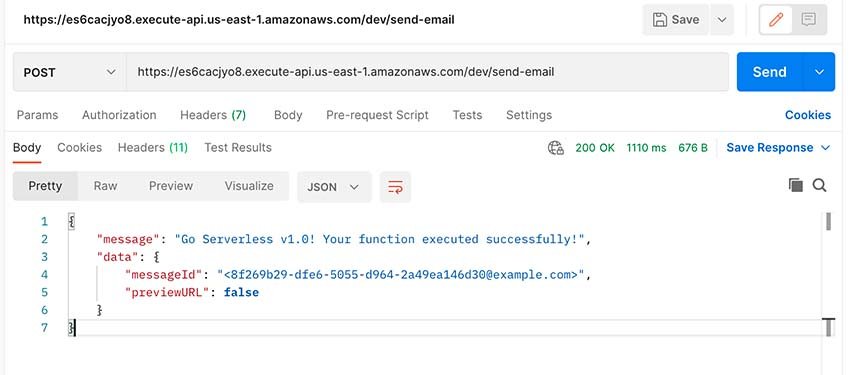


Now head over to your Mailtrap Inbox. You should be able to see the new email. Go through each tab (HTML, HTML Source, Text, Raw, Spam Analysis, HTML Check, Tech Info) and confirm that everything looks good. Otherwise, implement the suggestions to improve your email. Also, check out the responsiveness tabs to ensure compatibility with various devices.
Conclusion
We have seen how to use the Serverless framework, AWS Lambda, sending emails with Nodemailer and Mailtrap to send and test emails. However, we have only shown a few of what each of these tools and technologies can do, be sure to check out each of them to learn more about them.
We hope this tutorial will help you solve the question with serverless emails and you’ll don’t need to outsource it now.
Till next time!
