Mobile applications need a back-end server in order to perform tasks such as authenticating users and synchronizing user data across multiple devices. Creating such a server, however, requires a skill set that most independent app developers lack. Fortunately, there are several back-end as a service platforms, often called BaaS, you can use today. Google’s Firebase is one such platform.
Firebase offers essential services such as analytics, crash reporting, user authentication, and cloud messaging at no cost. Its freemium services include a real-time NoSQL database, file hosting, and static website hosting.
In this tutorial, I’ll show you how to add user authentication, analytics, and remote data storage to your Android app using Firebase.
Prerequisites
To follow along, you’ll need:
1. Using Firebase Analytics
Firebase Analytics is one of the most popular mobile app analytics solutions available today. By using it, you can get a precise understanding of who your users are and how they are using your app.
Step 1: Set Up Firebase Analytics
The latest canary builds of Android Studio have built-in support for Firebase Analytics. That means you can add Firebase Analytics to your project without ever having to leave Android Studio.
To start integrating Firebase Analytics with your project, click on Tools > Firebase. You will be presented with the following Assistant window:
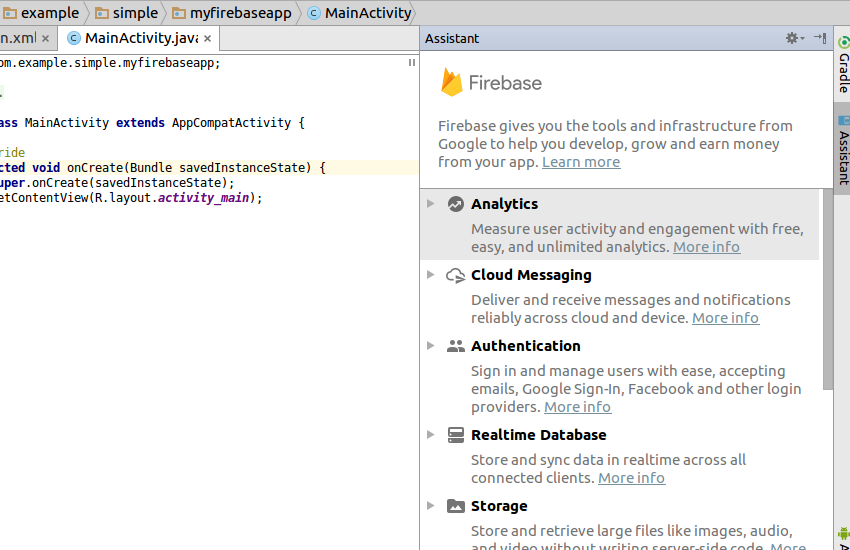
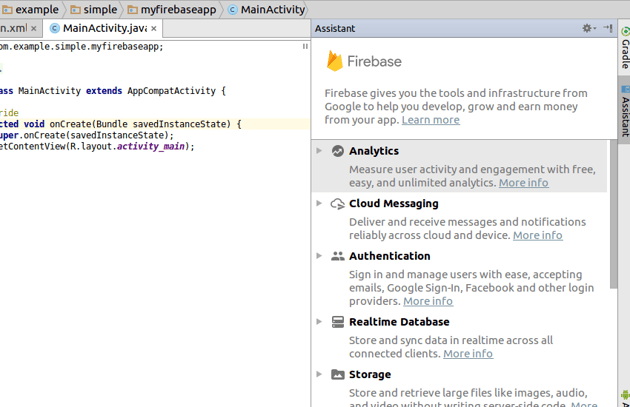
Click on Analytics and then Log an Analytics event.
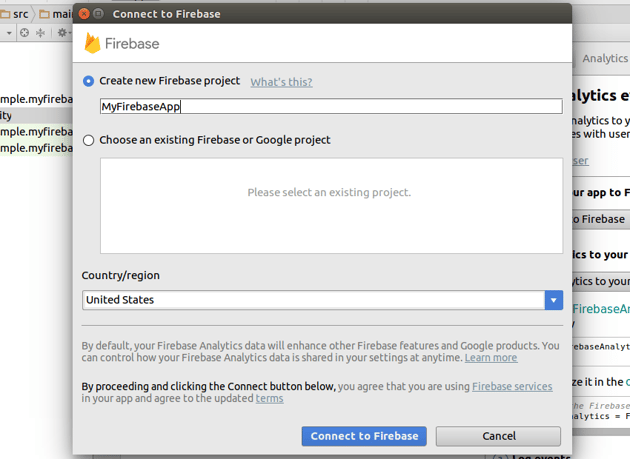
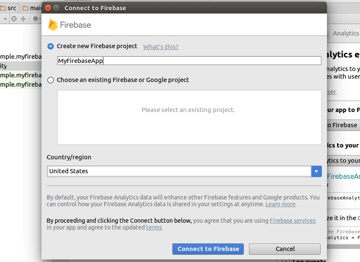
You must now associate your Android Studio project with a Firebase project. Therefore, click on the Connect to Firebase button.
In the dialog that pops up, you will be able to see all your existing Firebase projects. You can either pick one of them or choose to create a new project. For now, I suggest that you choose the Create new Firebase project option, and give a unique name to the project.

Once you press the Connect to Firebase button that’s inside the dialog, Android Studio will automatically make all the required configuration changes, such as generating a google-services.json file and uploading a SHA1 fingerprint.
You can now press the Add Analytics to your app button to add the Firebase plugin and the Firebase Core dependency to your project. Android Studio will show you the exact changes that will be made to the build.gradle files.


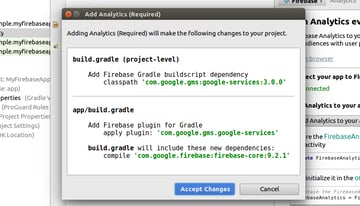
Press Accept Changes to complete the configuration.
Step 2: Generate Analytics Events
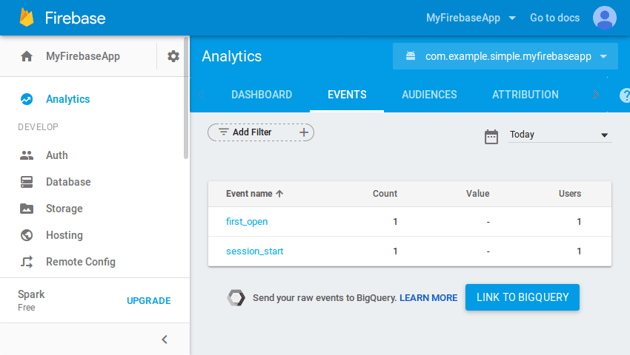
After you’ve configured Firebase Analytics for your app, you don’t have to write any additional code if you are satisfied with just the automatically generated analytics events, such as the user opening your app for the first time, using it for more than 10 seconds, making an in-app purchase, or uninstalling the app. Therefore, you can run your app now—on an emulator or a real device—and within the next 24 hours, you will be able to see analytics logs in the Firebase console.


If you want to analyze your users’ behaviors more closely, you can generate custom analytics events manually using the logEvent() method of the FirebaseAnalytics class. The method expects two parameters: a string specifying the name of the custom event, and a Bundle containing details about the event in the form of key-value pairs.
For example, if you want to generate an event called my_custom_event every time a user clicks on a specific button, you will have to add the following code to the button’s click handler:
1 |
// Create an instance of FirebaseAnalytics
|
2 |
FirebaseAnalytics fa = FirebaseAnalytics.getInstance(this); |
3 |
|
4 |
// Create a Bundle containing information about
|
5 |
// the analytics event
|
6 |
Bundle eventDetails = new Bundle(); |
7 |
eventDetails.putString("my_message", "Clicked that special button"); |
8 |
|
9 |
// Log the event
|
10 |
fa.logEvent("my_custom_event", eventDetails); |
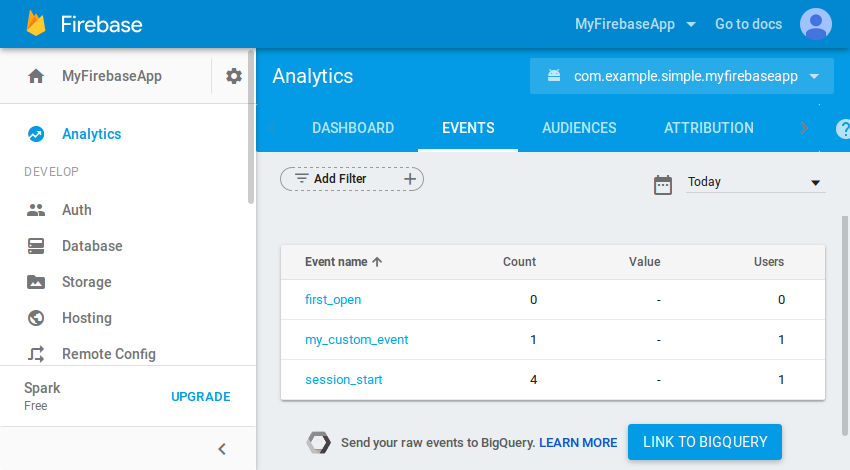
For the most part, custom events are indistinguishable from the automatically collected events in the Firebase console.


Note that event names are case-sensitive. Therefore, it’s a good idea to define all your event names as constant strings. Alternatively, you could use predefined event name constants that are available in the FirebaseAnalytics.Event class.
2. Using Firebase Auth
User authentication is an important requirement for most Android apps today. By being able to securely authenticate your users—and thus uniquely identify them—you can offer a customized experience to them based on their interests and preferences. You can also make sure that they have no problems accessing their private data while using your app from multiple devices.
Firebase Auth allows you to authenticate your users using a variety of sign-in mechanisms. In this tutorial, I’ll show you how to allow your users to sign in to your app using their email addresses and passwords.
Step 1: Configure Your Project
To be able to use Firebase Auth in your Android Studio project, you must add the following compile dependency to the app module’s build.gradle file.
1 |
compile 'com.google.firebase:firebase-auth:9.4.0' |
Step 2: Enable Password-Based Authentication
By default, Firebase doesn’t allow user authentication. Therefore, you must manually enable password-based user authentication in the Firebase console. To do so, navigate to the Auth section, and press the Set up sign-in method button. You’ll now see a list of all the sign-in providers available.

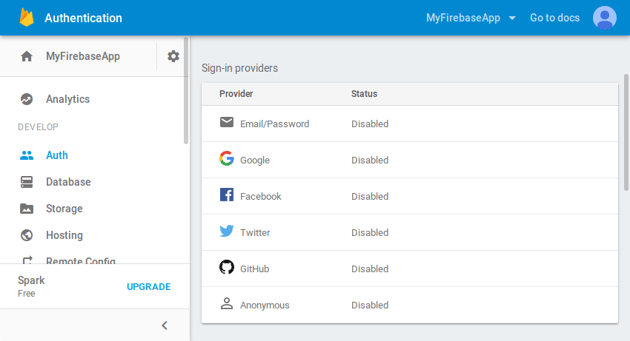

Choose Email/Password, enable it, and press Save.
Step 3: Support User Registration
With password-based authentication, new users must register themselves by providing a unique email address and a password. To add this functionality to your app, you can use the createUserWithEmailAndPassword() method of the FirebaseAuth class. As its name suggests, the method expects an email address and a password as its arguments.
To be able to determine the result of the createUserWithEmailAndPassword() method, you must add an OnCompleteListener to it using the addOnCompleteListener() method. The following code snippet shows you how to register a new user and also tell if the registration process completed successfully:
1 |
FirebaseAuth.getInstance() |
2 |
.createUserWithEmailAndPassword(emailAddress, password) |
3 |
.addOnCompleteListener(new OnCompleteListener<AuthResult>() { |
4 |
@Override
|
5 |
public void onComplete(@NonNull Task<AuthResult> task) { |
6 |
if(task.isSuccessful()) { |
7 |
// User registered successfully
|
8 |
}
|
9 |
}
|
10 |
});
|
Note that it is your responsibility to validate email addresses and make sure that the users use strong passwords.
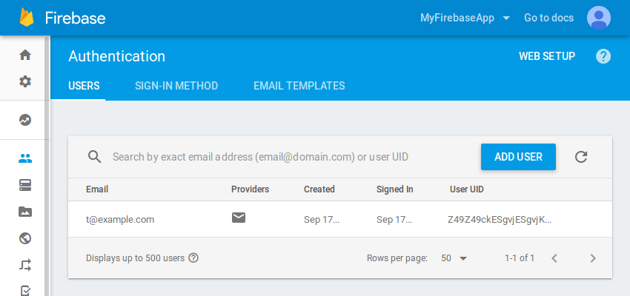
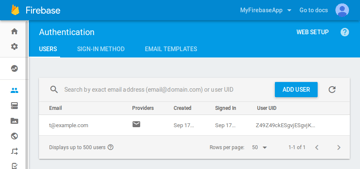
You can take a look at the email addresses of all the successfully registered users in the Users tab of Firebase console’s Auth section.

Step 4: Support User Sign-In
After a successful registration, the user is automatically signed in. The user will continue to stay signed in even if your app restarts. Nevertheless, your app must include code that allows users to manually sign in using the email address and password they specified during the registration process.
To sign a user in manually, you must use the signInWithEmailAndPassword() method of the FirebaseAuth class. The method expects an email address and a password as its only arguments, and returns a Task<AuthResult> object. By adding an OnCompleteListener to it, you can check if the sign-in was completed successfully.
In order to avoid signing in a user who’s already signed in, you must call the signInWithEmailAndPassword() method only if the current FirebaseUser is null.
The following code snippet shows you how to sign a user in:
1 |
FirebaseAuth auth = FirebaseAuth.getInstance(); |
2 |
if (auth.getCurrentUser() != null) { |
3 |
// Already signed in
|
4 |
// Do nothing
|
5 |
} else { |
6 |
auth.signInWithEmailAndPassword(emailAddress, password) |
7 |
.addOnCompleteListener(new OnCompleteListener<AuthResult>() { |
8 |
@Override
|
9 |
public void onComplete(@NonNull Task<AuthResult> task) { |
10 |
if (task.isSuccessful()) { |
11 |
// User signed in successfully
|
12 |
}
|
13 |
}
|
14 |
});
|
15 |
}
|
Step 5: Support User Sign-Out
To sign a user out, you can simply call the signOut() method of the FirebaseAuth class.
1 |
FirebaseAuth.getInstance().signOut(); |
3. Using Firebase’s Real-Time Database
One of the most powerful features of the Firebase platform is its real-time database, and it’s named that for a good reason: all write operations performed on it are instantly available to all the clients that are observing it. With such a database, you can create applications that allow users to seamlessly switch from one device to another, and also instantly collaborate with other users.
Step 1: Configure Your Project
Before you use the real-time database, you’ll have to add the following compile dependency to your app module’s build.gradle file:
1 |
compile 'com.google.firebase:firebase-database:9.4.0' |
Step 2: Write Data
You can think of the real-time database as a JSON object. That means you can add key-value pairs to it, where the keys are always strings, and the values are either primitives, arrays, or other JSON objects.
Before you write to the real-time database, you must get a reference to it using the getInstance() method of the FirebaseDatabase class. You can then get a reference to any path inside the database using the getReference() method. The path can contain either a single key or several keys arranged hierarchically.
Once you have a DatabaseReference to a path, you can set its value using the setValue() method.
The following code snippet shows you how to add a simple key-value pair to the database:
1 |
FirebaseDatabase db = FirebaseDatabase.getInstance(); |
2 |
DatabaseReference ref = db.getReference("message"); // Key |
3 |
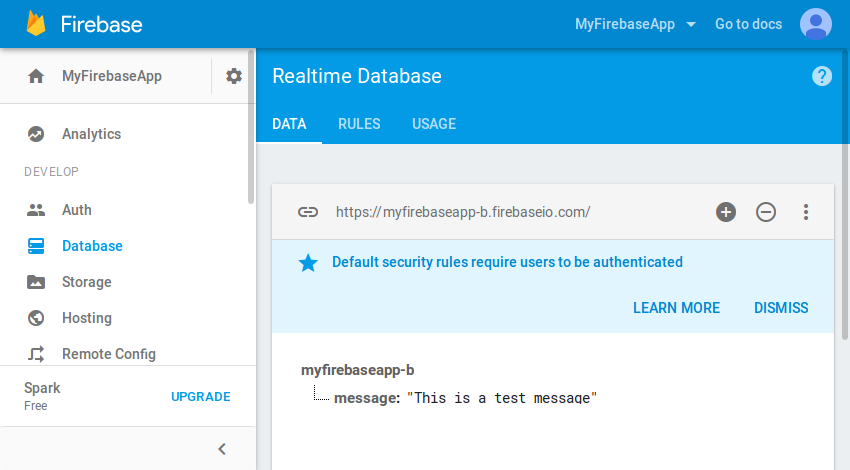
ref.setValue("This is a test message"); // Value |
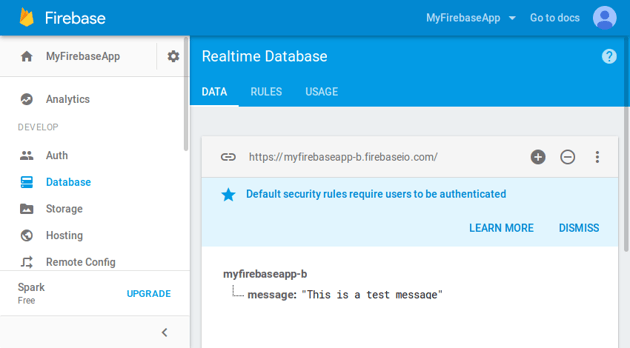
By going to the Database section of the Firebase console, you can view all the data that’s inside the real-time database.
Step 3: Read Data
In order to read a value from the real-time database, you must attach an asynchronous observer to the associated key or path. More precisely, you must attach a ValueEventListener to a DatabaseReference object using the addValueEventListener() method.
The onDataChange() method of the ValueEventListener gives you access to a DataSnapshot object, whose getValue() method can be used to retrieve the latest value of the key.
For example, here’s how you can retrieve the value we set in the previous step:
1 |
FirebaseDatabase db = FirebaseDatabase.getInstance(); |
2 |
DatabaseReference ref = db.getReference("message"); // Key |
3 |
|
4 |
// Attach listener
|
5 |
ref.addValueEventListener(new ValueEventListener() { |
6 |
@Override
|
7 |
public void onDataChange(DataSnapshot dataSnapshot) { |
8 |
// Retrieve latest value
|
9 |
String message = dataSnapshot.getValue(String.class); |
10 |
}
|
11 |
|
12 |
@Override
|
13 |
public void onCancelled(DatabaseError databaseError) { |
14 |
// Error handling
|
15 |
}
|
16 |
});
|
Note that once a ValueEventListener is added, its onDataChange() method is triggered every time the value it is observing changes.
Conclusion
The Firebase platform obviates the need for a back-end server and lets you focus on building better apps. In this tutorial, you learned how to use it to add analytics, user authentication, and real-time cloud data storage to your Android app.
To learn more about Firebase, you can refer to its official documentation. You can also check out our tutorial on using Firebase Crash Reporting in Android: