In the first two tutorials in this series, we have built custom pages for logging in and registering a new user. Now, there is only one part in the login flow left to explore and replace: what happens if a user forgets their password and wants to reset their WordPress password?
In this tutorial, we’ll tackle that last step and complete the Personalize Login plugin we’ve been building throughout the series.
The password reset functionality in WordPress follows what has become more or less the standard approach on today’s websites:
- A user initiates the reset by entering their user name or email address and requesting a WordPress reset password.
- A temporary password reset token is created and stored in the user data. A link containing this token is sent to the user’s email address.
- The user clicks on the link.
- On the reset password page, the token is verified, and if it matches the user’s data, they get to pick a new password.
Just like login and new user registration, this functionality is handled through wp-login.php. So the overall idea of how we’ll customize this flow will by now be mostly familiar from previous tutorials.
If you haven’t read the first two tutorials yet, it’s best to start from Part 1 and go through the series in order. You can follow the tutorial while writing the code yourself or download the full source code from the linked GitHub repository.
Now, let’s get started by replacing the first screen in the flow.
Initiate the WordPress Reset Password
A reset WP password begins when a user arrives at your login page but doesn’t remember which password they used for this site.
For this, we placed a Forgot password? message template link at the bottom of the Sign In form in the first part of the series. By default, on WordPress powered sites, this link points to wp-login.php?action=lostpassword, a page that looks like this:


To replace this page with a custom one, we will create a function to redirect the user to our custom page and hook that function to a WordPress action.
In this case, we have two options to choose from: we can use the action lost_password, which is called right before the page is rendered, or the action we have been using in previous tutorials: login_form_{action}, this time, login_form_lostpassword.
We could go both ways, but to limit the amount of unnecessary code being executed, let’s choose the latter option.
But first, let’s create our new WordPress custom password reset page:
Step 1: Create a Reset Password Page
As you remember, in Part 1, we created a function for creating WordPress pages at plugin activation, using the plugin_activated callback function.
In this function, add the new page’s definition at the end of the $page_definitions array. In the WordPress password reset flow, we’ll also need a second page for choosing the new password. So, to save time, let’s also add this second page now.
Here’s the entire array for clarity (with the two last page definitions added):
// Information needed for creating the plugin's pages
$page_definitions = array(
    'member-login' => array(
        'title' => __( 'Sign In', 'personalize-login' ),
        'content' => '[custom-login-form]'
    ),
    'member-account' => array(
        'title' => __( 'Your Account', 'personalize-login' ),
        'content' => '[account-info]'
    ),
    'member-register' => array(
        'title' => __( 'Register', 'personalize-login' ),
        'content' => '[custom-register-form]'
    ),
    'member-password-lost' => array(
        'title' => __( 'Forgot Your Password?', 'personalize-login' ),
        'content' => '[custom-password-lost-form]'
    ),
    'member-password-reset' => array(
        'title' => __( 'Pick a New Password', 'personalize-login' ),
        'content' => '[custom-password-reset-form]'
    )
);
The plugin activation callback is only called when the plugin is explicitly activated, so to create these new pages, you’ll have to deactivate the plugin and then activate it again.
Now, with the pages created, we can redirect the user to member-password-lost instead of wp-login?action=lostpassword.
Step 2: Redirect the User to the Custom Page
As I mentioned above, we’ll use the action login_form_{action}, or login_form_lostpassword to cut in before wp-login.php gets a chance to render the default version of the “Lost your password?” screen.
In the plugin’s constructor, add the following line:
add_action( 'login_form_lostpassword', array( $this, 'redirect_to_custom_lostpassword' ) );
Then, create the function redirect_to_custom_lostpassword.
This function will check for the request method: for now, we’ll only act on requests sent using the GET method as those are the ones meant for displaying the screen. We’ll take a look at what happens at POST in a little while.
/**
 * Redirects the user to the custom "Forgot your password?" page instead of
 * wp-login.php?action=lostpassword.
 */
public function redirect_to_custom_lostpassword() {
    if ( 'GET' == $_SERVER['REQUEST_METHOD'] ) {
        if ( is_user_logged_in() ) {
            $this->redirect_logged_in_user();
            exit;
        }

        wp_redirect( home_url( 'member-password-lost' ) );
        exit;
    }
}
The function is actually the same as the one we used for redirecting the user to our custom registration page in the previous tutorial, with just the redirect replaced with the page slug of the new page we created above (a good place for some refactoring in the future, maybe?).
Now, if you click on Forgot your WordPress password? on the login page, you’ll be redirected to a WordPress custom password reset page. Next, let’s create a shortcode to add the WordPress password form for initiating the password reset.
Step 3: Create a Shortcode for WordPress Change Password Form
When creating the page for initiating the WordPress password reset, we added the shortcode, [custom-lost-password-form] to its body. Now, to replace the shortcode with a form, let’s create a shortcode handler.
In the plugin’s constructor, add the following line:
add_shortcode( 'custom-password-lost-form', array( $this, 'render_password_lost_form' ) );
Then, create the function for rendering the form:
/**
 * A shortcode for rendering the form used to initiate the password reset.
 *
 * @param  array   $attributes  Shortcode attributes.
 * @param  string  $content     The text content for shortcode. Not used.
 *
 * @return string  The shortcode output
 */
public function render_password_lost_form( $attributes, $content = null ) {
    // Parse shortcode attributes
    $default_attributes = array( 'show_title' => false );
    $attributes = shortcode_atts( $default_attributes, $attributes );

    if ( is_user_logged_in() ) {
        return __( 'You are already signed in.', 'personalize-login' );
    } else {
        return $this->get_template_html( 'password_lost_form', $attributes );
    }
}
By now, most of this function is already familiar to you: First we parse the shortcode parameters (show_title is used to decide whether a title should be rendered before the form for initiating the password reset). Then, if the user isn’t logged in, the function renders a template containing the WordPress forgot password form.
Let’s add that template now. In the templates directory, create a new file, naming it password_lost_form.php. Then, add the following code to that template:
<div id="password-lost-form" class="widecolumn">
    <?php if ( $attributes['show_title'] ) : ?>
        <h3><?php _e( 'Forgot Your Password?', 'personalize-login' ); ?></h3>
    <?php endif; ?>

    <p>
        <?php
            _e(
                "Enter your email address and we'll send you a link you can use to pick a new password.",
                'personalize_login'
            );
        ?>
    </p>

    <form id="lostpasswordform" action="<?php echo wp_lostpassword_url(); ?>" method="post">
        <p class="form-row">
            <label for="user_login"><?php _e( 'Email', 'personalize-login' ); ?>
            <input type="text" name="user_login" id="user_login">
        </p>

        <p class="lostpassword-submit">
            <input type="submit" name="submit" class="lostpassword-button"
                   value="<?php _e( 'Reset Password', 'personalize-login' ); ?>"/>
        </p>
    </form>
</div>
The template begins by showing a title if the show_title attribute is set to true (lines 2-4).
This is followed by some instructions on lines 6-13 and the actual form. As you’ll see on line 15, the form will be posted to the URL returned by the WordPress function wp_lostpassword_url, the same URL that we saw above when we redirected the user to our custom page.
This form contains just one text field, user_login (line 18). In this field, the default WordPress reset password functionality accepts either the user’s user name or email. As we are using email as the user name, they are both the same, so we’ll ask for just the email in the field’s label (line 17).
With this template added, when you go click on the Forgot Your Password? message template link on the login page, you’ll see a page that looks like this (If using a WordPress default theme like Twenty Fifteen)

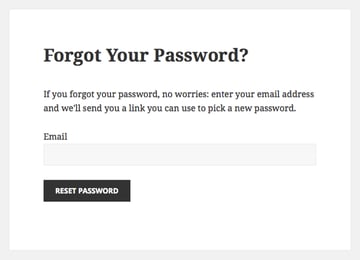
Step 4: Handle the WordPress Account Recovery Form Submit
Now that we have created the WordPress password form, it’s time to look at what happens when the user submits it.
In order for us to do proper error handling without resorting to hacks, we’ll need to code some of the functionality ourselves—using helper functions from wp-login.php as much as possible, naturally.
To do this, we’ll add a new function to handle the POST requests in thelogin_form_lostpassword action.
This function will use the retrieve_password function defined in wp-login.php to look up the user and initiate the password update procedure. Then, depending on whether there were errors or not, the function redirects the user to the correct page: in case of errors, back to the Forgot Your Password? message template page and when successful, to the login page.
In the constructor, add the following line:
add_action( 'login_form_lostpassword', array( $this, 'do_password_lost' ) );
Then, create the function:
/**
 * Initiates password reset.
 */
public function do_password_lost() {
    if ( 'POST' == $_SERVER['REQUEST_METHOD'] ) {
        $errors = retrieve_password();
        if ( is_wp_error( $errors ) ) {
            // Errors found
            $redirect_url = home_url( 'member-password-lost' );
            $redirect_url = add_query_arg( 'errors', join( ',', $errors->get_error_codes() ), $redirect_url );
        } else {
            // Email sent
            $redirect_url = home_url( 'member-login' );
            $redirect_url = add_query_arg( 'checkemail', 'confirm', $redirect_url );
        }

        wp_redirect( $redirect_url );
        exit;
    }
}
The function begins by checking the request method (on line 5). As we’re interested in the case when the password lost form is submitted, this function only jumps in when it finds a POST request. The GET requests are already handled by the function redirect_to_custom_lostpassword we created earlier.
Then, on line 6, we call the WordPress function retrieve_password. The function’s name is a bit misleading: the function doesn’t really retrieve the password but instead checks the data from the form and then prepares the user’s account for WordPress password reset by creating the reset WP password token and emailing it to the user.
If there are errors (line 7), we redirect the user back to the page member-password-lost, with the error codes passed as a request parameter (lines 8-10, with the actual redirect done on line 17).
If all goes well, the user is redirected to the login page with the request parameter checkemail set (lines 12-14) so that we can show a message to the user.
Now, if you submit the WordPress password form, everything should work alright. But to make the user experience complete, we’ll need to go back to the shortcodes rendering the password lost and login forms and show the errors and success notifications.
Let’s start from the positive, and add the success message.
In the shortcode function, render_login_form, add the following lines somewhere before the get_template_html call:
// Check if the user just requested a new password
$attributes['lost_password_sent'] = isset( $_REQUEST['checkemail'] ) && $_REQUEST['checkemail'] == 'confirm';
In the form template, add a message, using the attribute from above:
<?php if ( $attributes['lost_password_sent'] ) : ?>
    <p class="login-info">
        <?php _e( 'Check your email for a link to reset your password.', 'personalize-login' ); ?>
    </p>
<?php endif; ?>
Now, after successfully initiating a password reset the Sign In form should look like this:
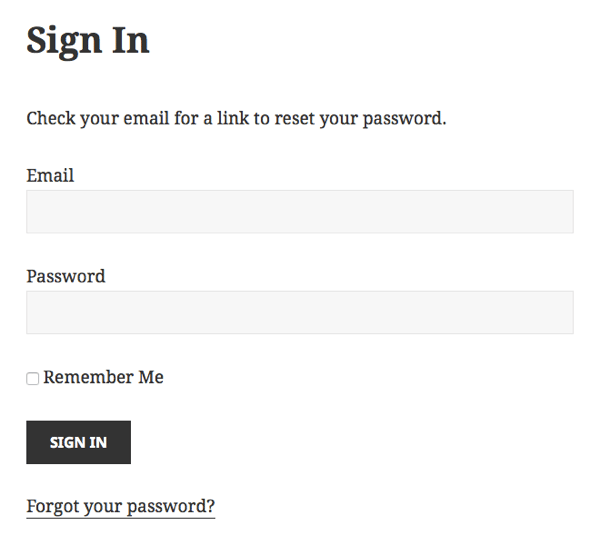
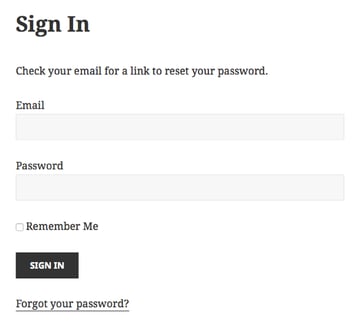
To display errors, we’ll go back to the lost WordPress change password form.
First, in the shortcode handler, render_password_lost_form, right before rendering the template, add the following lines to go through the error codes and collect matching error messages in the array $attributes['errors']:
// Retrieve possible errors from request parameters
$attributes['errors'] = array();
if ( isset( $_REQUEST['errors'] ) ) {
    $error_codes = explode( ',', $_REQUEST['errors'] );

    foreach ( $error_codes as $error_code ) {
        $attributes['errors'] []= $this->get_error_message( $error_code );
    }
}
Then, in the template, we’ll render the errors:
<?php if ( count( $attributes['errors'] ) > 0 ) : ?>
    <?php foreach ( $attributes['errors'] as $error ) : ?>
        <p>
            <?php echo $error; ?>
        </p>
    <?php endforeach; ?>
<?php endif; ?>
Finally, add the error messages to our function get_error_messages:
// Lost password

case 'empty_username':
    return __( 'You need to enter your email address to continue.', 'personalize-login' );

case 'invalid_email':
case 'invalidcombo':
    return __( 'There are no users registered with this email address.', 'personalize-login' );
Next, to complete the first step in the password reset flow, let’s take a look at how we can customize the email that is sent to the user.
Step 5: Customize the WordPress Change Password Email
As we saw earlier, when the request for a reset WP password is sent, in the function retrieve_password, a WordPress change password email is sent, containing quick instructions on what to do and a link that can be used to finish the password reset.
The message is short and to the point. It does what it’s supposed to do, but you might want to customize it to give it a personal touch and maybe make it a little more descriptive.
The default text is hard coded in wp-login.php, but before sending the message, WordPress gives plugin developers a chance to replace it using two filters.
First, to replace the message body, you can use the filter retrieve_password_message. Let’s do that now.
In the plugin’s constructor, add the following line:
add_filter( 'retrieve_password_message', array( $this, 'replace_retrieve_password_message' ), 10, 4 );
Then, create the function, replace_retrieve_password_message:
/**
 * Returns the message body for the password reset mail.
 * Called through the retrieve_password_message filter.
 *
 * @param string  $message    Default mail message.
 * @param string  $key        The activation key.
 * @param string  $user_login The username for the user.
 * @param WP_User $user_data  WP_User object.
 *
 * @return string   The mail message to send.
 */
public function replace_retrieve_password_message( $message, $key, $user_login, $user_data ) {
    // Create new message
    $msg  = __( 'Hello!', 'personalize-login' ) . "rnrn";
    $msg .= sprintf( __( 'You asked us to reset your password for your account using the email address %s.', 'personalize-login' ), $user_login ) . "rnrn";
    $msg .= __( "If this was a mistake, or you didn't ask for a password reset, just ignore this email and nothing will happen.", 'personalize-login' ) . "rnrn";
    $msg .= __( 'To reset your password, visit the following address:', 'personalize-login' ) . "rnrn";
    $msg .= site_url( "wp-login.php?action=rp&key=$key&login=" . rawurlencode( $user_login ), 'login' ) . "rnrn";
    $msg .= __( 'Thanks!', 'personalize-login' ) . "rn";

    return $msg;
}
The function receives four parameters:
-
$messageis the default version of the message to be sent to the user. We’ll ignore this parameter and create our own text from scratch. -
$keyis the token used to verify the user’s password reset request. It needs to be included in the password reset link. -
$user_loginis the user’s user name (in our case, email address), also needed in the password reset link. -
$user_datacontains some data about the user. We’ll ignore this for now, but you can explore it further in your own customization if you like.
Most of the function is just creating a message as a series of strings concatenations. The URL for completing the password reset is created on line 18.
For a more complete customization, one idea would be to add a settings field for editing the content of the password retrieval message and use that instead of coding the message inside the function this way.
If you like, you can use the filter retrieve_password_title to replace the email message title the same way. The filter function takes one parameter, the default title to be sent to the user, and should return the new title.
Still one other way to further customize the is to replace the entire message and send an HTML message instead, for example using the method I explained in an earlier tutorial about using Mandrill to send email messages from WordPress. In this case, I would use the Mandrill API to send the message in the filter function above and return false so that WordPress wouldn’t try sending the email again.
You have now completed the first step in the WordPress password reset procedure: the user can ask to reset the WP password and the process is initiated by WordPress.
Next, we’ll look at what happens when the user clicks on the link in the WordPress change password email.
Do a WordPress Password Reset
As we saw above, after initiating a WordPress reset password, the user is redirected back to the login page, with instructions to check their email.
In that WordPress change password email, there is a link back to wp-login.php with the parameters login and key for identifying the user and verifying the WordPress password reset request. When the user clicks on the link, WordPress verifies the user and the key for validity, and then if all is good, lets the user set a new password.
The functionality works well, and we’ll use parts of it, calling existing helper functions in wp-login.php, but again, because of how the actions and filters are organized in the WordPress password reset code, we’ll have to rewrite some of the code to be able to complete the customization.
Step 1: Redirect the User to Your WordPress Custom Password Reset Page
First, we’ll start by redirecting the user to our own WordPress custom password reset page (which we created at the beginning of this tutorial).
By now, this is probably familiar to you: In the same way we did in the login and register actions as well as the first page in the reset WP password flow, we’ll use the action login_form_{action} to divert the password reset action to our own custom functions before WordPress gets to do anything.
There are two wp-login.php actions that are used for the same functionality, rp and resetpass, so we’ll need to redirect them both to the same function, redirect_to_custom_password_reset.
In the plugin’s constructor, add the following lines:
add_action( 'login_form_rp', array( $this, 'redirect_to_custom_password_reset' ) );
add_action( 'login_form_resetpass', array( $this, 'redirect_to_custom_password_reset' ) );
Then, create the function:
/**
 * Redirects to the custom password reset page, or the login page
 * if there are errors.
 */
public function redirect_to_custom_password_reset() {
    if ( 'GET' == $_SERVER['REQUEST_METHOD'] ) {
        // Verify key / login combo
        $user = check_password_reset_key( $_REQUEST['key'], $_REQUEST['login'] );
        if ( ! $user || is_wp_error( $user ) ) {
            if ( $user && $user->get_error_code() === 'expired_key' ) {
                wp_redirect( home_url( 'member-login?login=expiredkey' ) );
            } else {
                wp_redirect( home_url( 'member-login?login=invalidkey' ) );
            }
            exit;
        }

        $redirect_url = home_url( 'member-password-reset' );
        $redirect_url = add_query_arg( 'login', esc_attr( $_REQUEST['login'] ), $redirect_url );
        $redirect_url = add_query_arg( 'key', esc_attr( $_REQUEST['key'] ), $redirect_url );

        wp_redirect( $redirect_url );
        exit;
    }
}
The function starts by checking that this is a GET request. POST requests sent to this same URL will be handled below.
Then, on line 8, we call the WordPress function check_password_reset_key to verify that the parameters passed with the reset WP password link are valid. If there was an error, we redirect the user back to the login page, with the error code as a request parameter (lines 9-16). We’ll add the code for displaying the error soon.
If the parameters were successfully validated and the user is allowed to update their password, the function continues by redirecting the user to our WordPress custom password reset page (still empty) member-password-reset.
On lines 19-20, we add the parameters key and login to the redirect URL so that they’ll be available for another check when the user tries to set a new password on the next screen. The default version of the WordPress password reset uses a cookie for this, but for the tutorial’s sake, I decided to go with request parameters to keep the code easier to follow.
Next, let’s create a custom version of the reset WordPress password form.
Step 2: Show the WordPress Change Password Form
The reset WordPress password form shown to the user after clicking on the WordPress change password email link, by default looks like this:
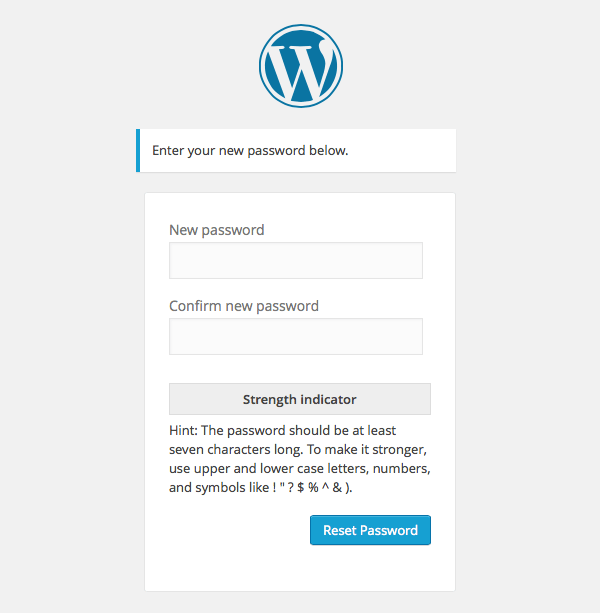
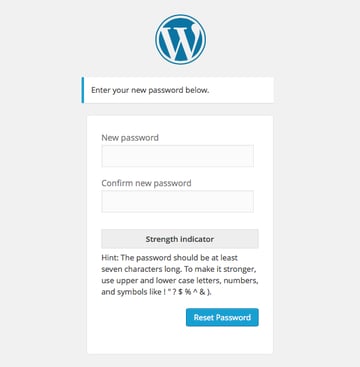
It’s a simple form with two fields, pass1 and pass2, one for entering the WordPress password and the other to retype it to check that there were no typos.
To create our custom version of this form, we’ll use a shortcode.
First, add the following line in the plugin’s constructor:
add_shortcode( 'custom-password-reset-form', array( $this, 'render_password_reset_form' ) );
Then, create the function for rendering the form:
/**
 * A shortcode for rendering the form used to reset a user's password.
 *
 * @param  array   $attributes  Shortcode attributes.
 * @param  string  $content     The text content for shortcode. Not used.
 *
 * @return string  The shortcode output
 */
public function render_password_reset_form( $attributes, $content = null ) {
    // Parse shortcode attributes
    $default_attributes = array( 'show_title' => false );
    $attributes = shortcode_atts( $default_attributes, $attributes );

    if ( is_user_logged_in() ) {
        return __( 'You are already signed in.', 'personalize-login' );
    } else {
        if ( isset( $_REQUEST['login'] ) && isset( $_REQUEST['key'] ) ) {
            $attributes['login'] = $_REQUEST['login'];
            $attributes['key'] = $_REQUEST['key'];

            // Error messages
            $errors = array();
            if ( isset( $_REQUEST['error'] ) ) {
                $error_codes = explode( ',', $_REQUEST['error'] );

                foreach ( $error_codes as $code ) {
                    $errors []= $this->get_error_message( $code );
                }
            }
            $attributes['errors'] = $errors;

            return $this->get_template_html( 'password_reset_form', $attributes );
        } else {
            return __( 'Invalid password reset link.', 'personalize-login' );
        }
    }
}
The core of this function starts on line 17, where we check that the user identification parameters login and key are present. If not, the password reset link isn’t valid, and we just render an error message (line 34).
If the check is OK, the two variables are added to the $attributes array to make them available to the form template (lines 18-19).
Then, on lines 21-30, we already prepare for errors that can occur when the WordPress account recovery form is submitted, using the same error passing method from earlier forms in the tutorial.
Finally, on line 32, the function reads the template and returns it to WordPress for rendering.
Let’s create the template next. In the templates directory, create a new file and name it password_reset_form.php. Add the following content:
<div id="password-reset-form" class="widecolumn">
    <?php if ( $attributes['show_title'] ) : ?>
        <h3><?php _e( 'Pick a New Password', 'personalize-login' ); ?></h3>
    <?php endif; ?>

    <form name="resetpassform" id="resetpassform" action="<?php echo site_url( 'wp-login.php?action=resetpass' ); ?>" method="post" autocomplete="off">
        <input type="hidden" id="user_login" name="rp_login" value="<?php echo esc_attr( $attributes['login'] ); ?>" autocomplete="off" />
        <input type="hidden" name="rp_key" value="<?php echo esc_attr( $attributes['key'] ); ?>" />

        <?php if ( count( $attributes['errors'] ) > 0 ) : ?>
            <?php foreach ( $attributes['errors'] as $error ) : ?>
                <p>
                    <?php echo $error; ?>
                </p>
            <?php endforeach; ?>
        <?php endif; ?>

        <p>
            <label for="pass1"><?php _e( 'New password', 'personalize-login' ) ?></label>
            <input type="password" name="pass1" id="pass1" class="input" size="20" value="" autocomplete="off" />
        </p>
        <p>
            <label for="pass2"><?php _e( 'Repeat new password', 'personalize-login' ) ?></label>
            <input type="password" name="pass2" id="pass2" class="input" size="20" value="" autocomplete="off" />
        </p>

        <p class="description"><?php echo wp_get_password_hint(); ?></p>

        <p class="resetpass-submit">
            <input type="submit" name="submit" id="resetpass-button"
                   class="button" value="<?php _e( 'Reset Password', 'personalize-login' ); ?>" />
        </p>
    </form>
</div>
The form begins with an optional title, displayed if the shortcode attribute show_title is set to true (lines 2-4).
The actual form follows right after the title. Notice that the form will be posted to wp-login.php?action=resetpass (line 6), the same URL used in the link in the password reset email, except that the email link used a short version, rp, instead of resetpass.
At the beginning of the form (lines 7-8), we set up two hidden fields rp_key and rp_login to pass the key and login parameters to the form handler that will use them to validate the password change request.
On lines 10-16, the template will print out errors if there are any. This code is exactly the same as in the previous shortcode template earlier in this tutorial.
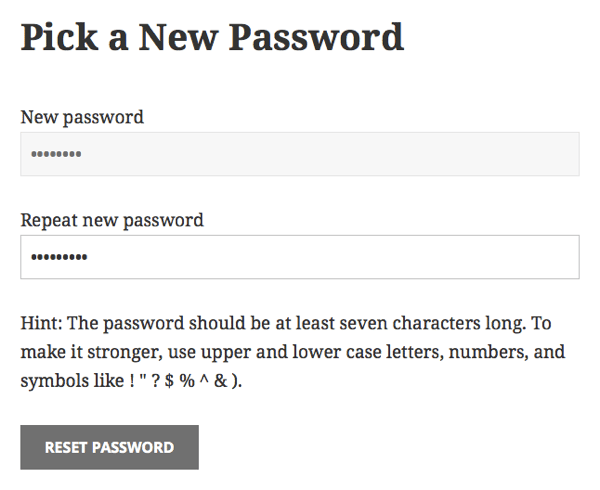
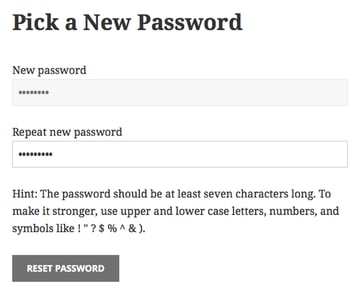
The two fields are printed out on lines 18-25, followed by some instructions for choosing a good WordPress password and the button for submitting the WordPress change password form.
Here’s what the WordPress change password form should look like now:
Step 3: Handle the WordPress Reset Pasword Action
When the user submits the form by clicking on the WordPress Reset Password button, its contents are sent to wp-login.php?action=resetpass, the same URL we used above to redirect the user to our custom password reset page.
Naturally, as we created the form ourselves, we could just as well use a different URL. However, by keeping this default URL and using the login_form_resetpass (and login_form_rp, just to be sure) action to replace the default functionality, we can make sure no one ends up accidentally calling the default version of the password reset.
To do this, once again, add two lines to the constructor:
add_action( 'login_form_rp', array( $this, 'do_password_reset' ) );
add_action( 'login_form_resetpass', array( $this, 'do_password_reset' ) );
Then, create the function:
/**
 * Resets the user's password if the password reset form was submitted.
 */
public function do_password_reset() {
    if ( 'POST' == $_SERVER['REQUEST_METHOD'] ) {
        $rp_key = $_REQUEST['rp_key'];
        $rp_login = $_REQUEST['rp_login'];

        $user = check_password_reset_key( $rp_key, $rp_login );

        if ( ! $user || is_wp_error( $user ) ) {
            if ( $user && $user->get_error_code() === 'expired_key' ) {
                wp_redirect( home_url( 'member-login?login=expiredkey' ) );
            } else {
                wp_redirect( home_url( 'member-login?login=invalidkey' ) );
            }
            exit;
        }

        if ( isset( $_POST['pass1'] ) ) {
            if ( $_POST['pass1'] != $_POST['pass2'] ) {
                // Passwords don't match
                $redirect_url = home_url( 'member-password-reset' );

                $redirect_url = add_query_arg( 'key', $rp_key, $redirect_url );
                $redirect_url = add_query_arg( 'login', $rp_login, $redirect_url )
                $redirect_url = add_query_arg( 'error', 'password_reset_mismatch', $redirect_url );

                wp_redirect( $redirect_url );
                exit;
            }

            if ( empty( $_POST['pass1'] ) ) {
                // Password is empty
                $redirect_url = home_url( 'member-password-reset' );

                $redirect_url = add_query_arg( 'key', $rp_key, $redirect_url );
                $redirect_url = add_query_arg( 'login', $rp_login, $redirect_url );
                $redirect_url = add_query_arg( 'error', 'password_reset_empty', $redirect_url );

                wp_redirect( $redirect_url );
                exit;
            }

            // Parameter checks OK, reset password
            reset_password( $user, $_POST['pass1'] );
            wp_redirect( home_url( 'member-login?password=changed' ) );
        } else {
            echo "Invalid request.";
        }

        exit;
    }
}
The function begins by checking the request method, which should be POST; GET requests have already been handled by the redirect function above.
Then, it collects the key and login parameters from the form data and uses them to verify the password reset link on line 9, using the WordPress function check_password_reset_key (the same function we used already in the redirect function).
On lines 10-18, we again check for possible errors in the password reset key check, redirecting the user to the Forgot Your Password? message template page for rendering the errors.
Then, if the reset key is valid, we can focus on the WordPress account recovery form.
First, the function checks that the two passwords match (lines 21-31), and then that they are not empty (lines 33-43). In both cases, the user is redirected back to our password reset page, with the key and login parameters included in the URL to let the user retry the password update.
Finally, if all checks are successful (feel free to add more checks if you like), the function resets the WordPress password using the function reset_password (on line 46) and redirects the user to the login page with a parameter password=changed appended to the URL to show a notification.
The WordPress password is now updated successfully, and all that’s left is to show the success notification and to add error messages.
First, let’s add the notification. In the shortcode function render_login_form, add the following check:
// Check if user just updated password
$attributes['password_updated'] = isset( $_REQUEST['password'] ) && $_REQUEST['password'] == 'changed';
Then, add the actual message to the template, login_form.php, right before rendering the form:
<?php if ( $attributes['password_updated'] ) : ?>
    <p class="login-info">
        <?php _e( 'Your password has been changed. You can sign in now.', 'personalize-login' ); ?>
    </p>
<?php endif; ?>
As we already added support for rendering the error messages above, all that’s left is adding the descriptive error messages to our function get_error_message.
Add the following lines right before the default branch in the switch...case construct:
// Reset password

case 'expiredkey':
case 'invalidkey':
    return __( 'The password reset link you used is not valid anymore.', 'personalize-login' );

case 'password_reset_mismatch':
    return __( "The two passwords you entered don't match.", 'personalize-login' );

case 'password_reset_empty':
    return __( "Sorry, we don't accept empty passwords.", 'personalize-login' );
Conclusion
That’s it! The reset WP password functionality is ready, so we have now finished customizing the WordPress login experience, from registering a new user to logging in and resetting a lost password.
I hope the series has given you enough tools so that you feel well equipped for further customizations—for example by adding a new step to the password reset flow—and a better understanding of what happens inside wp-login.php.
Now, go and customize some more!