There are several different ways to make a background transparent in Photoshop. And when multiple different tools do the same thing, it can be a pain to figure out which to use and when. Follow along as we go through four of the easiest ways you can quickly remove a background in Photoshop.
In a hurry? Remove backgrounds, edit photos, and automate your workflow using one of the hundreds of premium Adobe Photoshop actions and plugins from Envato Elements.


Hey, but what if you’re a visual person? In that case, you’ll love the Envato Tuts+ YouTube channel. There you’ll find awesome video tutorials, like this new video to learn how to make the background transparent in Photoshop:
What You’ll Learn in This Photoshop Transparent Background Tutorial
- How to make a background transparent in Photoshop
- How to use Photoshop Blend If
- How to use Refine Edge in Photoshop
- how to make an image background transparent in Photoshop using Select Color Range
- How to create a mask using the Pen Tool in Photoshop
What You’ll Need
To complete this project, you will need the following graphic resources:
Find more resources on Envato Elements!
1. How to Make a Background Transparent in Photoshop Using Blend If
Step 1
Let’s start with an alternative to a classic. I’ll be using this cloud. Instead of using Screen for an easy Photoshop transparent background effect, try using Blend If.
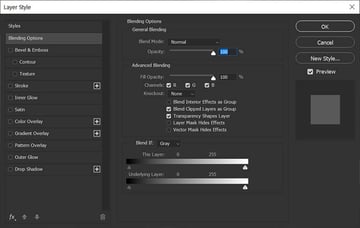
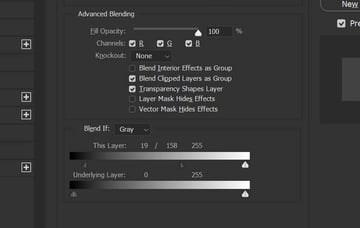
Double-click the layer you want to extract, and at the bottom of the Layer Style panel, you’ll see Blend If. There you’ll see the This Layer slider.


Step 2
Blend If works by choosing what value range will be blended away, rendering any part of an image with those values transparent.
You choose a value by sliding the toggles. The left toggles will target darker values, while the right will target lighter values.
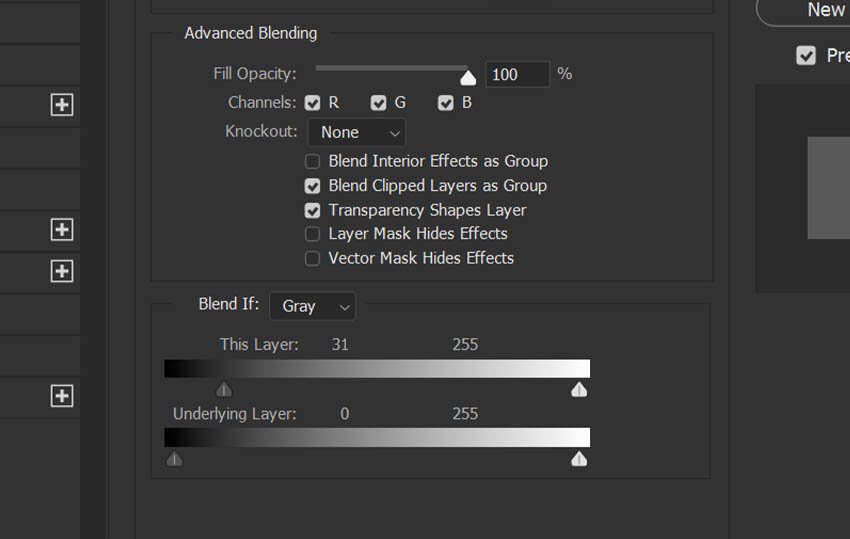
Let’s slide the left toggle inward, removing the black background.

Step 3
Now, the background is gone, but what we have is a very harsh, jagged edge.
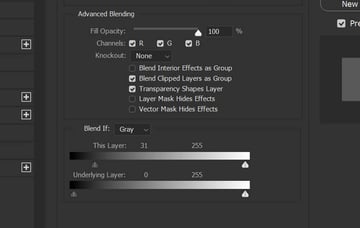
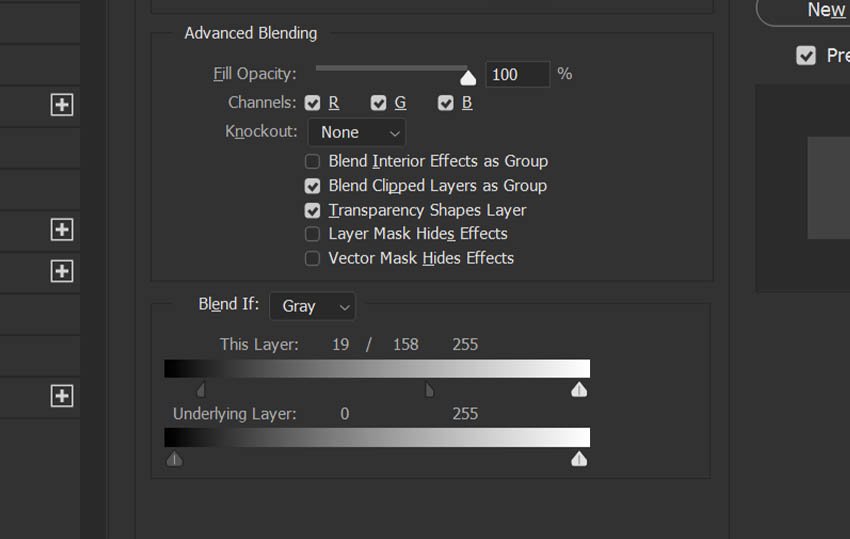
To create a smoother transition, hold Alt and split the toggles. Pulling the right toggle further right will create a much softer edge.
How far you pull the toggle will change every time. Blend if is a very visual tool with no magic settings. Just slide until it feels right.

Step 4
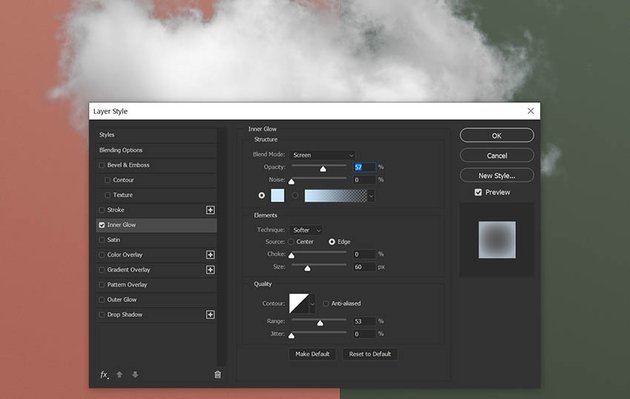
There’s still quite a bit of fringe leftover. To fix that, let’s add an Inner Glow layer style.
But, if you try to do that now, the glow will appear on the natural edge of the image. The pixels are still there; they’re just transparent. So let’s right-click > Convert to Smart Object. The Smart Object will treat the transparent pixels as deleted pixels.
Step 5
And now we can add that Inner Glow to remove those edges.


Step 6
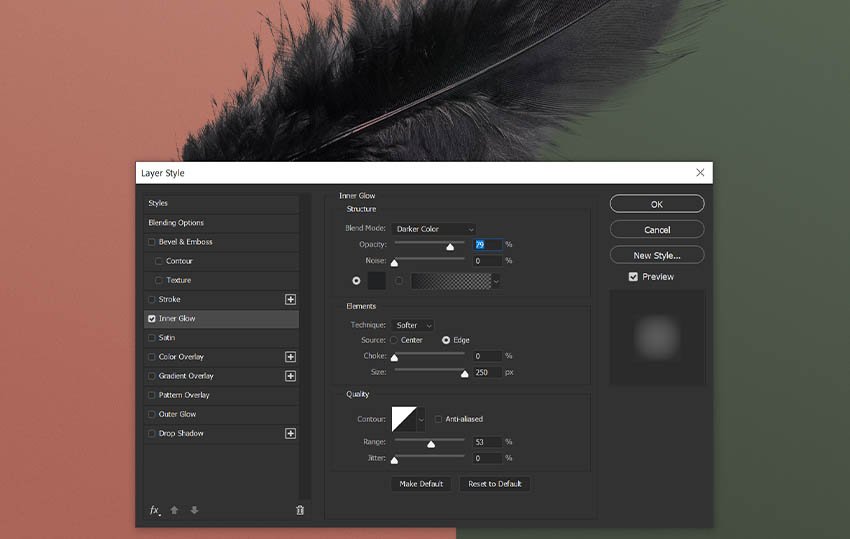
You can follow the same process with images on white backgrounds, only adjust the right-side toggles instead.
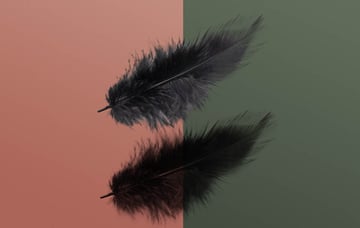
For this Black Feather, I still used Inner Glow to remove any leftover white background, but I set the Blend Mode to Darker Color and the Color to a dark gray.


Step 7
Now, you may be wondering why you should use Blend If instead of Blend Modes. There is no one correct answer—it all depends on what you want the end effect to be. Blend If will give you a more “solid” feeling effect, while Blend Modes will feel lighter and less opaque.
Also, remember that Blend If works with values, so an image doesn’t have to be on a black or white background. It just has to be on a solid background that’s brighter or darker than the object itself and has distinctly different values.


2. How to Make the Background Transparent in Photoshop Using Select Color Range
Step 1
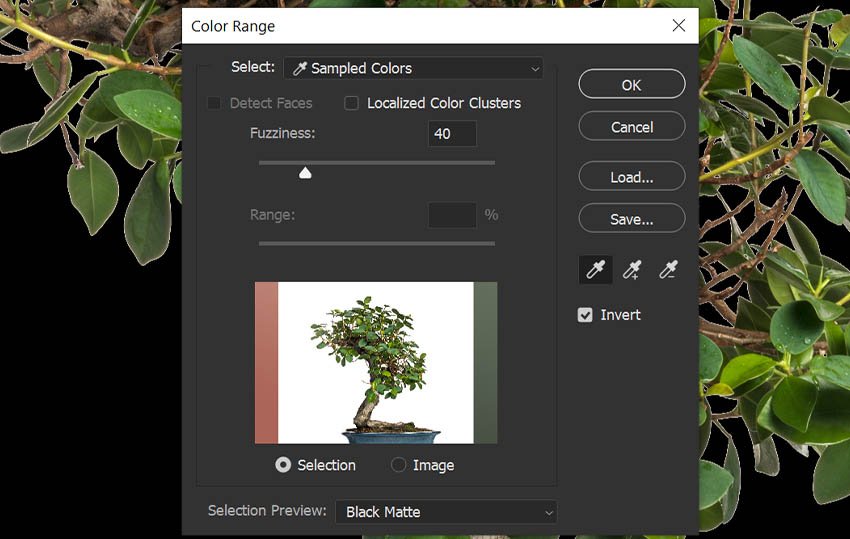
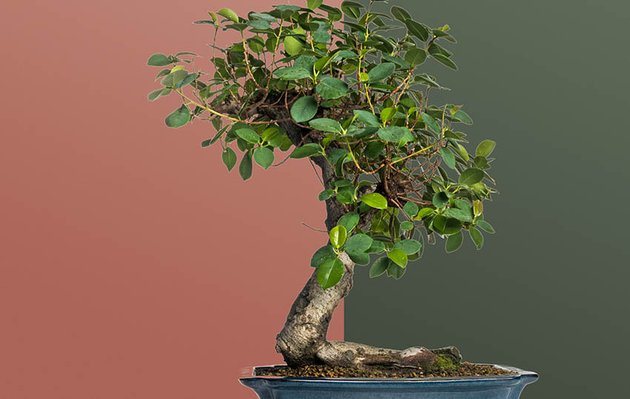
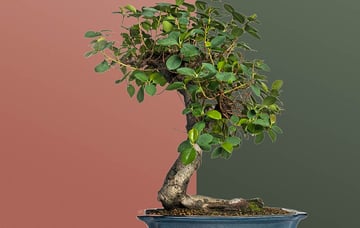
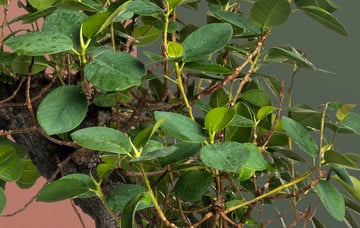
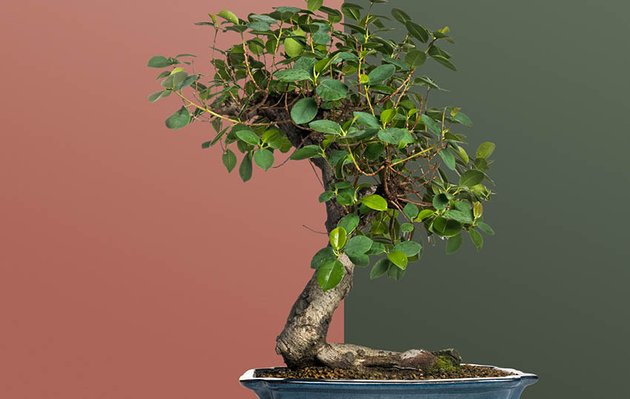
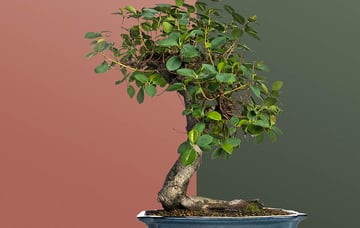
Up next, we have Select Color Range! This is an excellent option to switch a background to transparent in Photoshop, especially for objects on studio backgrounds that have too wide a tonal range for Blend If, like this Bonsai Tree. That’s because, unlike Blend If, Select Color Range keeps color in mind.
Go to Select > Color Range to open the Color Range panel.


Step 2
Let’s put in some settings:
- Fuzziness: 40
- Selection Preview: Black Matte
- Invert: Checked
These can change from image to image, especially Fuzziness, which tells Photoshop how much it should be grabbing onto color. Think of it like a tolerance or strictness. I find 40 to be a good starting point.
We also want to click to select the color we want Photoshop to grab onto—in this case, the white background. If your background has shadows or multiple tones of the same color, you can hold down Shift to add colors to the selection. Press OK when you’re happy with what you see.
Step 3
Add a Layer Mask so that the selection becomes a mask; more likely than not, you’ll have some cleanup to do.

Step 4
Hold down Control and click the Layer mask to reactivate the Selection.
Next, let’s go to Select > Modify > Contract and Contract by 2. If 2 seems too strong, you can also try 1.


Step 5
Then we’re going to Select > Inverse to invert the selection. Then Edit > Fill to fill the selection with black.
And if you feel like the edges of your mask are a little harsh, you can open the Properties panel and add a Feather of 0.4 px.


Step 6
Finally, if you ever notice any masked areas that shouldn’t have been masked, just bust out a hard round Brush set to white and mask those areas back in. This will happen a lot with brighter highlights when extracting on a white background, like our image here.
Luckily they’re quick to mask back in. And that goes for any of these tools; if a shadow or highlight accidentally gets masked, just pop it back in.
That’s how to make the background transparent in Photoshop using Select Color Range! It’s great for green screens as well.

3. How to Make an Image Background Transparent in Photoshop Using Select and Mask
Step 1
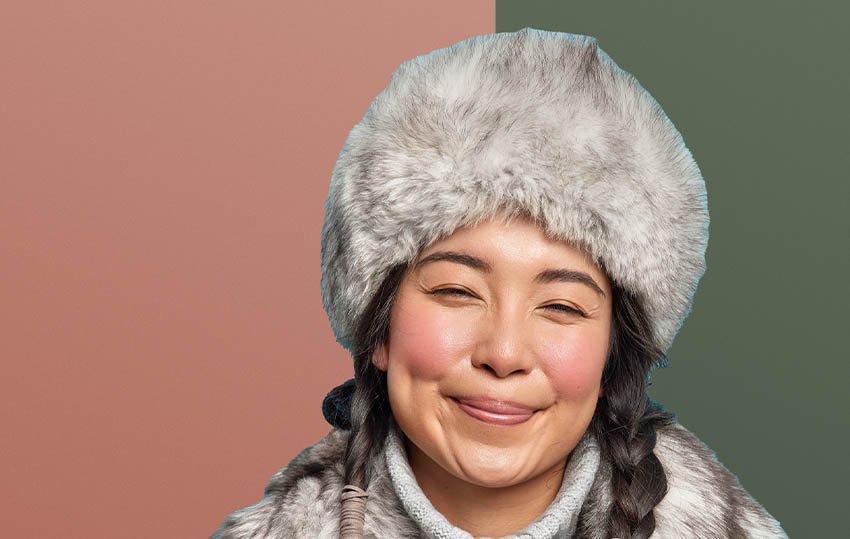
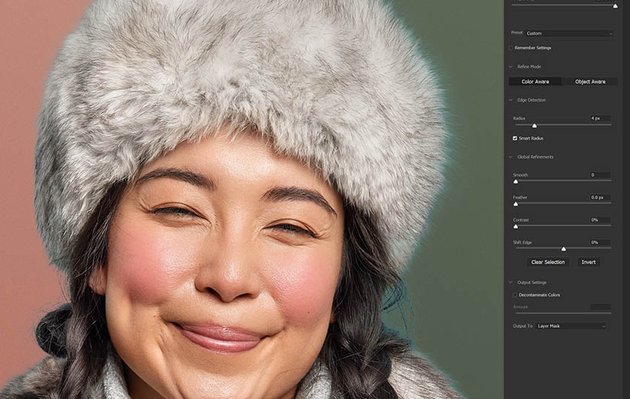
Next up, let’s talk about Select and Mask, or Refine Edge as it’s sometimes called. It’s one of Photoshop’s most powerful selection tools and the one I probably use daily when extracting subjects like this woman.
First, we need to make a selection of our subject. I’m going to use Select Subject and then add a Layer Mask.


Step 2
Now, we can go into Select and Mask either by pressing the button in the upper Options bar or by double-clicking the Layer Mask and choosing Select and Mask.
Step 3
The first thing I always recommend is to Check Smart Radius and set the Radius to 4 px. You can play with the Radius amount, but 4 px seems to work well for most things.
You also want to make sure the Refine Edge brush is active, found on the left-hand side.
Next, let’s hit Refine Hair in the upper options bar. This will refine the selection around the hair, but not the fur.


Step 4
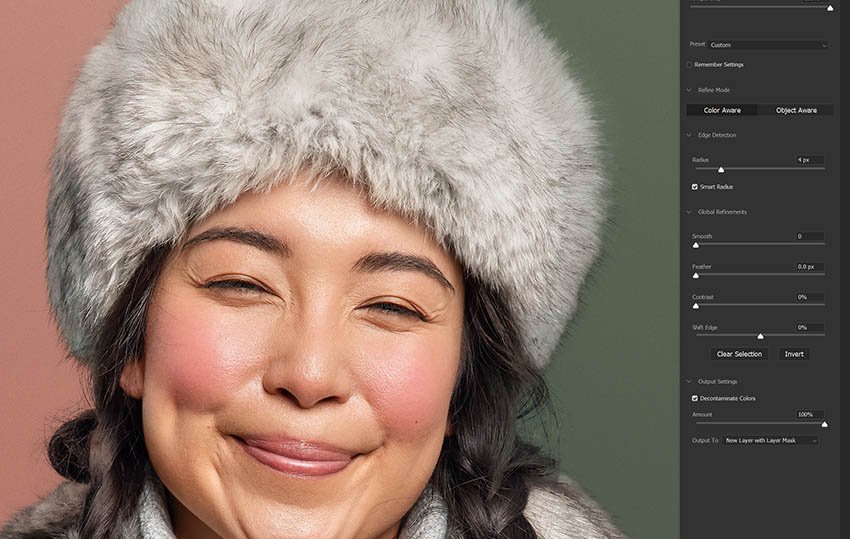
The fur is a job for the Refine Edge brush. Click and drag across the edges of the fur. Refine Edge will start to grab the fur detail but leave behind the blue background.
If Refine Edge is having a hard time separating your subject from the background, you can try switching to Object Aware in the right-hand Properties panel.


Step 5
With my base refinement done, I like to press OK and then jump back into Select and Mask to make more Refinements. That way, if I mess my selection up, I can just Cancel.
There are a couple of different ways we can deal with the leftover fringe edges in Select and Mask. First, we can bring in Shift Edge by -10, which will shift the edge inwards.
But although Shift Edge and the other Global Refinements work great on objects or untextured surfaces, they don’t work well with hair and fur.
So, instead, we can Check Decontaminate Colors found under Output Settings. Photoshop will try to bring in colors from the object being selected onto that fringe edge.
Step 6
Sometimes, this works great! But other times, it’ll look pretty horrible. And sometimes it’ll look good in some spots but not others.
This can be a problem since Decontaminate Color is a destructive filter, meaning it’ll permanently change whatever it’s applied to. Luckily, I have a way around that.
Let’s set the Amount to 100 and change Output to New Layer with Layer Mask.


Step 7
Now, Unhide our original layer and layer mask. Delete the layer mask on the Decontaminate Color layer. Then Clip the Decontaminate Color layer into the original layer and mask.
We can now add a new Layer Mask onto the Decontaminated layer and mask out all the areas that look not so great. In this case, it’s around the subject’s hair.


Step 8
If you still have some of that color left, you can get rid of it just by painting on a Clipped layer set to different Blend Modes.
Use the Eyedropper tool to pick a color close to the area you are painting on.
The Blend Mode will depend on the surface you’re painting on and what you need to hide. Here is a general guide on when to use which Blend Mode, keeping in mind you can always mix and match them:
- Color: Use Color to color match the fringe edge to the hair color.
- Hue: Hue can also be used as an alternative to Color.
- Multiply: Use Multiply to darken lighter fringes left behind very dark hair.
- Darken Color: Use Darken Color as an alternative to Multiply or to cover lighter fringes left behind lighter hair.
- Normal: Use Normal when the edge being painted on is low in detail or loses nothing from being a flat color.
- Lighten: Use Lighten on lighter color hair with a darker fringe edge.
- Screen: Use Screen as an alternative to Lighten or on light hair with a lighter fringe edge.


4. How to Make an Image Background Transparent in Photoshop Using the Pen Tool & Refine Edge
Step 1
You should use Select and Mask anytime a mask calls for it; it’s not specific to the selection tool. But let’s wrap things up by pairing up the Pen Tool and Refine Edge.
This is my go-to duo for removing the background from both people and objects that have a mix of smooth and textured edges.
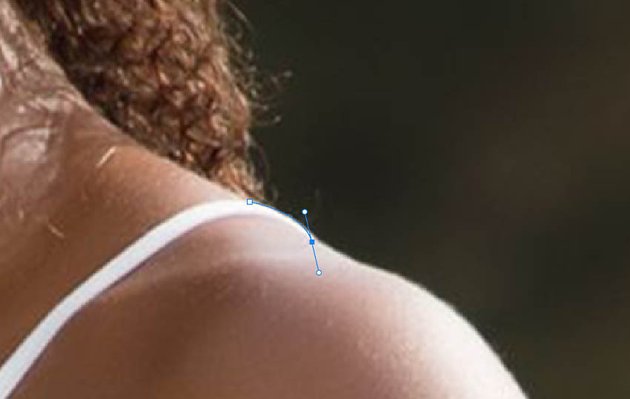
Select the Pen Tool and make sure it’s set to Path.
Step 2
Click to place an Anchor Point on a smooth portion of your subject. I’m going to start right below her hair, at the strap of her dress.
Click and hold to place a second anchor. You want to put Anchor Points where curves start and end. Here, the arc of her strap ends, so that’s where I placed the point.
Before letting go of the anchor, pull to curve the path, having it follow the edge you’re trying to extract.


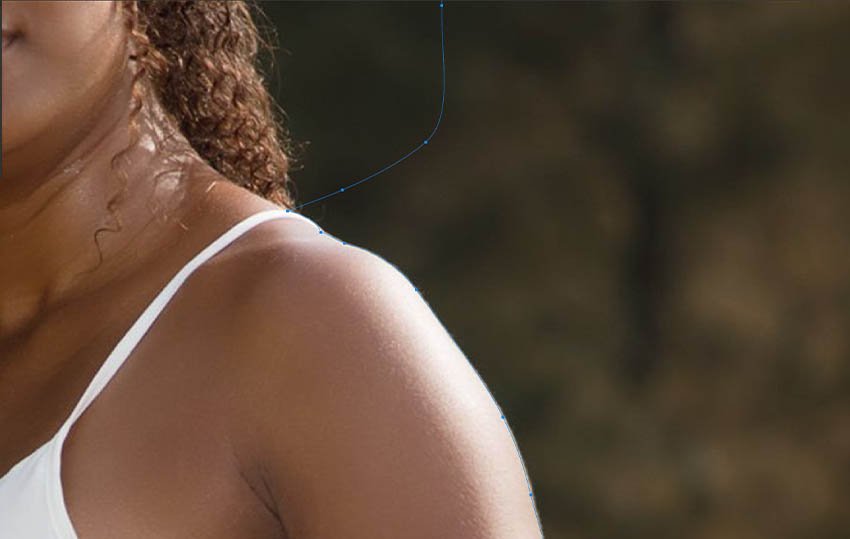
Step 3
Hold Alt to bring in or adjust the Path’s Controller Points. The controllers help guide the path going from anchor to anchor. You can modify these points at any time.
Then place another anchor down the edge of the subject.


Step 4
When placing anchors, less is better. That’s because fewer anchor points will result in smoother edges. However, just use as many as you need.
The more you use the Pen Tool, the more you’ll get used to it and get better at it. A lot of it is built on habit and even personal style.
Repeat those steps until you’ve created a connected Path all around the subject, but skip the hair.
The hair comes second; we only want to focus on the subject’s body.


Step 5
When the Path is finished, we can add a Layer Mask, and on the Canvas, Right Click > Fill Path, filling the path with black.


Step 6
I like to add a Feather of 0.4 px to my masks using the Properties panel, though that is optional and will depend on the image you’re extracting.
Then we’re going to Right Click > Convert to Smart Object. This makes it so we can safely extract our subject’s hair without messing up the body’s layer mask.
Suppose we tried to extract our subject’s hair on the same layer mask instead of splitting it into two different masks. In that case, the Refine Edge tool is likely to mess up the smooth, clean edge we made with the Pen Tool.
And by using Smart Objects, instead of rasterizing the layer, if we need to adjust the body’s layer mask, we can. Just double-click the Smart Object, make any adjustments, save, and then close the Smart Object. The main PSD will update with the changes made.
Step 7
Use the Magnetic Lasso tool or any Quick Select tool to make a sloppy selection from around the hair of the subject.
Add a new Layer Mask to the subject.


Step 8
Finally, go into Select and Mask and use the same Refine Edge techniques from earlier!


That’s It!
That’s how to make a background transparent in Photoshop! Removing a background from an image only takes as long as you need it to. Sometimes quick and dirty works; other times, getting that perfect extraction matters. Luckily, through a combination of those four tools, I’ve been able to extract any image that’s crossed my path. And Photoshop’s auto-select tools get better and better every year.


Edit Photos Even Faster!
If you need to remove a background or edit a photo even quicker, you can try one of these fast masking and other helpful utility add-ons, plugins, and actions!
Subtract Background Adaptive Action (ATN)
This Photoshop transparent background action can remove a background within seconds!. It’s great for items on flat simple backgrounds, and it even keeps all of the object’s original shadows for fast and easy compositing.
Fit to Canvas Script for Ps (ATN)

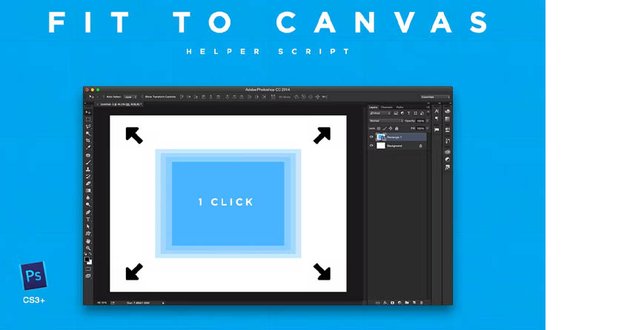

Automate your workflow by automating the size of your layers! Have a new background layer and want it to fill the whole screen? Press a button and it’s done for you!
Easy Cut: Layer Splitting Kit (ZXP)

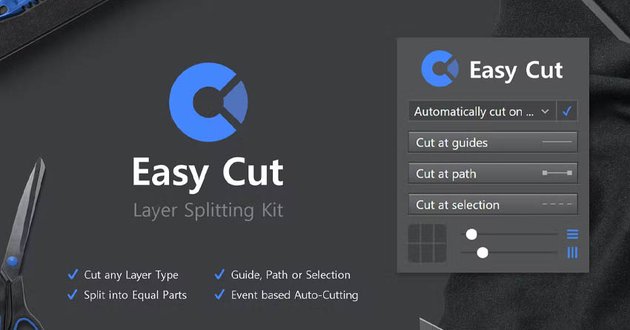
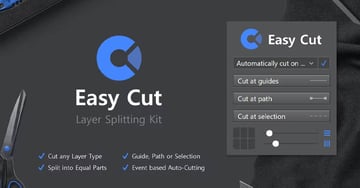
The Easy Cut plugin makes cutting layers easy! It cuts a layer, places the cut onto its own layer, and even copies over all the layer styles and effects.
Image Extend: Clipping & Expansion Kit (ZXP)

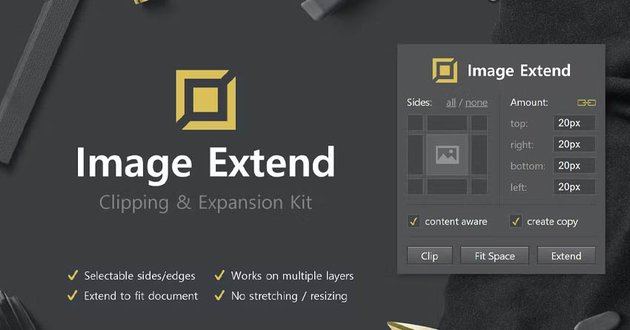

This image extender plugin helps makes your images bigger by automatically extending the edges of your canvas. There is no loss of quality, and it’s perfect for extending the edges of your new background for your newly extracted subject!