Who is Moo Deng, you ask? Only the internet’s cutest baby hippo! And where is Moo Deng from? According to Wikipedia, Moo Deng is a baby pygmy hippopotamus born on July 10, 2024, at Khao Kheow Open Zoo in Chonburi, Thailand.
Her name, meaning “bouncy pork” in Thai, was selected through a public poll. Moo Deng gained international fame due to her playful demeanor and endearing appearance, leading to a significant increase in zoo visitors and widespread online attention.
Learn how to create a cute illustration of Moo Deng using Adobe Illustrator. Transform simple shapes and use creative techniques to make your design stand out. Perfect for anyone who adores cute illustrations or is looking to have a fun time, this tutorial will give you cute animal drawing ideas to level up your design skills. If you already know how to draw in Illustrator, you’ll cruise through this tutorial easily.
Let’s get started!
What you will learn in this Moo Deng tutorial
- How to draw Moo Deng in Illustrator
- How to create an easy, cute animal drawing
- How to use Warp Effects
- How to create a cute animal illustration using basic shapes
- How to draw in Adobe Illustrator
1. How to create Moo Deng’s head in Illustrator
Step 1
After you’ve opened Adobe Illustrator, create a new document (File > New). Enter 850 px Width and 750 px Height in the new dialogue window, and press OK. This will be your new artboard.
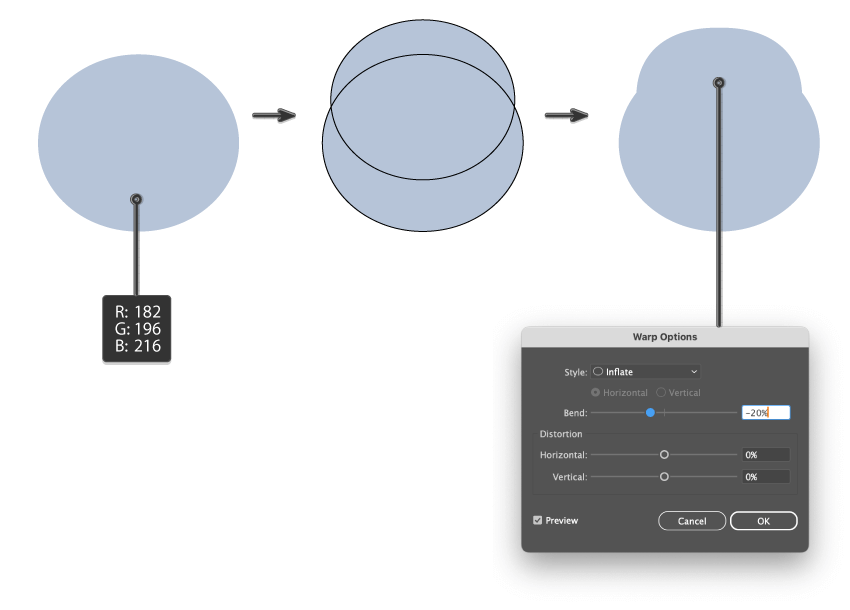
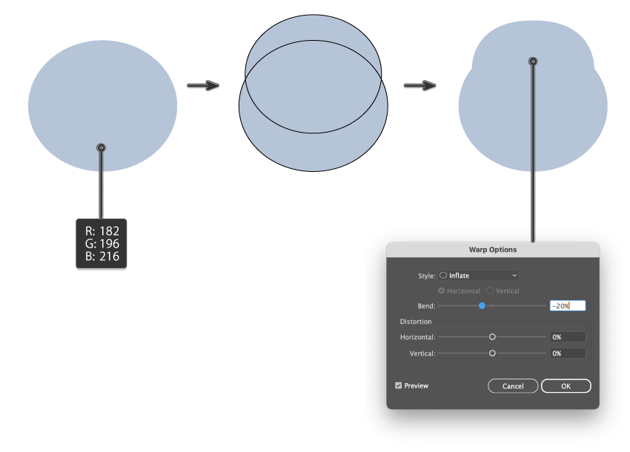
Now, let’s start our cute animal illustration by creating Moo Deng’s head. Use the Ellipse Tool (L) to draw an ellipse (fill color R=182, G=196, B=216). It’s the bottom part of the head.
Now, we want to create the upper part of Moo Deng’s head. Create a new ellipse with the same fill color on top of the first one. The black stroke in the image is just for better visibility; you don’t actually need it.
While keeping the upper part selected, go to Effect > Warp > Inflate and, in the new dialogue window, enter the options you see below. Then press OK.
Expand this shape (Object > Expand Appearance).
To combine the two parts, we want to use the Shape Builder Tool (Shift-M). Keep the two shapes selected, and use this tool to move your mouse over them.
Step 2
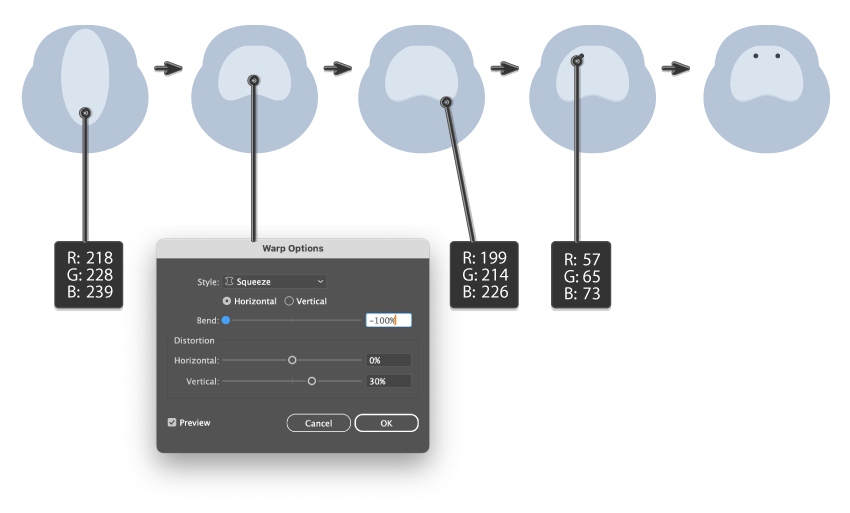
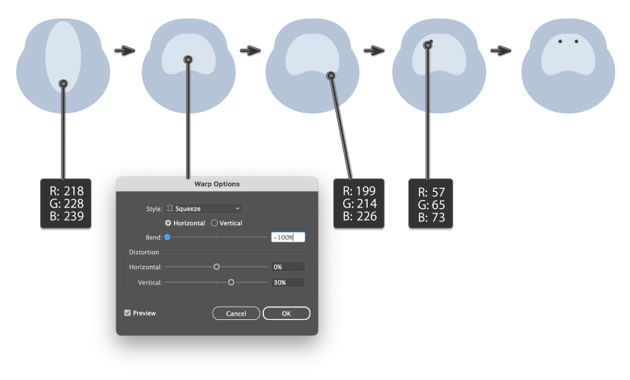
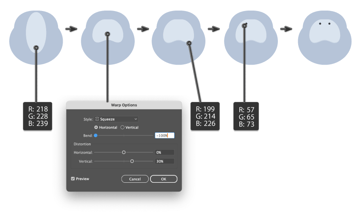
Next, let’s create the muzzle for our Moo Deng illustration. Use the Ellipse Tool (L) to draw an ellipse (fill color R=218, G=228, B=239) in the middle of the head.
While keeping it selected, go to Effect > Warp > Squeeze and, in the new dialogue window, enter the options you see below. Then press OK. This is the upper part of the muzzle. Expand this shape (Object > Expand Appearance).
To separate the upper part from the future lower part, create a copy of the upper one behind it (Control-C, Control-B) and stretch it downwards slightly. Change its fill color to R=199, G=214, B=226.
Again using the Ellipse Tool (L), draw a tiny circle (fill color R=57, G=65, B=73). This is the nostril.
After that, drag it to the right while holding the Shift and Alt keys. Shift will move it straight, and Alt will create a copy. Be sure to place the nostrils symmetrically.
Step 3
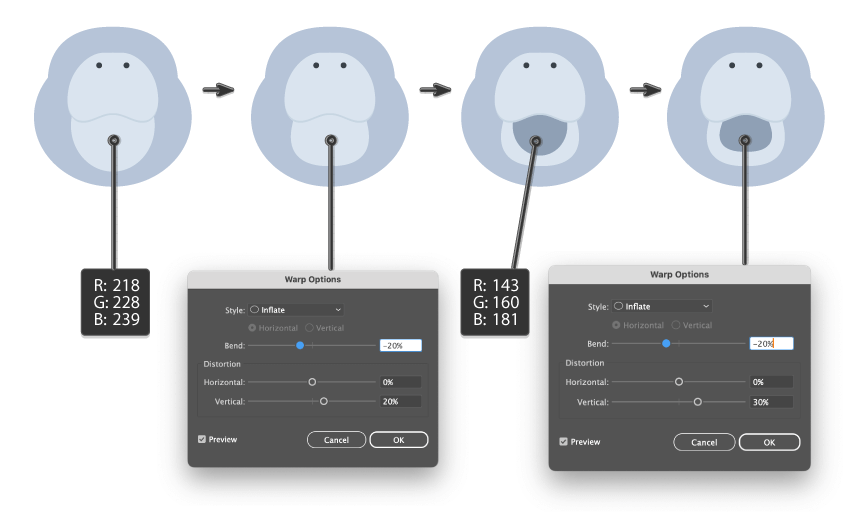
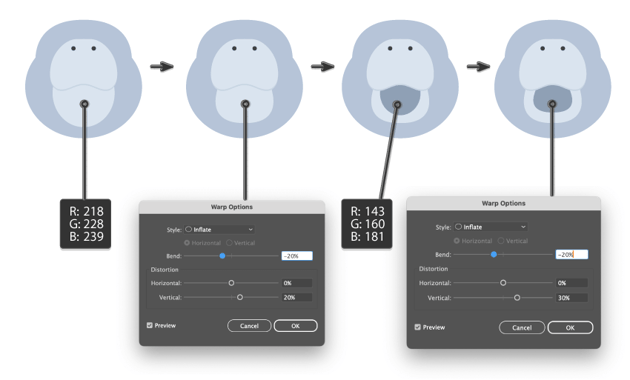
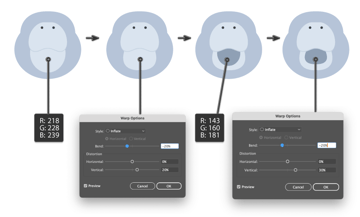
Now we need to create the lower part of the muzzle. Using the same fill color as the upper part (R=218, G=228, B=239), create an ellipse using the Ellipse Tool (L). Be sure it stays underneath the upper muzzle part. For this, you can cut off the lower part as well as the head (Control-X), and place them behind everything (Control-B).
After that, select just the lower part of the muzzle and go to Effect > Warp > Inflate and, in the new dialogue window, enter the options you see below. Then press OK. Expand this shape (Object > Expand Appearance).
Make a new ellipse (fill color R=143, G=160, B=181) to show that Moo Deng’s mouth is open in surprise. This new shape needs to stay behind the upper part of the muzzle as well.
While keeping it selected, once again go to Effect > Warp > Inflate and, in the new dialogue window, enter the options you see below. Then press OK. Expand this shape (Object > Expand Appearance).
Step 4
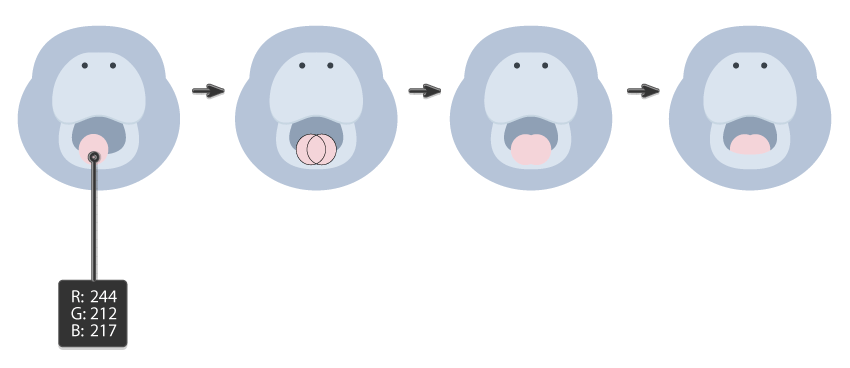
Let’s make the tongue. Start with a pink ellipse (fill color R=244, G=212, B=217).
Create a copy of it by holding the Shift and Alt keys at the same time and dragging it. Use the Shape Builder Tool (Shift-M) to create a single shape out of these two.
Then, select the darker shape of the lower muzzle part (the inside of the mouth). Create a copy in front (Control-C, Control-F). While holding the Shift button, select the tongue (holding the Shift button allows you to select two or more shapes). Finally, press the Intersect button on the Pathfinder panel (Window > Pathfinder). Now Moo Deng has a tongue inside her mouth.
Step 5
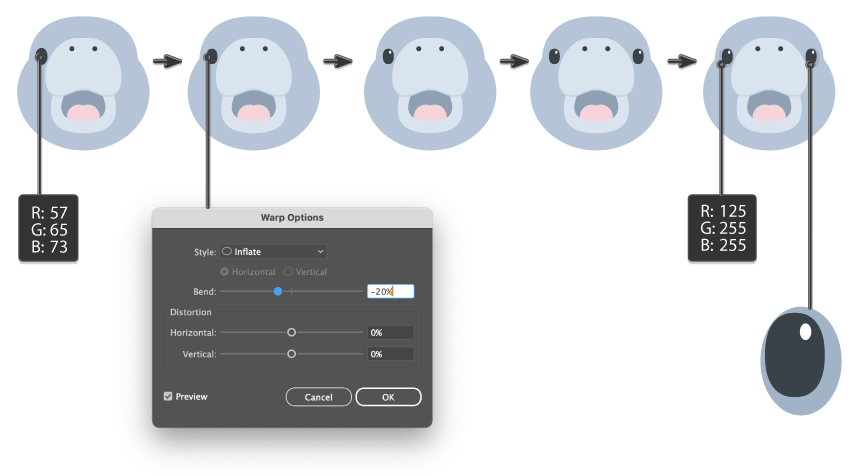
Have you noticed how we can use just one simple shape—the ellipse—to create so many design elements? Now, we can make the eyes using ellipses just as before. To draw the first eye, create an ellipse with the fill color R=57, G=65, B=73.
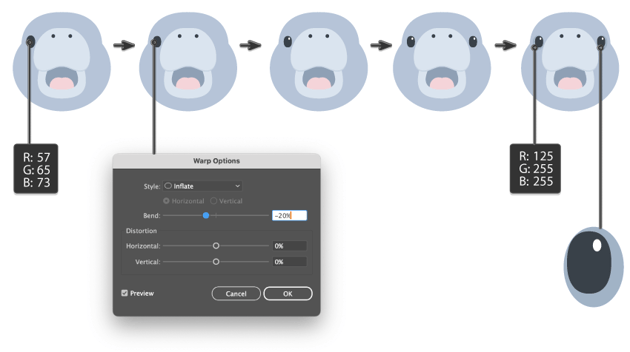
While keeping it selected, go to Effect > Warp > Inflate and, in the new dialogue window, enter the options you see below. Then press OK.
Let’s add a highlight to the eye. Draw a small white circle and place it in the upper-right corner of the eye. Then, make an ellipse under the eye since we want to add more depth to the face. The fill color is R=125, G=255, B=255.
To create another eye, select those three ellipses (two gray and one white) and drag them to the right while holding the Shift and Alt keys. Shift will move them straight, and Alt will create a copy. Be sure the eyes are placed symmetrically.
Step 6
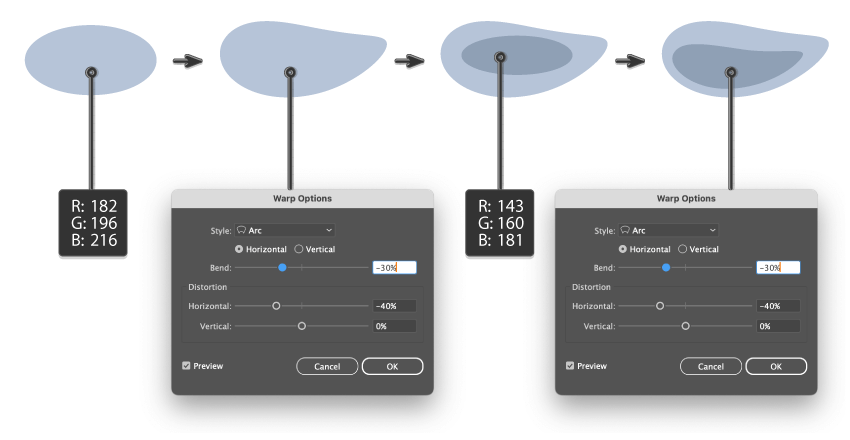
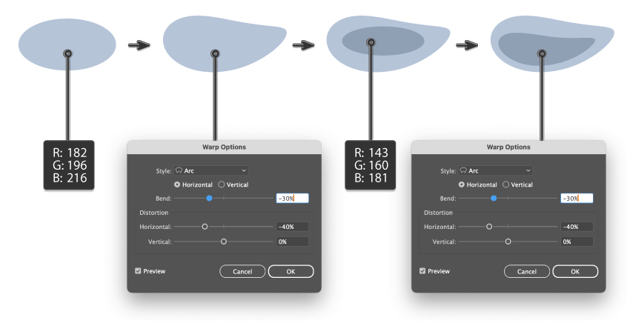
This Moo Deng vector illustration definitely needs ears. Draw a small ellipse with a fill color of R=182, G=196, B=216.
Go to Effect > Warp > Arc, and in the new dialogue window, enter the options you see below. Then press OK. Expand this shape.
Create a new ellipse in front. Change its fill color to R=143, G=160, B=181.
Go to Effect > Warp > Arc, and in the new dialogue window, enter the options you see below. Expand this shape too. Your first ear is now finished!
Step 7
Now, we want to create the other ear. Keep the first one selected, and take the Reflect Tool (O) and press Enter. It will open a new Reflect dialogue window. Be sure to check Axis Vertical, Angle 90 degrees, and press Copy. This will create a second ear for Moo Deng. Place it symmetrically and evenly.
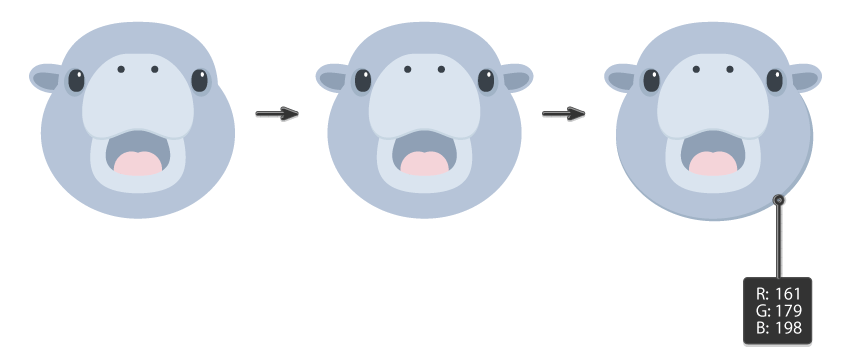
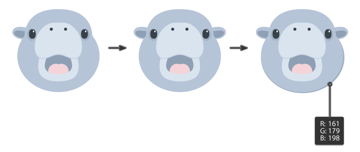
Later on, when we create the body, we will want to keep the head and torso separate. To do so, create a copy of the head shape behind (Control-C, Control-B), stretching it diagonally downwards and to the right. Change its fill color to R=161, G=179, B=198.
2. How to create Moo Deng’s body in Illustrator
Step 1
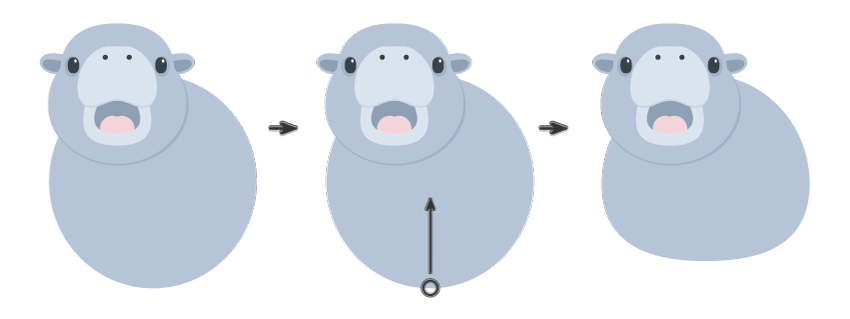
Let’s make Moo Deng’s body! Using the Ellipse Tool (L), create a big ellipse behind the head. To get the same fill color as the head, use the Eyedropper Tool (I).
Then, take the Direct Selection Tool (A), select the bottom anchor point of the ellipse, and slide it up.
Step 2
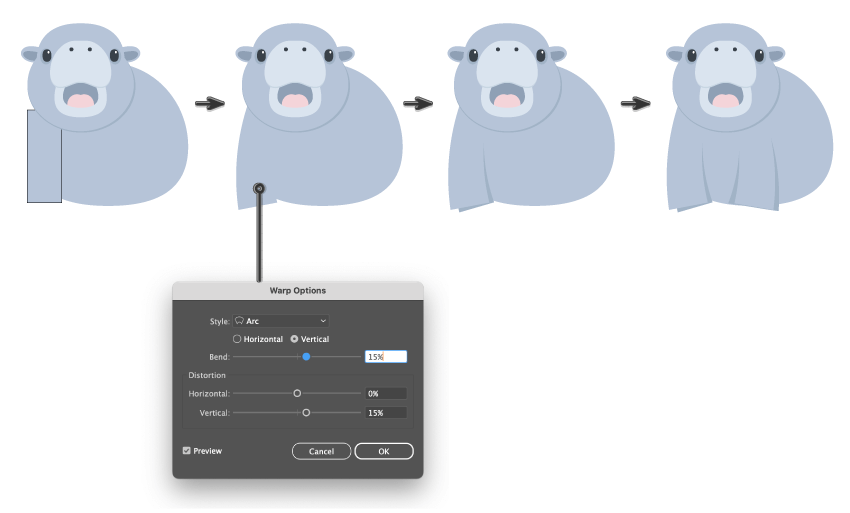
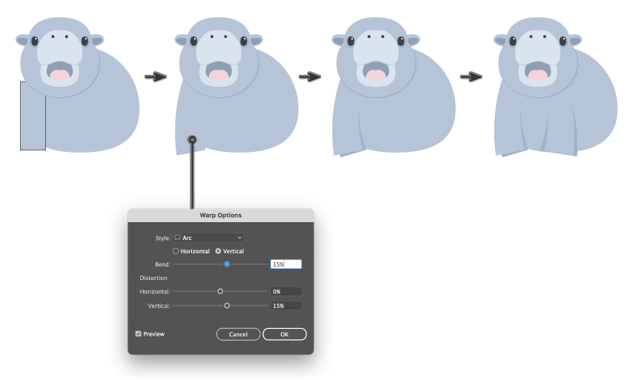
Use the Rectangle Tool (M) to add a long rectangle. We are creating Moo Deng’s leg. It should be the same fill color as the body—the black stroke is just for better visibility.
While keeping the rectangle selected, go to Effect > Warp > Arc. Enter the options you see below, and then press OK. Expand the shape.
Now we want to separate the leg from the body, and we’ll do it just like when we separated the head from the torso. While this new shape is selected, create a copy of it in the back: press Control-C, Control-B. Change its color to the same shadow color that separates the head from the body, and stretch it a little down and to the right.
Select Moo Deng’s right leg along with its shadow, and use the Reflect Tool (O) to create the left leg. Feel free to use the Direct Selection Tool (A) to move the anchor points of the shadows so that Moo Deng’s legs can stay visibly separated from the body.
Our Moo Deng illustration is ready! Make sure to group it (right-click > Group).
3. How to create a bathtub in Illustrator
Now let’s create some more elements for our illustration!
Step 1
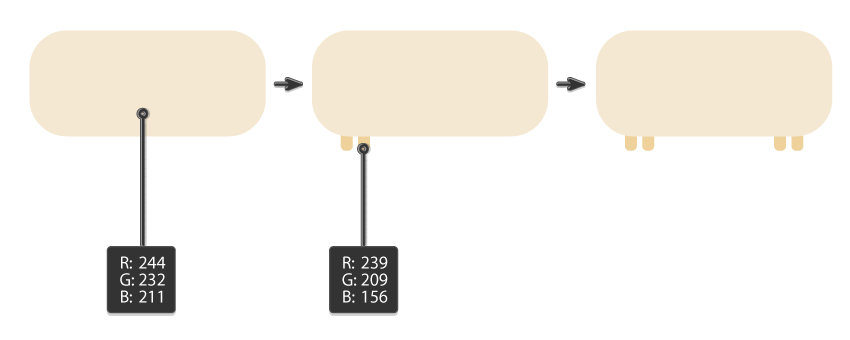
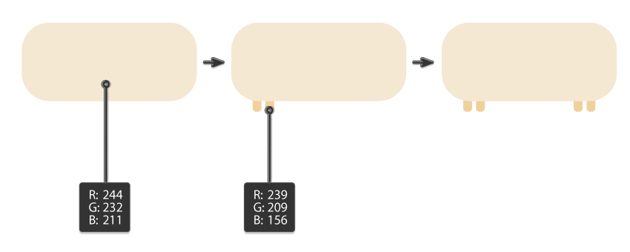
Change the fill color to R=244, G=232, B=211, and draw a rounded rectangle with the Rounded Rectangle Tool (M). We are creating the base of the bathtub.
Change the fill color to R=239, G=209, B=156. Using the same tool draw the bathtub leg. Then, just create another copy by dragging it to the right while holding the Shift and Alt buttons.
Create two more bathtub legs on the other side.
Step 2
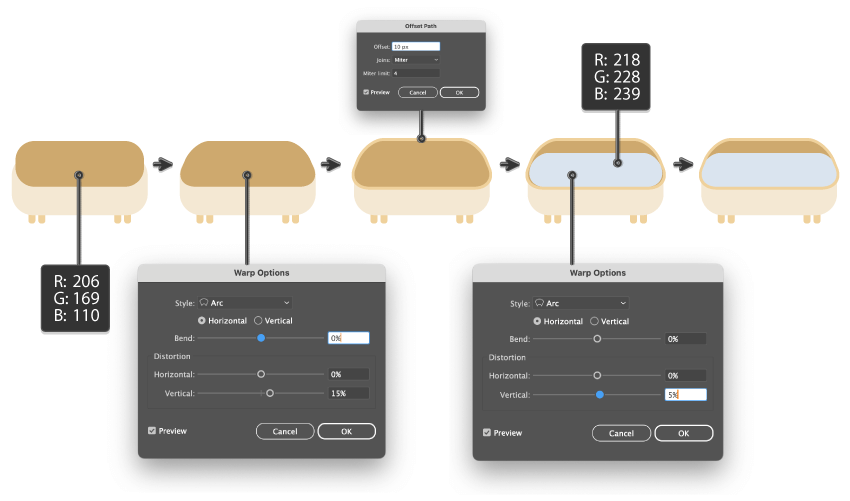
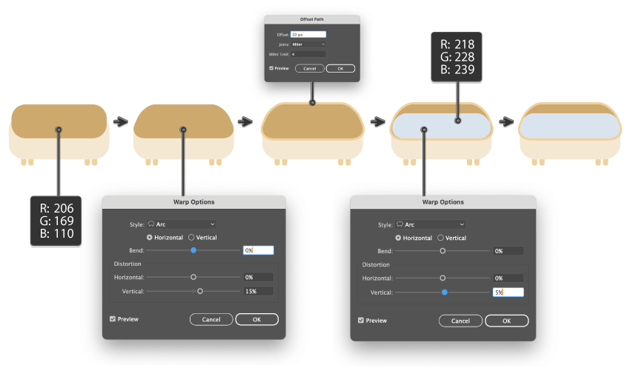
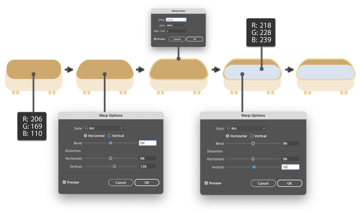
Let’s continue to create our bathtub. Using the same Rounded Rectangle Tool, draw a rounded rectange like in the image below. The fill color is R=206, G=169, B=110. This dark yellow shape is the inside of the bathtub.
Go to Effect > Warp > Arc, and in the new dialogue window, enter the options you see below and press OK. Expand this shape.
While keeping this shape selected, go to Object > Path > Offset Path… In the new dialogue window called Offset Path, enter Offset: 10 px, and then press OK. Change its fill color to R=239, G=209, B=156, or use the Eyedropper Tool (I) to take the fill color from the bathtub legs.
A new rounded rectange will be the water (fill color R=218, G=228, B=239). We want to deform it a little: go to Effect > Warp > Arc. Expand.
Keep the water selected, and make it bigger. After that, select the darkest inside part of the bathtub, and create a copy in front of it (Control-C, Control-F). This new copy is a cutter. Keep this copy selected and select the water. In the Pathfinder panel, press the Intersect button. Now the water should be exactly inside the bathtub.
Step 3
Let’s create a shower head. Take the fill color from the lightest part of the bathtub using the Eyedropper Tool (I). Make this fill color a stroke color by clicking on the Swap Fill and Stroke (Shift-X) button on the left panel.
Now, use the Rounded Rectangle Tool to draw a vertical rounded rectangle.
Take the Scissors Tool (C) and click on the anchor points shown in the image below. You should have two parts of the rounded rectangle. Delete the lower right part and place it behind the bathtub.
Create a new rounded rectangle where the shower head should be. Make the stroke color into the fill color by pressing Swap Fill and Stroke (Shift-X) button on the left panel.
Then, create any color rectangle that overlaps the shower head: we want to cut off the bottom part. Select both shapes and hit the Minus Front button on the Pathfinder panel (Window > Pathfinder).
Take the fill color from the darkest part of the bathtub and draw a long, narrow rounded rectangle on the bottom of the shower’s head.


Step 4
Place Moo Deng in the bath.



Step 5
Let’s make some soap bubbles to cover the bottom part of Moo Deng’s body. Take the water fill color and create a few circles. You need to hold the Shift button to create an even circle.



4. How to create floral elements in Illustrator
Step 1
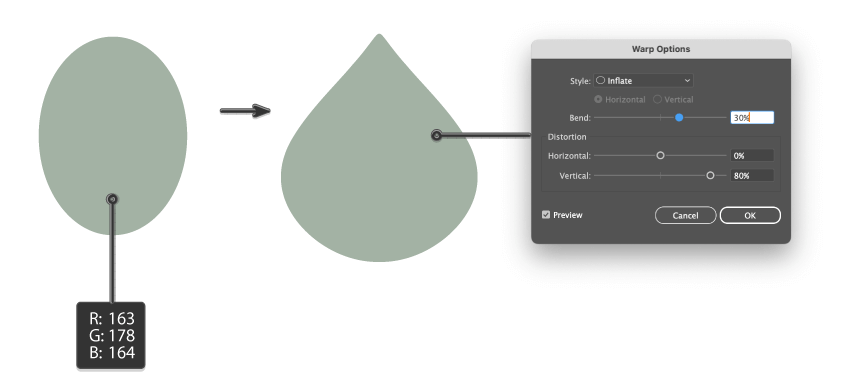
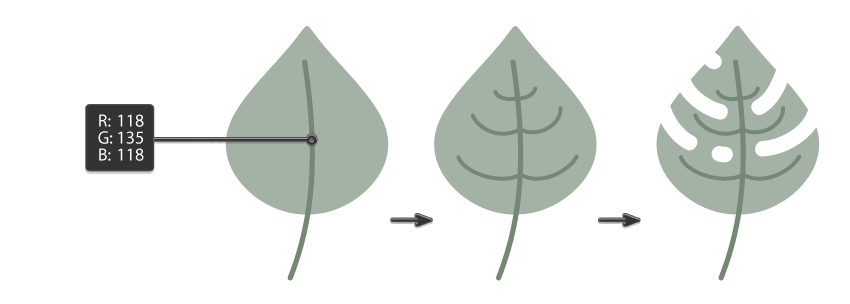
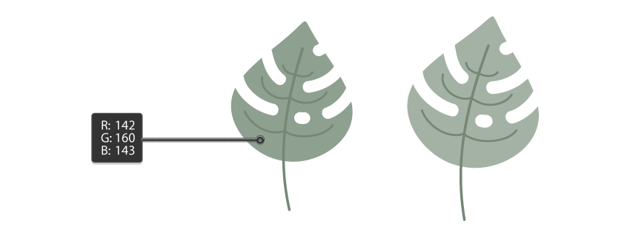
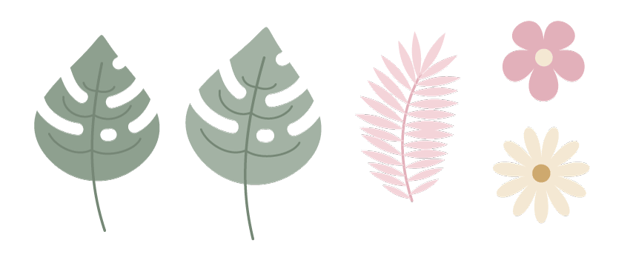
Now, we need to create a monstera leaf. Use the Ellipse Tool (L) to draw an ellipse (fill color R=163, G=178, B=164). While keeping it selected, go to Effect > Warp > Inflate and, in the new dialogue window, enter the options you see below. Expand this shape (Object > Expand Appearance).
Step 2
Let’s make a stalk for the monstera leaf. Make sure the leaf is not selected, press the Swap Fill and Stroke (Shift-X) button, and change the stroke color to R=118, G=135, B=118. Using the Arc Tool, draw the stalk of the leaf. On the Stroke panel, you can adjust the stroke Weight however you like, as it depends on how big the leaf is. Also, in the Cap section, make sure you select Round Cap.
Using the same stroke color and a lighter stroke Weight, draw the veins of the leaf.
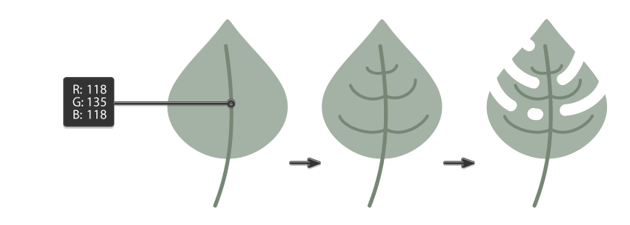
Now we want to create those typical monstera holes. Take the Eraser Tool (Shift-E) and select the object you want to erase, which is of course the leaf. Adjust the size of the Eraser Tool (Shift-E) by double-clicking on it. Then erase some parts of the leaf to create holes.
Step 3
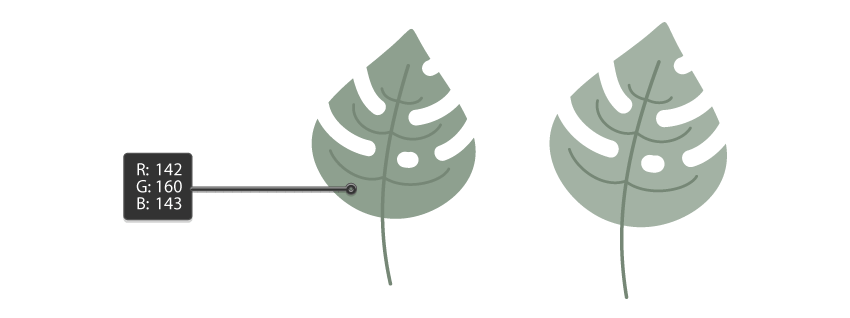
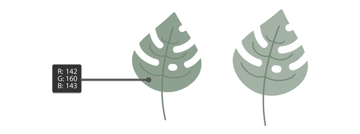
Create a copy of the whole leaf and change the fill color to R=142, G=160, B=143. Now you have two leaves.
Step 4
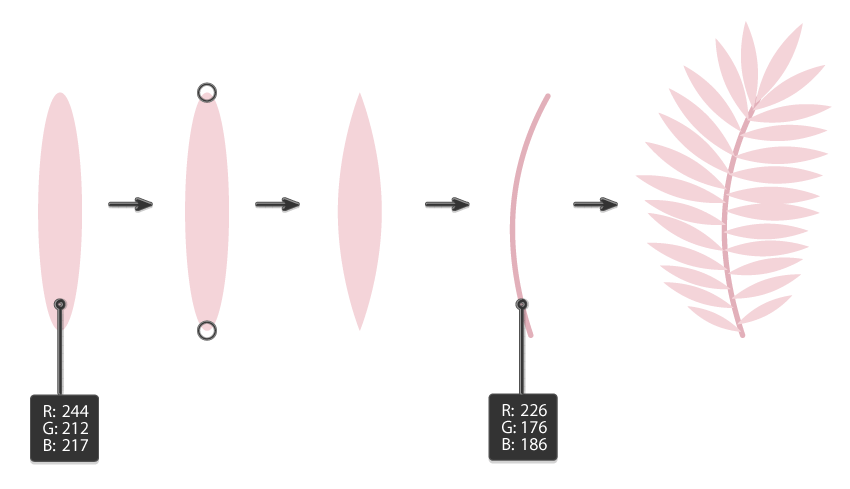
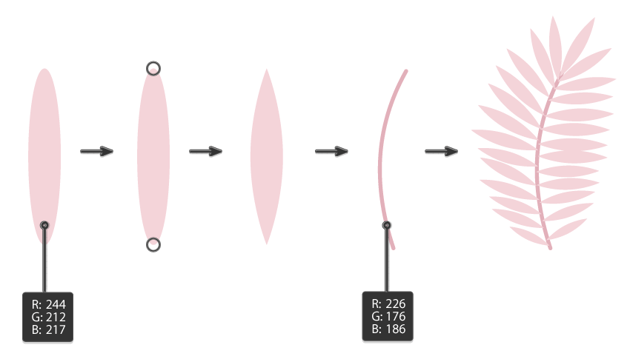
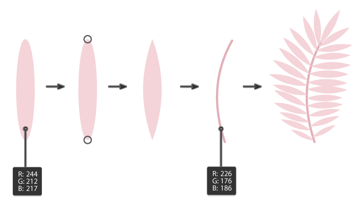
Next, for a beautiful color contrast, we want to create a pink leaf. Create a long vertical ellipse with the fill color R=244, G=212, B=217.
Using the Anchor Point Tool (Shift-C), click on the top and bottom anchor points of the leaf. That’s how you get pointy edges.
Press the Swap Fill and Stroke (Shift-X) button, and change the stroke color to R=226, G=176, B=186. Using the Arc Tool, draw the stalk of the leaf. On the Stroke panel, you can adjust the stroke Weight however you like, as it depends on how big the leaf is. Also, in the Cap section, make sure you select Round Cap.
Create a lot of copies of the pink pointy shape and place them around the stalk. The pink leaf is now ready.
Step 5
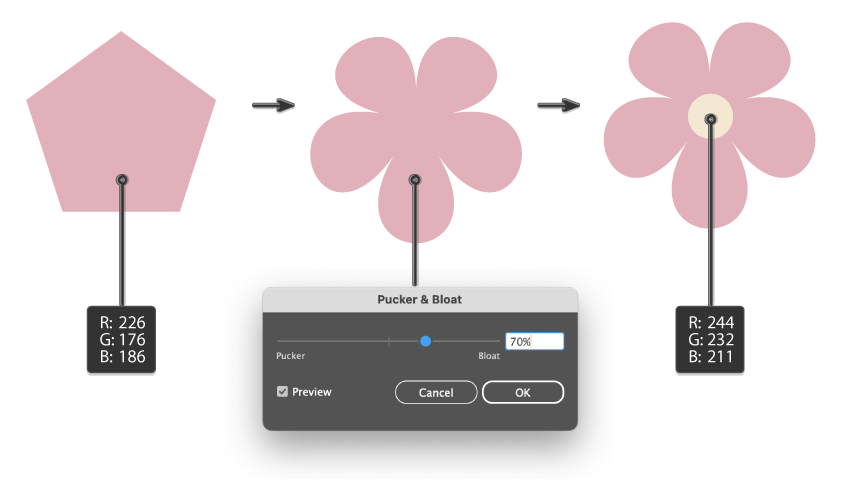
To create a simple flower, we need the Polygon Tool. If you don’t see it, just click on the Rectangle Tool or the Ellipse Tool (it depends on what you used previously) and hold for a second. A new pop-up window will appear where you can choose the Polygon Tool. Grab it and click on your canvas. In the new dialogue window called Polygon, enter Sides: 5 with any Radius, and then press OK.
Change its fill color to R=226, G=176, B=186 and go to Effect > Distort & Transform > Pucker & Bloat… Enter the options you see in the image below. Do you see a simple flower shape?
Add a yellow circle in the middle (fill color R=244, G=232, B=211), and the pink flower is complete.
Step 6
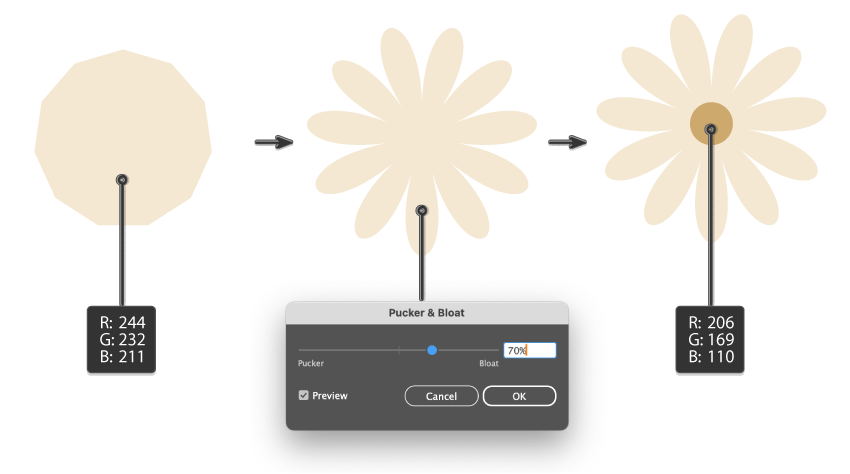
Now let’s create the yellow flower. Use the Polygon Tool to create a polygon with 11 sides (you can technically give it any number of sides you want).
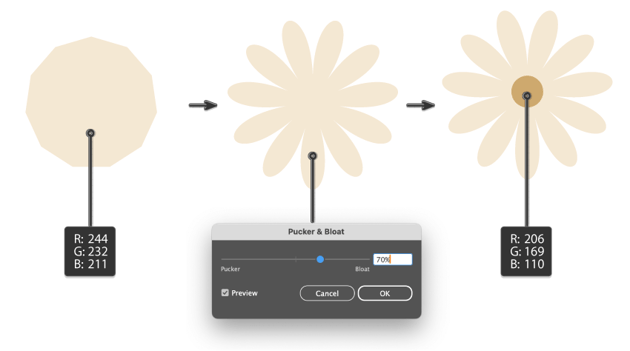
Set its fill color to R=244, G=232, B=211, and go to Effect > Distort & Transform > Pucker & Bloat… Enter the options you see in the image below.
Add a dark yellow circle in the middle (fill color R=206, G=169, B=110), and the yellow flower is complete.
Step 7
So far, you should have the five floral elements depicted in the image below. Be sure each one is grouped separately for easy moving.
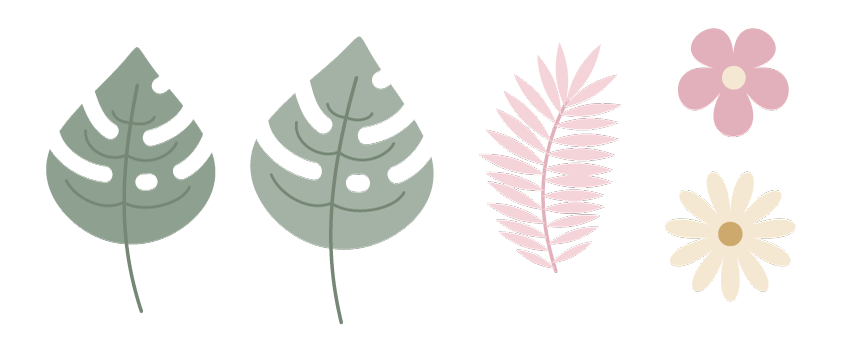
Place the floral elements behind the cute illustration of Moo Deng in the bathtub. You can follow the image below or place them however you’d like.



Step 8
Of course, the shower needs running water. Grab the Line Segment Tool (\) and go to the Stroke panel (Window > Stroke). Check Round Cap in the Cap section. Also put a tick in the box labeled Dashed Line. Finally, make the stroke color R=218, G=228, B=239 and draw some lines coming from the shower head.



Step 9
Select the water so you will have its fill color. Draw more circles as bubbles that cover the water and fly around Moo Deng.
Then, go to the Transparency panel (Window > Transparency), and change the Opacity from Normal to Screen and reduce it to 50%.



5. How to create a background in Illustrator
Step 1
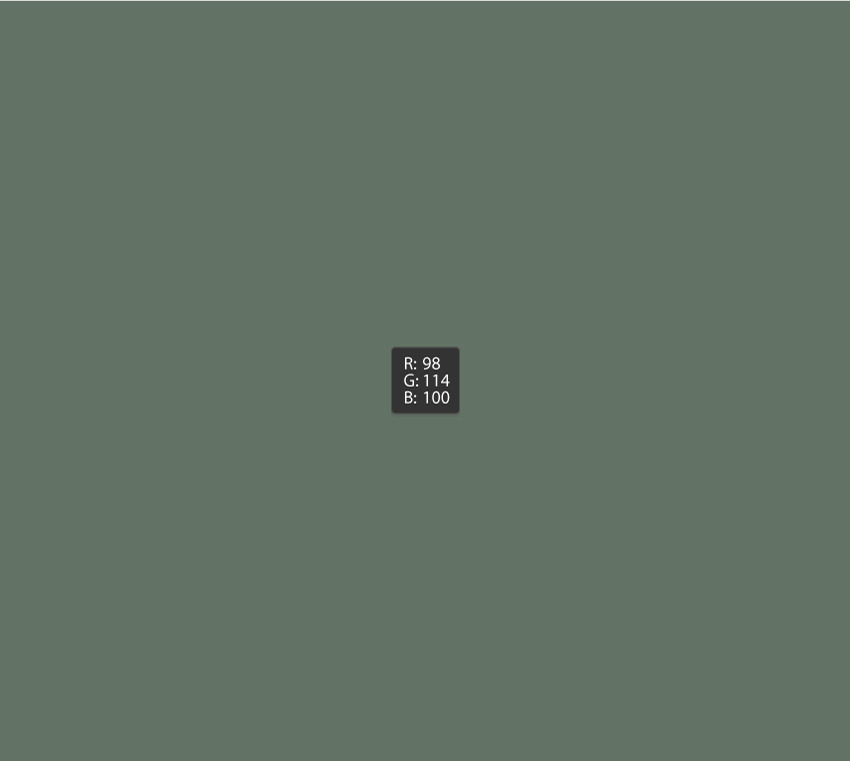
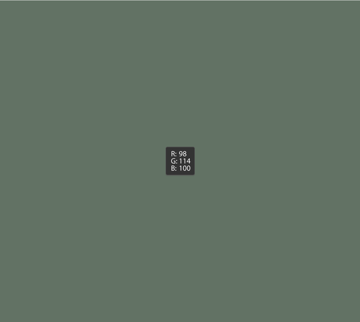
Take the Rectangle Tool (M) and click on your artboard. In the new dialogue window, enter 850 px Width and 750 px Height. Press OK and change the fill color to R=98, G=114, B=100. This will be our background.
Cut the background (Control-X) and place it behind everything you’ve created so far (Control-B). Make sure your background stays in the middle of your artboard.
If you want to place your background exactly in the middle of the canvas, go to the Align panel, and check Align to: Align to Artboard (bottom-right corner). When you check this, any items that you choose to align will be aligned to your artboard. Now you need to select the object that you want to align. In the Align Objects section, press Horizontal Align Center and Vertical Align Center. This is how you put any object exactly in the middle of your canvas or artboard.
Step 2
Now, place our vector Moo Deng illustration and all the other objects on the background.



Congratulations!
That’s such a cute picture! I hope you had fun creating it and learned something new about illustrating easy, cute animal drawings and how to draw in Illustrator along the way. Thank you for joining me in this tutorial.
Now you know how to draw Moo Deng. Keep exploring and experimenting with everything you’ve learned to create your own stunning designs. I can’t wait to see you in our next session!


If you want to learn more, take a look at these tutorials
Explore Envato Tuts+ for a wide range of drawing tutorials designed to enhance your skills. Our extensive guides cover diverse topics, offering valuable insights and techniques to help you grow. Whether you’re just starting out or already a pro, these tutorials can elevate your work. Take this opportunity to learn, improve, and advance your art with expert-led content crafted to support your creative journey.