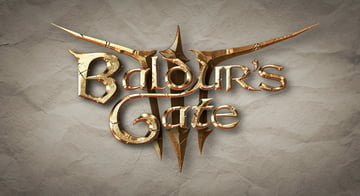
Tutorial Assets
You’ll need the following resources to complete this project and create the Baldur’s Gate logo 3D gold text effect:


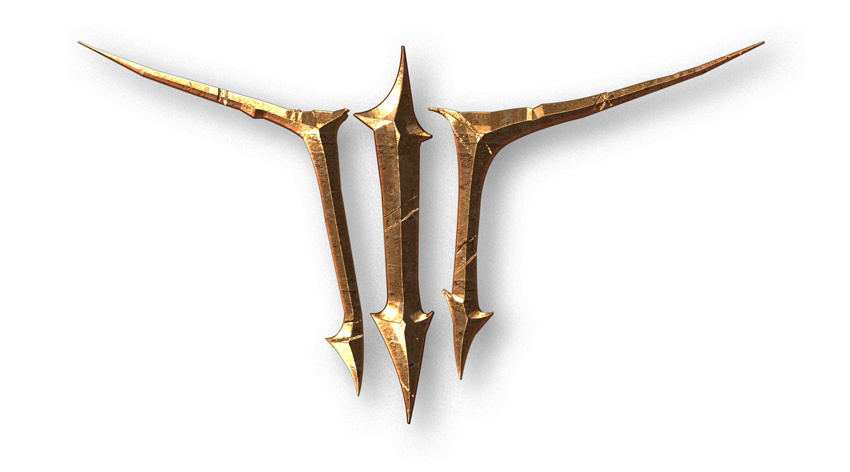
1. How to Create the Number “3” Shape
Step 1
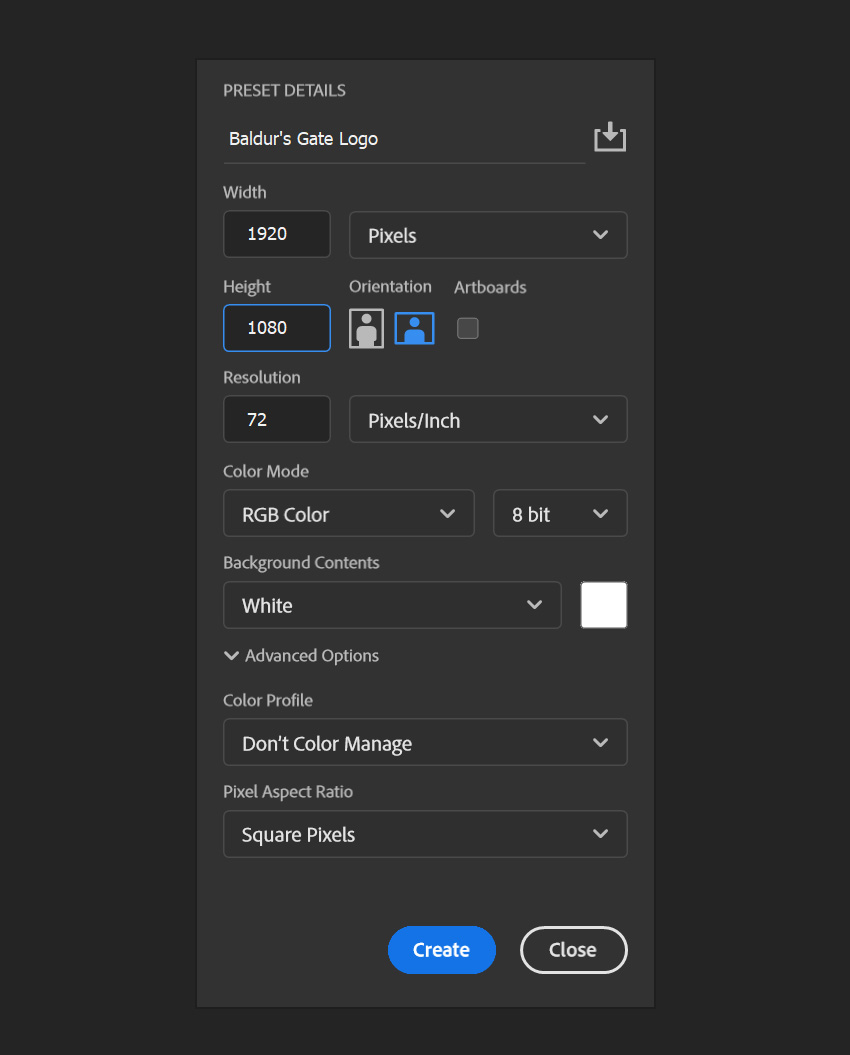
Let’s get started by launching Adobe Photoshop and going to File > New to open the New Document window. From there, type “Baldur’s Gate Logo” as the name of the document and set up the dimensions as shown. Keep the units set to pixels and use the following measurements:
- Width: 1920 px
- Height: 1080 px


Step 2
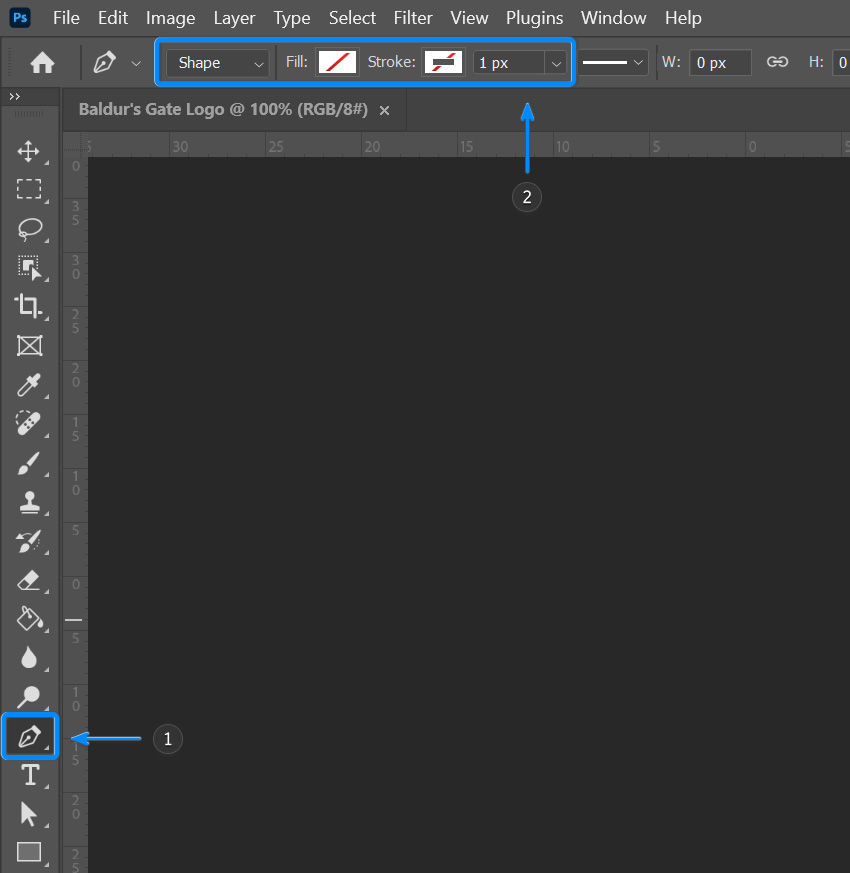
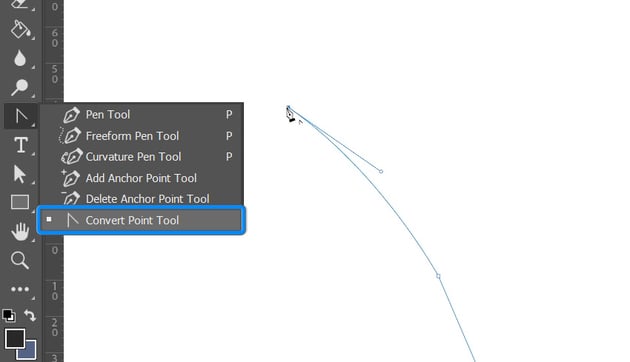
Select the Pen Tool and use the following settings:
- Tool Mode: Shape
- Fill: No Color
- Stroke: No Color


Step 3
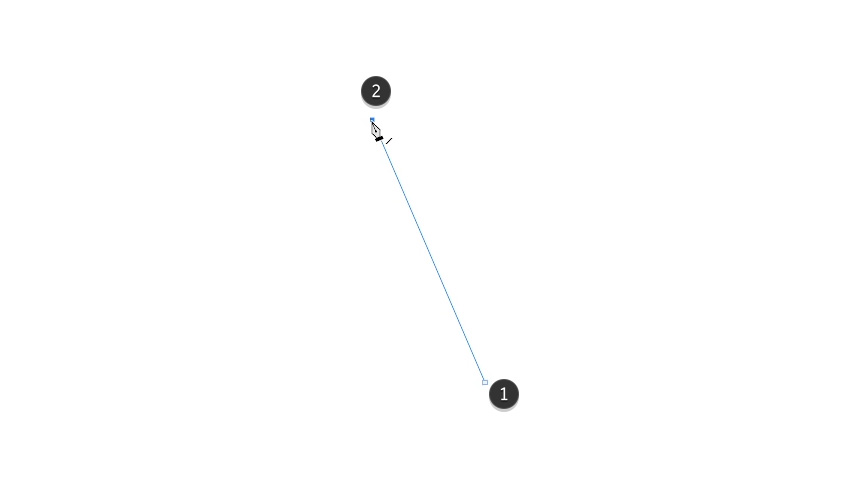
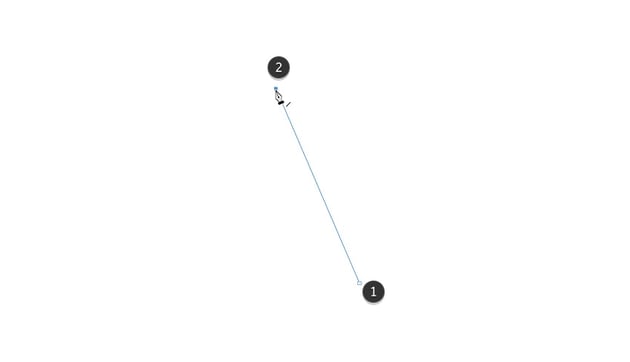
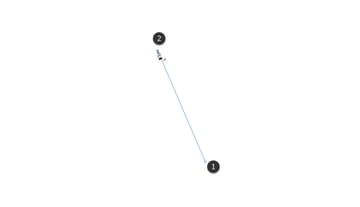
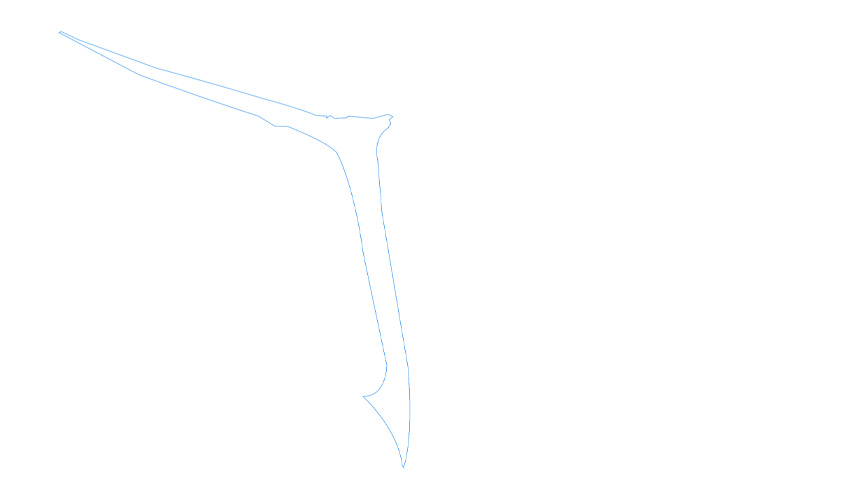
Now let’s create the first shape on the left for the number “3”. Click the left mouse button to create the first anchor point, and then click again to place a second anchor point to continue the outline of the shape.
Step 4
To create a curved line, simply click and drag with the mouse when creating your anchor point.

Step 5
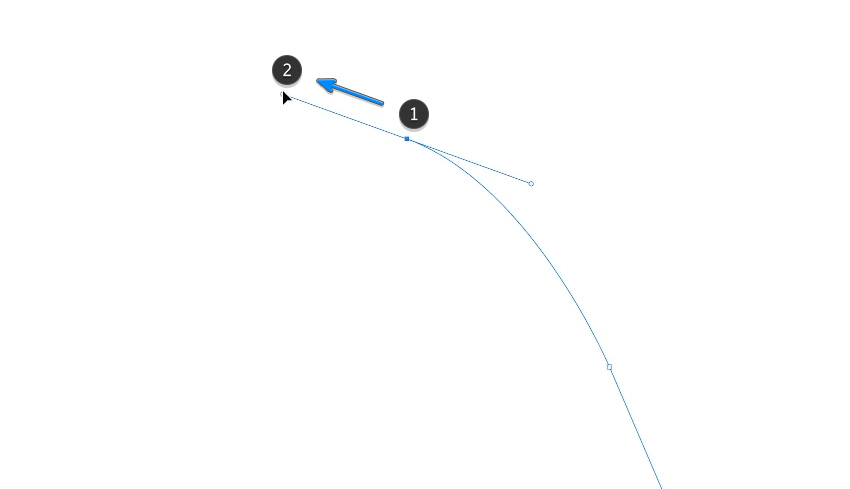
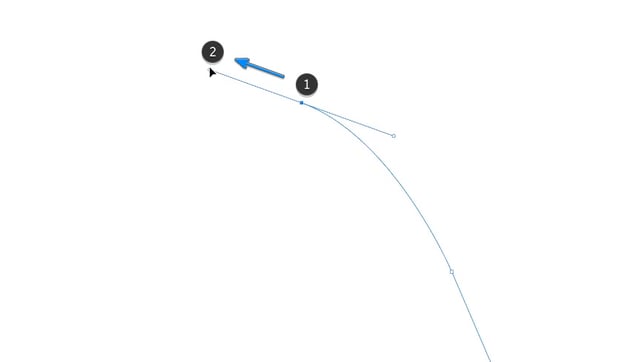
To create a corner from a curved line, use the Convert Point Tool or hold the Alt key on the keyboard whilst using the Pen Tool.


Step 6
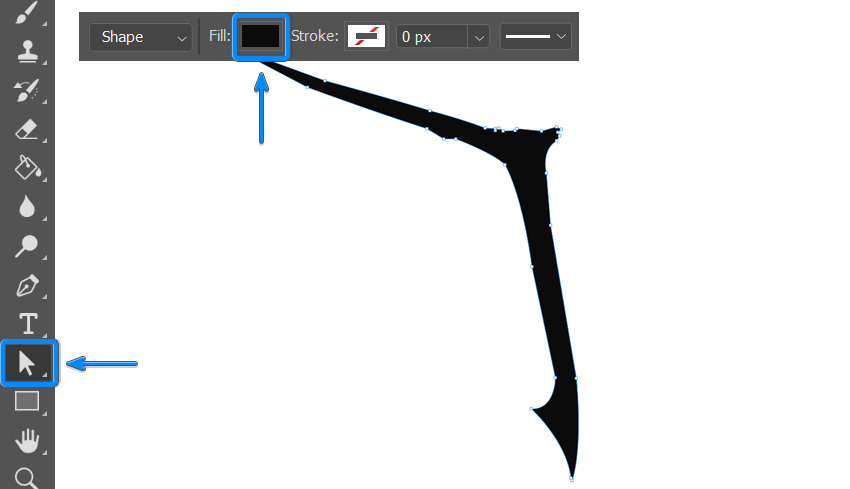
Continue using the Pen Tool to draw out the first shape, and then join the last anchor point to the first anchor point to finish it.
Step 7
Change the fill color from ‘No Color’ to black so that we can see the shape clearly. From there, you can use the Direct Selection Tool (A) to adjust the shape to your liking by clicking and dragging on the anchor points or handles.
Step 8
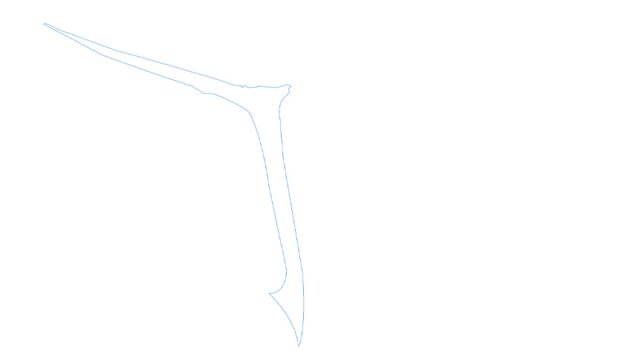
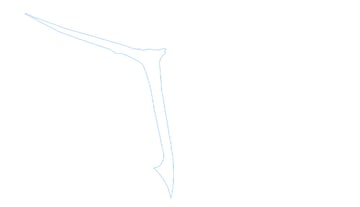
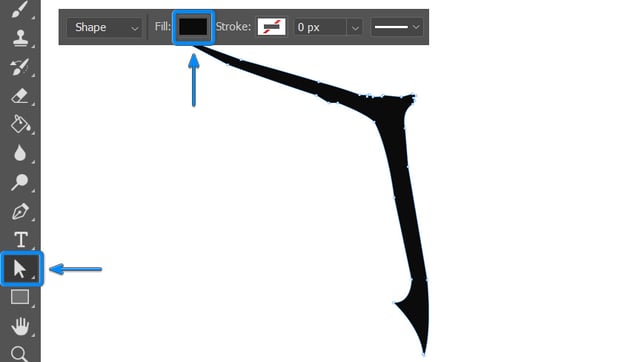
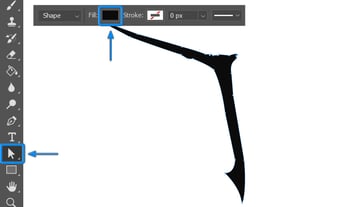
Repeat the above steps and techniques to create the next two shapes of the number 3 design for the Baldur’s Gate logo. Once you’re happy with the way they look, select all three shape layers and merge them (Right Click > Merge Shapes). Rename the new layer “Number 3”.


2. How to Create the Text Shapes for the Logo
Step 1
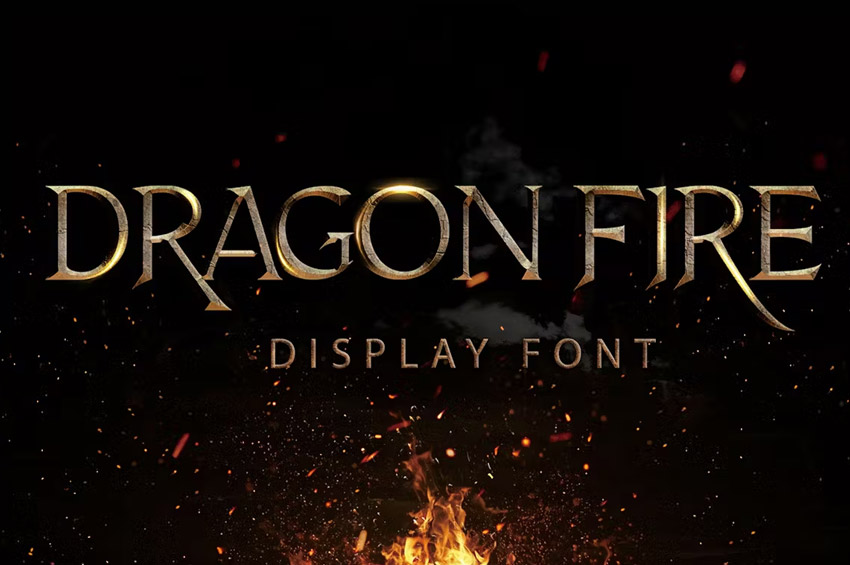
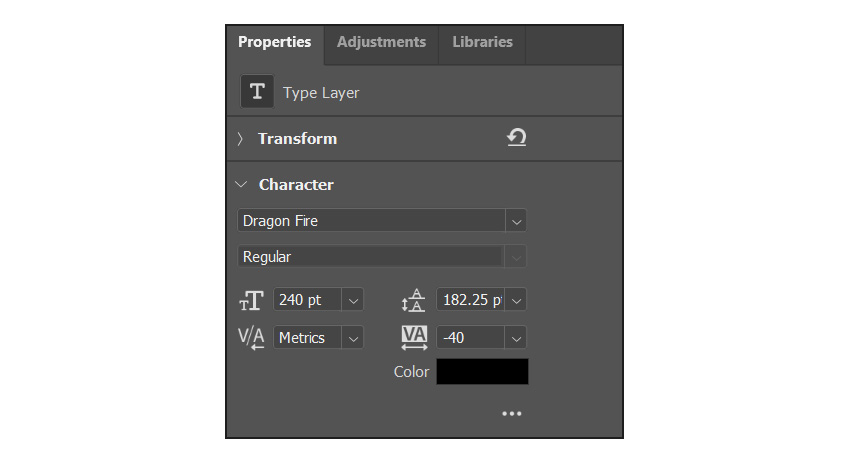
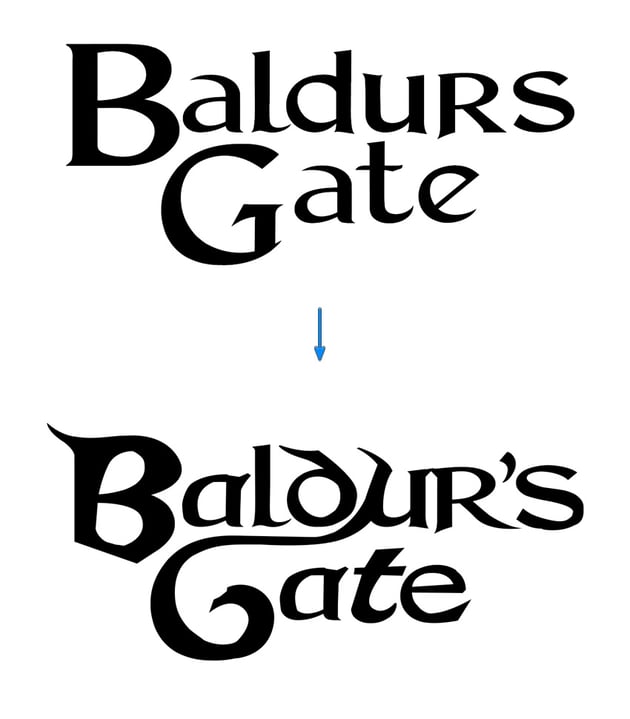
For this part of the tutorial, we’ll be using the Dragon Fire font, which is a medieval-style text effect available to download from Envato Elements. Although this font is not an identical match to the original design, we can use the tools in Adobe Photoshop to make it match a bit better.
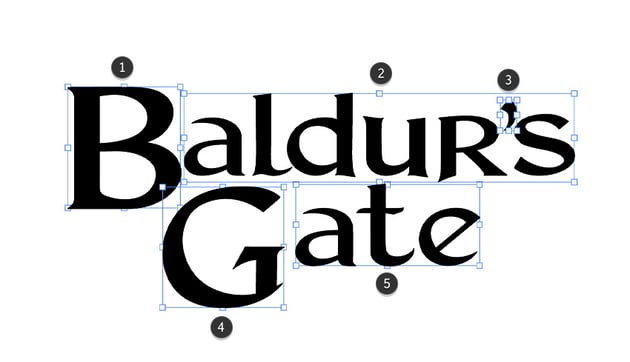
Create a new layer for the text and use the Type Tool (T) to write out the words for the logo. When creating the text, we want to separate the letters ‘B’ and ‘G’, as well as the remaining two lines of text, on their own individual layers. Also note that the ‘R’ is a capital letter that’s resized to match the rest of the letters.
To make the next part easier to manage, you may want to hide the ‘Number 3’ layer by clicking on the eye icon next to it.


Step 2
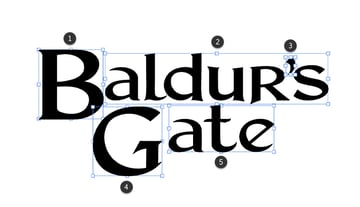
Next, we need to adjust the size and placement of the letters. For the ‘B’ and ‘G’ letters, set the font size to 400 pt. For the remaining text, set the font size to 240 pt. Then, place the letters so that they resemble the image below. I’ve also moved the apostrophe to its own layer to allow for better customization.

Step 3
Also, we want to adjust the tracking of the letters individually so that they’re spaced out correctly. Horizontally scale the letters by 120%. Note that this doesn’t have to be perfect as we can readjust this at a later stage as well.


Step 4
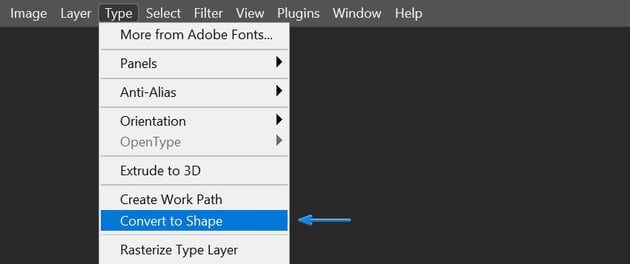
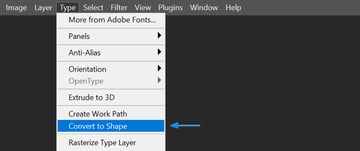
Select all the text layers, and then go to Type > Convert to Shape.

Step 5
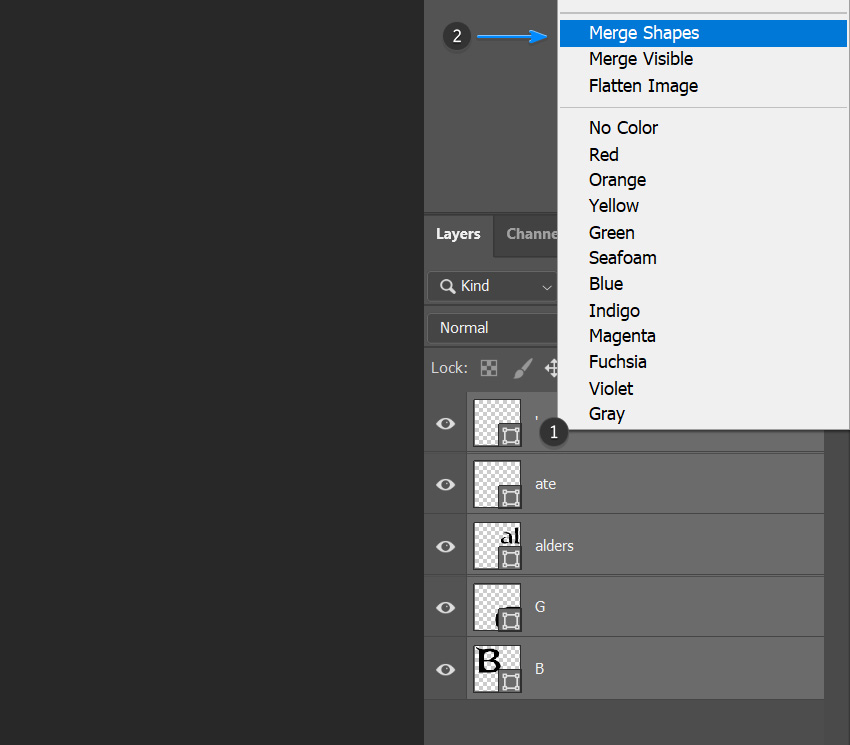
Then, select all the new shape layers and merge them (Right Click > Merge Shapes).


Step 6
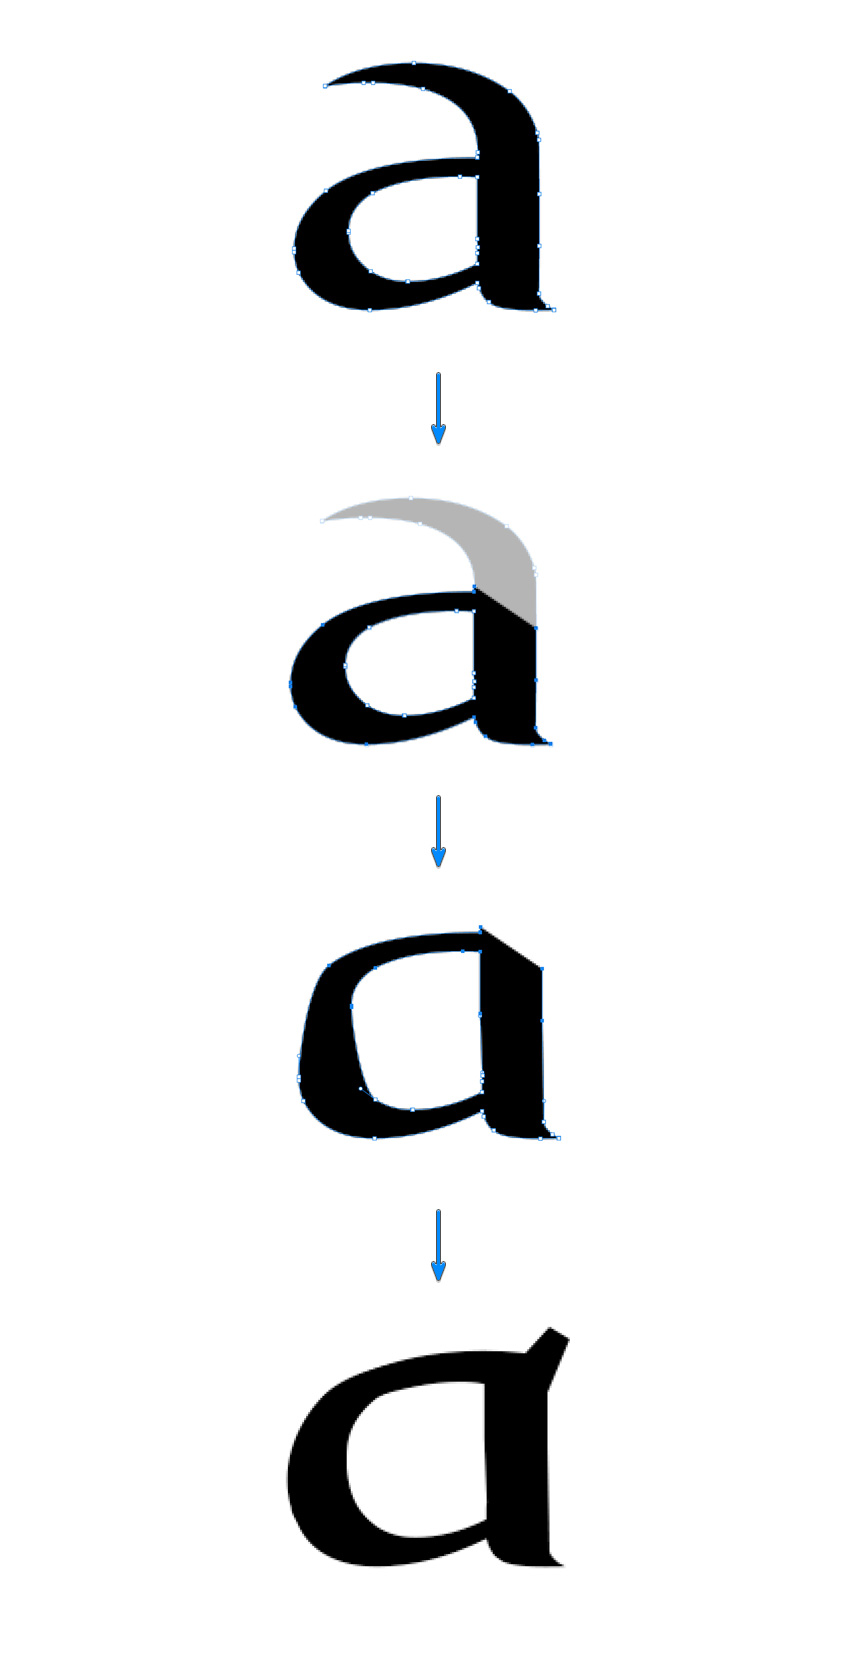
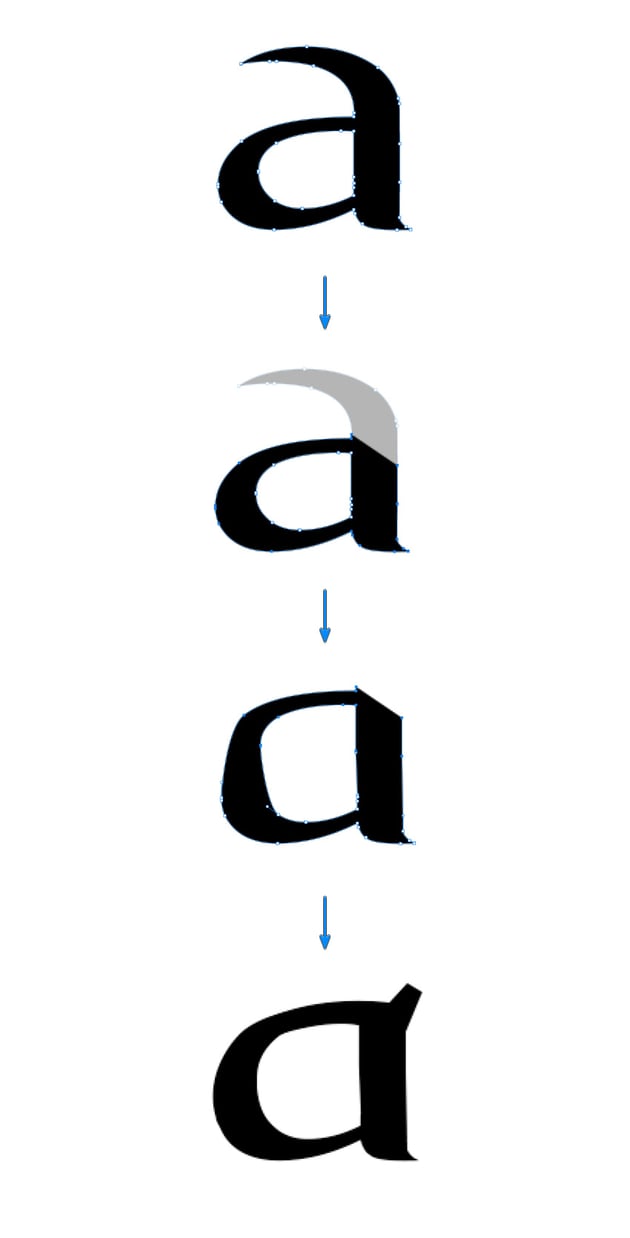
Now that the letters have been converted, we can use the Direct Selection Tool and Pen Tool to adjust the anchor points of the letters to better resemble the ones shown in the original logo.
For example, with the letter ‘a’, delete the top few anchor points with the Direct Selection Tool and then rejoin the rest of the letter with the Pen Tool.
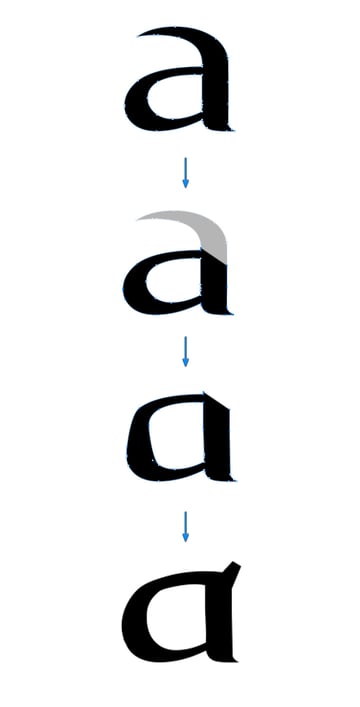
Step 7
Now do the same for the rest of the letters. In this example, I’ve only made some basic adjustments, but you can go even further if you want to match the original logo exactly.
To adjust the look of the letters even further, use the Pen Tool to create some additional shapes to match the shapes of the original Baldur’s Gate logo. Once you’re happy with the design, select all the shape layers and merge them (Right Click > Merge Shapes). Rename the new layer ‘Letters’.


3. How to Create a Photoshop Pattern
Step 1
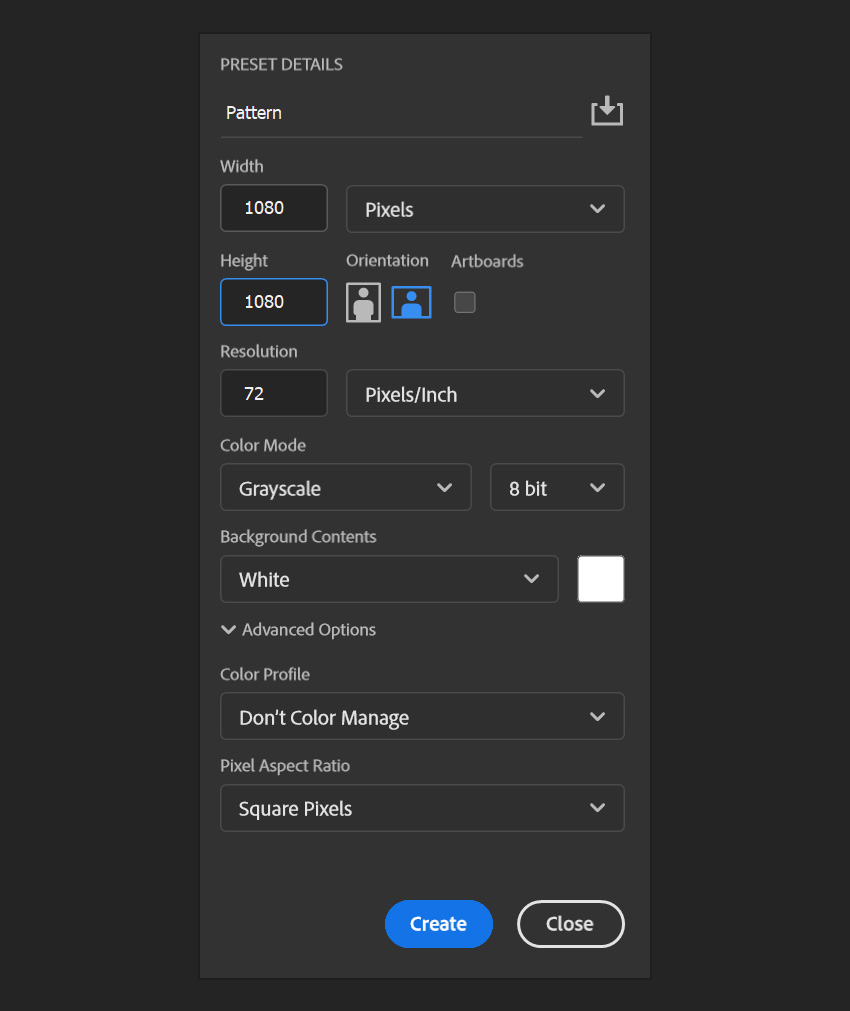
Create a new file by going to File > New to open the New Document window. Keep the units set to pixels and use the following measurements:
- Width: 1080 px
- Height: 1080 px


Step 2
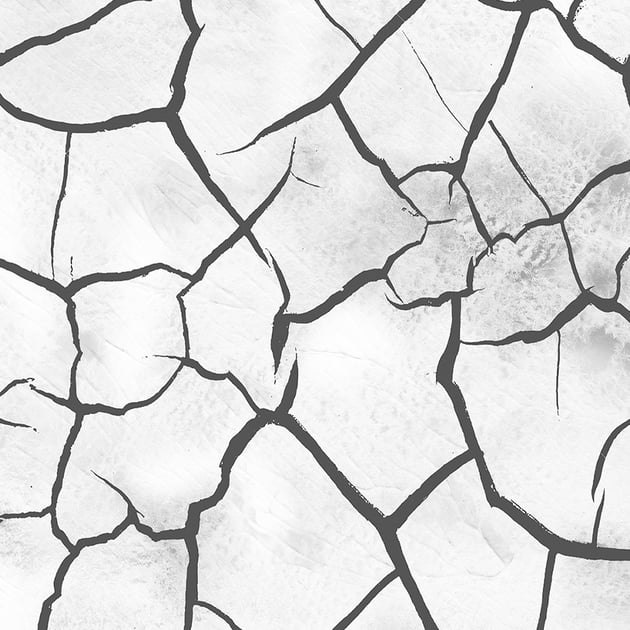
Import one of the crackled paper textures from Abstract Crackled Paper Textures by dragging and dropping it directly into the file. Then resize it so that it fits the document.


Step 3
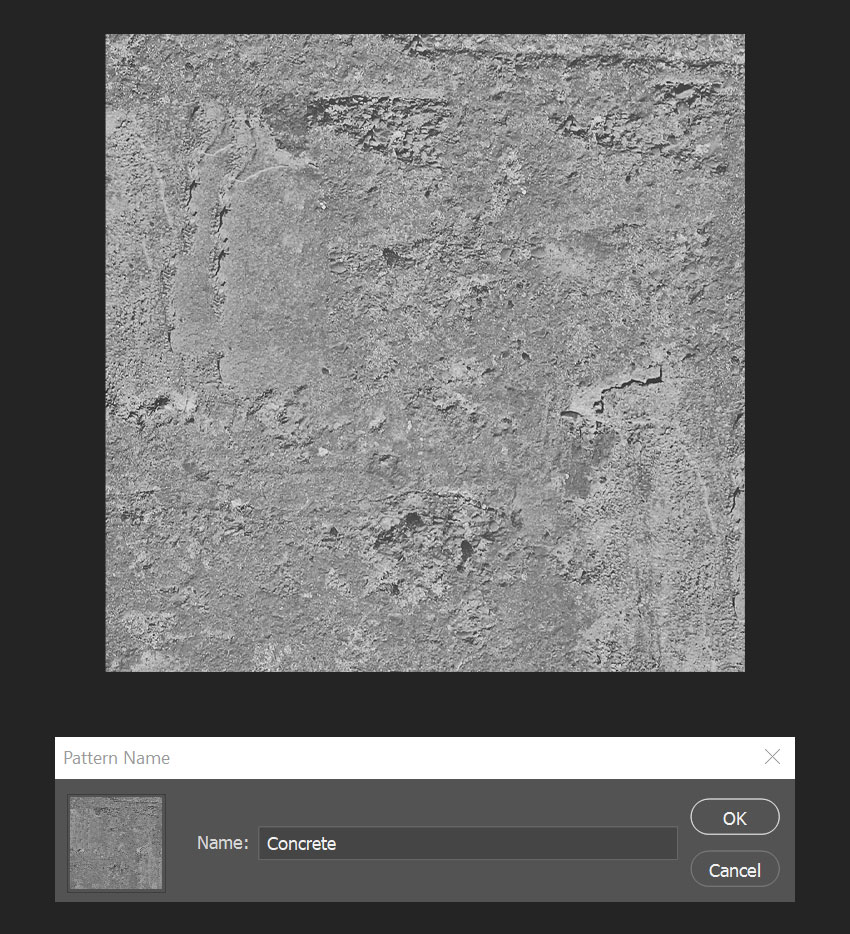
Press Control-A to select the whole area, and then go to Edit > Define Pattern and name it “Cracks”.


Step 4
Repeat the steps using one of the rough concrete textures from 25 Rough Concrete Textures and name it “Concrete”. You can also create more patterns to experiment with. Once you’ve done that, move on to the next section where you’ll learn how to make text gilded in Photoshop.


4. How to Make Text Gilded in Photoshop Using Layer Styles
Step 1
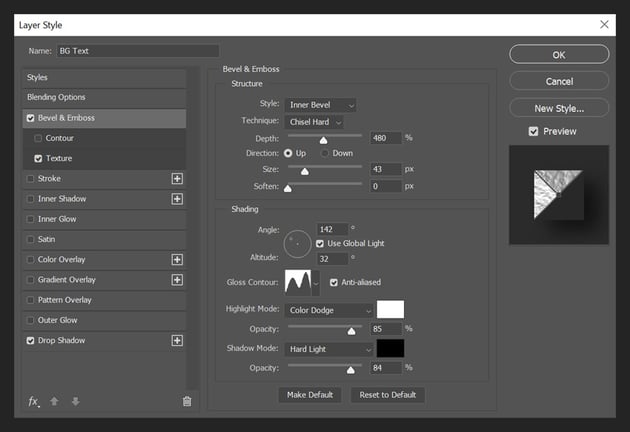
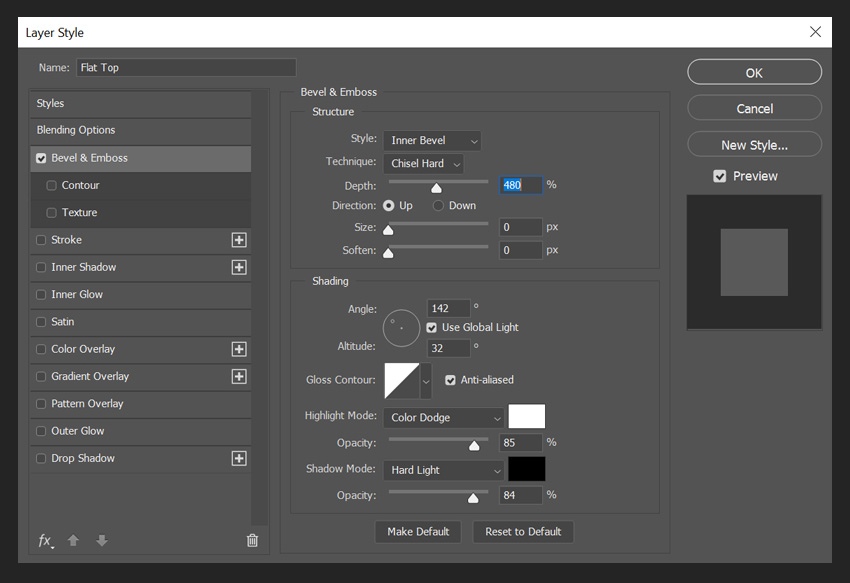
Now we’ll learn how to make 3D gold text in Photoshop. Select your ‘Letters’ layer in the Layers panel, right-click on the layer, and choose Blending Options from the menu. Here, we’ll begin to use and apply the 3D gold text effect Photoshop layer styles.
Add a Bevel & Emboss with these settings:
- Style: Inner Bevel
- Technique: Chisel Hard
- Depth: 480%
- Direction: Up
- Size: 43 px
- Check the Use Global Light box, choosing Angle 142° and Altitude 32°.
- Check the Anti-aliased box
-
Highlight Mode: Color Dodge with Color
whiteand Opacity 85%. -
Shadow Mode: Hard Light with Color
blackand Opacity 84%.


Step 2
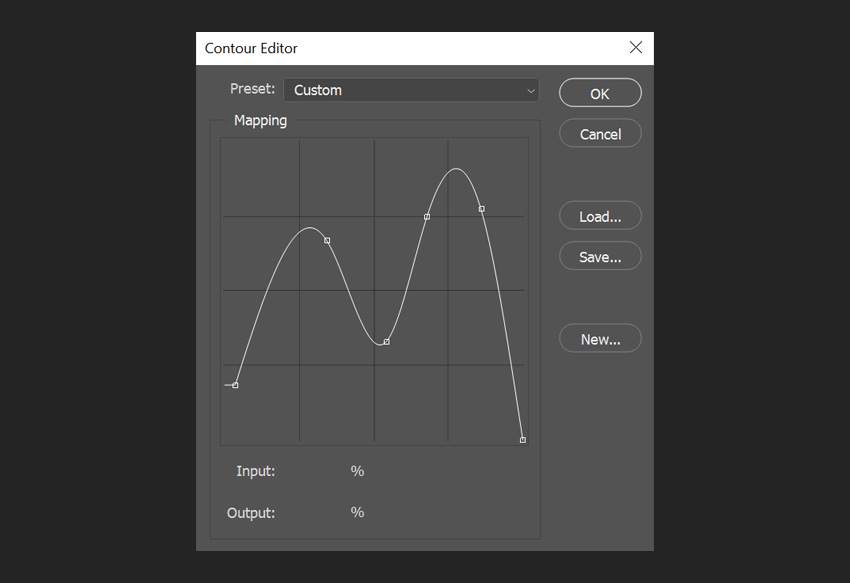
While you are still in the Bevel & Emboss tab, create a custom Gloss Contour.
Add six points to the contour curve. To add points, click anywhere on the curve. Now set an Input and an Output for each of these points.
- Point 1 – Input: 4% Output: 18%
- Point 2 – Input: 34% Output: 67%
- Point 3 – Input: 54% Output: 33%
- Point 4 – Input: 68% Output: 75%
- Point 5 – Input: 86% Output: 78%
- Point 6 – Input: 100% Output: 0%


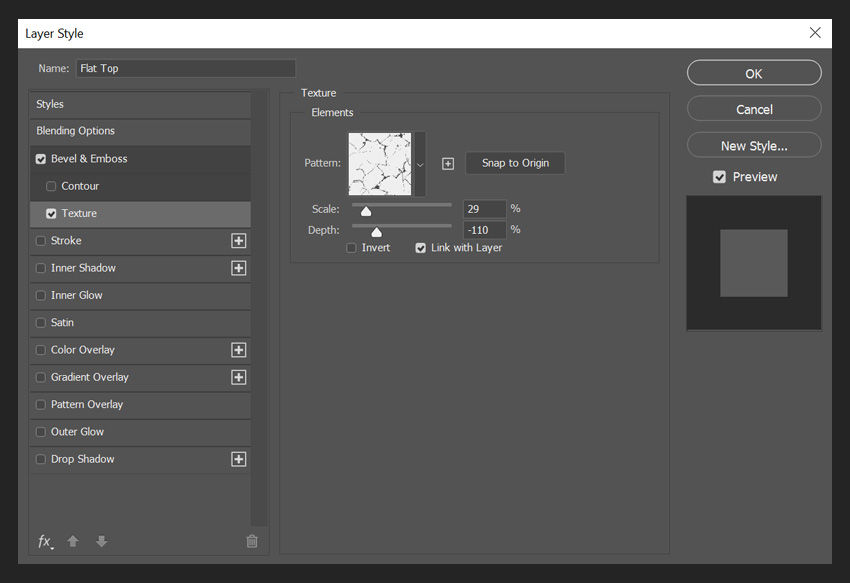
Step 3
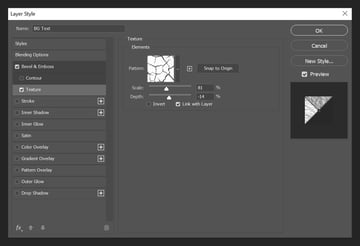
Check the Texture box and select the “Cracked” pattern we created earlier. Apply the following settings:


Step 4
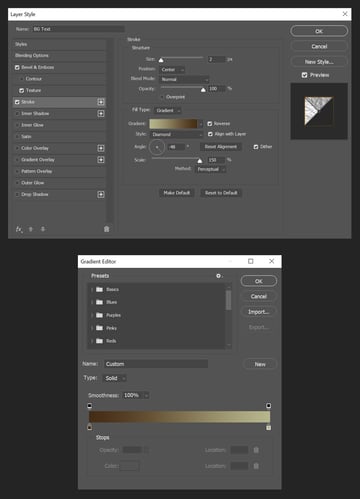
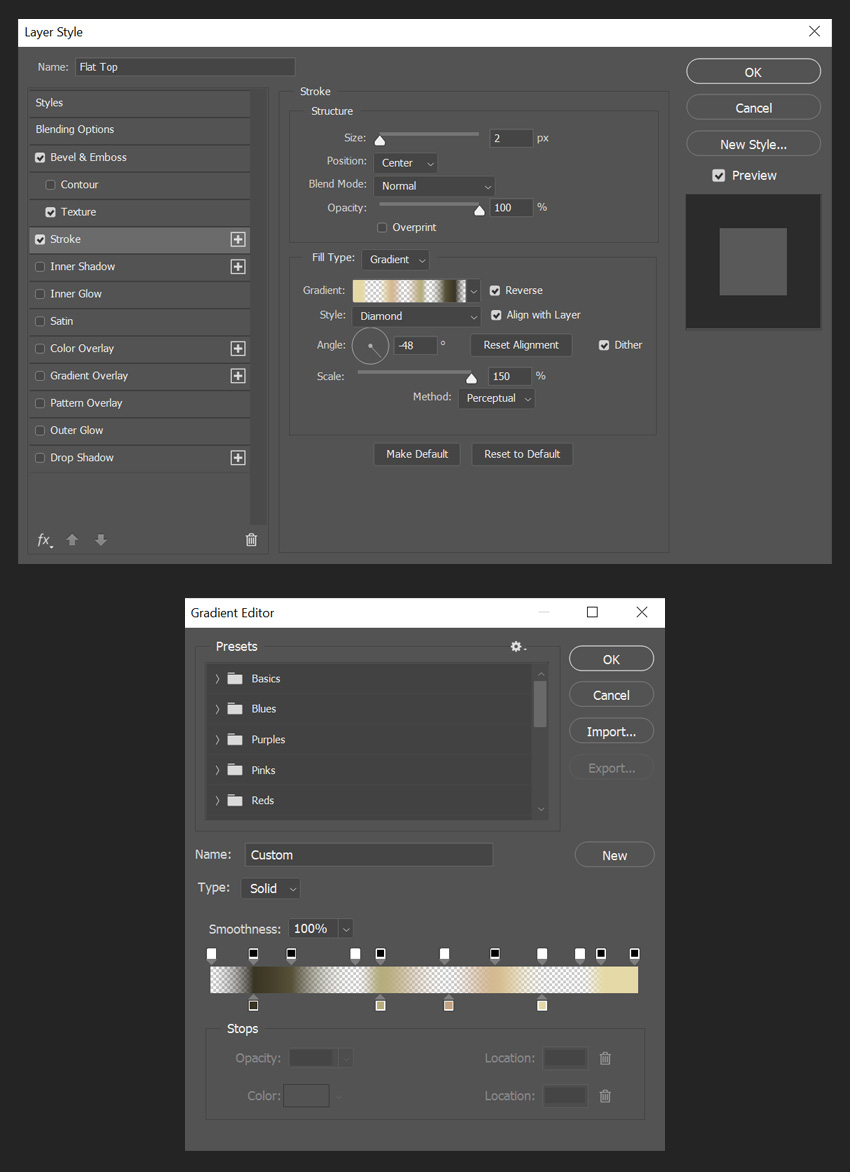
Add a Stroke with these settings:
- Size: 2 px
- Position: Center
- Blend Mode: Normal
- Opacity: 100%
- Fill Type: Gradient
- Style: Diamond
- Angle: -48°
- Check the Dither box
- Scale: 150%
- Click on the Gradient and set these color stops:
- Color stop 1 – Color:
#452c14Location: 0% - Color stop 2 – Color:
#b6b68cLocation: 100%


Step 5
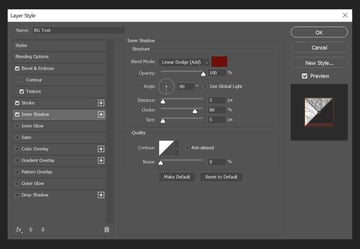
Add an Inner Shadow with these settings:
-
Blend Mode: Linear Dodge (Add) with Color
#700d06 - Opacity: 100%
- Uncheck the Use Global Light box before setting the Angle to 90°.
- Distance: 5 px
- Choke: 80%
- Size: 5 px


Step 6
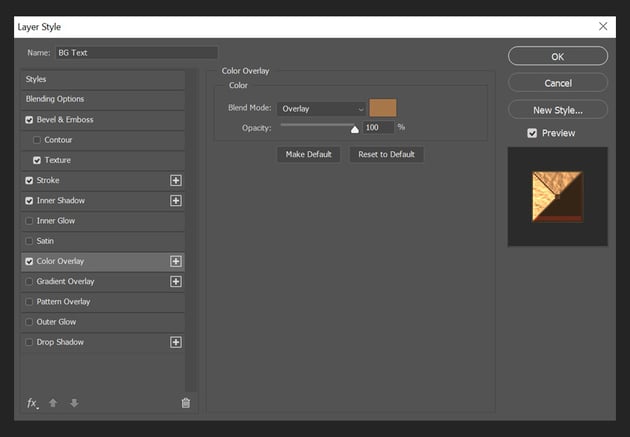
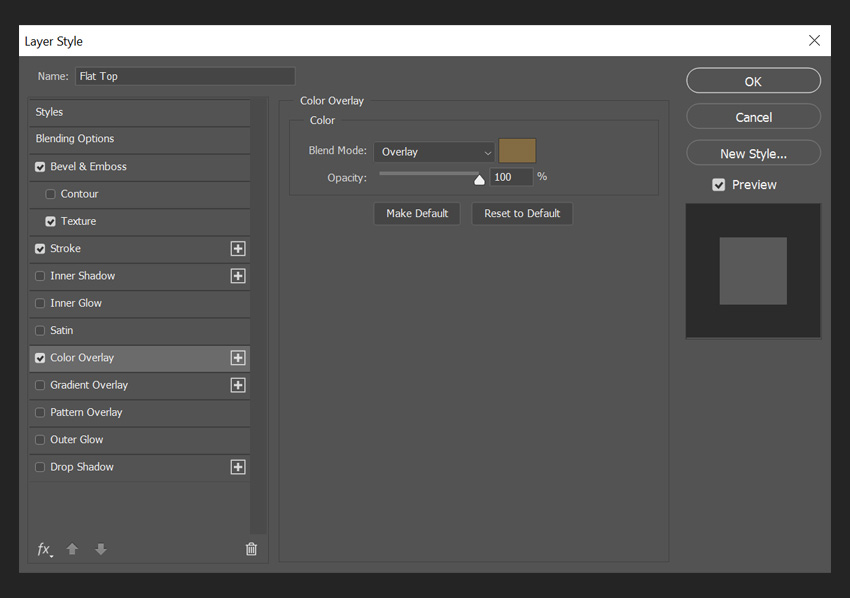
Add a Color Overlay with these settings:
-
Blend Mode: Overlay with Color
#a7774a - Opacity: 100%


Step 7
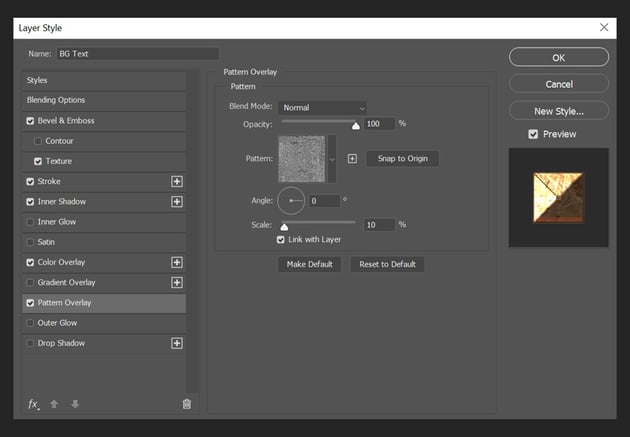
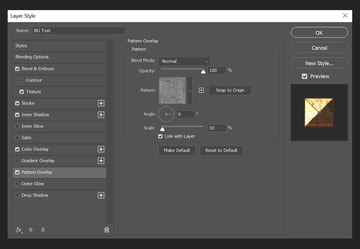
Check the Pattern Overlay box and select the “Concrete” pattern we created earlier. Apply the following settings:
- Blend Mode: Normal
- Opacity: 100%
- Angle: 0°
- Scale: 10%

Step 8
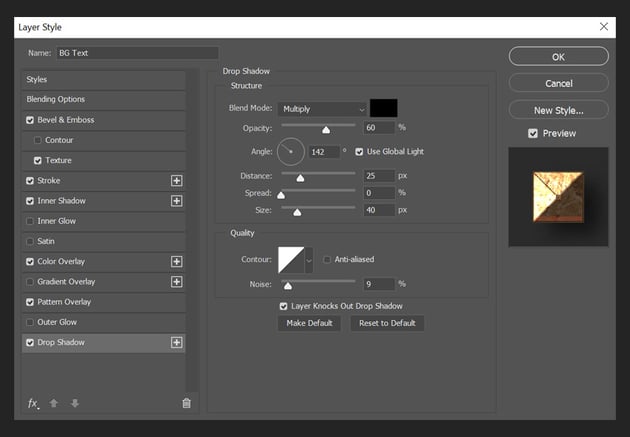
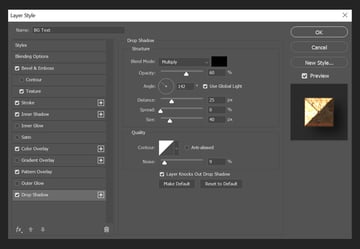
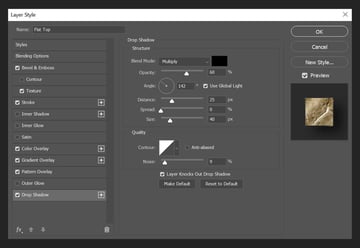
Add a Drop Shadow with these settings:
-
Blend Mode: Multiply with Color
#000000 - Opacity: 60%
- Angle: 142°
- Check the Use Global Light box
- Distance: 25 px
- Spread: 0%
- Size: 40 px
- Noise: 9%

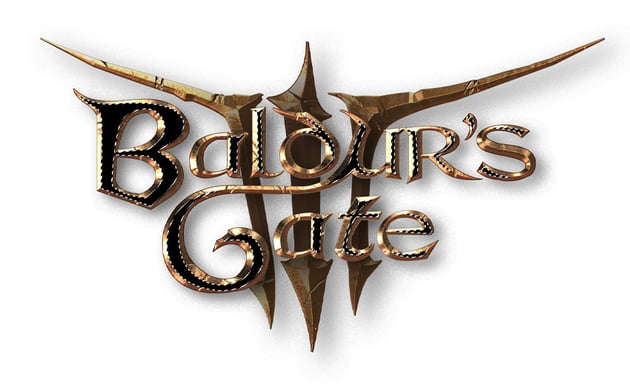
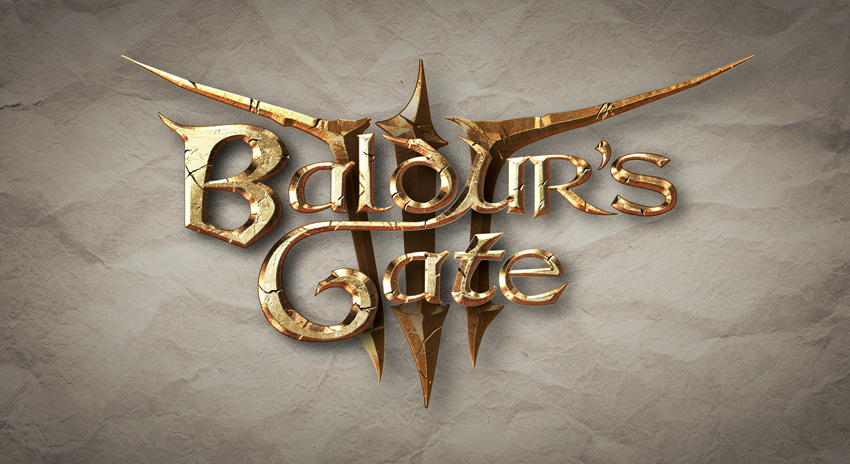
Step 9
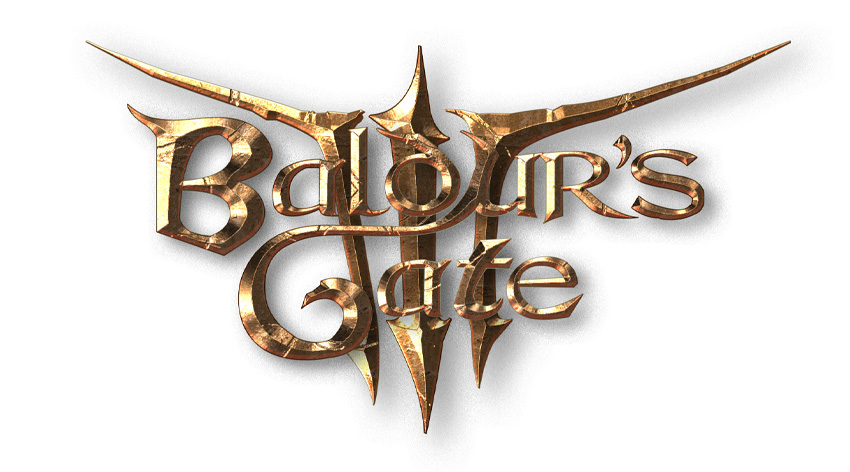
Your text should now look similar to the image below.


Step 10
Apply the same effects to the “Number 3” layer.


Step 11
However, if you make both layers visible, it appears quite difficult to read because there’s no contrast between the letters at the top and the shapes at the bottom.
Step 12
Let’s fix this by using the mouse to Control-Click on the “Number 3” Layer to select the shape. Create a new Layer and name it “Shadow”. Then, using a soft round brush, click the middle of the shape with the colour #331d0e to create a shadow behind the letters. Once that’s done, you’ll see that you’ve given the logo a nice-looking gold text effect Photoshop style.


5. How to Create the Flat Top for the Letters
Step 1
Use the Pen Tool to create the flat top shapes inside each individual letter. We’ll use a black fill color as before, so that we can easily identify the new shapes. Once you’re happy with the way they look, select all the new shape layers and merge them (Right Click > Merge Shapes). Rename the new layer ‘Flat Top’.


Step 2
Select your ‘Flat Top’ layer in the Layers panel, right-click on the layer, and choose Blending Options from the menu. Here, we’ll begin to use and apply the 3D gold text effect Photoshop layer styles.
Add a Bevel & Emboss with these settings:
- Style: Inner Bevel
- Technique: Chisel Hard
- Depth: 480%
- Direction: Up
- Size: 0 px
- Check the Use Global Light box, selecting Angle: 142° and Altitude: 32°
- Check the Anti-aliased box
-
Highlight Mode: Color Dodge with Color
whiteand Opacity: 85% -
Shadow Mode: Hard Light with Color
blackand Opacity: 84%


Step 3
Check the Texture box and select the “Cracked” pattern we created earlier. Apply the following settings:


Step 4
Add a Stroke with these settings:
- Size: 2 px
- Position: Center
- Blend Mode: Normal
- Opacity: 100%
- Fill Type: Gradient
- Style: Diamond
- Angle:– 48°
- Check the Dither box
- Scale: 150%
- Click on the Gradient and set these transparency and color stops:
- 5 transparency stops with Opacity: 0% on Locations: 0, 34, 55, 78, and 87
- 6 transparency stops with Opacity: 100% on Locations: 10, 19, 40, 67, 92, and 100
- Color stop 1 – Color:
#3a3523Location: 10% - Color stop 2 – Color:
#b6ad7dLocation: 40% - Color stop 3 – Color:
#c5a17eLocation: 56% - Color stop 4 – Color:
#e4d9a6Location: 78%

Step 5
Add a Color Overlay with these settings:
-
Blend Mode: Overlay with Color
#836b42 - Opacity: 100%

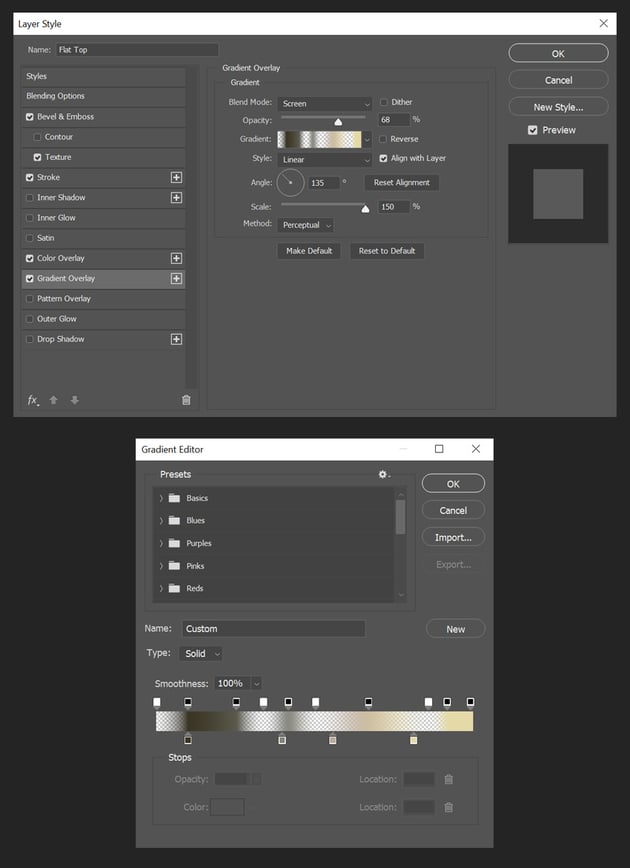
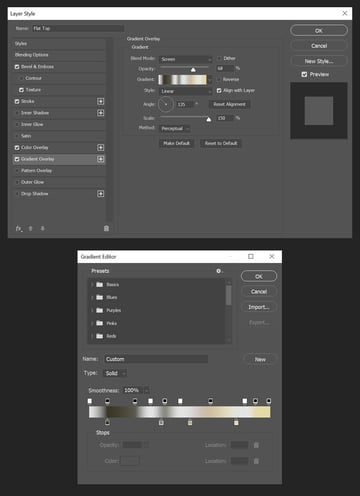
Step 6
Add a Gradient Overlay with these settings:
- Blend Mode: Screen
- Opacity: 68%
- Angle: 135°
- Click on the Gradient and set these transparency and color stops:
- 4 transparency stops with Opacity: 0% on Locations: 0, 34, 51, and 86
- 6 transparency stops with Opacity: 100% on Locations: 10, 25, 42, 67, 92, and 100
- Color stop 1 – Color:
#3a3523Location: 10% - Color stop 2 – Color:
#83857cLocation: 40% - Color stop 3 – Color:
#b8a99aLocation: 56% - Color stop 4 – Color:
#e4d9a6Location: 82%

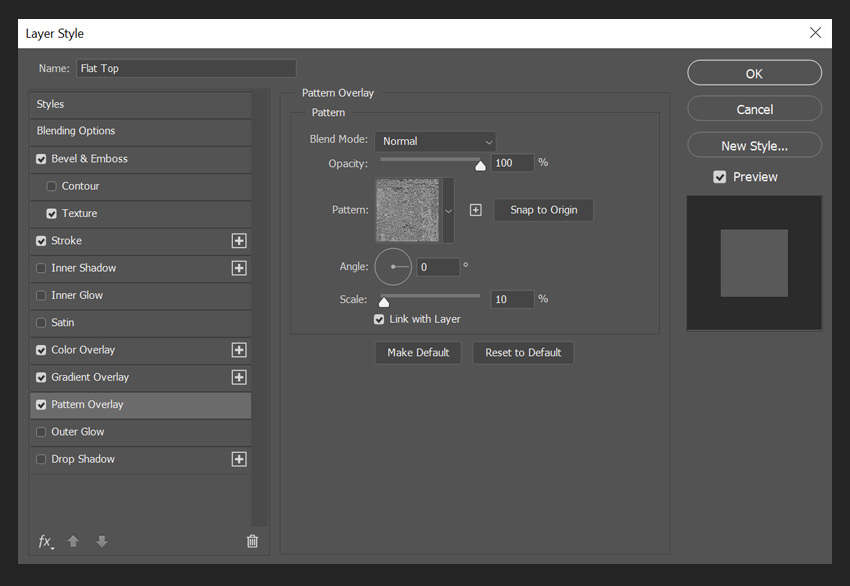
Step 7
Check the Pattern Overlay box and select the “Concrete” pattern we created earlier. Apply the following settings:
- Blend Mode: Normal
- Opacity: 100%
- Angle: 0°
- Scale: 10%


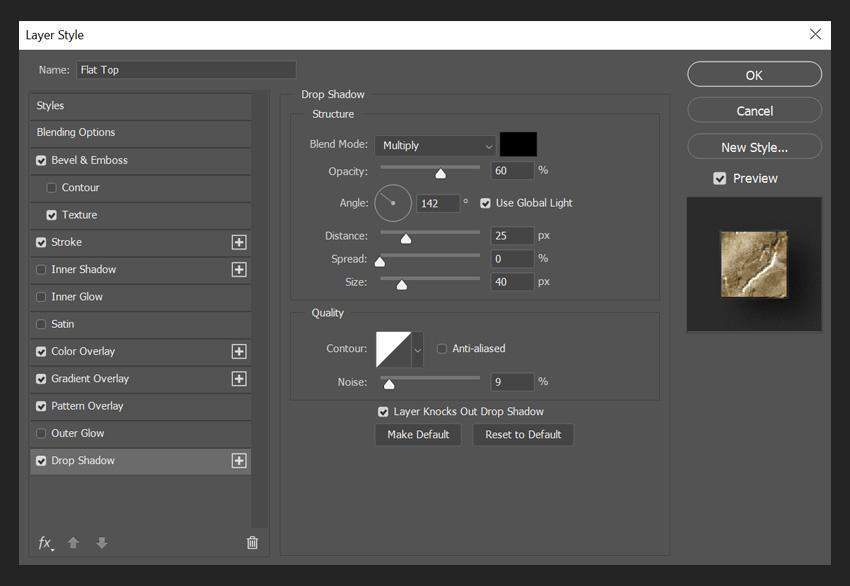
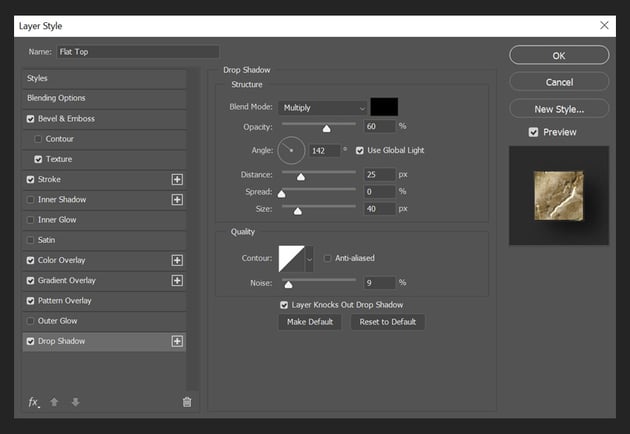
Step 8
Add a Drop Shadow with these settings:
-
Blend Mode: Multiply with Color
#000000 - Opacity: 60%
- Angle: 142°
- Check the Use Global Light box
- Distance: 25 px
- Spread: 0%
- Size: 40 px
- Noise: 9%
Step 9
Feel free to experiment with the settings, and then once you’re done, click on the OK button to apply all the layer style settings to your shapes.


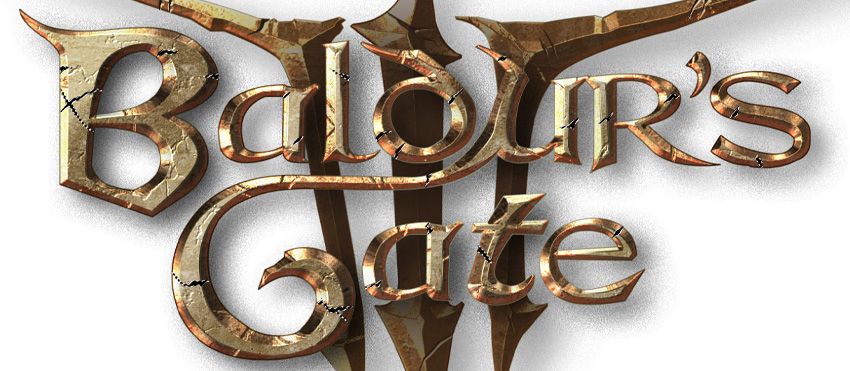
6. How to Add Some Battle Damage
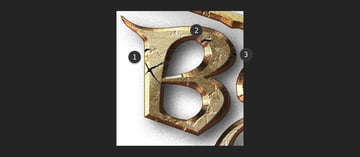
Step 1
Use the Pen Tool to create the cuts and cracks to add some battle damage to our Baldur’s Gate 3D gold text effect. We’ll use a black fill color as before, so that we can easily identify the new shapes. Below is a closeup of the letter “B”. On this letter, I’ve added a few shapes to represent the cuts and cracks.


Step 2
Repeat this for the other shapes. Once you’re happy with the way they look, select all the new shape layers and merge them (Right Click > Merge Shapes). Rename the new layer ‘Battle Damage’.
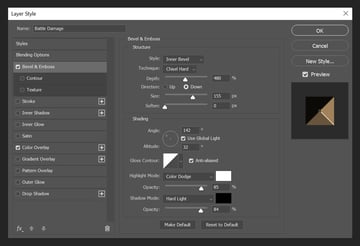
Step 3
Select your ‘Battle Damage’ layer in the Layers panel, right-click on the layer, and choose Blending Options from the menu. Here, we’ll begin to use and apply the 3D gold text effect Photoshop layer styles.
Add a Bevel & Emboss with these settings:
- Style: Inner Bevel
- Technique: Chisel Hard
- Depth: 480%
- Direction: Down
- Size: 155 px
- Check the Use Global Light box, selecting Angle: 142° and Altitude: 32°
- Check the Anti-aliased box
-
Highlight Mode: Color Dodge with Color
whiteand Opacity 85% -
Shadow Mode: Hard Light with Color
blackand Opacity 84%


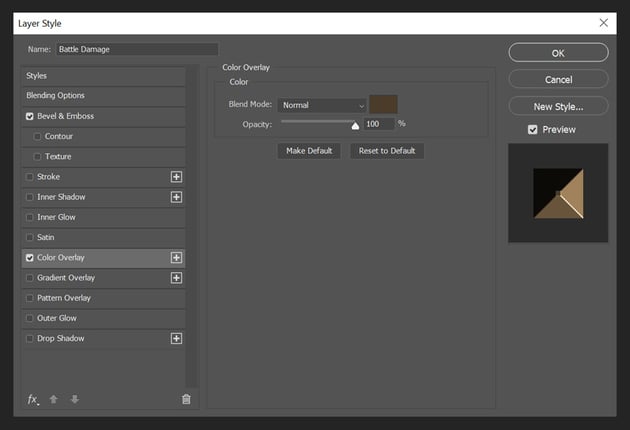
Step 4
Add a Color Overlay with these settings:
-
Blend Mode: Normal with Color
#4a3c2a - Opacity: 100%

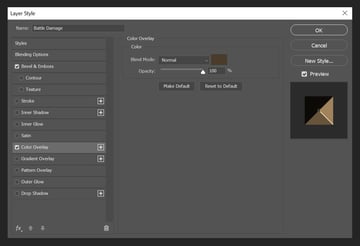
Step 5
Feel free to experiment with the settings, and then once you’re done, click on the OK button to apply all the layer style settings to your shapes.


7. How to Create the Background for the Logo
Step 1
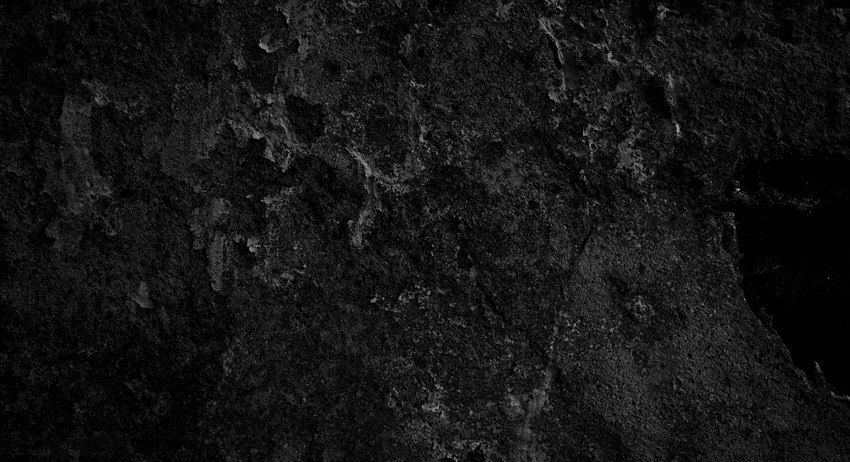
Import “Dark Stone Wall Texture_15” from the Dark Stone Wall Texture Backgrounds Stock Photo pack by dragging and dropping it directly into the file. Then resize it so that it fits the document.
You can hide the logo shapes for now in order to make this step easier.

Step 2
Create a new layer and use the Fill Tool to color it with #161719 with the Opacity set to 80–92% depending on how much stone wall detail you want to show through.

Step 3
Select the Elliptical Marquee Tool and use it to select as much of the document area as you can.
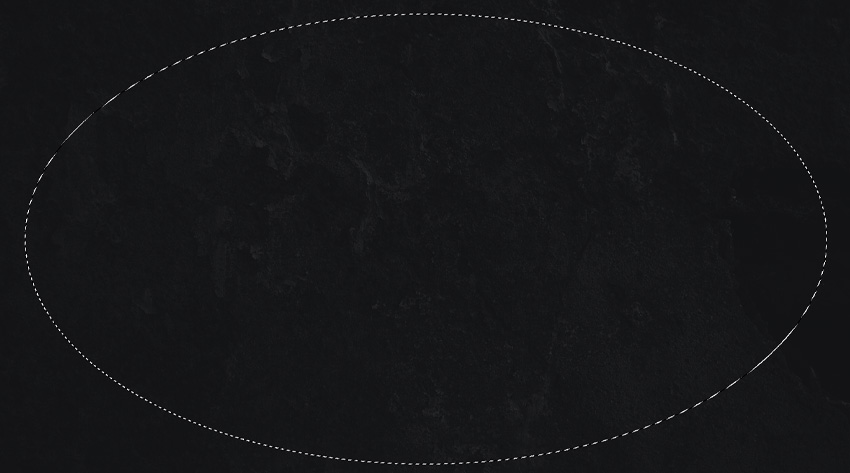

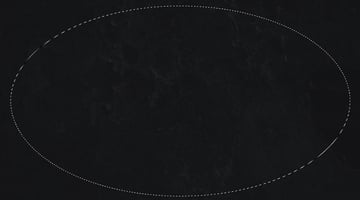
Step 4
Press Control-Shift-I to invert the selection, and fill it with black using the Fill Tool.
Step 5
Go to Filter > Blur > Gaussian Blur and set the Radius to 200.

Step 6
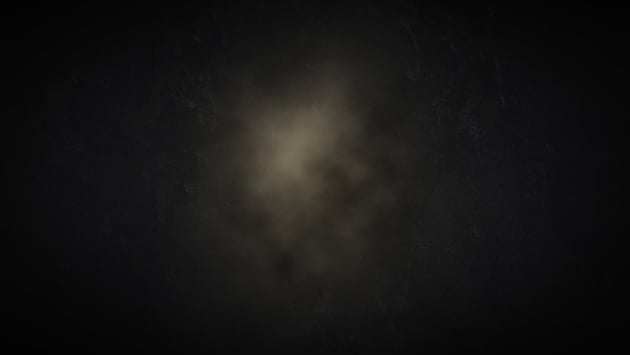
To create the smoke, use a soft round brush with the colour white and use a single click on the canvas to create a soft white ball.
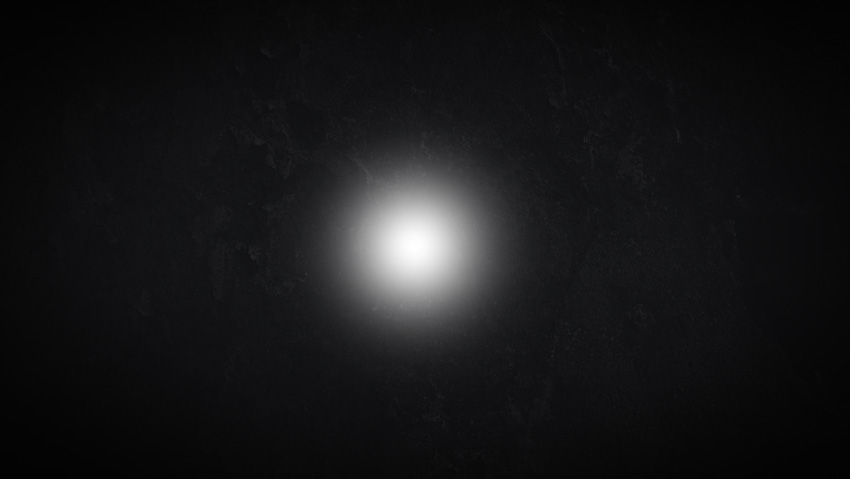
Step 7
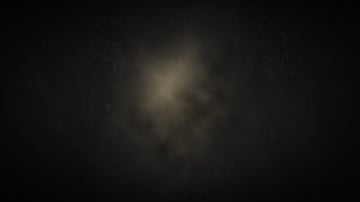
Use the Free Transform Tool (Control-T) to make the shape longer, as shown in the image below.
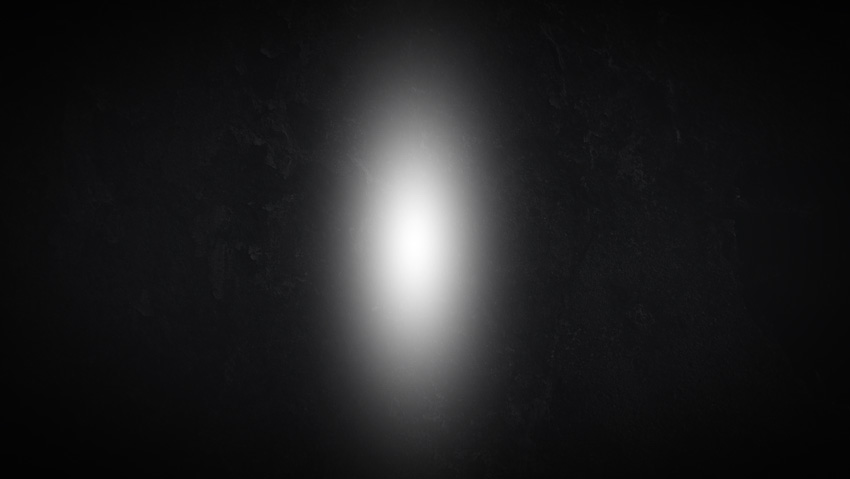
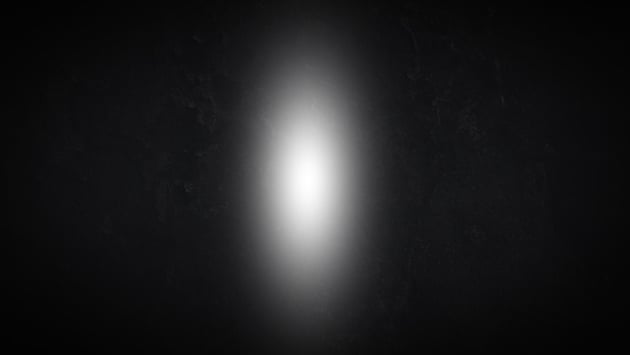
Step 8
Set the Opacity to 50% and then go to Filter > Render > Difference Clouds to create the smoke.
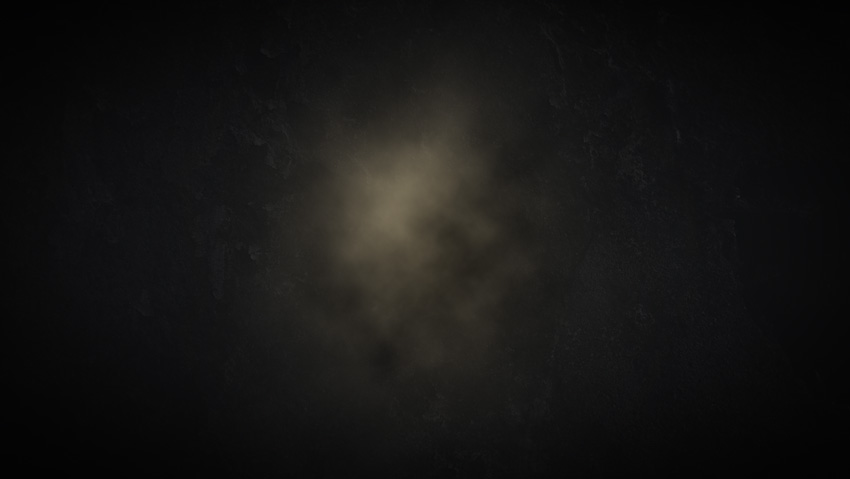
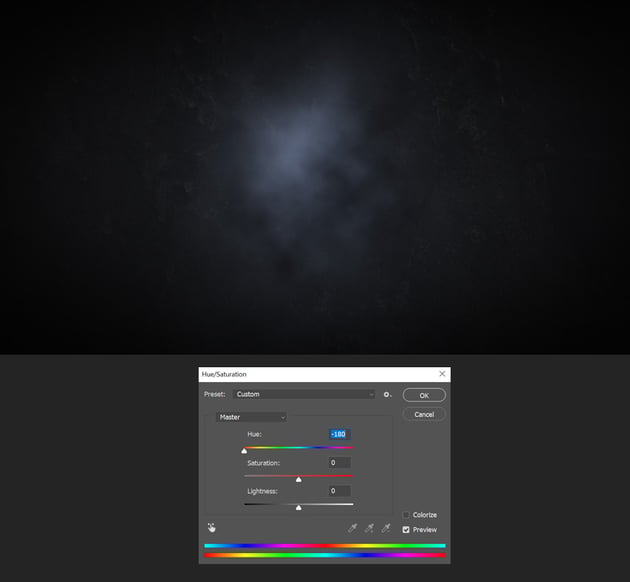
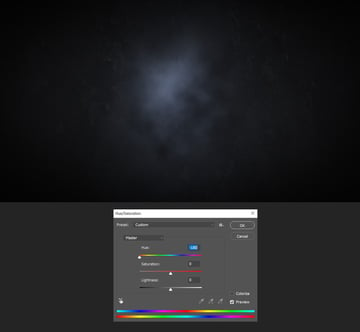
Step 9
Select the smoke layer and then go to Image > Adjustments > Hue/Saturation and move the hue pointer all the way to the left to change the color of the cloud.

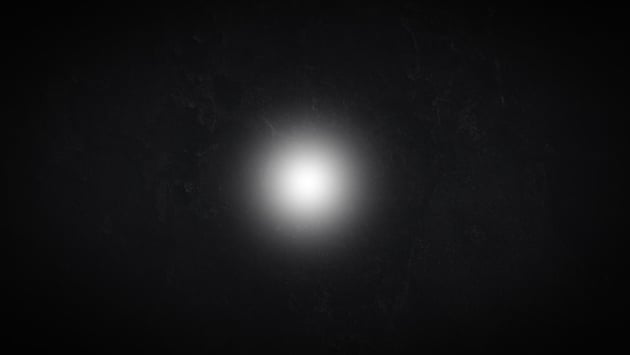
Step 10
Repeat the steps for the smoke at the bottom. Alternatively, you can use one of the smoke overlays from Smoke Photo Overlays to create the smoke by simply importing one of the images and setting the blend mode to Screen.


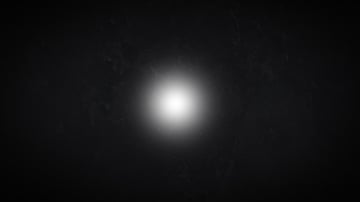
Step 11
Select all the layers created for the background and group them in a folder by pressing Control-G. Rename the folder “Background” and move it to the very bottom (below the rest of the layers) to complete the design. Make sure to unhide your logo layers if you had them hidden so that you can see the gold text effect Photoshop styles on your completed design.

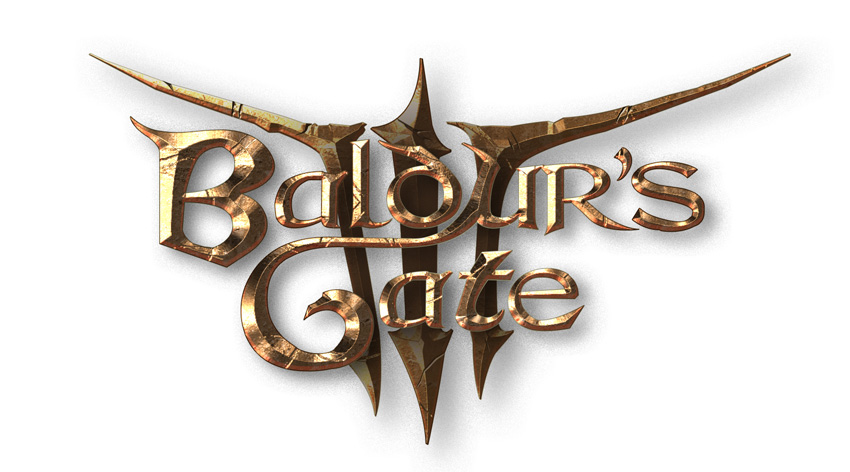
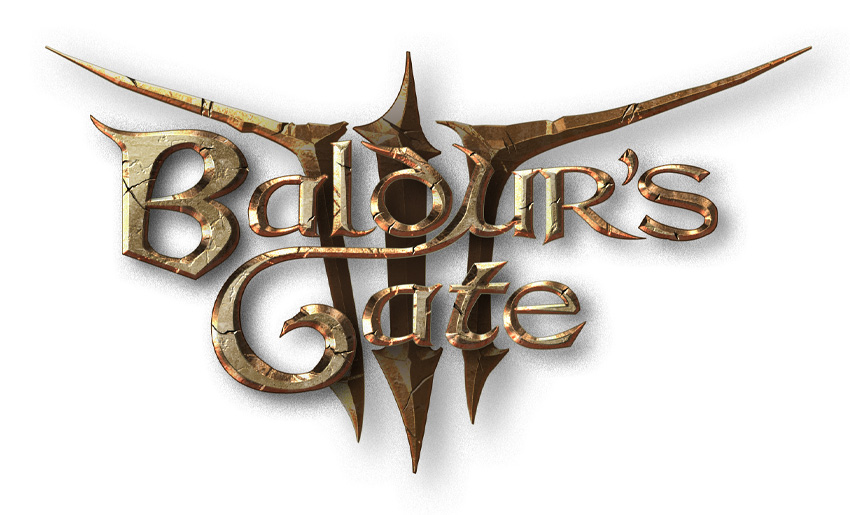
Congratulations! Your Baldur’s Gate 3 Logo Is Done!
Congratulations, adventurer! You’ve successfully created the Baldur’s Gate 3 logo text effect whilst learning how to make text gilded and how to make 3D gold text in Photoshop. Using digital sorcery, you’ve transformed mere text into an iconic logo, complete with a 3D gold medieval text effect and a dramatic background.
Now that you’re familiar with how to make text gilded in Photoshop, try importing this medieval text effect onto different backgrounds. Remember you can reuse these skills, techniques, and 3D gold text effects for your next project. So gear up, and let’s keep the adventure going. I’d love to see what incredible creations you conjure up next!
Popular Text Effects From Envato Elements
Looking for a quick way to make text gilded in Photoshop, or short on time when you want to create a gold text effect Photoshop style? Well, look no further than Envato Elements, where you’ll find a wide range of different and imaginative fonts, logos, graphics, and much more. You can download as many as you want with a simple subscription. Let’s take a look!
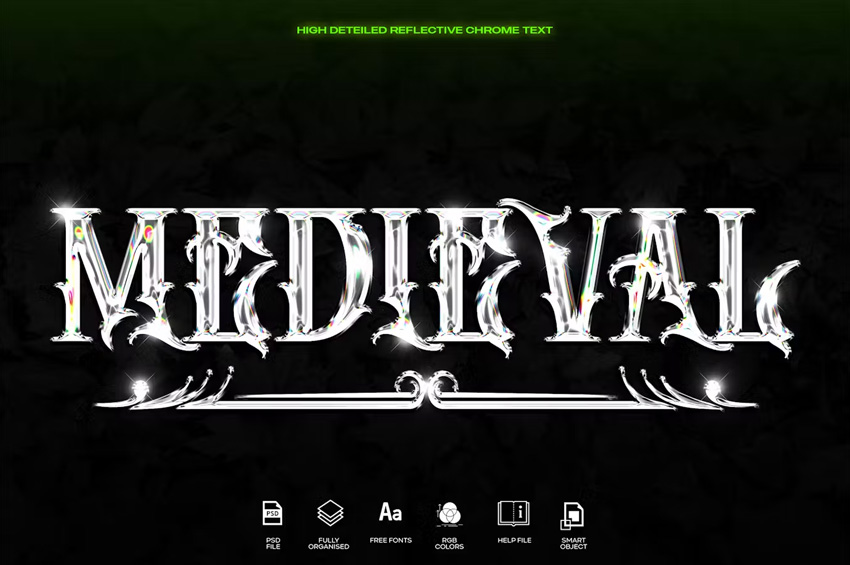
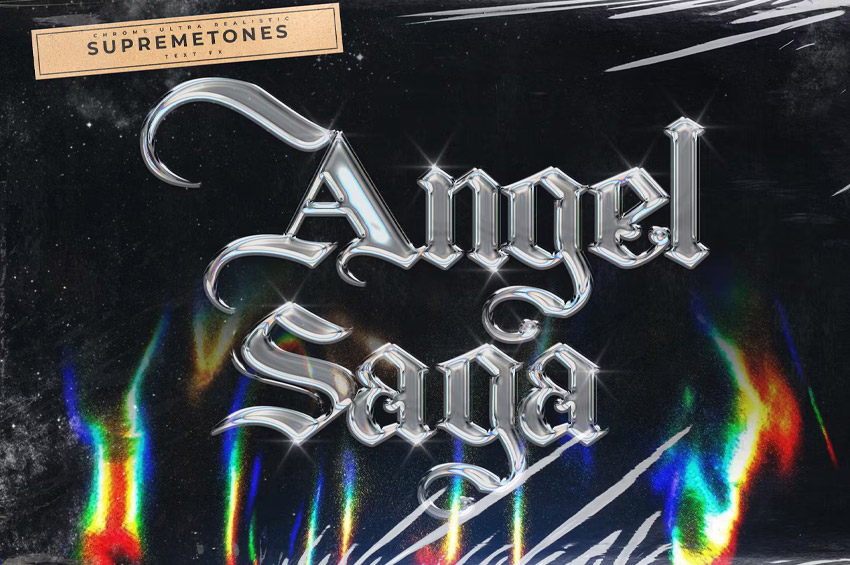
Medieval Chrome Reflective Text EFFECT (PSD)
Elevate your designs with the Medieval Chrome Reflective Text Effect from Envato Elements. This digital product infuses your text with a reflective chrome finish, perfect for your medieval text effect in games, posters, and book covers. It combines historical charm with modern flair, offering a simple way to add sophistication to your projects.
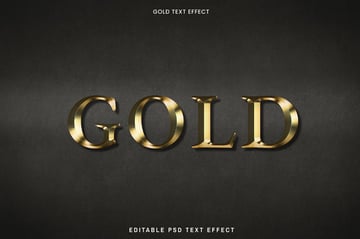
Gold Text Effect on a Black Background (PSD)
Bring a luxurious touch to your designs with the Gold Text Effect Photoshop pack, available on Envato Elements. This sleek text effect layers your typography with a rich, gold sheen against a stark black backdrop, perfect for high-end branding, invitations, and digital art.


Ultra-Realistic Reflective Text Effect (PSD)
For a more retro look, try the Ultra-Realistic Reflective Text Effect. Create shiny, metallic-looking text and logos with this effect. It works on all shapes, logos, and text. Simply replace the smart object with your text or logo/shape to apply the effect!


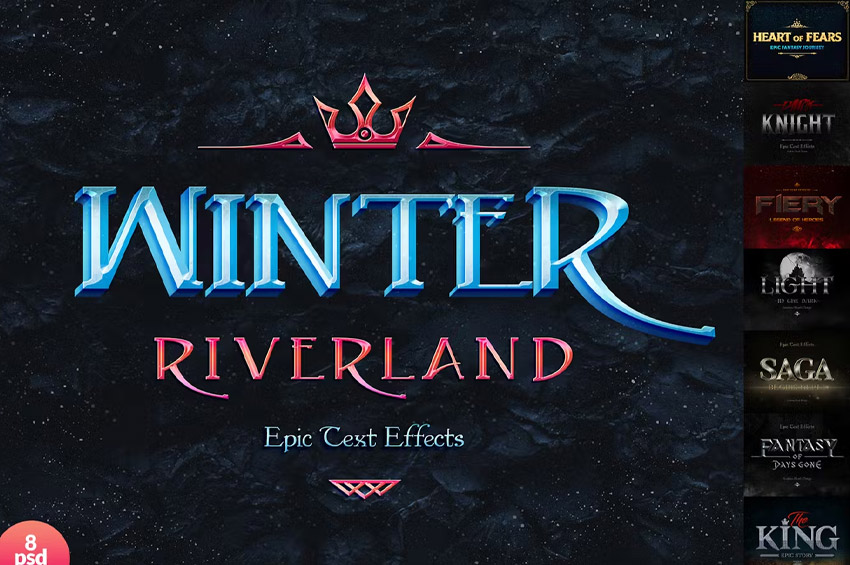
Epic Text Effects (PSD)
Need more medieval gothic font effects for your project? Then check out the Epic Text Effects pack, which includes a set of eight unique PSD templates that are easy to edit and use straight away. They’re perfect for creating great-looking posters, flyers, social media posts, and website banners.


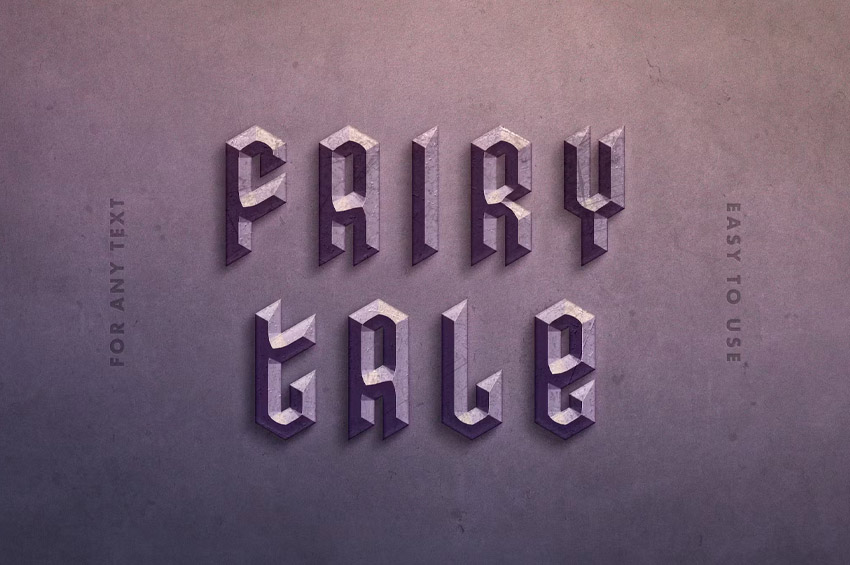
Stone Letters Text Effect (PSD)
For a rocky look, try the Stone Letters Text Effect. This text effect is easy to apply, and it’s perfect for your medieval fantasy text needs. Use it for your website banners, social media, cinematic titles, posters, and more.
Want to Learn More Photoshop Skills?
I hope you enjoyed our tutorial on how to make 3D gold text in Photoshop styles to create the Baldur’s Gate 3 logo. If you’re a fan of pop culture, take a look at some of these similar tutorials on Envato Tuts+ that teach you a variety of useful techniques and skills using Adobe Photoshop or Adobe Illustrator.