What You’ll Learn in This Photoshop Tutorial
- How to pixelate an image in Photoshop
- How to add a pixelated effect in Photoshop
- How to make pixel art in Photoshop
- How to create a pixel art oil painting effect
- How to make oil pixel art
What You’ll Need
To recreate the pixel effect in Photoshop, you will need the following resources:
1. How to Start Creating a Pixelated Photoshop Effect
First, open the photo that you want to work with. To open your photo, go to File > Open, choose your photo, and click Open. Before we get started, just check a couple of things:
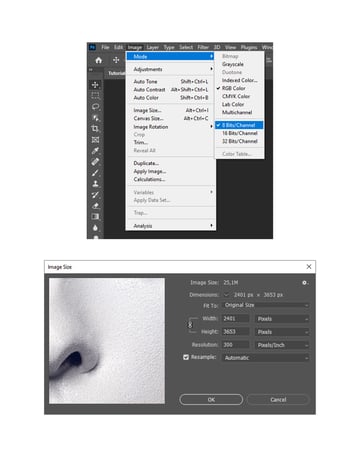
- Your photo should be in RGB Color mode, 8 Bits/Channel. To check this, go to Image > Mode.
- For best results, your photo size should be 2500–4500 px wide/high. To check this, go to Image > Image Size.
- Your photo should be the Background layer. If it is not, go to Layer > New > Background from Layer.


2. How to Create a Pixel Oil Painting Effect
Step 1
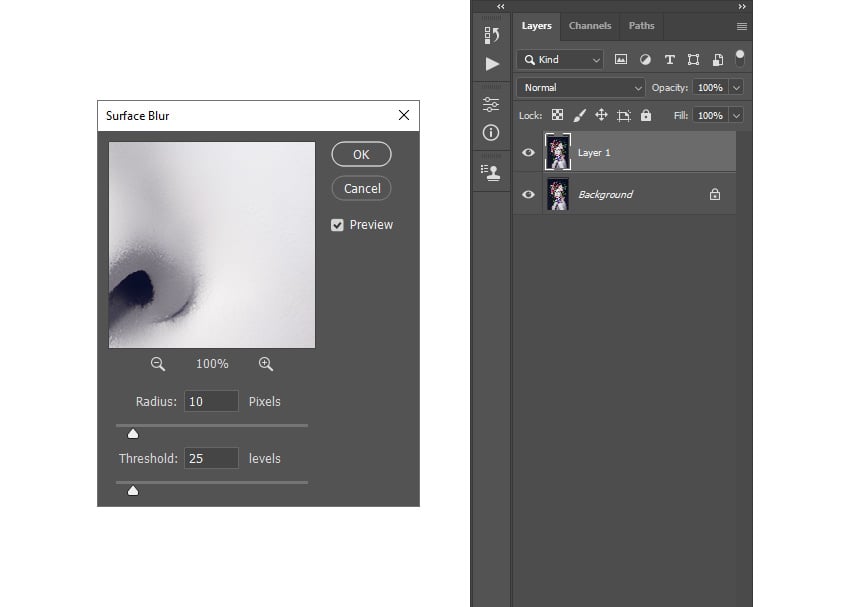
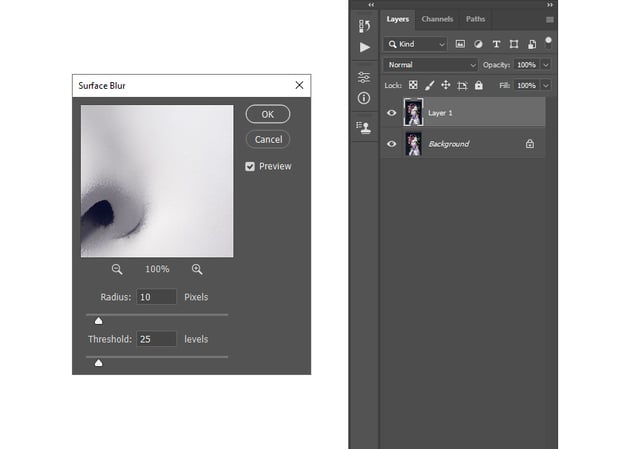
In this section, we are going to create an oil painting effect. Press Control-J on your keyboard to duplicate the Background layer. Then, go to Filter > Blur > Surface Blur, and set the Radius to 10 px and Threshold to 25 levels.
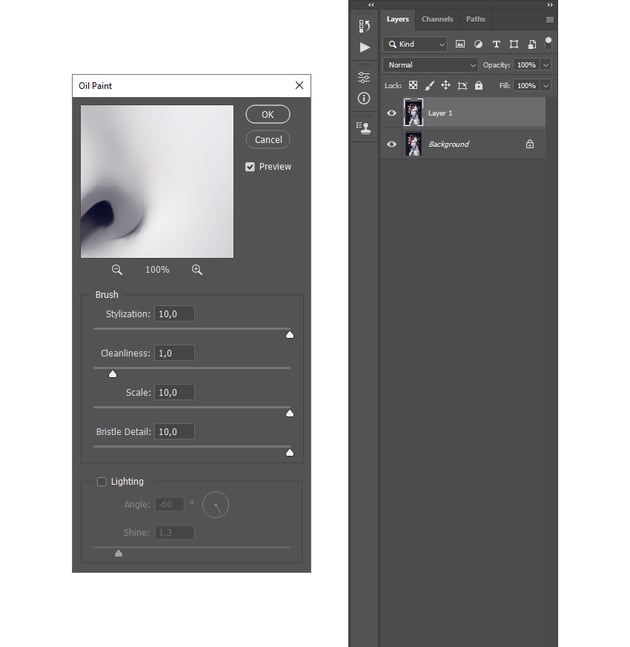
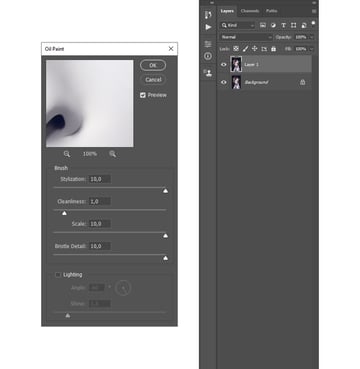
Step 2
Now go to Filter > Stylize > Oil Paint, and set the Stylization to 10 px, Cleanliness to 1 px, and the other settings as shown below:

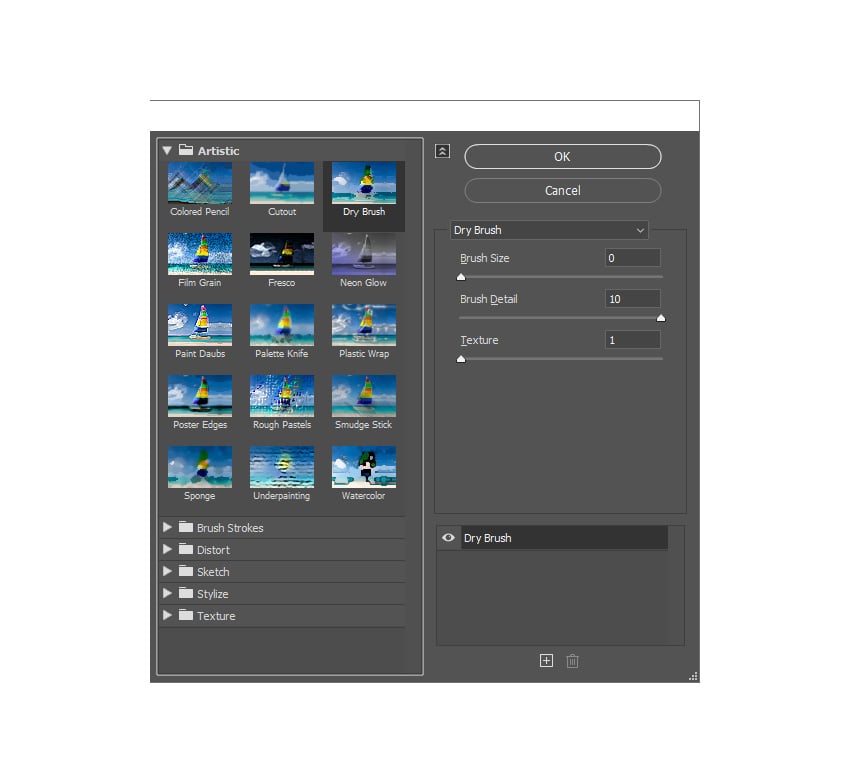
Step 3
Go to Filter > Filter Gallery > Artistic > Dry Brush, and set the Brush Size to 0, Brush Detail to 10, and Texture to 1.


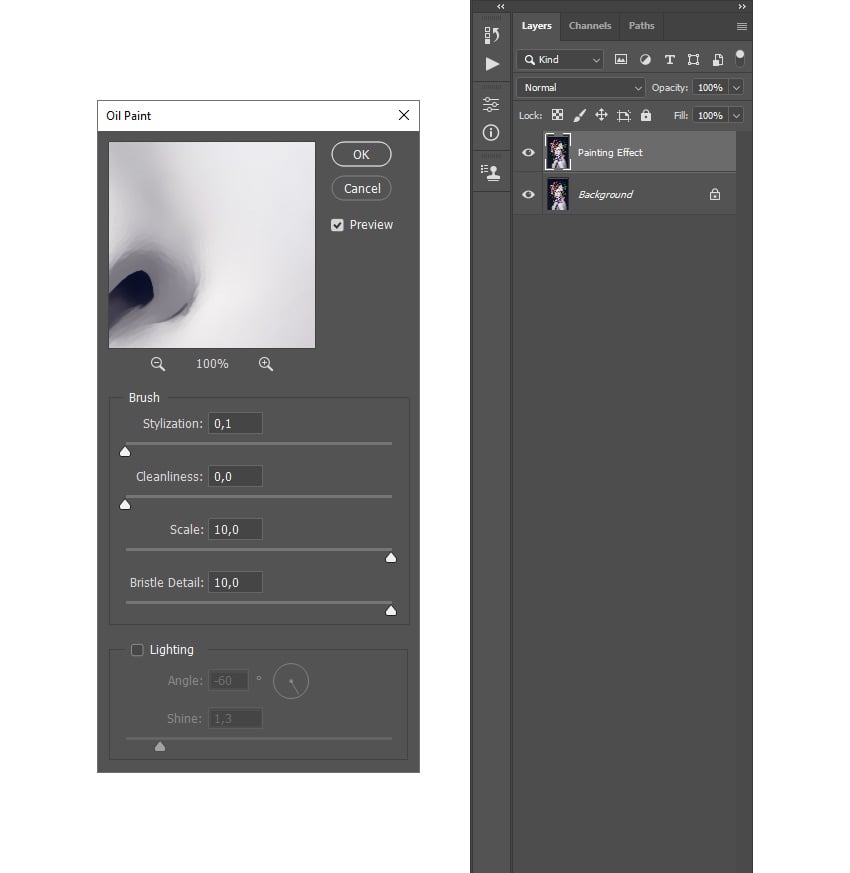
Step 4
Now go to Filter > Stylize > Oil Paint, and set the Stylization to 0.1 px, Cleanliness to 0 px, and the other settings as shown below. Name this layer Painting Effect.


3. How to Pixelate an Image in Photoshop
Step 1
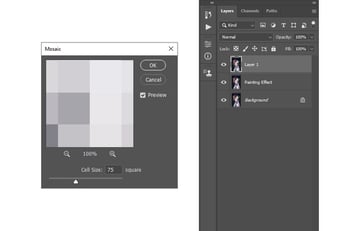
In this section, we are going to create pixels. Press Control-Alt-Shift-E to make a screenshot. Then, go to Filter > Pixelate > Mosaic and set the Cell Size to 75 square.


Step 2
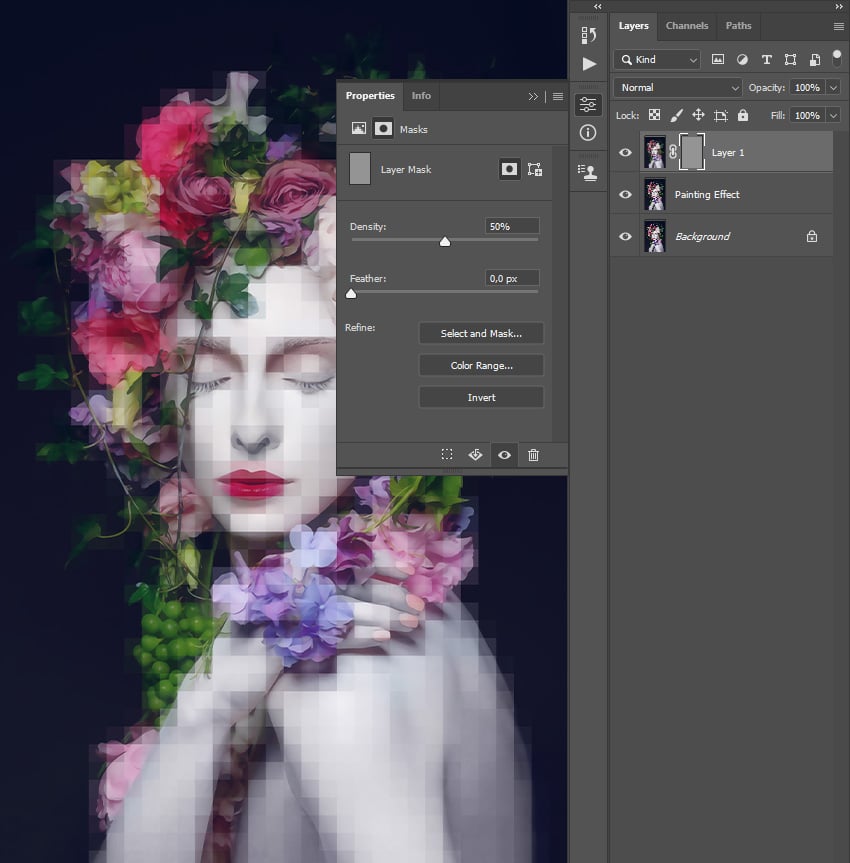
Go to Layer > Layer Mask > Hide All to add a layer mask that hides the complete layer. Select the layer mask, and in the Properties panel, set the Density to 50%.

Step 3
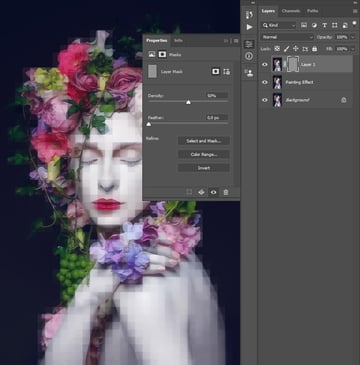
Choose the Rectangular Marquee Tool (M) and, while holding Shift, draw rectangles wherever you want to reveal pixels. Make sure to draw each rectangle so it matches the pixels behind. Here’s my result:


Step 4
In the Properties panel, set the Density back to 100%. Then, set the foreground color to #ffffff, go to Edit > Fill, and set the Contents to Foreground Color, Blending to Normal, and Opacity to 100%. Press Control-D to deselect, and name this layer Pixels.
Step 5
Press Control-J to duplicate this layer. Then, Right-click on the layer mask of this new layer and choose Apply Layer Mask.


Step 6
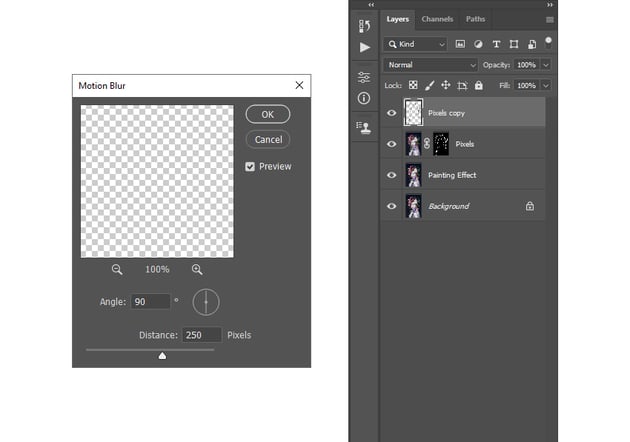
Now go to Filter > Blur > Motion Blur and set the Angle to 90° and Distance to 250 px.


Step 7
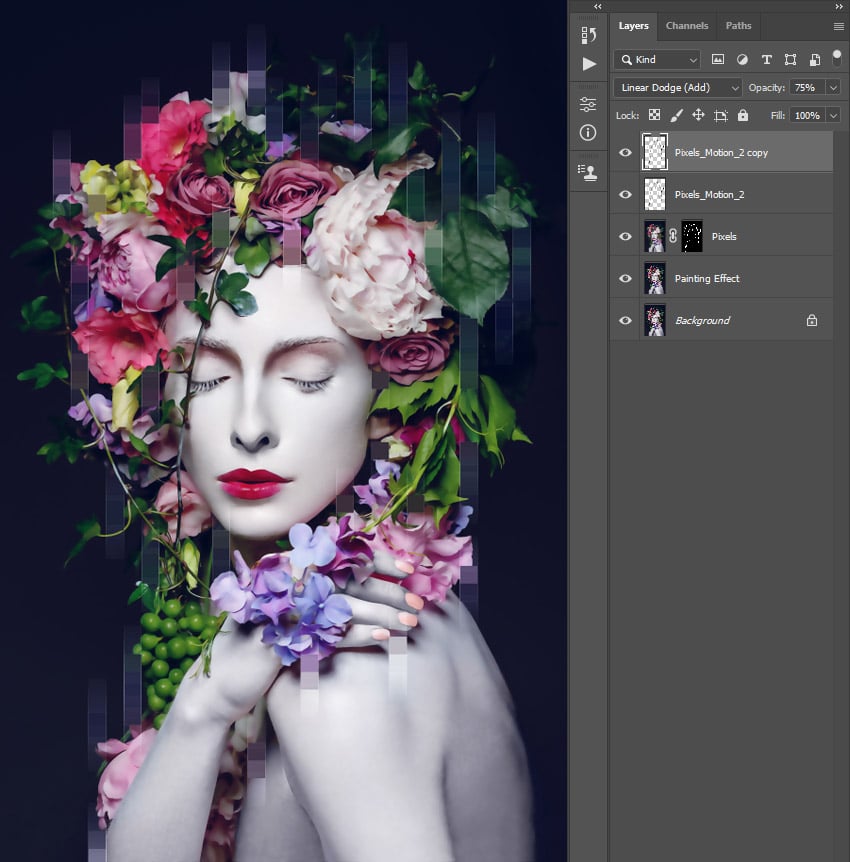
Change the Blending Mode of this layer to Linear Dodge (Add), set the Opacity to 75%, and name it Pixels_Motion_2.


Step 8
Press Control-J to duplicate this layer. Then, go to Filter > Stylize > Find Edges, and press Control-I to invert the layer’s colors.


Step 9
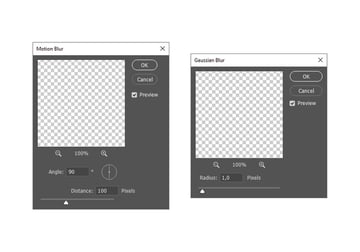
Go to Filter > Blur > Motion Blur, and set the Angle to 90° and Distance to 100 px. Then, go to Filter > Blur > Gaussian Blur, and set the Radius to 1 px.


Step 10
Set the Opacity of this layer to 50%, and name it Pixels_Motion_1.


4. How to Create a Canvas Texture
Step 1
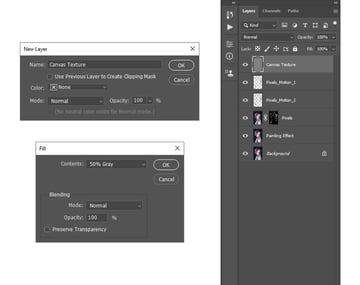
In this section, we are going to create a canvas texture. Press Control-Shift-N to create a new layer, and name it Canvas Texture. Then, go to Edit > Fill and set the Contents to 50% Gray, Blending to Normal, and Opacity to 100%.


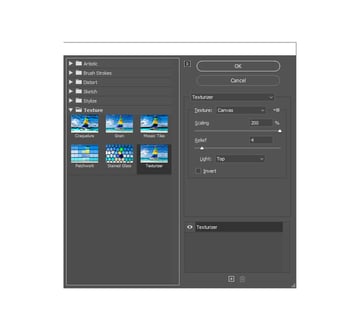
Step 2
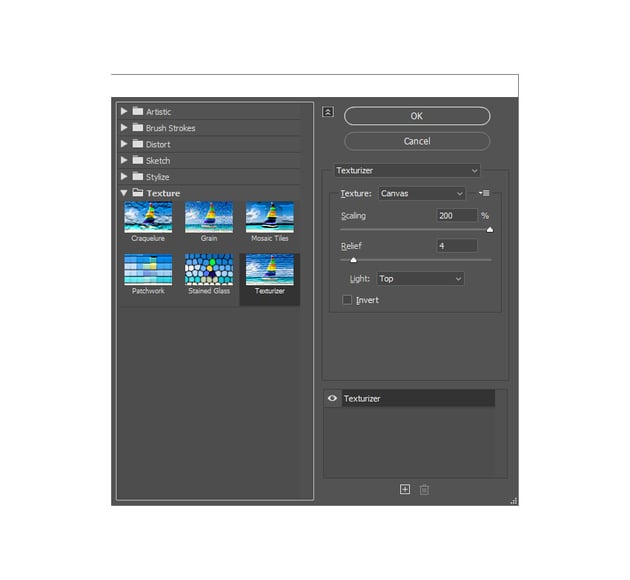
Now go to Filter > Filter Gallery > Texture > Texturizer, and set the Texture to Canvas, Scaling to 200%, Relief to 4, and Light to Top.

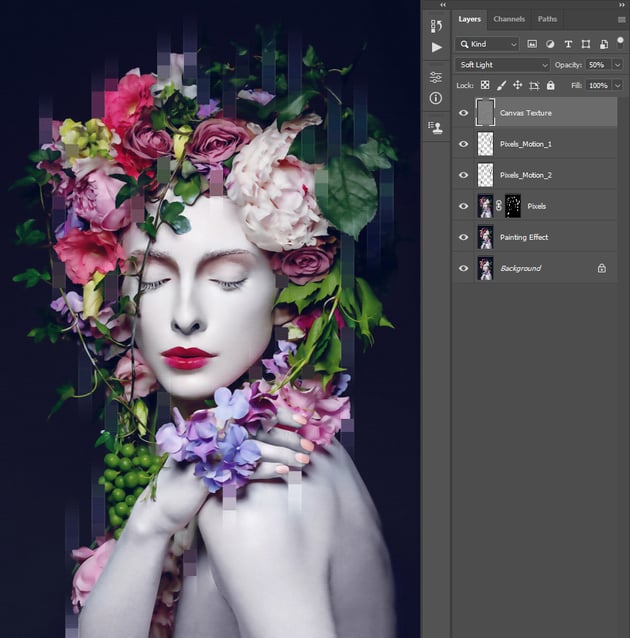
Step 3
Change the Blending Mode of this layer to Soft Light, and set the Opacity to 50%.


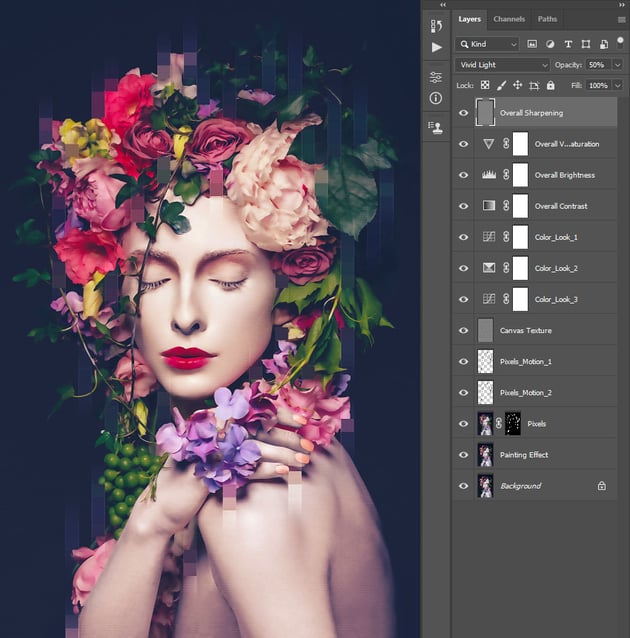
5. How to Make the Final Adjustments
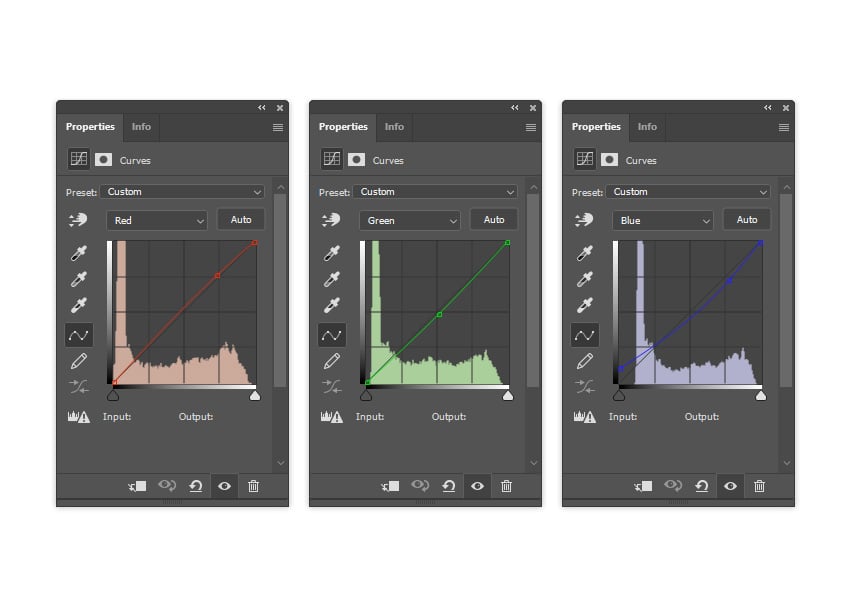
Step 1
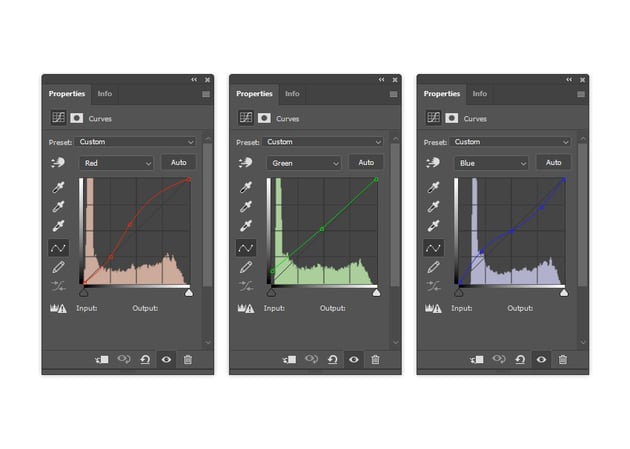
In this section, we are going to make some final adjustments to the oil pixel art effect. Go to Layer > New Adjustment Layer > Curves to create a new curves adjustment layer, and name it Color_Look_1. Double-click on this layer thumbnail and, in the Properties panel, enter the settings below:

Step 2
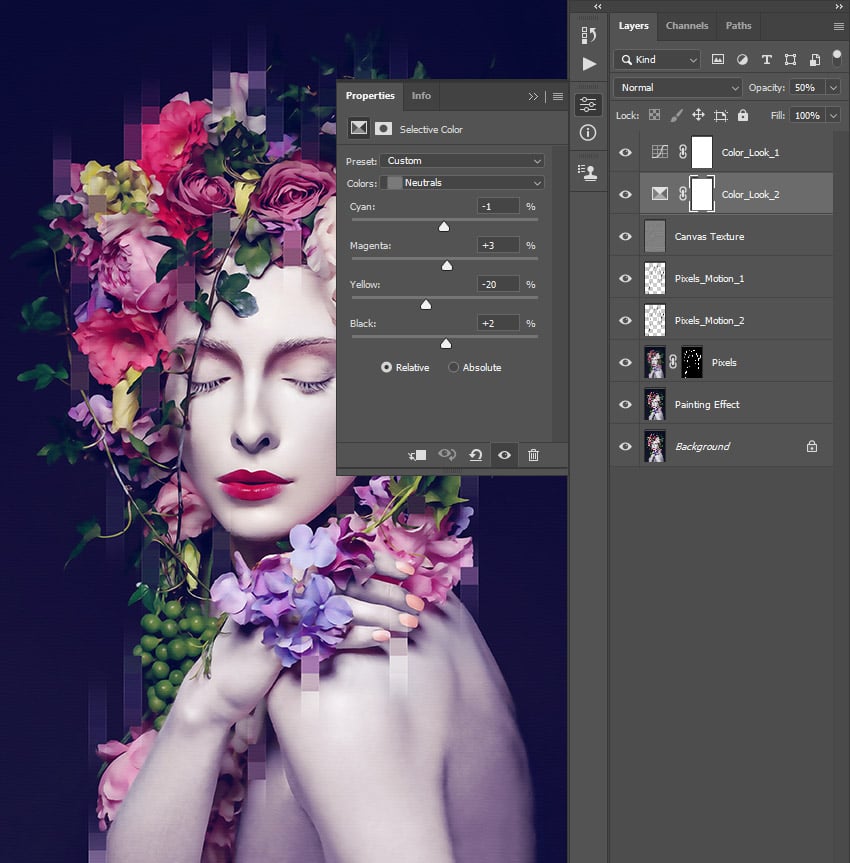
Select the Canvas Texture layer, go to Layer > New Adjustment Layer > Selective Color to create a new selective color adjustment layer, and name it Color_Look_2. Double-click on this layer thumbnail and, in the Properties panel, enter the settings below. Then, set the Opacity of this layer to 50%.

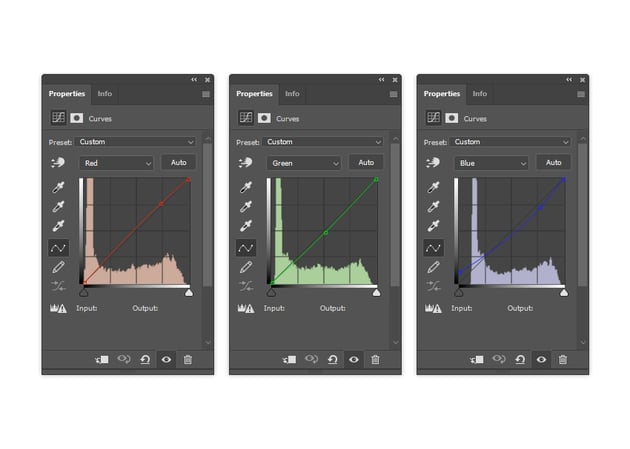
Step 3
Select the Canvas Texture layer again, go to Layer > New Adjustment Layer > Curves to create a new curves adjustment layer, and name it Color_Look_3. Double-click on this layer thumbnail and, in the Properties panel, enter the settings below. Then, set the Opacity of this layer to 50%.

Step 4
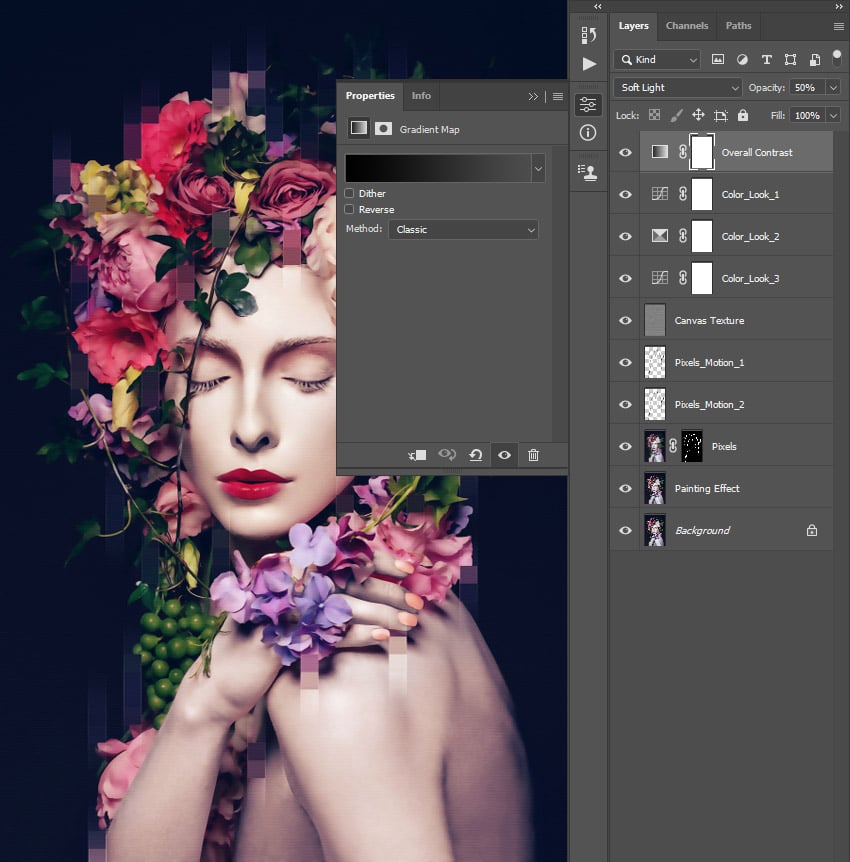
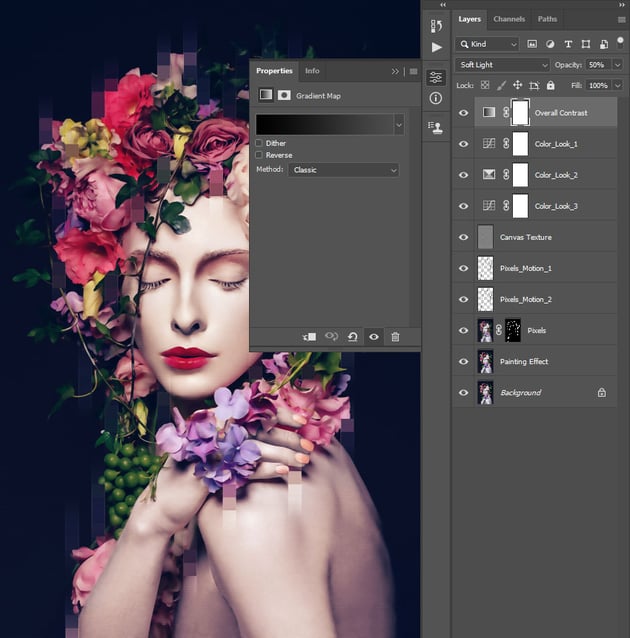
Select the Color_Look_1 layer, go to Layer > New Adjustment Layer > Gradient Map to create a new gradient map adjustment layer, and name it Overall Contrast. Double-click on this layer thumbnail, and then, in the Properties panel, enter the settings below. Then, change the Blending Mode of this layer to Soft Light and set the Opacity to 50%.

Step 5
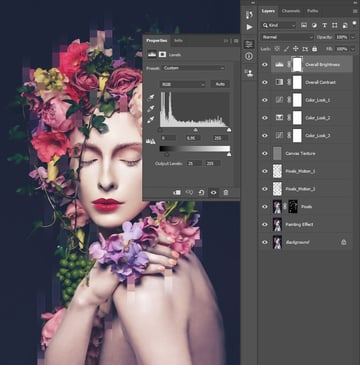
Go to Layer > New Adjustment Layer > Levels to create a new levels adjustment layer, and name it Overall Brightness. Double-click on this layer thumbnail and, in the Properties panel, set the Midtone Input Level to 0.95 and Shadow Output Level to 25.


Step 6
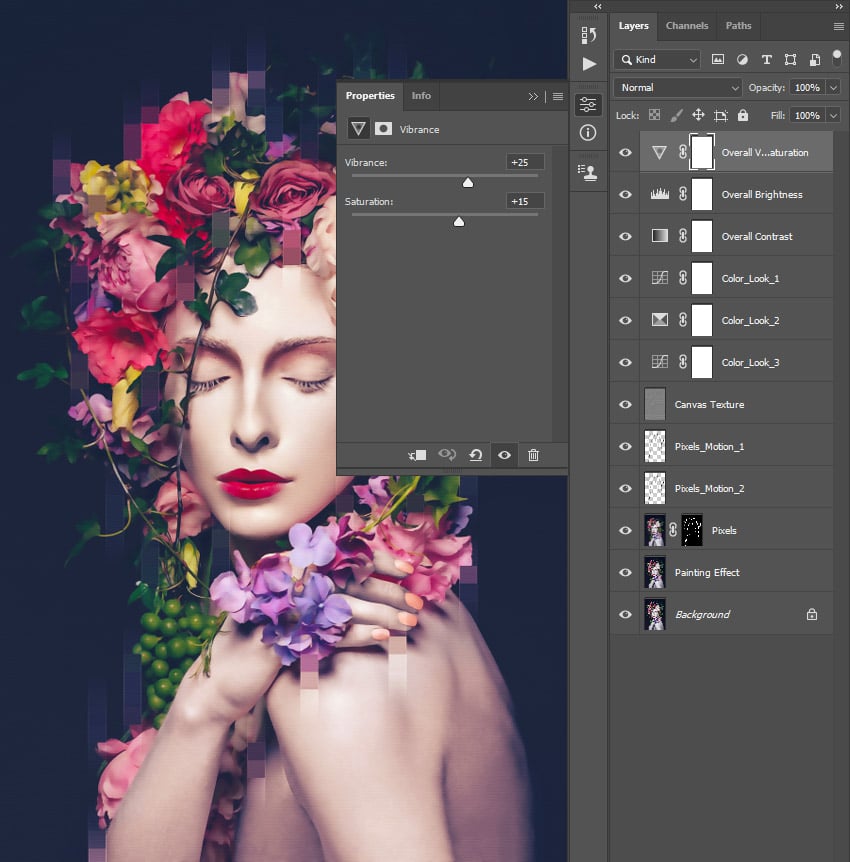
Now go to Layer > New Adjustment Layer > Vibrance to create a new vibrance adjustment layer, and name it Overall Vibrance/Saturation. Double-click on this layer thumbnail and, in the Properties panel, set the Vibrance to +25 and Saturation to +15.


Step 7
Press Control-Alt-Shift-E to make a screenshot, and then press Control-Shift-U to desaturate this layer. Then, go to Filter > Other > High Pass and set the Radius to 2 px.


Step 8
Now change the Blending Mode of this layer to Vivid Light and set the Opacity to 50%. Name this layer Overall Sharpening.


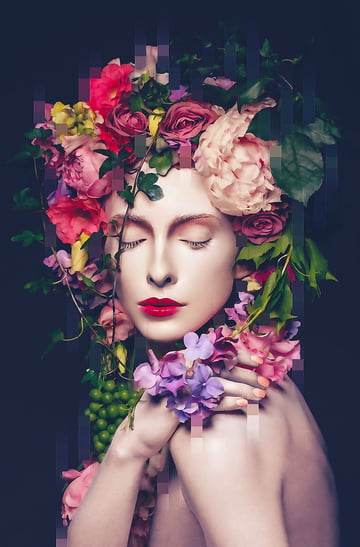
You Made It!
Congratulations, you’ve succeeded! You’ve now learned how to add a pixelated effect in Photoshop and how to create a pixel art oil painting effect. Here is our final Photoshop pixelated effect:


5 Photoshop Actions From Envato Elements
Want to see some cool pixel effects in Photoshop? Check out this list of pixelated effect Photoshop actions from Envato Elements.
Pixelated Glitch Photoshop Action (ABR, ATN)
With this action, you can create a pixelated glitch effect in an easy and fun way. The text is fully editable, so you can use your own text and font, color the results, and randomize the colors. Every time you run the action, you’ll get a unique result.
Pixelated Photoshop Action (ATN)
Simply brush over your photo where you want to pixelate and play the action! That’s all it takes to get this amazing pixelated effect out of your photo. The action comes with a video tutorial that covers how to set up your Photoshop file as well as in-depth effect customization techniques.
Pixel Artist Photoshop Action (ATN, TXT)
Turning your images into pixelated effects only takes a few clicks with this action. Open your photo, click play, and enjoy 25 different pixelated results. You can then use color maps and dither layers to further build up the look of the effect.
Pixelator Photo Effect for Photoshop (ATN)
This Photoshop action can create four different extrusion angles and five extrusion depths, and you can use any pixel size. You can easily create additional effects by duplicating pixel folders, and you can export your design on a transparent background.
8-Bit Pixel Art Photoshop Action (ATN)
Convert any photo to an 8-bit pixel art effect in no time. You can choose from three pixel sizes (small, medium, and large), and you can change the background. Since the effect remains fully layered, you have full control over the customization.
Did you like this tutorial? Then you may also like: