Most Android phones and tablets can be connected to a computer using a USB cable. However, by default, the USB connection established between an Android device and a computer is limited to file transfer only.
Therefore, if you want to use your device for Android application development, you have to make a few configuration changes on both your device and your computer. In this quick tip, I show you how to make those changes.
Prerequisites
To follow along, you need:
- the latest version of the Android SDK
- an Android device running Android 4.2 or higher
1. Configuring Your Android Device
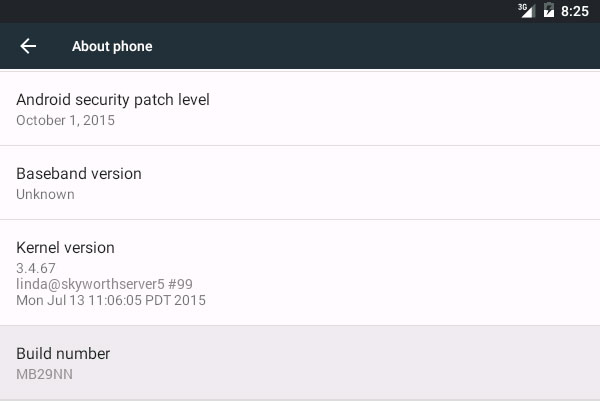
Because most Android users are not app developers, on devices running Android 4.2 or higher, all the settings meant for app developers are hidden by default. To show these settings, open the Settings app on your device and navigate to the About phone screen. Next, scroll down to Build number and click on it seven times.
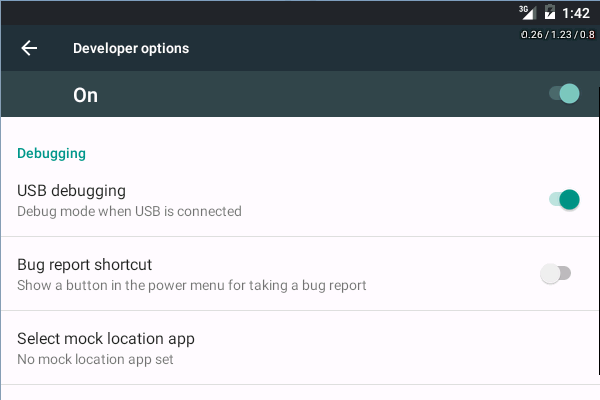
When you do this, you should be able to see the Developer options menu. Open it and make sure that the USB debugging option is checked.
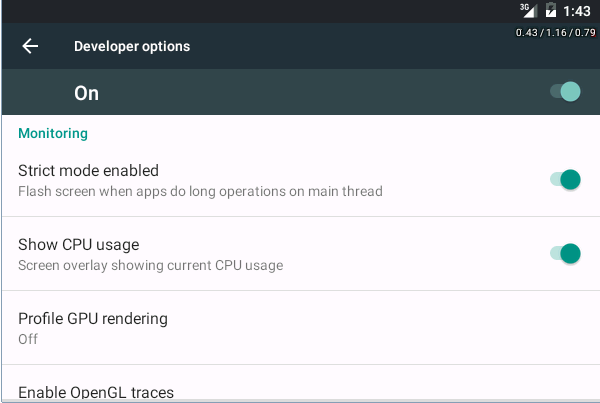
Additionally, I suggest that you check the Strict mode enabled and Show CPU usage options as well. With these options enabled, it is easier for you to tell if you’ve deviated from the recommended coding practices.
At this point, your device can be used for app development. Use its USB cable to connect it to your computer.
2. Configuring Your Computer
The configuration changes you need to make on your computer depend on the operating system it is running. In this quick tip, we focus on OS X, Windows, and Ubuntu.
OS X
On OS X, you don’t have to make any changes at all.
Windows
On Windows 7 or higher, you have to download and install an Original Equipment Manufacturer USB driver for your Android device. Usually, such a driver can be found on the website of the device manufacturer. If you are using any of the Google Nexus phones or tablets, however, you must install the Google USB Driver.
Ubuntu
On most flavors of Ubuntu, the configuration is slightly more involved. First, you must determine the USB vendor ID of your device. To do so, you can use the lsusb command.
lsusb --verbose
You are now able to see the USB-related details of all the devices that connected to your computer over USB. In the Device description section, look for the name of the company that manufactured your device and make a note of the value of the idVendor field. The value should be a 4-digit hexadecimal number.
Next, as a superuser, create a new file and name it /etc/udev/rules.d/51-android.rules.
sudo vi /etc/udev/rules.d/51-android.rules
Add the following udev rule to this file:
SUBSYSTEM=="usb", ATTR{idVendor}=="YOUR_VENDOR_ID", MODE="0666", GROUP="plugdev"
Finally, use the chmod command to allow all system users to read 51-android.rules.
sudo chmod a+r /etc/udev/rules.d/51-android.rules
3. Establishing a Local Connection
Now that both your Android device and your computer have been configured, you can start the Android Debug Bridge server, or ADB for short, to automatically establish a connection between them.
Navigate to the platform-tools directory of the Android SDK and use the adb start-server command to start ADB.
adb start-server
As soon the server is ready, you see a dialog appear on your device’s screen asking you to confirm if you want to allow USB debugging. The dialog also contains an RSA key fingerprint of your computer. Press OK to establish the USB connection.
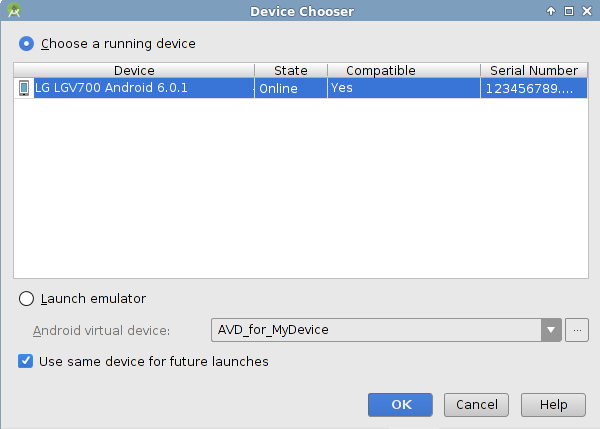
From now on, you can use your device instead of the Android emulator while developing apps. If you are using Android Studio, on pressing the Run button in the toolbar, you are able to see your device in the list of running devices.
4. Establishing a Connection Over Wi-Fi
A lot of Android developers own multiple Android phones and tablets in order to see how their apps look and behave on different screen sizes and Android versions. Keeping all those devices connected to a computer with USB cables can be awkward. Therefore, ADB also allows developers to connect to their devices over Wi-Fi.
In order to configure your device for debugging over a Wi-Fi connection, connect it to your computer with a USB cable. Additionally, make sure that both the computer and the device are connected to the same Wi-Fi network. You must now open a port on the device on which it can listen to TCP/IP connections using the adb tcpip command. For example, here’s how you open port 5565:
adb tcpip 5565
Next, you need to determine the IP address of the device. To do so, open the Settings app on the device, navigate to the About phone screen, and click Status. You are able to see its IP address, in both the IPv4 and IPv6 formats, under the IP address heading.
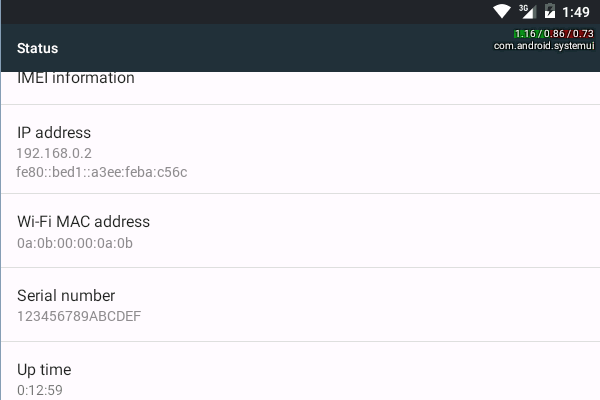
Now that you know both its IP address and port number, you can unplug your device from your computer, and connect to it over Wi-Fi using the adb connect command. For example, if your device’s IP address is 192.168.0.2, here’s how you would connect to it:
adb connect 192.168.0.2:5565
From this point on, you can use the device for Android app development just as you would use one connected over USB.
Conclusion
In this quick tip, you learned how to configure both your Android device and your computer for USB debugging. You also learned how to set up an ADB connection over Wi-Fi.
It is very important that you see how your app behaves on as many physical devices as possible, especially if you plan to publish your app on Google Play. Why is that? Android devices tend to have quirks and limitations which, if left unaccounted for, can cause your app to behave in an odd manner, or even crash.
If you don’t own all the Android devices you want to support, you may want to consider using Google’s Cloud Test Lab, which allows you to easily run and test your app on almost all popular Android devices.