Previously, we got ourselves started with React with Redux fundamentals and touched all the core concepts of Redux including Actions, Reducers and Stores. We also had a look at the features of React-Redux library including connect and Provider.
What we can do now is move further to complexity and reality by fleshing out the application we already started building to have more consumable features and tackle real situations.
Redux Thunk
Redux Thunk is a middleware for Redux written by Dan, the father of Redux. Normally, your action creators return an object of payload but with Thunk, you can return a defer-able function. This means, you can handle asynchronous requests in a React Redux environment using Redux Thunk.
We can apply the middleware to our store during configuration as discussed in the previous article:
// ./src/store/configureStore.js
import {createStore, compose, applyMiddleware} from 'redux';
// Import thunk middleware
import thunk from 'redux-thunk';
import rootReducer from '../reducers';

export default function configureStore(initialState) {
  return createStore(rootReducer, initialState,
    // Apply to store
    applyMiddleware(thunk)
  );
}
That sets up everything for Redux Thunk. Now, let’s make use of it in our existing app.
Our First Thunk
We already had a React Redux application from our previous post on this tutorial. At the moment, the sample is based on a static array for its data source. We can use Mock API to create some sample API data and see how we can use thunks to consume this data and make them available in our React application. The following is the endpoint and it is public:
http://57c62fdcc1fc8711008f2a7e.mockapi.io/api/book
I populated the API with mock data so we can have something fake to test with.
Create Async Action
As we discussed, actions that returns object are not good enough for async operations because the the payload is used as a later time different from when the action was dispatched. Rather, it returns a function that takes dispatch as its only argument and dispatches an action when th: promise resolves:
// ./src/actions/bookActions.js
// API URL
const apiUrl = 'http://57c62fdcc1fc8711008f2a7e.mockapi.io/api/book';
// Sync Action
export const fetchBooksSuccess = (books) => {
  return {
    type: 'FETCH_BOOKS_SUCCESS',
    books
  }
};
//Async Action
export const fetchBooks = () => {
  // Returns a dispatcher function
  // that dispatches an action at a later time
  return (dispatch) => {
    // Returns a promise
    return Axios.get(apiUrl)
      .then(response => {
        // Dispatch another action
        // to consume data
        dispatch(fetchBooksSuccess(response.data))
      })
      .catch(error => {
        throw(error);
      });
  };
};
The dispatcher function returned by the action creator function must return a promise which when resolved, dispatches another synchronous action to handle the data that was returned.
In Redux, a popular convention to keep track of application state is to append the status at the end of the action. Eg: _SUCCESS is appended to FETCH_BOOKS action to indicate that the books were retrieved successfully.
If you choose to handle errors you can dispatch FETCH_BOOKS_ERROR in the error callback or FETCH_BOOKS_LOADING before the the request to indicate an ongoing request.
The HTTP request is made with Axios, an npm package. Install via npm by running:
npm install axios --saveInclude in the calling code, in our case the bookActions.js file:
import Axios from 'axios';Update Reducer To Handle Aync Actions
Our reducer just needs to return the state as it is from the server when the the FETCH_BOOK_SUCCESS action is dispatched:
// ./src/reducers/bookReducer.js
export default (state = [], action) => {
  switch (action.type) {
    case 'FETCH_BOOKS_SUCCESS':
          return action.books;
    default:
          return state;
  }
};
Dispatch On Page Load
We need to start the application with some state and the way to go is dispatch the FETCH_BOOKS action on page load. This can be done immediately after configuring the store using the dispatch API:
// .../src/index.js
// ..preceeding codes
const store = configureStore();
store.dispatch(bookActions.fetchBooks());
// ..rest of code
Of course you must import the actions before they can be dispatched:
import * as bookActions from './actions/bookActions';
Applications that just reads that are not so interesting. Let’s try to write by posting to our API endpoint. The thunk to do this is not so different from what we already had for read:
// ./src/actions/bookActions.js
export const createBook = (book) => {
  return (dispatch) => {
    return Axios.post(apiUrl, book)
      .then(response => {
        // Dispatch a synchronous action
        // to handle data
        dispatch(createBookSuccess(response.data))
      })
      .catch(error => {
        throw(error);
      });
  };
};
Then the corresponding synchronous CREATE_BOOK_SUCCES action:
// ./src/actions/bookActions.js
export const createBookSuccess = (book) => {
  return {
    type: 'CREATE_BOOK_SUCCESS',
    book
  }
};
The thunk will update the data on the server and return the new created book. For the sake of UX, rather than do a re-fetch of all the data, we just append the single returned to book to the existing books state:
// ./src/reducers/bookReducer.js
export default (state = [], action) => {
  switch (action.type){
    case 'CREATE_BOOK_SUCCESS':
        return [
          ...state,
          Object.assign({}, action.book)
        ];
    case 'FETCH_BOOKS_SUCCESS':
          return action.books;
    default:
          return state;
  }
};
Refactor BookPage
It would be frowned at, if we leave the BookPage component to house the form. What if we have different pages that use this form? It won’t be reasonable to re-create it. A better solution is to make the form a component also to improve re-use:
// ./src/components/book/BookForm.js
import React from 'react';

const BookForm = (props) => {
    // Collector variables
    let titleInput, authorInput, priceInput, yearInput = null;
    return (
      <form onSubmit={e => {
            e.preventDefault();
            // Assemble data into object
            var input = {
              title: titleInput.value,
              author: authorInput.value,
              price: priceInput.value,
              year: yearInput.value
            };
            // Call method from parent component
            // to handle submission
            props.submitBook(input);
            // Reset form
            e.target.reset();
          }}
            className="form-horizontal"
      >
        <div className="input-group">
          <label className="col-sm-2 control-label">Title: </label>
          <div className="col-sm-10">
            <input
              type="text"
              name="title"
              ref={node => titleInput = node}
              className="form-control" />
          </div>
        </div>
        <br/>
        <div className="input-group">
          <label className="col-sm-2 control-label">Author: </label>
          <div className="col-sm-10">
            <input
              type="text"
              name="author"
              ref={node => authorInput = node}
              className="form-control" />
          </div>
        </div>
        <br/>
        <div className="input-group">
          <label className="col-sm-2 control-label">Price: </label>
          <div className="col-sm-10">
            <input
              type="number"
              name="price"
              ref={node => priceInput = node}
              className="form-control" />
          </div>
        </div>
        <br/>
        <div className="input-group">
          <label className="col-sm-2 control-label">Year: </label>
          <div className="col-sm-10">
            <input
              type="text"
              name="year"
              ref={node => yearInput = node}
              className="form-control" />
          </div>
        </div>
        <br/>
        <div className="input-group">
          <div className="col-sm-offset-2 col-sm-10">
            <input type="submit" className="btn btn-default"/>
          </div>
        </div>
      </form>
    );
};

export default BookForm;
Not only did we extract this form, we also added more fields including Author, Price and Year.
There is no need for the luxury of a class component so we used a stateless functional component and to manage events, we delegate them to the parent components by passing them down to the children via props. This is what happens with the submitBook method.
Let’s now see what happens with BookPage component after extracting parts of it’s JSX:
// ./src/components/book/BookPage.js
import React from 'react';
import { connect } from 'react-redux';
import BookForm from './BookForm';
import { Link } from 'react-router';
import * as bookActions from '../../actions/bookActions';

class Book extends React.Component{
  constructor(props){
    super(props);
  }

  submitBook(input){
    this.props.createBook(input);
  }

  render(){
    let titleInput;
    return(
      <div className="row">
        <div className="col-md-6">
          <h3>Books</h3>
          <table className="table">
            <thead>
              <th>
                <td>Title</td>
                <td></td>
              </th>
            </thead>
            <tbody>
            {this.props.books.map((b, i) => <tr key={i}>
              <td>{b.title}</td>
              <td><Link to={`/books/${b.id}`}>View</Link></td>
            </tr> )}
            </tbody>
          </table>
        </div>
        <div className="col-md-6">
          <h3>New Book</h3>
          {/* Import and inject Book form */}
         <BookForm submitBook={this.submitBook.bind(this)} />
        </div>
      </div>
    )
  }
}
// ... rest of the component code
All we just need to do is to import the BookForm component and inject into the BookPage component. The key line is the one below:
<BookForm submitBook={this.submitBook.bind(this)} />Book Details Page
We are making progress and it’s a good thing. Next thing to cross off our list is the details page by creating. Just like the BookPage component, we create a wrapper container component and a UI presentation component to display the content. Let’s start with the wrapper component:
// ./src/components/book/BookDetailsPage.js
import React, {PropTypes} from 'react';
import {connect} from 'react-redux';
import {bindActionCreators} from 'redux';
import BookDetails from './BookDetails'

class BookDetailsPage extends React.Component {
    constructor(props, context) {
        super(props, context);
    }

    render() {
        return (
            <div>
                <h1>Book Details Page</h1>
                <BookDetails />
            </div>
        );
    }
}

const mapStateToProps = (state, ownProps) => {
    return {
        // state mappings here
    };
}

const mapDispatchToProps = (dispatch) => {
    return {
        // actions mappings here
    };
}

export default connect(mapStateToProps, mapDispatchToProps)(BookDetailsPage);
This is an almost empty component which we will build upon as we move on. The only thing to check out is that the BookDetails component is imported and added to the JSX. Let’s create that:
// ./sec/components/book/BookDetails.js
import React, {PropTypes} from 'react';

const BookDetails = (props) => {
    return (
      <div className="media">
        <div className="media-left">
          <a href="#">
            <img className="media-object" src="http://placehold.it/200/450" alt="Placehold" />
          </a>
        </div>
        <div className="media-body">
          <h4 className="media-heading">Title</h4>
          <ul>
            <li><stron>Author: </stron> Author</li>
            <li><stron>Price: </stron> Price</li>
            <li><stron>Year: </stron> Year</li>
            <br/>
            <button className="btn btn-primary">Buy</button>
          </ul>
        </div>
      </div>
    );
};

export default BookDetails;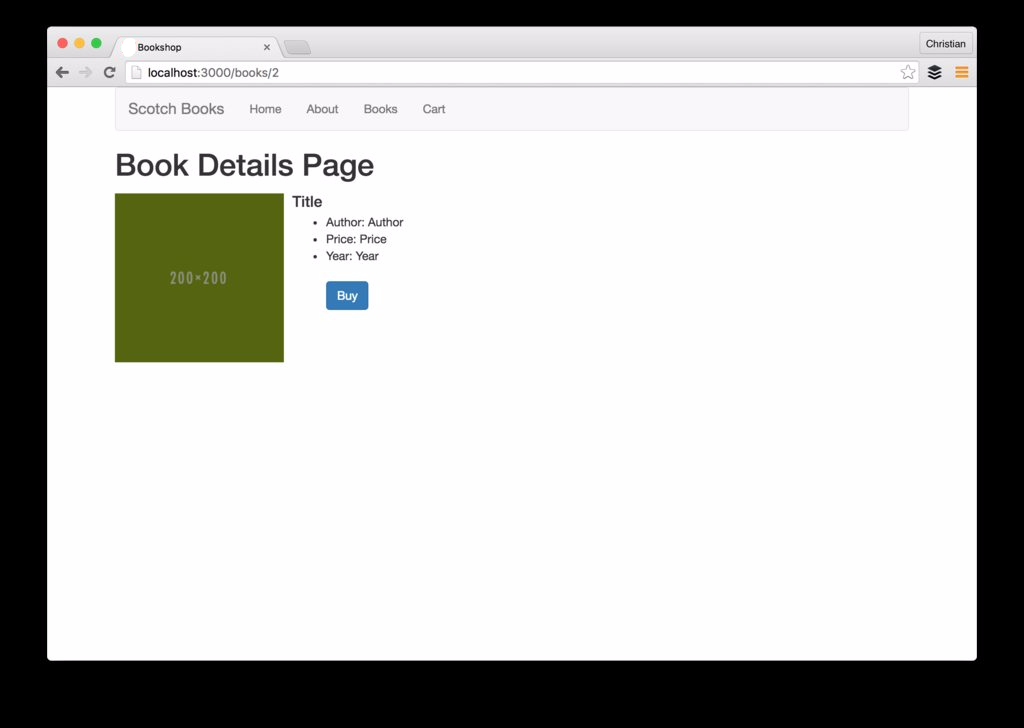
Basically markup and just showing what we are up to. Now let’s move further and consult Redux. Let’s begin by adding more actions to our actions file:
// ./src/actions/bookActions.js
// Sync Action
export const fetchBookByIdSuccess = (book) => {
  return {
    type: actionTypes.FETCH_BOOK_BY_ID_SUCCESS,
    book
  }
};
// Async Action
export const fetchBookById = (bookId) => {
  return (dispatch) => {
    return Axios.get(apiUrl + '/' +bookId)
      .then(response => {
        // Handle data with sync action
        dispatch(fetchBookByIdSuccess(response.data));
      })
      .catch(error => {
        throw(error);
      });
  };
};
Just like every other async actions we have encountered but this time takes a parameter which is the ID of the book.
actionTypes contains all our actions and makes it easy for us to re-use rather than hard-code the action name strings every time:
// ./src/actions/actionTypes.js
export const CREATE_BOOK_SUCCESS = 'CREATE_BOOK_SUCCESS';
export const FETCH_BOOKS_SUCCESS = 'FETCH_BOOKS_SUCCESS';
export const FETCH_BOOK_BY_ID_SUCCESS = 'FETCH_BOOK_BY_ID_SUCCESS';

export const ADD_TO_CART_SUCCESS = 'ADD_TO_CART_SUCCESS';
export const FETCH_CART_SUCCESS = 'FETCH_CART_SUCCESS';
There are more than one options to handle state update in the reducer. Either we just filter the already existing books for the book with the ID we are looking for or fetch the book with the ID from the API and handle with a different reducer.
We will go with the second option I listed above just to demonstrate that it is possible to have multiple reducers in your Redux app. So back to bookReducers, update the content with:
// ./src/reducers/bookReducers.js
// For handling array of books
export const booksReducer = (state = [], action) => {
  switch (action.type) {
    case actionTypes.CREATE_BOOK_SUCCESS:
        return [
          ...state,
          Object.assign({}, action.book)
        ];
    case actionTypes.FETCH_BOOKS_SUCCESS:
          return action.books;
    default:
          return state;
  }
};

// For handling a single book
export const bookReducer = (state = [], action) => {
  switch (action.type) {
    // Handle fetch by Id
    case actionTypes.FETCH_BOOK_BY_ID_SUCCESS:
      return action.book;
    default:
      return state;
  }
};
This time the reducers are named so we can use named import to gain access to them from the root reducer file:
// ./src/reducers/index.js
import { combineReducers } from 'redux';
import {booksReducer, bookReducer} from './bookReducers'

export default combineReducers({
  books: booksReducer,
  book: bookReducer
});
Now, we can map our state and actions to the props in the BookDetailsPage component. As usual, we create two functions to handle the tasks and connect these functions to the component:
// ./src/components/book/BookDetailsPage.js
// Map state to props
const mapStateToProps = (state, ownProps) => {
    return {
      book: state.book
    };
};
// Map dispatch to props
const mapDispatchToProps = (dispatch) => {
    return {
      // This dispatch will trigger
      // the Ajax request we setup
      // in our actions
      fetchBookById: bookId => dispatch(bookActions.fetchBookById(bookId))
    };
};

export default connect(mapStateToProps, mapDispatchToProps)(BookDetailsPage);
We fire the fetchByIdaction method in the component’s componentDidMount lifecycle which will start the process immediately the component is ready:
componentDidMount(){
   this.props.fetchBookById(this.props.params.id);
}
Next is to pass down the book to BookDetails component via props:
// ./src/components/book/BookDetailsPage.js
<BookDetails book={this.props.book}/>
Then update the BookDetails component to bind the props content to the view:
// ./src/components/book/BookDetails.js
import React from 'react';

const BookDetails = ({book}) => {
    return (
      <div className="media">
        <div className="media-left">
          <a href="#">
            <img className="media-object" src="http://placehold.it/200/550" alt="Placehold" />
          </a>
        </div>
        <div className="media-body">
          <h4 className="media-heading">{book.title}</h4>
          <ul>
            <li><stron>Author: </stron> {book.author}</li>
            <li><stron>Price: </stron> ${book.price}</li>
            <li><stron>Year: </stron> {book.year}</li>
            <br/>
            <button className="btn btn-primary">Buy</button>
          </ul>
        </div>
      </div>
    );
};

export default BookDetails;
Persisted Shopping Cart
Just to go through the process of Async actions, let’s treat one more entity, the cart. The logic behind a shopping cart is largely complex compared to just persisting the users cart items on the server but we just need to learn Redux Thunk without considering so much about carts conventions.
Let’s iterate through the process as a numbered step so it can serve as a reference for you anytime you have anything to do with React, Redux and Redux Thunk:
1. Create Components
We need to create a cart page component but before that, let’s update BookDetails so as to handle click event for the buy button:
// ./src/components/book/BookDetails.js
import React from 'react';

const BookDetails = ({book, addToCart}) => {
    return (
      <div className="media">
        <div className="media-left">
          <a href="#">
            <img className="media-object" src="http://placehold.it/200x280" alt="Placehold" />
          </a>
        </div>
        <div className="media-body">
          <h4 className="media-heading">{book.title}</h4>
          <ul>
            <li><stron>Author: </stron> {book.author}</li>
            <li><stron>Price: </stron> ${book.price}</li>
            <li><stron>Year: </stron> {book.year}</li>
            <br/>
            {/* onClick event */}
            <button className="btn btn-primary" onClick={e => addToCart(book)}>Buy</button>
          </ul>
        </div>
      </div>
    );
};

export default BookDetails;
The event is handled by a method on the props which is passed down by the parent container so we destructure to get the method. The method is called passing it a book instance. Add the method to BookDetailsPage so it won’t be undefined:
addToCart(book){
const item = {
title: book.title,
price: book.price
};
this.props.addToCart(item);
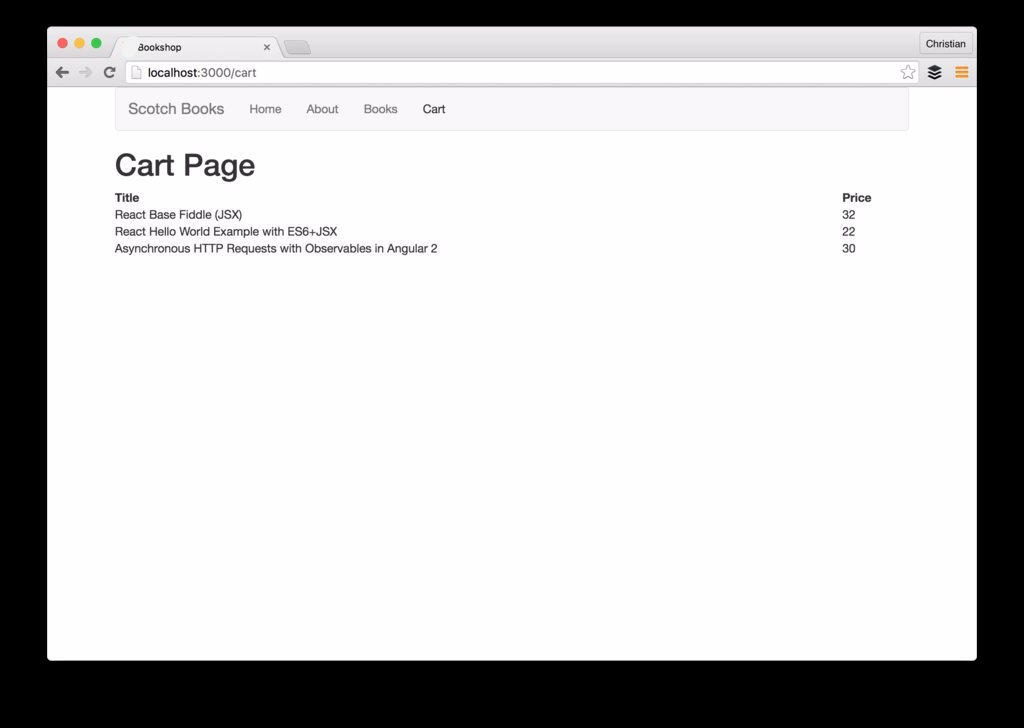
}Next we create a CartPage to handle items in the cart:
// ./src/components/cart/CartPage.js
import React, {PropTypes} from 'react';
import {connect} from 'react-redux';
import * as bookActions from '../../actions/bookActions';

class CartPage extends React.Component {
    constructor(props, context) {
        super(props, context);
    }

  componentDidMount(){
    this.props.fetchCart();
  }

    render() {
        return (
            <div>
                <h1>Cart Page</h1>
                <table className="table">
                  <tr>
                    <th>Title</th>
                    <th>Price</th>
                  </tr>
                  {this.props.items.map((item, index) => {
                    return (
                      <tr key={index}>
                        <td>{item.title}</td>
                        <td>{item.price}</td>
                      </tr>
                    );
                  })}
                </table>
            </div>
        );
    }
}

export default CartPage;
The props will be mapped using React-Redux’s connect later but for now, we will stick to the steps. The lifecycle method is also calling a method on the props which is also yet to be mapped but will serve load the cart data once the component mounts.
Finally in this step, we add an extra routes to our existing routes to serve the cart page:
// ./src/routes.js
<Route path="/" component={App}>
   <IndexRoute component={Home}></IndexRoute>
   <Route path="/about" component={About}></Route>
   <Route path="/books" component={BookPage}></Route>
   <Route path="/books/:id" component={BookDetailsPage}></Route>
   {/* Extra route to serve Cart. Don't forget to import*/}
   <Route path="/cart" component={CartPage}></Route>
 </Route>
2 Actions & Action Creators
We need to adding items and fetching items and each of this process will have an async action which use thunk to do the API fetch and a sync action which is dispatched with async’s returned data:
// ./src/actions/bookActions.js
// Sync add to cart
export const addToCartSuccess = (item) => {
  return {
    type: 'ADD_TO_CART_SUCCESS',
    item
  }
};
// Async add to cart
export const addToCart = (item) => {
  return (dispatch) => {
    return Axios.post('http://57c64baac1fc8711008f2a82.mockapi.io/Cart', item)
      .then(response => {
        dispatch(addToCartSuccess(response.data))
      })
      .catch(error => {
        throw(error);
      });
  };
};
// Sync load cart
export const fetchCartSuccess = (items) => {
  return {
    type: 'FETCH_CART_SUCCESS',
    items
  }
};
// Async load cart
export const fetchCart = () => {
  return (dispatch) => {
    return Axios.get('http://57c64baac1fc8711008f2a82.mockapi.io/Cart')
      .then(response => {
        dispatch(fetchCartSuccess(response.data))
      })
      .catch(error => {
        throw(error);
      });
  };
};
3. State Reducers For Actions
With the actions set, we can set up reducers to update state based on the actions we created. The reducers for cart is simple:
// ./src/reducers/cartReducers.js
export default (state = [], action) => {
  switch (action.type) {
    case 'ADD_TO_CART_SUCCESS':
      return action.item;
    case 'FETCH_CART_SUCCESS':
      return action.items;
    default:
      return state;
  }
};
4. Connect Component
Most boilerplate task like configuring and creating store was skipped because we already did that in the previous article. We just need to connect our CartPage component and then map states and actions to it’s props:
// ./src/components/cart/CartPage.js
// ...rest of component body
const mapStateToProps = (state, ownProps) => {
    return {
      items: state.cart
    };
};

const mapDispatchToProps = (dispatch) => {
    return {
      fetchCart: bookId => dispatch(bookActions.fetchCart()),
    };
};

export default connect(mapStateToProps, mapDispatchToProps)(CartPage);
Now the items and fetchCart props which we were making use of in the component body are now defined and has a value.
Wrap up
Glad to we got to the end of this tutorial. Redux Thunk has alternatives like Redux Saga which makes use of ES6 generators and you can check out.
You could observe the the app is not frictionless and shows stale data for a while before updating while navigating. What you could do is use a loading indicator to delay display until the new data is ready.
Also checkout React-Rouer-Redux which keeps everything in sync between React, Redux and React Router.