In this beginner’s tutorial, we’ll take a look at some Photoshop action basics and create a customizable vignette action—ready to use and adapt in any way you like! So grab your favorite photograph, and let’s get creating!
What You’ll Need
You’ll need the following assets in order to complete this project:
Now, let’s get started!
What Is a Vignette?
Around the Image
We’re not talking about short-form writing or anything like that in this tutorial—we’re referring to a visual effect where an image has a decrease in brightness (or saturation) around the outside. A vignette typically has a rounded appearance, like a camera’s lens, and often refers to an effect relating to photography.
However, in terms of Photoshop, we’re digitally creating (or enhancing) these photo effects.

So Why Bother With This Effect?
Well, notice how it potentially helps establish emphasis and/or a focal point. It can be utilized to create or emphasize mood. It can also help push an aesthetic—for example, it might work well with a vintage look.
Vignettes can work nicely with portraits, but the only limits, really, are your project’s goals and/or your creativity, when it comes to Photoshop effects!

1. How to Create Photoshop Actions
Step 1
To begin, let’s look at the basics of how Photoshop actions work. Then, we can build on these fundamentals and construct our Photoshop vignette effect.
Start up a New Document. To do so, go to File > New.
I’m going to work at 5 inches high by 7 inches wide for this demonstration, but you’re welcome to work at any size you’d like!
Once you’re happy with your settings, click Create.

Step 2
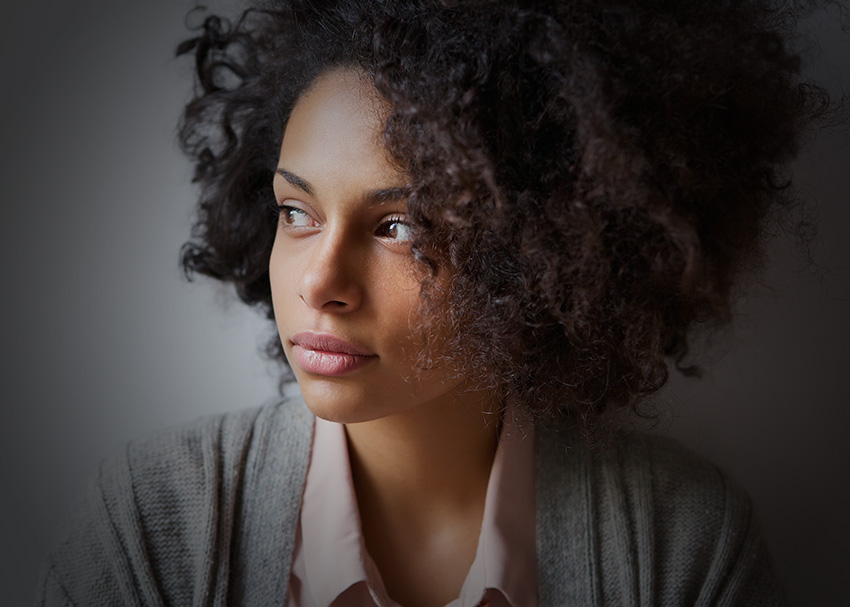
Now, let’s open up a test image of your choice. I used this image of a woman looking away.
Copy, Paste, and Resize your image to fit into your document the way you’d like.
Again, we’re ultimately going to apply our vignette effect to this image, but we’ll start off with some Photoshop action basics, to illustrate how they work.

Step 3
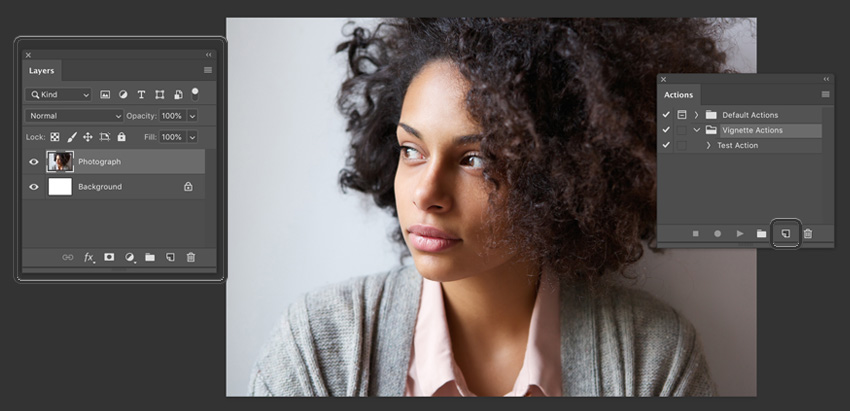
Let’s start by opening up the Actions panel. Go to Window > Actions to open it up.
This is what the panel looks like, below.

Step 4
So what does this panel do? Photoshop actions basically record a process that you can then replay.
Here’s an overview of the items at the bottom of the panel that we can use to create and use our actions:
Stop Recording—this button stops the recording of actions. So, unless you’re currently recording, it will not be selectable. The button itself looks like a square.
Begin Recording—starts up the recording of a new set of actions. The button looks like a circle.
Play Selection—this button replays our action. So, for example, when we’re ready to run our action in our project, this is the button we would select. The button itself looks like a triangle.
Create New Set—this is a collection of actions. For example, you might want to keep multiple actions in one place, for organization purposes. The button looks like a folder.
Create New Action—use this button to create a new action. The button itself looks like a page icon.
Delete—use this button to delete an action. It’s the icon that looks like a trash bin.

Step 5
Let’s start out by creating a new Action Set. Click on the New Set button, and give it a name that you’ll remember. I called mine “Vignette Actions”.

Step 6
Now, let’s create a new action. Click on the Create New Action button. It’ll bring up the following dialog box, with the following options:
Name—give your action a name; anything will do! I like to name my actions something relevant and easy to remember. In this case I called mine “Test Action”.
Set—this is what set you’d like your action located in, for organizational purposes. We’ve already created a set called “Vignette Actions”, so I put mine there.
Function Key—you can assign your action a function key, if you’d like to use it as a shortcut. You can also assign whether or not you’d like Shift or Control used in this shortcut. Be aware of this information, but we won’t use it in this example.
Color—this is purely for visual purposes, just like adding colors in the Layers panel. You can color code your actions (exclusive to the panel), if you’d like.
Once you’re happy with your values, click Record.

Step 7
Once you’ve clicked Record, take a look at the Actions panel. You’ll notice that the Record Button is active—we are currently recording an action. This means that, if you do something in Photoshop, it’s going to record it. For example, if you move something or use the Fill tool, it’ll record that at this point.
For the sake of an example, let’s select the Text Tool and type “Hello!” Notice how this is reflected in our Actions.
Once you’ve done so, click the Stop Button in your Actions panel. Now, we’ve finished recording.

Step 8
Now, let’s use our newly created action. Delete the Text Layer with “Hello” on it.
Then, select your action and click Play.
Voila! The text is recreated for us. See how this could be useful for a wide variety of things? I often use actions for repetitive tasks and special effects.

2. How to Create a Vignette Photoshop Action
Step 1
Now that we know the basics of how Photoshop actions work, let’s create a vignette action that we can easily reuse and reapply to any image we like.
Before we get started, delete any extra layers you might have (like the text layer that says “hello”, from earlier—we don’t need that anymore).
Once you’re ready, click Create New Action in your Actions panel.
Step 2
I decided to call my action “Vignette #1”. You’re welcome to call yours whatever you’d like. I also associated it with the Action Set we created earlier—Vignette Actions.
Once you’re happy with your selections, click Record.

Step 3
Now, we’re recording! Let’s start off by Creating a New Layer in the Layers panel.
I named this layer “Vignette”, for organizational purposes. To name a layer, just double-click on its name in the Layers panel, and then type in the name of your choice.
You will see this reflected as Make Layer and Set Current Layer, in your Actions panel. Remember, we are recording, right now!

Step 4
Next, swap the Foreground and Background colors. You can do so via the little arrow icons by your swatches, in the Tools panel, as highlighted below.
Then, set the Foreground Color to White. Click on the top color swatch in the Tools panel (they look like two blocks) and select white.
You will see this reflected as Exchange Swatches and Set Foreground color in your Actions panel.

Step 5
Now, fill our Vignette layer with our foreground color, white.
We will no longer be able to see our photograph, because there is a layer, filled with white, on top of it at the moment.

Step 6
Before we move on, take a look at your Actions panel. Here’s what it should look like, at this point:
Make Layer—Photoshop recorded us making a New Layer. This means, that when we run our action, it will start by making a new layer.
Set Current Layer—this is when we named this new layer “Vignette”.
Exchanged Swatches—we swapped the background and foreground colors here.
Set Foreground Color—then, we changed the foreground color to white.
Fill—we added a white fill to our layer called “Vignette”.
So, what happens if yours doesn’t look like that, if you made a mistake, or you need to pause in the middle? No problem! You can stop and resume recording at any time. You can also delete any extra items in the list that you may have made by accident. We’ll take a look at these features a little more, later in the tutorial.
For now, make sure your actions for Vignette #1 match this list.

Step 7
Now, let’s change our Vignette Layer’s Blending Mode to Multiply. It will be visible as Set Current Layer in your Actions.
You’ll notice that this makes the white layer, on top of our photo, disappear. No worries—that’s exactly what we want.

Step 8
Now, let’s add some Layer Effects to this layer. Click on the Add a Layer Style icon, in the Layers panel.
From the resulting menu, select Gradient Overlay.

Step 9
Now you should see your Gradient Overlay Options. You could do a lot of things with this, but here’s what we’ll do to create the effect we’re looking for.
Blend Mode—set this to Multiply.

Step 10
Opacity—I set mine to 75%, but you can set yours at any opacity you think works best for your project. Feel free to follow me on this, or experiment on your own.

Step 11
Gradient—mine looks like white to black, one of the default gradients in the list. Then I selected Reverse, so it displays in the opposite order.

Step 12
Style—we want Radial here. Instead of a linear gradient, we want something that radiates out of the center, like a circle.

Step 13
Angle—I left this at 90%.
Scale—I set mine to 150%, so it’s larger. Notice, if you play with this value, how it changes the size (or scale) of the “circle”.
One last note here, before we proceed—notice that if you have Preview selected, you can click and drag to move the center point of your radial gradient. Neat, huh? I’m going to leave mine at the default center position, but it’s nice to know this option is there.
Once you’re happy with your values, click OK.

Step 14
Now, we’ve finished the basics of our action! So click Stop in your Actions Panel to stop recording.

3. How to Use a Photoshop Vignette Action
Step 1
Now that we’ve created an action, let’s experiment with putting it to work!
Create a New Document. This time I’m going to make my document’s dimensions 5 inches high by 7 inches wide—the opposite of what we worked with before, because I want to test out my vignette action in other orientations.
Then, as we did previously, paste an image into your document. I used this image of a woman at the beach. You can crop and position your photo any way you prefer.

Step 2
Now let’s apply our action! Select the layer with your photograph on it.
Select Vignette #1 within your Vignette Actions Set.
Then, click Play in the Actions panel.

Step 3
Our vignette has now been applied to another picture! Wonderful—we can use it any time we like, as much as we’d like!
However…

Step 4
Projects don’t always work out perfectly the first time—we all make mistakes. So, what happens if your action has some kind of mistake in it, or you want to make an edit to it?
Thankfully, that’s simple!
For example, let’s say I want to add some color adjustment to my action. Choose the spot within the action where you want to record new actions. In my case, I want to add more actions to the end of Vignette #1. I select the last action here, “Set Layer Styles”, and then click Record.

Step 5
While recording, I added a New Layer, gave it a beige Fill Color, and then set the Layer’s Blending Mode to Color, Opacity 40%. The result is kind of a vintage effect Photoshop action utilizing color, combined with our vignette. See how you could build and play with this in any way you like?
When I was finished, I clicked Stop in my Actions panel.
Voila! Now my action has even more content to apply.

Step 6
But let’s say we have something here in our action that we don’t want—maybe we did some extra “stuff” that we didn’t want to record, for example.
Simple! I’m going to erase the extra actions here, as an example. Holding Shift (to select more than one item), click on any part of your actions that you’d like to erase. Then click on the trash can to delete them.
Note, this deletes part of your recorded actions—not your layers or parts of your artwork.

Step 7
Before we go, let’s look at one more useful aspect of actions! Let’s say you want to take your actions with you—or load up some actions created by someone else! Thankfully, it’s a really simple process.
Click on the Action Set you’d like to save—that’s the folder icon, within your Actions.
Then, looking at the Actions panel, click on the Menu Icon.
Select Save Actions, and you will be prompted to save an .ATN file.

Step 8
Loading up actions is just as simple!
Again, go to the Menu Icon in the Actions panel. This time, select Load Actions. You will be prompted to select an .ATN file, like the one we just saved.
Just an extra tip here—when downloading really detailed or advanced actions, they might come with companion elements, like brushes or patterns. Make sure you’re clear on what the action needs to play properly when loading one up, or you might have some hiccups!

And That’s a Wrap!
Thanks so much for joining me in this exploration of Photoshop actions and how to create a vignette Photoshop action! I hope you can use these tips and tricks to create a whole bunch of different actions and projects—good luck!

Enjoy working and experimenting with Photoshop actions? Want to experiment with some ready-made content, actions, and presets? Here are some really cool ones to check out:
Vignette Lightroom Presets
Enjoy working with Adobe Lightroom? Then check out this collection of awesome presets, with over ten different vignette presents to experiment with. Awesome, right?

So Vintage Photoshop Action
This is such an awesome set of Photoshop actions! There are 80 vintage styles, including some vignette and noise layers to experiment with, five high res textures, and more!

Charcoal Actions for Photoshop and Elements
This set contains three different actions for varied intensity of blurriness/aging. It gives a retro black-and-white effect to your images, and works in both Photoshop and Elements!

Double Light Photoshop Action
I love these lighting effects, and these actions are plenty user friendly—the developer even offers a help guide, walk-through video, and extra help, if you need it! Lighting can be such a powerful addition, visually and communicatively!

Double Exposure Photoshop Action
This set of actions actually comes with four variations, and it’s editable after you’ve applied the final effect! What photos might you combine here? This is one with so many potential applications.

Pixel Art Photoshop Action
I had a lot of fun trying out this action with some of my favorite photos. Easily achieve a pixel art effect with this Photoshop Action. It comes with a step-by-step guide, too!

Anaglyph Photoshop Actions
This set of Photoshop actions comes with so many awesome options to experiment with! It includes four basic anaglyph and 11 experimental anaglyph actions!

Duotone Pro Photoshop Actions
In just one click, you can apply one of 50 different duotone effects to your photos with this set of Photoshop actions. Awesome, right? In addition, your original photo remains preserved—no need to worry about changing the original.

If you enjoyed this tutorial, here are some others to check out!