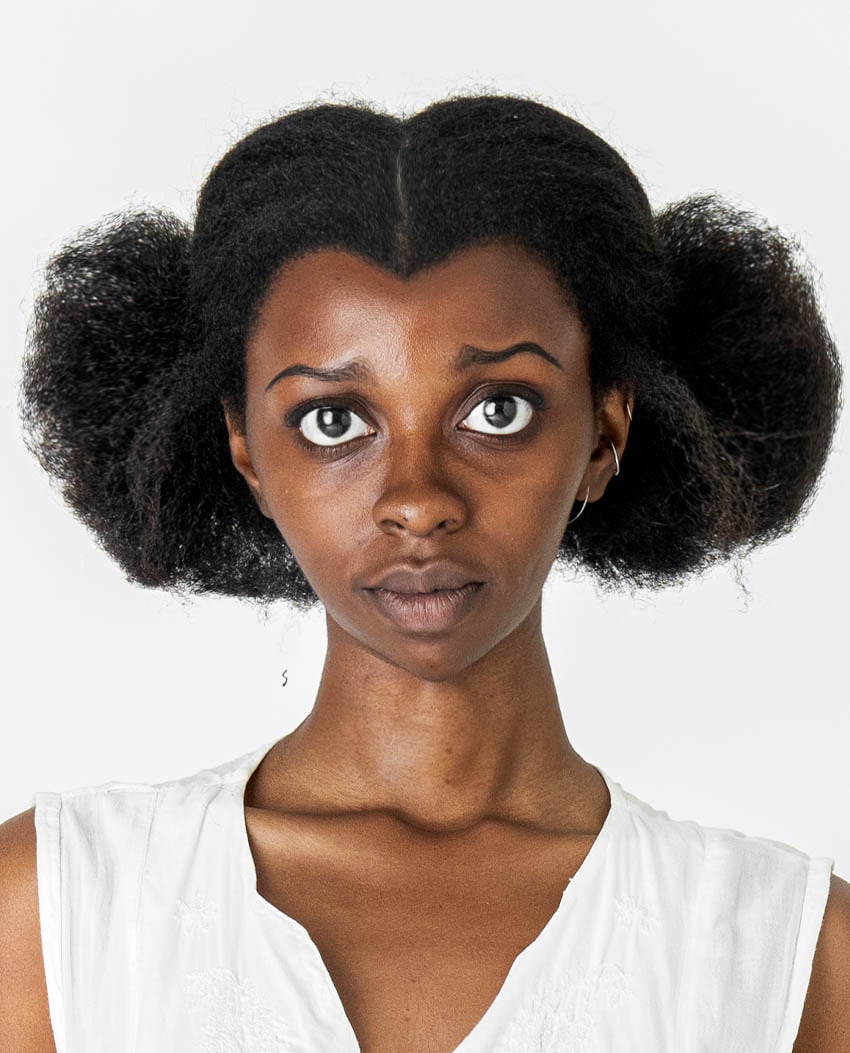
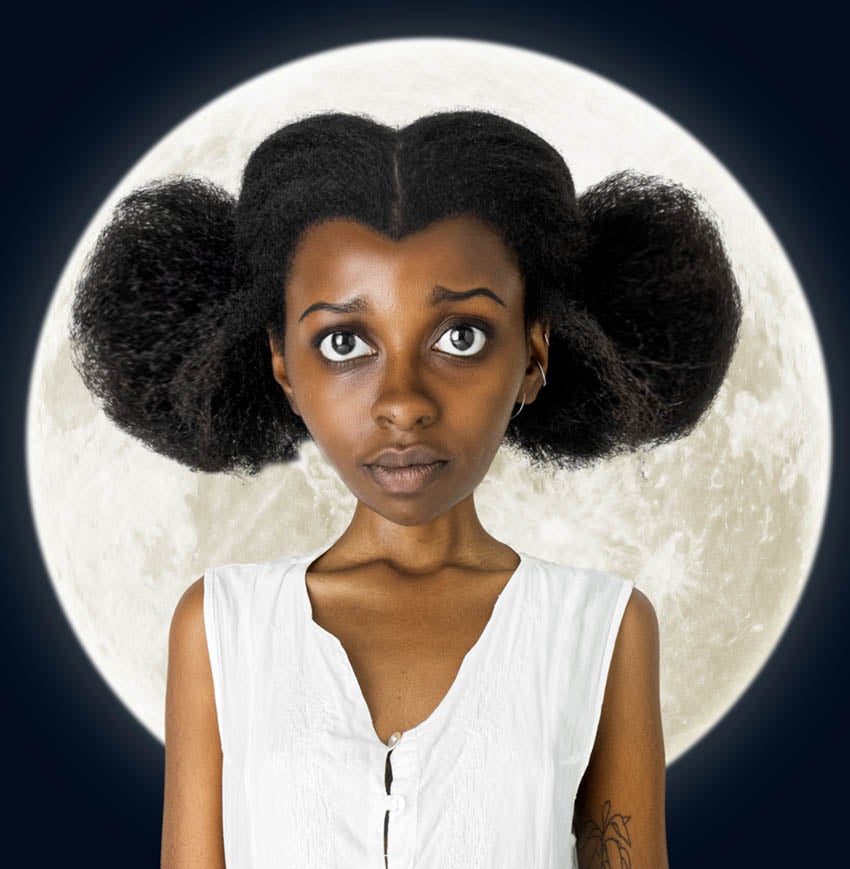
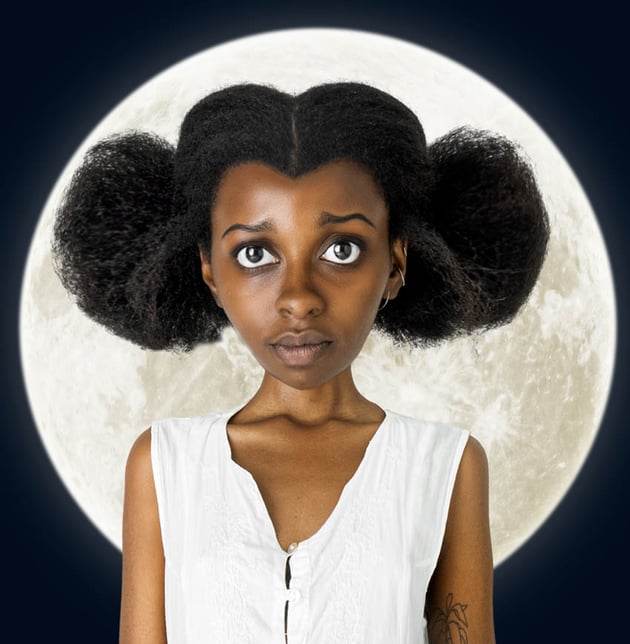
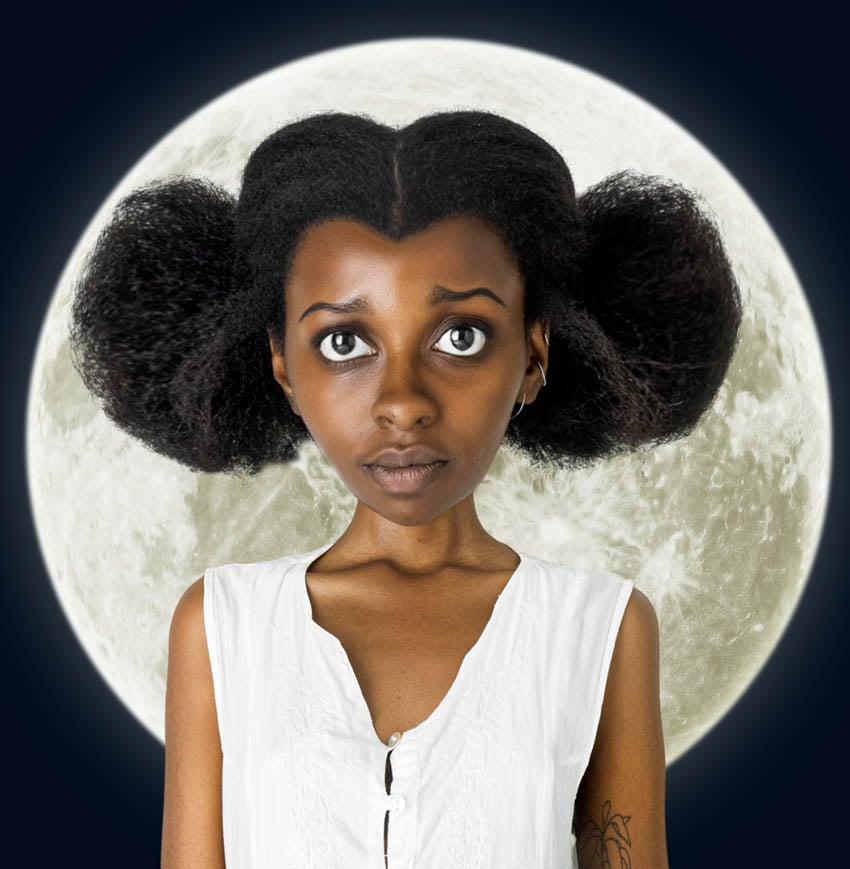
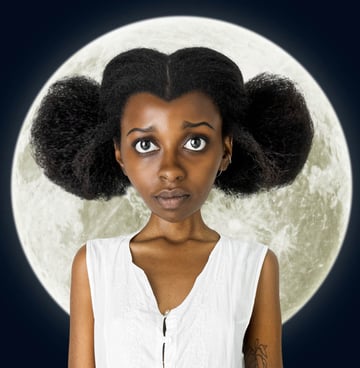
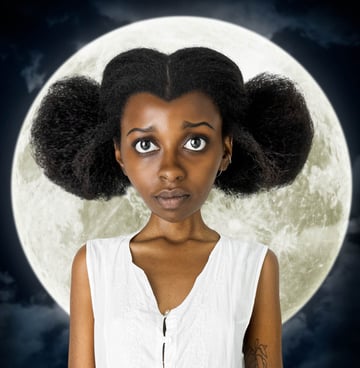
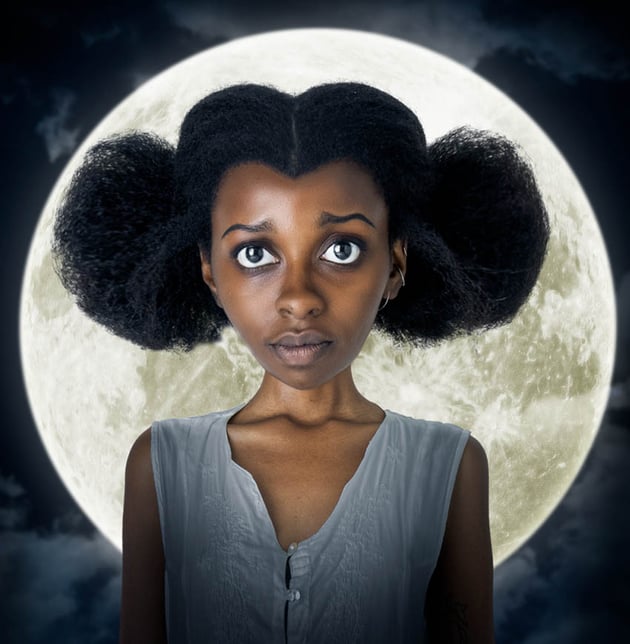
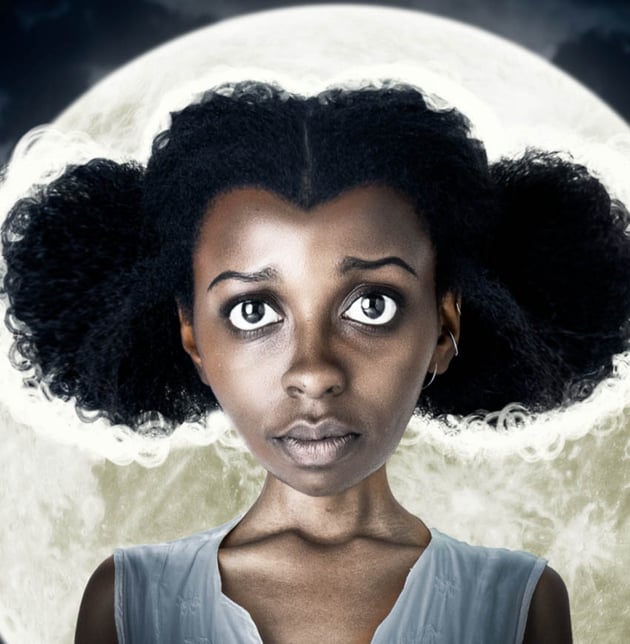
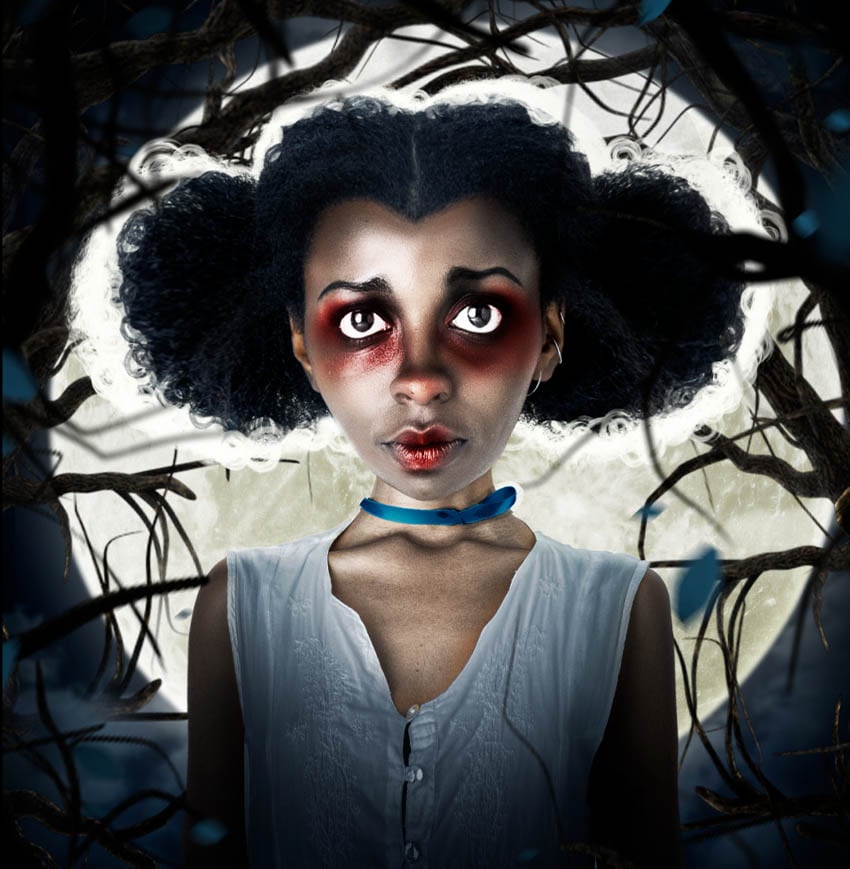
Today, we’ll be creating our very own Tim Burton photo filter! We’ll cover what makes Tim Burton’s art so recognizable. Then, we’ll recreate this iconic style using some smart liquifying techniques and simple image compositing. Let’s get started!
What You’ll Need
Find more resources on Envato Elements.
What Is Tim Burton’s Art Style?
Tim Burton’s art style is so iconic that it even has its own word: Burtonesque. His characters are a unique blend of grotesque and endearing, evoking both empathy and connection. They’re successful largely due to the style in which Tim Burton does the eyes of his characters.
His character design follows the same general blueprint, with a heavy emphasis on large eyes and foreheads. The eyes are the main focal point, often surrounded by dark under-eyes and heavy makeup paired with an otherwise pale face. The eyes are then further brought into focus by shrinking other details like the mouth and chin. This allows the eyes to be hyper-expressive.
In general, the key rule to remember is exaggeration. If a character is tall and skinny, they’ll be stretched to look even lankier, emphasizing their large eyes and head, almost like a doll. If a character is short, they’ll be very short and almost completely round. No matter the characteristic, when mimicking the Tim Burton art style, you want to push it to the extreme.
Burton’s attention to detail and willingness to tread outside of what’s considered traditionally cute or conventionally attractive are what make his style so easy to spot and recreate. Films like The Nightmare Before Christmas and Edward Scissorhands showcase his darkly enchanting aesthetic perfectly.
1. How to Recreate the Tim Burton Art Style
Step 1
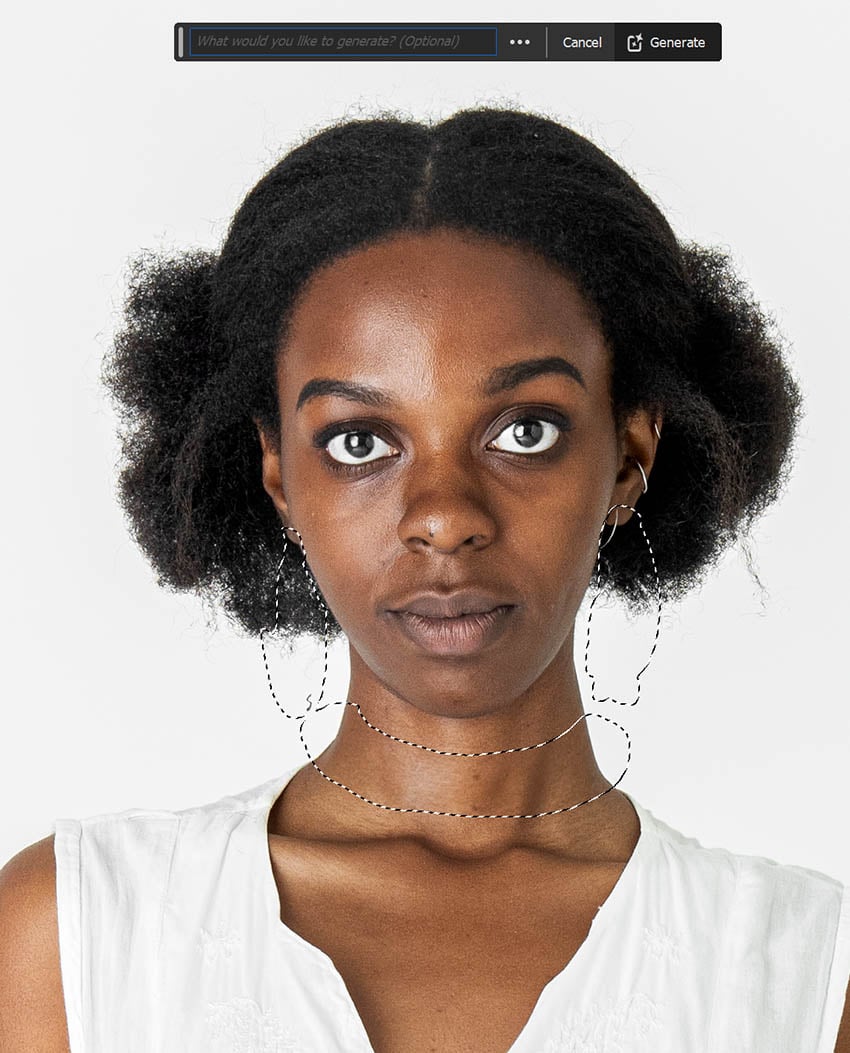
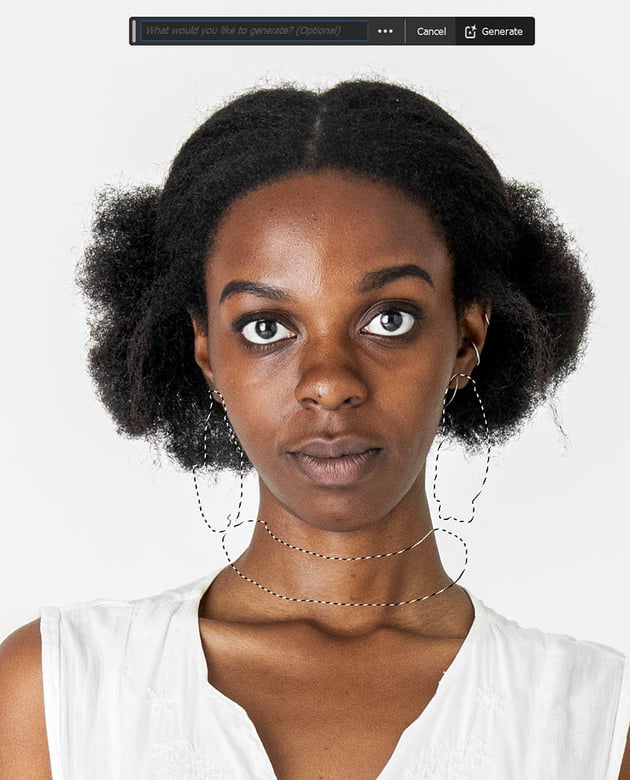
First, to start creating our Tim Burton concept art, we want to remove the subject’s existing jewelry using Generative Fill found in the floating Context bar. Use the Lasso tool to create selections around the jewelry you want to remove, and then hit Generate.
If you want Generative Fill to remove something, leave the prompt section blank.


Step 2
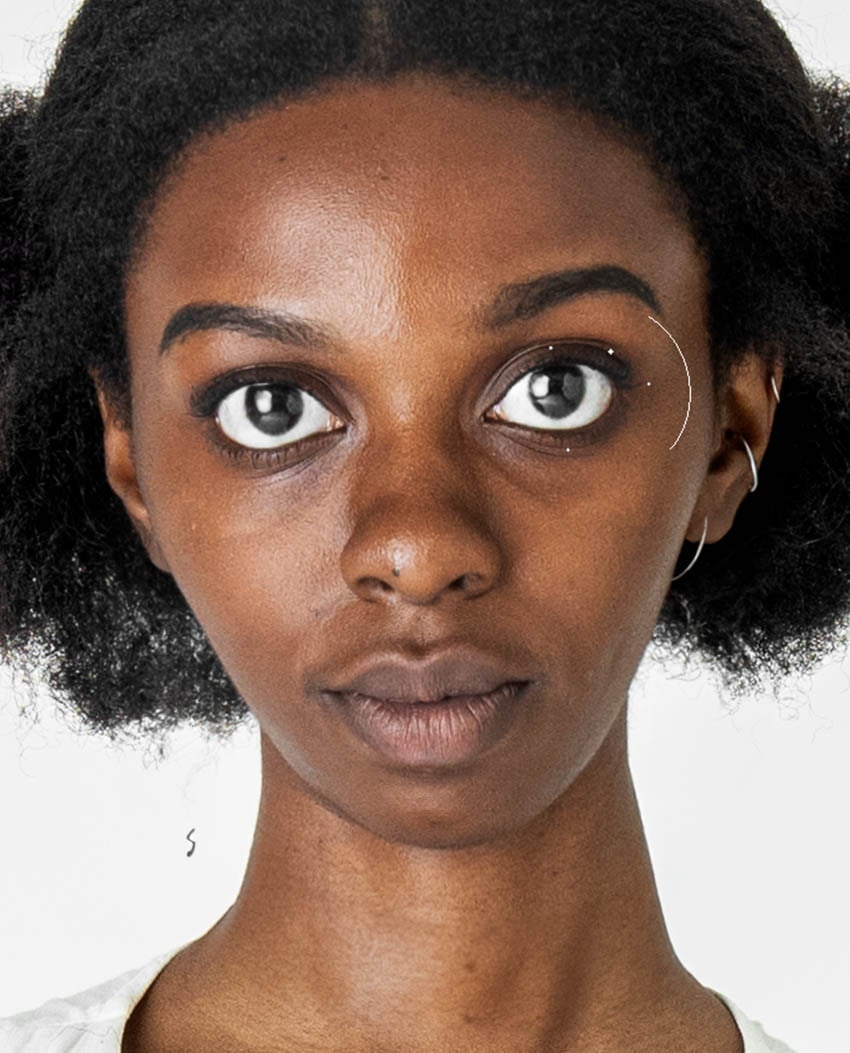
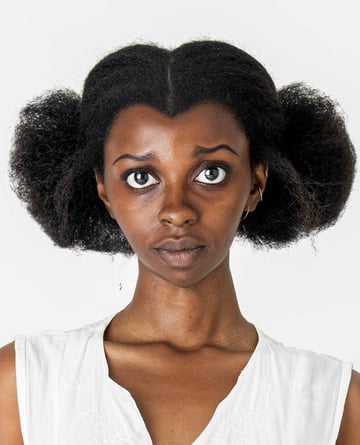
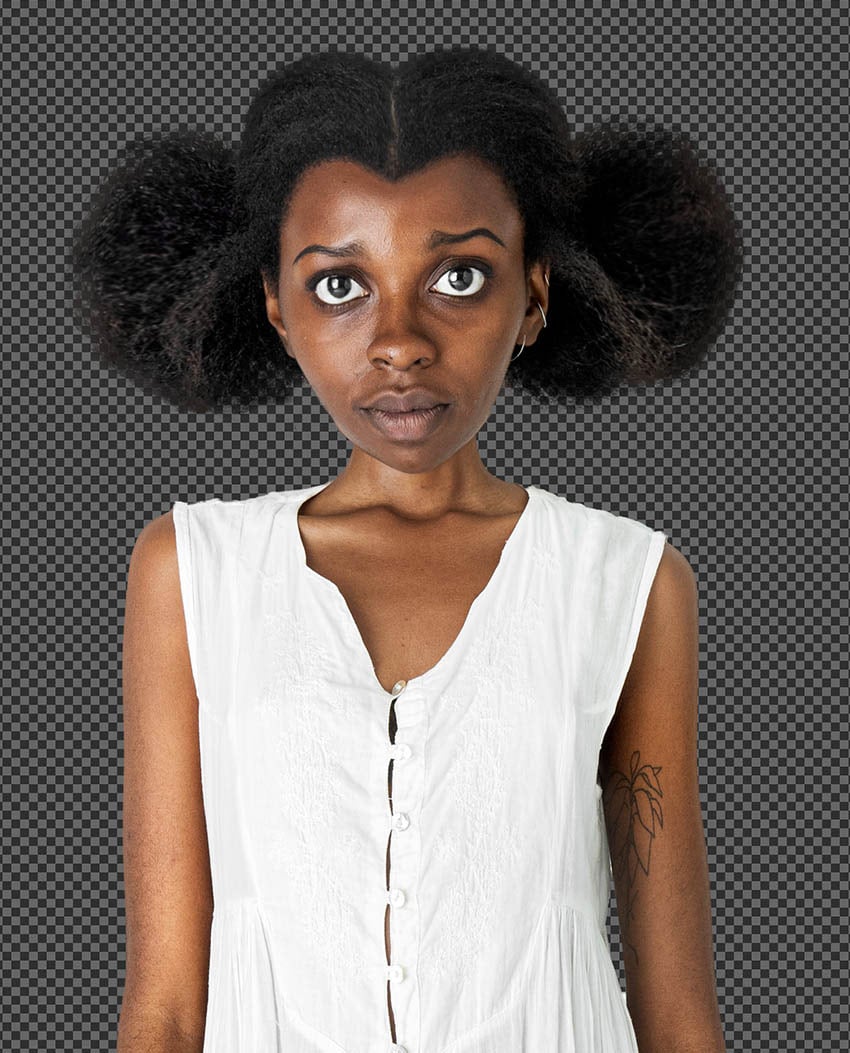
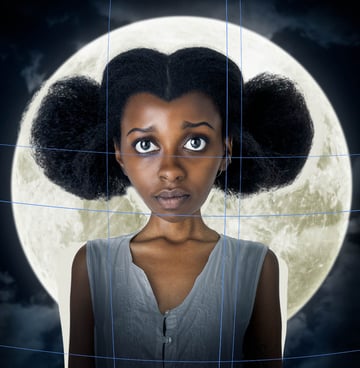
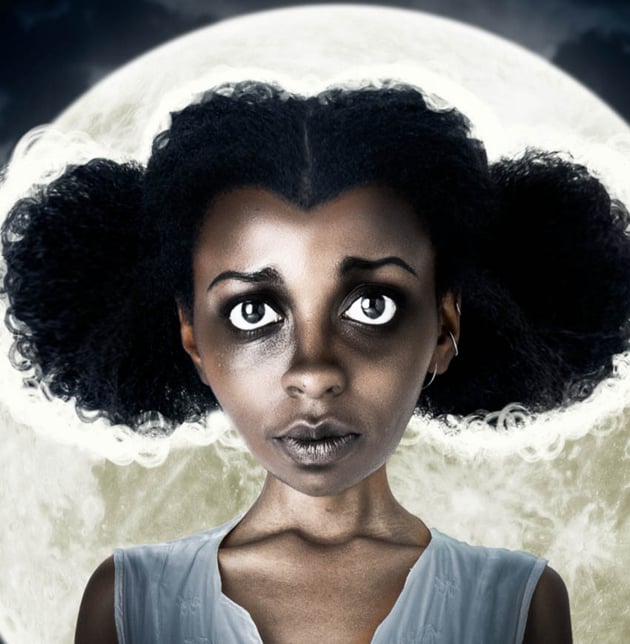
Next, let’s enter Filter > Liquify. In the left-hand sidebar, choose the Face tool. Use the toggles to increase the size of the eyes and shape the lips.
We want the eyes to be big and round, with the lips larger but less wide. We also want to start to shape the chin to be pointier, while shrinking the nose.
No Tim Burton fan art is complete without large eyes, so don’t be afraid to go big.


Step 3
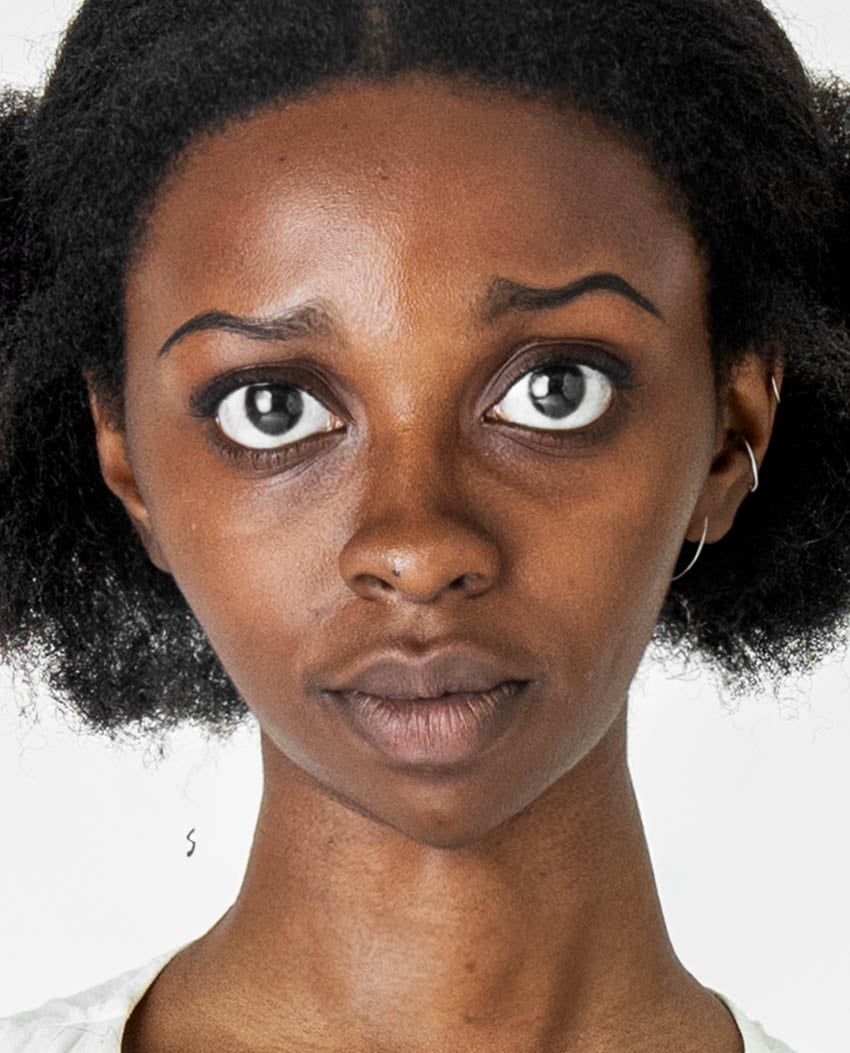
Now, we want to move on to the Forward Warp tool, found in the top of the left-hand toolbar while in Liquify.
Use this to push and pull the face. Focus on bringing up the eyebrows, while also making them thinner. Continue to make the shaft of the nose smaller and the eyes even rounder. Use this tool to bring the chin to a sharp point as well.


Step 4
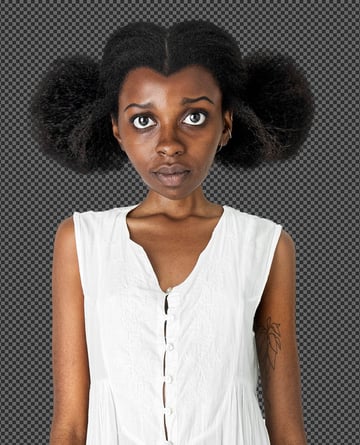
We’re going to use the same Forward Warp tool to stylize and enlarge the hair. We’ll also give our subject a widow’s peak hairline.

Step 5
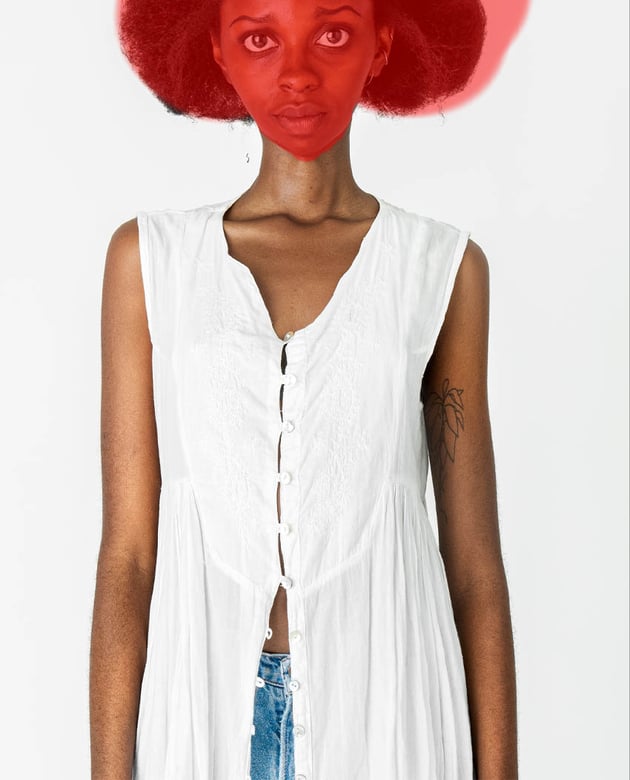
Use the Freeze Mask tool to cover her face. All the areas covered in red will no longer be affected by the Liquify tools.
Use the Forward Warp tool to elongate the body, pushing in the arms and shaping the shoulders. Since her natural body type is long and skinny, we want to exaggerate that body shape. Be sure to also elongate the neck.


Step 6
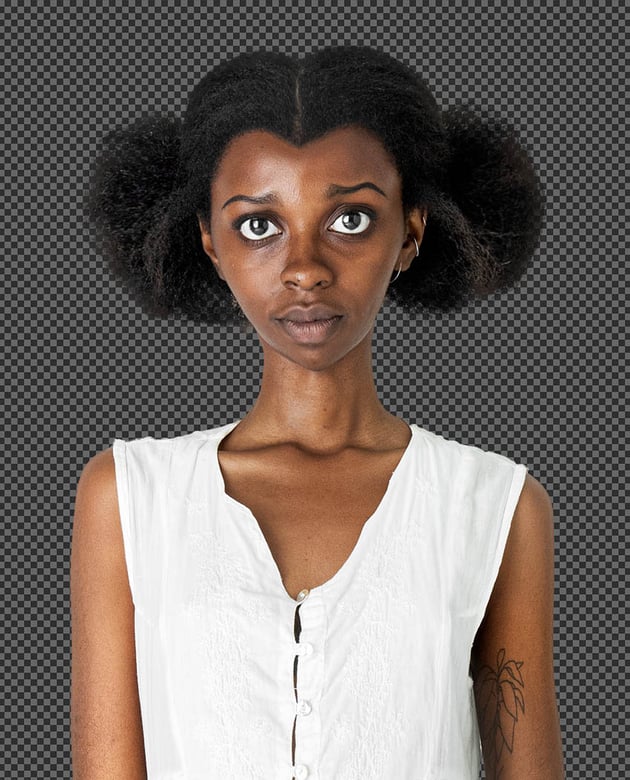
With our face and body shaped, we want to extract our subject. You can use your preferred method. I like using Subject Select, a Layer Mask, and then Select and Mask.

Step 7
Use the Lasso tool to roughly Cut and Paste the head onto a new layer. Move the head down lower onto the neck.
Shrink the body so that the head appears larger.

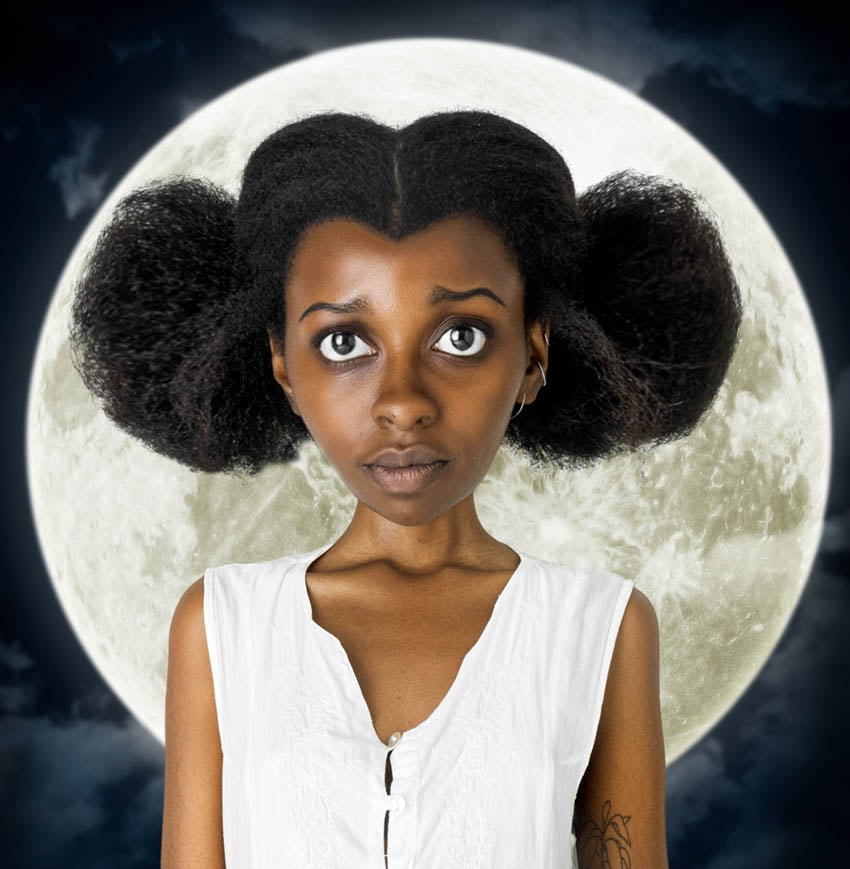
2. How to Create a Tim Burton Photoshop Background
Step 1
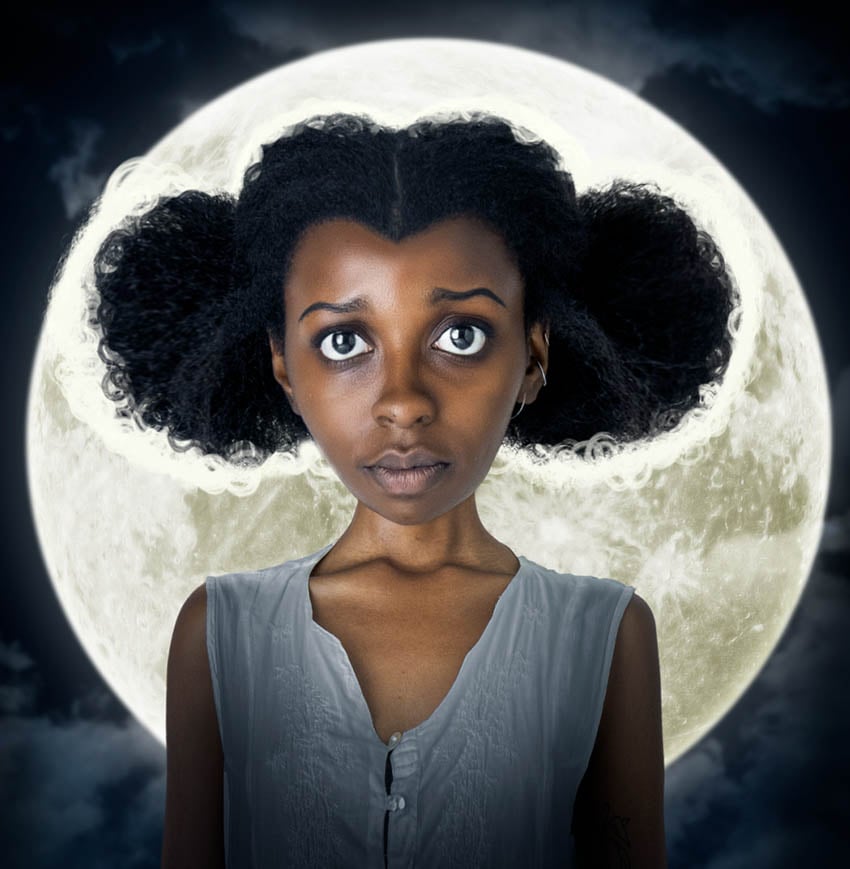
Download and place an image of a large moon on a black background behind the subject. Set the layer to Screen.
Use the Circular Marquee tool to create a selection around the moon. Make the selection slightly smaller than the moon. Add a Layer mask. This will help clean up the edges of the moon.
Go to Filter > Noise > Reduce Noise and set it to Strength 1, Preserve Detail 0%, and Sharpen Detail 0%.
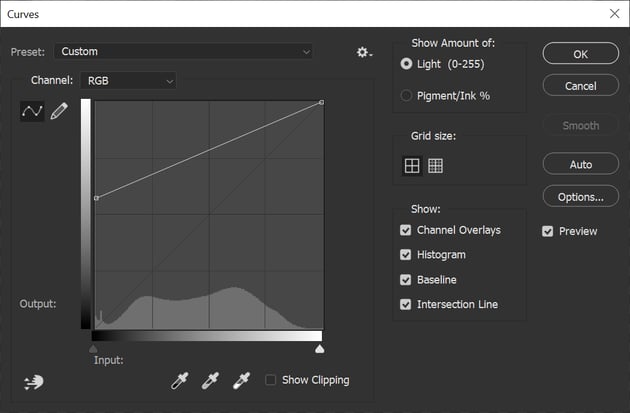
Go to Image > Adjustments > Curves to bring up the shadows of the image, removing some of the contrast. We want this to be a simplified moon, with less detail.


Step 2
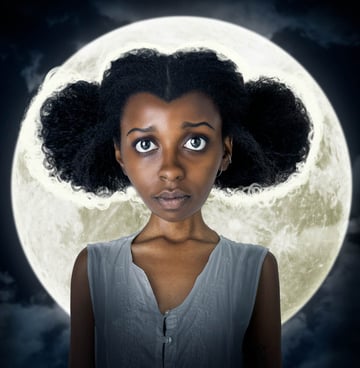
Add a slightly yellow color to the moon using Image > Adjustment Hue/Saturation. Set it to Hue 48, Saturation 14, and Lightness -2.
Next, go to Image > Adjustments > Brightness/Contrast and change the settings to Brightness 3 and Contrast 100.
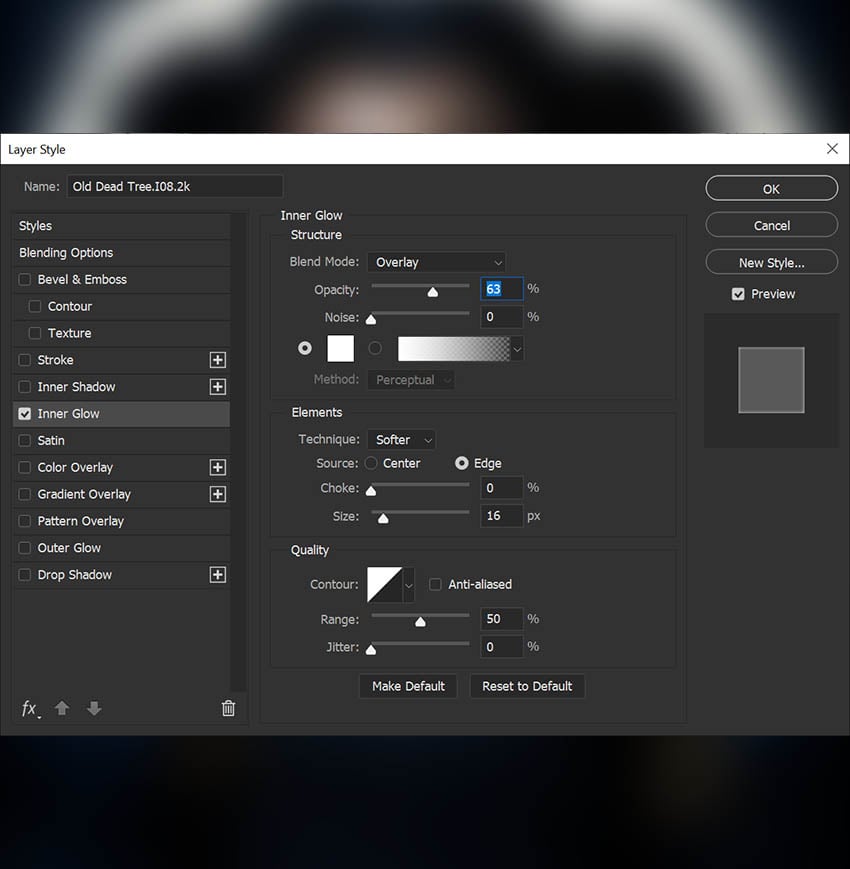
Finally, add Inner Glow and Outer glow layer styles to the moon, using the settings you see below.

Step 3
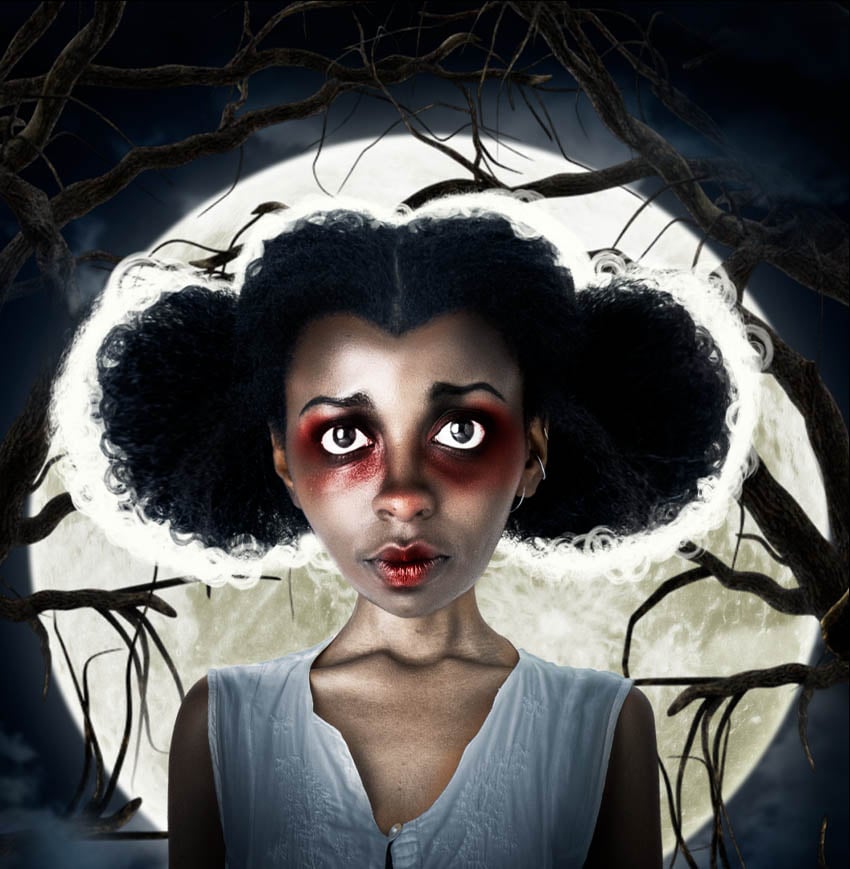
Place clouds on the background, over the moon, setting them to Soft Light.
Add a New Layer set to Overlay. Paint a quick vignette effect on the edges of the canvas using a soft round black Brush.
You can also use cloud stamp brushes or paint the clouds by hand.

Step 4
Create and Clip a Color Balance adjustment layer, setting it to Red -22 and Blue 28. Lower the Opacity to 60%.
Create and Clip a Brightness/Contrast adjustment layer into the subject, setting it to Brightness -95 and Contrast 50. Use a soft round Brush to mask the darkness away from the subject’s face and edges.
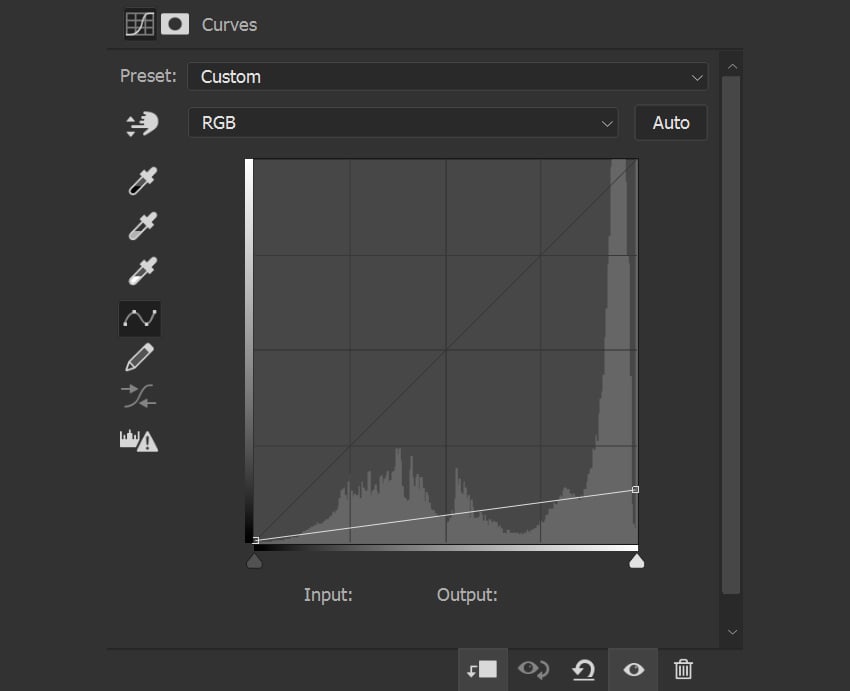
Create and Clip a Curves adjustment layer into the subject, setting it to what you see below. Use a soft round Brush set to black and a Layer Mask to mask away the shadow from the subject’s face.


Step 5
Duplicate your subject and bring the duplicate below the original. Add a Color Fill layer style, filling the layer with a pale yellow color #fffee9 that matches the light from the moon.
Use the Transform Warp tool to stretch the hair so that it’s peeking from behind the subject. This will give you a stylized rim light hair effect.


Step 6
Add a Layer Mask to the rim light hair layer, and mask away any areas that are behind the hair or that you don’t want.
Optional: You can use a semi-hard round Brush to paint in thick hair strands, as well as masking those same hair strands into the subject’s existing hair.

3. How to Create Tim Burton Art Makeup
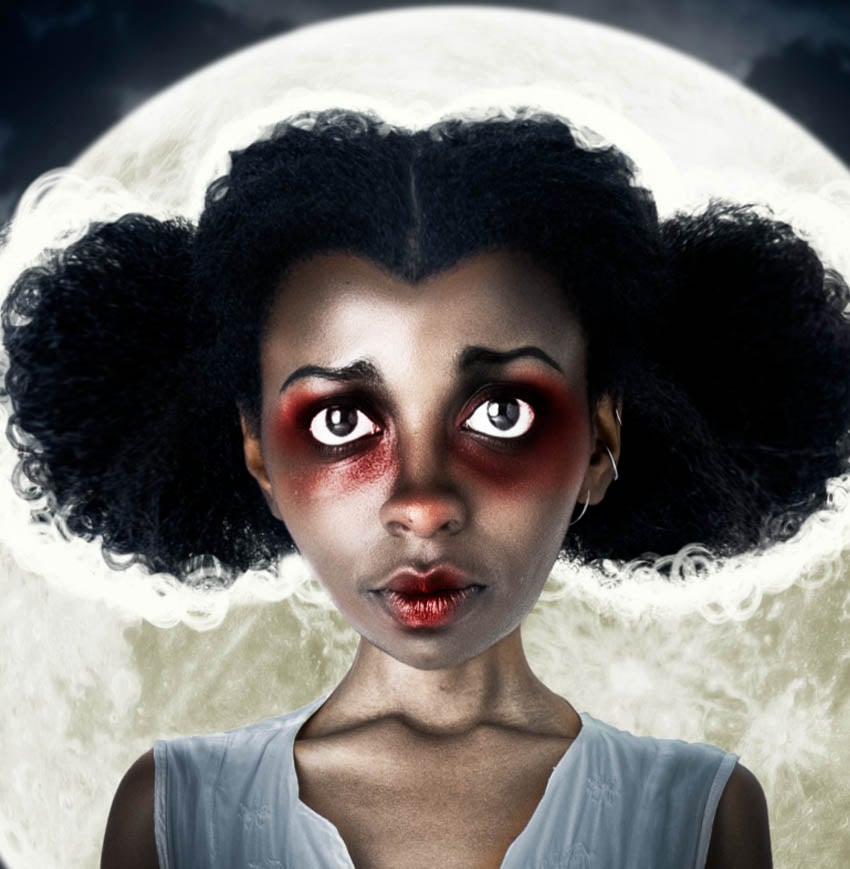
Step 1
Start with the body and face makeup. Create a Black & White adjustment layer and a Brightness/Contrast adjustment layer set to Brightness 28 and Contrast 100.
Group the two layers, add a Layer Mask to the group, and mask the layer away from everything but the skin.
Adjust the Opacity of both the individual layers and the layer group to get the best results. Below, I set the Black & White layer to 75% Opacity and the layer group to 50% Opacity.


Step 2
Next, we want to add darkness to the eyes and lips. Again, create a Black & White adjustment layer and a Brightness/Contrast adjustment layer set to Brightness -101 and Contrast 100.
Set the Black & White layer to 75% Opacity, and Group both layers. Set the Group Opacity to 75%.
Add a Layer Mask and fill it with solid black using Control/Command-I. Add darkness around the eyes and lips using a soft round brush.
Lower the brush’s Flow to 3% to help build the darkness up slowly.


Step 3
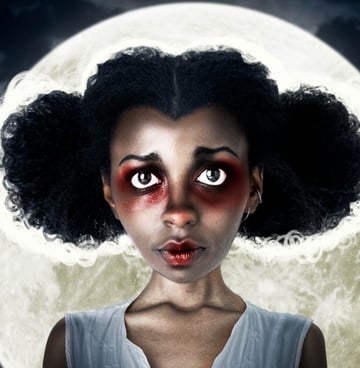
Create a Color Fill layer set to a deep red #792d2d color. Set the Layer mode to Overlay and the Opacity to 90%.
Again, fill the Layer Mask with black, and then mask in red around the eyes and on the lips.

4. How to Create Tim Burton Concept Art Branches
Step 1
Download multiple angles of our creepy tree 3D asset. Darken them using a Brightness/Contrast adjustment set to Brightness -70 and Contrast 100.
And an Inner Glow layer style set to what you see below.


Step 2
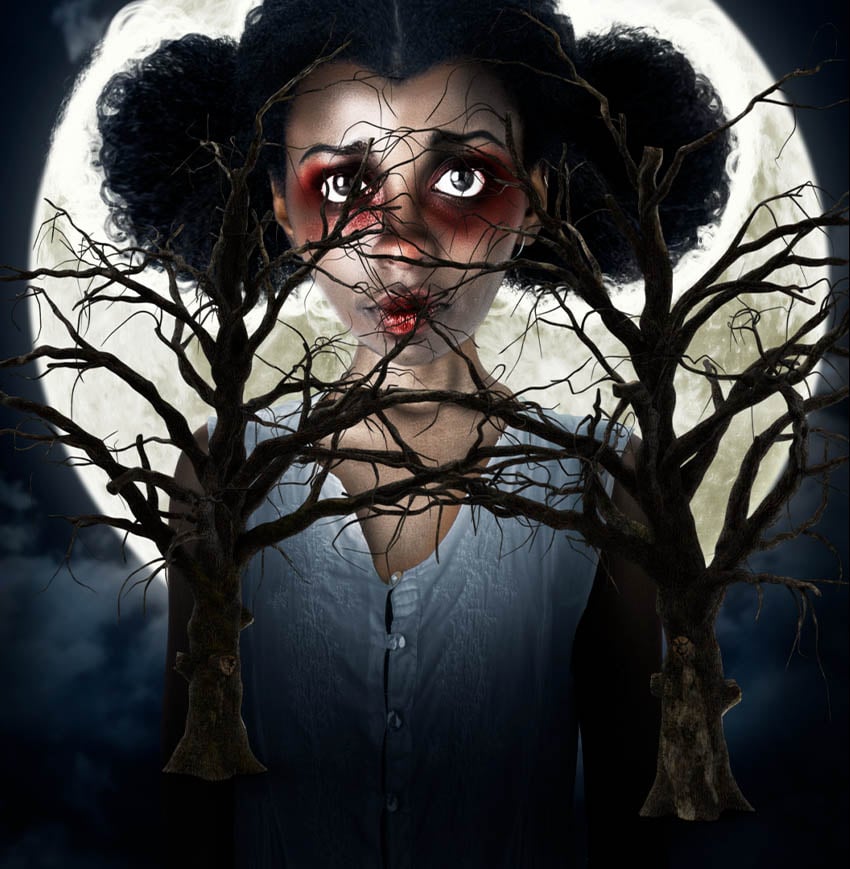
Enlarge and place the branches around the subject. We want the branches to frame both our subject and the moon. Try to place the branches so that they create a circular pattern.
Add a Layer Mask to the branches, and use a soft Round brush set to a low Flow to very lightly mask away areas of the tree. This will help them feel less flat.

Step 3
Keep Duplicating and building up your trees, again making them surround the subject in a circular shape.
Don’t be afraid to go big. Enlarge the trees and angle them as much as you need to. The tops of the trees are easier to angle into a circular shape than the trunk or the thicker branches.
Step 4
Add trees to the very front of the image as well. Add a Filter > Blur Gallery > Field Blur to the trees closest to the foreground.
Build the trees up to both the background and foreground to be as dense as you want.


Step 5
Grab some leaf or flower petal PNGs and place them on the canvas. I used the Cherry Petals from this pack.
Change them to blue using Image > Adjustments > Hue/Saturation set to Colorize, Hue 191, Saturation 41, and Lightness -42.
Next, darken the petals using Image > Adjustments > Brightness/Contrast set to Brightness -126 and Contrast 100.
Place them all over the canvas, both in front of and behind the subject.
5. How to Create a Tim Burton Fan Art Color Grade
Step 1
Before we get to our color grade, let’s add a New Layer on top of all the other layers, setting it to Overlay.
Use this layer and a soft round Brush set to black to add more shadows around the canvas edge.


Step 2
Let’s also select her neck with the Lasso tool. Now, in the floating Context bar, hit Generative Fill, type in the prompt “blue ribbon with bow”, and hit Generate.
If Generative Fill is having a hard time creating a bow, you can easily add one yourself using stock images or 3D assets, or even by painting a simple one yourself!

Step 3
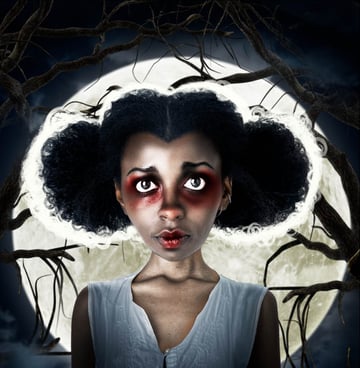
Finally, let’s add our color grade. At the very top of our layers, let’s create a Selective Color adjustment layer.
Settings:
- In the Cyan dropdown, set the Cyan to +100.
- In the White dropdown, set the Cyan to +80.

Step 4
Create a Color Fill layer and fill it with a grey-blue #181a1f color. Set the layer mode to Lighten, bringing the layer down to 44% Opacity. This will help lighten the darker areas of the image and give everything a uniform look.


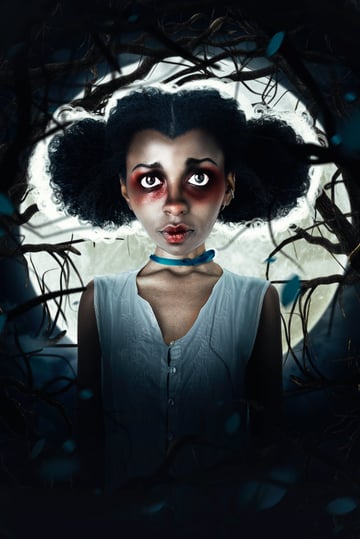
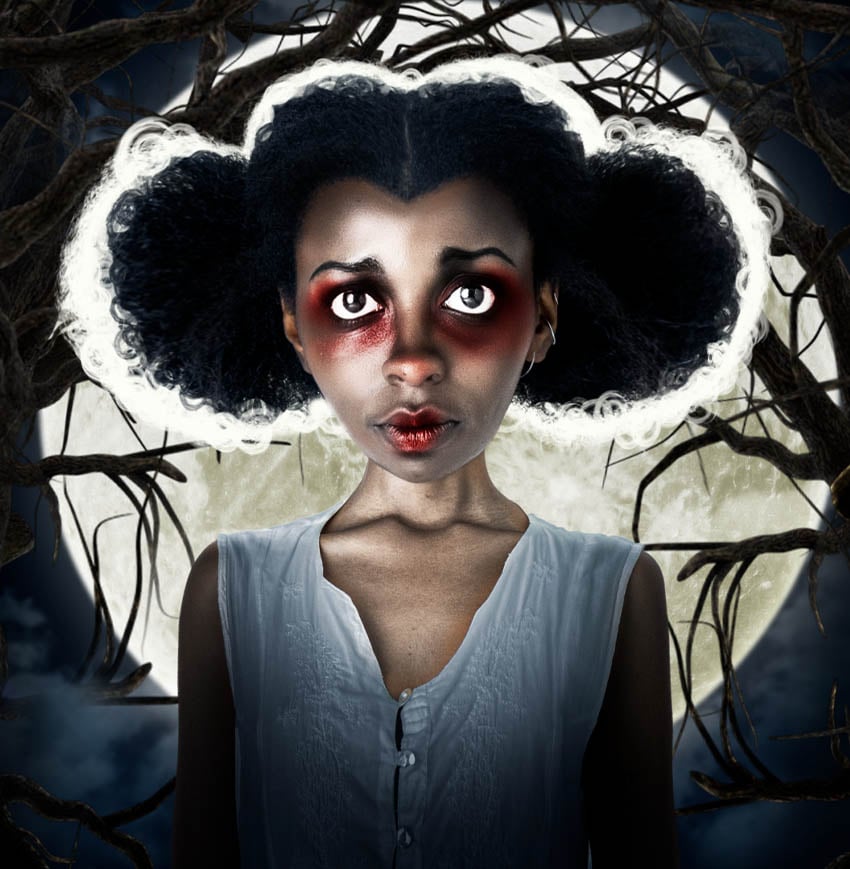
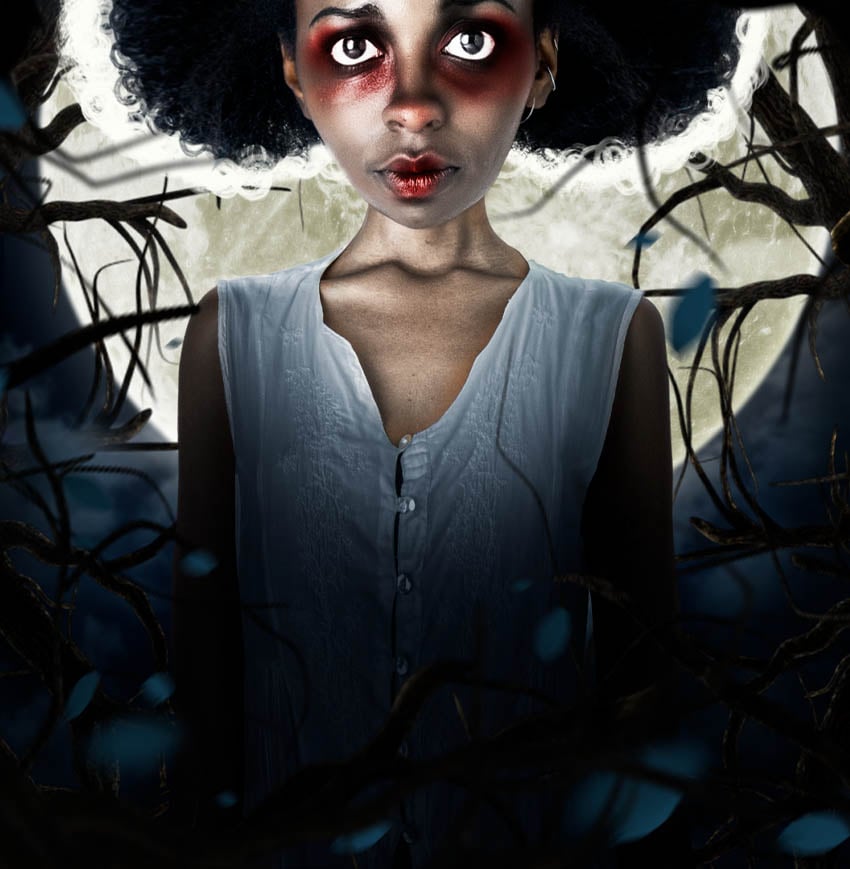
That’s How to Create Tim Burton Inspired Art in Photoshop!
That is how to recreate the Tim Burton art style in Photoshop! This Tim Burton Photoshop effect can be applied to any person, or even animals. The same general blueprint applies: keep the face pointy but the eyes big. When recreating a Tim Burton photo filter, the weirder the better!