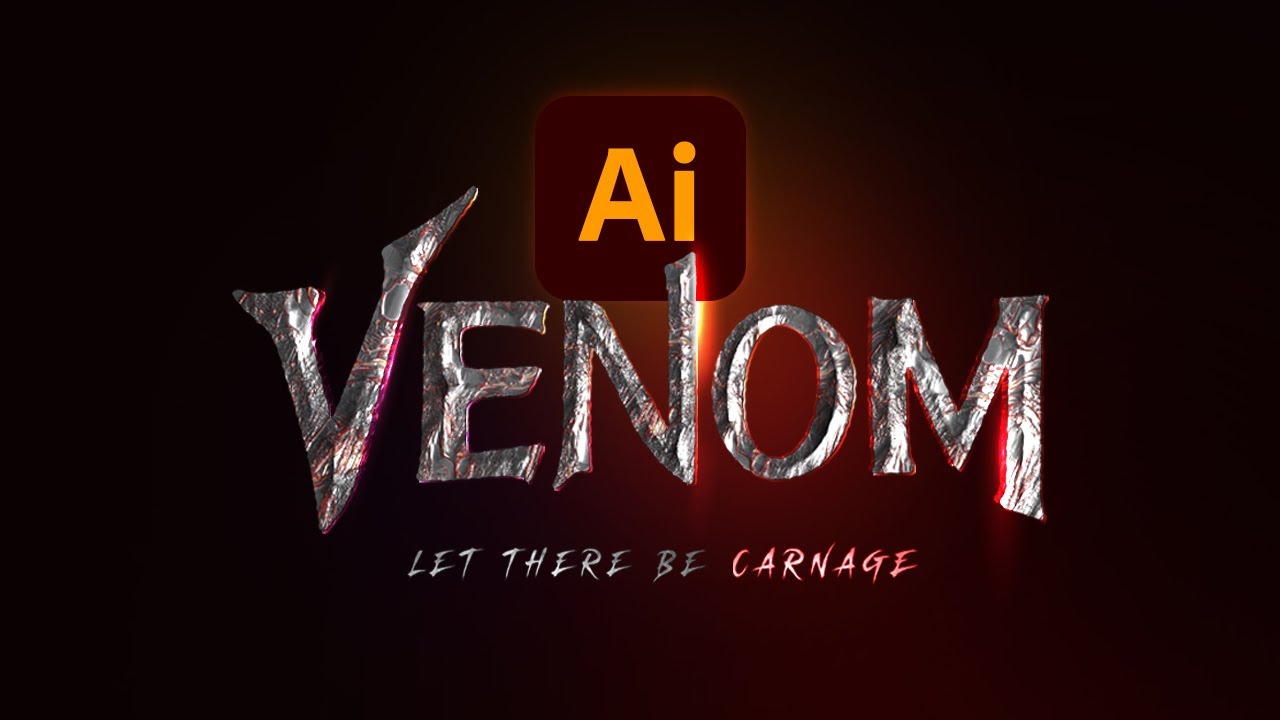
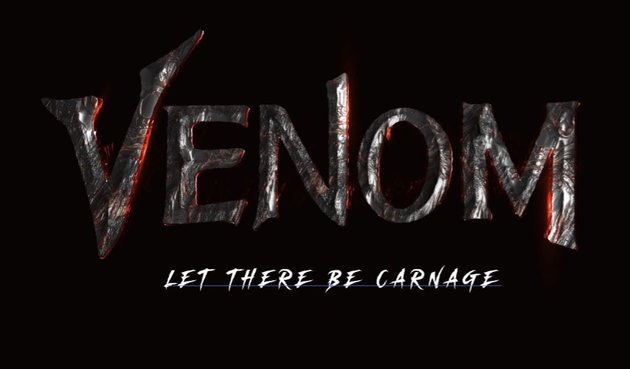
Welcome to this tutorial on how to draw a Venom logo! We’ll be using the new 3D features in Illustrator to create this awesome-looking Marvel Venom logo design. Learn to control a variety of advanced settings such as lighting, colour, 3D materials, and more!
Short on time but still need to create a movie-style text effect? Check out what’s available on Envato Elements, where you can download a wide variety of add-ons like the Ember Effect Photoshop Action. It features a realistic lava effect and comes with different colours. Download it using the link below:

Are you a visual person who prefers videos over written tutorials? Then I’m sure you’ll like this video on how to draw a Venom logo from the Envato Tuts+ YouTube channel. Learn how to create this cool 3D Venom text effect by watching the video:
What You’ll Learn in This Venom Logo Illustrator Tutorial
In this tutorial, I will show you step by step how to draw a Venom logo from scratch using the new 3D tools available in Adobe Illustrator. Topics we cover will include:
- How to create the vector shapes for the Venom logo design, which we will use as the base for the Venom text effect
- How to create a lava texture in Illustrator using 3D materials
- How to create the Venom glow effect using blend modes in Adobe Illustrator
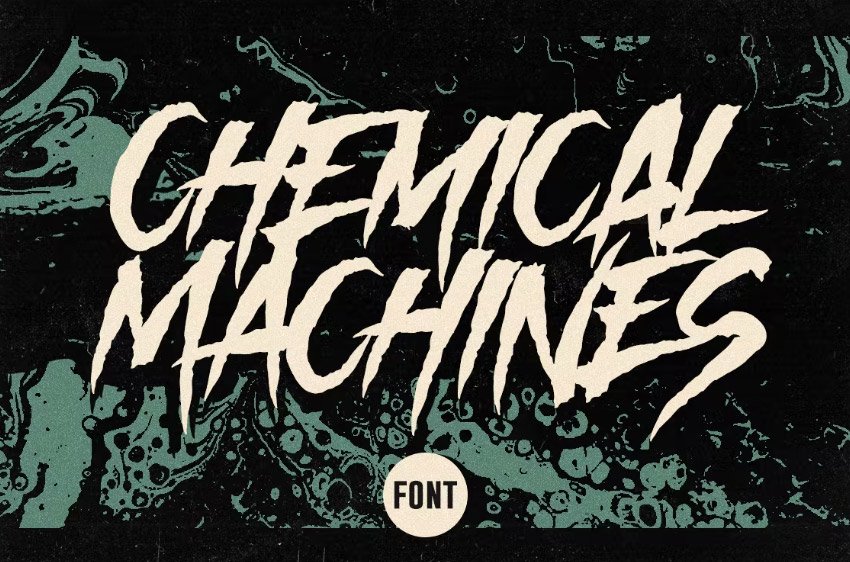
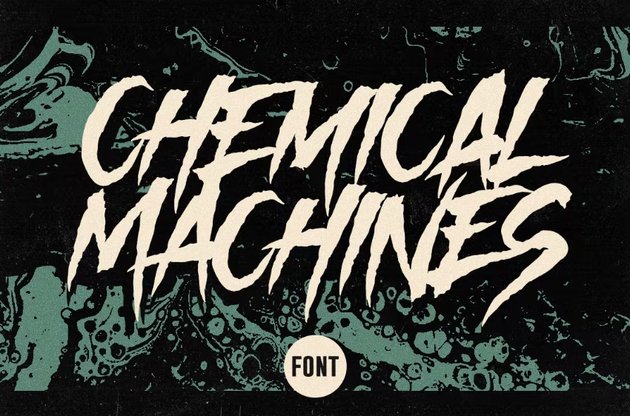
- How to create the Venom movie logo tagline using the Chemical Machines – Horror Font
- How to enhance the Venom logo design using Adobe Photoshop
What You’ll Need
The following assets were used during the production of this Venom logo tutorial:
1. How to Set Up the Document
Step 1
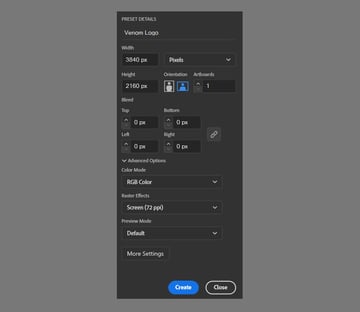
Let’s start by opening Adobe Illustrator and creating a new document with a file size of 3840 x 2160 pixels.


Step 2
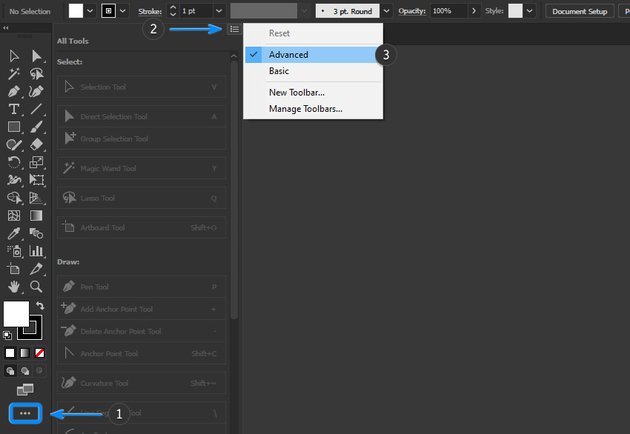
Click on the Options Icon which is located at the bottom of the toolbar. Then click on the button in the top right and select the Advanced toolset.


Step 3
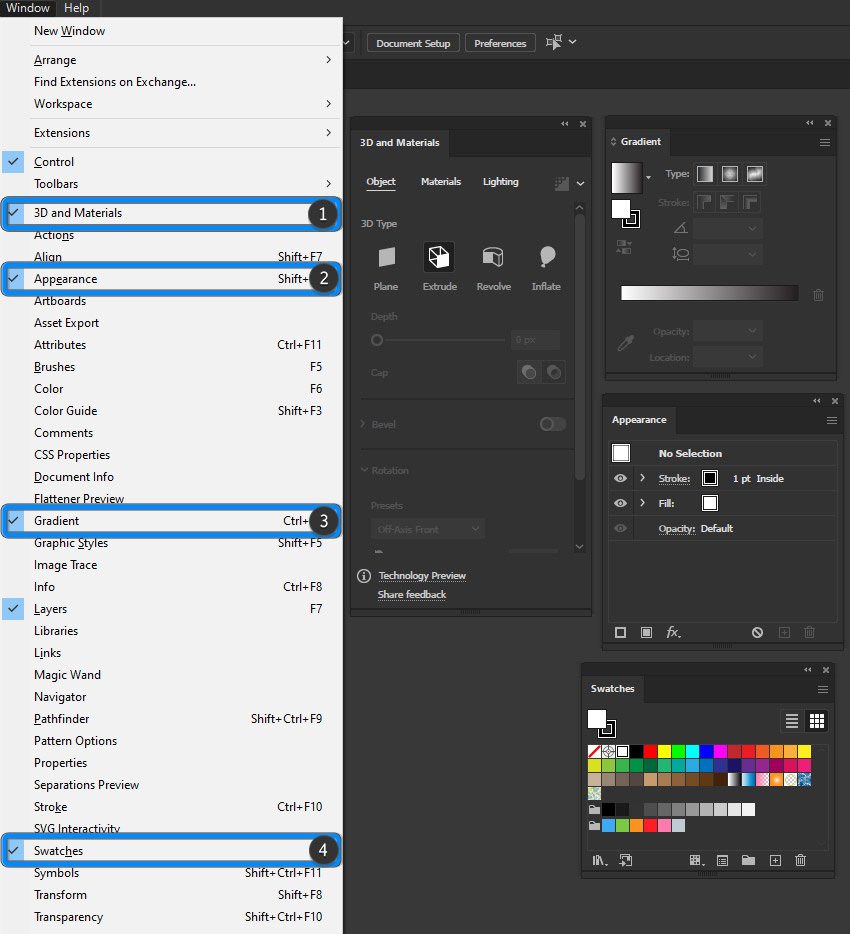
Go to the top menu bar to select Window and then open the following panels:
- 3D and Materials
- Appearance
- Gradient
- Swatches
Once you’ve opened them all, make sure to dock them to the side so you can easily access them.
2. How to Begin Drawing
Step 1
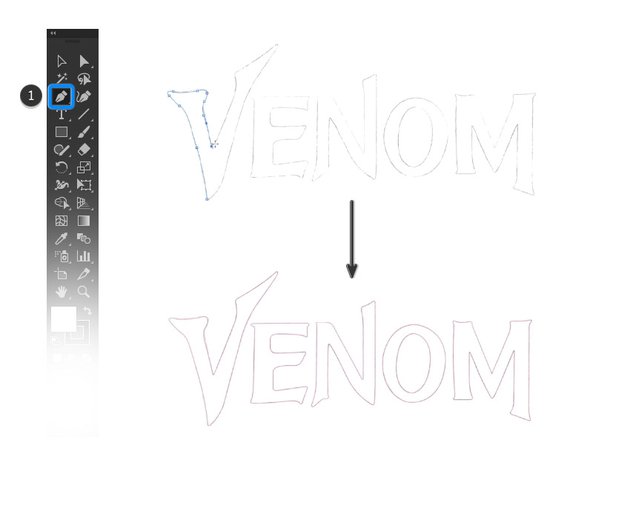
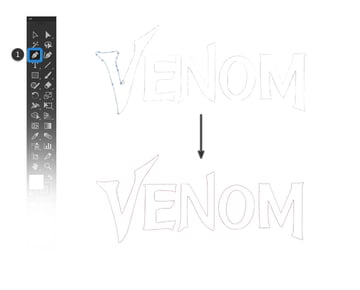
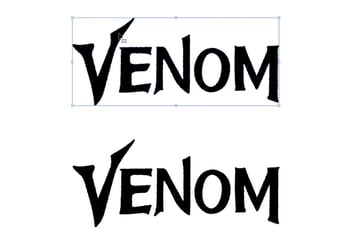
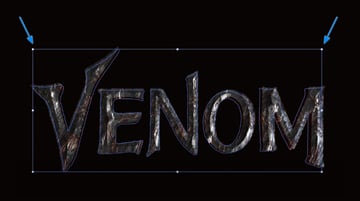
We will use an image or sketch of the Venom logo as our reference. Import it into Adobe Illustrator by going to File > Place. The Venom logo will then be imported into the project.


Step 2
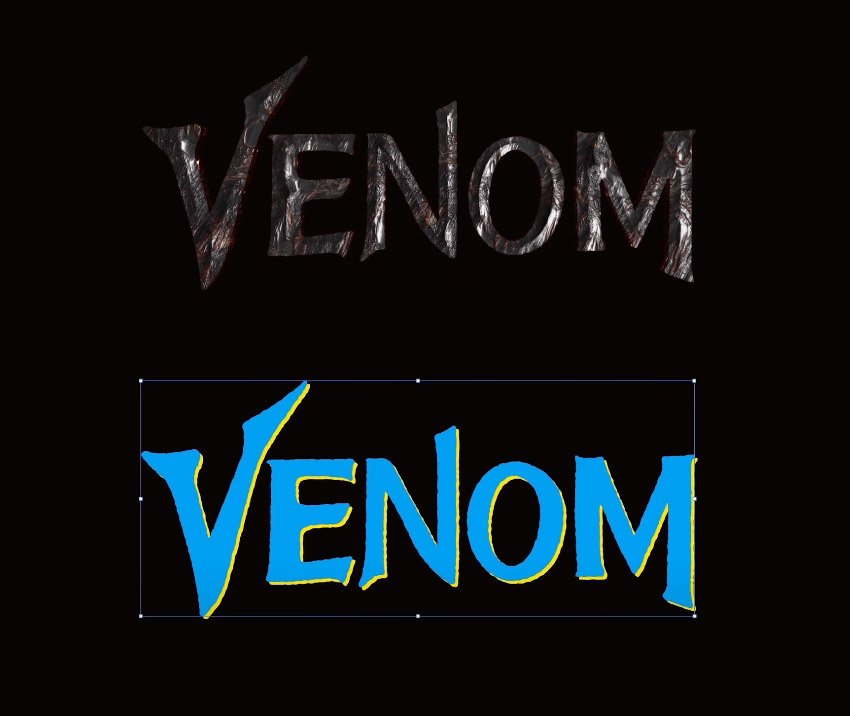
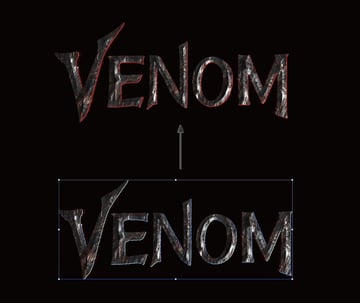
Use the Pen Tool (P) and draw over the reference image below to create a custom shape.
Once you have created all the letters for the Venom logo, you can then delete the reference image underneath.

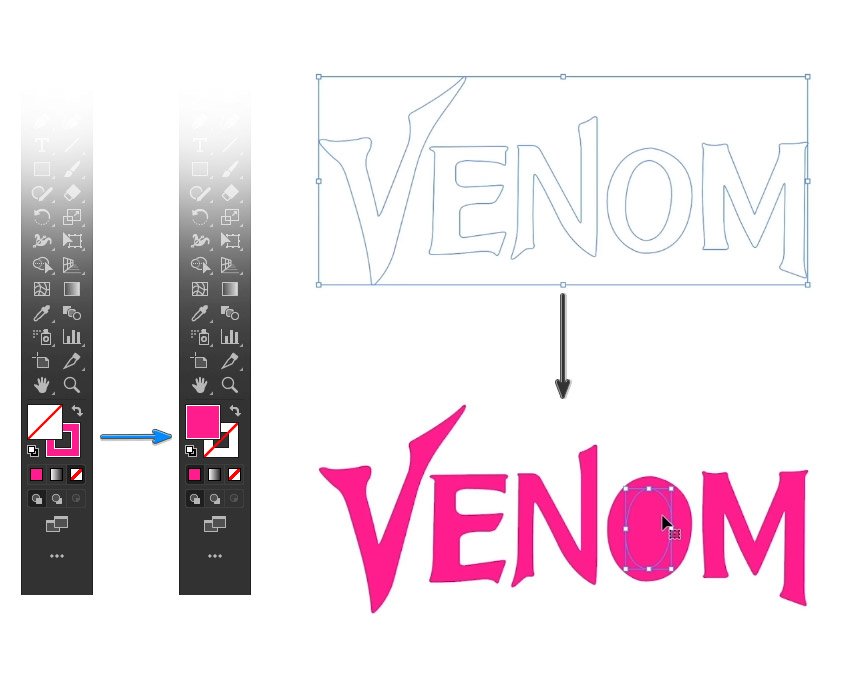
Step 3
Select all your shapes and then, from the bottom of the toolbar, you can swap the stroke to a fill. This will affect the shapes that you have selected.

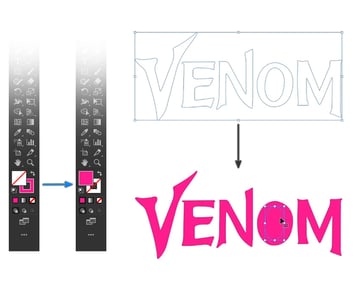
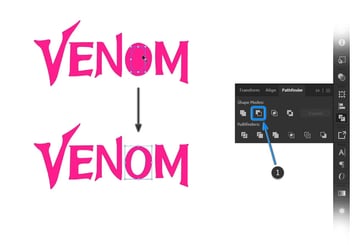
Step 4
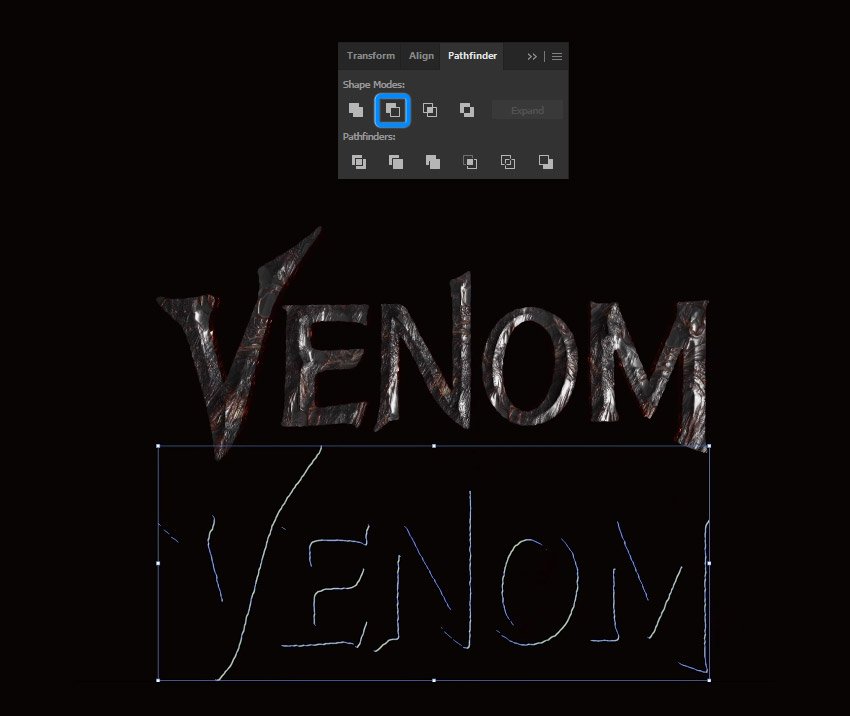
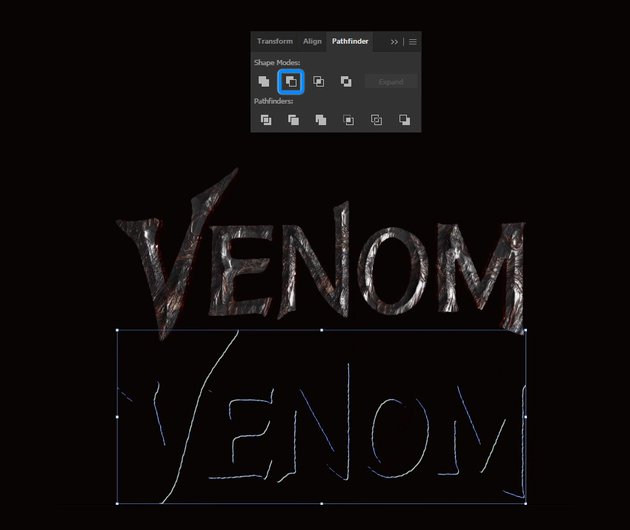
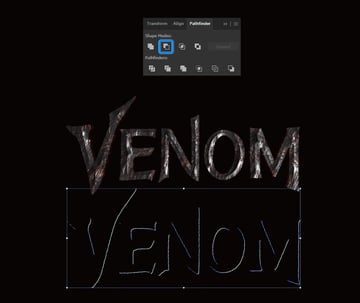
To create the inner part of the letter “O”, we need to select both the inner and outer parts of the letter shapes. Then go to the Pathfinder panel and select Minus Front.


Step 5
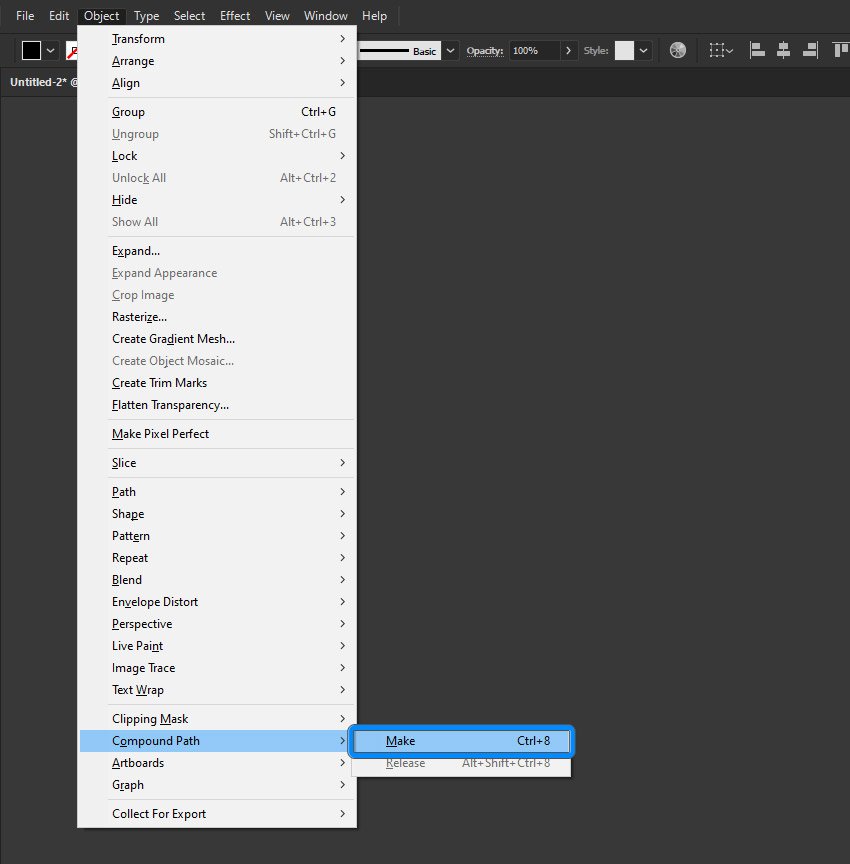
Make sure that all the shapes for the Venom logo are selected again, and go to Object > Compound Path > Make. This will make it so that any effects we apply to the shapes will be applied to the logo as a whole instead of individually.

3. How to Roughen Up the Edges
Step 1
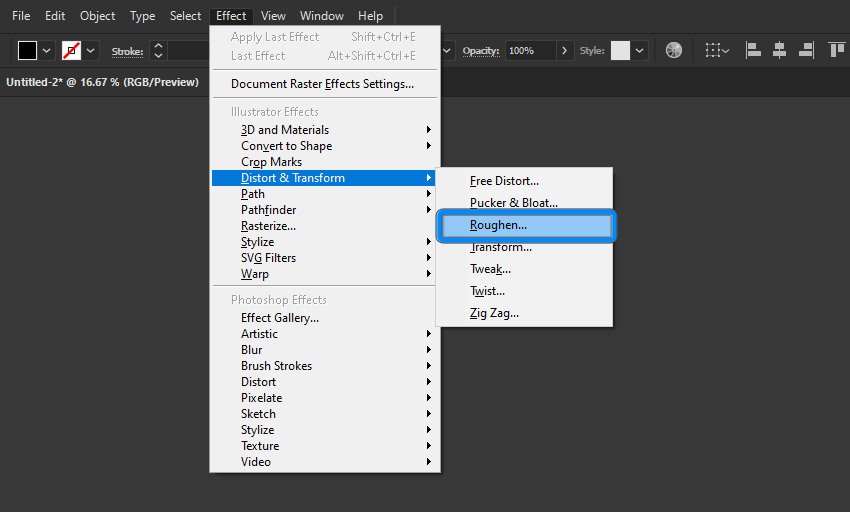
Now we need to roughen up the edges of the logo so that it looks more believable when the material effects are applied. To do this, go to Effect > Distort & Transform > Roughen.


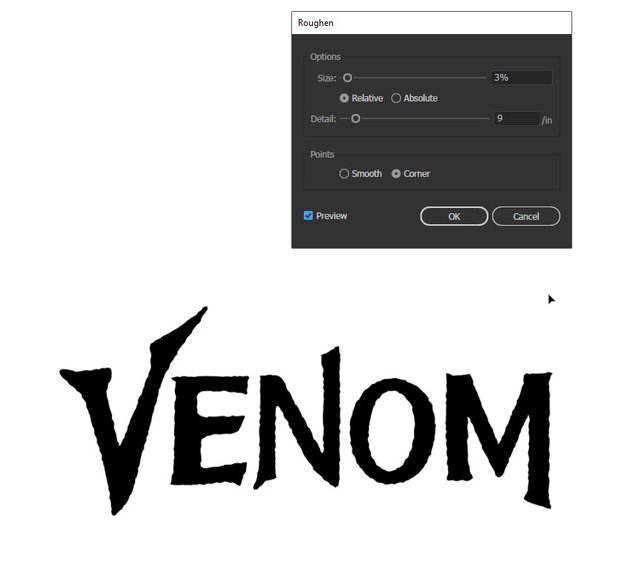
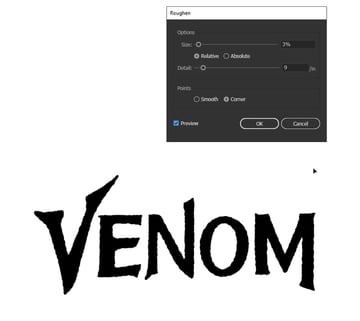
Step 2
When the Roughen window pops up, make sure to check the Preview box so you can see how the sliders affect the logo shapes. Use the sliders to create the following values:
- Size: 3%
- Relative
- Detail: 9
- Points: Corner

Step 3
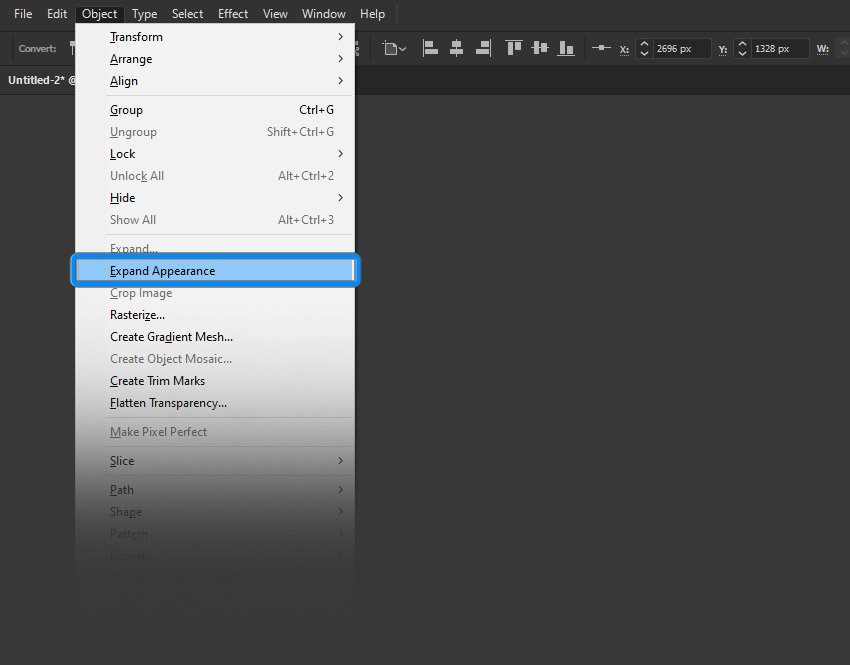
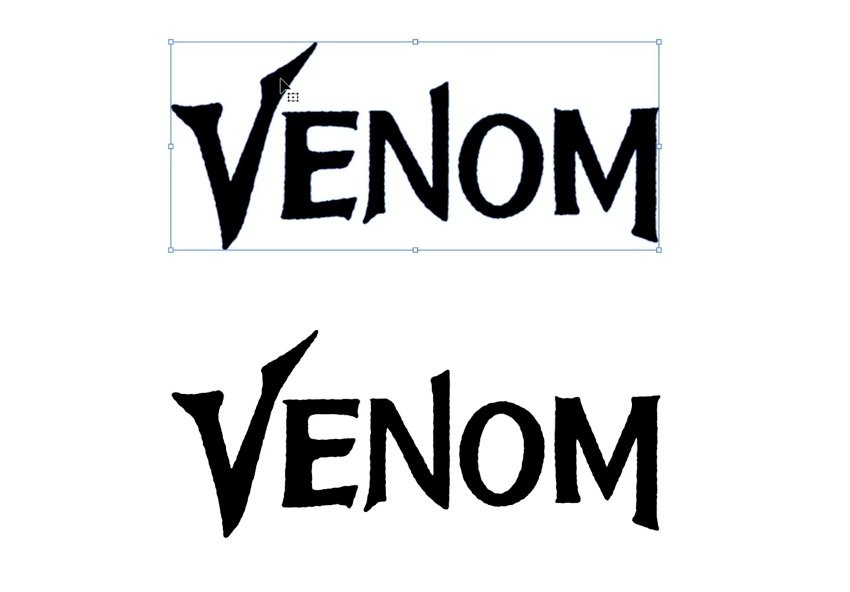
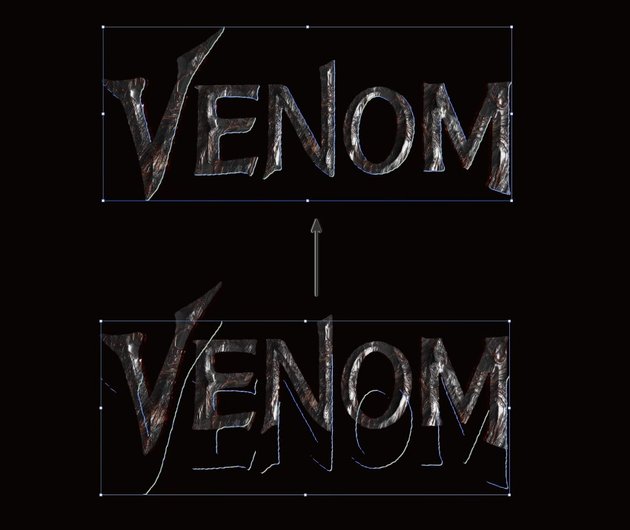
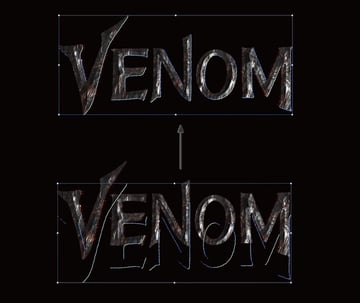
Once you are happy with the way the logo edges look, go to Object > Expand Appearance to finalize the shape.


Step 4
Duplicate your logo by copying it (Control-C) and pasting it in place (Control-Shift-V) and then moving it out of the way. You can hold the Shift key to ensure that it moves in a straight line. This makes it easier to place the logos in the same location.
We will set this logo aside for now and come back to it later on in the tutorial.
4. How to Use the 3D Panel in Adobe Illustrator
Step 1
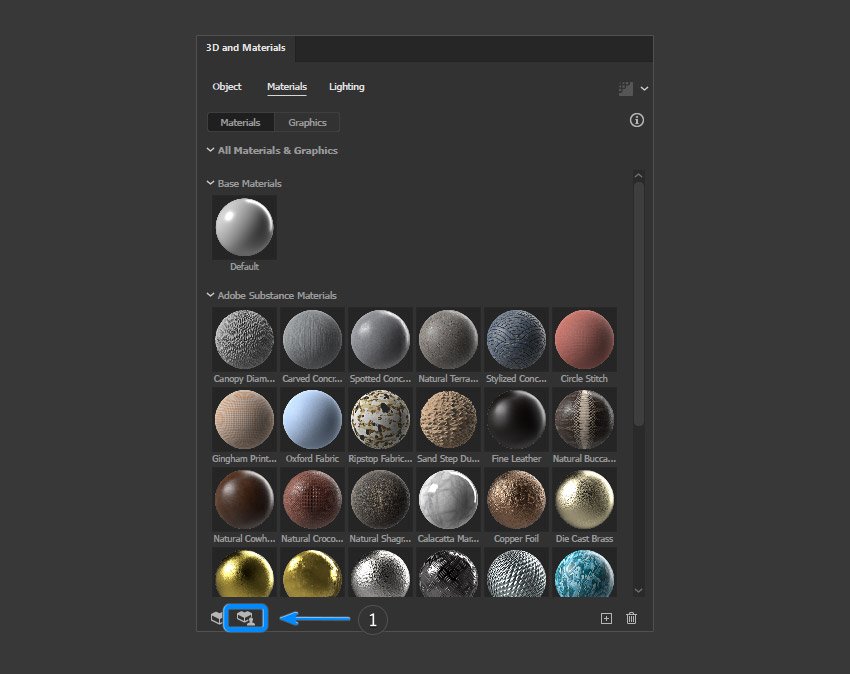
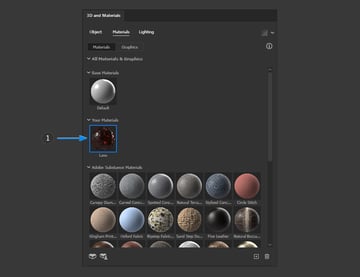
Now we can use the 3D and Materials Panel, which is new to Adobe Illustrator 2022. Select the Materials tab at the top, and you’ll see that it comes with a wide range of ready-made materials for you to use and apply to your shapes in Adobe Illustrator.
You can also download more materials by clicking on the Substance 3D Community Assets button located near the bottom left.


Step 2
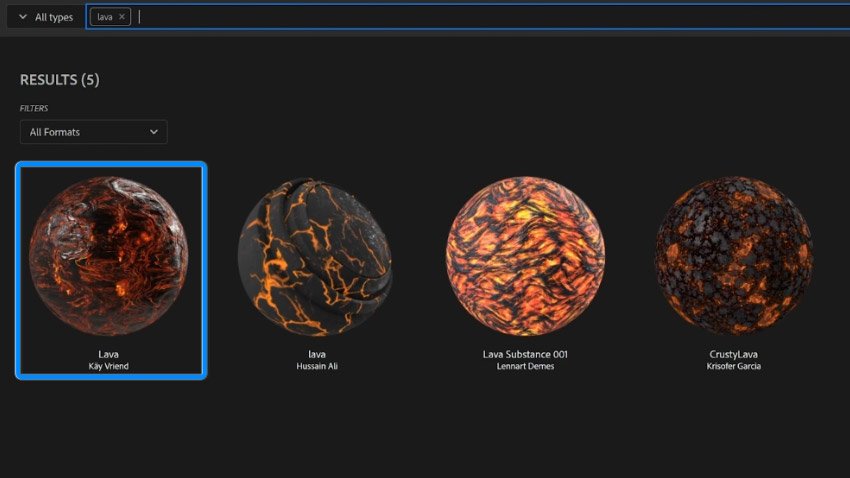
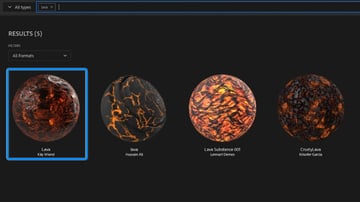
This will open up your web browser and take you to the Adobe Substance 3D Community Assets website, where you can browse the whole library of assets that are available.
In the search bar, type “lava” and select the Lava material shown in the image below.
Step 3
Click on the Download button to download the material file to your computer.


Step 4
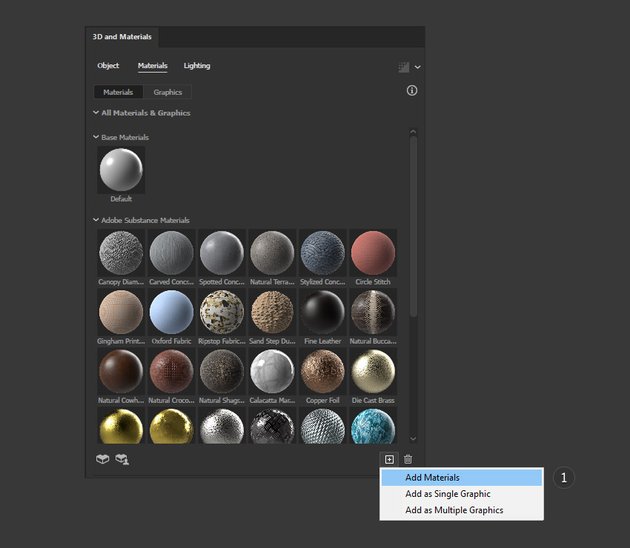
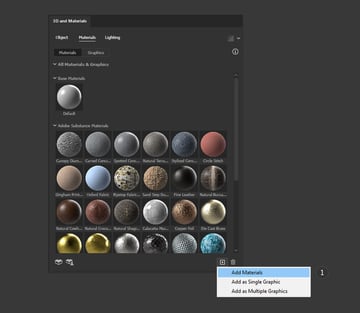
Once the material has been downloaded from the website, add it to the 3D and Materials Panel by clicking on the Add Materials button located near the bottom right of the panel.

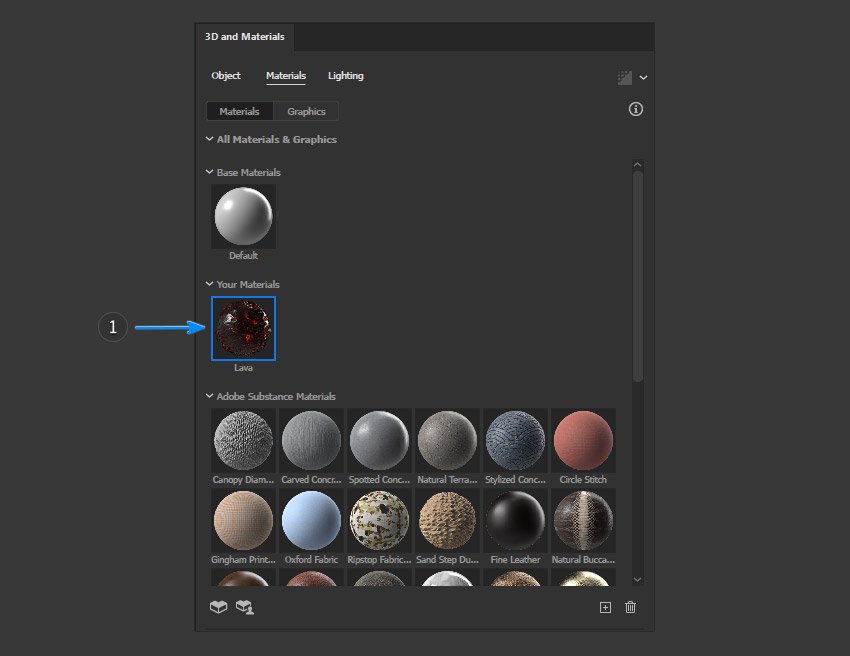
Step 5
Once the material has been added, you can then select it in the 3D and Materials panel. Make sure the Venom logo is selected, and the Lava Material will be applied to it.

Step 6
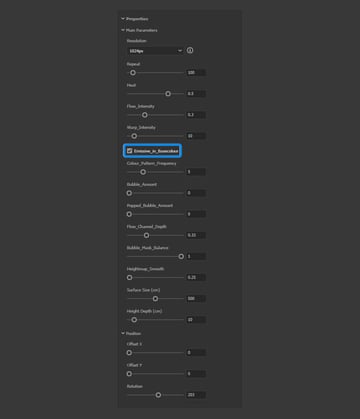
Within the Materials tab, you’ll find the Main Parameters options.
Use the image below and apply these values to make your Lava material really stand out:
- Resolution: 1024 px
- Repeat: 100
- Heat: 0.5
- Flow Intensity: 0.3
- Warp Intensity: 10
- Emissive in Basecolour: Checked
- Colour Pattern Frequency: 5
- Flow Channel Depth: 0.33
- Bubble Mask Balance: 1
- Heightmap Smooth: 0.25
- Surface Size (cm): 500
- Height Depth (cm): 10
- Rotation: 203


Step 7
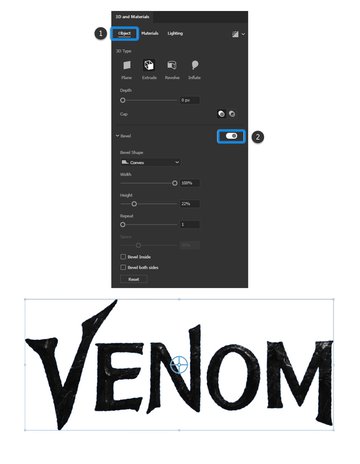
Click on the Object tab to see the options available. Here we want to select Extrude for the 3D Type, which will then allow you to change the settings for how the Bevel looks.
Follow the settings below to give your Venom logo a 3D effect:
- 3D Type: Extrude
- Depth: 0 px
- Bevel Shape: Convex
- Width: 100%
- Height: 22%
- Repeat: 1


Step 8
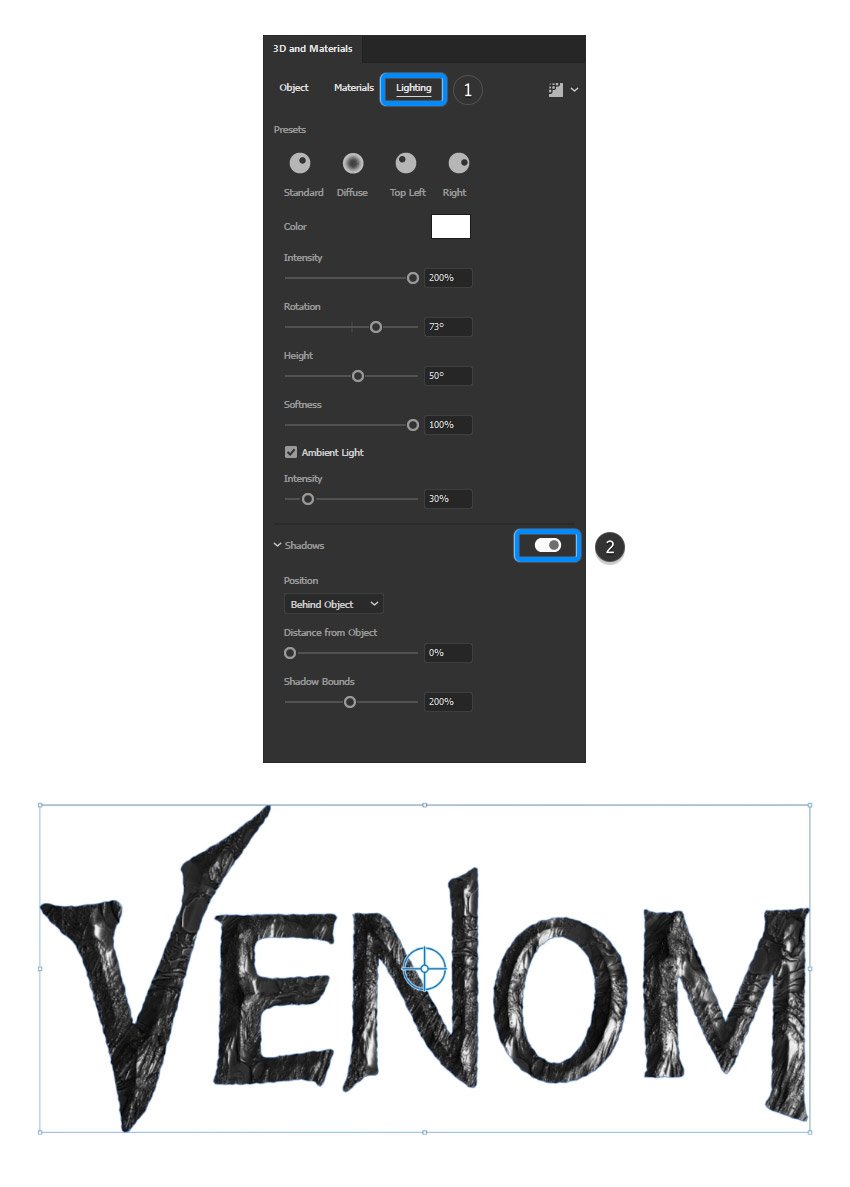
The last tab to explore within the 3D and Materials Panel is the Lighting tab. From here, you can play around with the different lighting and shadow options to give the Venom logo the best look possible. Here are the settings used for this tutorial if you want to follow along:
-
Color:
#FFFFFF - Intensity: 200%
- Rotation: 73°
- Height: 50°
- Softness: 100%
- Ambient Light: Checked
- Intensity: 30%
- Position: Behind Object
- Distance from Object: 0%
- Shadow Bounds: 200%

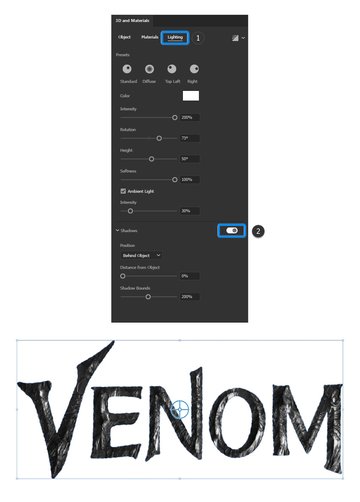
Step 9
To create the background for the logo, select the Rectangle Tool (M) and use it to draw a black shape covering the whole artboard. Once you’ve created the shape, make sure to send it behind the logo by right-clicking on it and selecting Arrange > Send to Back.
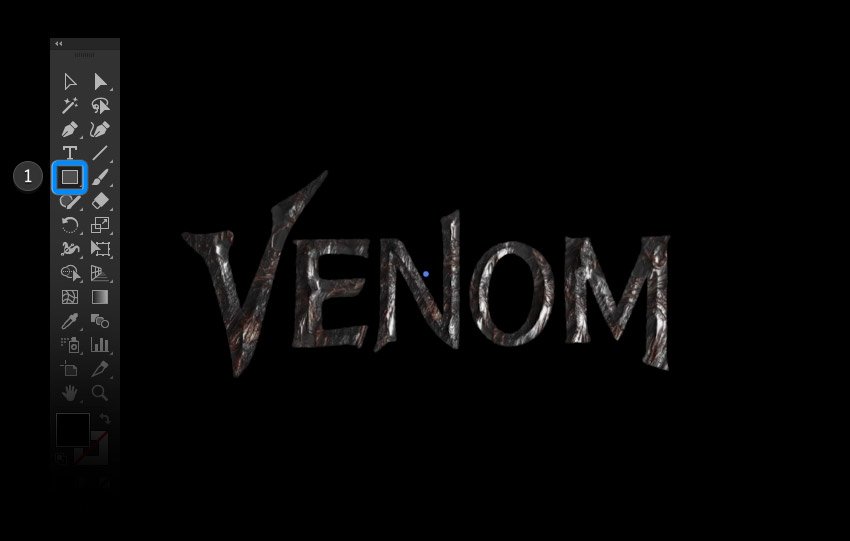
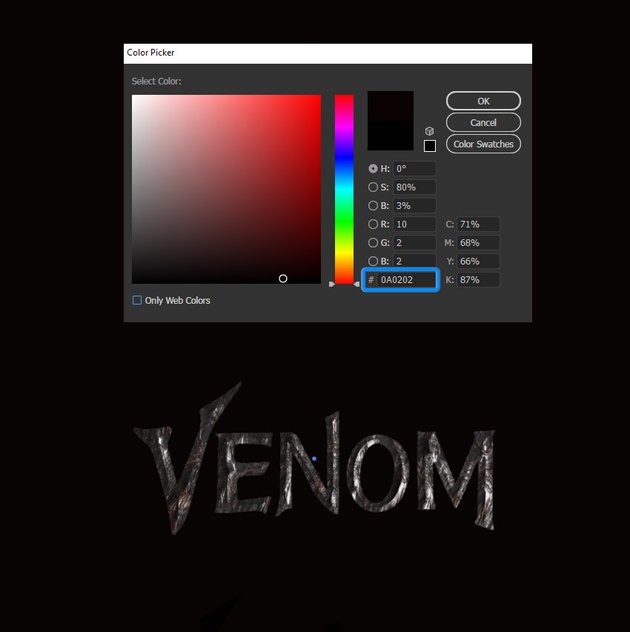
Step 10
To follow the exact colour of the background, you can use #0A0202, which looks black, but it actually has a hint of colour in it which will become important later on when we start adding the colour dodge effects.
In order to lock the background shape in place, you must first select the background and then go to Object > Lock > Selection. This will lock the background shape in place so that you don’t move it accidentally whilst working.


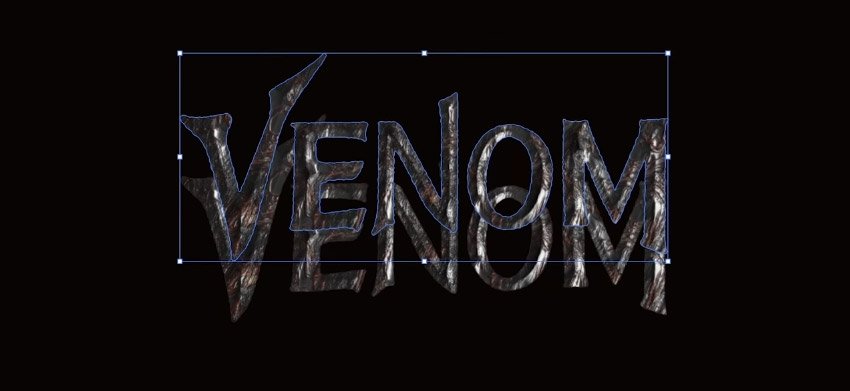
Step 11
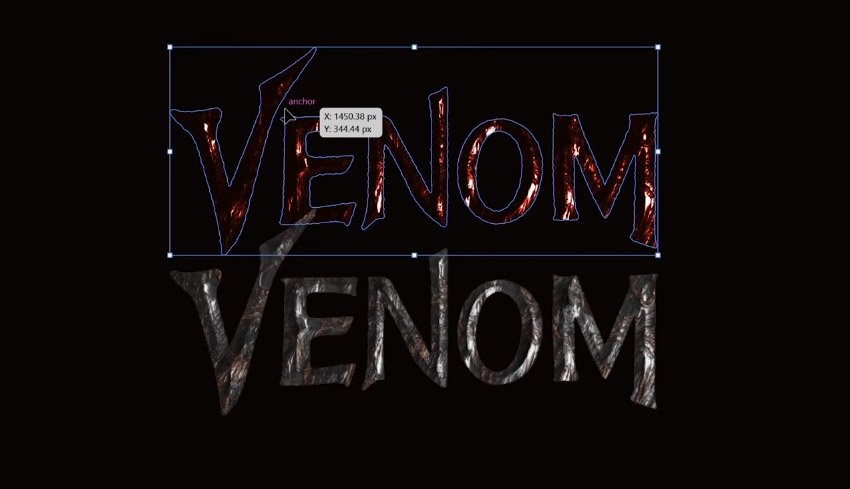
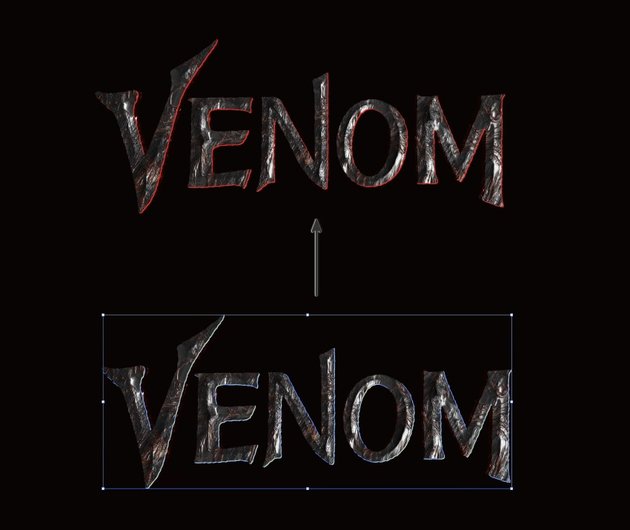
Now select the textured logo and duplicate it by copying it (Control-C) and pasting it in place (Control-Shift-V) and then moving it below the first logo.
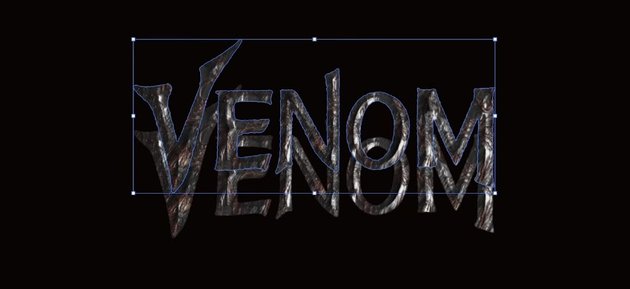
Step 12
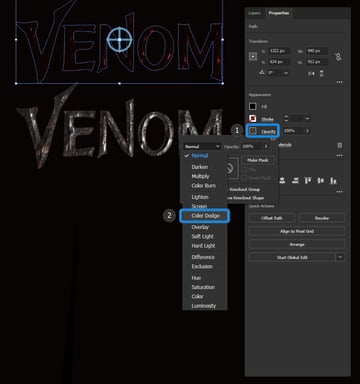
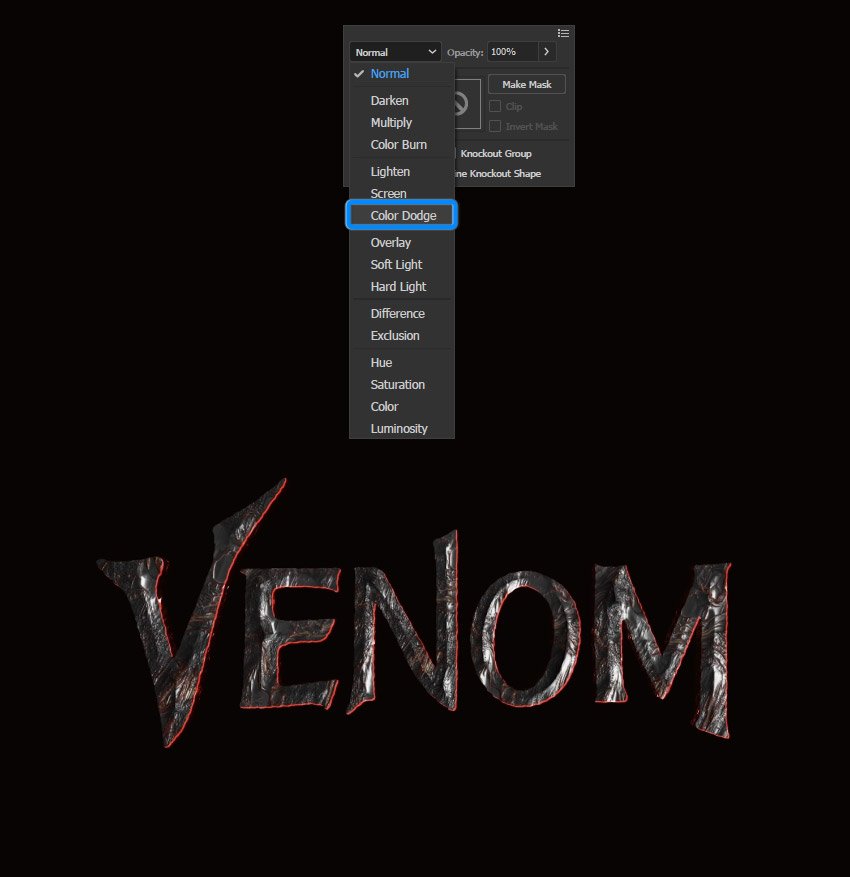
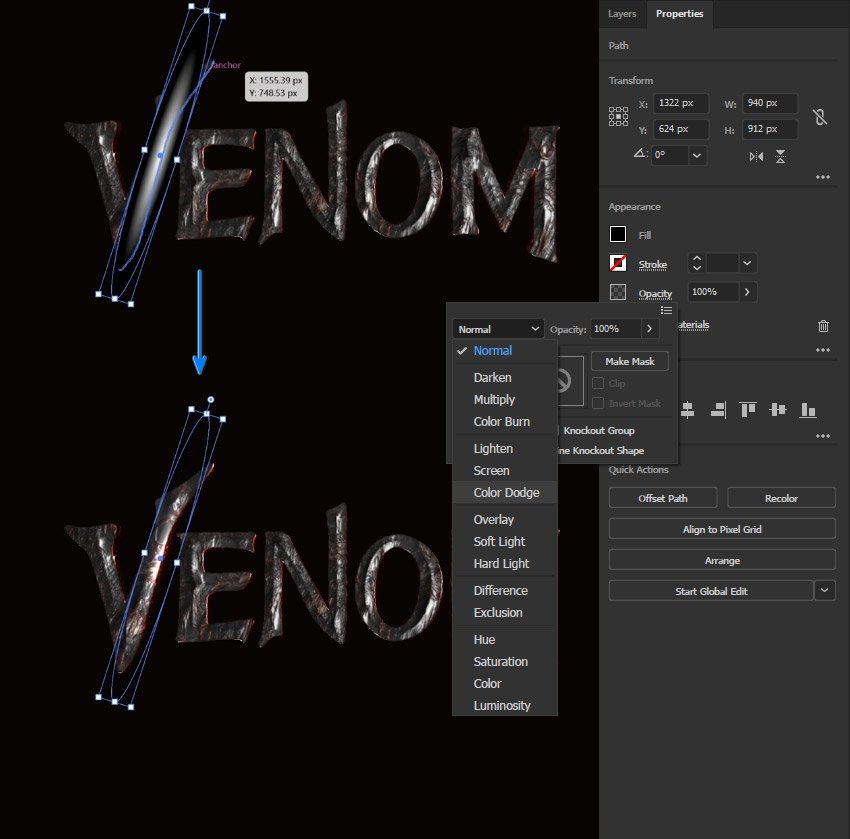
Select the top logo and then in the Properties panel, select Opacity and then change the blending mode from Normal to Color Dodge.
As you can see, because the background colour has a hint of colour in it, the color dodge effect then picks up on that, and we now have red glowing text.


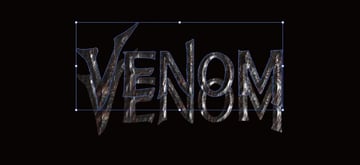
Step 13
Copy (Control-C) and paste in place (Control-Shift-V) three times to enhance the red effect. Then select all three copies and go to Object > Select > Group to group them all together.

Step 14
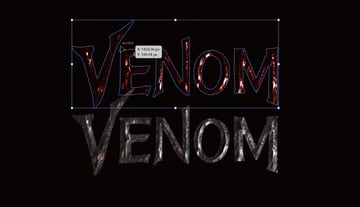
Move the red glowing text behind the second Venom logo (Object > Arrange > Send Backward).
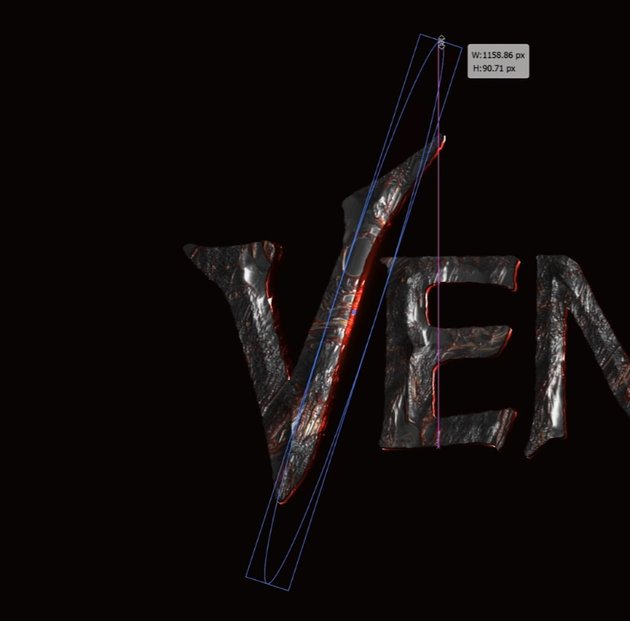
Step 15
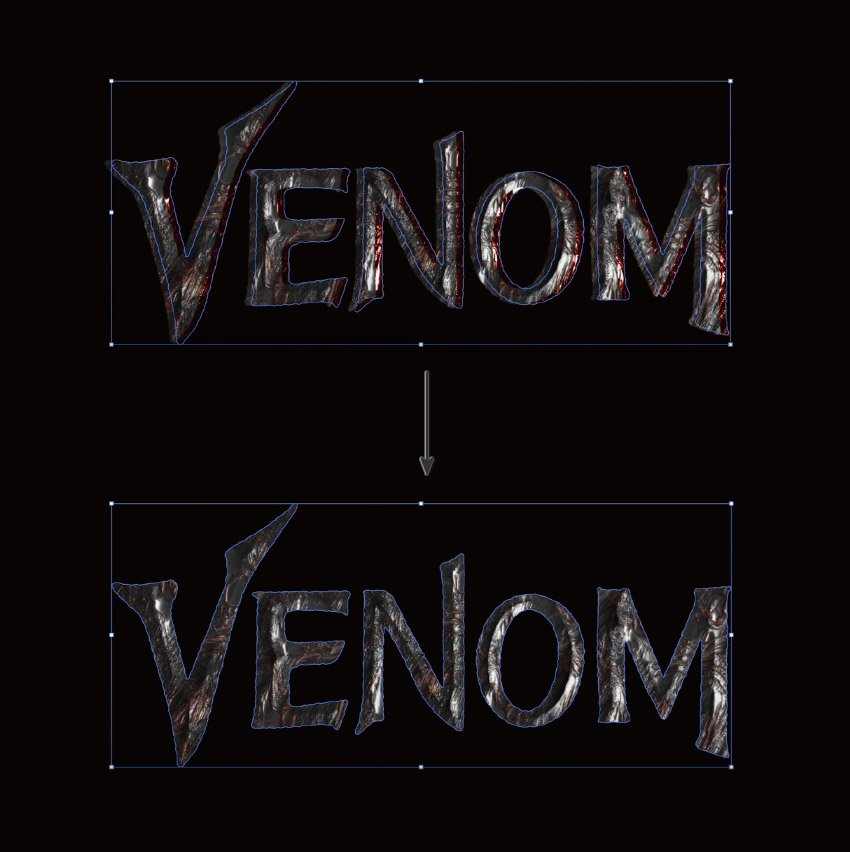
Move the red glowing logo so that it is smaller on both sides, which will give it a red edges effect. You can then use the arrow keys on the keyboard to tinker with the position so that it feels balanced on both sides.
Step 16
Select the original flat vector logo that we set aside earlier. Make it a yellow colour and then duplicate it by copying it (Control-C) and then pasting it in place (Control-Shift-V). Offset this version up and to the left ever so slightly, and then change the colour to blue.


Step 17
Select both flat logos and then click on the Minus Front button located in the Pathfinder panel. This will leave a nice edge highlight that we can use.
Step 18
Hold Shift on the keyboard and move the highlight and line it up back in position to give our Venom logo a nice edge highlight.

Step 19
Once the highlight is in position, change it to a red colour #FE3022 so that it fits the lava colour scheme.

Step 20
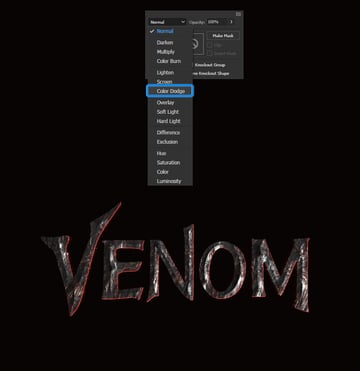
Make sure that the red highlight is selected and then change the blending mode to Color Dodge. You can do this from the Properties panel—select Opacity and then change the blending mode from Normal to Color Dodge.

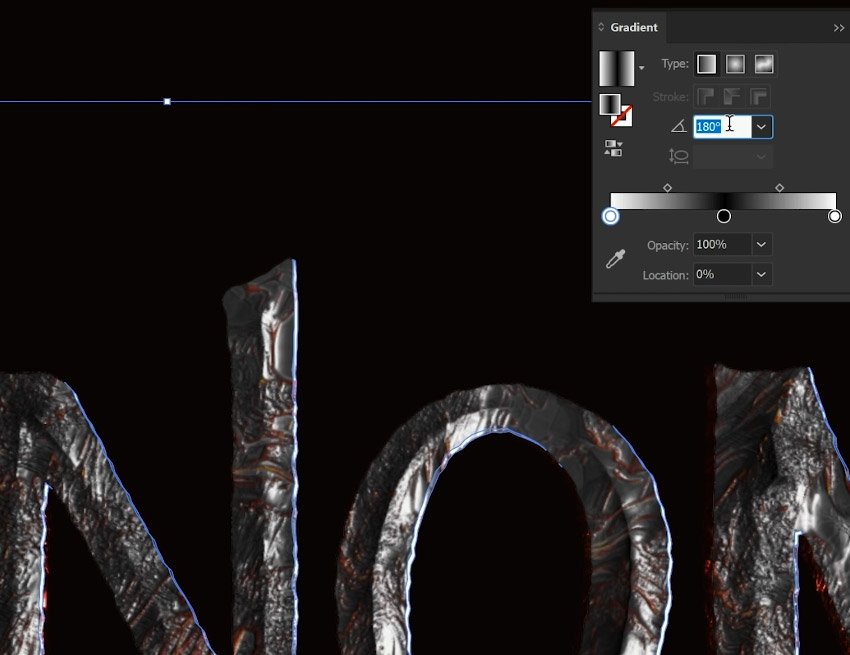
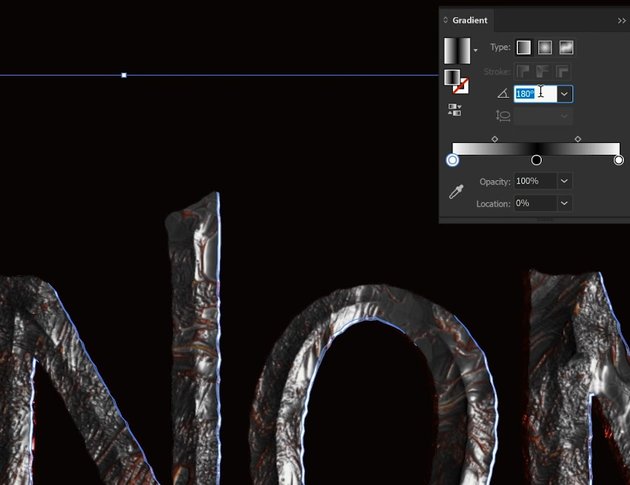
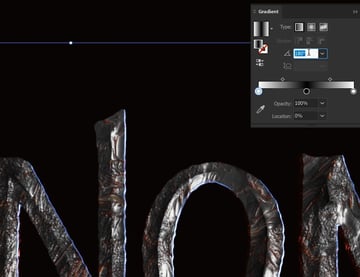
Step 21
With the highlight still selected, change it to a gradient and use the Gradient panel to adjust the angle to 180°. Then add a new colour node so that there is white on the left and right sides and black in the middle.
Now you can nudge the highlight to the right so that it sits on top of the background instead of the lava lettering. The gradient will pair with the color dodge, which will bring out the red subtly hidden in the background.
5. How to Add Highlights
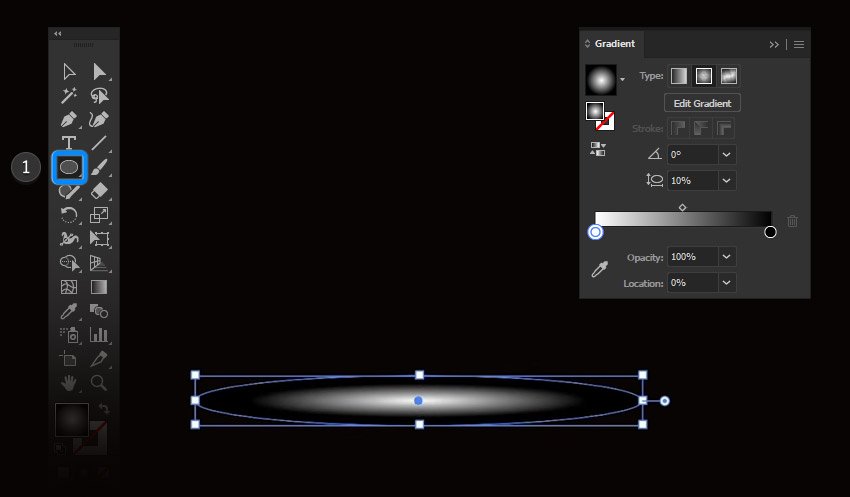
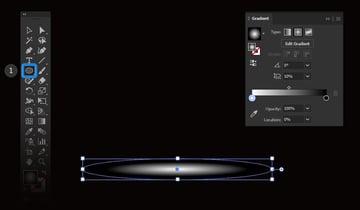
Step 1
Next, use the Ellipse Tool to draw an ellipse and apply a standard black and white gradient to it using the Gradient panel with the settings shown below:
- Type: Radial Gradient
- Angle: 0°
- Aspect Ratio: 10%
- Opacity: 100%

Step 2
Use the Selection Tool (V) to move the gradient into place on top of the Venom logo. Then rotate it so that it matches the angles and edges of the letters.
From there, we are going to use the same technique again using the blending modes in the Properties panel. Select Opacity and then change the blending mode from Normal to Color Dodge.
Once the colour dodge has been applied, you can see that it really highlights the area.


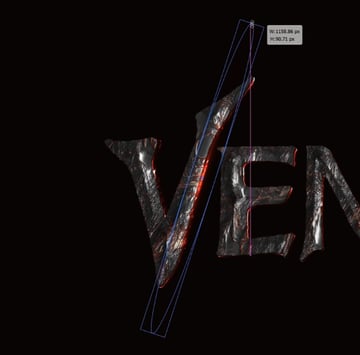
Step 3
Use the Selection Tool (V) to move the highlight so that it sits on top of the red edges, giving it a nice red glow effect.

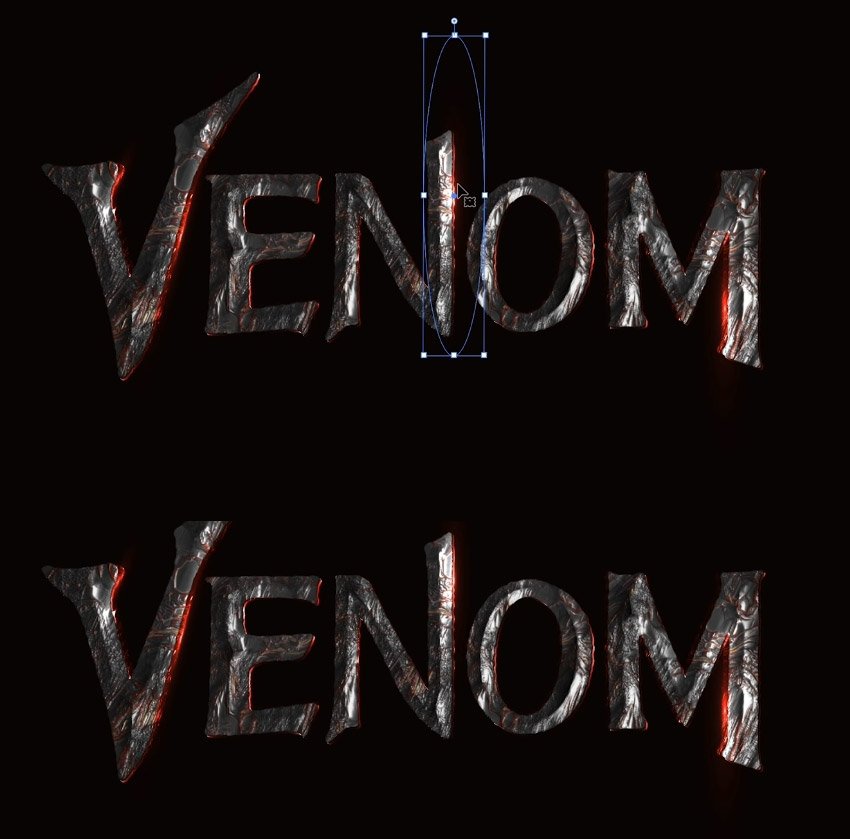
Step 4
Repeat this technique a few different times throughout the logo to add the highlight effect on other letters.
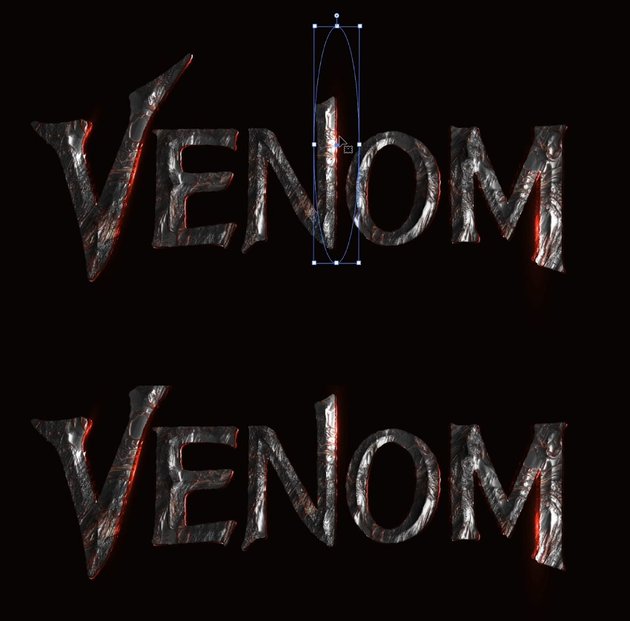
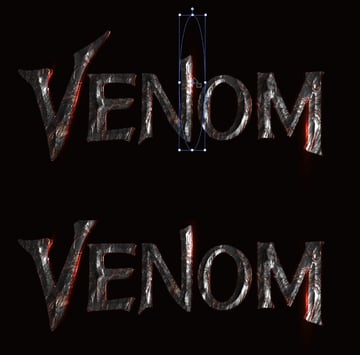
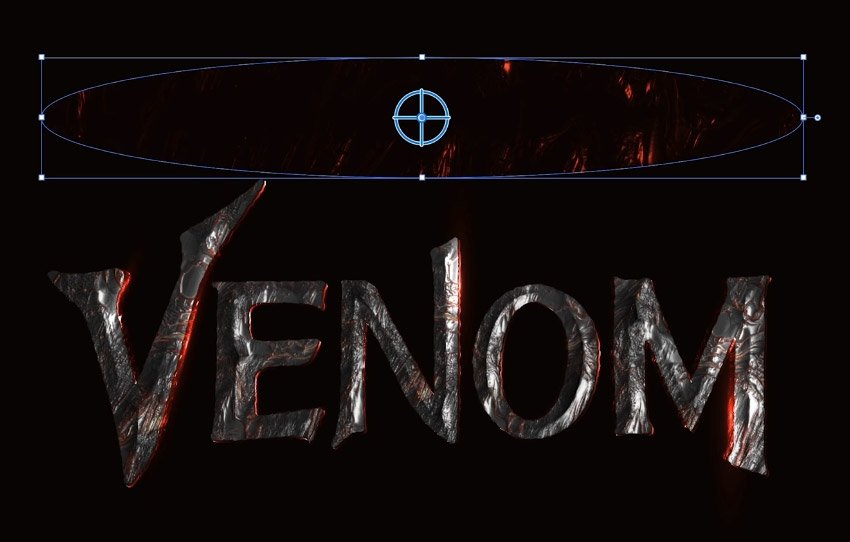
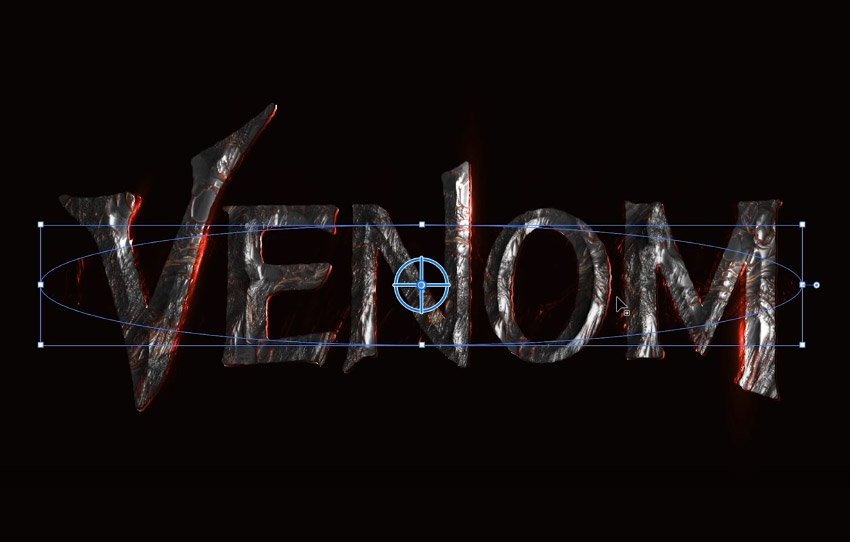
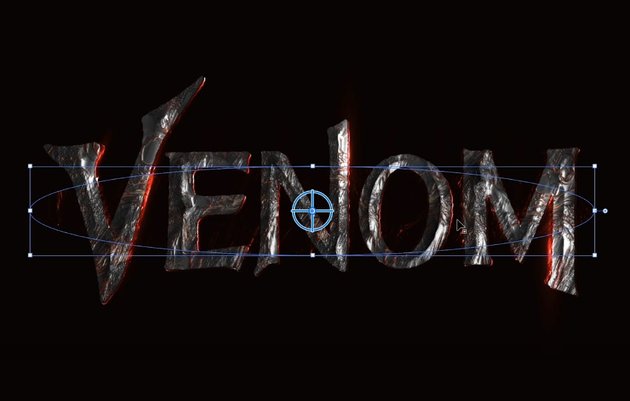
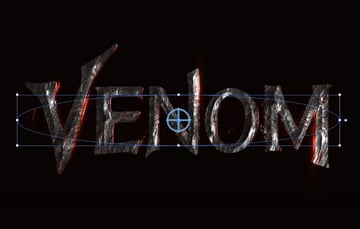
Step 5
Use the Ellipse Tool (L) again to create another ellipse shape that almost covers the size of the Venom logo.
Select both the ellipse and the Venom logo then go to the Layers panel. Click the arrow to expand the layer to see all the shapes that have been created.
The two selected shapes have their circles highlighted on the right. By holding Alt on the keyboard, you can drag the Venom logo onto the ellipse shape.


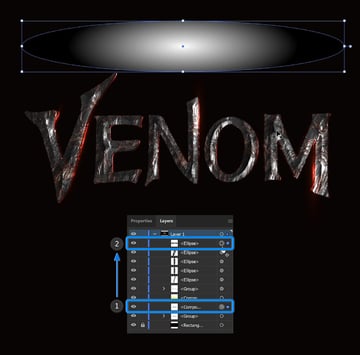
Step 6
By doing this, you will apply the volcanic appearance to the ellipse.


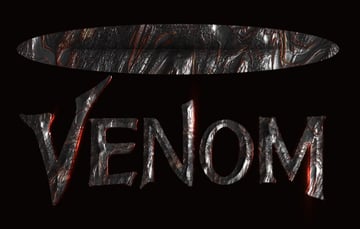
Step 7
Make sure that the ellipse shape is selected, and then change the blending mode to Color Dodge. You can do this from the Properties panel—select Opacity and then change the blending mode from Normal to Color Dodge.
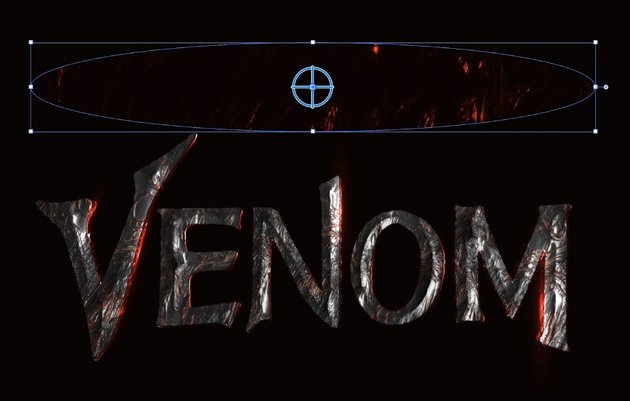
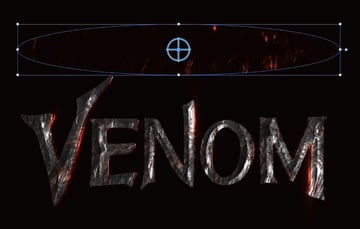
Step 8
Place the ellipse shape behind the Venom logo (Object > Arrange > Send Backward).
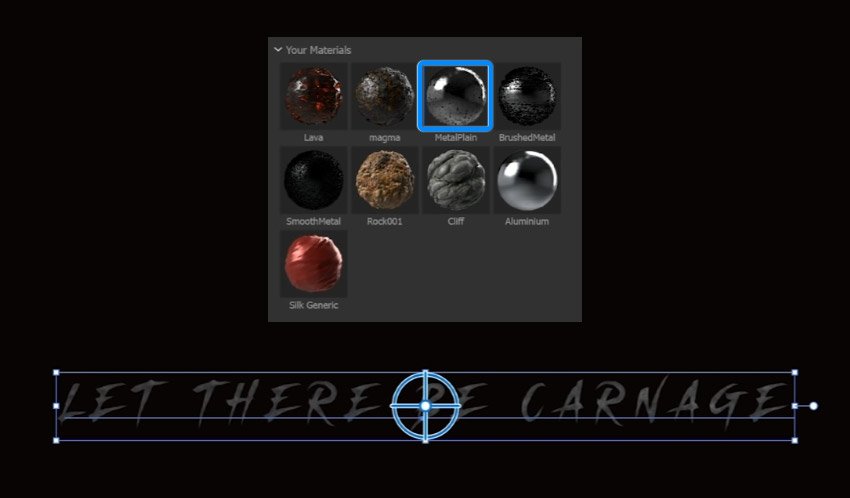
6. How to Add the Tagline
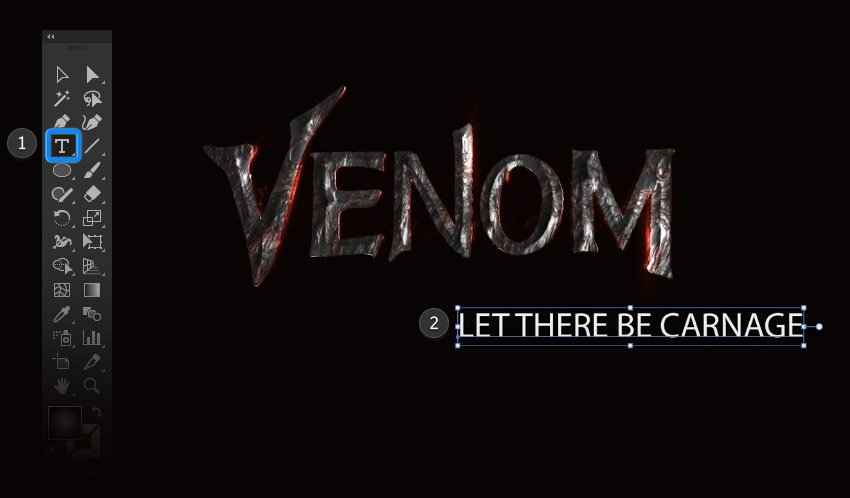
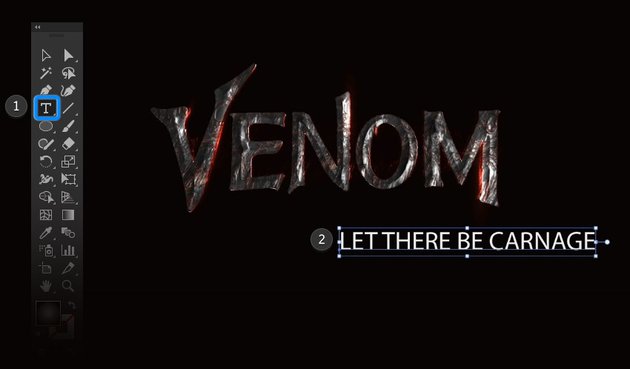
Step 1
Now to add the tagline. Use the Type Tool (T) to type “Let There Be Carnage” below the main Venom letters.

Step 2
Centrally align the text to the Venom letters, and then change the font to Chemical Machines Slant. Then, using the Character panel, you can increase the tracking so that there’s more space between the letters.

Step 3
With the text still selected, apply one of the Adobe Illustrator metal effect materials to it from the 3D and Materials panel.
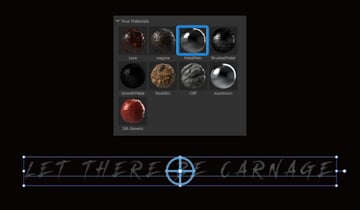
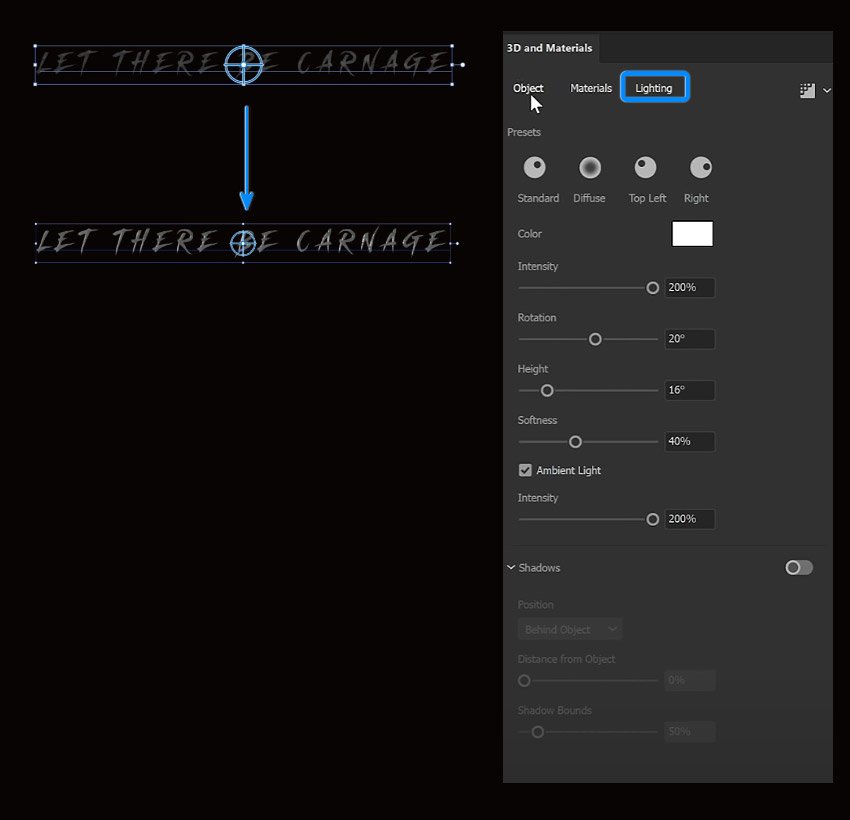
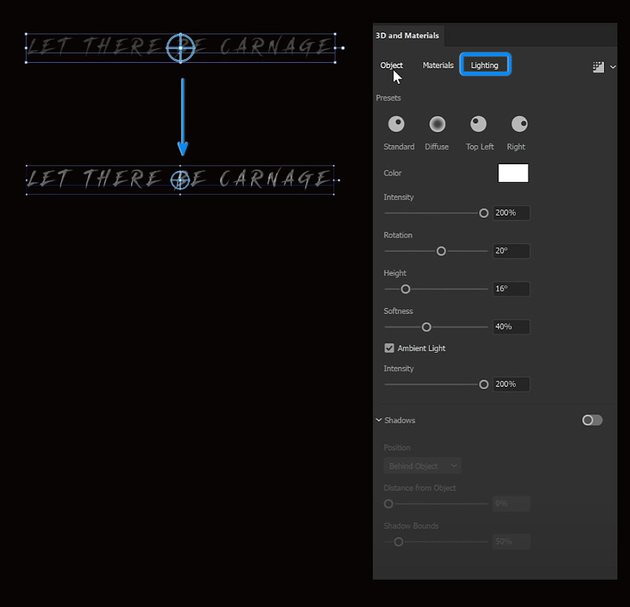
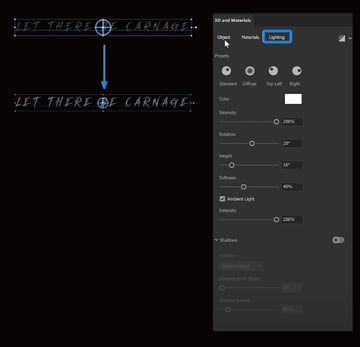
Step 4
Select the Lighting tab from the 3D and Materials panel and use the settings below:
-
Color:
#FFFFFF - Intensity: 200%
- Rotation: 20°
- Height: 16°
- Softness: 40%
- Ambient Light: Checked
- Intensity: 200%
Step 5
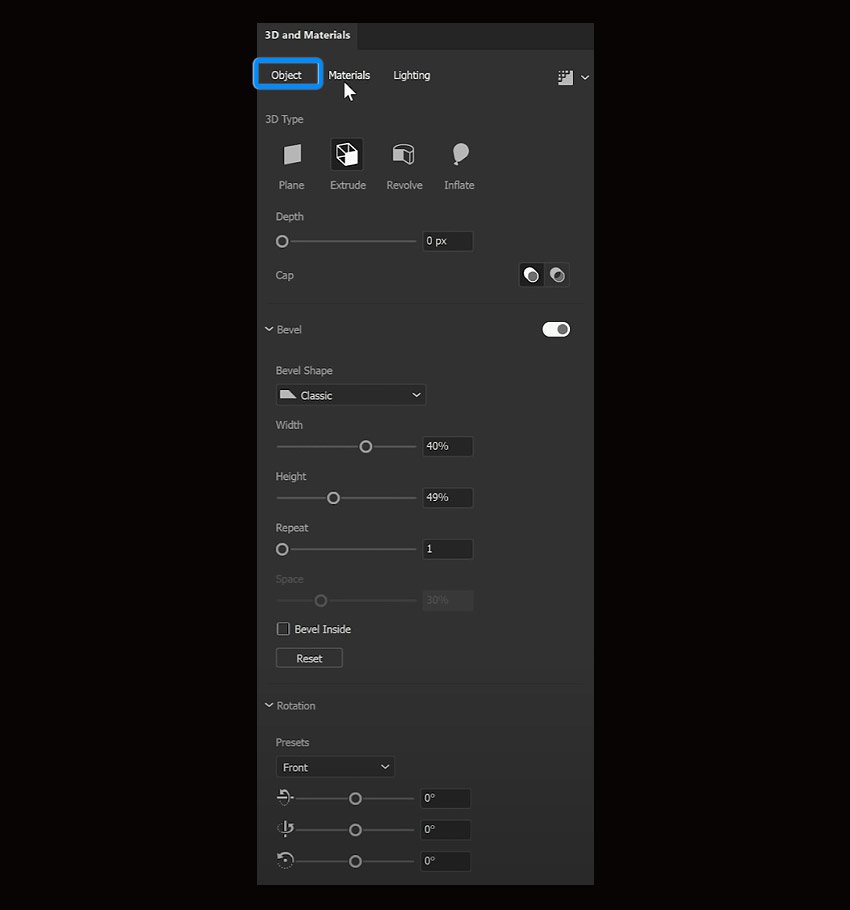
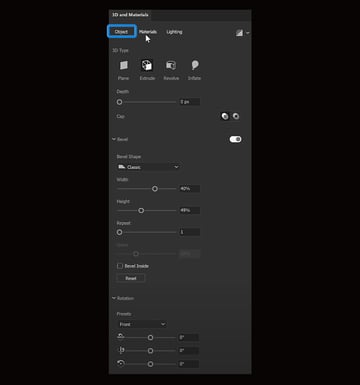
Select the Object tab from the 3D and Materials panel and use the settings below:
- 3D Type: Extrude
- Depth: 0 px
- Bevel Shape: Classic
- Width: 40%
- Height: 49%
- Repeat: 1

Step 6
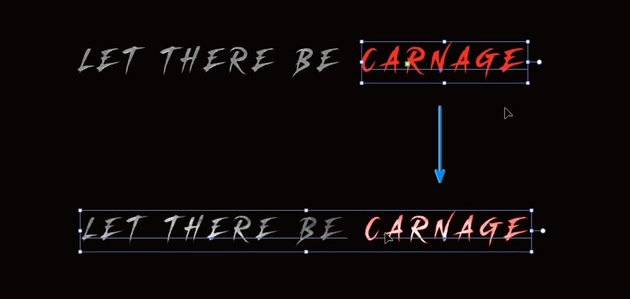
Duplicate the text and place one above the other. Remove the “Carnage” text from the top and “Let There Be” from the bottom.
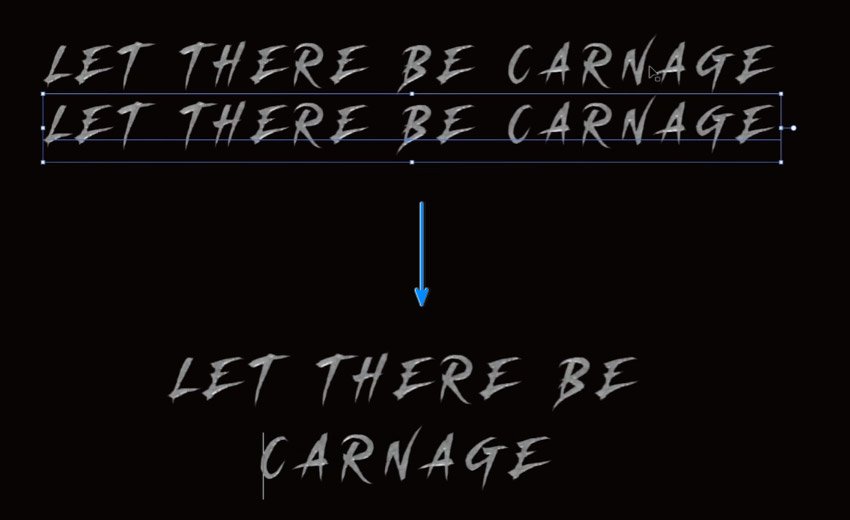
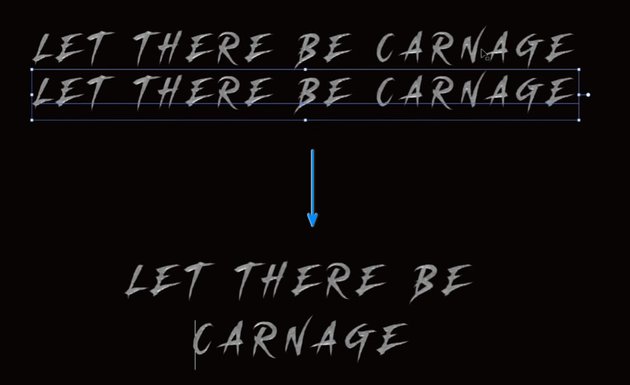
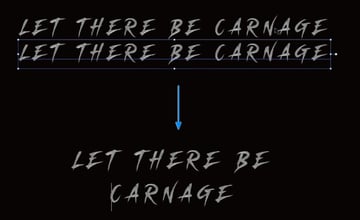
Step 7
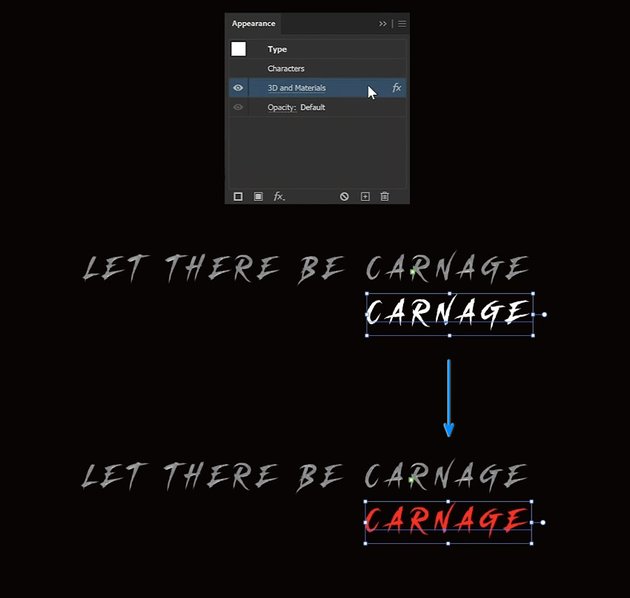
Then place the “Carnage” text back in place so that the tagline is one line again, and duplicate “Carnage” once again.
Place it underneath, and then in the Appearance panel, remove the 3D and Materials effect so that it becomes a flat colour, and then make it red.

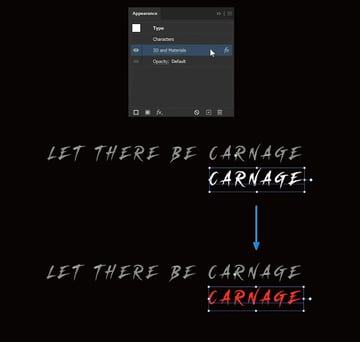
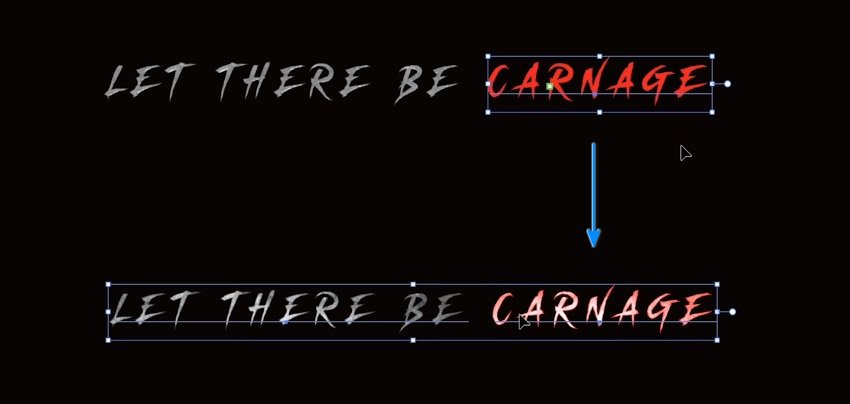
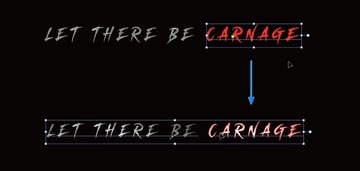
Step 8
Place the red “Carnage” text above the 3D text, and then change the blending mode to Color Dodge. You can do this from the Properties panel—select Opacity and then change the blending mode from Normal to Color Dodge.
7. How to Enhance the Venom Logo in Adobe Photoshop
Step 1
Now that the Venom logo is complete, we can then import it into Adobe Photoshop to add some final touches to enhance the design.
Create a new document in Photoshop by going to File > New and using the following settings:
- Width: 3840 pixels
- Height: 2160 Pixels
- Resolution: 72 DPI
- Color Mode: RGB
For the background colour, make sure to use #0A0202, which is the same colour we used in Adobe Illustrator.
Then, to import the Venom logo, simply select all the shapes in Adobe Illustrator and copy them (Control-C). Then go back into the Adobe Photoshop file and paste (Control-V).
Import the Venom logo as layers if you want to continue adjusting the logo in Adobe Photoshop.

Step 2
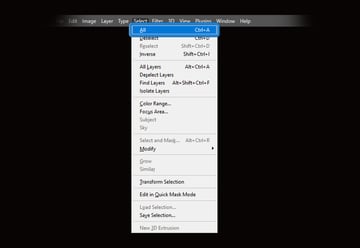
Once you have completed adjusting the logo, go to Select > All (Control-A).


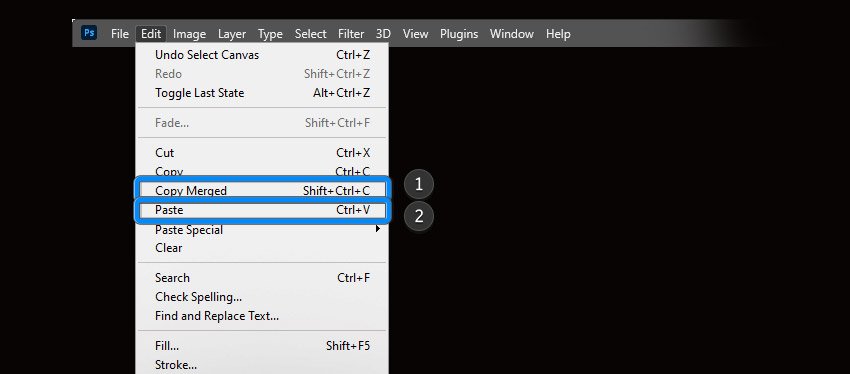
Step 3
From there, go to Edit > Copy Merged followed by Edit > Paste (Control-V). This will create a new layer with a flattened version of the entire composition. Select the new layer in the Layers panel. You can then convert it into a smart object by right-clicking on it and selecting Convert to Smart Object.

Step 4
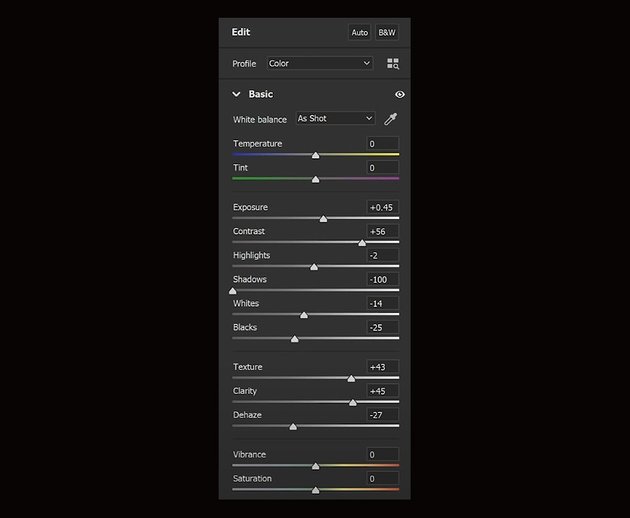
Go to Filter > Camera Raw Filter. From here, we can play around with the settings to enhance the look of the Venom logo.
Under the Basic settings, adjust the following:
- White Balance: As Shot
- Exposure: +0.45
- Contrast: +56
- Highlights: -2
- Shadows: -100
- Whites: -14
- Blacks: -25
- Texture: +43
- Clarity: +45
- Dehaze: -27


Step 5
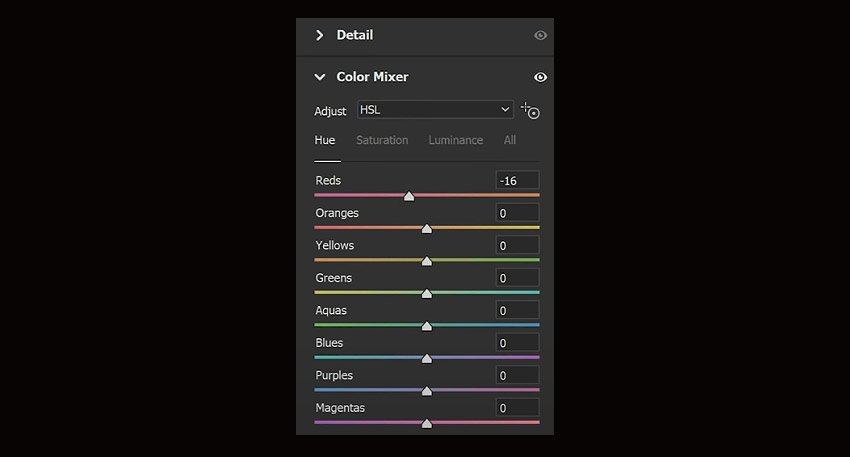
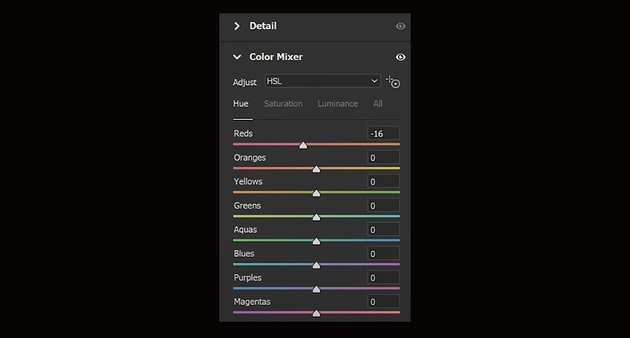
Under Color Mixer, change the Reds value to -16.
Step 6
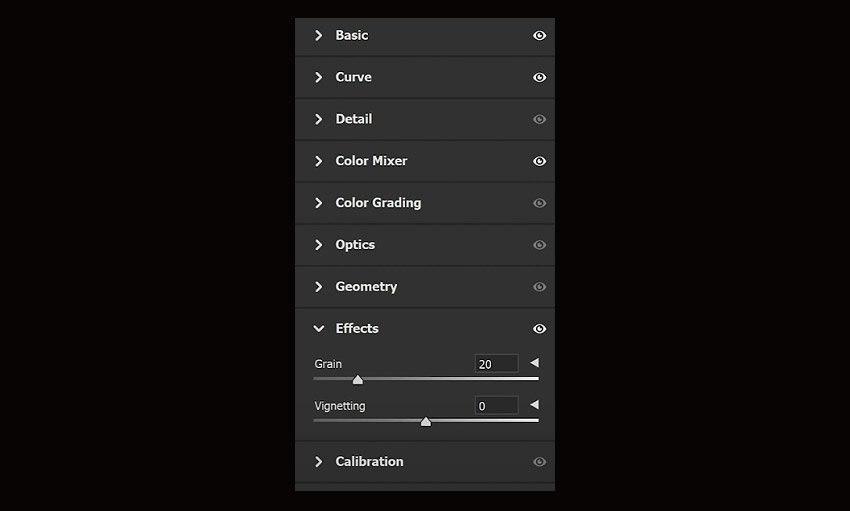
Then, under Effects, increase the Grain value to 20.
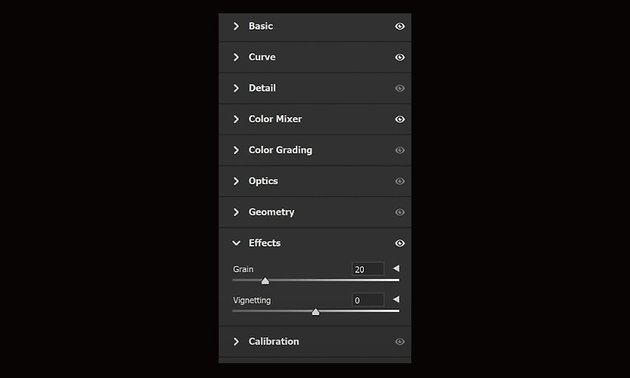

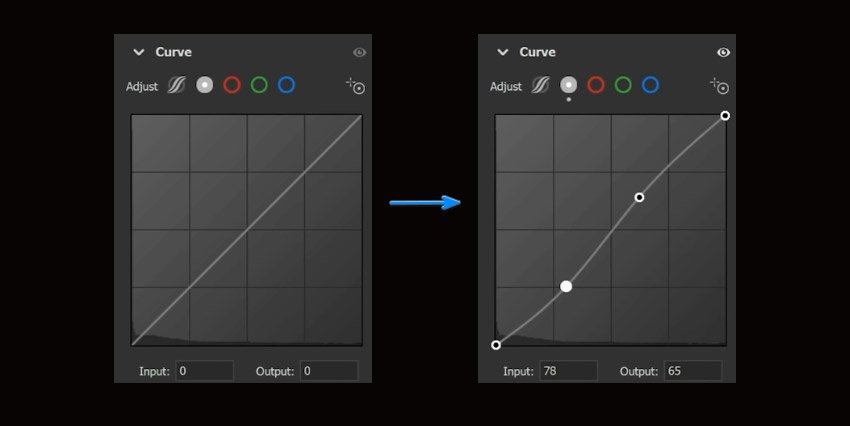
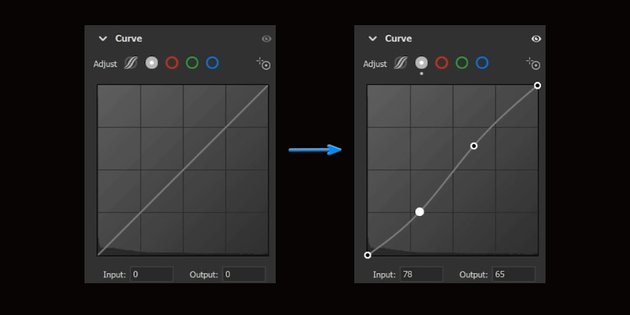
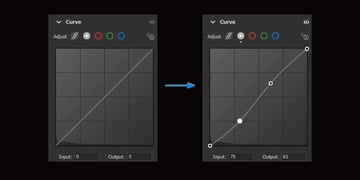
Step 7
Under Curves, change the graph so that it looks like the image below:
Step 8
Continue playing with the settings here until you’re happy with the way your Venom logo looks.

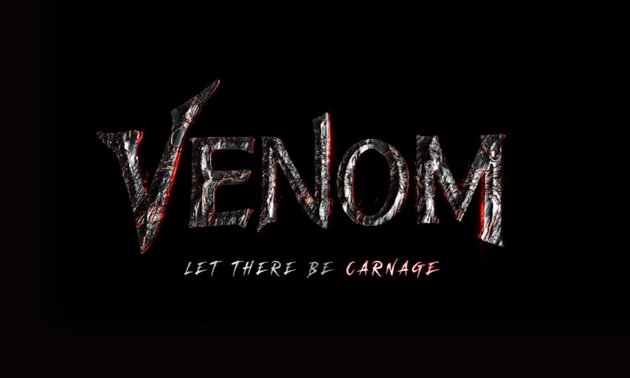
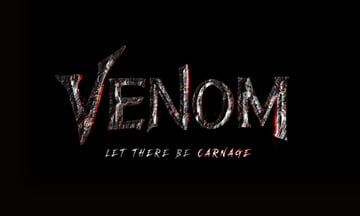
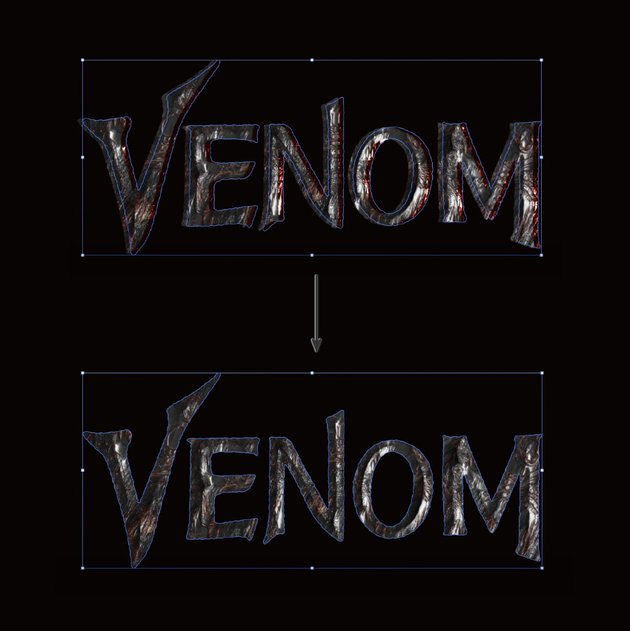
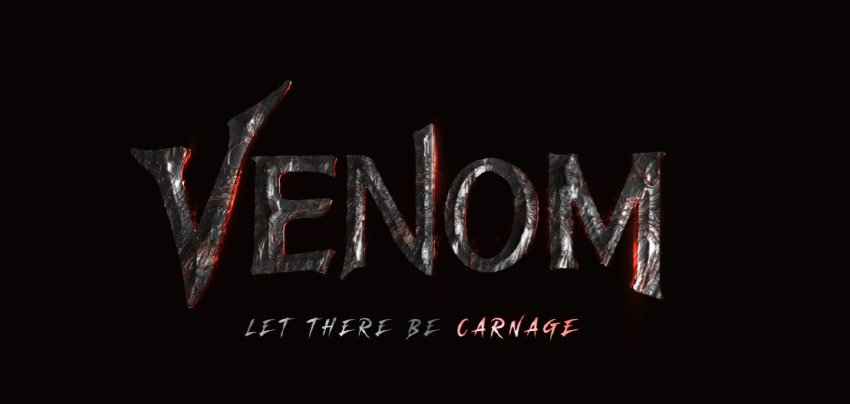
Congratulations! Your Venom Logo Effect Is Done!
Congratulations! And that is how you can create a Venom text effect in Adobe Illustrator. In this Marvel Venom logo design tutorial, we learned how to use the new 3D panel in Adobe Illustrator and how to apply materials to our shapes.
After that, we continued to work on improving the look of the logo, using blending modes to create a venom glow effect and the tagline.
Finally, once we were happy with the way the Venom movie logo looked, we then took it into Adobe Photoshop to add some finishing touches to the design. Hopefully you enjoyed the tutorial and learnt something new, and I’ll see you next time here on Envato Tuts+!
Top 5 Movie Logo Effects From Envato Elements
Want to create cool movie title logo effects, but short on time? Then head on over to Envato Elements, where you can download many different templates, actions, and more that you can use and customise. Here are five of my favourites.
Mystic Text Logo Effect (PSD, PDF)
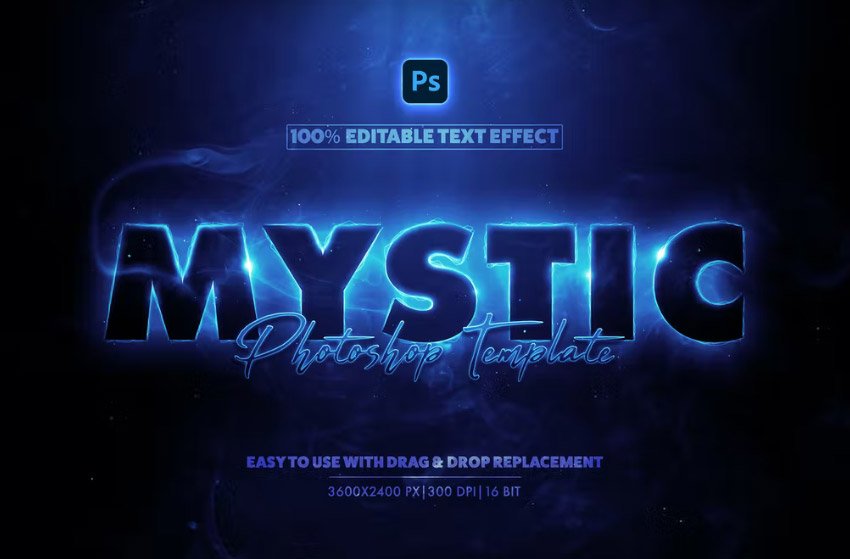

This fully editable text effect is easy to use and works with Adobe Photoshop. Transform your text or logo into a mystical and mysterious text effect that you can use for your own projects. This add-on is perfect for fantasy movie projects, epic titles, scenes, and posters!
Stone 3D Text Effect (PSD)

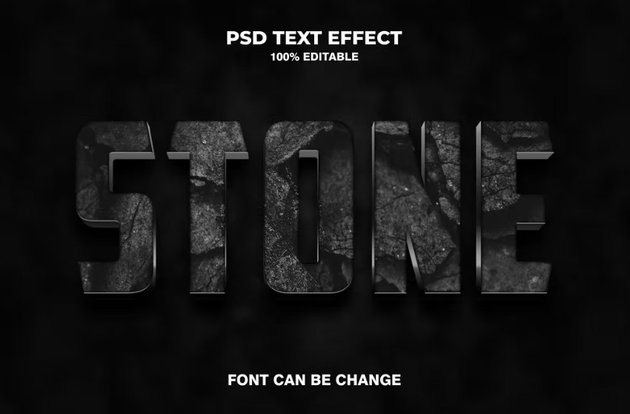

This Adobe Photoshop text effect is easy to use—all you have to do is place your design into the smart object. Transform your logo into this stone effect which is perfect for posters, flyers, covers, and cinematic movie titles.
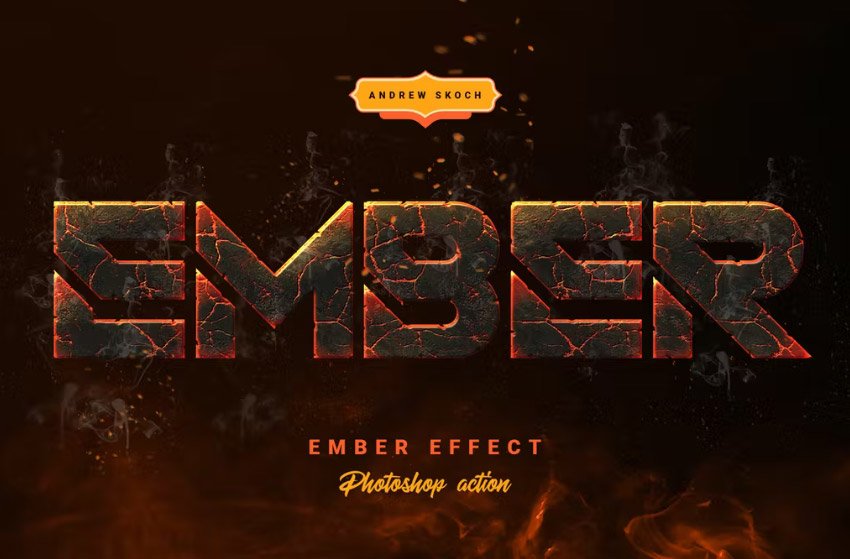
Ember Effect Photoshop Action (ATN, ABR, PAT, PDF, PSD)
The Ember Effect Photoshop Action is a great way to transform your text and logo designs into a cool-looking hot lava effect / ember effect / magma effect / fire effect. It features a realistic effect with three different colours (red, blue, and green).
Lava Editable Text Effect & Font Style (AI, EPS)
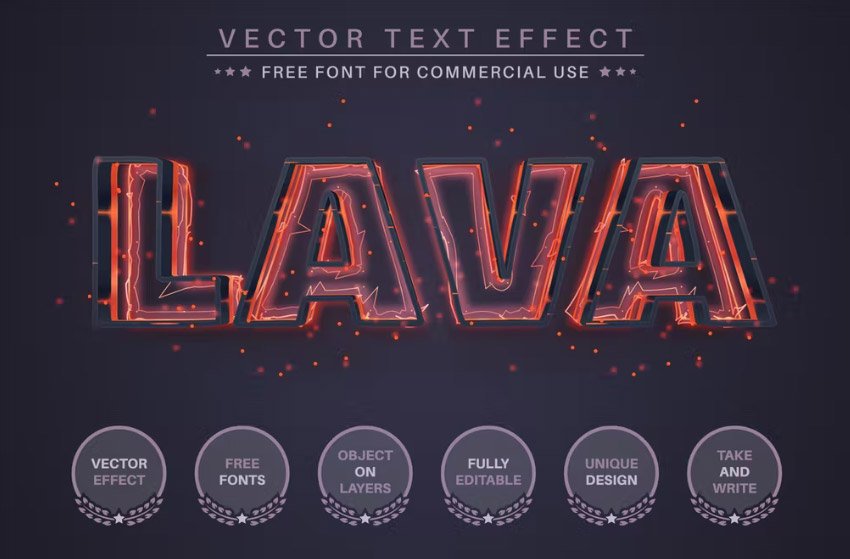

Introducing the vector text effect “Lava”! This fully editable text effect is easy to use in Adobe Illustrator—simply type in your text, and the effect will be applied. This effect is great to use for your own movie projects, flyers, posters, and covers.
Fully Editable Text Effect Style (EPS)
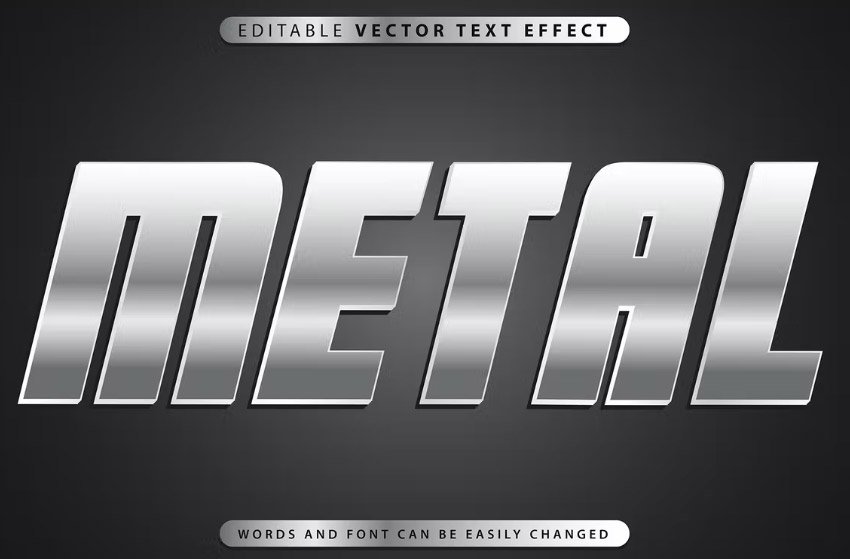
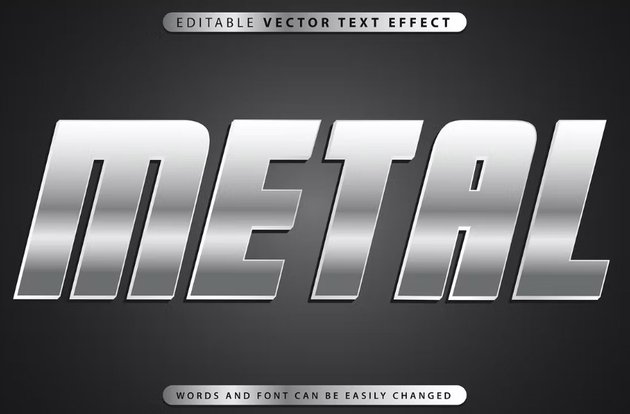
This fully editable Adobe Illustrator Metal Effect is easy to use and turns your text into this shiny look. Apply this effect on your logo designs, movie projects, flyers, posters, and more!