
Just imagine: a scorching sun, a clear blue sky, a cool breeze blowing in from the sea, and your favorite ice cream in your hand. Well, aren’t these the key ingredients for a perfect summer mood?
In this tutorial we’ll try to picture this mood by creating a colorful summer portrait of a beautiful woman. We’ll experiment with different methods and techniques to get a great result.
Now, this is a complete Procreate portrait tutorial. You’ll learn how to paint a portrait in Procreate from scratch. But if you want to speed up the process and easily create Procreate portraits, you need professional Procreate brushes.

If you’d like to find the best Procreate brushes for your digital drawings, scroll down after this Procreate portrait tutorial. Discover unlimited Procreate brushes downloads from Envato Elements.
Watch This Procreate Portrait Tutorial
If you prefer to watch this tutorial in action, check out this video. Here you’ll learn how to paint a portrait in Procreate. And if you want to learn more and watch more useful tutorials, subscribe to the Envato Tuts+ YouTube channel!

What You Will Learn In This Procreate Portrait Tutorial:
- How to paint a portrait in Procreate from scratch
- How to make a sketch in Procreate
- How to create the line art and main shapes
- How to create the paper texture brush
- How to add shadows and highlights
1. How to Make a Sketch
Step 1
In this tutorial, I’m using an iPad Pro with the Apple Pencil and the Procreate 4 app.
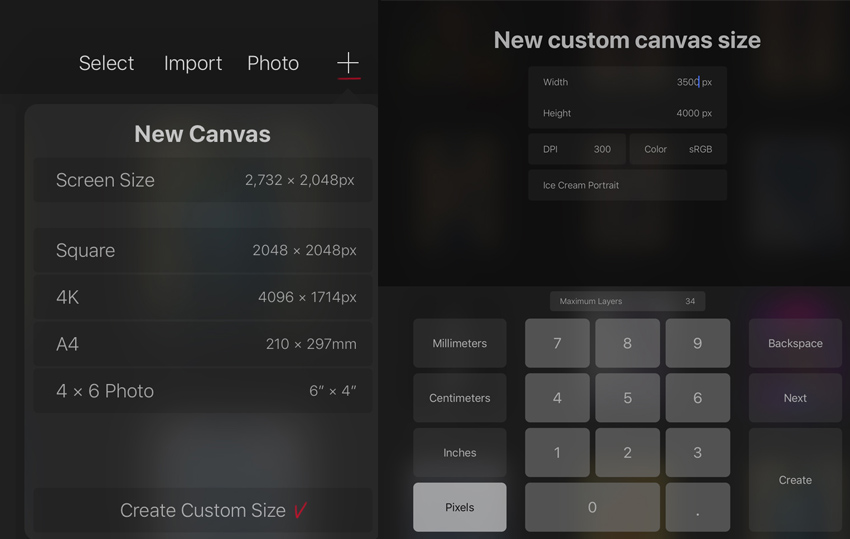
First, open the application. Tap the (+) icon in the top right corner to create a New Canvas. Tap to Create Custom Size and create a 3500 x 4000 px canvas, RGB, 300 DPI.
Step 2
To begin with, let’s draw a schematic sketch.
I create my sketch directly in Procreate using my Apple Pencil.
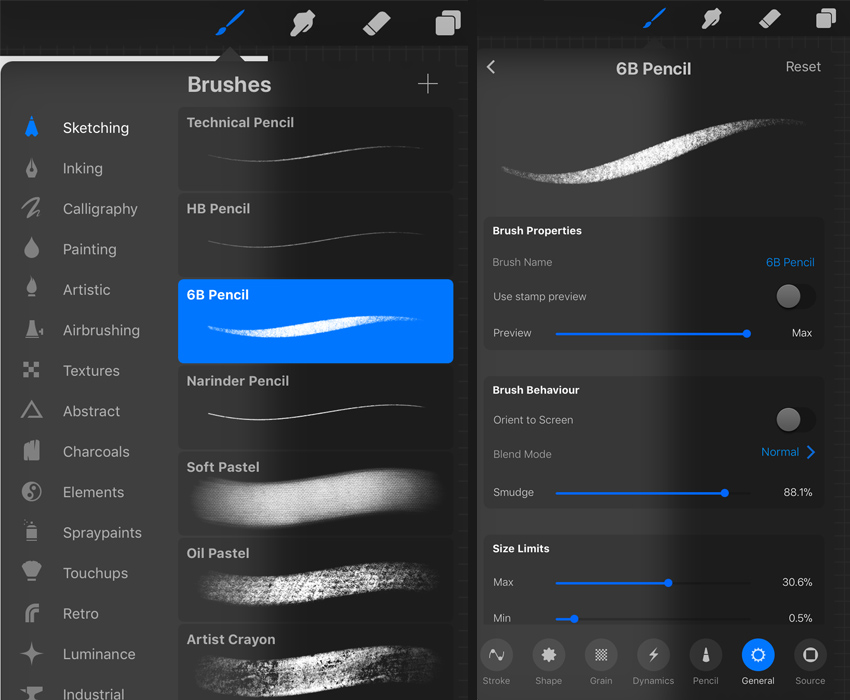
First, open the Brushes tab and tap the Sketching set. For the sketch, any brush from this set will be suitable. I chose the 6B Pencil.
Let’s modify this brush a little bit. Tap the 6B Pencil icon, and the Settings of the tool will appear. Choose the General settings and change the Size Limits to ~30% Max. It will allow us to have more flexibility in the sketching process.
Step 3
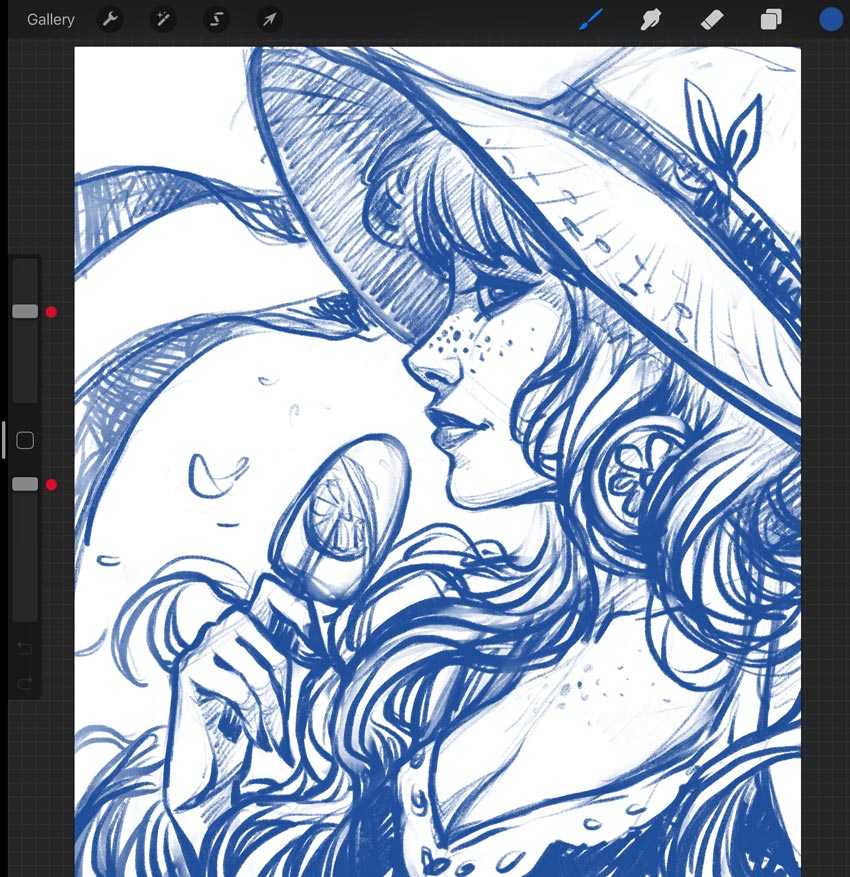
Let’s begin by drawing a sketch.
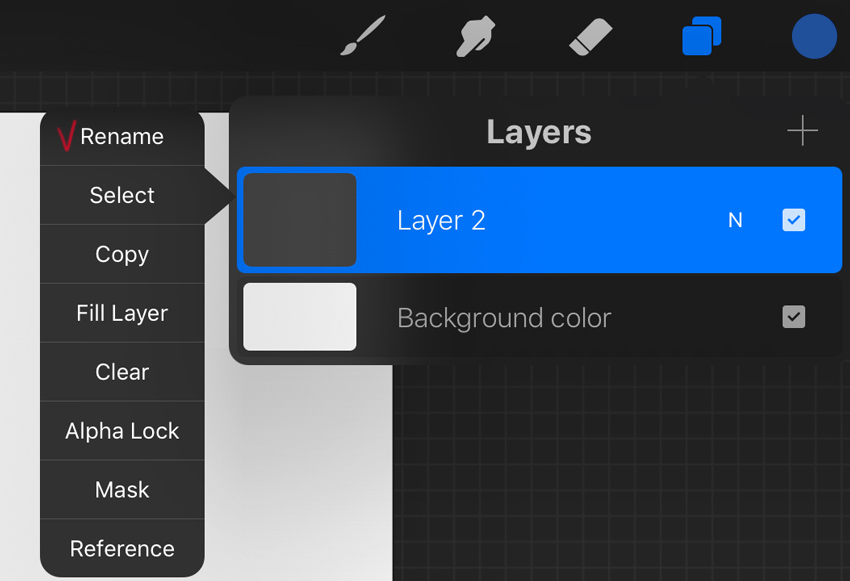
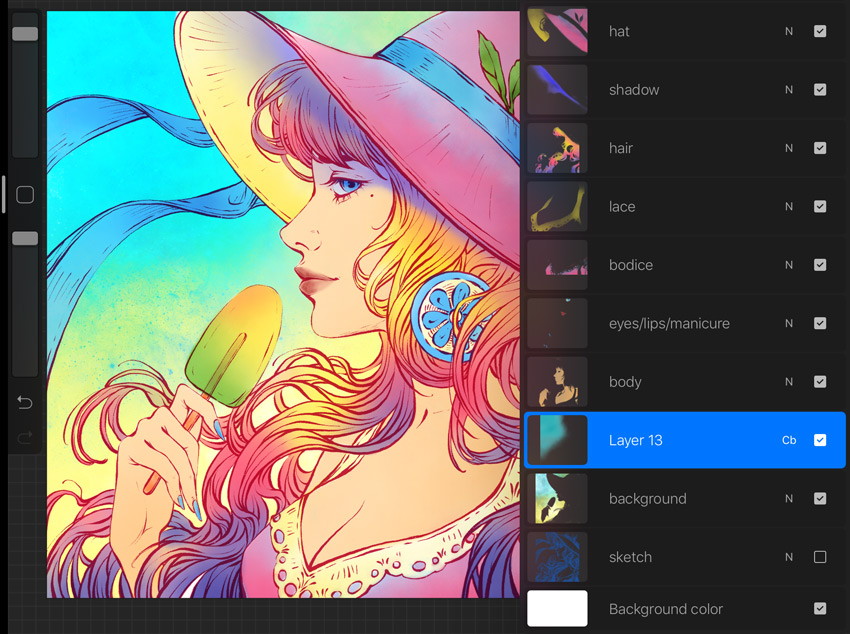
We already have two layers by default: one layer with the background color and one empty layer. Open the Layers panel, tap “Layer 2”, and rename it “sketch”.
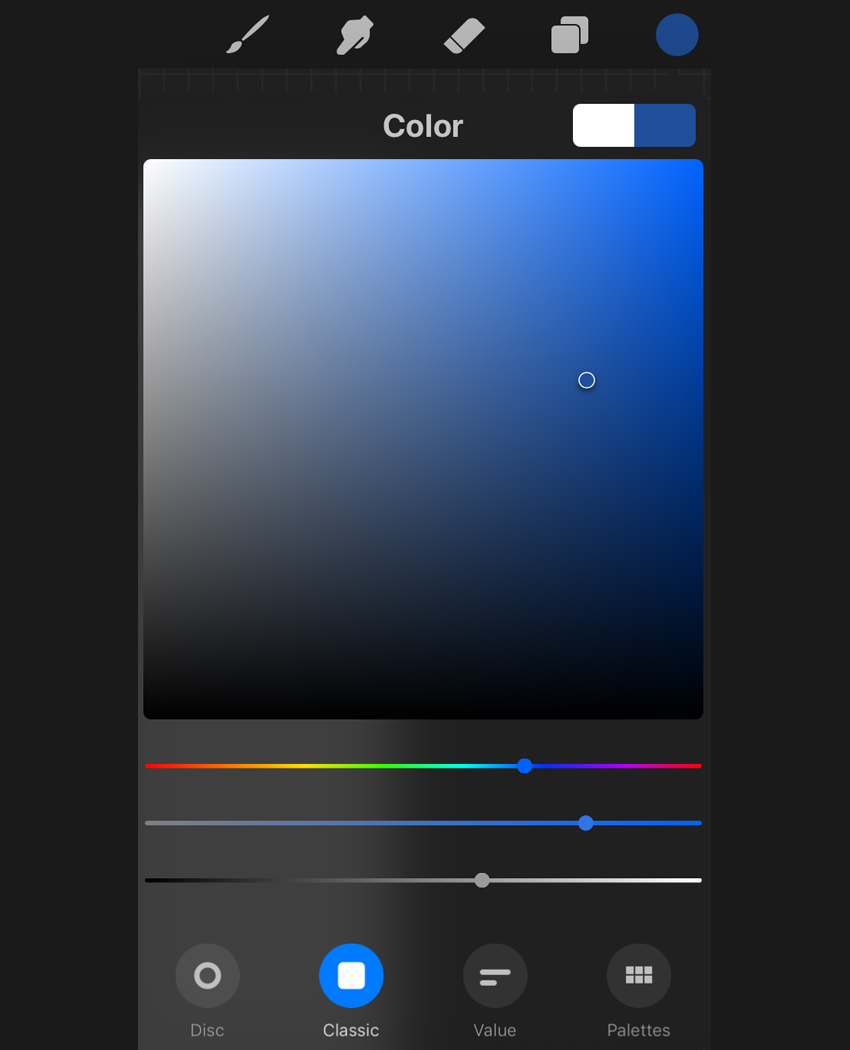
Now you can choose any color you like from the Colors menu in the top right corner. I picked the blue one.
Step 4
Now we can start sketching. First, make a combination of basic shapes, searching for the silhouette of the character and her features. Then refine the sketch, adding a couple more details to give them a bit more character.
For convenience, you can rotate the canvas in the process. Just use two fingers and rotate your image or size it.
Also, you can change the Size and Opacity of any Brush tool by moving up and down the sliders on the left side of the screen.
2. How to Create the Line Art
Step 1
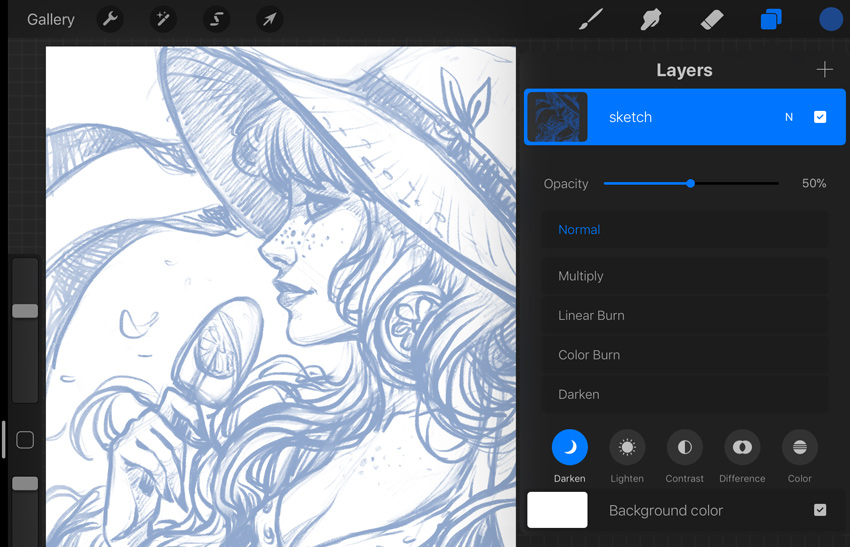
First, open the Layers menu, tap N on the “sketch” layer, and lower the Opacity to 50%.
Step 2
Create a New Layer for the lines on top of the “sketch” layer.

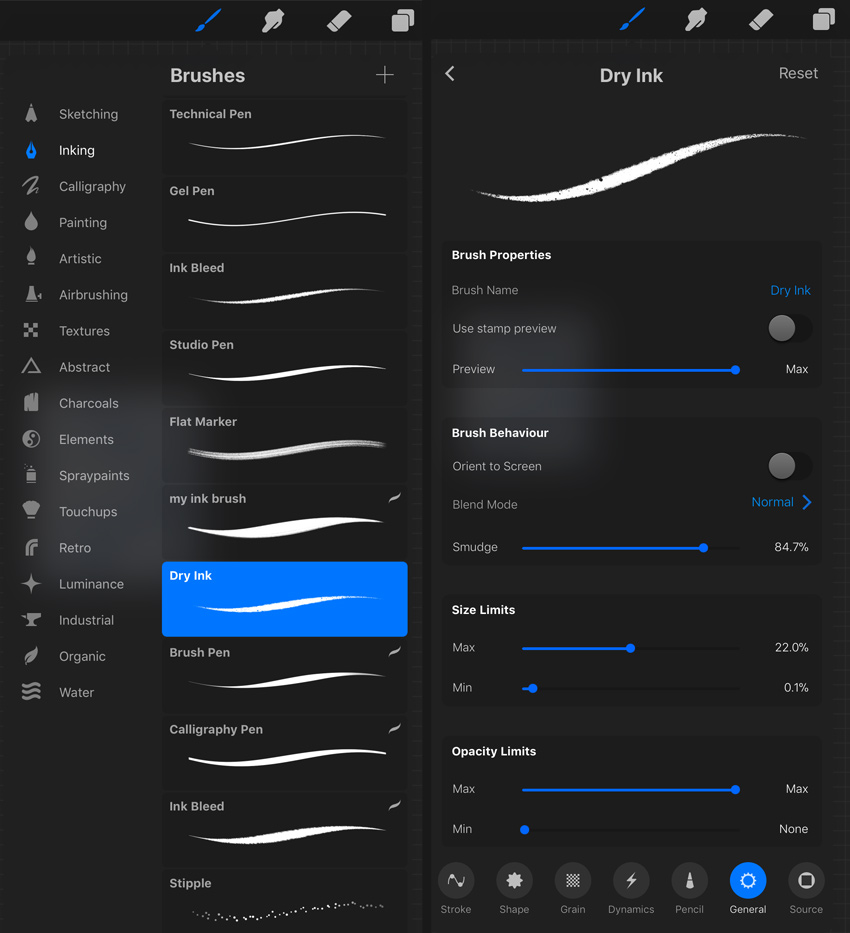
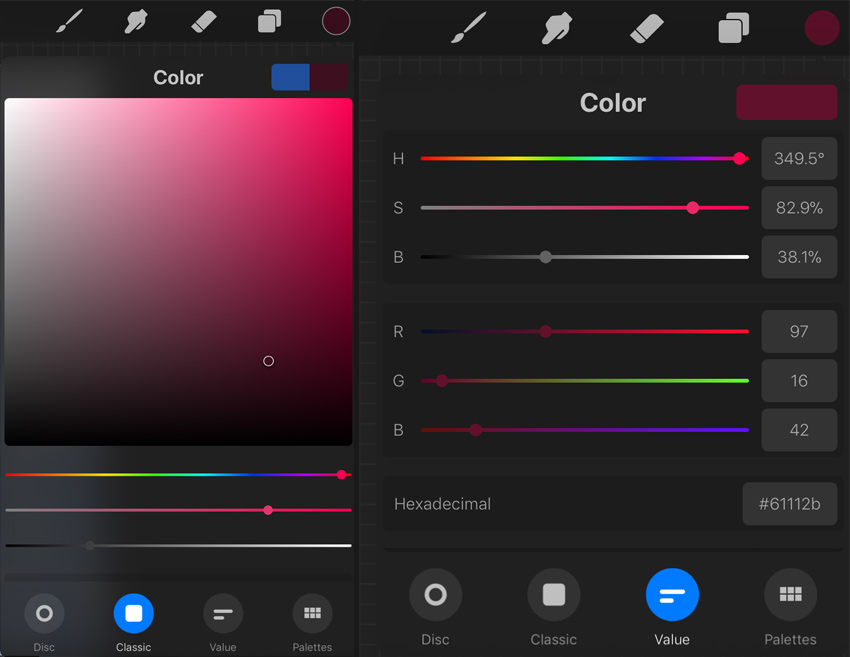
Go to Brushes > Inking > Dry Ink and pick a maroon color from the Colors menu.
Step 3
Let’s begin to create our line art.
You can make a few trial lines to sense them. Set the brush Size to about 40% with 100% Opacity. The thickness of the lines depends on the pressing force of the stylus.
Start drawing the face and body. Draw lines as smoothly as you like. Create clean, confident lines, making transitions from thin to thick and vice versa. Having a variance of line weight is good; it gives more life to your drawing.
Also draw the main lines of her hat and bodice. Decorate the hat with ribbons and small leaves.
The ice cream in her hand will be semi-transparent, so make the lines thinner and almost imperceptible.
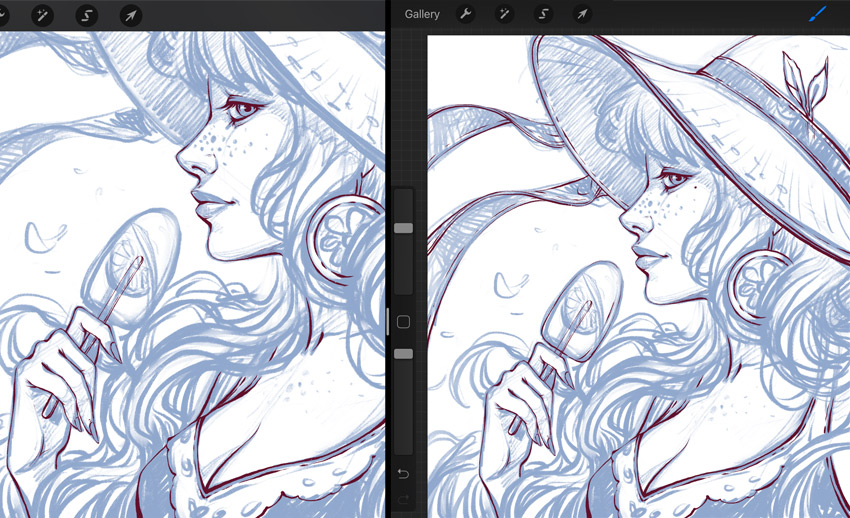
Step 4
Now draw the hairstyle. First, make just the main lines following the sketch, and then add tiny details.
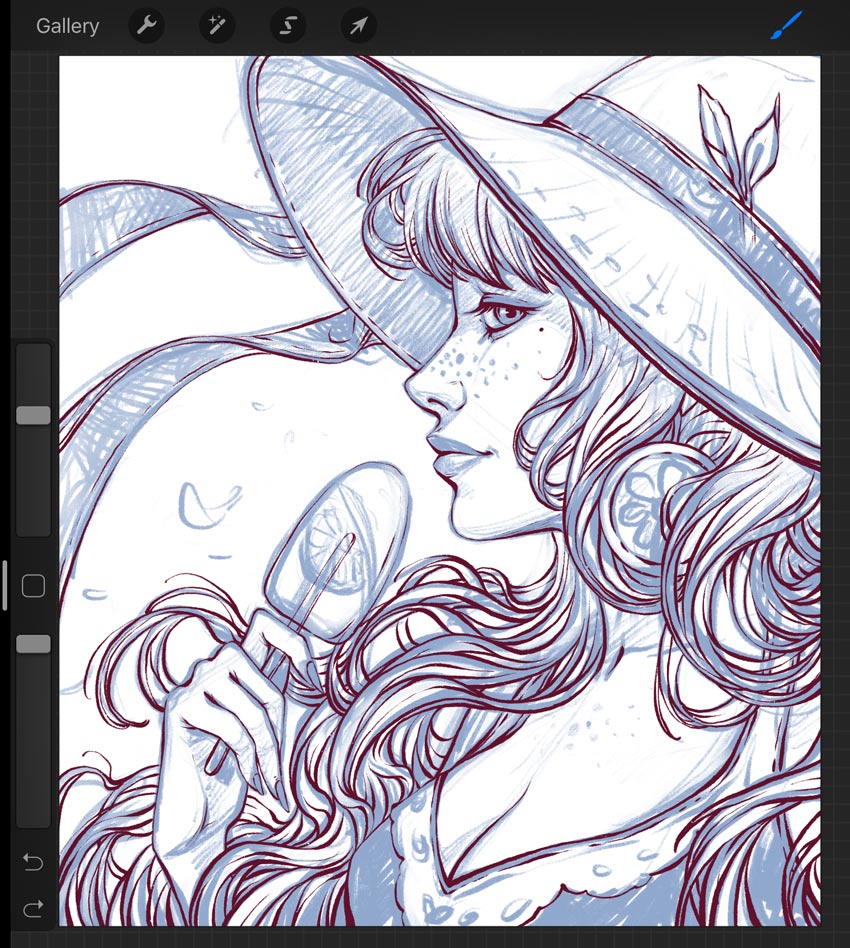
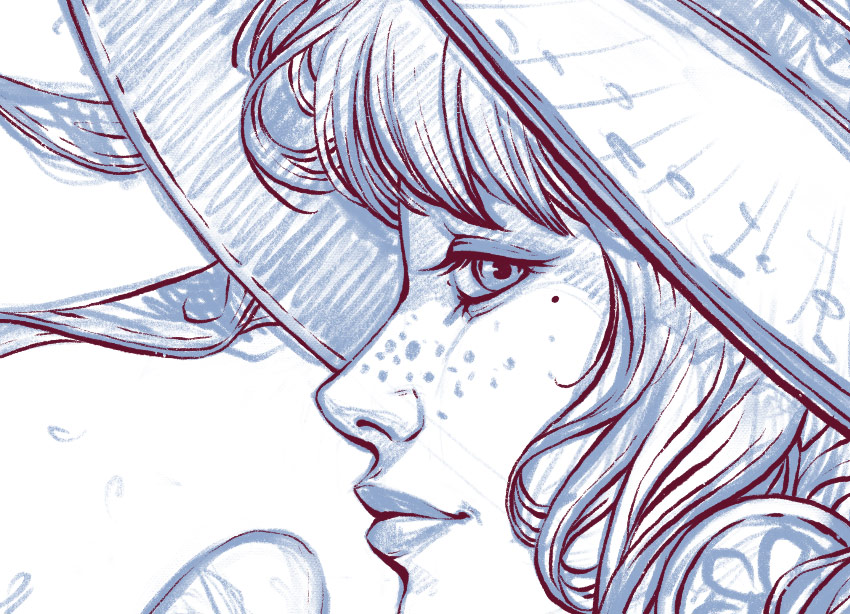
Step 5
Make the “sketch” layer invisible.
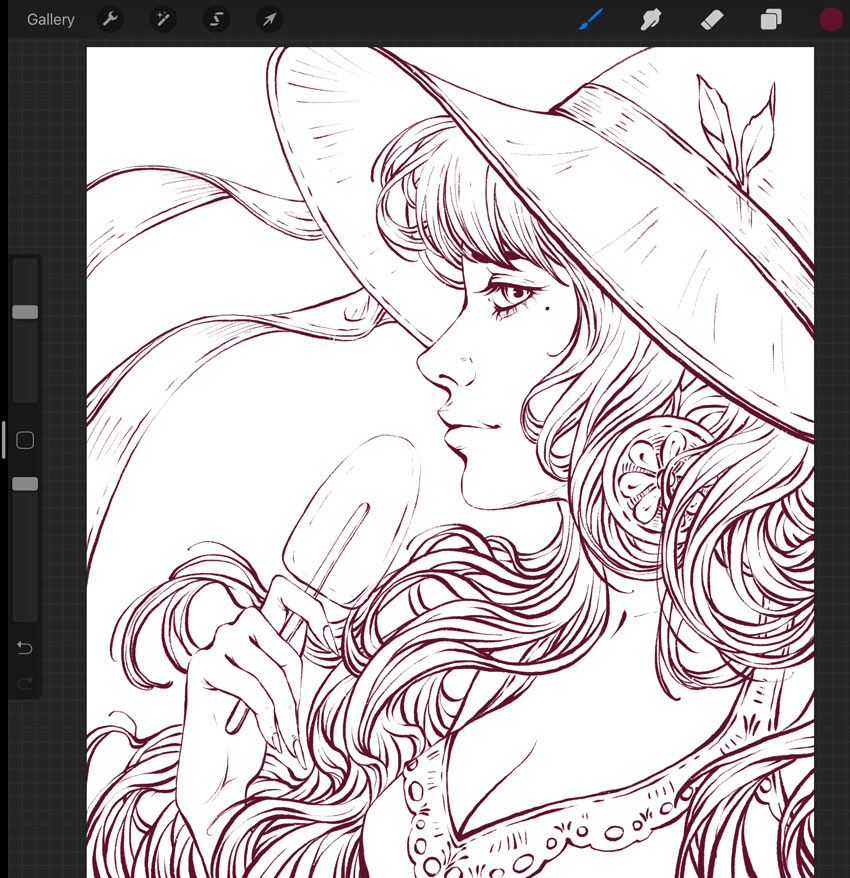
Finish your line art by adding some necessary details, decoration, and small, thin strokes.
3. How to Create the Main Shapes
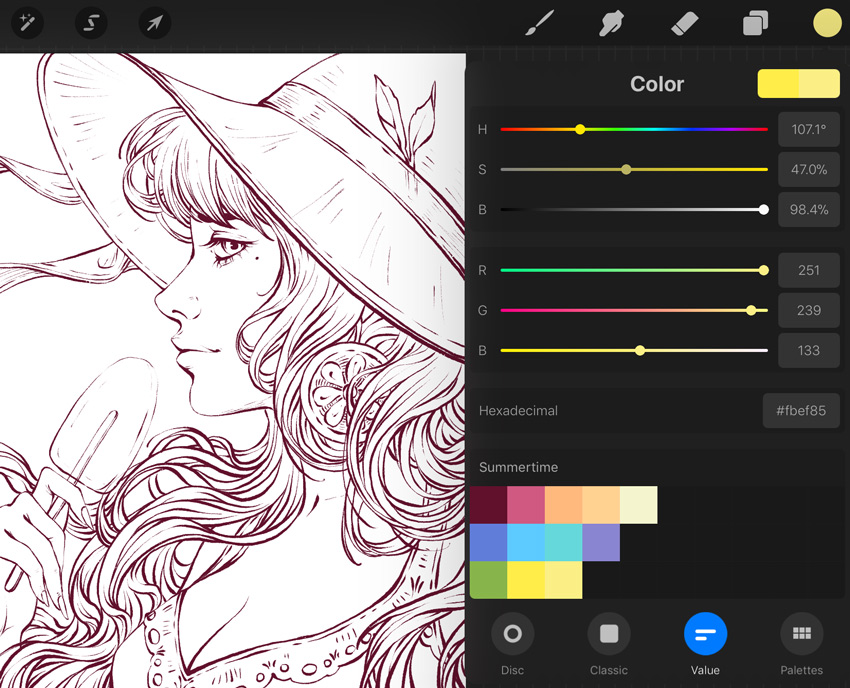
Step 1
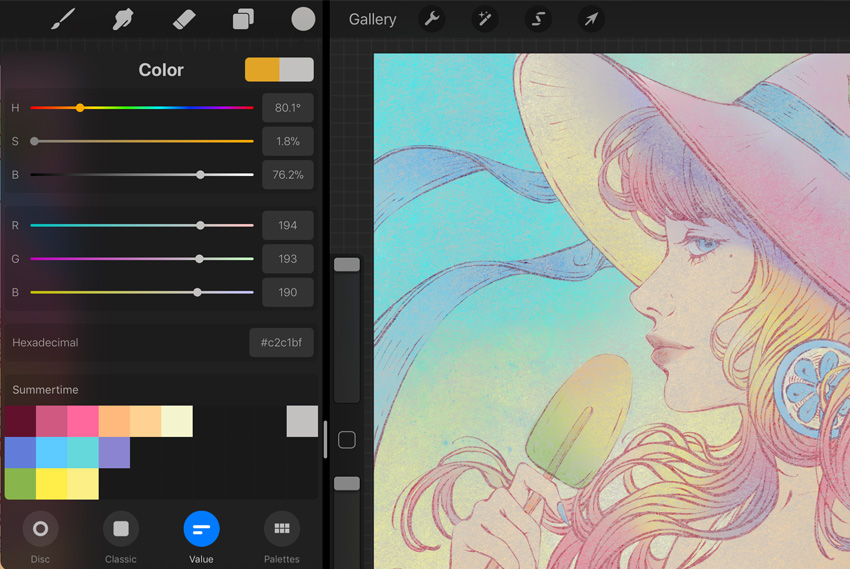
First let’s create the Palette of the basic colors.
We have the Colors menu in the top right corner, where we can select the color.
Click on the (+) icon to Create a New Palette, and a new area with empty boxes for our new palette will appear. Rename it “Summertime”.
Let’s add the color from the lines first. Pick the color and tap on any of the empty boxes, and it saves it. Tap on the boxes to create the colors for your palette, and tap on them to delete any of them.

This way we’ll create our own Palette. Basically, we’ll choose beautiful soft colors to create a summer mood.
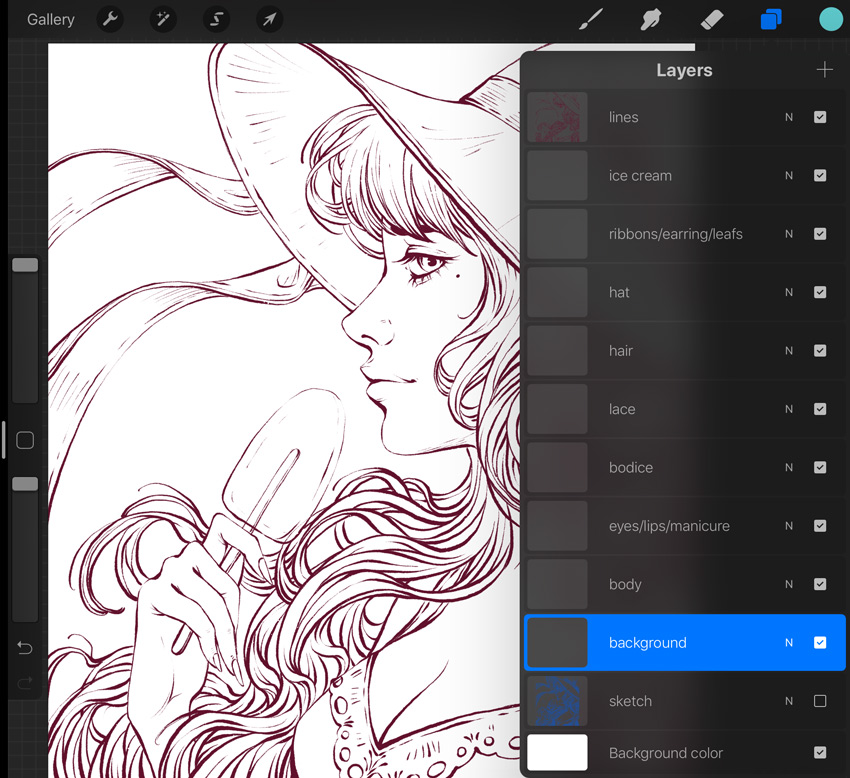
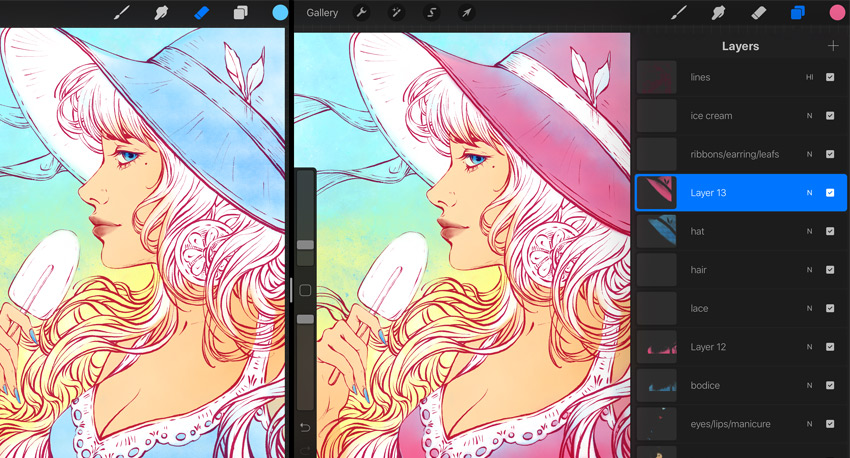
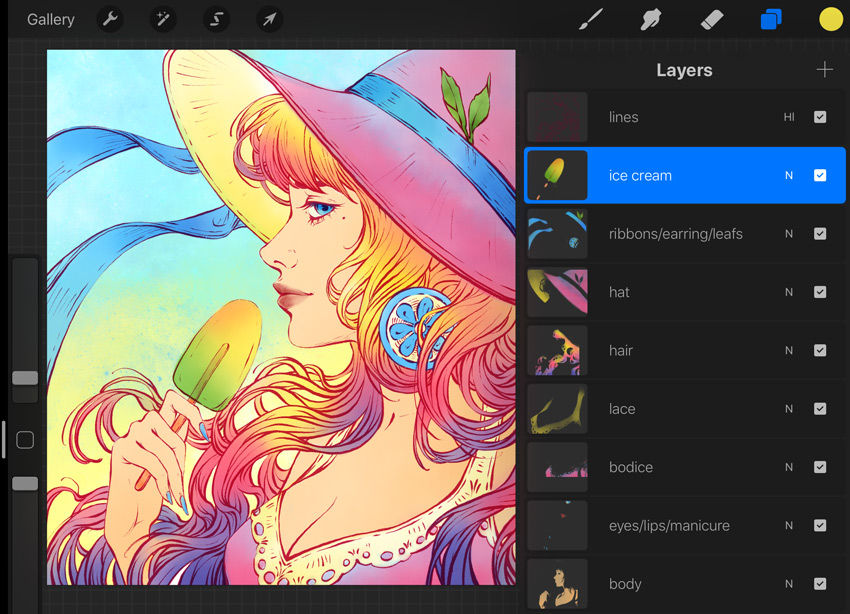
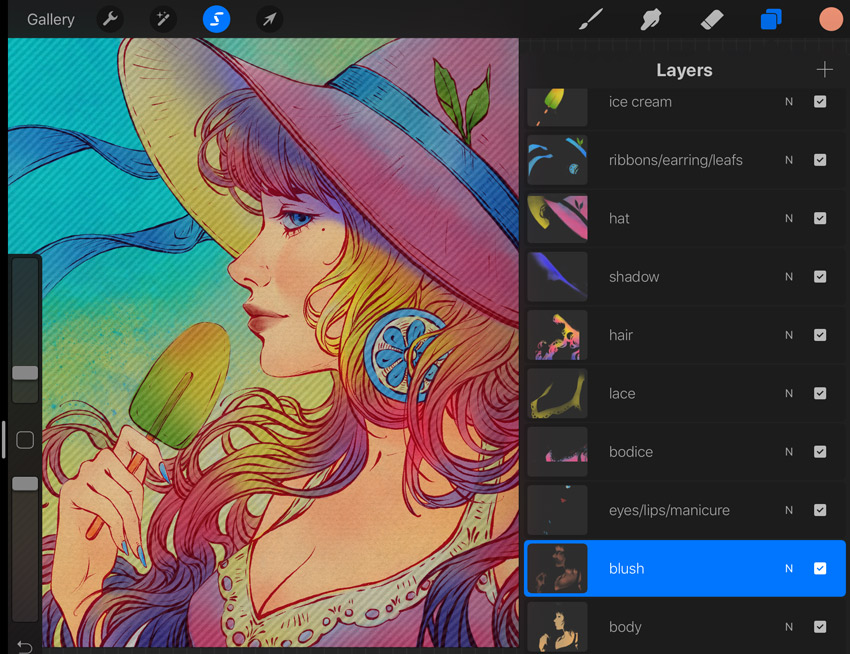
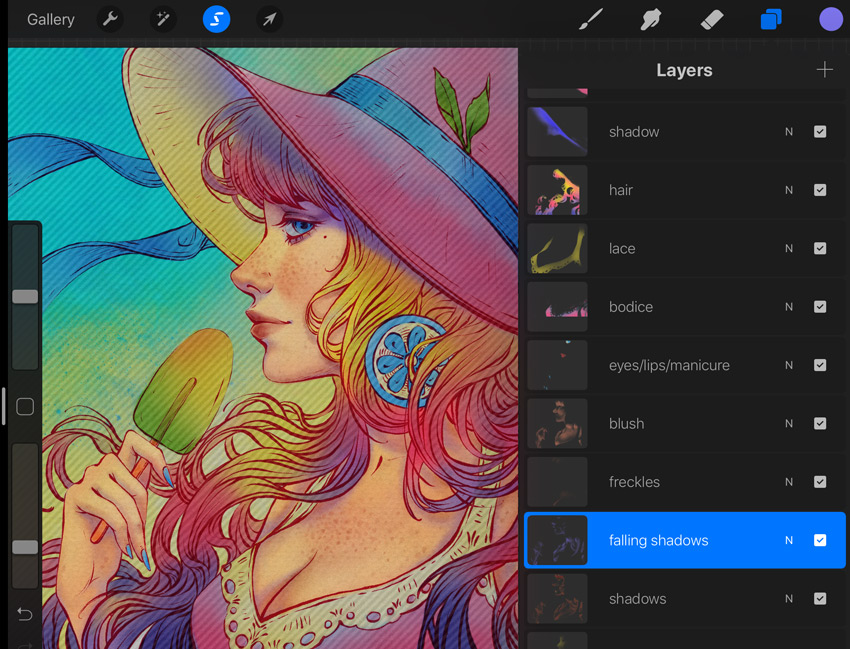
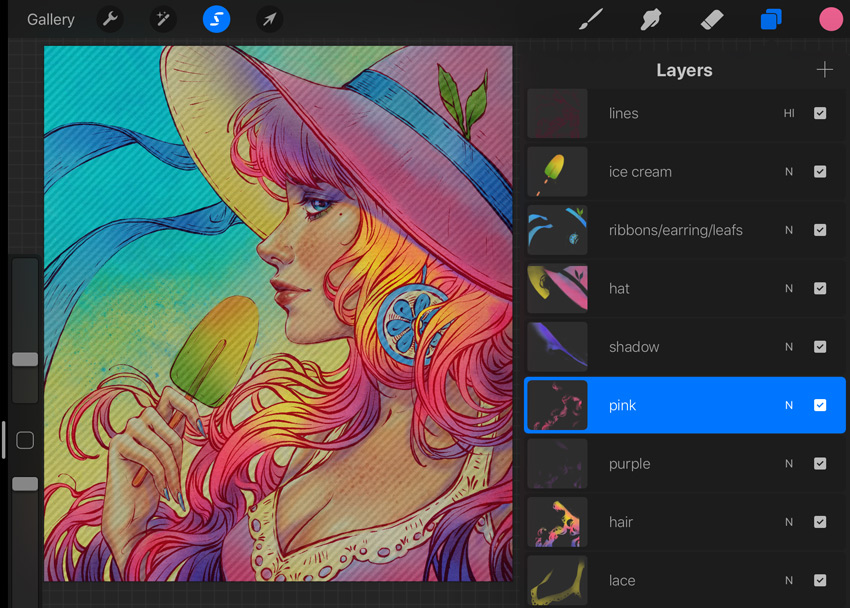
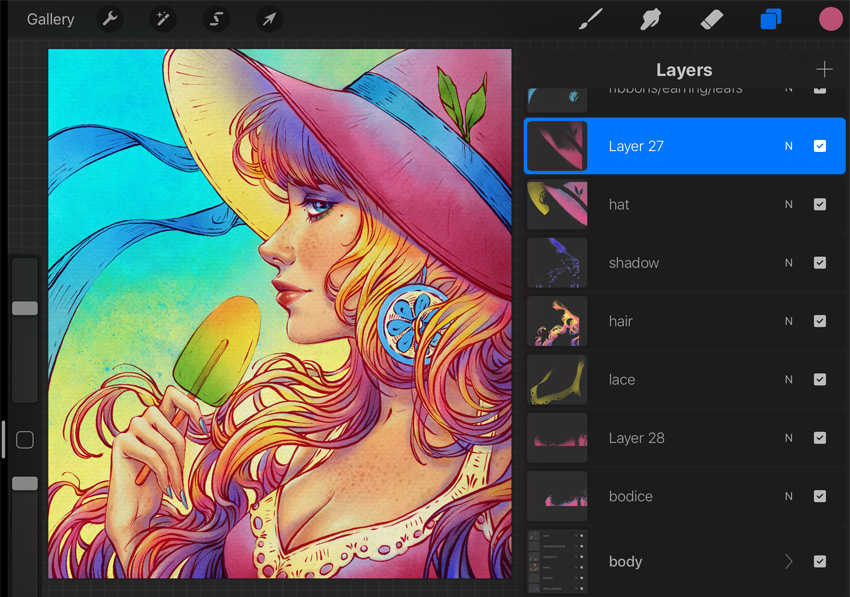
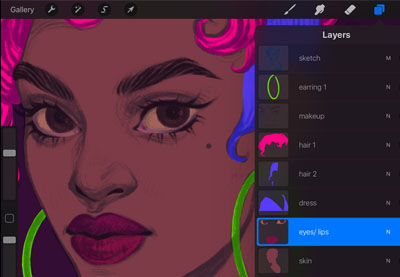
For a convenient work process, we’ll create separate layers for each part of our character. Organize the layers as shown in the screenshot below.
Step 2
Well, it’s time to begin painting.
Considering the gentle colors in our palette, let’s change the color of our line art a little bit. Just change the Blending Mode of this layer to Hard Light. In this way, the lower layers with basic colors will give new tints to the lines.

Step 3
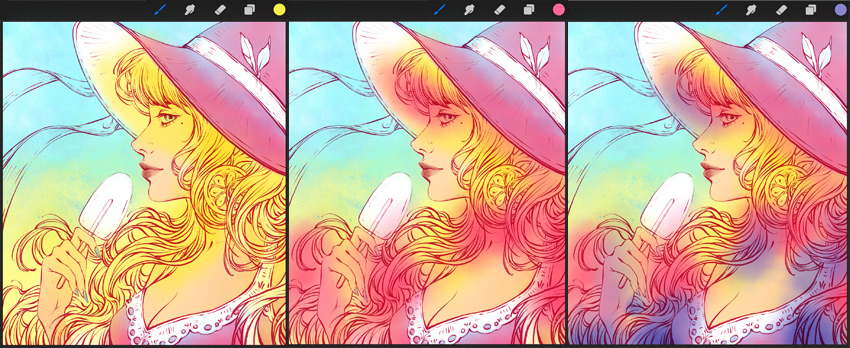
Let’s start by filling the background with basic colors.
Pick a new brush, Nebula, from the Luminance set, and modify it by changing the Size and Opacity Limits to Max.
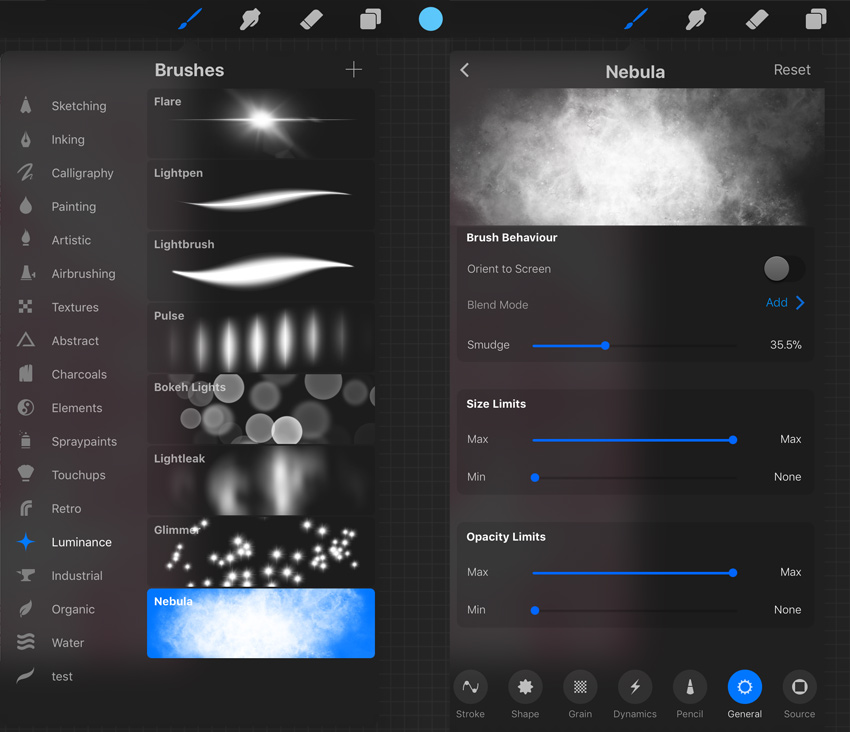
Choose a blue color from our Palette to add some mistiness to the upper part of the canvas.
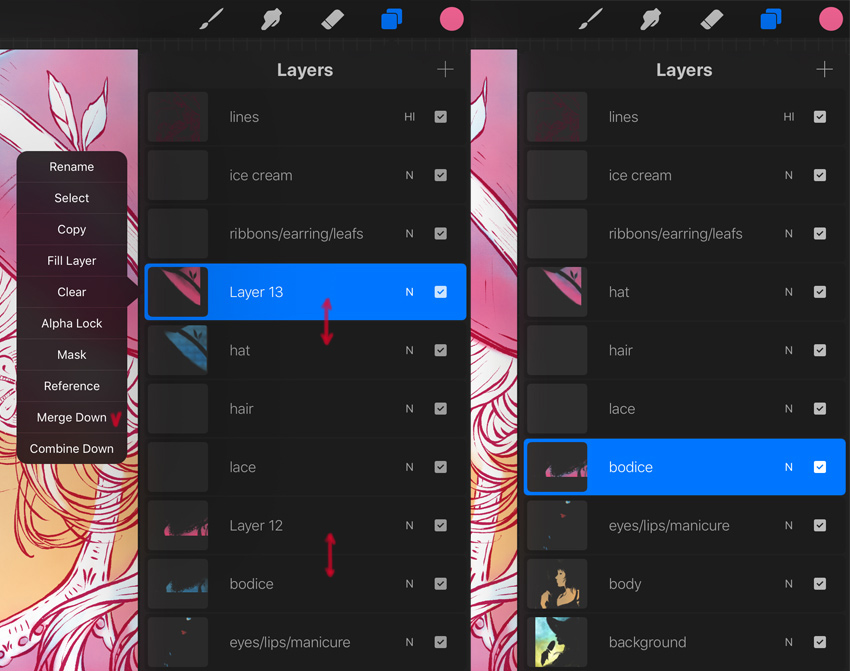
Now create a New Layer under the “background” layer, and add some yellow splashes as well.
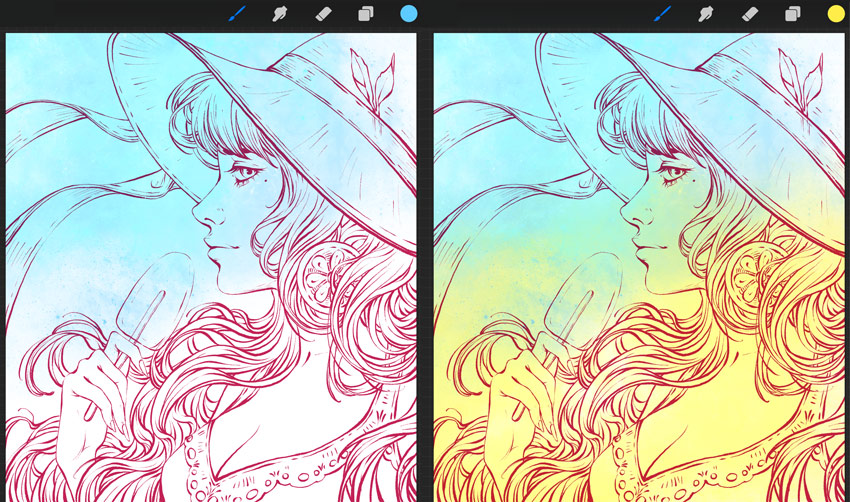
Let’s merge these layers now. Tap on the top background layer and choose Merge Down from the drop-down list. Or you can take the two layers (one finger on one, and one finger on the other) and squeeze them together.
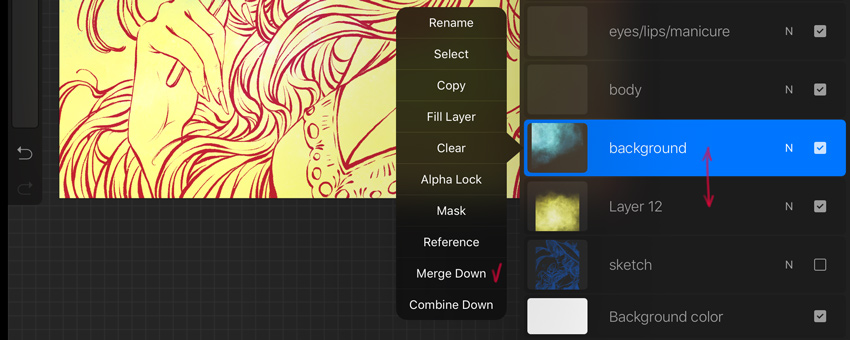
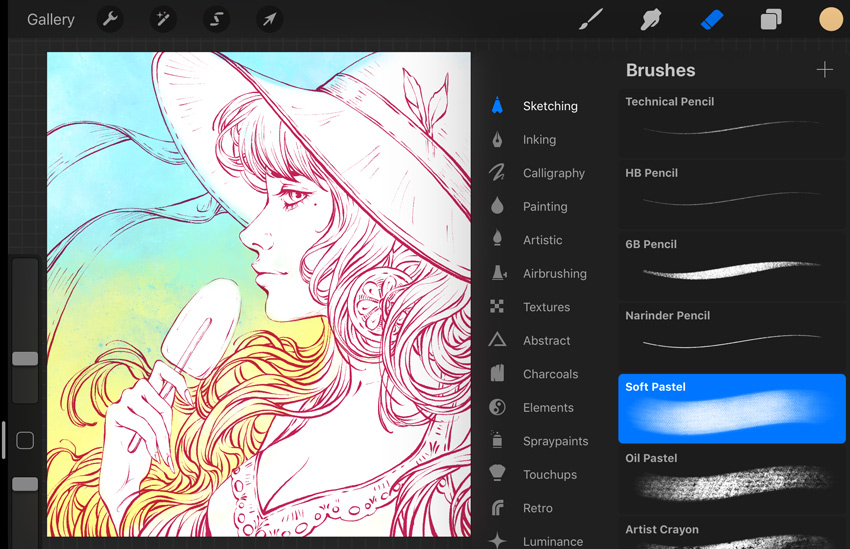
Pick the Eraser Tool to delete the background color from our character. Choose the Soft Pastel brush as an eraser.
Step 4
Let’s find a cool brush for the painting.
Go to Brushes > Water > Wash and pick a skin tone color from our Palette.
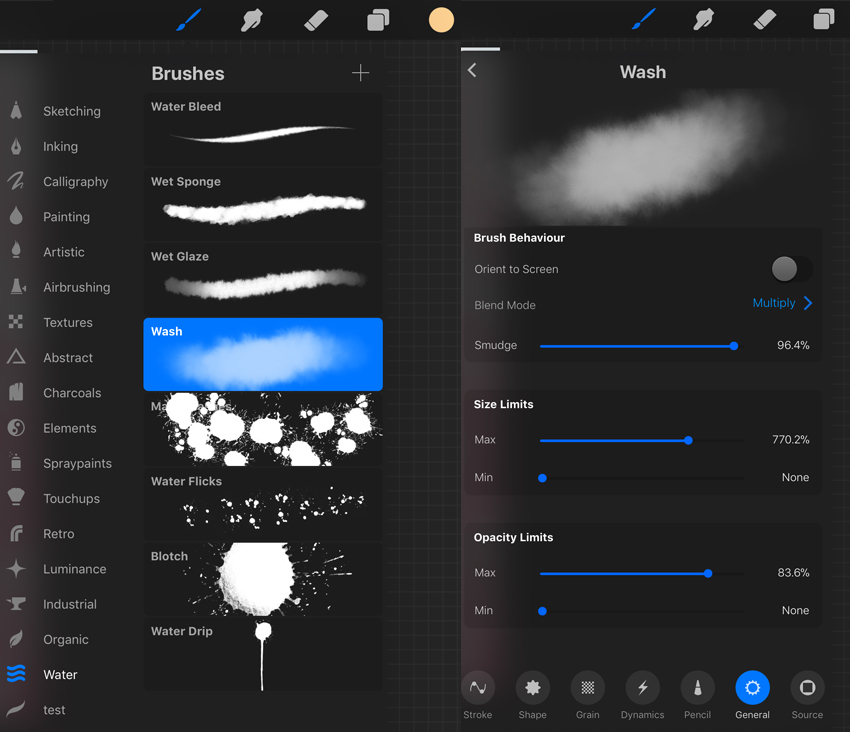
Now use the Max Size of the brush and fill the face, body, and hand with color. Clean the area around the body using the Eraser Tool. In the end, add some colors to the eyes, lips, and nails.
Step 5
Now we’ll work by switching between the “hat” and “bodice” layers.
First, add a light blue tint to the bodice and the outer side of the hat. Then create the New Layers on top and add some pink strokes. Clean the lace and ribbon areas.
Once we’re happy with the result, we can merge these layers.
Step 6
Using the same principle, we’ll color the hair.
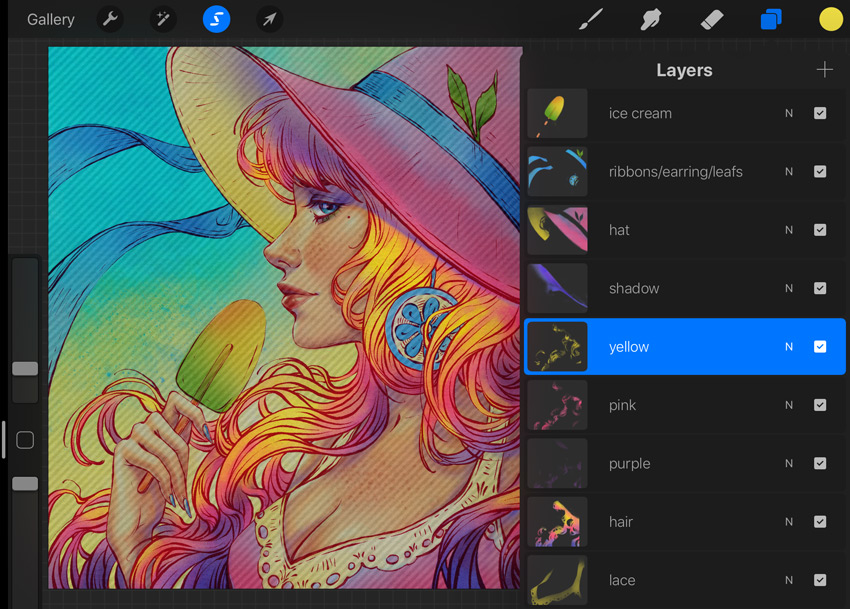
First, fill the upper part of the hairstyle with yellow. Then create a New Layer on top of the “hair” layer, and add some pink spots. Now create a New Layer again, and add some medium purple color to the edges.
Now we can merge these three layers into one.
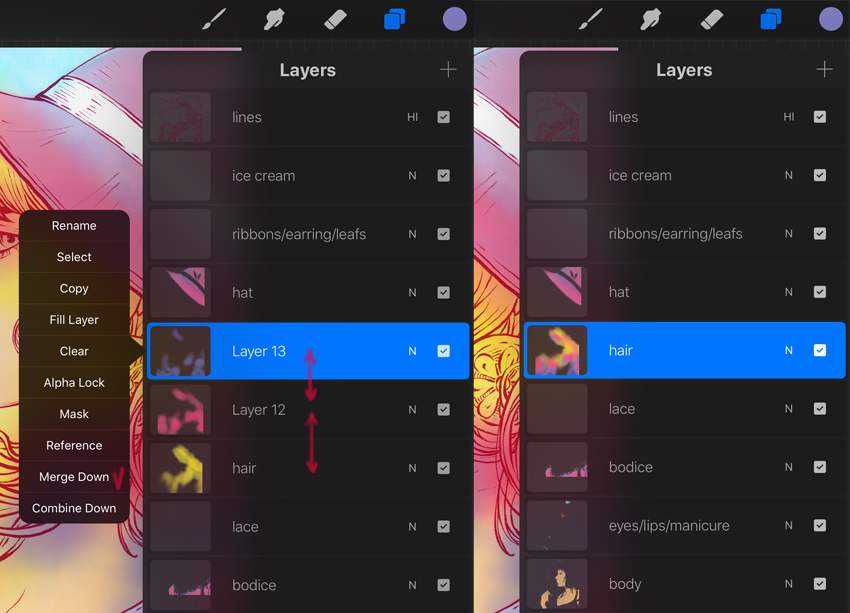
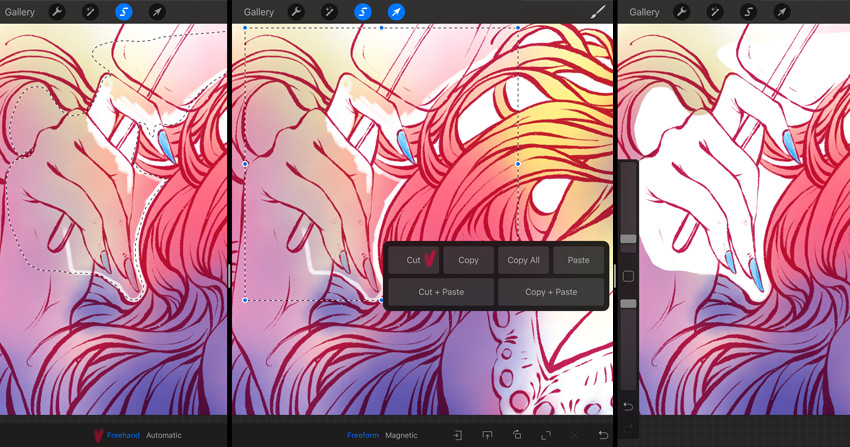
In the end, we need to clean the area around the hairstyle. We can use the Eraser Tool, as we did before. But in this case I find the Selection Tool is a more convenient method.
Tap the Selection Tool, and make sure it’s on Freehand. Draw the shape on the area you need to delete. Then tap Transform, which is next in the top panel, swipe down with three fingers, and the menu will appear. Choose Cut, and you’ll get an absolutely clean area.
Step 7
Using the same coloring method, fill the rest of the details with colors.
Step 8
Let’s add a falling shadow from the hat.
Create a New Layer under the “hat” layer. Pick a medium purple color and draw the shape on top of the inner part of the hat, fringe, and forehead. Refine the edges using the Eraser Tool.
Step 9
In the end, let’s make our background a little more saturated. On a New Layer on top of the “background”, draw a big blue shape, and set the Blending Mode to Color Burn.
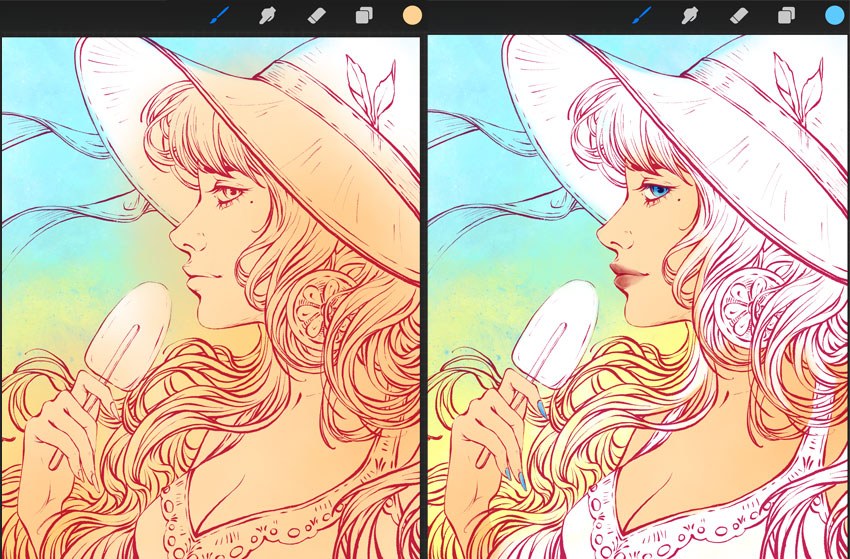
And here’s what we’ve got at this stage.
4. How to Create the Paper Texture Brush
Step 1
It’s not so difficult to make a cool custom brush in Procreate.
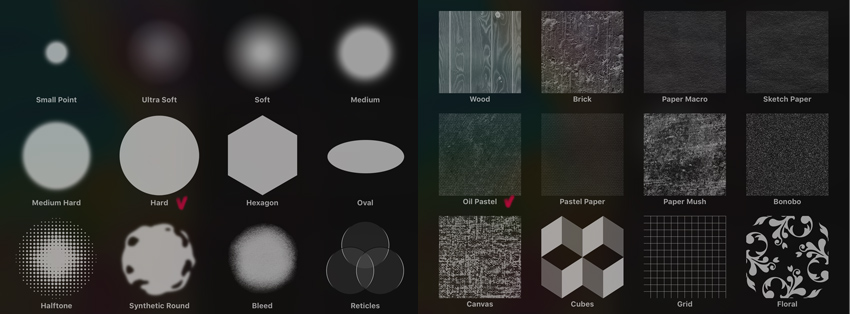
First, choose any set of brushes you like to create a new brush. My choice is the Textures set because it’s very suitable for texture brushes.
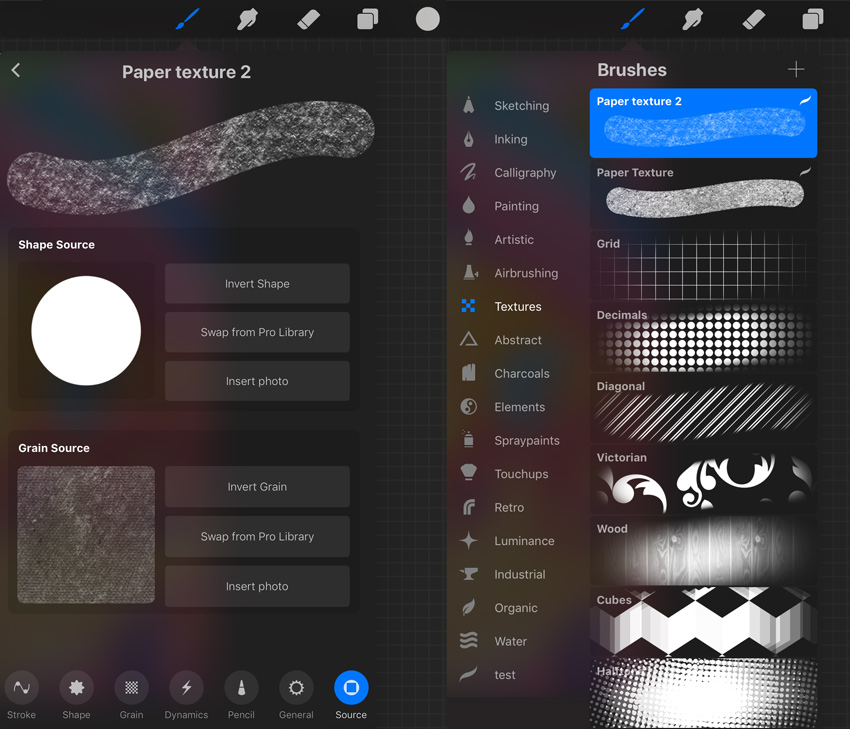
Start by tapping the (+) icon in the top-right corner of the brush list to create your New Brush. The menu with sources will appear.
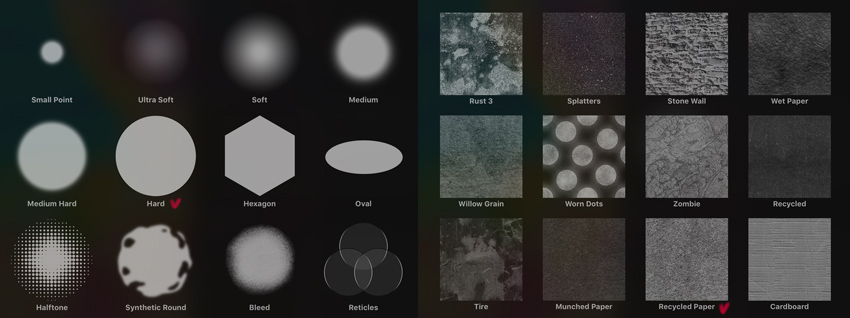
For the Shape, tap Swap from Pro Library and choose the Hard circle. For the Grain, tap Swap from Pro Library and choose the Recycled Paper texture.
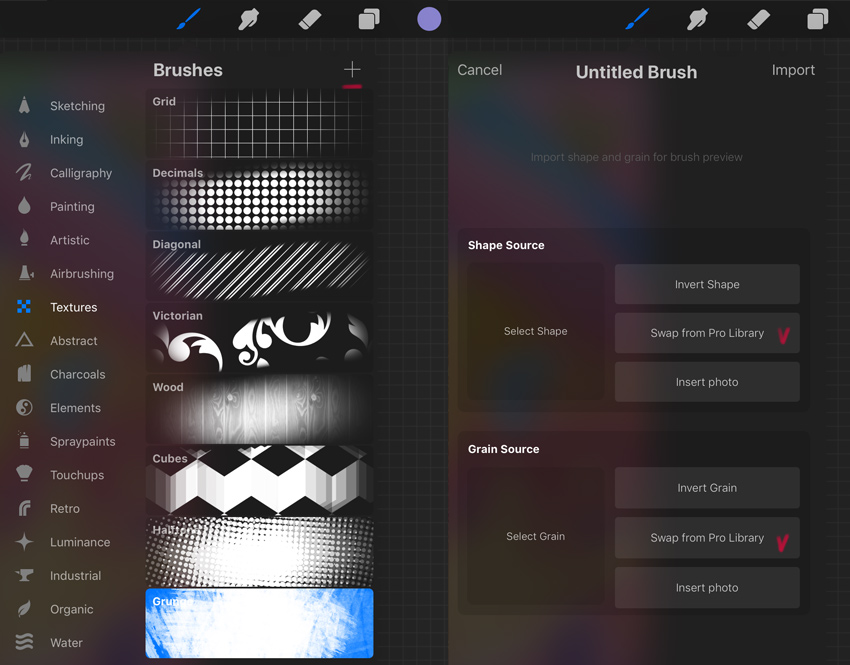
Rename it “Paper Texture”.
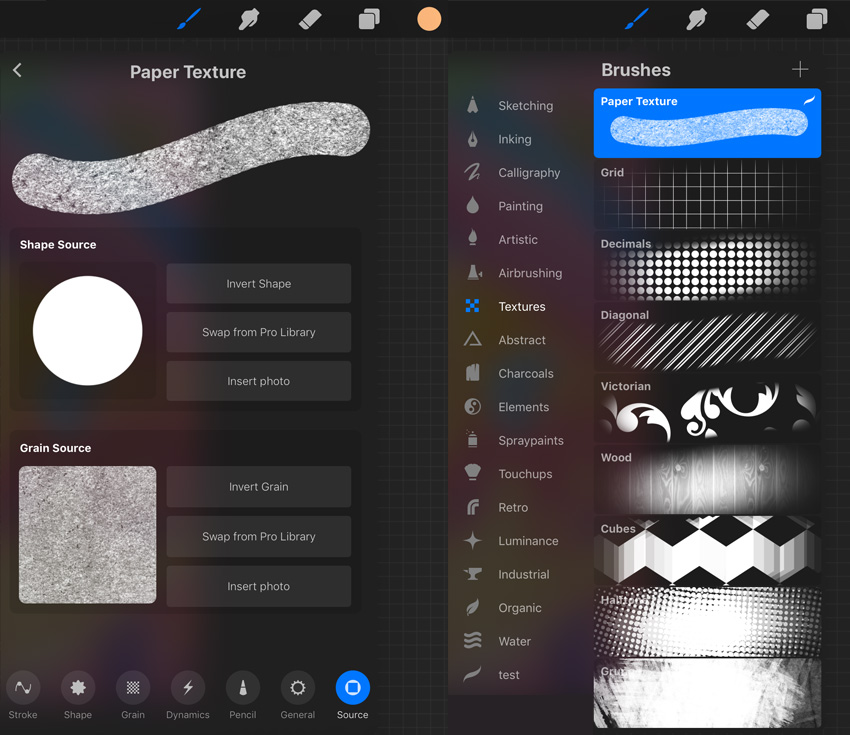
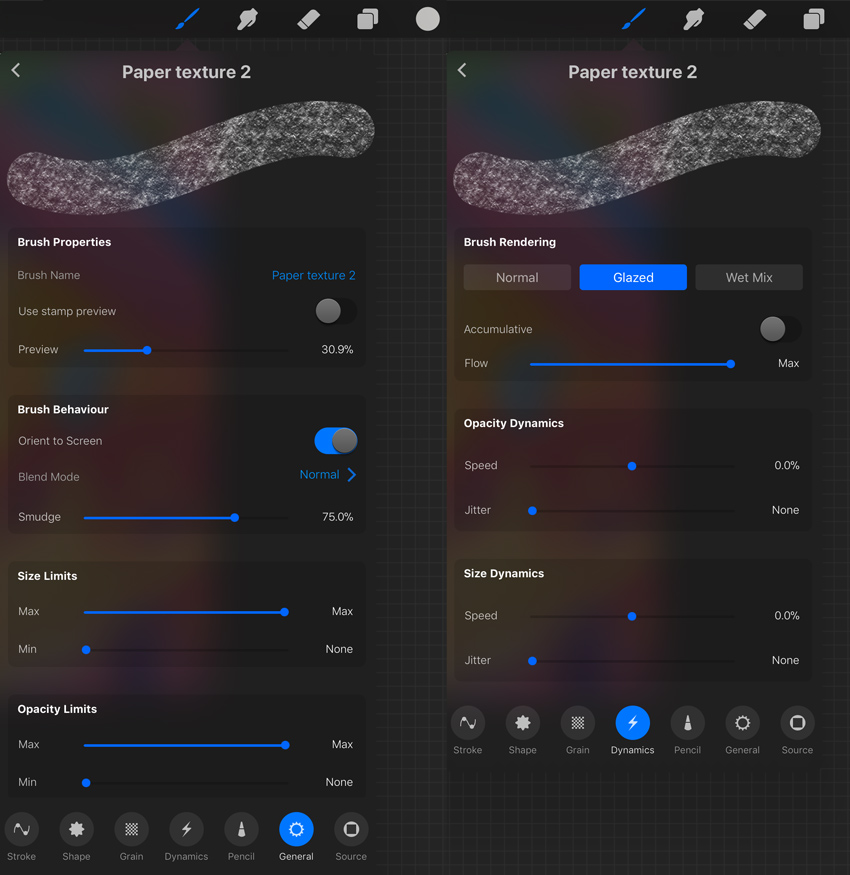
Open the General settings, and set the Size Limit to Max.
In the Dynamics settings, set the brush to Glazed.
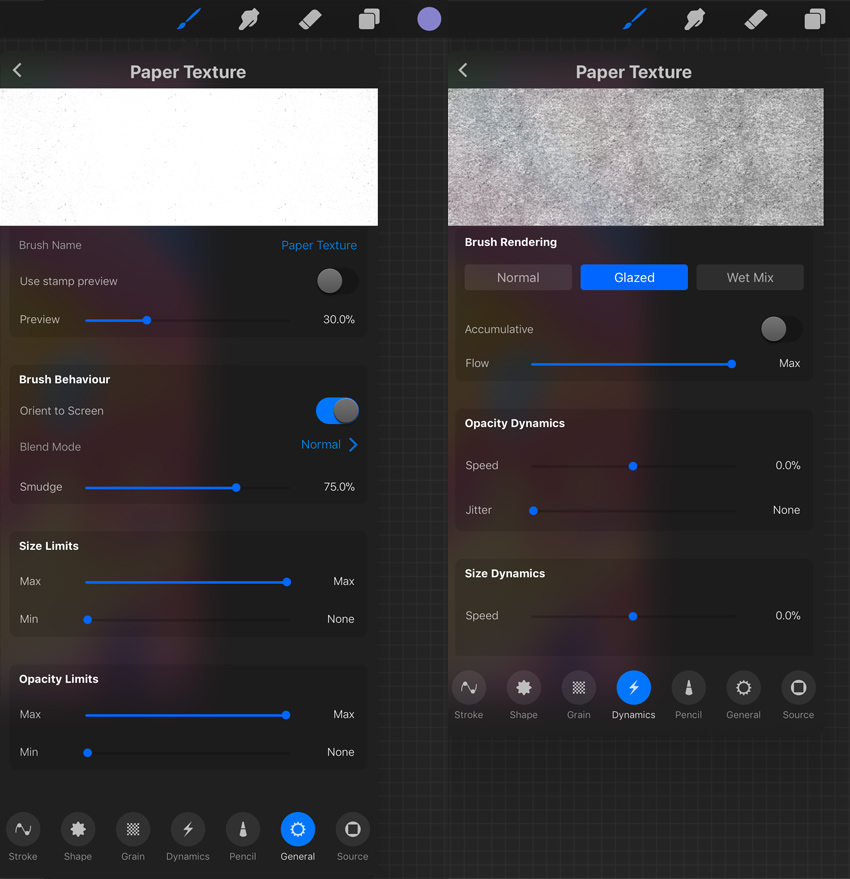
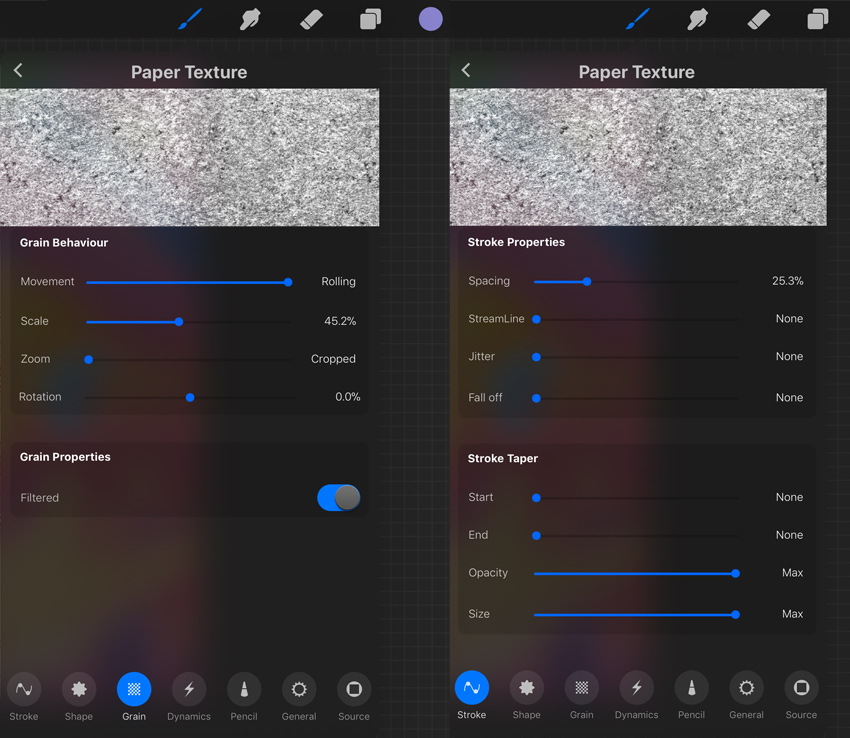
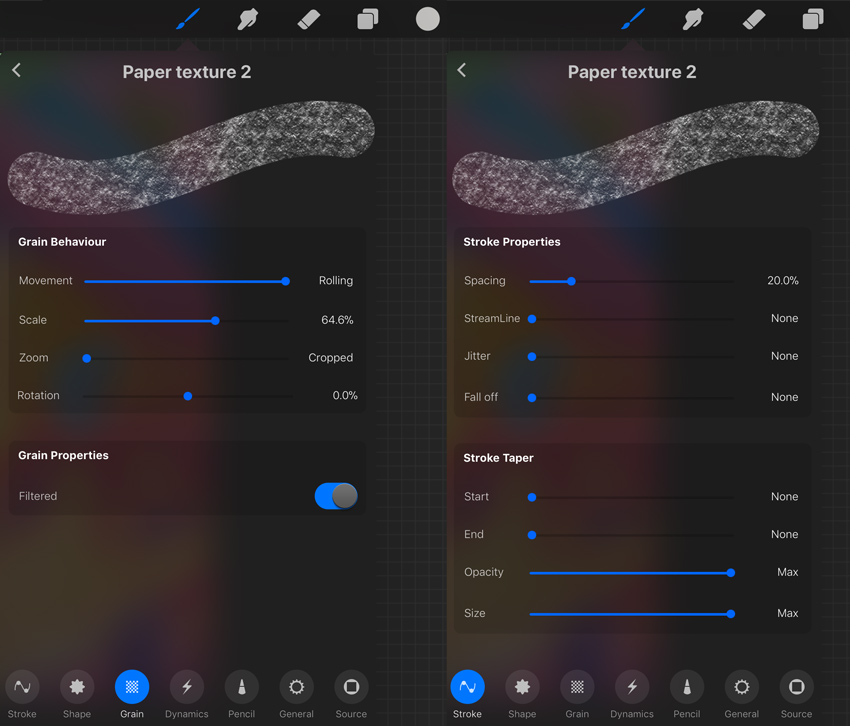
In the Grain settings, set the Scale to about 45%.
In the Stroke settings, change the Spacing to about 25%.
Now we can use our new Paper Texture brush.
Create a New Layer on top of the “lines”, and rename it “Paper”.
Choose a pale grey color. You can add it to your Palette to save this color. Increase the brush Size to the max. Now drive the brush back and forth across the canvas area without lifting the stylus off the surface. You’ll get a layer filled with texture.
Change the Blending Mode of this layer to Multiply, and drop the Opacity to 40%.
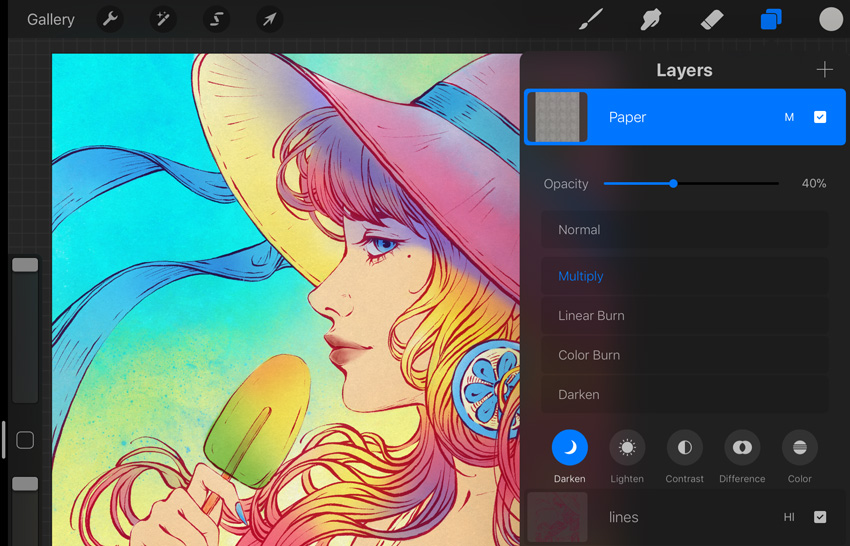
Now create a New Layer under the “Paper” layer, and rename it “Paper 2”.
Fill it with texture too, and change the Blending Mode to Color Burn, 60% Opacity.

Step 2
Using the same method, let’s create another texture brush.
For the Shape, choose Hard circle from the Pro Library as well. For the Grain, choose the Oil Pastel texture.
Rename it “Paper Texture 2”.
In the General settings, set the Size Limit to Max.
In the Dynamics, set the brush to Glazed.
In the Grain settings, set the Scale to about 65%.
In the Stroke settings, change the Spacing to about 20%.
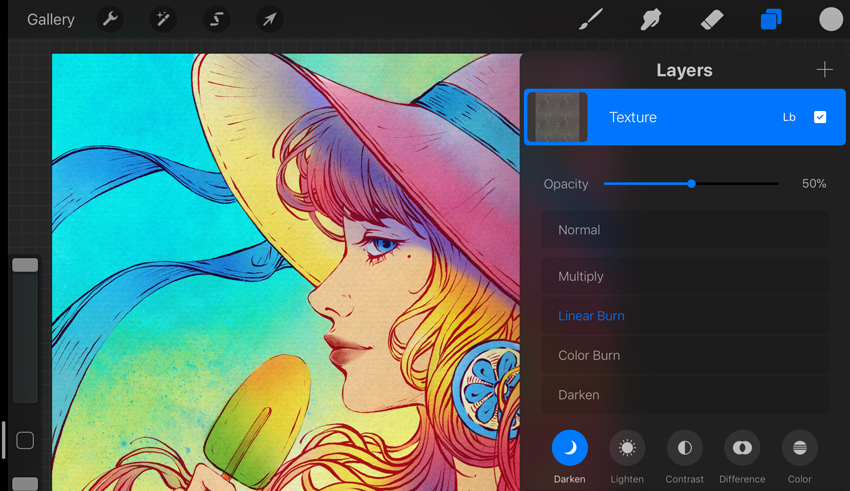
Now create a New Layer on top of “Paper”, and rename it “Texture”.
Choose a pale grey color from your Palette. Fill this layer with texture using your new brush, setting the brush Size to the max.
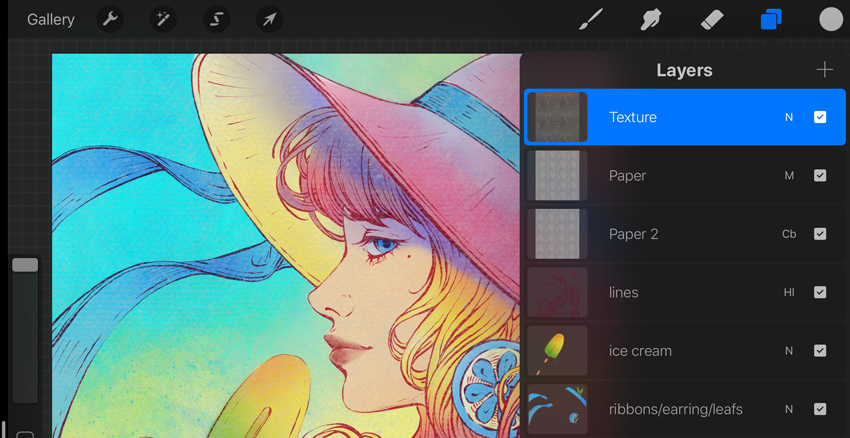
Change the Blending Mode of this layer to Linear Burn. Reduce the Opacity to about 50%. You can play around with the Opacity until you’re happy with how it looks.
Step 3
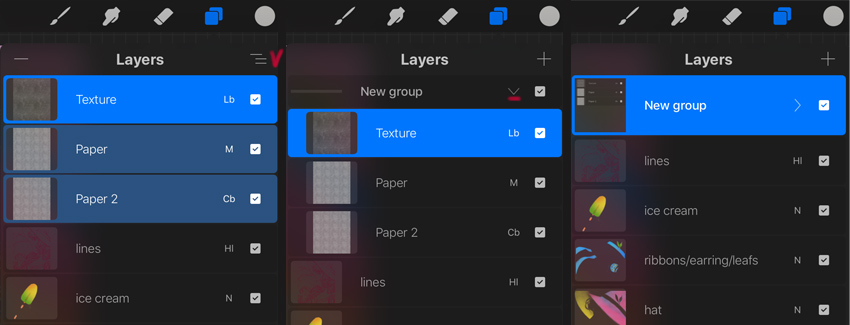
In the end, let’s create a Layers Folder or Group with our textures.
Drag your layers with textures from left to right to select them. Then tap the lines in the top right, and you’ll get the New Group with your layers.
You can open or close this folder—just tap the little arrow in front of the group name.
Step 4
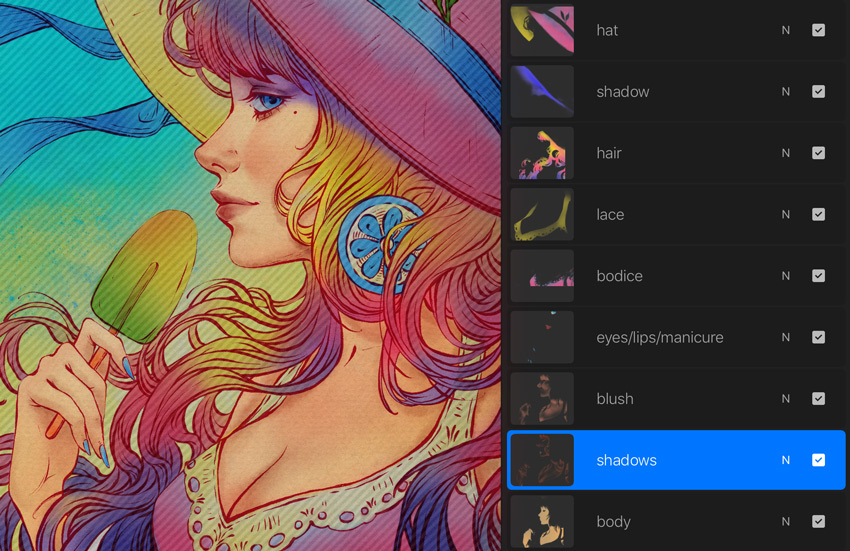
And here’s what we’ve got at this stage. Looks pretty good already, right?

5. How to Add Shadows and Highlights
Step 1
It’s time to draw the beautiful face of our character. Let’s add some blush to the skin first.
Create a New Layer for the blush on top of the “body” layer. Then tap on the “body” layer and choose Select from the drop-down list. It will allow us to draw on the “blush” layer just inside the body shape.
Use the same Wash brush from the Water set and peach color to draw some blush on the cheeks, nose, chest, and fingers. You can vary the brush Size and Opacity in the process as you like.
Step 2
Create a New Layer for the shadows between the “body” and “blush” layers. Now select a light brown color and choose the Water Brush from the Painting set.

Start creating subtle shadows by making strokes on the shadowy area. Change the brush Size and Opacity in the process until you get the desired result.
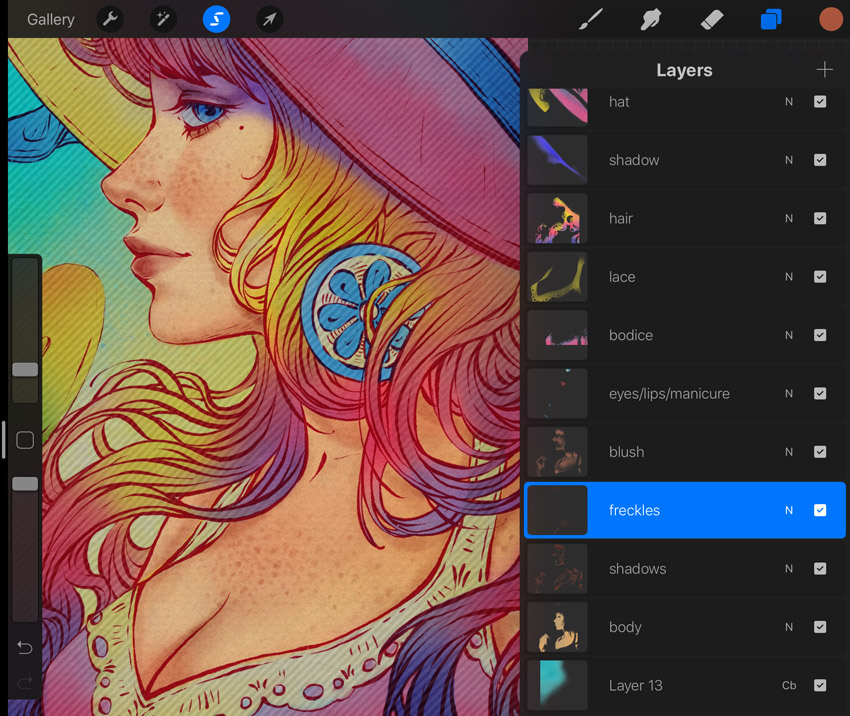
Create a New Layer on top of the “shadows”. Using the same brush and color, add some freckles to the nose, cheeks, and chest. Vary the brush Size around 5–15% in the process.
Step 3
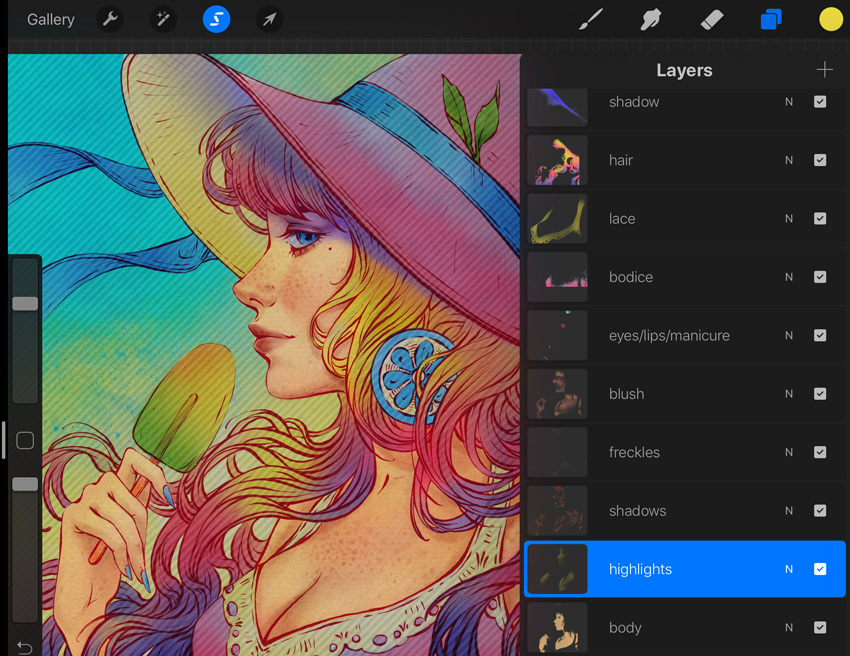
Create a New Layer on top of the “body” layer, and rename it “highlights”. Pick a yellow color from our Palette, and paint some highlight strokes using the Wash brush.
Step 4
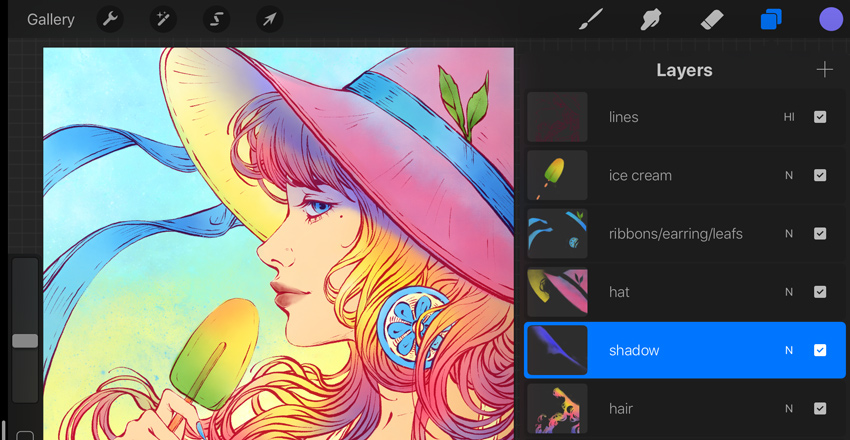
Let’s add the falling shadows. Use the Water Brush here. Pick a medium purple color and draw shadows under the eye, nose, lips, fingers, and hair curls. Vary the brush Size and Opacity in the process.
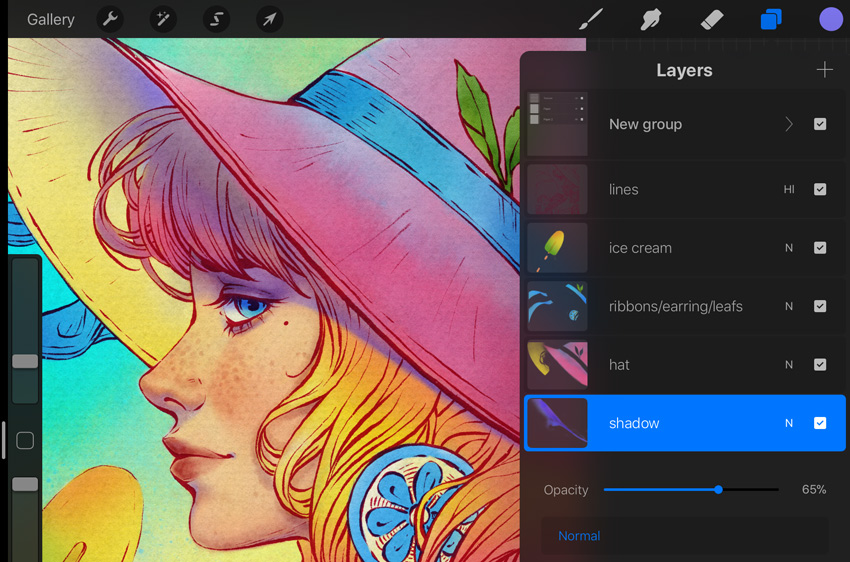
Let’s go back to the “shadow” layer, which is under “hat”. Reduce the Opacity of the layer to about 65%. Refine the shadow shape a little using the Eraser Tool.
Step 5
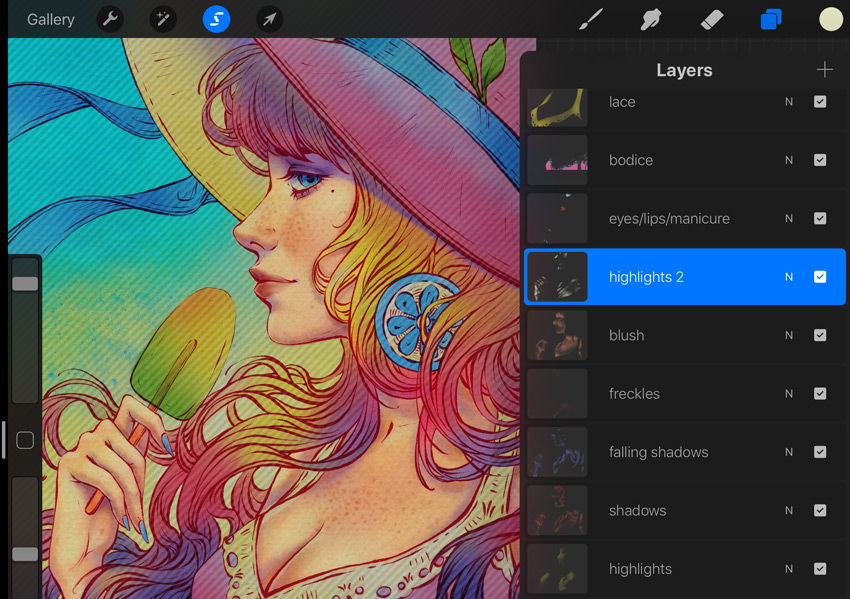
Now let’s add some highlights to the lightened area.
Create a New Layer on top of the “blush”, and rename it “highlights 2”. Pick a pale yellow color from our Palette, and add some bright highlights using the same Water Brush.
Step 6
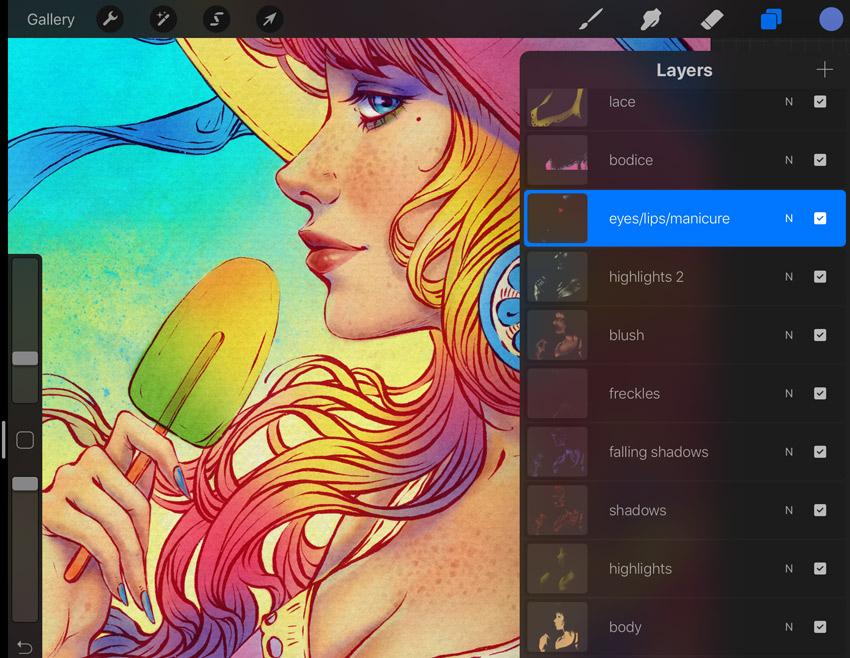
Now we’ll get to work on the “eyes/lips/manicure” layer. Add some volume and makeup to the eyes and lips. Use the Eraser Tool to create some twinkles on the lips and nails.
Step 7
Create a New Layer again for the glare. Draw some bright highlights and gloss using a pale yellow color from our Palette and the Soft Pastel brush from the Sketching set.
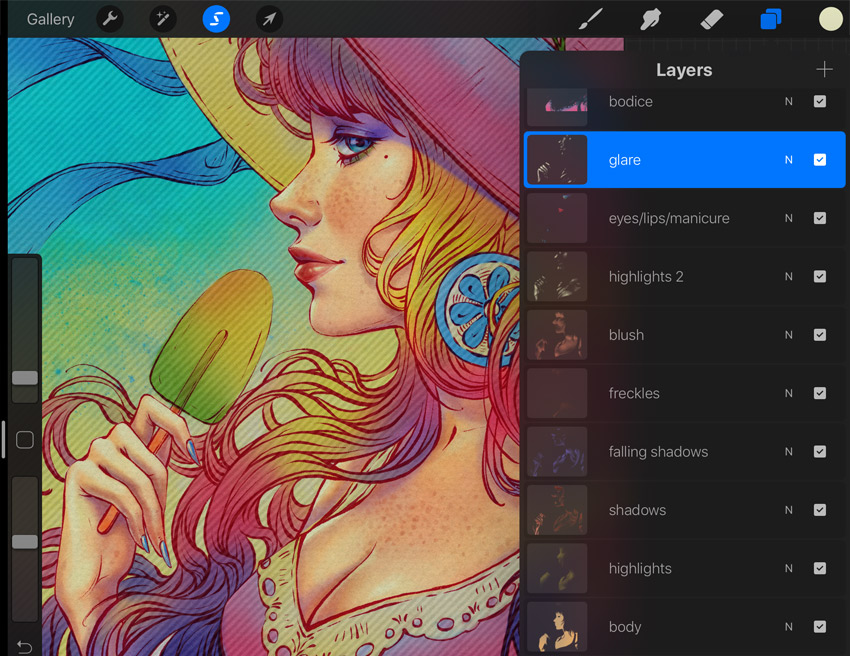
Step 8
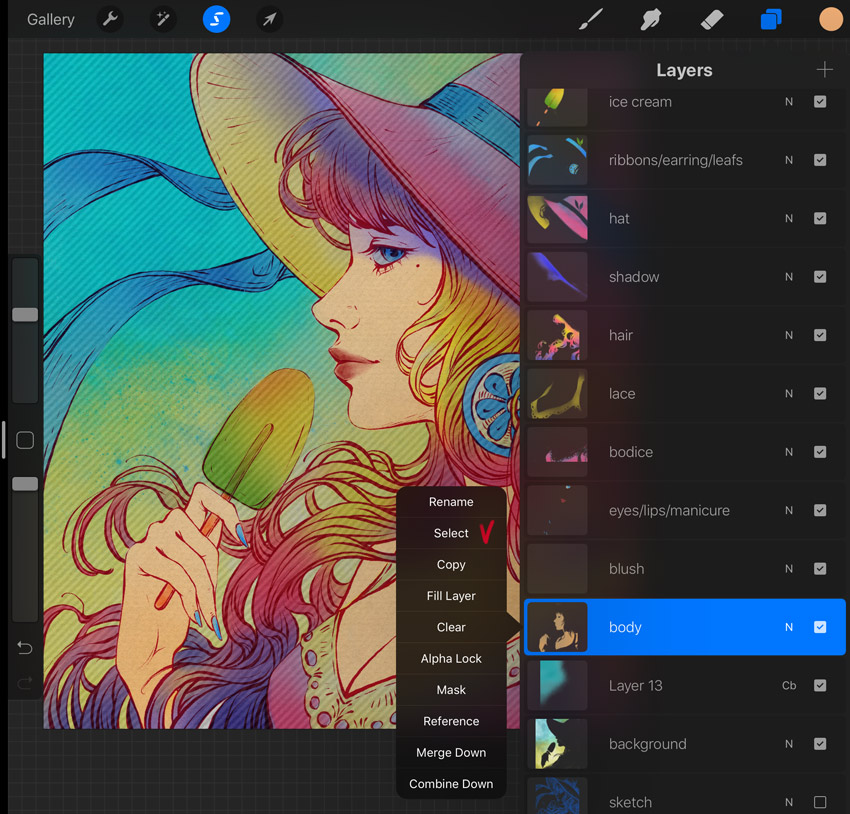
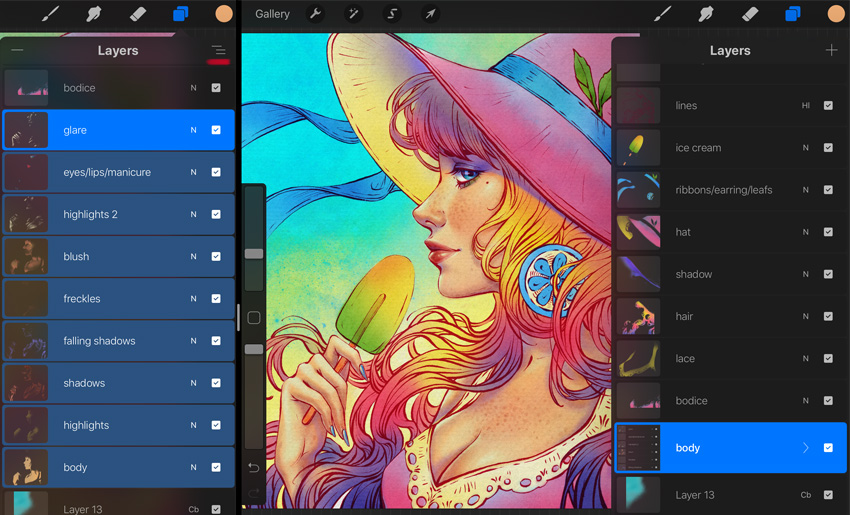
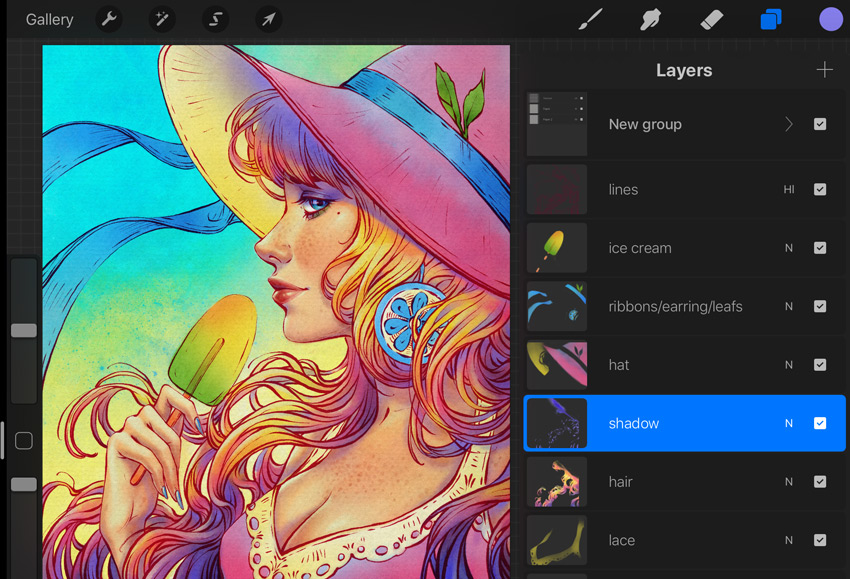
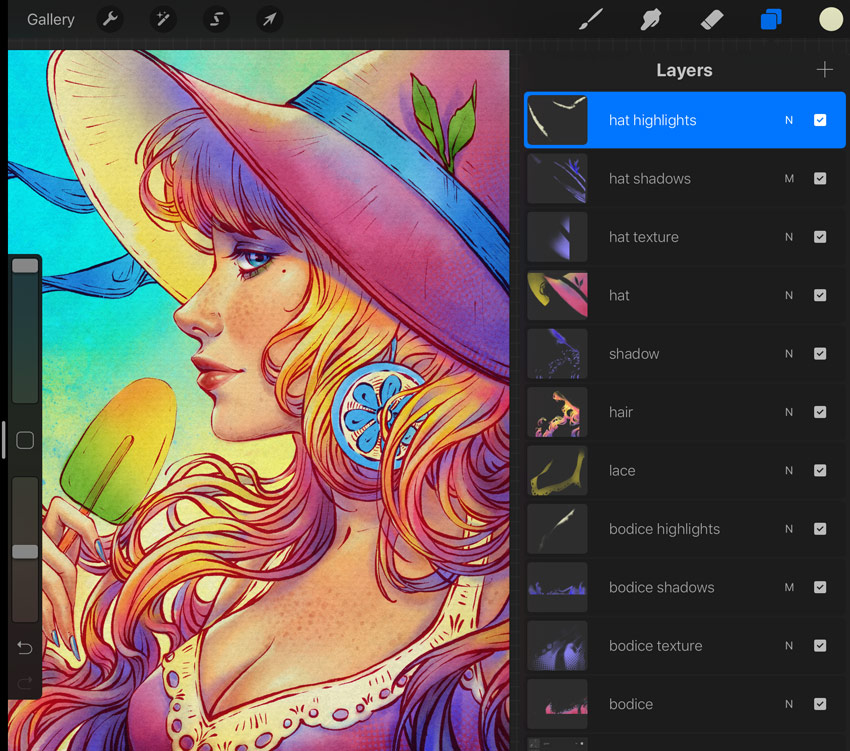
In the end, for a convenient work process, let’s create a Group with all body layers.
Select all these layers as we did before, tap the lines in the top right, and you’ll get the New Group. Rename it “body”.
Step 9
Let’s start forming the hairstyle.
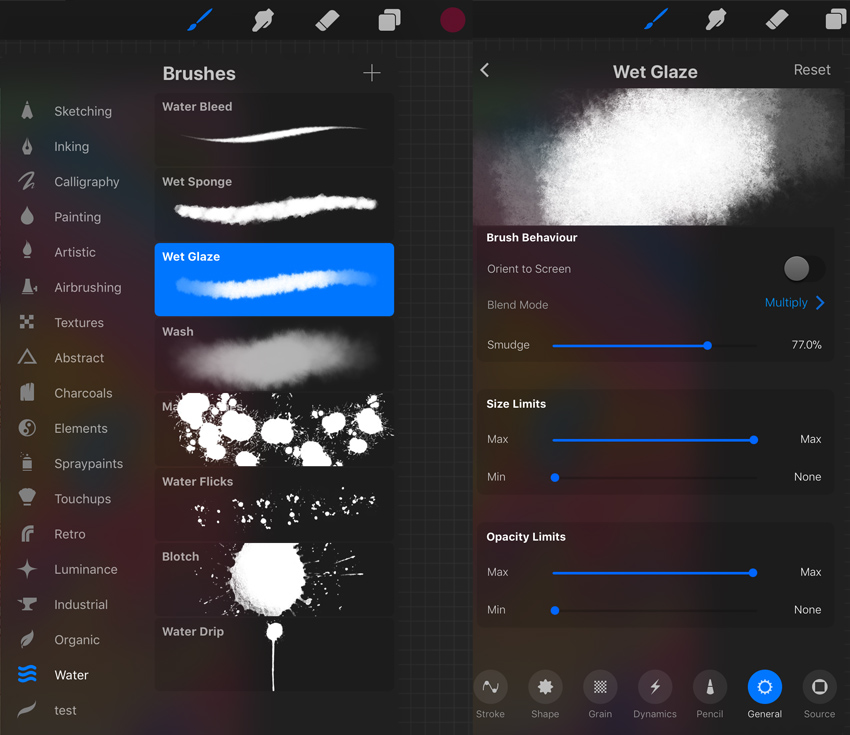
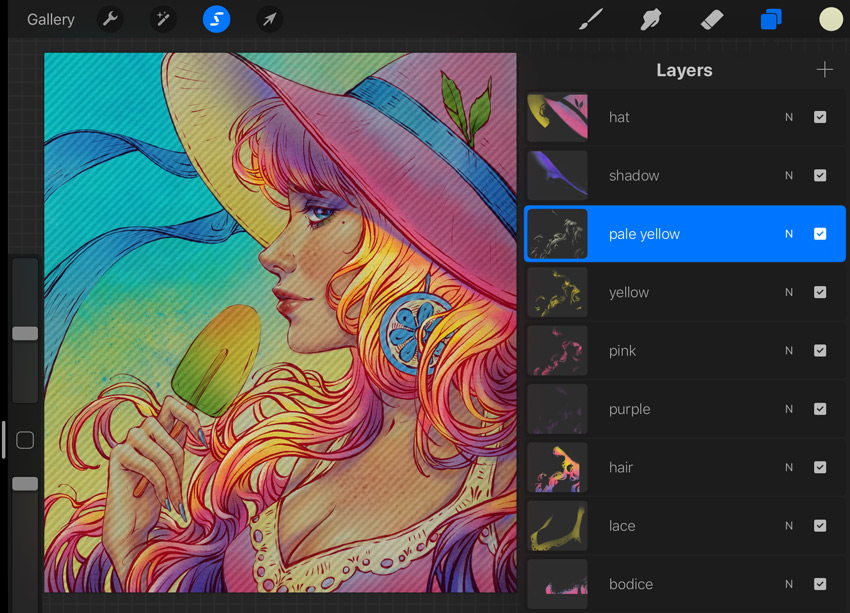
Choose a new Wet Glaze brush from the Water set. You can see all the brush settings in the screenshot below.
Select the “hair” layer, and create a New Layer on top of it. Draw some new purple strokes on the shadowy area of the curls, creating beautiful artistic spots.
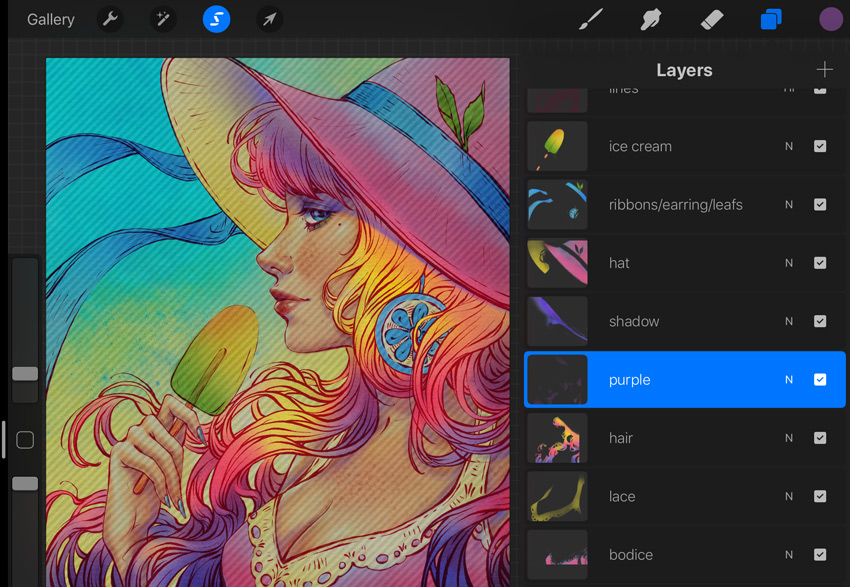
This way, draw some pink brush strokes on the New Layer. Feel free to place them in whatever manner you find best.
Create a New Layer again, and add some bright yellow spots too.
In the end, add some bright highlights to the hairstyle using a pale yellow color.
Now we can merge all these hairstyle layers into one.
Open the “shadow” layer, pick a medium purple color, and draw shadow shapes on the dark areas of the hair curls. Refine the edges using the Eraser Tool.
Step 10
It’s time to add some volume to the hat and bodice. We’ll work by switching between these two.
We’ll use the Wet Glaze brush from the Water set to get painting effects and an imitation of watercolor.
Create two New Layers: one on top of the “hat”, and another on top of the “bodice”. Pick your brush and draw some pink textured shapes for the shadows.
Create a New Layer again, and add some bright yellow strokes to the highlights area of the hat.
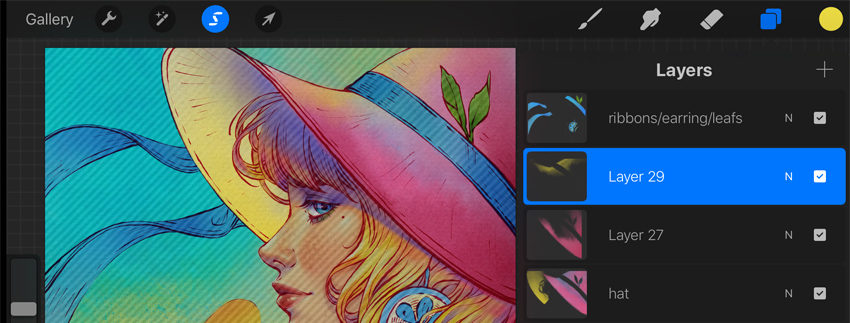
Now let’s add some texture to the fabric. Choose a new Halftone brush from the Textures set.
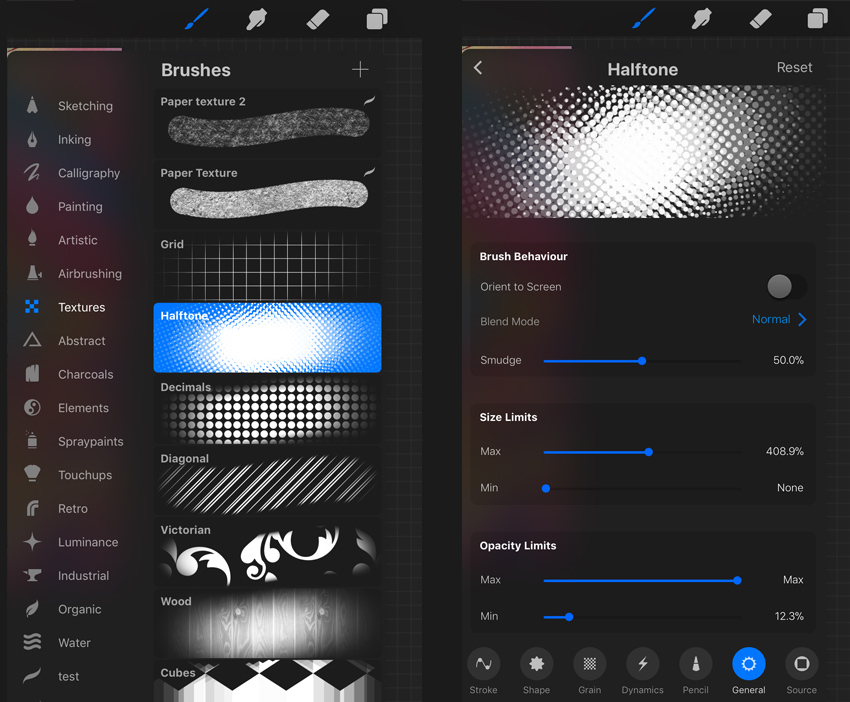
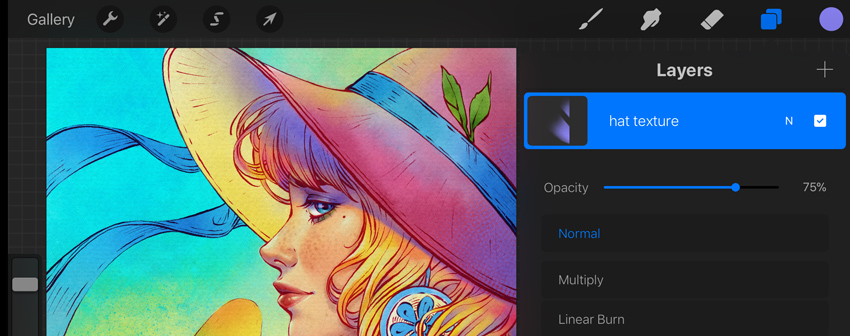
Create New Layers for the hat and bodice textures. Pick a medium purple color and draw some textured shapes on top of the dark parts of the hat and bodice.
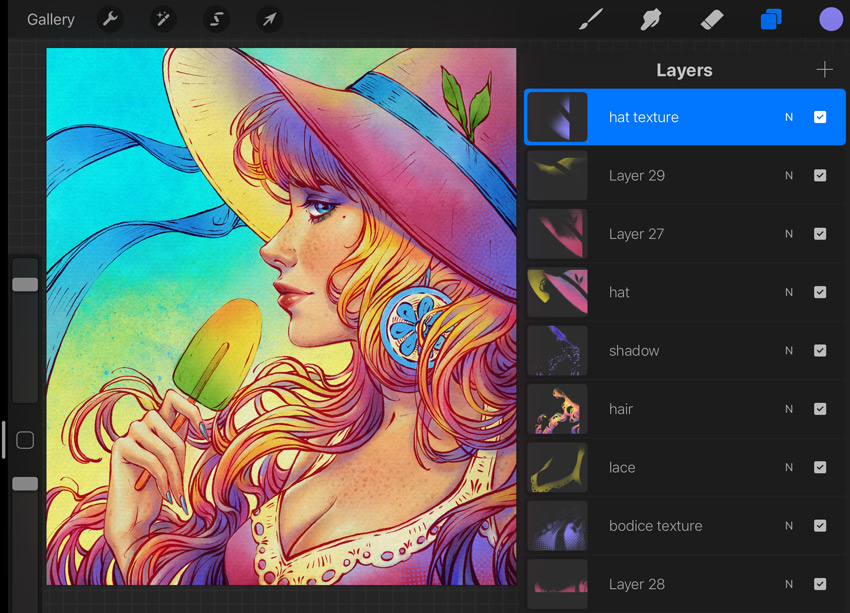
Reduce the Opacity of these layers to 75%.
Create New Layers for the hat and bodice shadows and highlights.
Use a medium purple color to draw some falling shadows from the ribbons and leaves on the hat, as well as from the lace and curls on the bodice. Set the Blending Mode to Multiply.
Then add some shapes of highlights using a pale yellow color from our Palette.
Step 11
Let’s add highlights and shadows to the accessories.
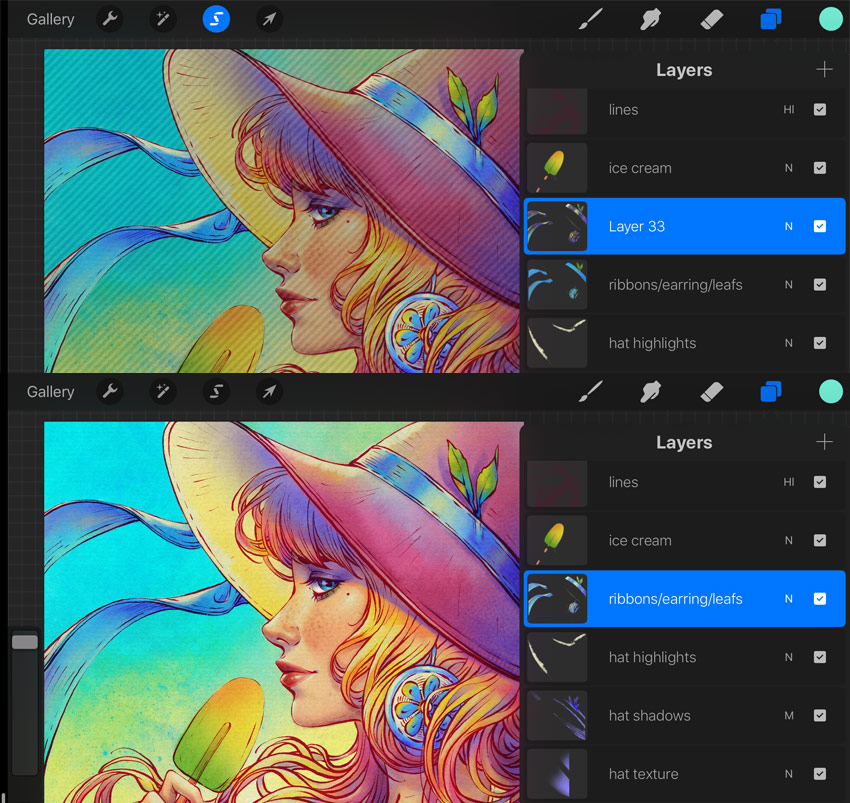
Create a New Layer on top of “ribbons/earring/leafs”.
Start with the ribbons and earring. Use colors from your Palette and the Wet Glaze brush. Create some deep blue and purple spots for the shadows and some yellow reflections. In the end, add some pale yellow highlights.
Create some colorful spots on the leaves using blue, purple, yellow, and pink.
Then merge these layers with accessories into one.
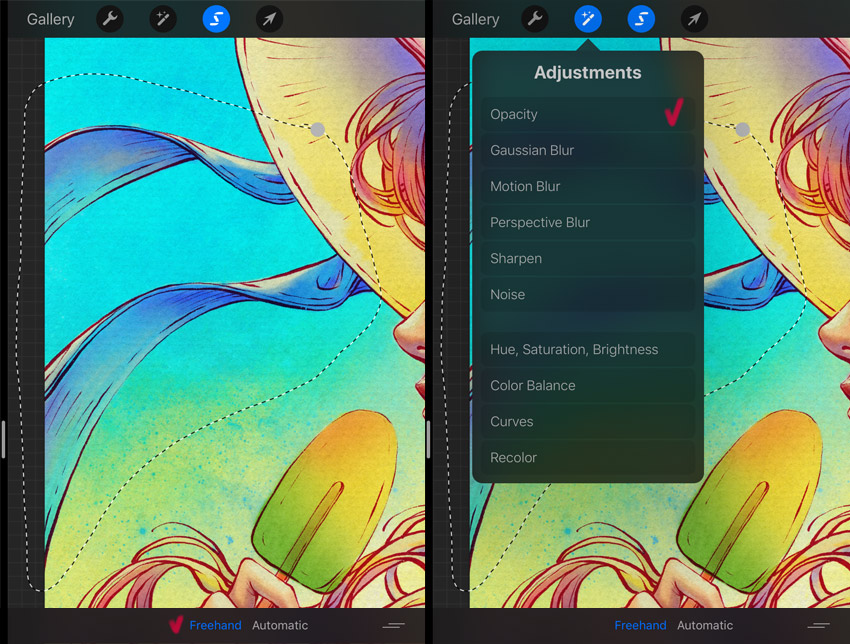
Let’s reduce the Opacity of the waving ribbons.
Take the Selection tool, and make sure it’s on Freehand. Select the area with your ribbons. Then go to Adjustments > Opacity, and reduce the Opacity to about 75%.
As we added colorful spots to the ribbons, do the same for the lace, as shown in the screenshot below.
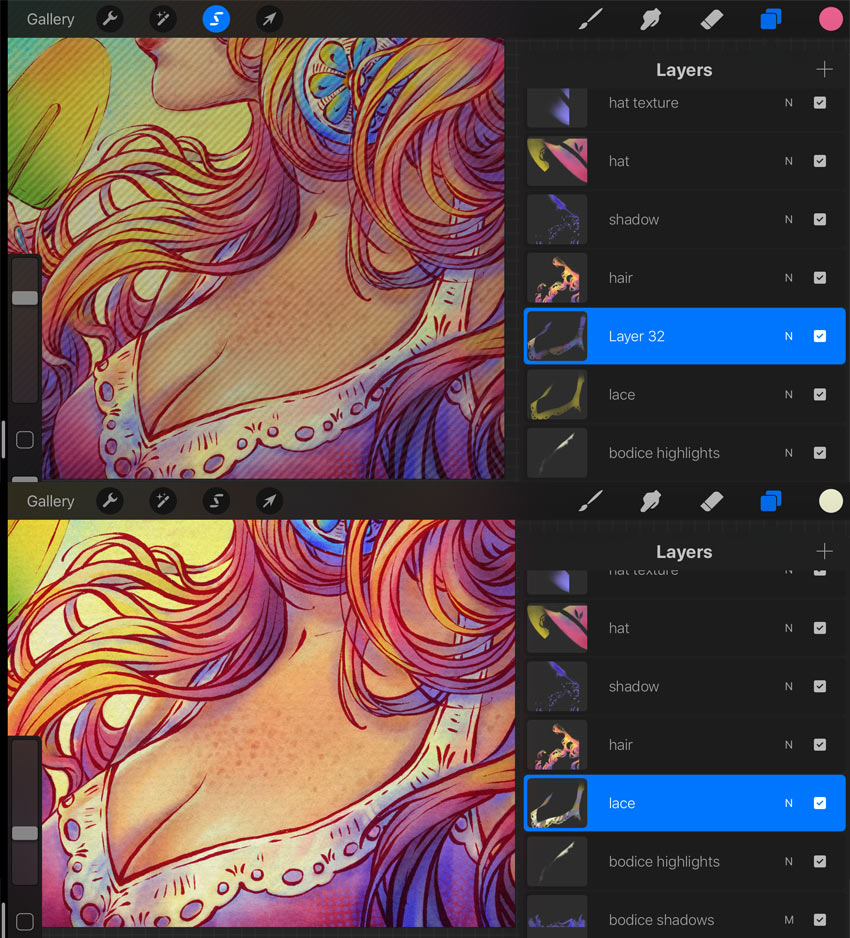
Step 12
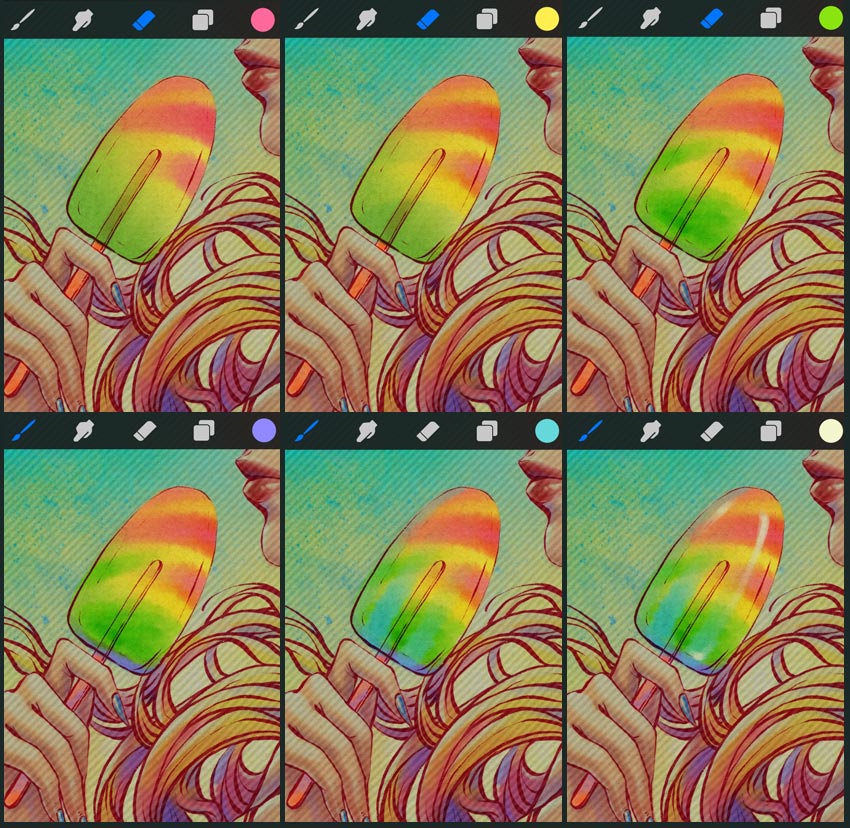
Let’s move to the ice cream.
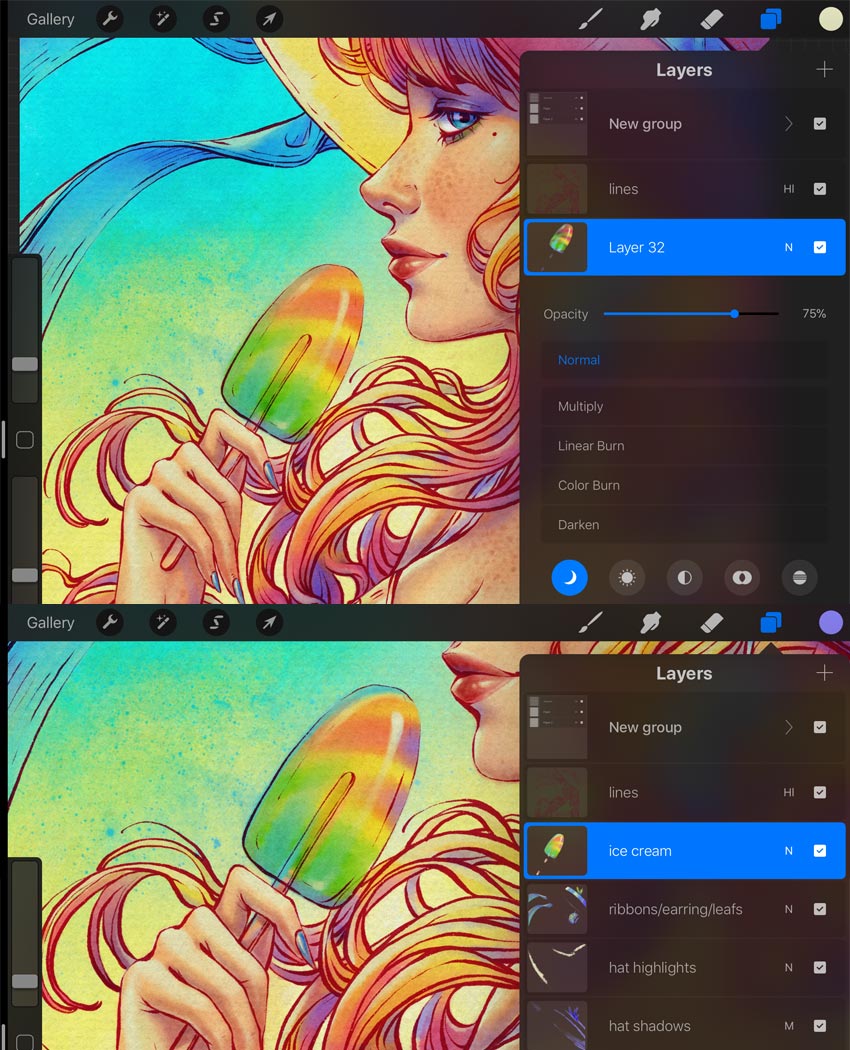
First, Select the “ice cream” layer, and create a New Layer on top of it.
Pick the Wet Glaze brush from the Water set and a pink color. Draw two or three lines to ornament your ice cream. Also use yellow and grass-green colors to make it multilayered. Then, use a medium purple color for the bottom of ice cream and for the shadows on the stick. Also add some light blue reflections.
In the end, pick the Soft Pastel brush and add some bright gloss to your ice cream.
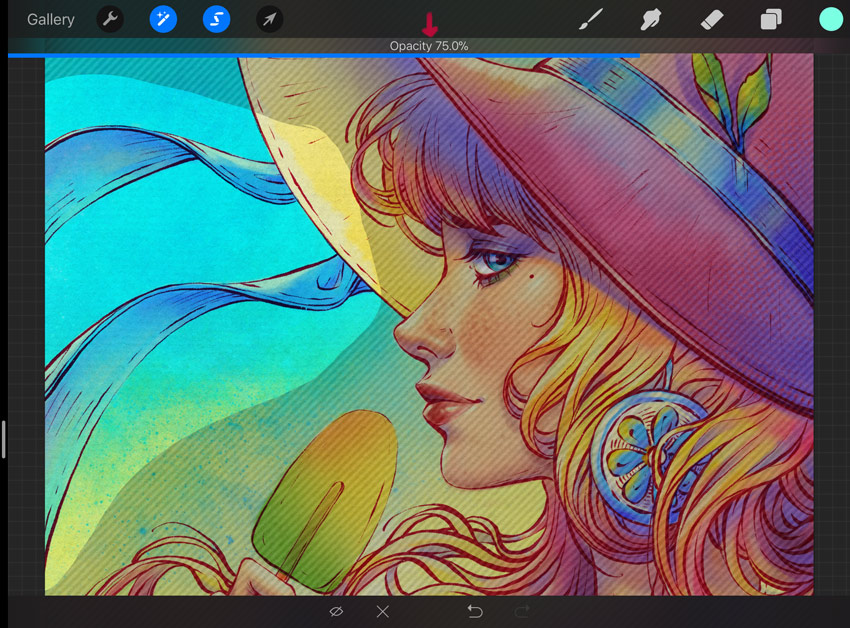
Reduce the Opacity of this layer to 75%, and merge the layers with the ice cream into one.
Refine your ice cream, adding some purple tints and more gloss.
6. It’s Time for the Final Touches
Step 1
Let’s add some new details and texture to the background.
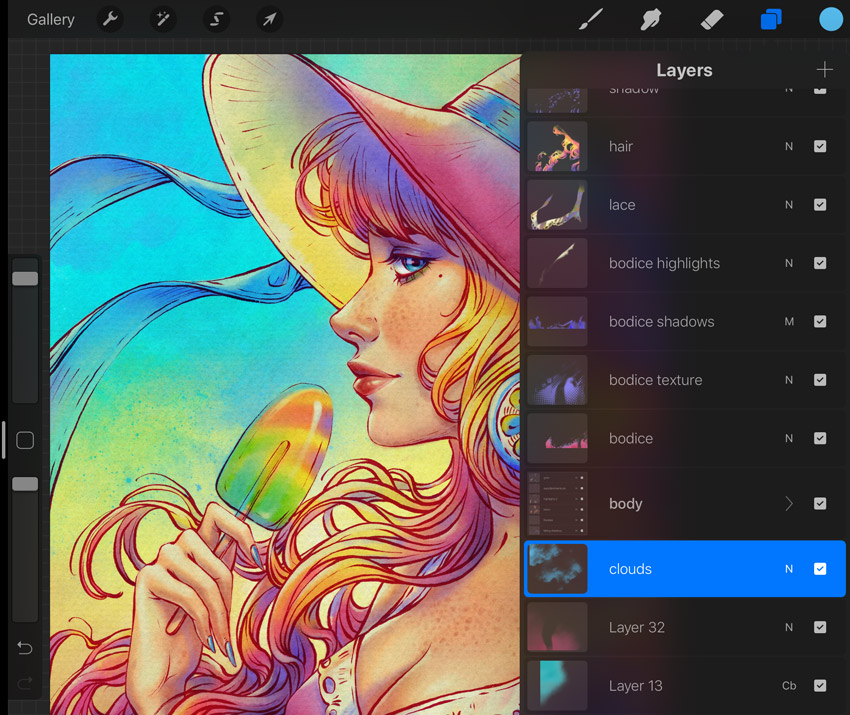
Create a New Layer under the “body” group. Pick a new Clouds brush from the Elements set and a blue color to add some soft cloud shapes to the background.
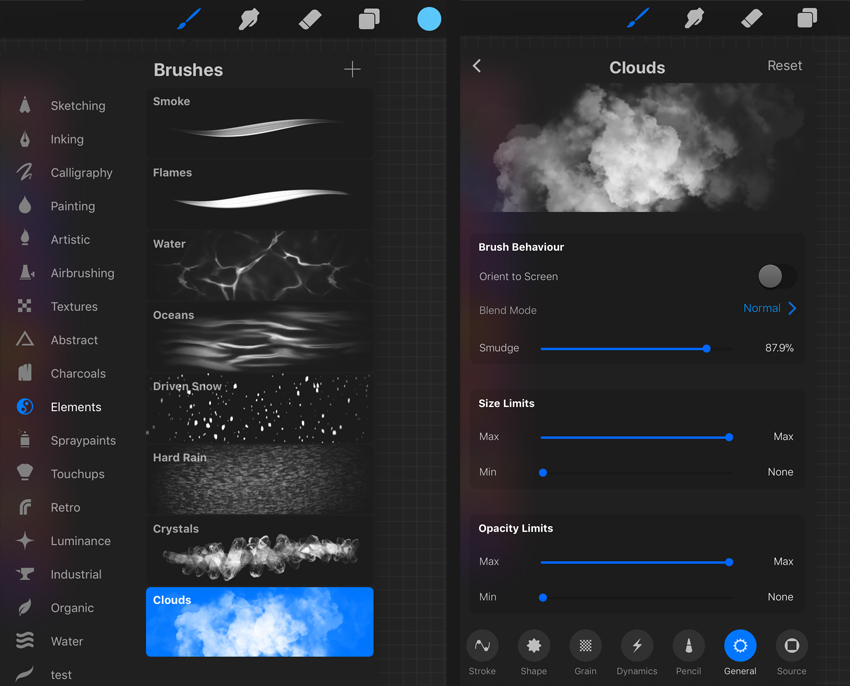
Step 2
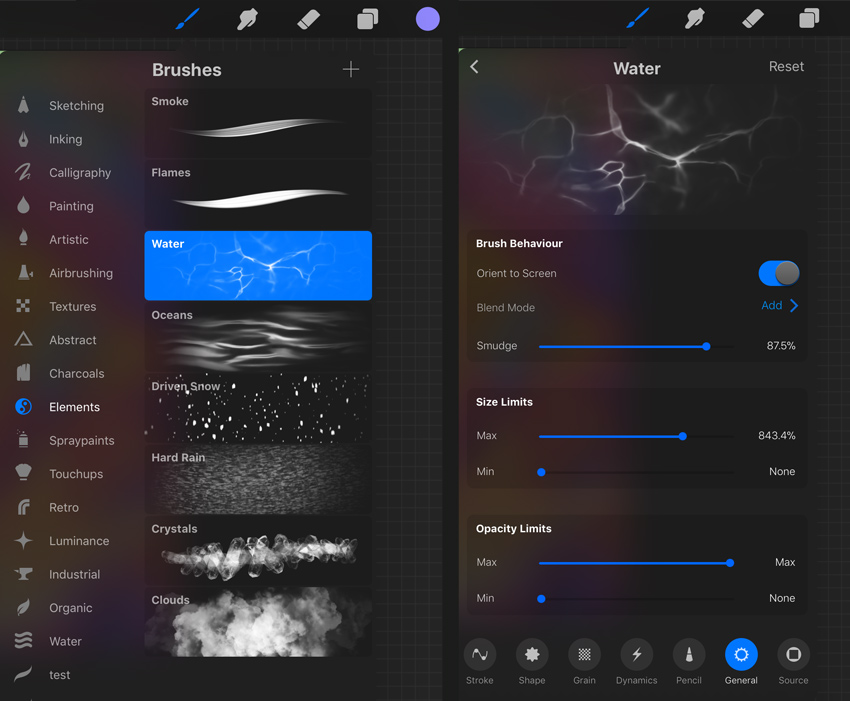
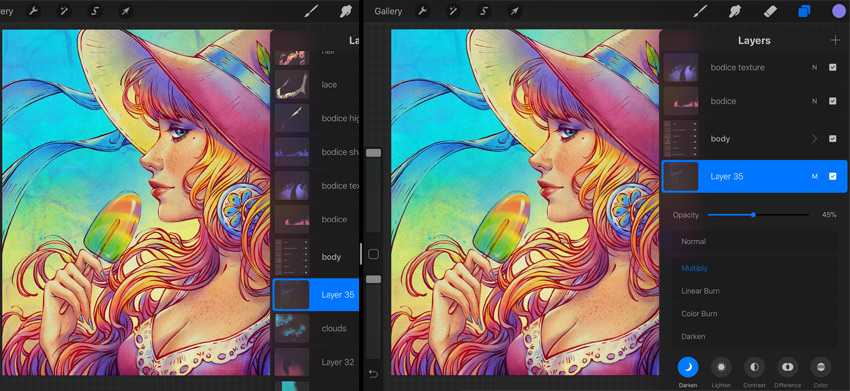
Now pick the Water brush from the Elements set as well, and create a New Layer on top of the “clouds”. Form some cool textures, using the purple color from your Palette.
Reduce the Opacity of the layer to about 45%, and change the Blending Mode to Multiply.
Step 3
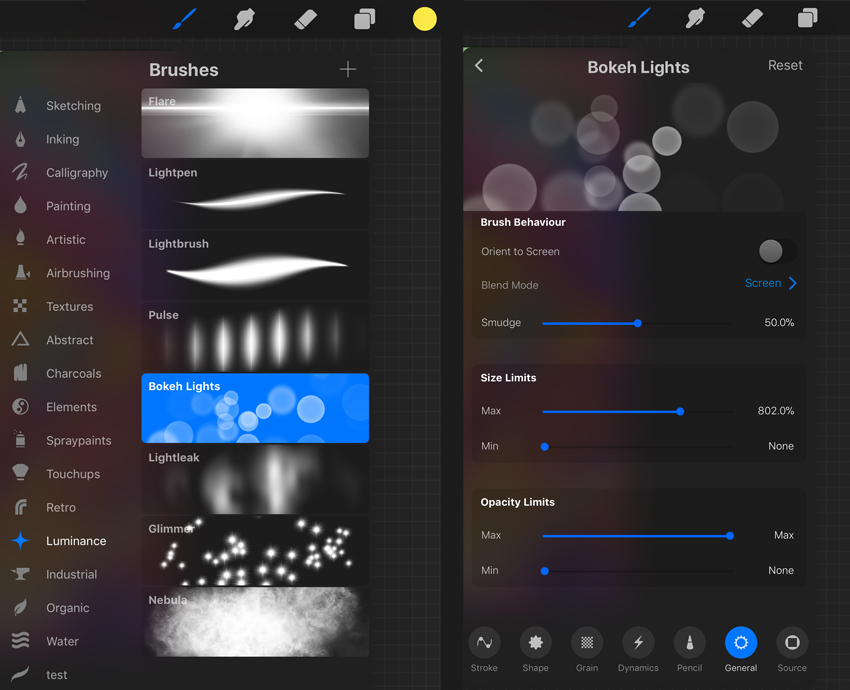
In the end, let’s add some bokeh lights to complete our piece.
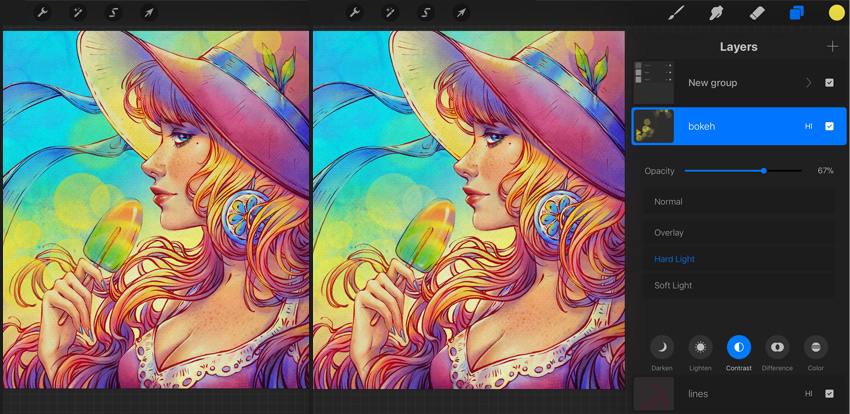
Create a New Layer on top of the “lines”. Pick the Bokeh Lights brush from the Luminance set, and add some yellow shapes of bokeh to the top right and bottom left corners of your image. These spots may extend beyond your composition, so you can fix it with a soft Eraser Tool.
Change the Blending Mode of the “bokeh” layer to Hard Light, and reduce the Opacity to about 65–70%, until you are happy with how it looks.
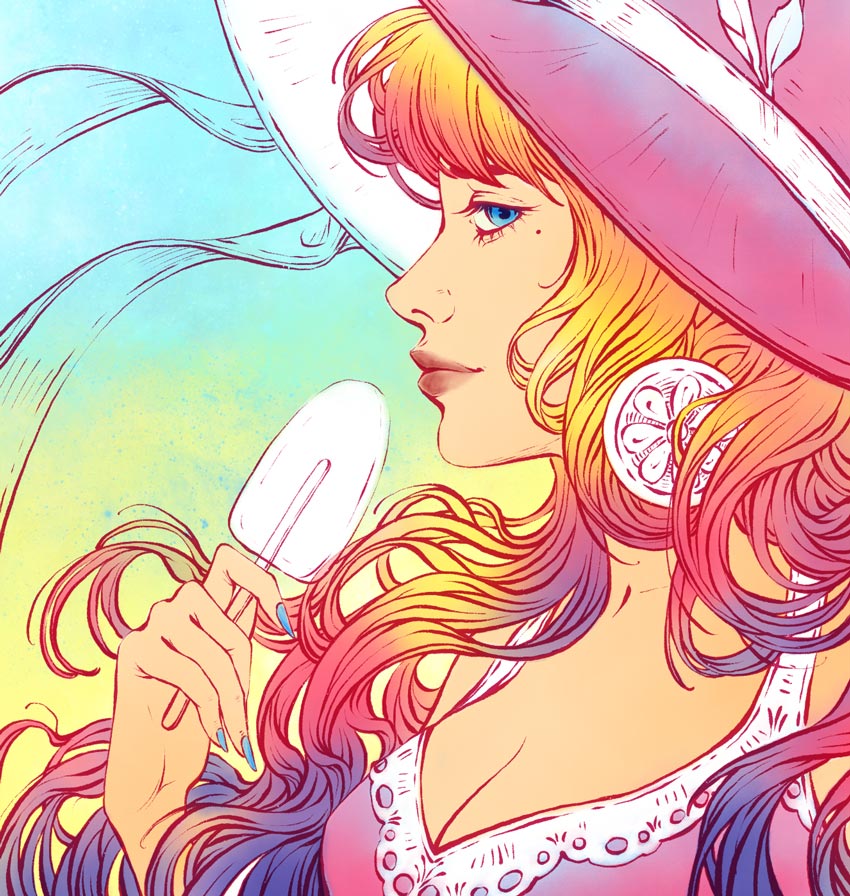
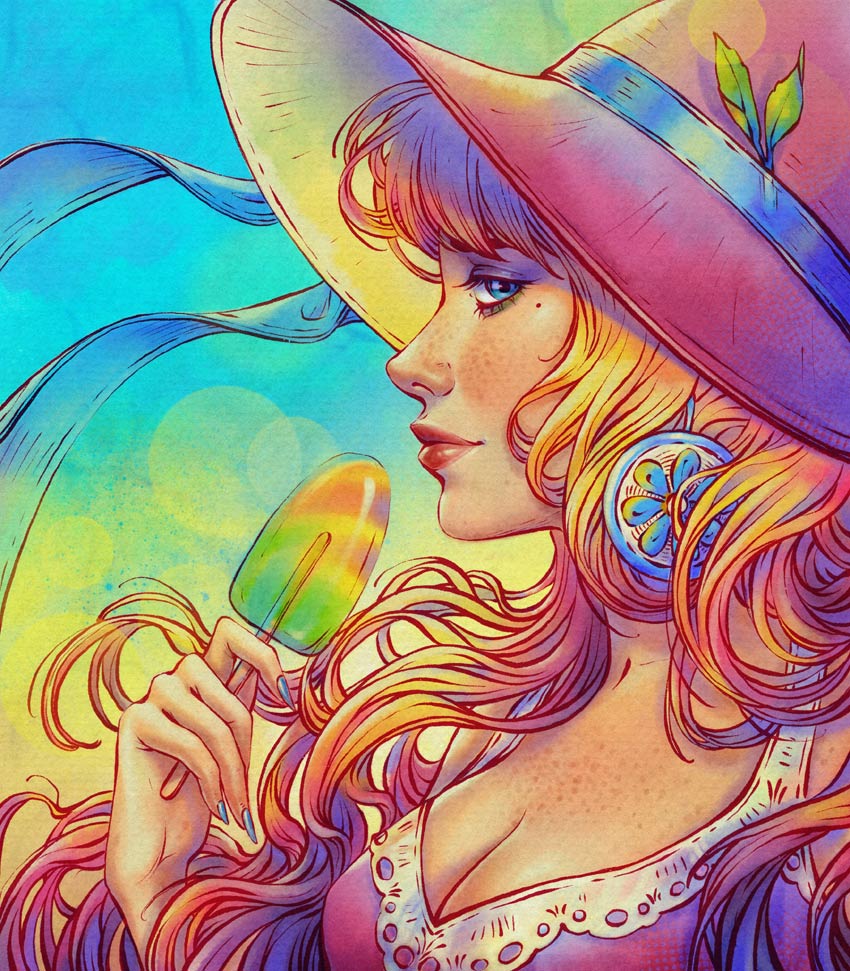
The Procreate Portrait Drawing is Finished!
Our colorful summer portrait is ready! I hope you liked creating and experimenting with me. Enjoy the process, and please share your result!
5 Best Procreate Brushes From Envato Elements
Now you know how to paint a portrait in Procreate. I hope you’ve liked my Procreate portrait tutorial. If you want professional Procreate brushes for your creative digital projects, we’ve got what you need.
Next up, we’ll see some of the best Procreate brushes from Envato Elements. If you’re a digital artist, you’ll love our subscription-based marketplace.
For a low monthly fee, enjoy unlimited Procreate brushes downloads. You can also get unlimited premium fonts, graphic templates, actions and presets and more!
Let’s review some cool Arabic style fonts from Envato Elements:
1. Procreate Portrait Brushes
If you want your Procreate portrait drawing to look professional and save time, you need these Procreate portrait brushes.
The Procreate brush pack includes 30 brushes for skin, hair, brows and lashes. You’ll be able to do the sketch, contours, shades and details with these complete Procreate portrait brushes.
2. Skin Studio – Procreate Blending Brushes

Your Procreate portrait drawing will need good blending tools for the skin texture. And these Procreate blending brushes are the perfect toolkit.
This Procreate brush pack has everything you need to achieve realistic skin textures for your Procreate portraits. The Procreate blending brushes included are for freckles, blemishes, wrinkles and eyelashes.
3. Oil Paint – Procreate Painting Brushes

Procreate painting brushes are a great tool for Procreate portrait drawings. This Procreate brush pack has a great variety for your next project.
You’ll get 52 realistic Procreate painting brushes. Each brush has a rich texture and a natural look. Try them today for your Procreate portraits.
4. Procreate Hair Brushes Pack
Your Procreate portraits surely need realistic hair. These Procreate hair brushes are your perfect toolkit.
Not only you can paint realistic hair. These Procreate hair brushes also include an eyebrow brush, a lash brush and body hair brushes. These will make your Procreate portrait drawing a piece of cake!
5. Foliage – Procreate Tree Brushes

Procreate tree brushes are a great way to add realistic natural elements to your drawings. This Procreate brush pack is one of the most popular Procreate tree brushes we’ve got.
There are 60 Procreate tree brushes in this pack. You’ll get brushes for leaves, clouds, trees, grass, birds and more.
Discover More Procreate Brushes and Resources
I hope you’ve liked the selection of the best Procreate brushes from Envato Elements. If you want to explore more cool resources, we’ve got these for you:
 Procreate30+ Best Procreate Tutorials for Beginners and Advanced!
-
ProcreateHow to Install and Use Procreate Brushes
-
BrushesHow to Create and Customize Procreate Brushes
-
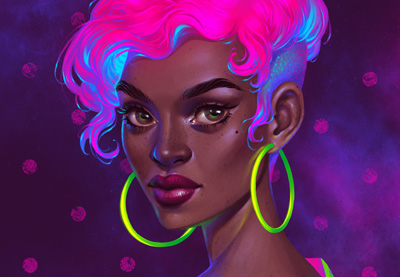
ProcreateHow to Create a Stylish Neon Portrait in Procreate
-
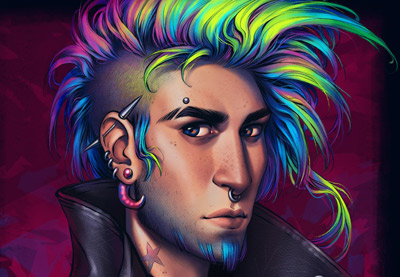
ProcreateHow to Create a Punk-Rock Portrait in Procreate
-
ProcreateHow to Install and Use Fonts in Procreate
-
ProcreateHow to Do Calligraphy on Procreate
-
Procreate44 Best Procreate Fonts (Calligraphy, Tattoo, Comic, and More!)

Editorial Note: This post has been updated with contributions from Maria Villanueva. Maria is a staff writer with Envato Tuts+.
