
In this tutorial, it will show you the steps to turning a regular photo into an eye-catching fashion illustration using lighting effects and colour correction in Adobe Photoshop CS6. Layered PSD file included. Let’s get started!
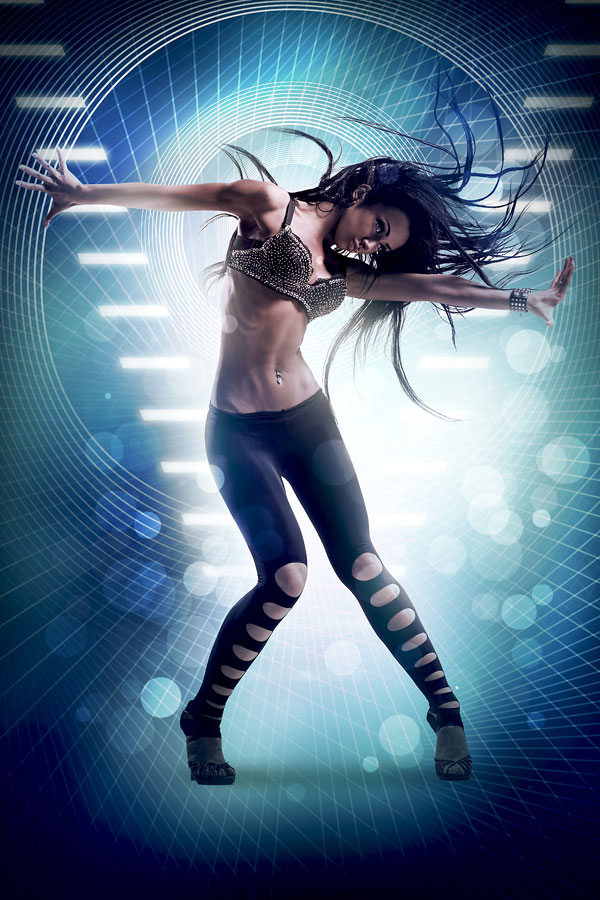
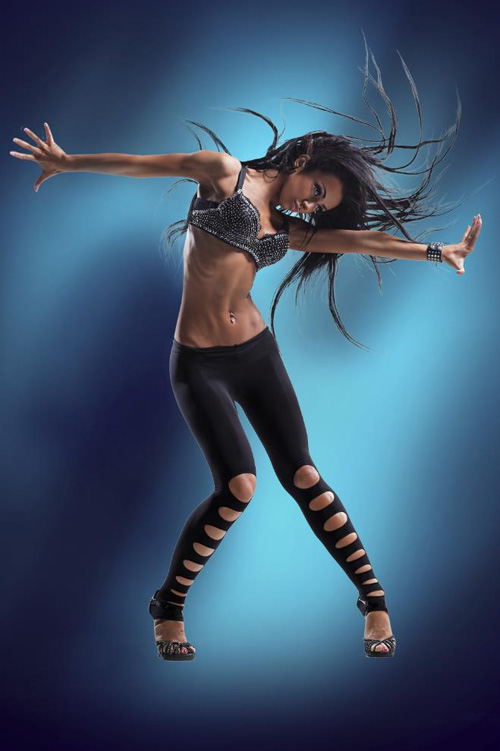
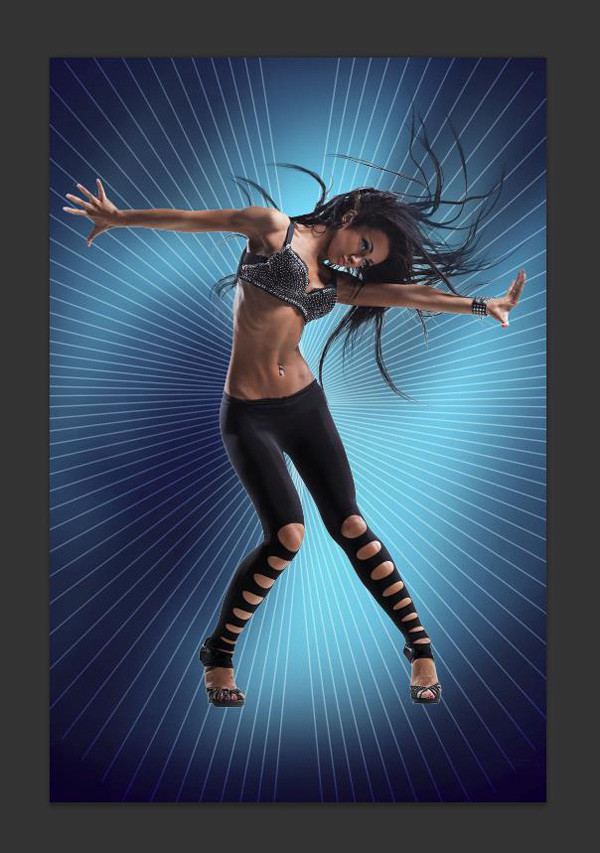
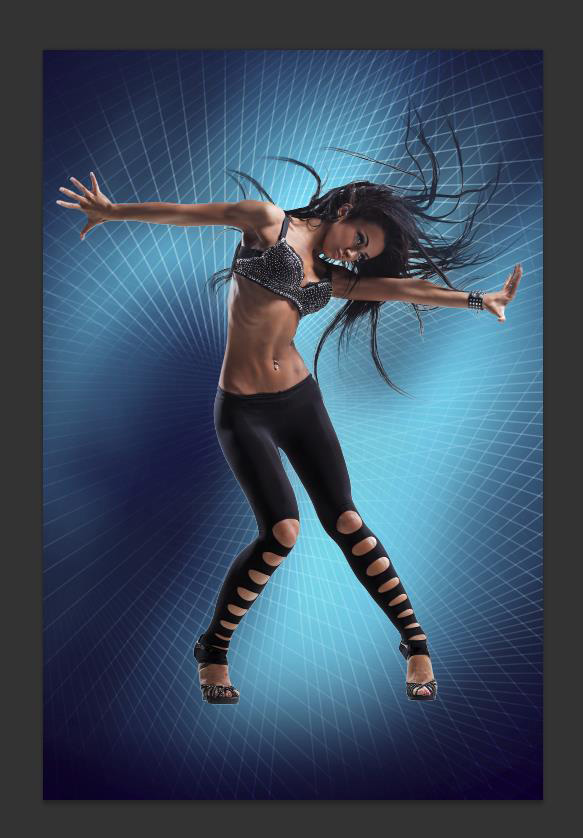
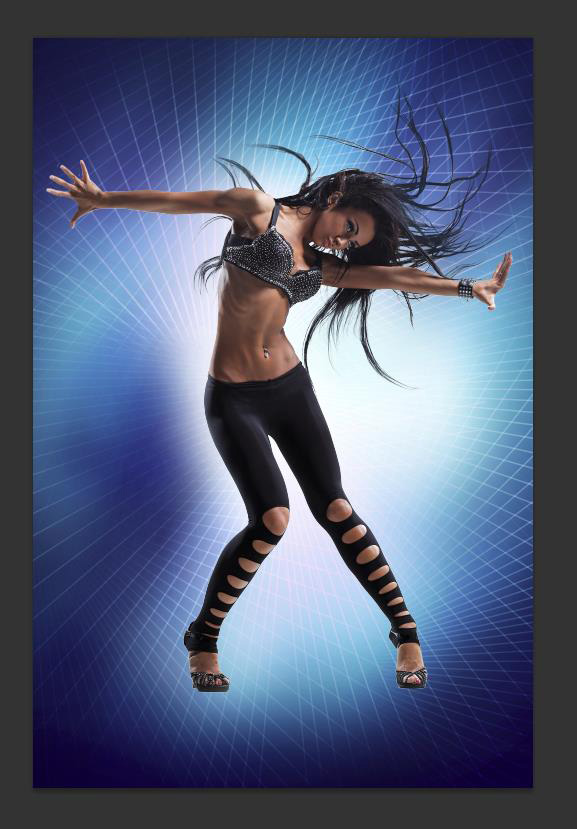
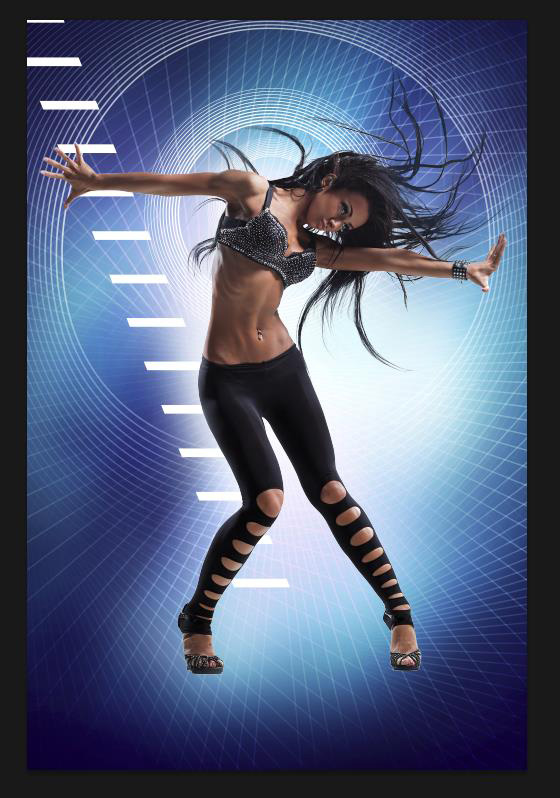
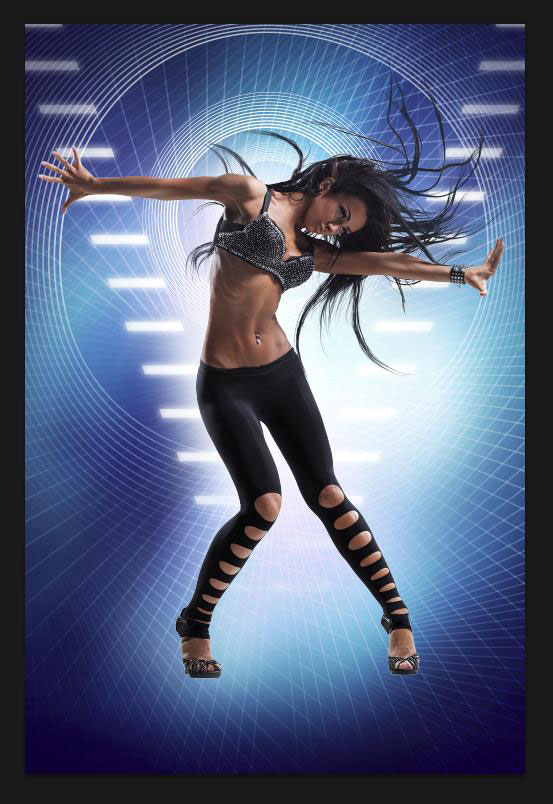
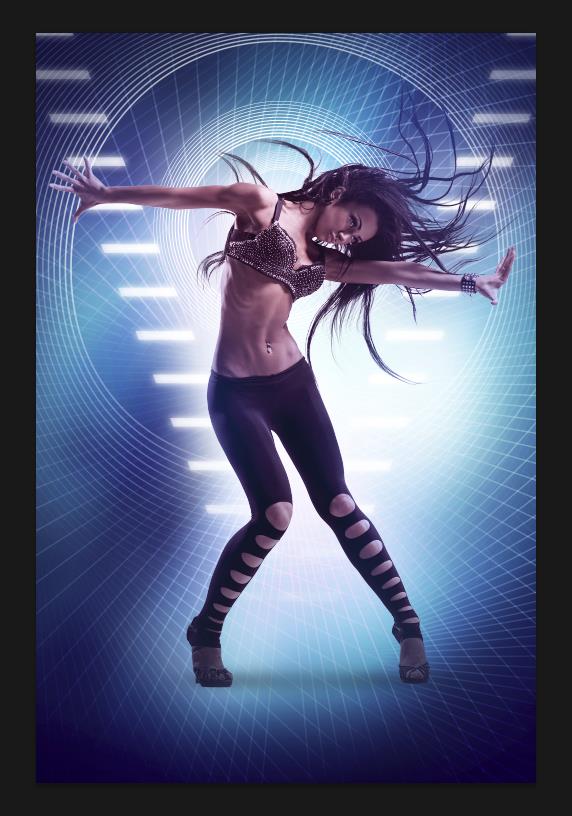
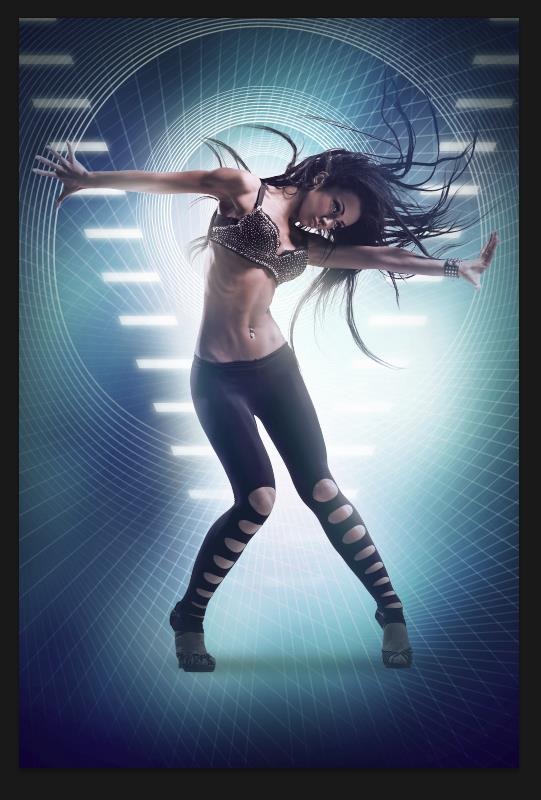
Final Image Preview
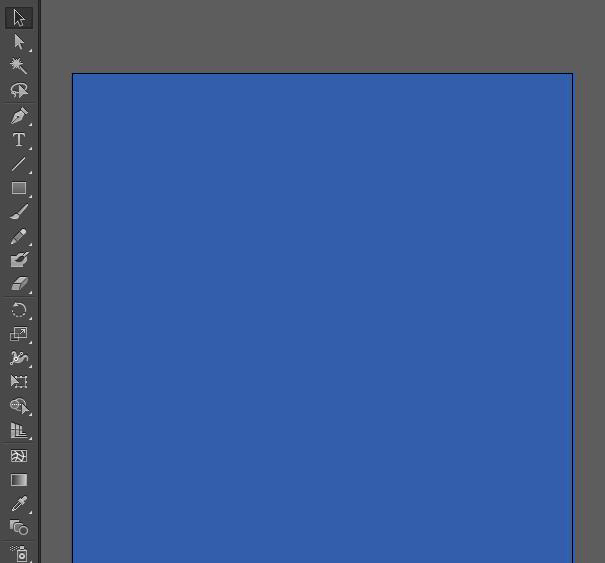
Start working by creating a new document (Ctrl+N) in Adobe Photoshop CS6 with the size 1000px by 1500px (RGB color mode) at a resolution of 72 pixels/inch. Use the Paint Bucket Tool (G) to fill with #030221 color the new background layer.

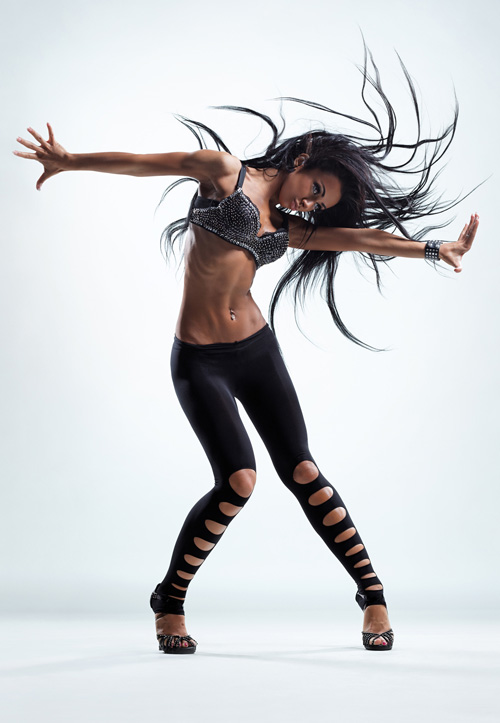
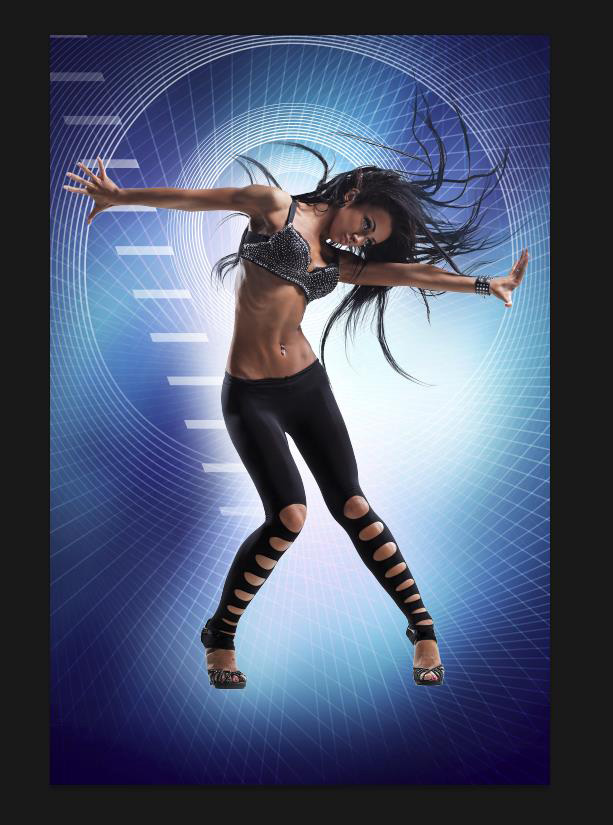
Find a stock photo with a dancer posing on studio, I used this photo from Shutterstock. I would like to thank the author of this photo, or if you prefer, you can substitute similar image of your own.
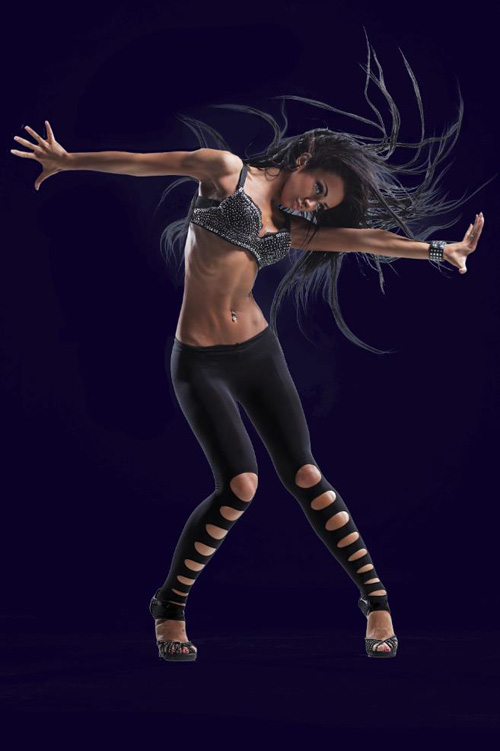
Remove the background using your favorite tools like Pen Tool (P), Magic Wand Tool (W), Magnetic Lasso (L) or even a simple Filter>Extract and insert it on a new layer in our main document.
Let’s represent now a layer under the dancer’s one. Take the Brush Tool (B) and select a smooth brush of the color #65b0c9, set and Opacity to 40% in Options bar, and paint the background as it is shown below.
Set the Blending mode for this layer to Linear Dodge.
Next represent a new layer again and apply the same brush to paint the background with same color above it. Set the Blending mode for this layer to Color Dodge.
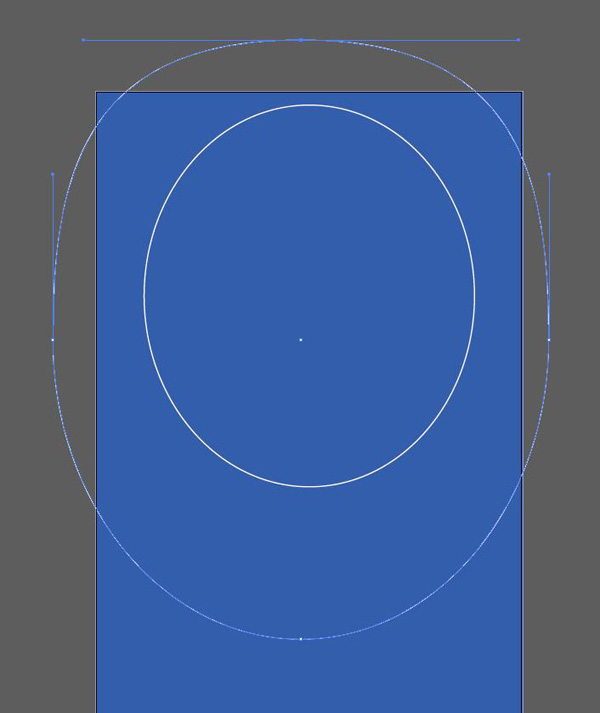
Open the Adobe Illustrator program and create a new file with the size 1000px by 1500px. Then draw a blue rectangle, applying the Rectangle Tool (M).
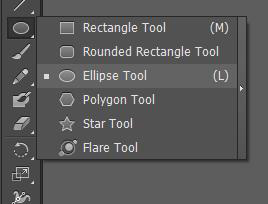
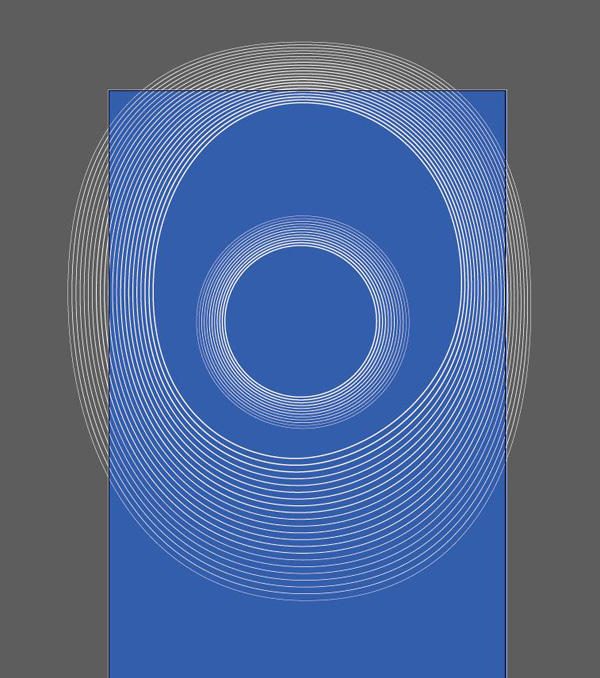
Using the Ellipse Too, we’ll draw two ellipses.
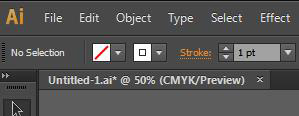
The big ellipse should have Stroke – 1pt and the small one – 3pt.
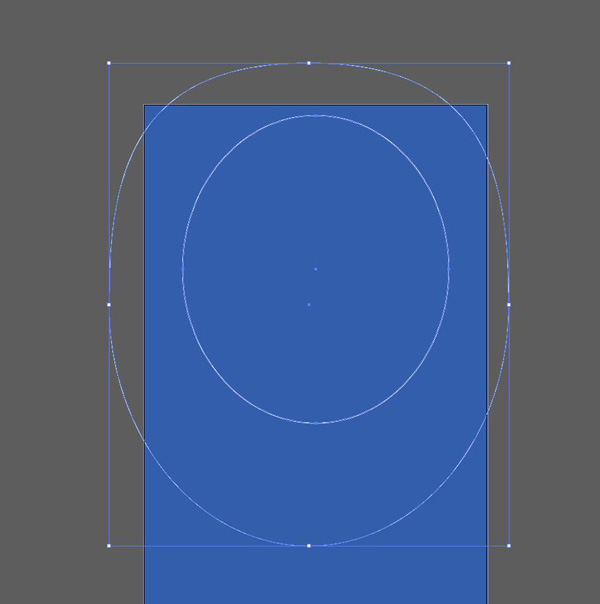
The big ellipse may be adjusted with the Convert Anchor Point Tool (Shift+C) as it is represented on the next picture.
Select out both ellipses using the Selection Tool (V). Press Shift button.
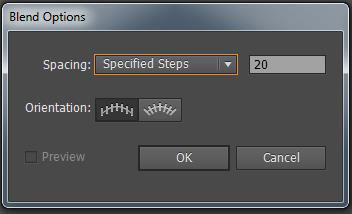
Apply on the selected ellipses next option: Object > Blend > Blend Options. Set Specified steps to 20.
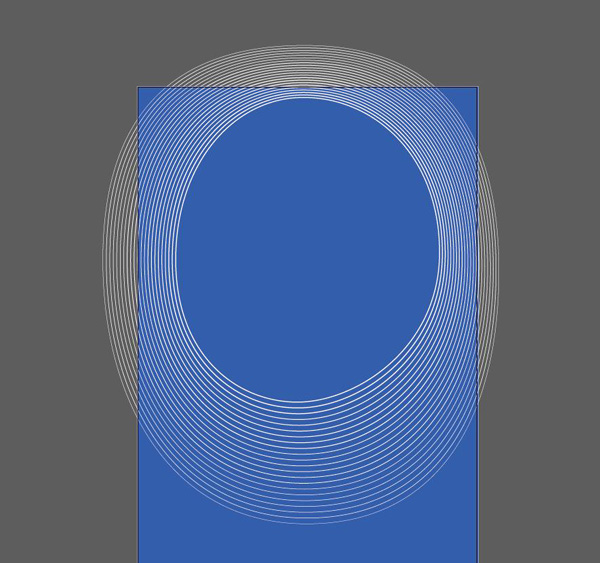
Press the next combination of buttons Ctrl+Alt+B and we’ll get 20 intermediate elements as it is shown below:
Using the same methods, let’s represent now a circle, having less intermediate copies inside of it, only 10 Specified steps.
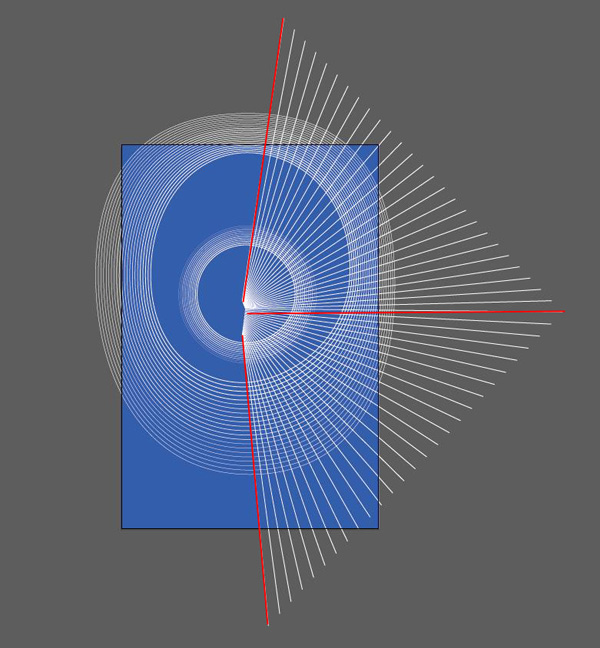
Using the Line Segment Tool, represent three lines marked with red color, having Stroke – 3pt and Specified steps – 25. We’ll get the next element:
Select the Rectangle Tool (M).
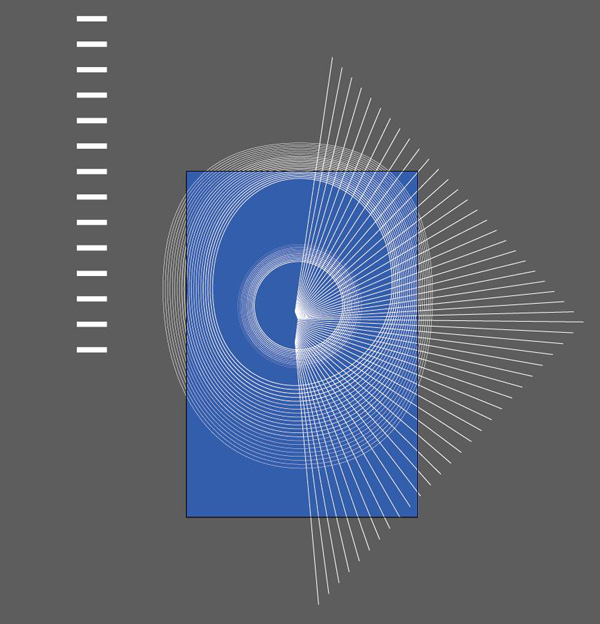
Let’s represent now two parallel rectangles, applying Specified steps – 12.
Now we’ll select out the figure composed out of triangles’ shape lines, using the Selection Tool (V) and press Ctrl+C to Copy the lines. Open up the Adobe Photoshop and press on our file Ctrl+V to Paste as Smart Object the lines in our main document.
Set the Blending mode for this layer to Soft Light.
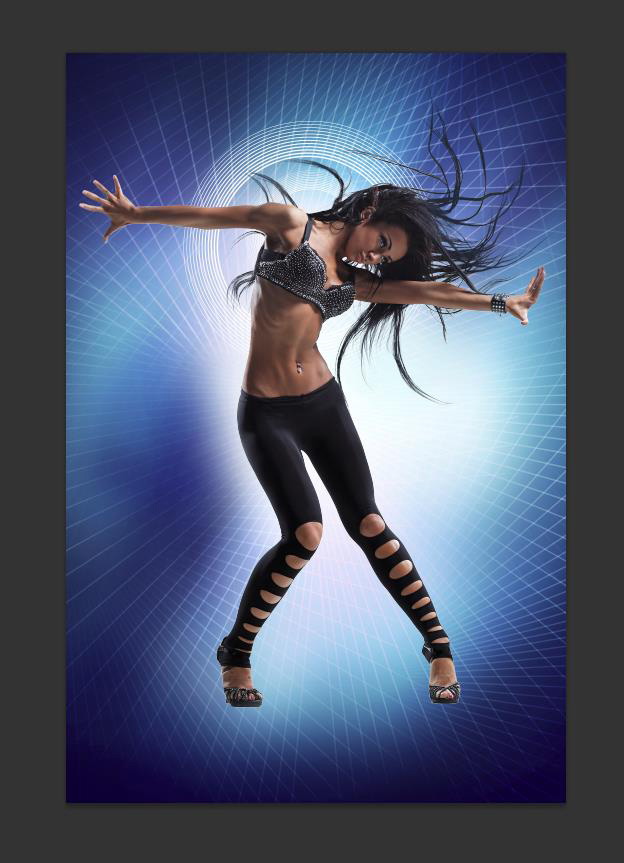
Double up the layer Ctrl+J and turn over horizontally the duplicate, using the Free Transform (Ctrl+T) command (Flip Horizontal). Place this layer under the dancer’s layer, getting the next result.
Make a copy one of the layers now and choose Free Transform (Ctrl+T) command to get the same result as on the picture it is shown.
Select now the Eraser Tool (E) and clean out smoothly the edges of the last made layer.

Place below another layer processing it firstly the same way.
Combine in a group all the layers containing the lines (press CTRL button to select the necessary layers and hold on the left mouse’s button while dragging the selected layers on Create a new group icon from bottom part of the Layers panel).
Apply Vector Mask for the new group and choose the Brush Tool (B) also to hide out the lines on the mask the same way as it is shown next image.
Insert some lines on the top, as on the next image it is demonstrated.
Create a new layer and select Soft Round brush of white color, set Flow to 20% in Options bar to represent the shining effect as it is shown below.
Set the Blending mode for this layer to Overlay.
Create another new layer and insert some brushstrokes as shown using the same brush. Set the Blending mode for this layer to Normal.
Select the brush on a new layer and insert the violet shining effects, having this color #9265C9.
Create a new layer and apply the same brush with the same color but this time to get a greater shining effect along the edges, the same way from the next picture. Set the Blending mode for this layer to Soft Light.
Get back to the Illustrator, select the circles and press CTRL+C to Copy. Return to Adobe Photoshop and press CTRL+V to Paste as Smart Object. Set the Blending mode for this layer to Hard Light.
Then make a copy of the big circle:
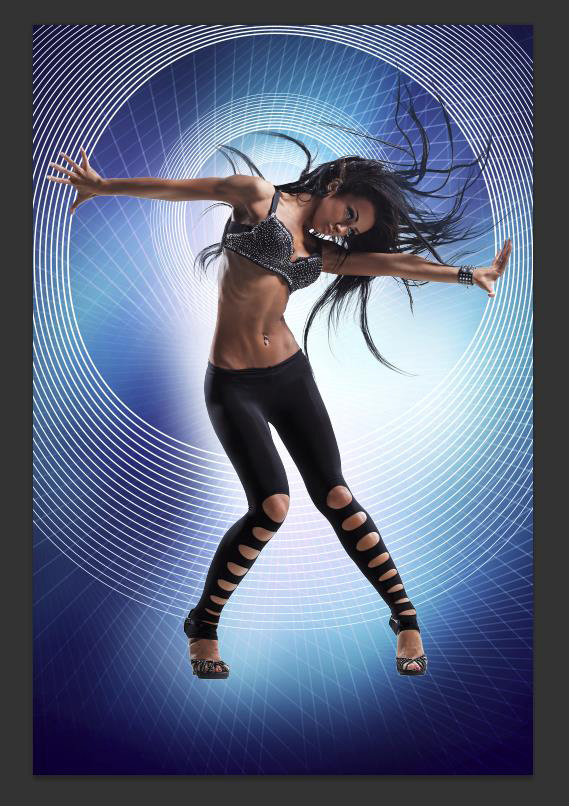
Hide it out along the edges, using an Eraser Tool.
Insert the made rectangles from Illustrator, distort it the same way from below, applying the Free Transform (Ctrl+T) command.
Hide it out, using the Eraser tool.
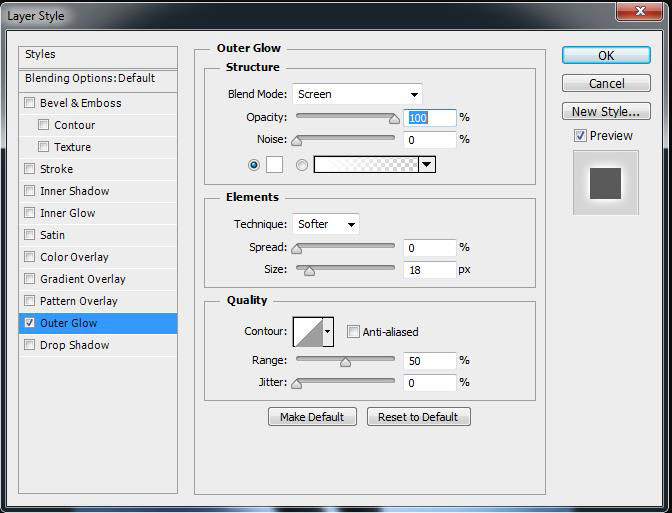
Click on Add a layer style icon from bottom part of the Layers panel and select Outer Glow.
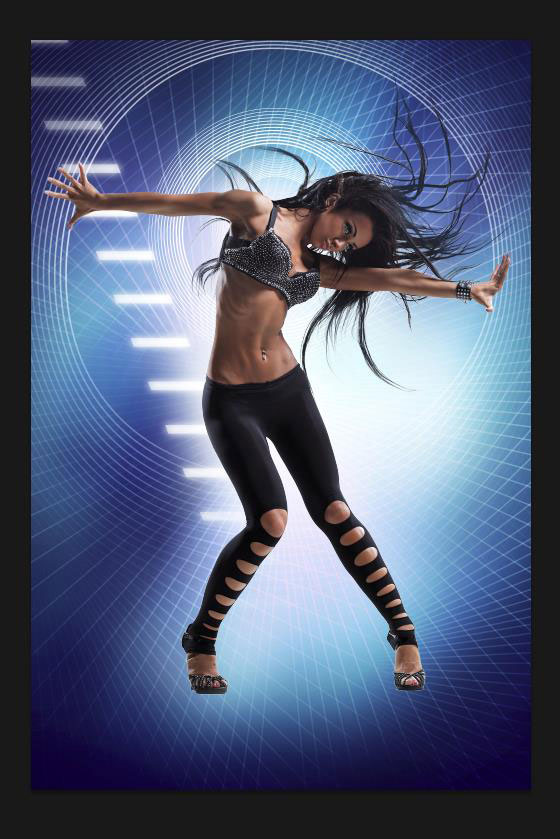
The rectangles layer will shine:
Make a copy of this layer and turn it over by horizontal position.
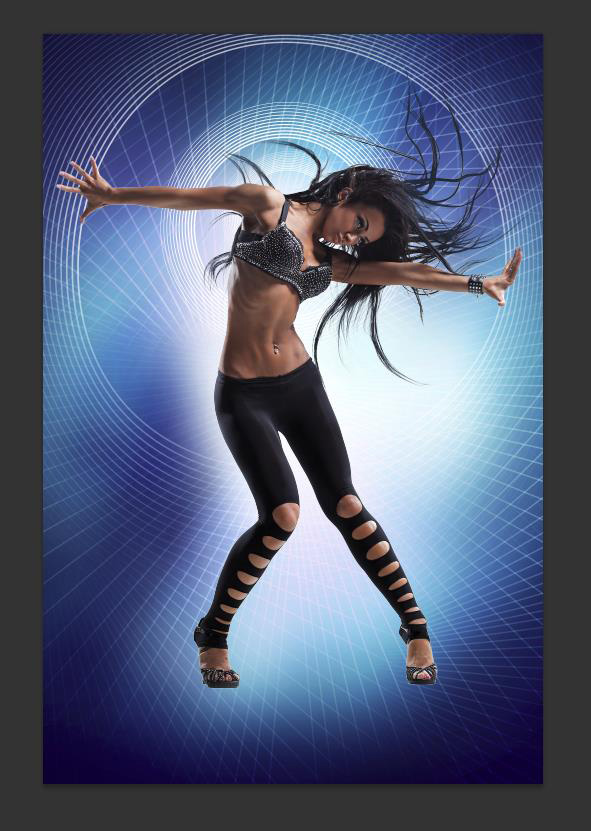
Let’s represent the shadow on the new layer now, using the Soft Round brush with Flow – 10% and insert an easy luminescence on the model’s shoulder’s zone.

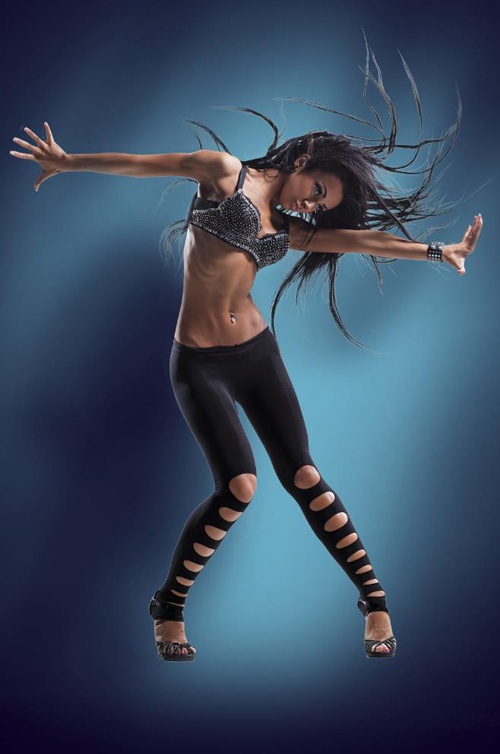
Create a new layer, using the Paint Bucket Tool (G) fill the layer with #5F2D50 color. Set Fill to 60% for this layer and change the Blending mode to Color.
Hold down Alt (Windows) or Option (Mac OS) and click between new layer with the color on it and the layer containing the model in the Layers panel to create a clipping mask. The color will be applied only on the model’s layer.
Click Create new fill or adjustment layer from bottom part of the Layers panel and click to Curves to adjust the curve shape as shown to make a little color corrections.

The model’s layer became more contrasting in result.
Now we have to make darker the bottom part of the model’s legs, by creating a new layer and combining it with the model’s one. Apply the Soft Round brush with Flow – 10% and black color. Paint smoothly the legs until the model’s knees’ zone.
Repeat the operations now, selecting this time the blue color #4164AA. We have also to tone the model’s hair, her hand and the her hips.
Now we shall represent the light effect, by creating a new layer and combining it with the model’s one. Select after that the brush of white color and make lighter the contours the same way demonstrated below.
Create a new layer again and fill it with the next shown color #61BFBB. Set Fill to 80% for this layer and change the Blending mode to Soft Light.

… and create another new layer filled with #ff6b00 color. Set Fill to 14% for this layer and change the Blending mode to Color.
Create a new layer, use Soft Round brush to paint the canvas’ edges with black color, Flow – 10%.
Click Create new fill or adjustment layer from bottom part of the Layers panel and click to Curves to adjust the curve shape as shown to make a little color corrections. Add a mask on this layer and press Ctrl+I to inverse the color of the mask.

Choose now the brush of white color and paint in the mask of the adjustment layer. This time we’ll paint the head’s zone, the left top edge and the right lowest one, getting the contrast effect this way.
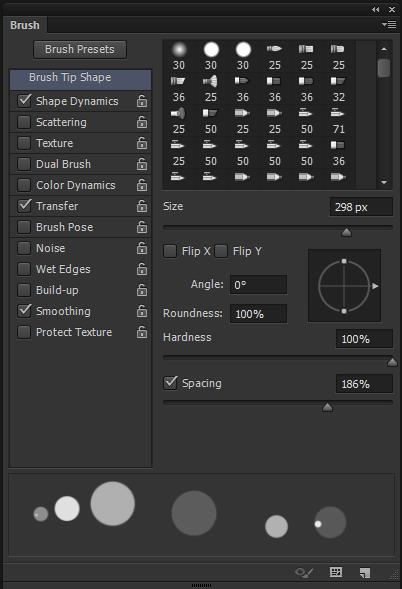
Next we need a customizez brush, select Hard Round brush, go to Brushes panel (F5), select the Brush Tip Shape. Click and drag any of the sliders to change the Size and brush Spacing as show. The Preview window displays the changed brushstroke.
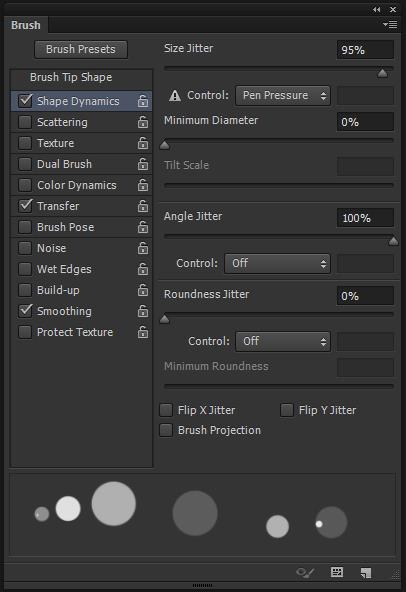
Go to Shape Dynamics and apply the next settings:
Apply Transfer:

Use this customized brush to represent the circles in an arbitrary mode (brush Flow – 80%) on new layer. Set the Blending mode for this layer to Overlay.
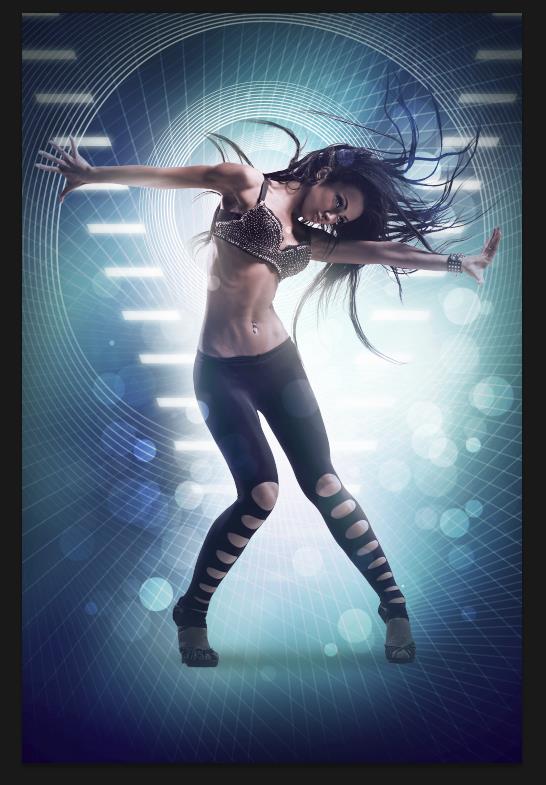
Create a new layer and select Soft Round brush with Flow – 30%, paint the indicated zones lighter as it is represented next image. Set the Blending mode for this layer to Overlay.

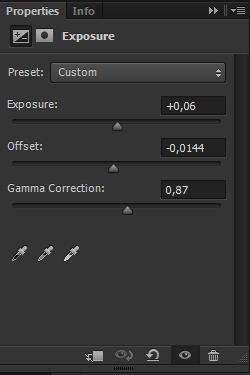
Click Create new fill or adjustment layer from bottom part of the Layers panel and click to Exposure to adjust tonality by performing calculations in a linear color space. Set the next value for Exposure, Offset and Gamma.
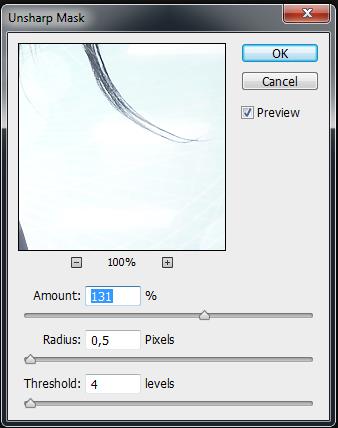
Press Ctrl+Shift+E to put together all the layers in a single one. Apply on this layer the next filter: Filter > Sharpen > Unsharp Mask.
View full size here.
Download free Layered PSD file.