Borders aren’t always treated the same as other elements when it comes to emails in Dark Mode. In this article I’ll take you through what is happening to your borders, as well as how fix any problems you’re having with them.
Top Email Templates on Envato Elements
Before we dive in, don’t forget that you can download unlimited email templates with your Envato Elements subscription, to use with MailChimp, Campaign Monitor, and many other Email Service Providers. Envato Elements also gives you access to thousands of other creative assets, like stock photos, graphics, video templates, audio, Photoshop actions, you name it!

First Up: What Exactly Is Going on With My Email Borders in Dark Mode?
It can be hard to know what you’re looking at when you start encountering problems in your Dark Mode emails. Below is a roundup of what each client tends to do to borders, and how well it supports useful interventions.
Sometimes, it may seem like your border is behaving strangely, when actually it’s just that the background behind it has changed and the border isn’t being adjusted at all, which creates its own headaches. This table will help you straighten out what’s actually happening.
|
Email Client |
Does it adjust border color in Dark Mode? | What options are there for controlling border in Dark Mode with separate CSS? |
Is background: linear-gradient supported? |
Is box-shadow supported? |
Does outline behave any differently to border? |
| Apple Mail (iOS) | Yes, but you can prevent or control it | CSS media queries | Yes | Yes | No |
| Apple Mail (macOS) | Yes, but you can prevent or control it | CSS media queries | Yes | Yes | No |
| Gmail app (Android) | Yes, if they are light. Keeps darker borders dark | None | Yes | No | No |
| Gmail app (iOS) | Yes | None | Yes | No | Yes, doesn’t get inverted |
| Microsoft365 Outlook for Windows | Yes |
mso-border-alt can be used which overrides border (but color still adjusted in Dark Mode) |
No | No | Yes, doesn’t render, even in Light Mode |
| Outlook for Mac | Yes for tables, border on div, p or a tags are unchanged |
CSS media queries (partial support) | Yes | Yes | No |
| Outlook.com | No | CSS using [data-ogsc] and [data-ogsb] (limited control), browser itself will respond to CSS media queries*** | No | No | No |
| Outlook app (Android) | No | CSS using [data-ogsc] and [data-ogsb] | No | No | No |
| Outlook app (iOS) | No | CSS using [data-ogsc] and [data-ogsb] | No | No | No |
| Yahoo app (Android) | Yes, if they are light. Keeps darker borders dark | None | No | No | No |
| Windows Live Mail | Yes | None | No | No | Yes, doesn’t render, even in Light Mode |
*** Outlook.com will apply your CSS media queries for Dark Mode if the user has their computer set to Dark Mode. This is something to bear in mind, as it may seem like your media queries are working to target the Outlook.com interface when that’s not technically the case. Remember that some people may have their Outlook.com interface set to light mode, but their computer on Dark Mode, and vice versa. Check out Rémi Parmentier’s article on Outlook.com’s Dark Mode to find out how to make sure you don’t end up with strange results in all these scenarios.
So How Do I Fix My Email’s Borders in Dark Mode?
Now we’ve seen what’s going on, let’s dive into what we can do. First I’ll talk about some easy wins in specific email clients. Then I’ll go over some techniques that you can mix and match in your attempts to solve your border problems.
1. Using Media Queries to Control Borders in Dark Mode in Apple Mail (iOS and macOS)
This is the lowest-hanging fruit because Apple’s Mail (on iOS and macOS) has full support for CSS media queries for Dark Mode, meaning you can adjust your border colors freely to anything you like. For example, if you have the class borders on the element with your border, in Dark Mode you can set the border to be a different color by adding the following CSS to the head of your email:
<style>
    @media (prefers-color-scheme: dark) {
        .borders {border-color: #fafafa !important;}
    }
</style>
Make sure you’ve also included these two meta tags in the head of your email, because without them, the code above won’t work.
<meta name="color-scheme" content="light dark">
<meta name="supported-color-schemes" content="light dark">
Also note, however, that once you add these meta tags, these apps will start making greater adjustments to your email. If you’re not ready to code a full dark mode scheme, you may not wish to do this. To completely disable dark mode in these clients, and only show the light version of your email, change them both to content="light" only.
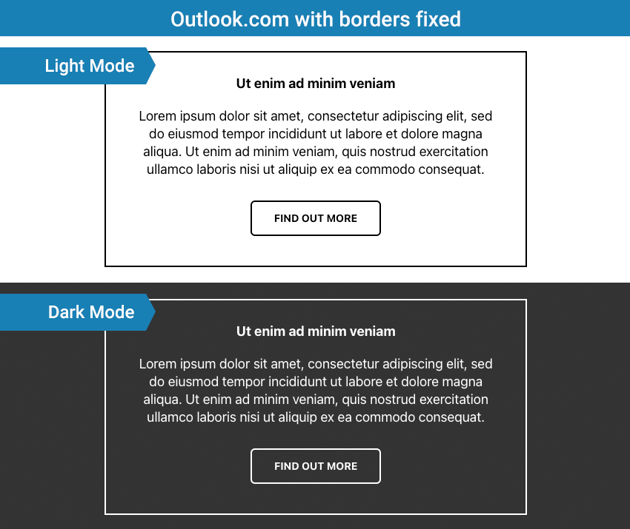
2. Using Data Attributes to Fix Borders in Dark Mode in outlook.com and the Outlook Apps for iOS/Android
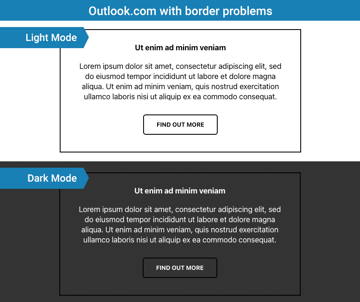
These apps all behave similarly to one another and they do not adjust borders at all.They tend to leave dark background colors alone, but darken light ones. This means that if you have dark borders on a white background, the background will be darkened, but your borders are left as they are. This can result in almost invisible black borders on a dark grey background:


Outlook.com and the Outlook apps don’t support CSS media queries, but they do support something similar which works particularly well for borders. This is a life-saving trick that was uncovered by Mark Robbins.
As Rémi Parmentier explains in his article one how to make emails react to Outlook.com’s dark mode, when Outlook.com and the Outlook apps adjust your colors for Dark Mode, they add data attributes to all of your elements as markers that the colors have been changed. We can hook into these attributes with our CSS to target them with specific styles for Dark Mode.
Now, it doesn’t give you free rein when it comes to things like background colors: if you use this method and try to apply very bright backgrounds to your elements, Outlook.com and the Outlook apps are still likely to adjust the color to make it darker. However with borders, it does seem to leave your overrides alone, so it’s possible to force a white border onto something in dark mode using this trick.
Check out Rémi’s article for more general details on how to apply this method to elements in your email.
But as a simple example, you can add a class to your bordered element, here I’ll add oldotcom-border:
<td class="oldotcom-border" style="border:2px solid #000000;padding:30px 40px;">
You can then add the following style tag to the head of your email to override the border color:
<style>
	[data-ogsc] .oldotcom-border,
	[data-ogsc] .oldotcom-border .btnlink {
		border: 2px solid white !important;
	}
</style>
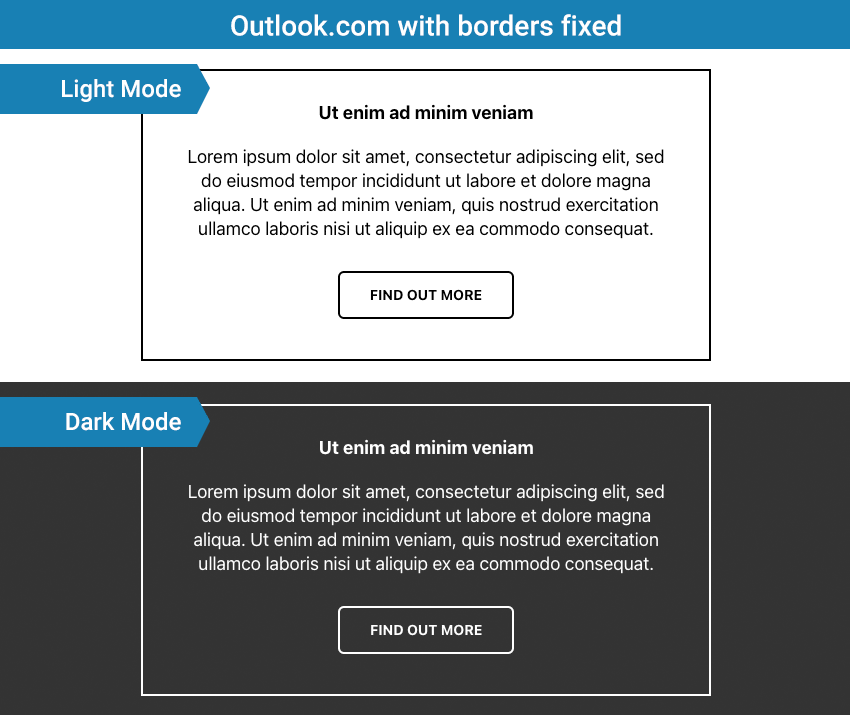
I have identified (using a browser’s code inspector while on Outlook.com webmail) that in my email’s code there is definitely a parent element of my cell that has the data-ogsc attribute added to it, so I am using that as my attribute selector. Then I am targeting my cell’s class, as well as the class of the buttons within, and forcing their borders to be white.
As you can see, my borders are now perfect in Outlook.com:

3. Using Different Elements to Fix Border Problems in Outlook for Mac
Outlook for Mac does tend to invert border colors but it keeps dark backgrounds dark. This can mean light borders on already-dark backgrounds become invisible:


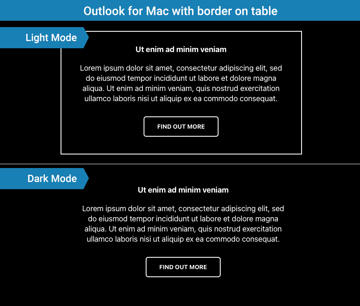
Luckily however it has one weird but wonderful quirk: it inverts borders on tables and cells, but not on divs, paragraphs or link tags (and possibly other tags as well).
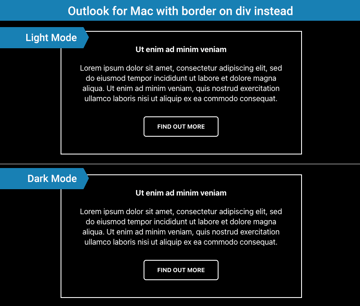
This means that where possible, you can recreate your layout using different elements and add your border to those if you want the border to remain unchanged – or vice versa for the opposite.
For example on this particular table, I recreated it using a div, and now the border remains in dark mode:


4. Using Outlook-Specific Code to Fix Borders in Outlook for Windows
If you’re using VML, utilise the stroke property to add a border in the VML shape.
It’s also helpful that you can easily include fixes just for Outlook using conditional HTML and CSS. Simply wrap any HTML with <!--[if mso]> at the start and <![endif]--> at the end, and the code will only render in Outlook.
You can also use mso-border-alt after border if you want to specify something slightly different for Outlook. It will override border in Outlook for Windows only. In this example, our border will be black, but white in Outlook:
border:2px solid #000000;mso-border-alt:2px solid #ffffff;
General Tricks for Fixing Borders in Dark Mode Across Other Email Clients
There’s no one way to fix border issues in Dark Mode. Depending on your color palette, you’re likely to struggle with different elements to the next person, and something that helps in one client might make things worse in another.
Often I find that I need to combine techniques. This generally means nesting an element inside another element, and applying different techniques to both, where one technique might be invisible (or can be disabled) in some clients, where the other technique will work to fix your border in the intended client.
It’s a balancing act, and you need to be a bit strategic. But with that in mind, below are some general strategies that I use.
1. Adjust Your Colors Slightly
This one is obvious, but try tweaking your colors a little. Sometimes tweaking your border from #ffffff to #fafafa and your background from #000000 to #111111 can make a relatively unnoticeable difference but suddenly make your borders visible in Dark Mode.
For example the Gmail and Yahoo apps for Android, notorious Dark Mode pests, tends to leave #cccccc borders on dark backgrounds alone in dark mode, and they remain about as bright as you can go before it hits a point where they will be inverted in Dark Mode. If you use #cccccc or darker instead of white, and #333333 or lighter instead of black, you will retain a similar level of contrast between Light and Dark Modes (and this combo still meets AAA compliance for accessibility on text as well).


Of course changing your color palette isn’t always possible, but it’s worth a try to see how it looks early on, and then keep it in your pocket as a last resort.
2. Try RGBA Color Values
Where possible you could use a bolder color and make it slightly transparent instead using RGBA. The transparency may paradoxically help your border to be more visible in Dark Mode in some clients.
Don’t forget to include a fallback color for clients that don’t support it RGBA. So if you wanted a border that is #999999, this equates roughly to black at 40% opacity. Include the hex value first, and the RGBA second, so that clients that don’t support it will apply the first one and ignore the second since it doesn’t recognise it. For example, add this CSS to your element with a border to achieve this:
border:3px solid #999999;border:3px solid rgba(0,0,0,0.4);
3. Fake Borders Using Backgrounds and Padding
Nest your element inside a parent element, and add a couple of pixels of padding to the parent element, as many pixels as you need your border width to be.
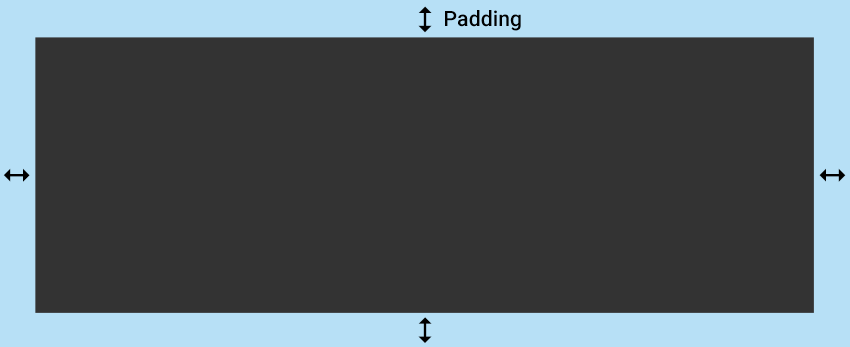
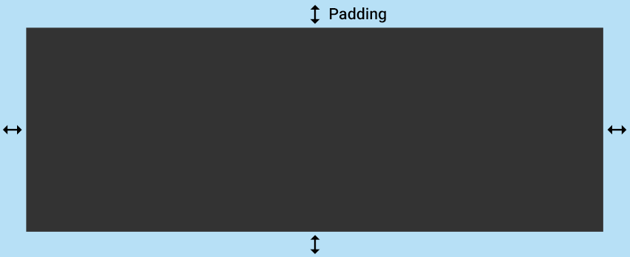
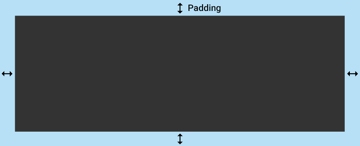
Then add a background treatment to the parent element which will act as a fake border.
Adding a plain background color isn’t likely to help you much as it’s going to behave the same as your existing background colors, but sometimes it may be all you need.
Alternatively, you can add either a CSS background-image (linking perhaps to a 1×1 pixel image of the color you want your border to be) or you can use the CSS linear-gradient background image property (a wonderful trick developed by Annett Forcier) to set up a background color.
Refer to the table at the top of this article to see where these are currently supported.
If you wanted to use a background image on a cell to simulate a 2px border, you could style the cell like this:
<td style="padding:2px;background-image:url(’your-1x1-white-image.png’);">
Or to try the same with linear-gradient, you would use this:
<td style="padding:2px;background:linear-gradient(#ffffff,#ffffff);">
You’ll see I haven’t provided a fallback color, because often you are just trying to have this solution show up in a few clients where it’s supported, and hide it from clients that don’t. But you may need to add a fallback in some situations.
4. Try Outline if You Are Working With Square Edges
CSS border and outline behave differently in a few email clients, which may help you develop a targeted fix for some of them. Refer to the table at the top of this article to see where outline is currently supported.
You can apply an outline and a border to the same element too. An outline is always drawn on the outer edge of an element, so be aware that it adds to the width of your element.
To apply both in different colors to a table cell, you could add the following CSS. This could be used to create a hidden outer border that shows up in a specific client when colors are inverted:
<td style="outline:2px solid #ffffff;border:2px solid #000000;">
5. Try a Box-Shadow
This isn’t supported in as many clients, but can be a useful fix particularly in Outlook for Mac. Refer to the table at the top of this article to see where box-shadow is currently supported.
You can apply a box-shadow that is styled to be thick without any blurring, so it looks exactly like a border. You can also apply it to an element that already has a border.
Helpfully these can be applied to the outside or the inside of the element too.
For a 2px wide box-shadow border applied to the outside of an element, use this CSS:
box-shadow: 0px 0px 0px 2px #ffffff;
And for the same applied to the inside, use this CSS:
box-shadow: inset 0px 0px 0px 2px #ffffff;
6. Try Using CSS Blend Modes
You can also try fixing your Gmail app woes using blend-modes: see Rémi Parmentier’s excellent article Fixing Gmail’s dark mode issues with CSS Blend Modes to find out how to do this.
Blend Modes also work in other email clients. It can be tricky to use these effectively for borders, but is very much worth having in your arsenal.
And There You Have It!
It’s never a perfect science, but hopefully these tips have helped you!
Always remember to make use of helpful tools like caniemail.com and How to Target Email Clients for help with finding out which features are supported across emails clients, and how to target them. If you are having issues with a particular client, remember that you aren’t alone! Take a look at Rémi Parmentier’s Email Bugs repository on GitHub, where the email development community can report and discuss email client behaviour.
With infinite color combinations possible in your emails, border problems can also come in many different shapes and sizes, but hopefully these tips have helped you find a way around yours!
Learn More About Dark Mode and Email Design